Automatically Generate Product Descriptions with AI (Step-by-Step)

Watch Step By Step Video Tutorial Below


1. Accessing Pabbly Connect for Integration

To start integrating Pabbly, Pab, and Google, you need to access Pabbly Connect. Open your browser and search for Pabbly.com Connect, which will take you to the homepage of Pabbly Connect.

Here, you can either sign in if you’re an existing user or click on “Sign Up Free” to create a new account. New users can explore the software with 100 free tasks every month, allowing you to familiarize yourself with the platform.


2. Creating a New Workflow in Pabbly Connect

Once logged in, navigate to the dashboard of Pabbly Connect. Here, you will see options to create a new workflow. Click on “Create from Scratch” to start building your integration.

In the workflow builder, select the AI workflow builder option. You will be prompted to describe the automation you want to set up. For instance, you can write a simple prompt explaining that when a new row is added in Google Sheets, you want to generate content and add it back to Google Sheets.

  • Select the trigger as “New Updated Spreadsheet Row”.
  • Choose the event as “Update Cell Value”.
  • Preview your workflow to ensure accuracy.

After confirming the details, click on “Approve and Create” to finalize your workflow setup.


3. Setting Up Trigger and Action Steps in Pabbly Connect

In this section, we will set up the trigger and action steps using Pabbly Connect. The trigger will be set to capture new data added to your Google Sheets. This ensures that every time a new detail is added, the automation will be activated.

Copy the webhook URL provided by Pabbly Connect. In your Google Sheets, navigate to the extensions, select the Pabbly Connect add-on, and choose “Initial Setup”. Here, paste the copied webhook URL.

  • Set the trigger column to the final data column where new entries will be captured.
  • Submit the configuration to connect your Google Sheets with Pabbly Connect.

Once the connection is established, test it by clicking on the “Send Test” button. This will confirm that the data from Google Sheets is being captured successfully.


4. Generating Product Descriptions Using AI

With the trigger set, we can now generate product descriptions using AI tools integrated through Pabbly Connect. For this, select the AI tool you wish to use, such as Jamini, and create a new connection.

Click on the link to obtain your API key from your AI tool account. Copy the key and paste it into the relevant field in Pabbly Connect. This step is crucial for the AI tool to function correctly within your workflow.

  • Map the data fields from your previous steps to ensure the AI generates accurate descriptions.
  • Specify the prompt for generating the product description.

After setting up the AI tool, click on “Save and Send Request”. This action will trigger the AI to generate the product description based on the data provided from Google Sheets.


5. Updating Google Sheets with Generated Content

The final step involves updating your Google Sheets with the generated product descriptions using Pabbly Connect. Select the existing connection and choose the Google Sheets where you want the descriptions to be stored.

Specify the range for updating the sheet. For example, if you want to update column H with the generated descriptions, enter the correct range in Pabbly Connect. Once done, click on “Save and Send Request” to complete the integration.

  • Confirm that the updates have been successfully made in your Google Sheets.
  • Check the specific column to see the newly generated product descriptions.

With this, you have successfully set up a complete automation process that integrates Pabbly, Pab, and Google using Pabbly Connect.


Conclusion

This tutorial demonstrated how to integrate Pabbly, Pab, and Google using Pabbly Connect. By following these steps, you can automate product description generation and streamline your workflow efficiently.

Google Sheets to Telegram Automation Made Easy

Watch Step By Step Video Tutorial Below


1. Accessing Pabbly Connect for Automation

To start automating your tasks, you need to access Pabbly Connect. Open a new tab and type in the URL pabyt.com/connect. Here, you can either sign in or sign up for a free account.

If you’re new to Pabbly Connect, signing up gives you 100 free tasks each month to explore its features. Existing users can simply sign in to access their workflows.


2. Setting Up the Trigger in Google Sheets

In this step, we will set up Google Sheets as the trigger application in Pabbly Connect. This means that every time a new entry is made in the Google Sheet, it will trigger an action.

Follow these steps to set up your trigger:

  • Select Google Sheets as your trigger application.
  • Choose the event as “New or Updated Spreadsheet Row”.
  • Click the “Connect” button to generate a webhook URL.

Copy the generated webhook URL, as it will be used to connect Google Sheets with Pabbly Connect.


3. Configuring Google Sheets to Send Data

Now that you have the webhook URL, it’s time to configure Google Sheets. Open your Google Sheet and navigate to the “Extensions” menu. Here, you will need to install the Pabbly Connect Webhook add-on.

Once installed, you will need to set up the webhook URL in the add-on:

  • Go to Extensions > Pabbly Connect Webhooks > Initial Setup.
  • Paste the webhook URL you copied earlier.
  • Specify the trigger column (e.g., D for the last data column).

Click “Submit” to finalize the setup. This allows Google Sheets to automatically send data to Pabbly Connect whenever a new entry is made.


4. Setting Up the Action to Send Notifications to Telegram

With your trigger set, it’s time to configure the action. In Pabbly Connect, select Telegram as your action application. This step allows you to send notifications to your Telegram channel whenever a new lead is added.

Here’s how to set up the action:

  • Choose the event as “Send a Text Message”.
  • Connect your Telegram account by entering the bot token.
  • Specify the chat ID where notifications will be sent.

After completing these steps, you can map the fields from Google Sheets to create dynamic messages for your Telegram notifications.


5. Testing the Integration

Now that everything is set up, it’s time to test the integration. You can do this by adding a new lead entry in your Google Sheet. Once you add the entry, Pabbly Connect will automatically capture the data and send it to your Telegram channel.

To ensure everything is working correctly:

  • Add a new row in your Google Sheet with the lead’s details.
  • Check your Telegram channel for the notification.
  • Verify that all details are correctly displayed.

If everything looks good, you’ve successfully automated the notification process using Pabbly Connect.


Conclusion

In this tutorial, we explored how to automate Google Sheets notifications to Telegram using Pabbly Connect. By following the steps outlined, you can streamline your workflow and receive timely updates without manual intervention.

Generate Facebook Posts with AI in Minutes

Watch Step By Step Video Tutorial Below


1. Accessing Pabbly Connect for Automation

To start automating your Facebook posts, first, access Pabbly Connect by opening a new tab and navigating to pabbl.com/connect. This is the central platform that facilitates the integration of various applications, including Facebook.

Once on the landing page, look for the option to “Sign Up for Free” in the top right corner. By signing up, you can explore 100 free tasks each month, allowing you to create this automation without any cost.


2. Creating Your Workflow in Pabbly Connect

After signing up, you will be directed to the workflow builder of Pabbly Connect. This is where you will set up the automation for posting on Facebook. Click on the “Add Trigger” button to begin.

  • Select “Schedule by Pabbly” as your trigger application.
  • Choose the event as “Schedule Workflow”.
  • Set the frequency to “Every Day” and choose a specific time (e.g., 12:00 PM).

Once you save these settings, your workflow will run daily at the specified time, automating your Facebook posting process.


3. Generating Content Using Google AI Studio

Next, you need to generate the content for your Facebook posts. This can be done by adding a new action step in Pabbly Connect. Select “Google AI Studio” as your action application.

For the event, choose “Generate Content” and connect it using your API key from Google AI Studio. If you have not created a connection before, click on “Add New Connection” and follow the prompts to obtain your API key.

  • Enter a prompt that reflects the type of content you want to generate for your Facebook page.
  • Select the content model appropriate for your needs.

After entering the necessary details, save and send a test request to generate the caption for your post.


4. Creating a Facebook Post with Generated Content

With the generated content ready, the next step is to create a Facebook post using Pabbly Connect. Add another action step and select “Facebook Pages” as your action application.

Choose the event as “Create Page Photo Post” and connect your Facebook account. If this is your first time connecting, log in to your Facebook account when prompted.

  • Select the Facebook page where you want to post.
  • Map the image URL generated from the previous step.
  • Map the caption generated to provide context for your post.

After mapping the required fields, save and send a test request to verify that your post is created successfully on Facebook.


5. Confirming Automation Success

Finally, after completing the previous steps in Pabbly Connect, check your Facebook page to confirm that the post has been successfully created. This will demonstrate that your automation is functioning as intended.

Every day at the scheduled time, Pabbly Connect will run this workflow, generating new content and posting it on your Facebook page without any manual effort required from you.

With this automation, you can save time and ensure consistent engagement on your Facebook page. Feel free to experiment with different prompts and content types to keep your audience engaged.


Conclusion

By following this tutorial, you can effectively use Pabbly Connect to automate your Facebook posts. This integration allows for seamless content generation and posting, saving you valuable time while enhancing your online presence.

Website Lead Automation: SMS Responses + Google Sheets Entry

Watch Step By Step Video Tutorial Below


1. Accessing Pabbly Connect for Automation

To begin automating your SMS and Google Sheets integration, you first need to access Pabbly Connect. Open a new tab and type in the URL: pabby.com/connect. This will take you to the Pabbly Connect homepage.

If you are a new user, click on the “Sign Up Free” option to create an account. Existing users can simply select “Sign In”. Once logged in, you can start creating your automation workflows.


2. Creating a Workflow in Pabbly Connect

Once you are on the workflow page of Pabbly Connect, you will need to set up a trigger. A trigger is the event that starts your automation. In this case, you will select the “Webhook” application as your trigger.

  • Select “Webhook” from the list of apps.
  • Choose the event as “Catch Webhook”.
  • Click the “Connect” button to generate a Webhook URL.

Copy the generated Webhook URL and paste it into your website form code. This URL will link your website form to Pabbly Connect, allowing data to flow seamlessly.


3. Integrating Google Sheets with Pabbly Connect

Next, you will integrate Google Sheets into your workflow. After setting up the trigger, select Google Sheets as your action application in Pabbly Connect. Choose the event as “Add New Row”.

Click the “Connect” button to establish a connection with your Google account. You will need to give access to Pabbly Connect to manage your Google Sheets. Once connected, select the spreadsheet where you want to store the leads data.

  • Map the fields from your Webhook response to the corresponding columns in Google Sheets.
  • Ensure each field is set to receive dynamic data from the Webhook.

Once you have mapped the fields, click on “Save and Send Test Request” to verify that the data is being added correctly to your Google Sheet.


4. Sending SMS via Twilio Using Pabbly Connect

Now, it’s time to set up SMS notifications using Twilio within Pabbly Connect. Select Twilio as your action application and choose the event as “Send SMS”.

Click the “Connect” button and enter your Twilio Account SID and Auth Token to authorize Pabbly Connect to send SMS messages. These credentials are available in your Twilio account dashboard.

  • Enter the body of the SMS, including a personalized message for your leads.
  • Map the recipient’s phone number from the Webhook response to ensure the correct number receives the SMS.

After filling in all required fields, click “Save and Send Test Request” to send a test SMS. You should receive an SMS confirming the successful setup.


5. Conclusion

In this tutorial, we explored how to automate SMS sending and Google Sheets integration using Pabbly Connect. By following these steps, you can enhance your business efficiency and improve customer communication.

Start utilizing Pabbly Connect today to streamline your workflows and save time on manual tasks. Automate your processes effortlessly!

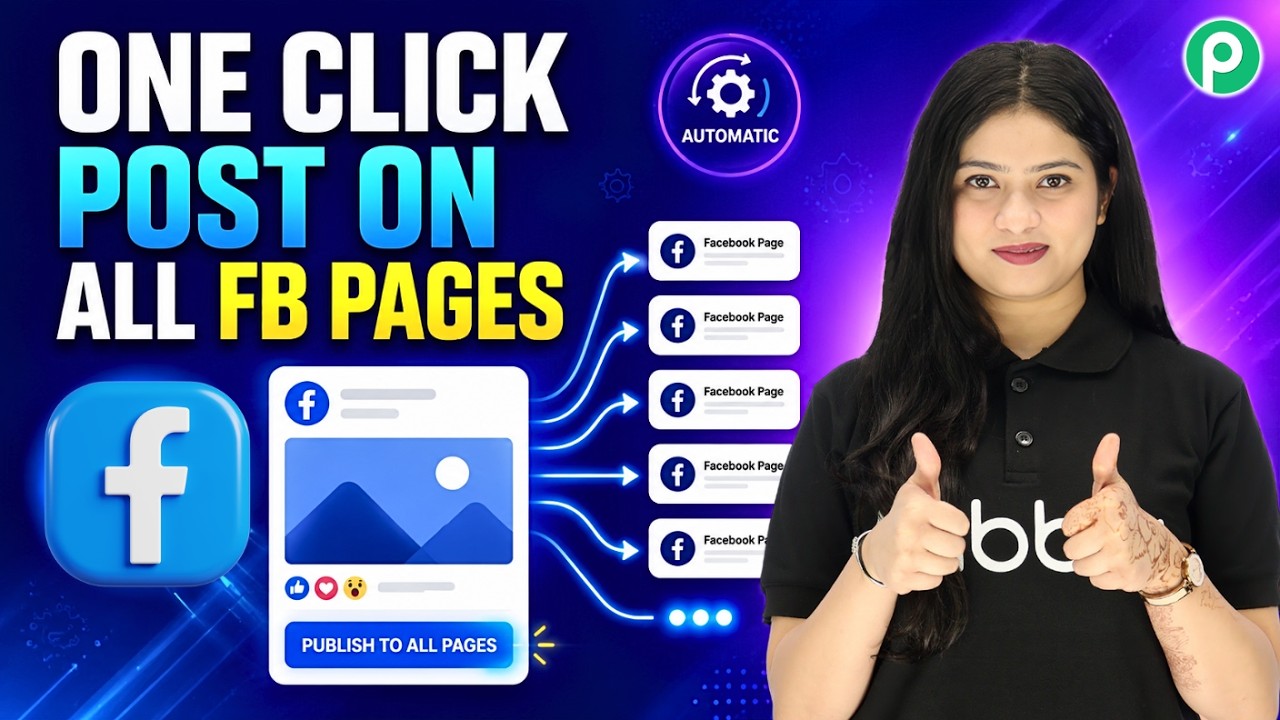
One Click to Post on All Facebook Pages Automatically

Watch Step By Step Video Tutorial Below


1. Accessing Pabbly Connect for Automation

To start automating your Facebook posts, you need to access Pabbly Connect. This platform allows you to connect various applications without any coding skills. Simply go to the Pabbly Connect landing page by typing pabby.com/connect in your browser.

Once there, you will see options to sign in or sign up for free. If you are a new user, click on the “Sign up for free” button to create an account. Existing users can simply sign in. New users will receive 100 free tasks every month to explore the software.


2. Creating a Workflow in Pabbly Connect

After logging into your Pabbly Connect account, navigate to the dashboard and click on the “Create Workflow” option. Here, you can either create a workflow from scratch or use AI to generate one based on a simple prompt.

  • Select “Create from scratch” or use the AI option.
  • Provide a clear instruction, such as “Connect Facebook pages with Facebook pages”.
  • Choose the trigger event, like “New Post” on your Facebook page.

This process allows you to automate posting across multiple Facebook pages seamlessly, making social media management much easier.


3. Connecting Your Facebook Pages

Now that you’ve set up your workflow, it’s time to connect your Facebook pages using Pabbly Connect. Click on the trigger step and ensure your Facebook account is connected. If not, click on the “Add New Connection” button to link your Facebook pages.

Once connected, you will need to select the specific Facebook page that will trigger the automation. Make sure to choose the correct page where you want to capture new posts. After selecting the page, click on the “Save and Send Test Request” button to ensure everything is set up correctly.


4. Capturing Post Details for Automation

After successfully connecting your Facebook pages, you need to create a new post on your primary Facebook page. This post will serve as the trigger for the automation. Enter the image and caption for your post, and then publish it.

  • Create a new post on your primary Facebook page.
  • Publish the post to capture the response in Pabbly Connect.
  • Check the response in Pabbly Connect to ensure all details are received.

This response will include the image link, caption, and other necessary details for your automation. Use this information to set up the next steps in your workflow.


5. Posting to Multiple Facebook Pages Automatically

With the response captured, you can now set up the action to post the same content on multiple Facebook pages. Select the action step in Pabbly Connect and choose “Create Page Post” as the action.

Map the caption and image URL from the previous response to ensure each new post includes the same content. This dynamic mapping allows for automatic updates each time a new post is made on your primary page.

  • Select the action to create a new page post.
  • Map the caption and image URL from the previous response.
  • Test the automation to ensure it works correctly.

Now, whenever you post on one Facebook page, the same content will be automatically shared on the other pages, saving you time and effort.


Conclusion

In this tutorial, we explored how to automate your Facebook posts across multiple pages using Pabbly Connect and Pabbly Subscription Billing. By following these steps, you can streamline your social media management and ensure consistent messaging across your brand’s pages.

With Pabbly Connect, you can easily set up workflows to manage your Facebook posts without manual effort, allowing you to focus on other important aspects of your business.

Send Razorpay Payment Alerts to Telegram Automatically

Watch Step By Step Video Tutorial Below


1. Accessing Pabbly Connect for Integration

To begin integrating Telegram with Razorpay, you need to access Pabbly Connect. If you’re a new user, navigate to pabbl.com/connect in your browser. This will take you to the landing page of Pabbly Connect.

In the top right corner, you’ll see the option to “Sign up for free.” Click this to create an account and get started with 100 free tasks every month. This allows you to explore Pabbly Connect and set up your automation without any cost.


2. Setting Up Trigger for Razorpay

Once you’re logged into Pabbly Connect, you need to set up the trigger. Click on the “Add Trigger” button and select Razorpay as the application. For the event, choose “Payment Capture” to notify when a payment is received.

  • Open your Razorpay dashboard.
  • Navigate to Account and Settings.
  • Select Webhooks and click on “Add New Webhook”.

Paste the webhook URL provided by Pabbly Connect into the Razorpay Webhook settings. This establishes a connection between Razorpay and Pabbly Connect, allowing you to capture payment data.


3. Capturing Webhook Response

After setting up the webhook, you need to test it by creating a payment. Go back to Razorpay, select a product, and complete a test payment. This will generate a webhook response that Pabbly Connect will capture.

Once the payment is completed, Pabbly Connect will display the webhook response confirming that the connection is successful. This step is crucial as it verifies that Razorpay and Pabbly Connect are communicating correctly.


4. Setting Up Action for Telegram

Now, it’s time to set up the action step in Pabbly Connect. Click on “Add New Action Step” and select Telegram Bot as the application. Choose the event “Send a Text Message” to notify your team of new payments.

  • Connect your Telegram bot using the BotFather.
  • Copy the API token provided by BotFather and paste it into Pabbly Connect.
  • Add your bot to the Telegram group where notifications will be sent.

After successfully connecting, you will need to provide the chat ID of the group. This ensures that all messages are sent to the correct location. Finally, map the necessary fields for the message content, which could include customer details and order information.


5. Testing the Integration

After setting everything up, it’s time to test the integration. Click on “Save and Send Test Request” in Pabbly Connect. This will send a test message to your Telegram group confirming that the automation is working as intended.

Once you receive the message, your integration is complete! Now, every time a payment is captured in Razorpay, your team will receive a notification in Telegram instantly. This automation will save you time and ensure that your team is always updated.


Conclusion

Integrating Telegram with Razorpay using Pabbly Connect allows for seamless notifications about new payments. This setup enhances communication and streamlines your workflow effectively.

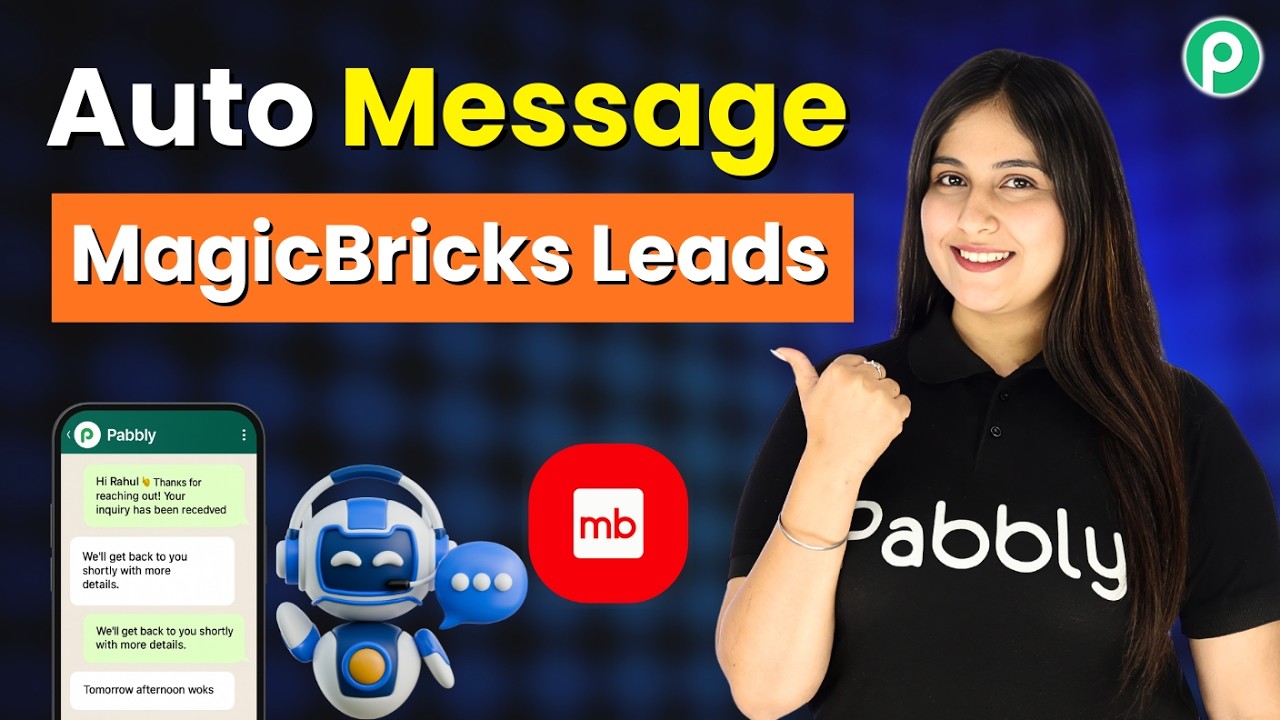
Automatically Send WhatsApp Messages to MagicBricks Leads

Watch Step By Step Video Tutorial Below


1. Accessing Pabbly Connect for Integration

To start integrating WhatsApp with Pabbly Connect, you first need to access the Pabbly website. Simply search for Pabbly Connect in your browser and navigate to the homepage. Here, you will find options to sign in or sign up for a free account.

If you are a new user, click on “Sign Up Free” to create your account. This grants you access to 300 tasks every month for exploring the software. If you’re an existing user, just click on “Sign In” to enter your dashboard.


2. Creating a Workflow in Pabbly Connect

Once you are logged into Pabbly Connect, you will need to create a new workflow. Click on the “Access Now” button to enter the Pabbly Connect dashboard. From here, you can start building your integration workflow.

To create a workflow, follow these steps:

  • Click on “Create Workflow”.
  • Choose to create from scratch or use AI.
  • Select “New Leads” from Magic Bricks as your trigger.

After setting this up, you can proceed to the next steps of your integration process using Pabbly Connect to send WhatsApp messages automatically.

Automatically Send Google Ads Leads to Systeme.io (Full Automation)

Watch Step By Step Video Tutorial Below


1. Accessing Pabbly Connect for Google Ads Integration

To begin integrating Google Ads with your CRM, first access Pabbly Connect. This platform allows you to automate processes effortlessly. Start by visiting the Pabbly website and signing into your account.

Once logged in, navigate to the Pabbly Connect dashboard. Here, you will find options to create new workflows. Click on the “Create Workflow” button to initiate the process of connecting Google Ads with your CRM.


2. Creating a Workflow in Pabbly Connect

In this step, you will create a workflow specifically for sending Google Ads leads to your CRM. Name your workflow something like “Automatically Send Google Ads Leads to CRM” and select the appropriate folder for organization.

  • Name your workflow clearly for easy identification.
  • Select the folder where you want to save the workflow.
  • Click on “Create” to finalize your workflow setup.

Now, you will set the trigger application. Select Google Ads as your trigger, specifically choosing the event “New Lead Form Entry”. This will ensure that every new lead captured in Google Ads will automatically trigger the workflow.


3. Connecting Google Ads with Pabbly Connect

Next, you need to establish a connection between Google Ads and Pabbly Connect. This involves generating a webhook URL that will bridge the two applications. Copy the webhook URL provided by Pabbly Connect and head to your Google Ads account.

In Google Ads, create a lead form and navigate to the lead delivery option. Paste the copied webhook URL into the designated field. This step is crucial as it allows Google Ads to send lead data directly to Pabbly Connect.

  • Open your Google Ads account and create a lead form.
  • Locate the lead delivery option and paste the webhook URL.
  • Send a test to ensure the connection is working properly.

Once the test is sent and confirmed, return to Pabbly Connect to check if the data has been received successfully. This confirms that the connection between Google Ads and Pabbly Connect is functioning as intended.


4. Adding Your CRM as the Action Step

After successfully connecting Google Ads, the next step is to add your CRM as the action application in Pabbly Connect. You will select “System.io” as the action application and choose the event “Create Contact”.

To establish this connection, you will need to enter your API key and domain. Obtain your API key from your profile settings in System.io. After entering the required information, save the connection to finalize it.

  • Select “Create Contact” as the action event.
  • Enter your API key and domain from System.io.
  • Save the connection to proceed.

This step ensures that every new lead from Google Ads is automatically added to your CRM as a contact, streamlining your lead management process.


5. Mapping Data from Google Ads to Your CRM

Now that your CRM is connected, it’s time to map the data fields from Google Ads to your CRM. This is where you specify how the lead information will be transferred. Mapping ensures that the correct data is sent to the corresponding fields in your CRM.

For instance, you will map fields such as first name, last name, email, and phone number. Instead of manually entering these details, use the mapping feature to keep the process dynamic. This way, every new lead will populate the correct fields automatically.

  • Map fields like first name, last name, email, and phone number.
  • Ensure the mapping is dynamic to accommodate new leads.
  • Save and send the test request to verify the mapping.

After testing the mapping, check your CRM to confirm that the new contact has been created successfully. This completes the integration process, allowing you to automate lead capture from Google Ads into your CRM using Pabbly Connect.


Conclusion

In this tutorial, we explored how to integrate Google Ads with your CRM using Pabbly Connect. By following these steps, you can automate the process of capturing leads, ensuring they are added to your CRM without any manual effort.

Automatically Organize New Order Details in CRM

Watch Step By Step Video Tutorial Below


Introduction to Pabbly Connect for Razer Pay Integration

To streamline your order management process, Pabbly Connect serves as an essential integration platform. It automates the transfer of customer details from Razer Pay to Airtable, eliminating manual data entry.

By using Pabbly Connect, you can ensure that every new order from Razer Pay is automatically captured and organized in your Airtable base. This not only saves time but also reduces the risk of errors in data management.


Setting Up Pabbly Connect for Razer Pay

To begin, navigate to the Pabbly Connect dashboard. If you’re new, visit pabbl.com/connect and sign up for a free account. This gives you access to 100 free tasks each month, allowing you to test various workflows.

Once logged in, click on the ‘Create Workflow’ button on the right side of the dashboard. Select ‘Create from Scratch’, then name your workflow and select a folder for organization. After pressing ‘Create’, you will see a blank page to start building your integration.


Setting Up the Trigger with Razer Pay

In this section, you will set Razer Pay as the trigger application in Pabbly Connect. Click the plus button to add your trigger application, searching for Razer Pay in the search box.

Once selected, choose the event ‘Payment Captured’ to ensure the workflow triggers with each new order. After selecting this, press the connect button to generate a webhook URL. This URL will direct customer details into Pabbly Connect.

  • Login to your Razer Pay account.
  • Navigate to Accounts and Settings, then Webhook.
  • Add a new webhook and paste the URL from Pabbly Connect.
  • Select the same event as in Pabbly Connect.
  • Press ‘Create Webhook’ to finalize the setup.

After setting up the webhook in Razer Pay, go back to Pabbly Connect. You will see it waiting for a webhook response, indicating the setup is ready for testing.


Setting Up the Action with Airtable

Now, it’s time to add the action step to store customer details in Airtable. Click the plus button again and search for Airtable as your action application in Pabbly Connect.

Select the event ‘Create Record’ and connect to your Airtable account. If you have not already set up a connection, select ‘Add New Connection’ and authorize Pabbly Connect to access your Airtable base.

  • Choose the Airtable base where you want to store the data.
  • Select the specific table in your base for customer records.
  • Map the fields from Razer Pay to the corresponding columns in Airtable.

By mapping these fields, Pabbly Connect ensures that customer details are automatically updated each time a new order is placed. This eliminates the need for manual data entry and keeps your records accurate and up-to-date.


Testing the Workflow in Pabbly Connect

To verify that your integration works, perform a test purchase on Razer Pay. After completing the order, return to Pabbly Connect to check if the response has been captured successfully.

If the webhook response shows the order details, your workflow is functioning correctly. You can now refresh your Airtable base to see if the new customer information has been added.

This entire process demonstrates how Pabbly Connect automates data handling from Razer Pay to Airtable, ensuring that all order details are organized without manual intervention. This is especially beneficial for businesses handling multiple orders daily.


Conclusion

In conclusion, using Pabbly Connect to automate Razer Pay orders into Airtable saves time and reduces errors. By following these steps, you can streamline your order management process effectively.

This integration not only enhances productivity but also allows you to focus on growing your business rather than managing data manually.

Send Shopify Order Notifications to Telegram Automatically

Watch Step By Step Video Tutorial Below


1. Accessing Pabbly Connect for Integration

To start integrating Shopify with Telegram notifications, you first need to access Pabbly Connect. Open your browser and go to the Pabbly Connect landing page.

If you are a new user, click on the “Sign Up for Free” button in the top right corner. This allows you to explore Pabbly Connect with 100 free tasks each month. Existing users can directly access the workflow builder.


2. Setting Up Shopify Trigger in Pabbly Connect

In the Pabbly Connect workflow builder, you will need to set up a trigger for Shopify. Click on the “Add Trigger” button to begin.

  • Search for Shopify and select “Shopify V2”.
  • Choose the event as “New Order”.
  • Click on “Connect” to receive a webhook URL.

Copy the provided webhook URL and navigate to your Shopify settings. Under “Notifications”, find the “Webhooks” section to create a new webhook. Select “Order Creation” as the event, keep the format as JSON, and paste the copied URL. Click on “Save” to establish the connection between Shopify and Pabbly Connect.


3. Capturing Webhook Response from Shopify

After setting up the webhook, you need to test the connection by creating a test order in Shopify. Purchase a product as a test user to generate a new order.

Once the order is placed, return to Pabbly Connect to capture the webhook response. You will see the order details populated in your workflow, confirming the successful connection.

  • Ensure all customer details and product information are correct.
  • This response will be used for sending notifications via Telegram.

Now that you have the response, you can proceed to set up the action step in Pabbly Connect to send notifications to Telegram.


4. Sending Notifications to Telegram via Pabbly Connect

Next, you will set up an action step to send the order details to Telegram. Click on “Add New Action Step” and search for “Telegram Bot”.

Select the event as “Send a Text Message” and click on “Connect”. If you have an existing connection, select it; otherwise, create a new connection by entering the required token from your Telegram bot.

  • Create a new bot in Telegram using BotFather and get the token.
  • Add the bot to your desired group and give it admin access.

After connecting the bot, you will need to map the dynamic order details into your message template. This ensures that every new order triggers a notification with the correct details.


5. Finalizing the Integration and Testing

After setting up the message template in Pabbly Connect, you need to finalize the integration. Make sure to map all necessary fields, such as customer name, order value, and shipping location.

Once all mappings are complete, click on “Save and Send Test Request” to verify that the message is sent to your Telegram group successfully. Check your Telegram to confirm the order alert appears as expected.

This automation allows your team to receive real-time notifications for every new order placed on Shopify, enhancing operational efficiency and response time.


Conclusion

In this tutorial, we explored how to integrate Shopify with Telegram notifications using Pabbly Connect. This automation streamlines order notifications, ensuring your team stays informed in real-time.