Share Facebook Page Posts to Your Discord Server Automatically

Watch Step By Step Video Tutorial Below


1. Accessing Pabbly Connect for Integration

To start integrating your Facebook page with Discord, you need to access Pabbly Connect. Open a new tab and enter the URL pabbly.com/connect. This will take you to the Pabbly Connect homepage.

If you’re a new user, click on the “Sign Up Free” button to create your account. Existing users can simply sign in. Once logged in, you will see the Pabbly apps page, where you can access Pabbly Connect by clicking the “Access Now” button.


2. Creating a New Workflow in Pabbly Connect

After accessing Pabbly Connect, click on the “Create Workflow” button to start building your automation. You will be prompted to choose between the Beta workflow builder and the Classic version. Choose the Beta version for a more modern experience.

Next, enter a name for your workflow, such as “Share Facebook Page Post to Discord Server Automatically”. Select your folder (if applicable) and click the “Create” button to proceed. This will take you to the workflow page where you can set up your trigger and action.

  • Click on “Create Workflow”.
  • Select “Beta” workflow builder.
  • Enter workflow name and choose folder.

Now, you can add your trigger, which in this case will be a new post on your Facebook page. This sets the automation in motion whenever you create a new post.


3. Setting Up Facebook as Trigger in Pabbly Connect

In the workflow page, you will need to select Facebook as your trigger app. Search for Facebook in the app selection and choose the “New Post” event. After selecting the event, click on the “Connect” button.

You will then be prompted to either use an existing connection or create a new one. If you’re creating a new connection, click on “Add New Connection” and follow the prompts to connect your Facebook account. Make sure you select the correct Facebook page from which you want to fetch posts.

  • Select Facebook as the trigger app.
  • Choose “New Post” as the event.
  • Connect your Facebook account.

Once connected, you can save and send a test request to ensure that the connection works properly. This step is crucial for confirming that Pabbly Connect is receiving data from your Facebook page.


4. Notifying Discord as Action in Pabbly Connect

After successfully setting up Facebook as your trigger, the next step is to choose Discord as your action app. Search for Discord and select it. Choose the “Send Channel Message Markdown” event to send notifications to your Discord channel.

Click on the “Connect” button to set up the connection. You will need to enter the webhook URL from your Discord server, which you can obtain from the server settings under integrations. Once you have copied the webhook URL, paste it into the corresponding field in Pabbly Connect.

  • Select Discord as the action app.
  • Choose “Send Channel Message Markdown” as the event.
  • Paste the Discord webhook URL.

Now, you can set up the message format you want to send to your Discord channel. This is where you can use dynamic fields from the Facebook post to populate the message automatically.


5. Testing and Saving Your Integration in Pabbly Connect

Once you have configured the message fields in Discord, click on “Save and Send Test Request” to test the integration. Pabbly Connect will send a test message to your Discord channel. Check your Discord to confirm that the message appears correctly.

If everything works as expected, your integration is complete! You can now automate notifications for new Facebook posts to your Discord channel, eliminating the need for manual updates. This automation will save you time and keep your community informed effortlessly.

To finalize, ensure you save your workflow in Pabbly Connect. You can also revisit and edit the workflow whenever necessary to adjust to your needs.


Conclusion

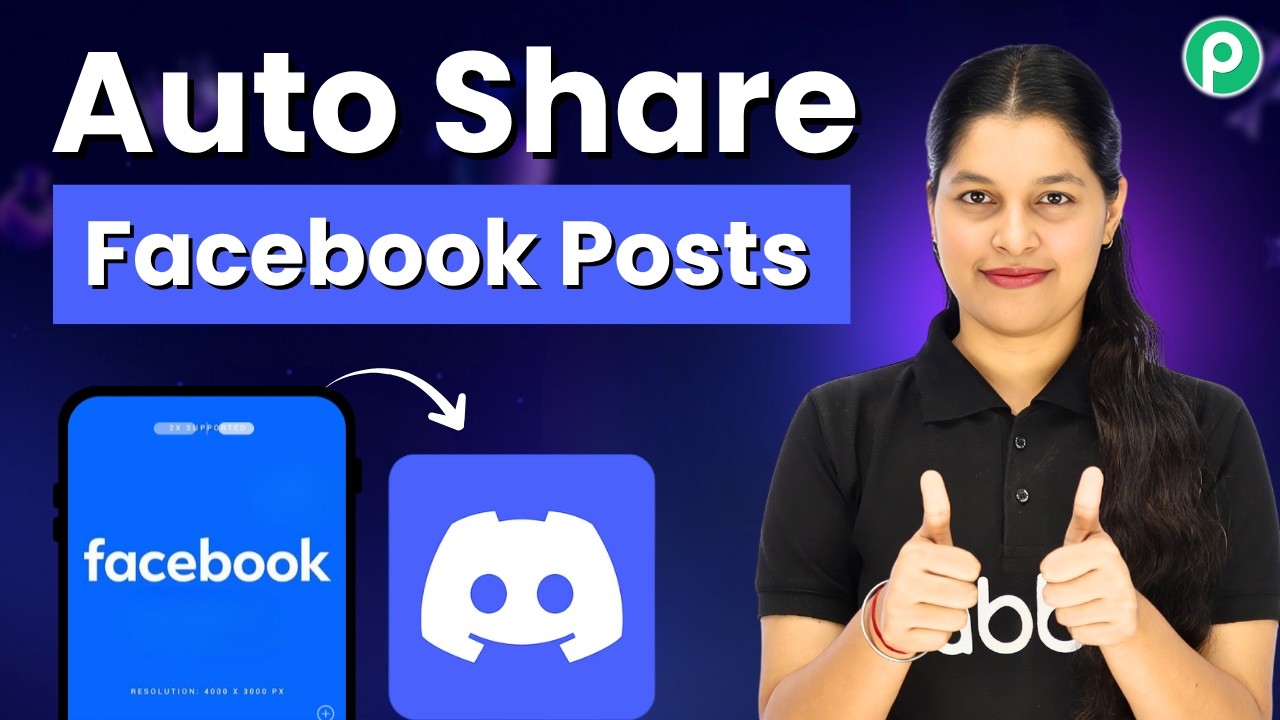
This tutorial demonstrated how to integrate Facebook with Discord using Pabbly Connect. With this automation, you can keep your community updated on new posts effortlessly. Start using Pabbly Connect today to streamline your workflows!

Send Confirmation Emails After Form Submission

Watch Step By Step Video Tutorial Below


1. Accessing Pabbly Connect for Integration

To start using Pabbly Connect, visit the official website and sign up for a free account. This platform allows you to seamlessly integrate various applications to automate your workflows.

After signing up, log in to your Pabbly Connect dashboard. Here, you can create workflows that connect applications like Click and Just for managing subscriber confirmations efficiently.


2. Creating a Workflow in Pabbly Connect

Once logged in, click on the “Create Workflow” button in Pabbly Connect. This will initiate the process of setting up your automation.

Next, you will need to name your workflow. For instance, you could name it “Blissbox Subscriber Confirmation System”. Then, select a folder to keep your workflows organized. Finally, click the “Create” button to proceed.

  • Click on “Create Workflow”.
  • Name your workflow meaningfully.
  • Select a folder for organization.

With these steps, you have successfully created a workflow in Pabbly Connect and are ready to set up your trigger application.


3. Setting Up the Trigger Application

In this step, select Google Sheets as your trigger application within Pabbly Connect. This integration will allow you to capture data from Google Forms.

After selecting Google Sheets, choose the event “New or Updated Spreadsheet Row”. This ensures that your workflow triggers every time a new entry is added to your Google Sheet.

  • Select Google Sheets as the trigger application.
  • Choose “New or Updated Spreadsheet Row” as the event.
  • Connect your Google account to Pabbly Connect.

This connection allows Pabbly Connect to access your Google Sheets data and initiate the workflow whenever a new row is added.


4. Defining Action Steps in Pabbly Connect

Now that your trigger is set, it’s time to define the action steps. First, select Airtable as your action application in Pabbly Connect. This will store subscriber details.

Choose the event “Create Record” to add new subscriber information to your Airtable base. Ensure you create a connection between Airtable and Pabbly Connect to facilitate data transfer.

Once connected, you will need to select your base and table in Airtable. Map the fields from your Google Sheets data to the corresponding Airtable fields. This dynamic mapping allows Pabbly Connect to update records automatically.


5. Sending Confirmation Emails via Gmail

For the final step, integrate Gmail to send confirmation emails to your subscribers. In Pabbly Connect, select Gmail as your action application.

Choose the event “Send Email” and connect your Gmail account to Pabbly Connect. Fill out the email fields, including the recipient’s email address, subject, and content. Make sure to map relevant subscriber details dynamically.

Once completed, click on “Save and Send Test Request” to verify that the email is sent successfully. This integration ensures that your subscribers receive instant confirmation emails, enhancing their experience.


Conclusion

In this tutorial, we detailed how to use Pabbly Connect to integrate Click and Just for efficient subscription confirmations. By following these steps, you can automate email notifications and manage subscriber data seamlessly.

Automatically Generate Google Meet Links from Google Sheets

Learn how to automatically generate Google Meet links from Google Sheets using Pabbly Connect. This step-by-step tutorial covers the entire integration process. Explore systematic approaches to creating efficient automation solutions that convert technical concepts into practical, implementable instructions.

Watch Step By Step Video Tutorial Below


1. Setting Up Pabbly Connect for Automation

To automatically generate Google Meet links from Google Sheets, you first need to set up Pabbly Connect. Start by visiting the Pabbly Connect website and signing up for a free account. This will allow you to create workflows that connect different applications seamlessly.

Once logged in, create a new workflow and choose Google Sheets as your trigger application. This setup will enable you to capture new meeting details entered into your spreadsheet. Follow these steps to get started:

  • Visit Pabbly Connect and sign up or log in.
  • Create a new workflow and select Google Sheets as the trigger.
  • Configure the trigger to capture new or updated rows in your spreadsheet.

After setting up the trigger, you will be ready to capture meeting details automatically. This integration saves time by eliminating manual data entry, making your workflow efficient.


2. Connecting Google Sheets with Pabbly Connect

Next, you need to connect Google Sheets to Pabbly Connect. This connection allows Pabbly to track changes in your spreadsheet and trigger actions accordingly. To establish this connection, follow these steps:

Open your Google Sheets document and navigate to the Extensions menu. Here, you will install the Pabbly Connect Webhooks add-on, which is essential for this integration. Follow these steps:

  • Go to Extensions > Add-ons > Get Add-ons in Google Sheets.
  • Search for ‘Pabbly Connect Webhooks’ and install the add-on.
  • After installation, refresh your spreadsheet to activate the add-on.

Once the add-on is installed, you will configure it to send data to Pabbly Connect whenever a new meeting is added. This setup is crucial for the automation to function correctly.


3. Setting Up the Trigger in Pabbly Connect

With Google Sheets connected, the next step is to set up the trigger in Pabbly Connect. This involves specifying which column will trigger the automation when new data is entered. Here’s how to do it:

In your Pabbly Connect workflow, select Google Sheets as the trigger application and set the event to ‘New or Updated Spreadsheet Row’. After connecting your Google account, you will receive a Webhook URL. This URL needs to be added to your Google Sheets add-on:

Copy the Webhook URL provided by Pabbly Connect. In Google Sheets, go to Extensions > Pabbly Webhooks > Initial Setup. Paste the Webhook URL and set the trigger column (e.g., column F).

After saving the setup, your Google Sheets will now send data to Pabbly Connect whenever a new meeting entry is added. This automation will streamline your scheduling process significantly.


4. Scheduling Google Meet Using Pabbly Connect

After configuring the trigger, the next step is to schedule a Google Meet meeting using the details captured from Google Sheets. This is done by adding an action step in Pabbly Connect:

Select Google Meet as the action application and choose ‘Schedule a Meeting’ as the event. Connect your Google account to allow Pabbly Connect to create meetings on your behalf. You will need to fill in the following details:

Select the calendar where the meeting will be scheduled. Map the meeting title and description from the previous step. Set the start and end dates and times in the required format.

Once the meeting details are mapped, Pabbly Connect will automatically create a Google Meet link and schedule the meeting in your Google Calendar. This integration ensures that you have all meeting details organized efficiently.


5. Updating Google Sheets with Meeting Links

The final step is to update your Google Sheets with the Google Meet link generated during the scheduling process. This ensures that your team members can easily access the meeting link directly from the spreadsheet:

Add another action step in your Pabbly Connect workflow, selecting Google Sheets again, and choose ‘Update Cell Value’ as the event. Specify the range where the Google Meet link should be inserted:

Select the spreadsheet and the specific sheet. Map the cell where the meeting link will be updated (e.g., column G). Insert the Google Meet link from the previous step.

Once this step is completed, every time a new meeting is scheduled, the Google Meet link will automatically populate in your Google Sheets, providing easy access for all team members. This completes the automation setup using Pabbly Connect.


Conclusion

In this tutorial, we explored how to automatically generate Google Meet links from Google Sheets using Pabbly Connect. By following these steps, you can streamline your scheduling process, saving time and ensuring all meeting details are organized effectively. Start automating your workflows with Pabbly Connect today!

Ensure you check out Pabbly Connect to create business automation workflows and reduce manual tasks. Pabbly Connect currently offer integration with 2,000+ applications.

How to Send Facebook Home Service Leads Directly to Google Sheets

Learn how to integrate Facebook Home Service Leads with Google Sheets using Pabbly Connect in this step-by-step tutorial. Discover hidden automation capabilities within your existing tools. This guide shows you how to connect your essential applications and permanently eliminate redundant manual processes.

Watch Step By Step Video Tutorial Below


1. Accessing Pabbly Connect for Integration

To start sending Facebook Home Service leads directly to Google Sheets, first, access Pabbly Connect. Visit the Pabbly Connect homepage by entering the URL in your browser.

If you are a new user, select the ‘Sign Up Free’ option to create an account. Existing users can click on ‘Sign In’ to log into their accounts. Pabbly Connect offers 100 free tasks every month for new users, making it easy to practice and explore the platform’s features.


2. Creating Your Workflow in Pabbly Connect

After signing in, you will land on the Pabbly Connect dashboard. Click on the ‘Create Workflow’ button to start building your automation. Choose to create your workflow from scratch for full customization. using Pabbly Connect

  • Select the ‘Beta Workflow Builder’ for a modern interface.
  • Name your workflow, for example, ‘Add Facebook Home Service Leads to Google Sheets.’
  • Click on the ‘Create’ button to proceed.

Once your workflow is created, you will see options to set up triggers and actions. Pabbly Connect operates on a trigger-action model, where the trigger is the event that starts the workflow, and the action is the task performed as a result.


3. Setting Up Facebook Lead Ads as the Trigger

In this step, select ‘Facebook Lead Ads’ as your trigger app. Choose the event ‘New Lead Instant’ to capture new leads as they come in. Click on the ‘Connect’ button to establish a connection. using Pabbly Connect

To create a new connection, log in to your Facebook account and authorize Pabbly Connect to access your lead ads. Select your Facebook page from the dropdown and choose the lead form you wish to monitor. Make sure to set the response format to simple for easier data handling.


4. Testing Your Connection with Facebook Lead Ads

After setting up the trigger, it is essential to test the connection. Use the Facebook lead ad testing tool to submit a test lead. Fill out the form with necessary details like name, email, phone number, and city, then submit. using Pabbly Connect

  • Ensure your test entry is submitted successfully.
  • Check Pabbly Connect for the captured response to confirm the integration works.

Once the test lead is captured in Pabbly Connect, you are ready to send this data to Google Sheets.


5. Adding Google Sheets as the Action App

Select ‘Google Sheets’ as your action app in Pabbly Connect. Choose the event ‘Add New Row’ to insert the lead information into your spreadsheet. Click on the ‘Connect’ button to link your Google account. using Pabbly Connect

After connecting, select the spreadsheet you created for Facebook leads. Map the fields from the Facebook lead ads response to the corresponding columns in Google Sheets. This mapping allows Pabbly Connect to automatically fill in the details for each new lead.


Conclusion

Using Pabbly Connect, you can seamlessly send Facebook Home Service leads directly to Google Sheets. This automation saves time and ensures you never miss a lead. Start using Pabbly Connect today to streamline your workflow and enhance your business operations.

Ensure you check out Pabbly Connect to create business automation workflows and reduce manual tasks. Pabbly Connect currently offer integration with 2,000+ applications.

How to Automate Your Discord Server

Learn how to automate your Discord server using Pabbly Connect to integrate Google and Discord seamlessly. Follow our detailed tutorial for easy setup! Build sophisticated automated workflows in less time than you think. This guide translates complex integrations into straightforward steps for immediate implementation.

Watch Step By Step Video Tutorial Below


1. Accessing Pabbly Connect for Automation

To automate your Discord server, you first need to access Pabbly Connect. Start by searching for Pabbly.com in your browser, which will take you to the homepage of Pabbly Connect.

Here, you can either sign in if you’re an existing user or click on ‘Sign Up Free’ to create a new account. Pabbly Connect offers a free plan that allows you to explore its features with 100 tasks every month.


2. Creating Your Workflow in Pabbly Connect

Once you are signed into Pabbly Connect, you will be directed to the dashboard. To create a new workflow, click on the ‘Create Workflow’ button. This will open a dialog box where you can name your workflow, for example, ‘Automate Your Discord Server’.

  • Select the Beta version for a modern interface.
  • Choose the folder for your workflow, such as ‘Automations’.

After naming your workflow, click on the ‘Create’ button. This step sets up the initial framework for your automation process.


3. Setting Up the Trigger in Pabbly Connect

In this section, you’ll set up the trigger for your automation using Pabbly Connect. The trigger will be a scheduled event that runs every day at a specified time. Click on the ‘Choose App’ section and select ‘Schedule by Pabbly’.

Next, select the event type as ‘Scheduled Workflow’. You will then choose how often you want the workflow to run, such as every day at 12:00 PM. Click on the ‘Save’ button once you have configured your schedule.


4. Generating Content Using AI Tools

After setting up the trigger, you will need to generate content for your Discord server. In this step, use Pabbly Connect to connect with an AI tool like OpenAI or Jamini. Select the AI tool as your action application.

  • Choose the action event as ‘Generate Content’.
  • Provide the necessary prompts for generating game tips.
  • Click on ‘Save and Send Request’ to create the content.

Once the content is generated, you will receive a successful response which confirms that the game tip has been created.


5. Posting Generated Content to Discord

In the final step, you will use Pabbly Connect to post the generated game tip to your Discord server. Select Discord as the action application and choose the action event ‘Send Channel Message’.

To configure this, you will need to enter the Webhook URL from your Discord channel settings. After that, map the data from the previous step to the message content field. This ensures that the newly generated tip is sent as a message on your Discord server.


Conclusion

In this tutorial, we have shown you how to automate your Discord server using Pabbly Connect to integrate Google and Discord seamlessly. By following these steps, you can set up an automated system that generates and posts game tips daily.

Ensure you check out Pabbly Connect to create business automation workflows and reduce manual tasks. Pabbly Connect currently offer integration with 2,000+ applications.

Send Real-Time WhatsApp Messages from New Google Sheets Entries

Learn how to send real-time WhatsApp messages automatically from new Google Sheets entries using Pabbly Connect. Step-by-step guide included. Discover how to seamlessly connect your essential tools through accessible instructions that make powerful automation available to professionals at every skill level.

Watch Step By Step Video Tutorial Below


1. Accessing Pabbly Connect for Integration

To send real-time WhatsApp messages using Pabbly Connect, you first need to access the platform. Open a new tab and type Pabbly.com/connect in the URL bar. This will take you to the Pabbly Connect homepage.

If you are new, click on the Sign Up Free button to create an account. Existing users can simply log in. Once logged in, you will see the dashboard where you can manage your integrations.


2. Creating a New Workflow in Pabbly Connect

After logging in, click on the Create Workflow button to initiate a new automation process. You will be prompted to select a workflow builder, either the beta or classic version. Choose the beta version for a modern experience.

  • Enter a name for your workflow, such as Send Real-Time WhatsApp Messages from New Google Sheets Entries.
  • Select a folder to organize your workflow.
  • Click on the Create button.

Your workflow page will now display options for adding a trigger. This is where you will set up the Google Sheets integration.


3. Setting Up Google Sheets as a Trigger

In the workflow page, click on Add Trigger and select Google Sheets as your trigger app. Choose the event as New or Updated Spreadsheet Row. This means every time a new entry is added to your Google Sheet, the automation will activate.

Next, click on Connect to link your Google account. If you already have a connection, select it; otherwise, create a new one. After connecting, you will receive a webhook URL which acts as a bridge between Google Sheets and Pabbly Connect.


4. Configuring Google Sheets for Automation

In your Google Sheets, go to Extensions, then Add-ons, and select Get Add-ons. Search for Pabbly Connect Webhook and install it if you haven’t done so already. After installation, navigate back to Extensions and select Pabbly Connect Webhooks to set up the webhook.

  • Paste the webhook URL you copied from Pabbly Connect.
  • Set the trigger column as the last column of your data, for example, E.

Once configured, click Submit. This will ensure that every new entry in your Google Sheet sends data to Pabbly Connect automatically.


5. Setting Up WhatsApp Integration in Pabbly Connect

Now that your Google Sheets trigger is set, it’s time to configure WhatsApp. In your Pabbly Connect workflow, search for WhatsApp Cloud API and select it as your action app. Choose Send Template Message as the event.

Click on Connect and enter your WhatsApp business account details, including the token, phone number ID, and business account ID. This information is crucial for sending messages through WhatsApp.

For the recipient’s phone number, use mapping to pull data from the Google Sheets response. This allows Pabbly Connect to dynamically insert the lead’s phone number into the message template, ensuring personalized communication.


Conclusion

Using Pabbly Connect, you can effortlessly send real-time WhatsApp messages from new Google Sheets entries. This automation not only saves time but also enhances customer communication by ensuring prompt responses. Start using Pabbly Connect today to streamline your business processes.

Ensure you check out Pabbly Connect to create business automation workflows and reduce manual tasks. Pabbly Connect currently offer integration with 2,000+ applications.

Auto Send Welcome Video to New Contest Participants

Learn how to automatically send welcome videos to new contest participants using Pabbly Connect. Step-by-step tutorial on integrating Google Sheets, YouTube, and WhatsApp. Implement the precise methodologies leading organizations use to automate repetitive tasks, illustrated with practical examples designed for immediate application.

Watch Step By Step Video Tutorial Below


1. Access Pabbly Connect to Start Automation

To begin automating the process of sending welcome videos to new contest participants, first, access Pabbly Connect. Open a web browser and navigate to the Pabbly Connect website. If you are a new user, click on the ‘Sign Up Free’ button to create an account. Existing users can click on ‘Sign In’ to access their accounts.

Once logged in, you will be directed to the Pabbly Connect dashboard. Here, you can see various applications available for integration. Click on the ‘Create Workflow’ button to start setting up your automation. This is where you will build the workflow that connects all necessary applications.


2. Create a Workflow for Contest Participation

In your Pabbly Connect dashboard, click on the ‘Create Workflow’ button. You will be prompted to name your workflow. For this tutorial, name it ‘Mega Fest Contest Welcome Video Automation’. After naming, select a folder to keep your workflow organized and click ‘Create’.

  • Click on the ‘Add Trigger’ button.
  • Select your trigger application (e.g., Landing Page).
  • Choose the event (e.g., New Lead).

This setup will ensure that every time a new participant registers, the automation is triggered, allowing you to send a welcome video seamlessly.


3. Integrate Landing Page with Pabbly Connect

After setting your trigger, you will need to integrate your landing page where participants will sign up. Copy the webhook URL provided by Pabbly Connect and paste it into the integration settings of your landing page. This step is crucial as it allows data from the landing page to flow into Pabbly Connect when a new participant signs up.

Ensure that the request method is set to POST and save the settings. Once the landing page is published, you can test the integration by filling out the form. Upon submission, the details should appear in your Pabbly Connect account, confirming that the integration works correctly.


4. Send Welcome Video via WhatsApp

Next, you will set up the action to send a welcome video message via WhatsApp. In your workflow, click on the ‘+’ button to add a new action step. Select Pabbly Chatflow as the action application and choose the event ‘Send Text Message’. This allows you to send a personalized message along with the video link.

  • Map the recipient’s WhatsApp number using data from the trigger.
  • Compose your welcome message, including a link to your YouTube video.
  • Test the action to ensure it sends correctly.

This step completes the initial setup for sending welcome videos, making your communication with participants efficient and engaging.


5. Log Participant Data into Google Sheets

Finally, to keep track of your contest participants, you need to log their information into Google Sheets. In Pabbly Connect, add another action step and select Google Sheets as the application. Choose the event ‘Add New Row’ to log participant details automatically.

Connect your Google Sheets account by selecting the appropriate spreadsheet and sheet. Map the participant details like name, email, and phone number to the corresponding columns. This ensures that every new lead captured from your landing page is stored for future reference and follow-ups.

After completing the mapping, test this action step to confirm that new rows are added correctly to your Google Sheets. This integration helps you manage participants effectively and follow up as necessary.


Conclusion

By following this guide, you can automate the process of sending welcome videos to new contest participants using Pabbly Connect. This integration not only enhances participant engagement but also streamlines your data management process through Google Sheets. Start using Pabbly Connect today to simplify your workflows and improve lead nurturing.

Ensure you check out Pabbly Connect to create business automation workflows and reduce manual tasks. Pabbly Connect currently offer integration with 2,000+ applications.

Share Daily News on Discord Automatically

Learn how to automate sharing daily news on Discord using Pabbly Connect. This step-by-step tutorial guides you through the integration process. Transform complex automation concepts into accessible, actionable steps that eliminate unnecessary manual work while maximizing existing application capabilities.

Watch Step By Step Video Tutorial Below


1. Setting Up Pabbly Connect for Daily News Sharing

To start sharing daily news on Discord automatically, you need to access Pabbly Connect. If you are a new user, go to your browser and search for pabbl.com/connect. Once on the landing page, click on the ‘Sign Up for Free’ option in the top right corner. You will receive 100 free tasks every month to explore the features of Pabbly Connect.

Existing users can directly open their workflow builder in Pabbly Connect. This is where you will set up the automation to share news on Discord. This powerful tool allows you to create workflows that connect different applications seamlessly.


2. Creating the Workflow in Pabbly Connect

In the workflow builder of Pabbly Connect, you will need to set up a trigger and an action. The trigger initiates the workflow when a specific event occurs, and the action defines what happens next. Click on the ‘Add Trigger’ button to begin.

  • Search for ‘RSS by Pabbly’ as the trigger application.
  • Select ‘New Item in Feed’ as the event.
  • Connect by entering the feed URL of the news source.

After entering the feed URL, select the sync filter type as ‘Recommended’. Click on ‘Save and Send Test Request’ to test the connection. This will allow Pabbly Connect to fetch the latest news items from the specified RSS feed.


3. Configuring Discord Integration

After setting up the RSS feed trigger, it’s time to configure the action to send messages to Discord. Click on ‘Add New Action Step’ and search for Discord as the action application. Choose the event type that suits your needs, such as ‘Send Channel Message HTML’ or ‘Markdown’. using Pabbly Connect

  • Connect your Discord account by entering the Webhook URL.
  • Set the channel where you want to send the messages.
  • Map the message content dynamically using the data from the RSS feed.

This mapping process ensures that each new news item is sent to Discord automatically, providing real-time updates to your channel members.


4. Mapping News Details in Pabbly Connect

Once you have set up the Discord action, you need to map the news details to the message format you want to send. In the message field, type a message like ‘New Update:’, followed by the news headline and description. Use the mapping feature of Pabbly Connect to insert dynamic content from the RSS feed.

To map the details, simply type a slash and search for the relevant fields like title, description, and link. This will ensure that every time a new news item is fetched, the message sent to Discord will be updated accordingly. After mapping all necessary fields, click on ‘Save and Send Test Request’ to verify that the setup works correctly.


5. Finalizing the Automation Process

After testing the integration, you should see a successful response indicating that the message was sent to your Discord channel. This confirms that Pabbly Connect is functioning properly and will check for new items every 60 minutes as per your settings.

With this automation in place, you can now share daily news updates on Discord without any manual effort. If you wish to change the news category, simply update the feed URL in your workflow. This flexibility allows you to customize the news sources based on your interests.


Conclusion

In this tutorial, we explored how to use Pabbly Connect to automate sharing daily news on Discord. By setting up an RSS feed trigger and mapping the news details, you can keep your Discord channel updated effortlessly. This integration not only saves time but also enhances communication within your community.

Ensure you check out Pabbly Connect to create business automation workflows and reduce manual tasks. Pabbly Connect currently offer integration with 2,000+ applications.

Put Your Entire Business on Autopilot with Pabbly Chatflow AI

Learn how to automate your business with Pabbly Chatflow AI. This detailed tutorial covers step-by-step integration processes for a seamless experience. Explore how leading businesses automate customer interactions with carefully designed chat sequences that feel natural and helpful.

Watch Step By Step Video Tutorial Below


1. Accessing Pabbly Chatflow for Your Business

To put your entire business on autopilot, the first step is to access Pabbly Chatflow. Open a new tab and navigate to Pabbly.com/chatflow. This platform allows you to automate WhatsApp messages and responses effectively.

If you are new to Pabbly, click on the ‘Sign Up Free’ option to receive 100 free credits every month. Existing users should select the ‘Sign In’ button to access their accounts. Once logged in, click on the ‘Access Now’ button for Pabbly Chatflow to reach the dashboard.


2. Creating Your AI-Powered Assistant with Pabbly Chatflow

After accessing Pabbly Chatflow, the next step is to create your AI assistant. Click on the ‘Assistant’ feature on the left side of the dashboard. Then, hit the ‘+ Add Assistant’ button to start building your assistant.

  • Name your assistant, for example, ‘Put Your Entire Business on Autopilot’.
  • Choose the instructions tab and select ‘AI Agent’.
  • Set the temperature to control the creativity of the assistant’s replies.

Once these settings are configured, you can proceed to customize the assistant’s behavior according to your business needs.


3. Configuring Assistant Settings in Pabbly Chatflow

With your assistant created, it’s time to configure its settings in Pabbly Chatflow. Begin by entering a header message that welcomes users when they start a conversation. This sets the tone for user interactions.

Additionally, you can customize the footer message, which will be sent at the end of conversations. Don’t forget to set any stop keywords that will halt the AI’s responses when needed. Here’s how to set them up:

  • Enter a fallback message for situations where the assistant cannot respond.
  • Define retry attempts for the assistant to try responding again.

These configurations ensure your assistant can handle various scenarios effectively and maintain smooth communication with users.


4. Uploading Your Knowledge Base to Pabbly Chatflow

Next, uploading a knowledge base file is crucial for your assistant’s effectiveness in providing accurate responses. In Pabbly Chatflow, you can drag and drop your knowledge base file, which contains essential information about your business.

Ensure your knowledge base is well-structured and includes details such as operating hours, menu options, and FAQs. The accepted formats are PDF and TXT, with a maximum size of 90 MB. After uploading, your assistant will be able to give precise answers based on the information provided.


5. Activating and Testing Your Assistant in Pabbly Chatflow

After configuring all settings and uploading the knowledge base, you can activate your assistant in Pabbly Chatflow. Simply toggle the activation button and save your assistant settings. This will make your assistant live and ready to assist customers.

To test your assistant, send a simple message like ‘Hi’ to see how it responds. This is crucial to ensure everything works as intended. You can also embed the assistant on your website by copying the provided code and pasting it into your site’s HTML.

Conclusion

This guide summarizes the key points and helps you understand the essential features and benefits of using this tool.

Ensure you check out Pabbly Connect to create business automation workflows and reduce manual tasks. Pabbly Connect currently offer integration with 2,000+ applications.


In conclusion, using Pabbly Chatflow to automate your business processes can significantly enhance customer interaction. By following these steps, you can create a responsive AI assistant tailored to your business needs, ensuring 24/7 availability for your customers without manual intervention.

Automate WhatsApp Business Communication with AI

Learn how to automate WhatsApp Business communication using Pabbly Chatflow in this detailed tutorial. Enhance customer support with AI-powered responses. Learn how to create intelligent chat workflows that provide instant customer support while qualifying leads 24/7 without human intervention.

Watch Step By Step Video Tutorial Below


1. Accessing Pabbly Chatflow for WhatsApp Automation

To automate WhatsApp Business communication, you first need to access Pabbly Chatflow. Start by opening a new tab and typing the URL Pabbly.com/chatflow. Once on the homepage, you will see options for signing in or signing up.

If you are new to Pabbly Chatflow, click on the ‘Sign Up Free’ button. After signing up, you will receive 100 free credits to explore the platform. Existing users can simply click on ‘Sign In’ to access their account.


2. Creating Your AI Assistant in Pabbly Chatflow

Once logged into Pabbly Chatflow, navigate to the dashboard where you can see all Pabbly applications. Click on the ‘Access Now’ button under Pabbly Chatflow. Here, you can create your AI assistant that will respond to customer queries on WhatsApp.

  • Click on the ‘AI Assistant’ option from the sidebar.
  • Select ‘Add AI Assistant’ to create a new assistant.
  • Enter a name for your assistant, for example, ‘Cloud Nest AI Assistant’.

After naming your assistant, you will be directed to a configuration page. Here, you can set the AI instructions and choose the instruction type. Make sure to select ‘AI Agent’ for the best results.


3. Configuring Your AI Assistant Settings

In this section, you will configure your AI assistant settings within Pabbly Chatflow. You will need to set the temperature for your AI’s responses, which determines the creativity of the answers. A temperature of 0.5 is recommended for friendly interactions.

Additionally, you will need to provide your OpenAI API key. Follow these steps to get your API key:

  • Visit the OpenAI API key page and click ‘Create New Secret Key’.
  • Enter a name and project name to generate the key.
  • Copy the key and paste it into the API key section in Pabbly Chatflow.

Once the API key is saved successfully, you can manage additional settings like header/footer messages and stop keywords to control the AI assistant’s responses.


4. Setting Up Your Knowledge Base

The knowledge base is essential for your AI assistant to respond accurately. In Pabbly Chatflow, navigate to the ‘Knowledge Source’ tab and upload your business details in .txt or PDF format. Ensure your document contains relevant information about your products and services.

For example, if your business is a SaaS company, your knowledge base should include:

Details about the services you offer. Pricing information. How to create projects or use your software.

After uploading the knowledge base, ensure it’s linked correctly to your AI assistant, so it can provide accurate responses to customer inquiries.


5. Enabling Your AI Assistant for WhatsApp Communication

To finalize your setup, you need to enable your AI assistant for WhatsApp communication through Pabbly Chatflow. Go to the settings and select ‘Inbox Settings’. Here, you can enable AI auto replies for all contacts or a specific contact list.

To enable the assistant for a particular chat, select the contact and click on the ‘Choose AI Assistant’ option. From there, select the AI assistant you created and save the settings. This will allow your assistant to respond to customer queries automatically.

By following these steps, your AI assistant is now ready to handle customer inquiries on WhatsApp, providing instant responses 24/7, thus improving customer service without manual effort.


Conclusion

Using Pabbly Chatflow to automate WhatsApp Business communication enhances customer support significantly. By setting up an AI assistant, businesses can provide instant responses, improving engagement and satisfaction.

Ensure you check out Pabbly Connect to create business automation workflows and reduce manual tasks. Pabbly Connect currently offer integration with 2,000+ applications.