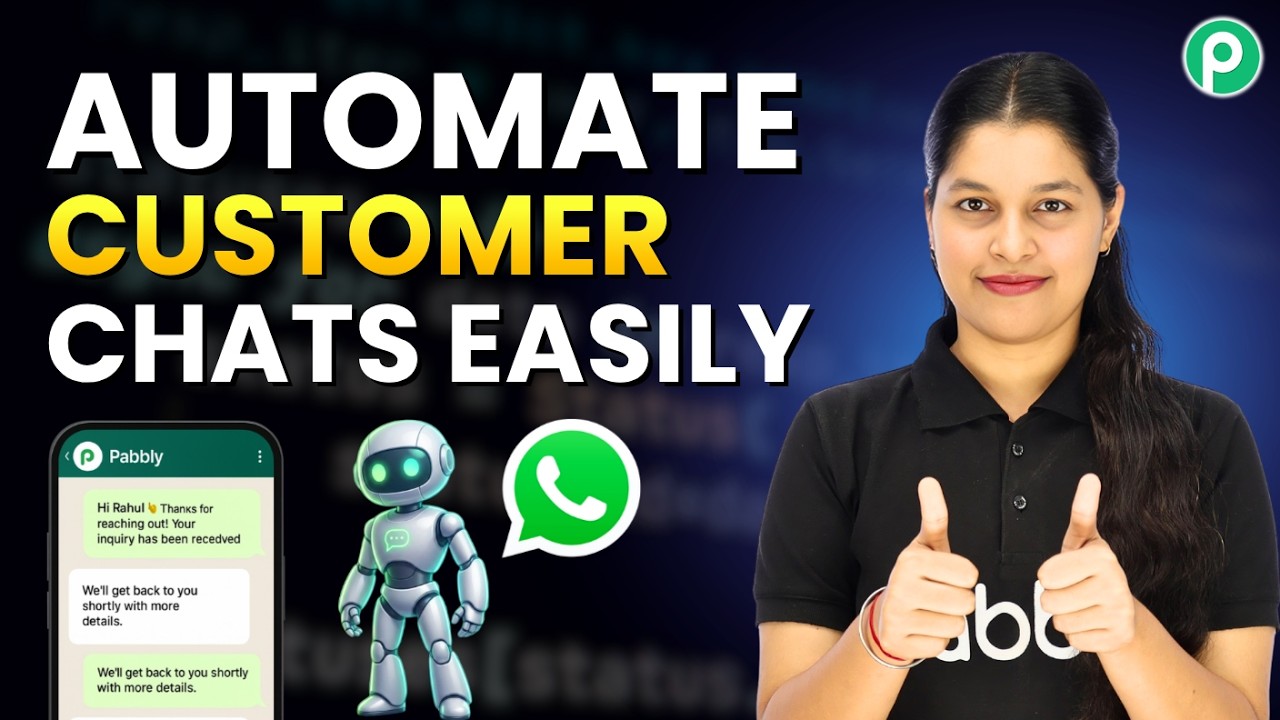
Automate Customer Conversations on WhatsApp 💬

Watch Step By Step Video Tutorial Below


1. Accessing Pabbly Connect for WhatsApp Integration

To begin automating your WhatsApp conversations, you need to access Pabbly Connect. This platform allows you to integrate various applications seamlessly. Start by visiting the Pabbly Connect website and signing in to your account.

If you’re a new user, you can sign up for free and explore the features. Once logged in, navigate to the dashboard, where you can create new workflows. This is essential for setting up your WhatsApp chatbot.


2. Creating a WhatsApp Chatbot Using Pabbly Connect

Once you are in Pabbly Connect, the next step is to create your WhatsApp chatbot. This involves accessing the flow page of Pabbly Chatflow. Here, you can set up the automated responses for your customers.

  • Navigate to the flow page of Pabbly Chatflow.
  • Create a new flow and name it appropriately.
  • Set the trigger event for your chatbot.

In this case, the trigger can be a keyword that initiates the conversation. For instance, using the keyword “hello” will start the interaction with your customers. This is crucial for ensuring that users receive timely responses.


3. Designing Your Chatbot Flow with Pabbly Connect

After setting up the trigger, you can start designing the flow of your chatbot in Pabbly Connect. This involves dragging and dropping various message blocks to create a seamless interaction.

For example, you can create a welcome message followed by options for users to book an appointment or ask a question. Each button can lead to different flows, allowing for a more personalized experience.

  • Add a welcome message that greets users.
  • Create buttons for different user actions.
  • Use the ask question node to gather user information.

By utilizing these features, you can ensure that your customers have a smooth experience while interacting with your WhatsApp chatbot.


4. Setting Up the AI Assistant in Pabbly Connect

To enhance your chatbot’s capabilities, you can set up an AI assistant within Pabbly Connect. This assistant will help answer customer queries based on the knowledge base you provide.

To do this, select the AI assistant option and configure it to respond to common questions. Ensure that your knowledge base is detailed and includes all relevant information about your business.

  • Create a knowledge base that includes FAQs.
  • Assign the AI assistant to the appropriate buttons.
  • Test the AI responses to ensure accuracy.

This setup allows your chatbot to provide instant responses, improving customer satisfaction and engagement.


5. Finalizing Your WhatsApp Chatbot with Pabbly Connect

After designing your chatbot and setting up the AI assistant, it’s time to finalize everything in Pabbly Connect. Make sure to save your flow and test it thoroughly to ensure it works as intended.

Once you are satisfied with the performance, you can start using your WhatsApp chatbot to automate customer conversations. This will save you time and improve your efficiency in handling queries.

Remember, you can always modify the flow based on customer feedback and interactions. The flexibility of Pabbly Connect allows you to adapt as needed.


Conclusion

In this tutorial, we explored how to automate your WhatsApp conversations using Pabbly Connect. By following these steps, you can create an efficient chatbot that enhances customer interactions and streamlines your business processes.
How to Send Unlimited WhatsApp Messages Automatically

Watch Step By Step Video Tutorial Below


1. Accessing Pabbly Connect for WhatsApp Integration

To start using Pabbly Connect, first, visit Pabbly’s official website. You can sign up for a free trial if you are a new user or log in if you already have an account. This platform enables seamless integration between WhatsApp and other applications.

After signing in, navigate to the dashboard where you can see various applications. Click on the option for Pabbly Chatflow to access the WhatsApp integration features. This is where you will set up your automation workflows.


2. Creating a WhatsApp Template in Pabbly Connect

Next, you need to create a WhatsApp template within Pabbly Connect. This template will be used for broadcasting messages. To do this, go to the template section in Pabbly Chatflow and select the option to create a new template.

  • Choose a name for your template, such as “Promotional Message”.
  • Draft your message, including personalization variables where necessary.
  • Submit the template for approval, ensuring it meets WhatsApp’s guidelines.

Once approved, your template will be ready for use in the broadcasting process. This allows for personalized messages to be sent to your contacts efficiently.


3. Setting Up WhatsApp Broadcasts Using Pabbly Connect

Now that your template is ready, you can set up a broadcast through Pabbly Connect. Navigate to the broadcast section and select the option to create a new broadcast campaign. Here, you will choose the type of broadcast and name it, for example, “Unlimited Messages”.

Next, select the contact list you want to send messages to. This is crucial as it determines who will receive your WhatsApp messages. You can upload contacts from a CSV file or choose an existing list.


4. Sending Messages via Pabbly Connect

After configuring your broadcast, it’s time to send the messages using Pabbly Connect. You will have the option to send a test message first to ensure everything is set up correctly. Enter your own WhatsApp number for testing purposes.

Once you confirm that the test message is received correctly, you can proceed to schedule the broadcast. Choose whether you want to send it immediately or at a later date and time. Make sure to set a future date if you choose to schedule it.


5. Monitoring Broadcast Results in Pabbly Connect

After your broadcast is sent, you can monitor the results directly within Pabbly Connect. This section provides insights into how many messages were sent, delivered, and any that failed. Understanding these metrics is essential for optimizing future broadcasts.

By analyzing the broadcast results, you can refine your contact lists and messaging strategies to improve engagement rates. This feedback loop is crucial for effective communication with your audience.


Conclusion

In this tutorial, we explored how to integrate WhatsApp with Pabbly using Pabbly Connect. By following these steps, you can automate your messaging process efficiently. This integration not only saves time but also enhances customer engagement through personalized communication.

WhatsApp Bot for Clinic Appointments & Patient Queries 🩺

Watch Step By Step Video Tutorial Below


1. Introduction to Pabbly Connect for Appointment Booking

Pabbly Connect is the central integration platform that allows you to automate appointment bookings through WhatsApp. In this section, we will explore how to set up a WhatsApp chatbot using Pabbly Connect to streamline patient queries.

To begin, you need to access Pabbly Connect. This platform will serve as the backbone for integrating your WhatsApp chatbot with other applications. The first step is to create an account on Pabbly Connect if you haven’t already done so.


2. Creating a WhatsApp Chatbot with Pabbly Connect

Using Pabbly Connect, we can create a WhatsApp chatbot that handles appointment bookings. Start by logging into your Pabbly account and navigating to the Pabbly Chatflow section.

  • Access the Pabbly Chatflow page by typing the URL in your browser.
  • If you are a new user, click on ‘Sign Up Free’ to create an account.
  • Existing users can simply log in to their accounts.

Once logged in, you will see options to create a new flow. This is where you will set up your WhatsApp chatbot. Make sure to add your WhatsApp number to your Pabbly account to enable messaging.


3. Setting Up the Chatbot Flow in Pabbly Connect

In this section, we will configure the flow for the WhatsApp chatbot. The flow will include triggers and action nodes that define how the chatbot interacts with users. We will set the trigger to respond to a specific keyword.

To initiate the chatbot, we will use the keyword ‘hello’ as the trigger. This will start the interaction with users. After the trigger, configure the response messages that will appear when users initiate the chat.

  • Add a welcome message that prompts users to book an appointment or ask questions.
  • Create buttons for users to select their desired action.

After setting up the initial messages, you can add further questions to gather necessary information from the user, such as appointment date and time. This information will be crucial for confirming appointments.


4. Integrating Google Sheets with Pabbly Connect

To store the appointment data, we will integrate Google Sheets using Pabbly Connect. This integration will allow us to automatically save user responses directly into a Google Sheet for easy tracking.

In your Pabbly Connect dashboard, create a new workflow that connects the WhatsApp chatbot with Google Sheets. You will need to set up a webhook URL that Pabbly Connect will use to send the data.

  • Use the API request node to connect your chatbot with Pabbly Connect.
  • Map the fields from the chatbot to the corresponding columns in Google Sheets.

Once this setup is complete, every time a user provides their appointment details, the information will be automatically stored in Google Sheets, ensuring that you have a reliable record of all bookings.


5. Sending Reminder Messages and Using AI Assistant

In addition to booking appointments, Pabbly Connect enables you to send reminder messages to users. After the appointment is booked, you can set a delay for sending a reminder message to the user.

To set this up, use the delay action in Pabbly Connect and configure it to send a reminder message one minute before the appointment. This ensures that users are reminded of their upcoming appointments.

  • Use the AI assistant feature to handle user queries effectively.
  • Configure the AI assistant with a knowledge base to respond to common patient questions.

This integration will not only help in managing appointments but also enhance user experience by providing instant responses to queries.


Conclusion

In conclusion, using Pabbly Connect to automate appointment booking through a WhatsApp chatbot streamlines the entire process. By following the steps outlined, you can effectively manage patient interactions and keep track of appointments with ease. Start utilizing Pabbly Connect today to enhance your clinic’s efficiency!

Turn WooCommerce Orders into Instant CRM Contacts

Watch Step By Step Video Tutorial Below


1. Accessing Pabbly Connect for Integration

To start integrating WooCommerce with HubSpot CRM, you first need to access Pabbly Connect. Simply visit the Pabbly website by typing pabby.com in your browser.

Once on the website, you can either sign in if you are an existing user or sign up for a free account. Pabbly Connect offers 100 tasks free monthly, allowing you to explore its features before upgrading.


2. Creating a Workflow in Pabbly Connect

After signing into Pabbly Connect, navigate to the dashboard where you can manage your workflows. Click on the “Create Workflow” button to start a new automation.

  • Name your workflow appropriately, such as “WooCommerce to HubSpot Integration”.
  • Select the folder where this workflow will be saved.
  • Click on “Create” to finalize the setup.

Once the workflow is created, you will see a prompt to select your trigger application, which will be WooCommerce in this case. This sets the stage for the automation process.


3. Setting Up the Trigger with WooCommerce

The next step involves setting up WooCommerce as the trigger application in Pabbly Connect. You will select the “New Order Created” event as the trigger.

After selecting the trigger event, you will receive a webhook URL. This URL acts as a bridge between WooCommerce and Pabbly Connect, allowing data to flow seamlessly.

  • Open your WordPress dashboard and navigate to WooCommerce settings.
  • Go to the “Advanced” tab and select “Webhooks”.
  • Click on “Add Webhook” and paste the webhook URL.

Make sure to set the topic as “Order Created” and save the webhook. This completes the trigger setup, enabling WooCommerce to send order details to Pabbly Connect.


4. Testing the Webhook Response

To ensure the integration is functioning correctly, you need to test the webhook response in Pabbly Connect. Click on “Recapture Webhook Response” to initiate the test.

Next, simulate a new order in your WooCommerce store. This will allow Pabbly Connect to capture the order details sent from WooCommerce.

  • Visit your WooCommerce store and place an order.
  • Enter the required customer details during checkout.
  • Complete the order to trigger the webhook.

Once the order is placed, return to Pabbly Connect to verify that the response has been captured successfully. This confirms that the integration is set up correctly.


5. Adding Action Step to HubSpot CRM

Now that the trigger is set, the final step is to add HubSpot as the action application in Pabbly Connect. Select “Create a Contact” as the action event.

Connect your HubSpot account to Pabbly Connect by following the prompts. Once connected, you will be able to map the WooCommerce order details to the appropriate fields in HubSpot.

  • Map customer details such as name, email, and address from WooCommerce to HubSpot.
  • Ensure all required fields are filled correctly to avoid errors.
  • Click on “Save and Send Test Request” to finalize the action.

After saving, check your HubSpot CRM to confirm that the new contact has been created successfully. This completes the integration process using Pabbly Connect.


Conclusion

In this tutorial, we explored how to use Pabbly Connect to integrate WooCommerce with HubSpot CRM. By following these steps, you can automate the process of adding new customer orders directly to your CRM, enhancing efficiency and data management.

Automatically Capture Google Ads Leads in Real-Time

Watch Step By Step Video Tutorial Below


1. Accessing Pabbly Connect for Integration

To start integrating Google Ads with Airtable, you first need to access Pabbly Connect. Open your browser and navigate to Pabbly.com/connect. This platform allows you to automate workflows between various applications seamlessly.

If you are a new user, click on the “Sign Up Free” option to create an account. Existing users can simply sign in. Once logged in, you will be directed to the Pabbly Connect dashboard, where you can begin creating your automation workflow.


2. Creating a Workflow in Pabbly Connect

In Pabbly Connect, creating a workflow is straightforward. Click on “Create from Scratch” to initiate a new workflow. You will be prompted to describe your workflow in a single line. For this integration, type “When a new lead comes in from Google Ads, add it as a new record in Airtable”.

  • Select the Google Ads trigger for new leads.
  • Choose the Airtable action to create a new record.
  • Review and approve your workflow settings.

After setting up the trigger and action, click “Approve and Create” to finalize your workflow. You will receive a unique workflow link that can be used for testing and further adjustments.


3. Setting Up the Trigger for Google Ads

The next step in Pabbly Connect involves setting up the trigger for Google Ads. Select the application and the event that will initiate the workflow. For this integration, choose the Google Ads app and the event labeled “New Lead Form Entry”.

Once you select the event, Pabbly Connect will provide you with a Webhook URL. Copy this URL as you will need to paste it into your Google Ads lead form settings to establish the connection.


4. Configuring Airtable to Capture Leads

Now, it’s time to configure Airtable to receive the data from Google Ads through Pabbly Connect. In Airtable, create a new base and set up a table with fields that match the lead information you want to capture, such as name, email, phone number, and company name.

After setting up your Airtable base, return to Pabbly Connect to map the fields. Choose the Airtable app and select the action event “Create Record”. Map the data fields from your Google Ads lead form to the corresponding fields in Airtable. This ensures that the information flows correctly from one application to the other.


5. Testing the Integration Setup

Finally, it’s crucial to test your integration in Pabbly Connect. Go back to your Google Ads account and submit a test lead through the lead form. Check your Airtable base to see if the new record appears with the correct information.

If everything is set up correctly, you should see the lead data populated in Airtable shortly after submission. This confirms that your integration is working as intended, allowing you to capture leads in real-time.


Conclusion

In this tutorial, we explored how to integrate Google Ads with Airtable using Pabbly Connect. By following these steps, you can automate your lead capture process effectively, ensuring that no leads are missed. Utilize Pabbly Connect for seamless automation in your business!

WhatsApp Chatbot for Gym Memberships & Class Bookings 💪

Watch Step By Step Video Tutorial Below


1. Accessing Pabbly Connect for WhatsApp Integration

To start integrating WhatsApp with Pabbly Connect, first, access the Pabbly Connect dashboard. This platform is essential for setting up your automation process. Once logged in, you can create a new workflow to automate WhatsApp interactions.

Begin by selecting the option to create a new workflow. You will be prompted to name your workflow. For instance, you can name it “WhatsApp Gym Chatbot” to reflect its purpose. This step is crucial as it helps you keep track of your various automations.


2. Setting Up the WhatsApp Trigger in Pabbly Connect

Now that you have created your workflow, it’s time to set up the trigger for WhatsApp. The trigger is what initiates the automation when a user sends a message. In this case, you will set the trigger to activate when a specific keyword, such as “hello”, is received via WhatsApp.

  • Select the “Webhook” option in Pabbly Connect.
  • Copy the Webhook URL provided.
  • Go to your WhatsApp settings and configure the Webhook URL.

After setting up the Webhook, you can test it by sending a message to your WhatsApp number. This will confirm that the trigger is working correctly and is ready to initiate the automation.


3. Creating the WhatsApp Chatbot Flow with Pabbly Connect

With the trigger set, you can now design the chatbot flow using Pabbly Connect. This involves creating a welcome message and options for users to book classes or ask questions. Start by dragging and dropping message blocks into your flow.

For the welcome message, you can type something like, “Welcome to our Gym! Please choose an option below:”. Then, create buttons for the options: “Book Fitness Classes” and “Ask Questions”. Each button will lead to different paths in your automation.

  • For the “Book Fitness Classes” button, add a message block that lists available classes.
  • For the “Ask Questions” button, connect it to your AI assistant.

This structure allows users to navigate easily and get the information they need without leaving WhatsApp, making the process efficient.


4. Collecting User Information for Class Bookings

When users select the “Book Fitness Classes” button, you can prompt them to enter their details. This is where Pabbly Connect shines by allowing you to collect user inputs seamlessly. Ask for their full name and preferred class timings.

For example, after the user selects a class like Yoga, you can ask them to enter their full name and preferred timing. Use input fields to collect this information and store it using Pabbly Connect’s custom fields feature.

  • Create custom fields for “Full Name” and “Preferred Timing”.
  • Ensure that responses are stored correctly for personalized confirmation messages.

Once the user provides their information, send a confirmation message thanking them and confirming their booking. This enhances user experience and builds trust.


5. Integrating AI Assistant for Queries in Pabbly Connect

To enhance the user experience further, integrate an AI assistant into your WhatsApp chatbot using Pabbly Connect. This assistant can handle queries related to gym membership plans and other questions users may have.

When a user selects the “Ask Questions” button, trigger the AI assistant to respond based on a pre-defined knowledge base. This allows users to get instant answers without waiting for human interaction.

  • Set up the AI assistant with relevant information about your gym.
  • Ensure the assistant can answer common questions accurately.

This integration not only saves time for your staff but also provides a quick service to your clients, enhancing overall satisfaction.


Conclusion

Integrating WhatsApp with Pabbly Connect allows gym owners to automate class bookings and answer queries efficiently. This setup enhances customer interaction and streamlines operations, making it a valuable tool for any business.

How to Send Daily Messages on Slack Automatically

Watch Step By Step Video Tutorial Below


1. Accessing Pabbly Connect for Automation

To automate daily messages on Slack, start by accessing Pabbly Connect. If you are a new user, open your browser and visit pabbl.com/connect to reach the Pabbly Connect landing page.

In the top right corner, click on the “Sign up for free” option. This allows you to explore Pabbly Connect with 100 free tasks every month, enabling you to send up to 100 Slack messages daily at no cost.


2. Creating Your Workflow in Pabbly Connect

Once you are logged into Pabbly Connect, navigate to the workflow builder. This is where you will set up the automation for sending messages. Click on the “Add Trigger” button to begin.

  • Select “Scheduled by Pabbly” as your trigger application.
  • Choose “Schedule Workflow” as the event and click on “Connect”.
  • Set the frequency to daily and specify the time as 9:00 AM.

After saving this configuration, your workflow will now be scheduled to run every day at 9:00 AM, ready to send motivational messages automatically.


3. Generating Messages with Google Gemini

Next, you will use an AI tool like Google Gemini to generate the motivational messages. Click on “Add New Action Step” and select Google Gemini as your action application.

For the event, choose “Generate Content” and click on “Connect”. If you have already established a connection with Google Gemini, select the existing connection. Otherwise, create a new one by entering your API key from Google AI Studio.

  • Open Google AI Studio and navigate to the “Get API Key” section.
  • Click on “Create API Key” and name your key.
  • Copy the generated API key and paste it into Pabbly Connect.

After pasting the API key, you can enter the prompt for generating the motivational message. Click on “Save and Send Test Request” to generate a message that will be sent via Slack.


4. Sending Messages to Slack via Pabbly Connect

Now, it’s time to connect Slack to send the generated messages. Click on “Add New Action Step” and select Slack as your action application.

Choose “Send Channel Message” as the event and click on “Connect”. If you haven’t connected Slack yet, select “Add New Connection” and provide the necessary token type (user or bot).

  • Log into your Slack account to grant permissions.
  • Select the channel where the message will be sent, such as “Sales Team”.
  • Map the message generated by Google Gemini to ensure dynamic content.

After mapping the message, click on “Save and Send Test Request”. You should receive a confirmation that the message was sent successfully to your Slack channel.


5. Conclusion: Automate Your Slack Messages with Pabbly Connect

In this tutorial, you learned how to automate daily motivational messages on Slack using Pabbly Connect. By integrating Google Gemini and Slack, you can send unique messages every day without manual effort.

With this setup, your team will receive a fresh motivational quote each morning at 9:00 AM, enhancing team morale effortlessly. Try this automation today and see the benefits of using Pabbly Connect for your workflows!

Send Unlimited Emails from Google Sheets Automatically

Watch Step By Step Video Tutorial Below


1. Accessing Pabbly Connect for Automation

To start using Pabbly Connect, you need to visit pabbly.com in your browser. This will take you to the Pabbly homepage, where you can either sign in or sign up for a free account. Signing up allows new users to explore the platform with 100 free tasks each month.

Once signed in, navigate to the Pabbly Connect dashboard. This is where you’ll create your automation workflow to send bulk emails using Gmail and Google Sheets. Click on “Access Now” to enter the Pabbly Connect interface.


2. Creating a Workflow in Pabbly Connect

In this section, we will create a new workflow in Pabbly Connect. Click on the option to create a workflow from scratch. You will be prompted to define your automation process. Enter a description like, “Send email via Gmail when a new row is added in Google Sheets.” This sets the stage for your automation.

  • Select the trigger as “New Row in Google Sheets”.
  • Choose the action as “Send Email via Gmail”.
  • Preview your workflow to ensure it’s correct.

After confirming your settings, click on “Approve and Create”. This action will generate a unique workflow link that can be used to connect Google Sheets with Pabbly Connect.


3. Setting Up Google Sheets with Pabbly Connect

To connect your Google Sheets with Pabbly Connect, you’ll need to install the Pabbly Connect Webhooks add-on. Open Google Sheets and navigate to Extensions > Add-ons > Get Add-ons. Search for “Pabbly Connect Webhooks” and install it. This step is crucial for enabling the integration.

Once installed, refresh your Google Sheets. Go back to Extensions and select Pabbly Connect Webhooks, then click on “Initial Setup”. Here, you will see the option to input the Webhook URL provided by Pabbly Connect. Paste this URL into the designated field and specify the trigger column where new data will be added.


4. Testing the Integration between Google Sheets and Gmail

After setting up the Webhook, it’s time to test the integration. In your Google Sheets, add a new row of data to trigger the Webhook. Then, head back to Pabbly Connect and click on the “Send Test” button. This will send the test data to the Webhook URL.

Once the test is successful, you can check if the data has been received in Pabbly Connect. If everything is set up correctly, you will see a successful response indicating that the data from Google Sheets has been captured. This confirms that the connection is functioning properly.


5. Sending Bulk Emails via Gmail

Now that your integration is set up, you can send bulk emails using Gmail through Pabbly Connect. Click on the “Sign in with Google” button to connect your Gmail account. Select the account you want to use for sending emails and grant the necessary permissions.

Next, fill out the email fields such as sender name, recipient email, subject, and content. You can map the recipient’s email from the Google Sheets data. After configuring the email settings, click on “Save and Send” to send the email. You will see a success message confirming that the email has been sent successfully.


In conclusion, using Pabbly Connect to integrate Gmail and Google Sheets allows you to automate bulk email sending efficiently. By following the steps outlined in this tutorial, you can streamline your email marketing efforts and save valuable time.

How to Send WhatsApp Messages with PDF Automatically

Watch Step By Step Video Tutorial Below


1. Accessing Pabbly Connect for Automation

To start automating WhatsApp messages, you need to access Pabbly Connect. Open your browser and navigate to pabbl.com/connect. If you are a new user, click on “Sign up for free” in the top right corner to create an account. This allows you to explore the platform with 100 free tasks every month.

Once registered, you can log in to your Pabbly Connect dashboard. Here, you will create a workflow that connects Google Sheets with WhatsApp. This setup will enable you to send automated messages efficiently.


2. Setting Up Google Sheets with Pabbly Connect

In this section, you will set up Google Sheets to work with Pabbly Connect. Open your Google Sheets and store the data of your leads. You will use this data to send WhatsApp messages automatically. The first step is to add the “Pabbly Connect Webhooks” extension to your Google Sheets.

  • Go to Extensions > Add-ons > Get add-ons.
  • Search for “Pabbly Connect Webhooks” and install it.
  • Refresh your spreadsheet after installation.

After refreshing, navigate to Extensions > Pabbly Connect Webhooks > Initial Setup. Here, paste the webhook URL from your Pabbly Connect workflow and set the trigger column to your desired data column. Click submit to establish the connection.


3. Capturing Data from Google Sheets

Now that you have set up Google Sheets, it’s time to capture the data using Pabbly Connect. Go back to your Pabbly Connect workflow and ensure that the webhook response is waiting. You can do this by sending a test from your Google Sheets.

  • Click on “Send Test” in your Google Sheets.
  • Check Pabbly Connect to see if the data is captured successfully.

Once the data is captured, you will see it reflected in your Pabbly Connect workflow. This confirms that your Google Sheets and Pabbly Connect integration is working correctly.


4. Sending WhatsApp Messages Using Pabbly Connect

With your data captured, the next step is to send WhatsApp messages using Pabbly Connect. Click on “Add New Action Step” in your workflow and select Pabbly Chatflow as the action application.

Choose the event as “Send Document Message”. You will need to connect your Pabbly Chatflow account by entering the API token. This token can be found in your Pabbly Chatflow account under Settings > API and Webhooks. Paste the token in your Pabbly Connect workflow and save the connection.


5. Finalizing Your Workflow for Automation

Now that your WhatsApp action is set up, you need to configure the message details. Enter the recipient’s WhatsApp number, ensuring it includes the country code. Use mapping to insert dynamic data from your previous steps in the message.

Finally, click on “Save and Send Test Request” to ensure everything is working. If your WhatsApp number is active, you will receive the message successfully. For bulk sending, you can use the “Send All Data” option in the Pabbly Connect Webhooks extension to send messages to all leads at once.


Conclusion

This tutorial covered how to automate WhatsApp messages using Pabbly Connect and Google Sheets. By following these steps, you can efficiently send personalized messages to your leads. Start using Pabbly Connect today to enhance your automation processes!

This WhatsApp Chatbot Can Fill Your Event Seats Automatically 🔥

Watch Step By Step Video Tutorial Below


1. Accessing Pabbly Connect for WhatsApp Integration

Pabbly Connect is the central platform for integrating WhatsApp with various applications. To get started, visit the Pabbly Connect website and log in or sign up for an account.

Once logged in, navigate to the dashboard where you can create a new workflow. This will allow you to set up the integration between WhatsApp and other applications seamlessly, ensuring that your event business can respond to inquiries instantly.


2. Creating a WhatsApp Chatbot Using Pabbly Connect

In this section, we will create a WhatsApp chatbot that can handle event bookings. Start by selecting the “Add Flow” button in Pabbly Connect, where you can name your flow. For example, you might name it “WhatsApp Chatbot for Event Bookings.”

  • Click on “Add Flow” and name your flow.
  • Select the trigger event as “Template Selected. “
  • Choose your pre-created WhatsApp event invitation template.

By using Pabbly Connect, you can create a fully automated chatbot that interacts with users, providing them with ticket options and booking confirmations without manual intervention.


3. Setting Up Ticket Options in Pabbly Connect

After creating your flow, the next step is to set up the ticket options. You can add a list button to allow users to select different types of tickets, such as Standard, Pro, and VIP passes.

For each ticket type, you will need to provide a header, body, and footer in the list button settings. This setup will ensure that users have clear options to choose from when booking their event tickets.

  • Enter a header like “Select Your Ticket Type”.
  • Provide ticket options: Standard, Pro, and VIP.
  • Link the list options to the chatbot flow.

Using Pabbly Connect, this setup allows for a dynamic user experience where users can quickly select their desired ticket type and proceed with their booking.


4. Collecting User Information via Pabbly Connect

Once the user selects a ticket type, the chatbot will prompt them to enter their full name and contact number. This information is crucial for booking tickets and personalizing responses.

In Pabbly Connect, you can set up custom fields to capture this information, ensuring that each user’s details are stored accurately. This personalization makes the interaction feel more genuine and engaging.

  • Ask the user for their full name using a custom field.
  • Request the contact number and number of tickets.
  • Store all responses in Pabbly Connect for future reference.

This step is essential for ensuring that the booking process is smooth and that users receive confirmation messages tailored to their input.


5. Sending Confirmation and Follow-Up Messages with Pabbly Connect

After collecting user information, the chatbot will send a confirmation message summarizing the booking details. This message will include the user’s name, contact number, ticket type, and quantity.

Using Pabbly Connect, you can easily set up this confirmation message to be sent automatically once the user has provided their details. This feature enhances user satisfaction by providing immediate feedback.

  • Create a confirmation message template in Pabbly Connect.
  • Include dynamic fields for personalization.
  • Ensure the message is sent immediately after user input.

This automated confirmation process not only saves time but also ensures that users feel valued and informed about their bookings.


Conclusion

Integrating WhatsApp with Pabbly Connect allows businesses to automate event ticket bookings and enhance customer engagement. By following this tutorial, you can set up a seamless chatbot that responds instantly to inquiries and collects user information efficiently.