Ideal For: All the homemade product manufacturers, homemade food product sellers, retail homemade food product shop owners, and other merchants can use this method to take their homemade food products selling business online.

Why Choose this Method for Selling Over any Other Solution?
Unlike any other solution, this method allows you to:
- List and sell your homemade food products for FREE. Absolutely no payment required.
- No commission on sales.
- Collect payment through multiple payment modes from a single checkout page.
- Sell one time or recurring subscriptions of your homemade food products.
- Sell and collect payment in any currency as per your requirement.
- Give discounts on your products by offering special coupon codes.
- Add sales commission agents to help you in selling your homemade food products.
When it comes to homemade food products, Jake Owen’s lyrics make more sense “Homemade me love a dirt road, homemade me crave some ice-cold homemade”. Homemade food products hold a special place in our heart as it shows affection, dedication, and caring. That’s the reason why homemade food products never go out of business.
Why would you like to sell homemade food products online?
When it comes to food, homemade food products brings the feeling of home to people who are away from their houses. Just because of it, there is a huge uptick in the selling of homemade food products online. Recently “The Hindu” published the story about homemade food products where it has been said that organic packaged food market to cross ₹87.1 crores by 2021.
To be very honest, it is the only sector which never goes antiquated, everybody has witnessed the success of the Mother Dairy. And, considering all this if you’re thinking of starting a homemade food product business then we have a software named Pabbly Subscription Billing. It is the tool that lets you create an elegant checkout page for selling homemade food products online. Not just this, it is packed with features which are as follows:
- Offer discount and coupon codes on homemade food products
- Collect currency in offline and online mode
- Track the status of prospects
- List various homemade food products in the single checkout page
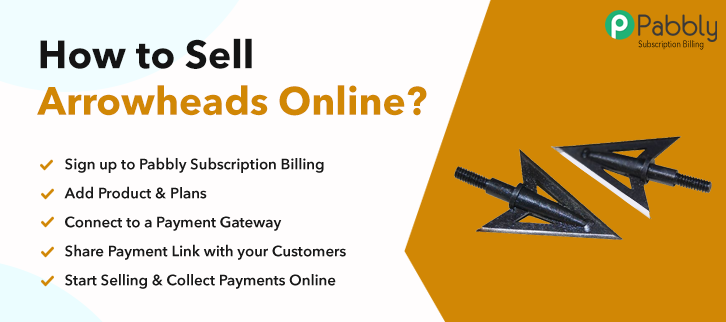
Above are some of the reasons for trying your hands-on software. Let’s discuss the process of creating a checkout page using the tool.
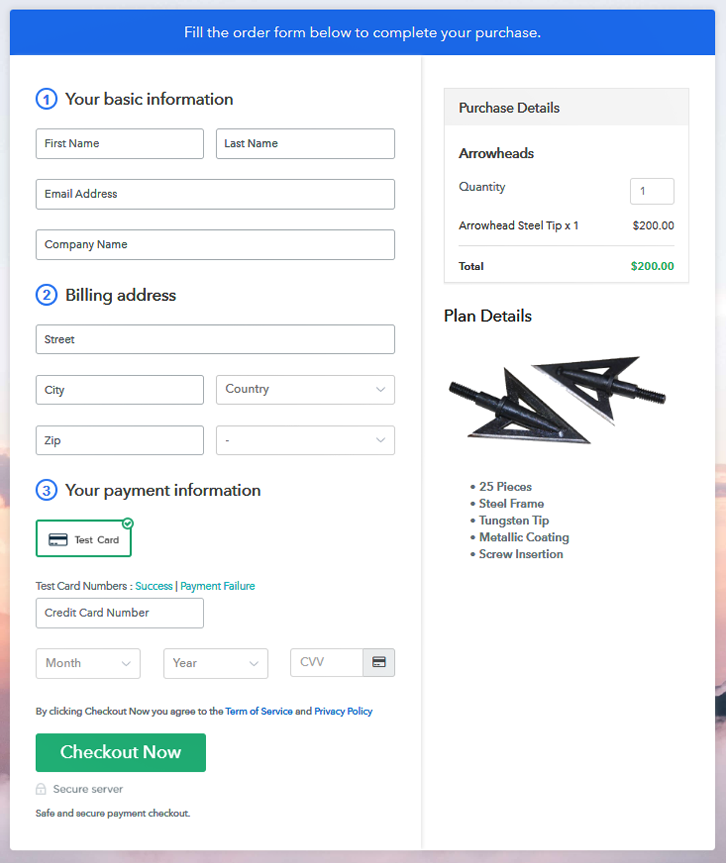
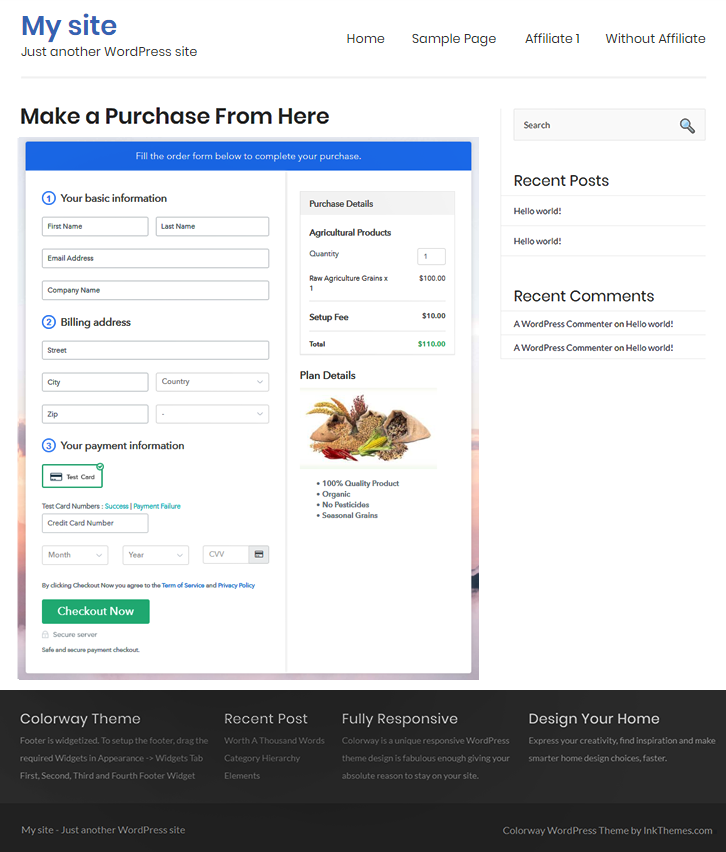
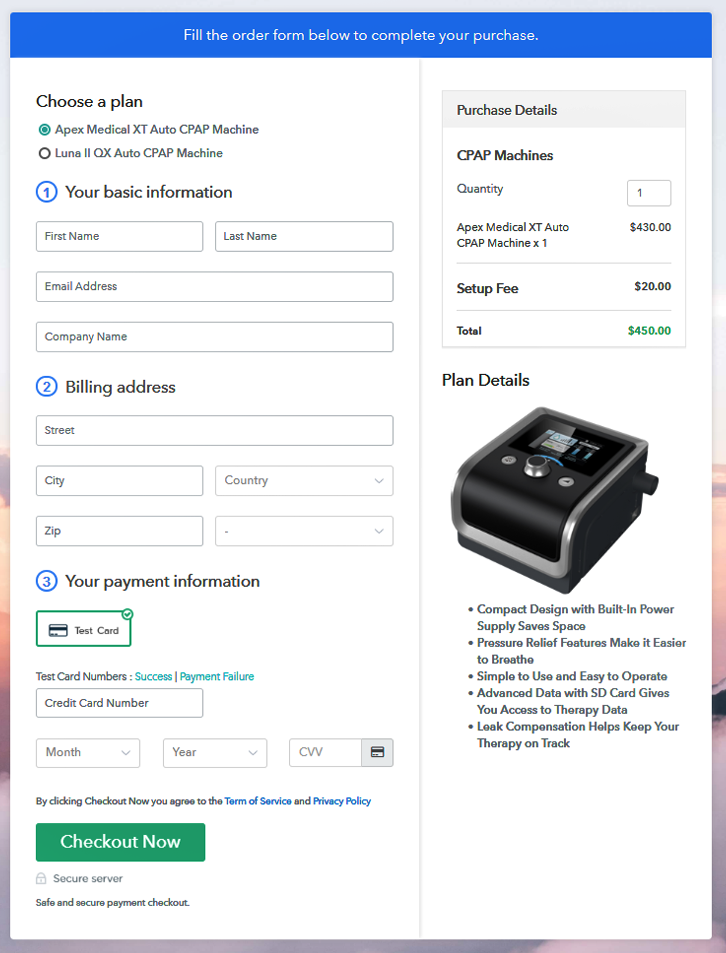
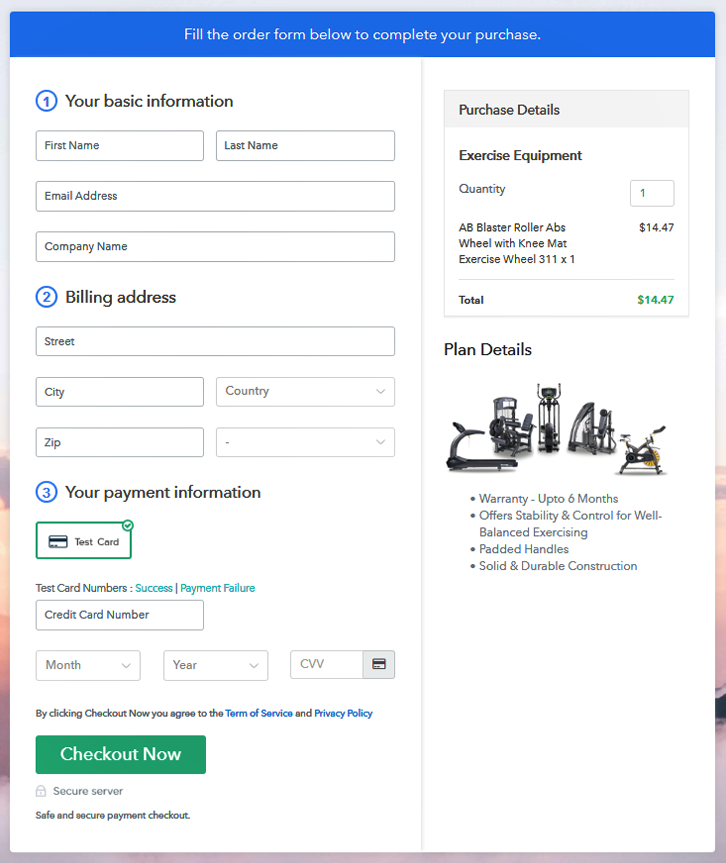
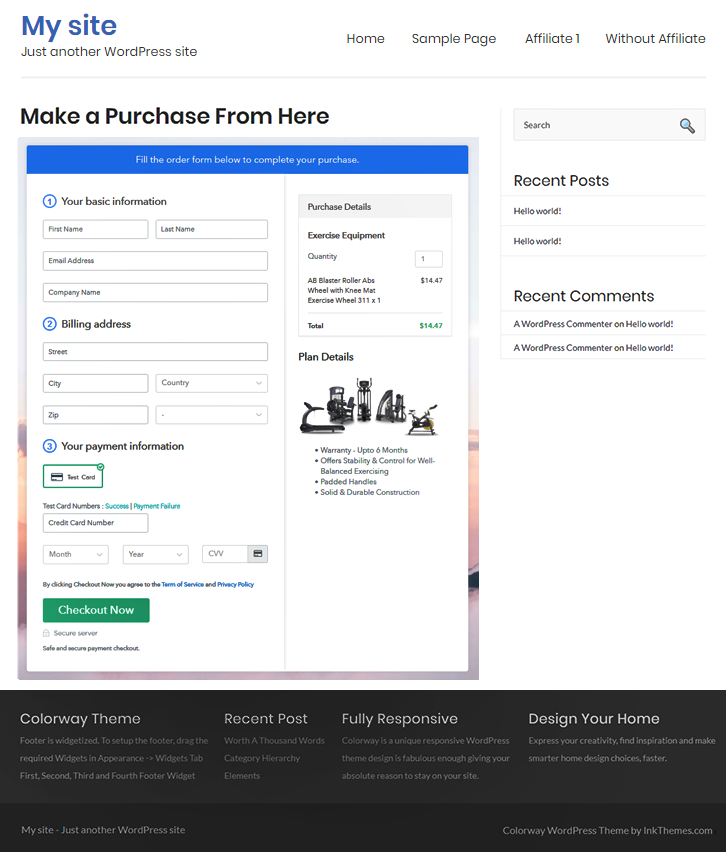
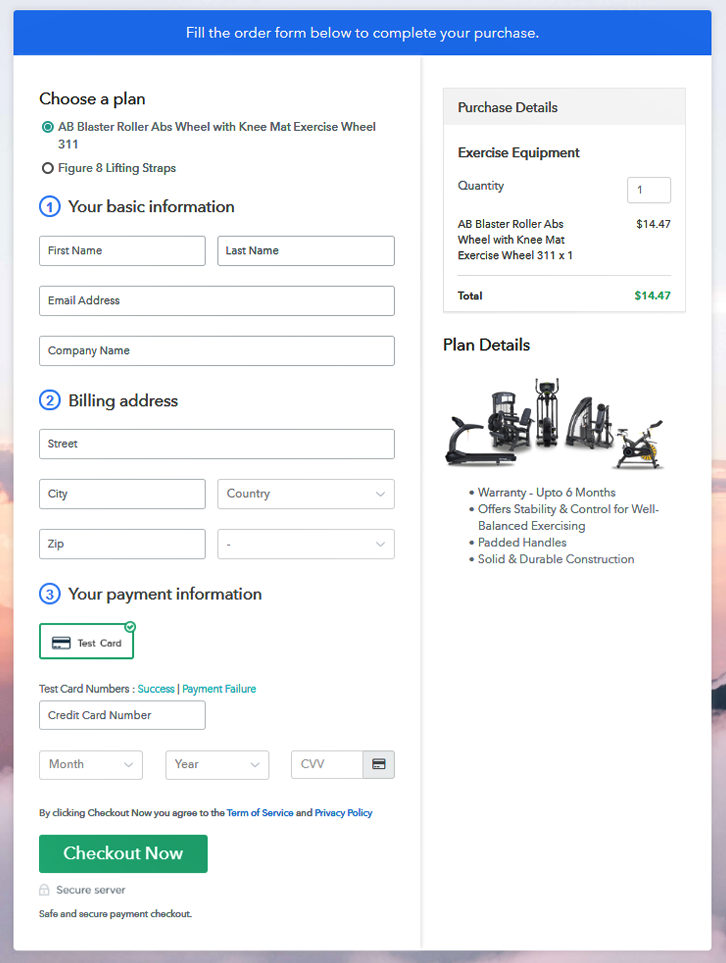
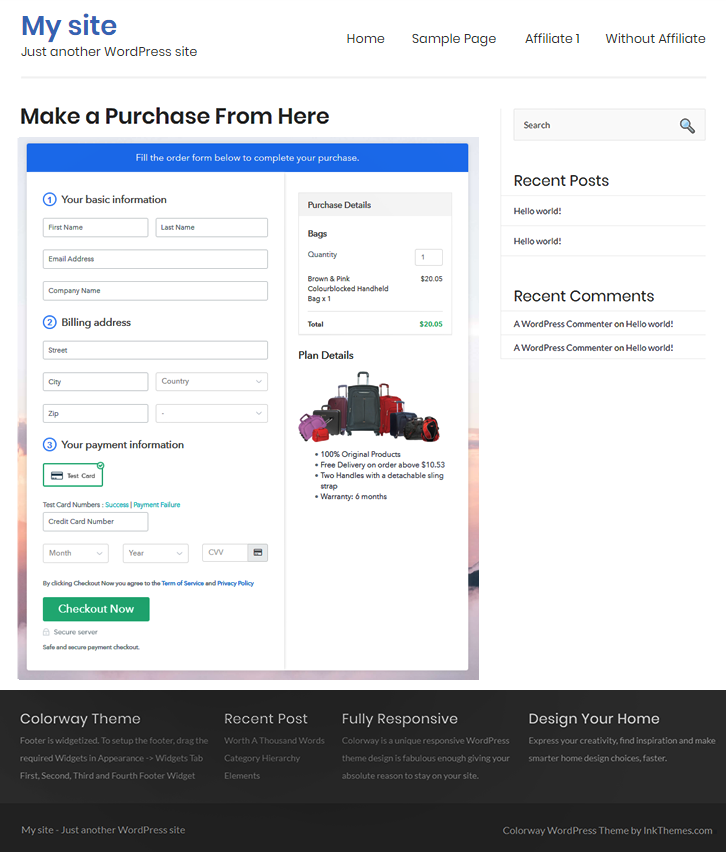
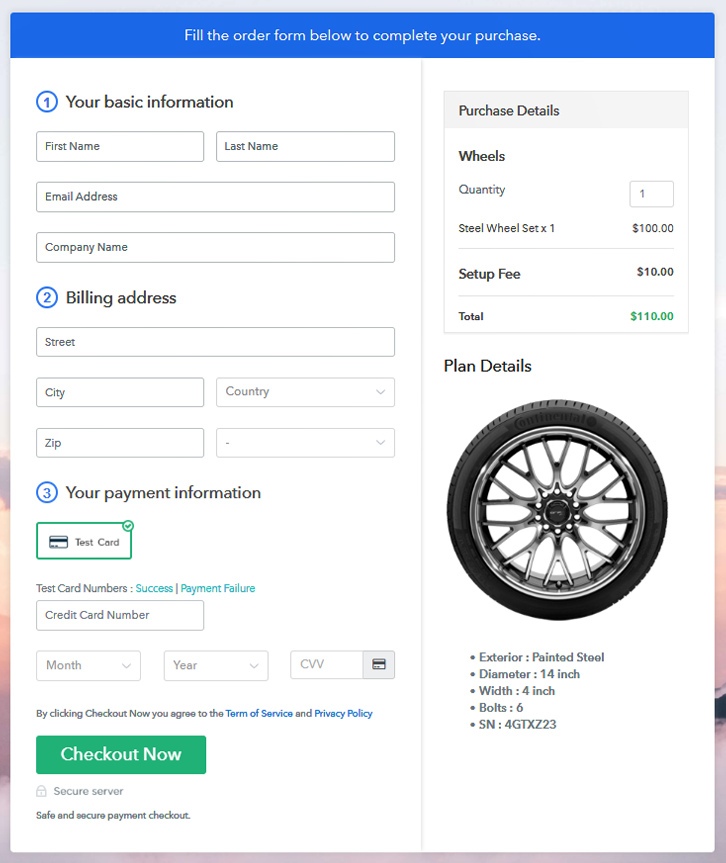
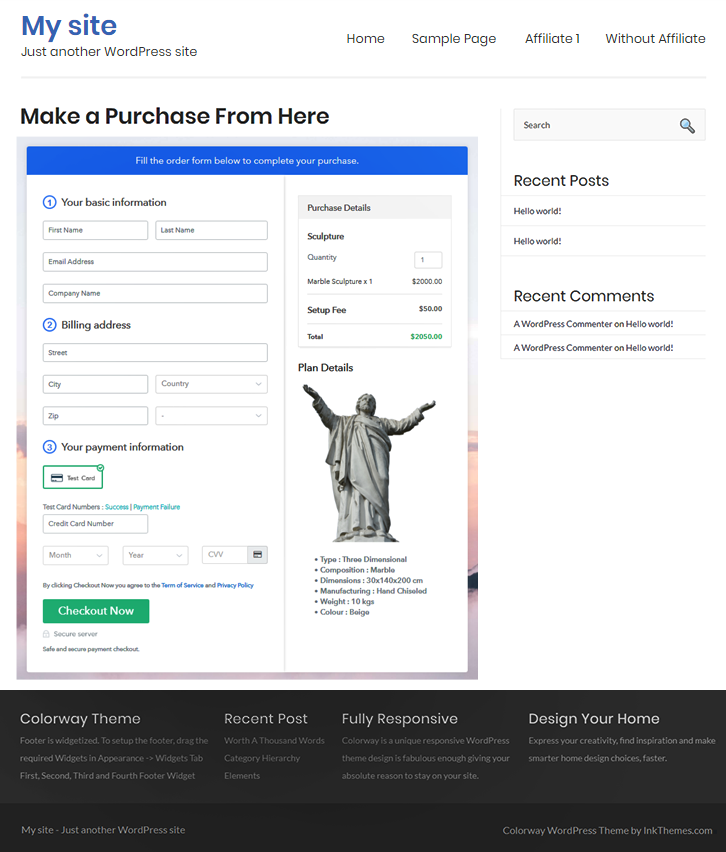
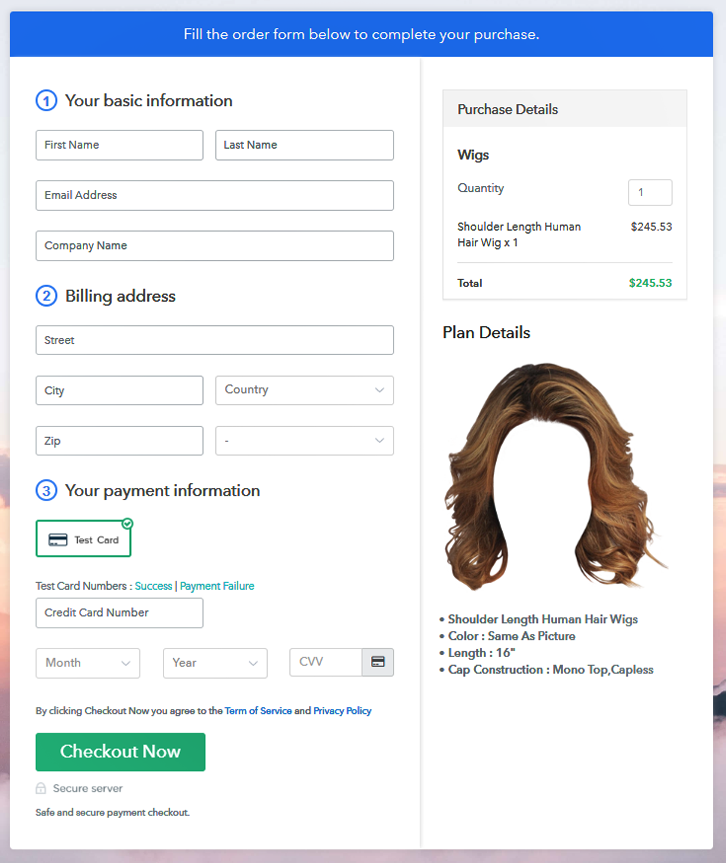
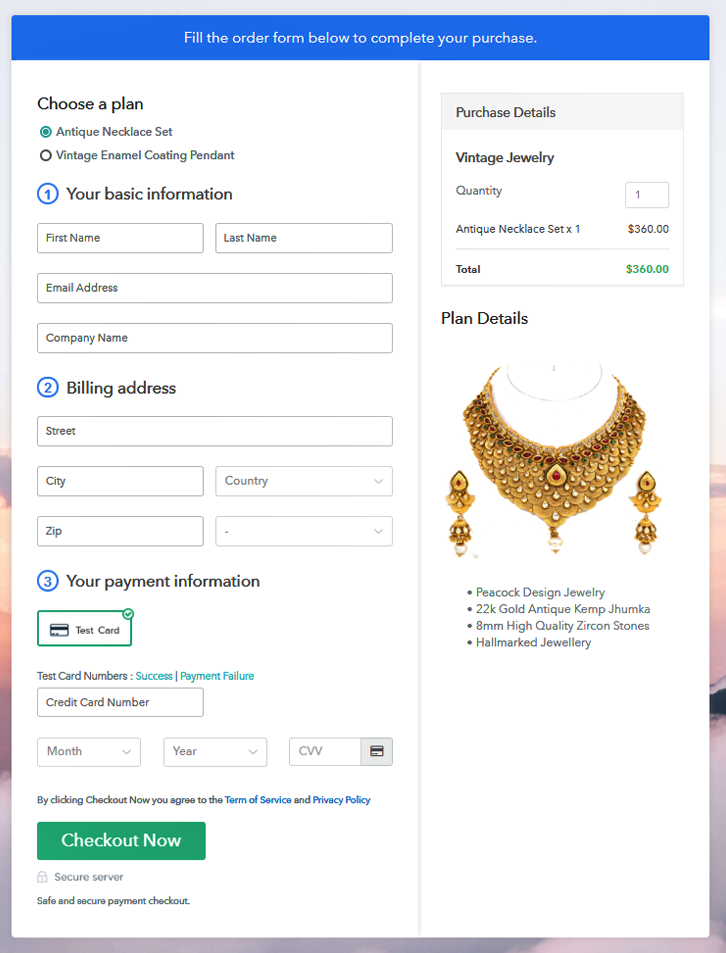
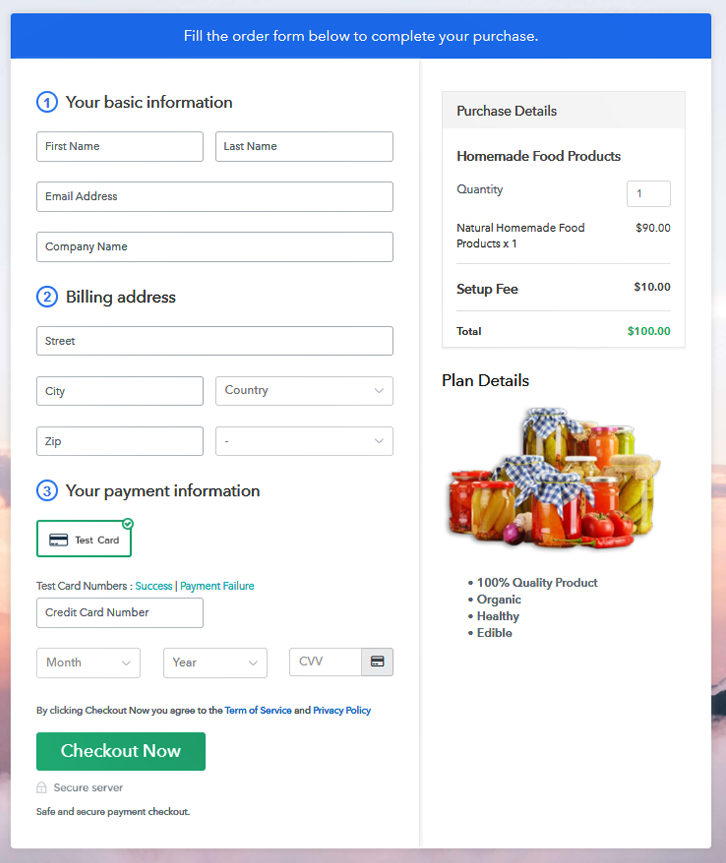
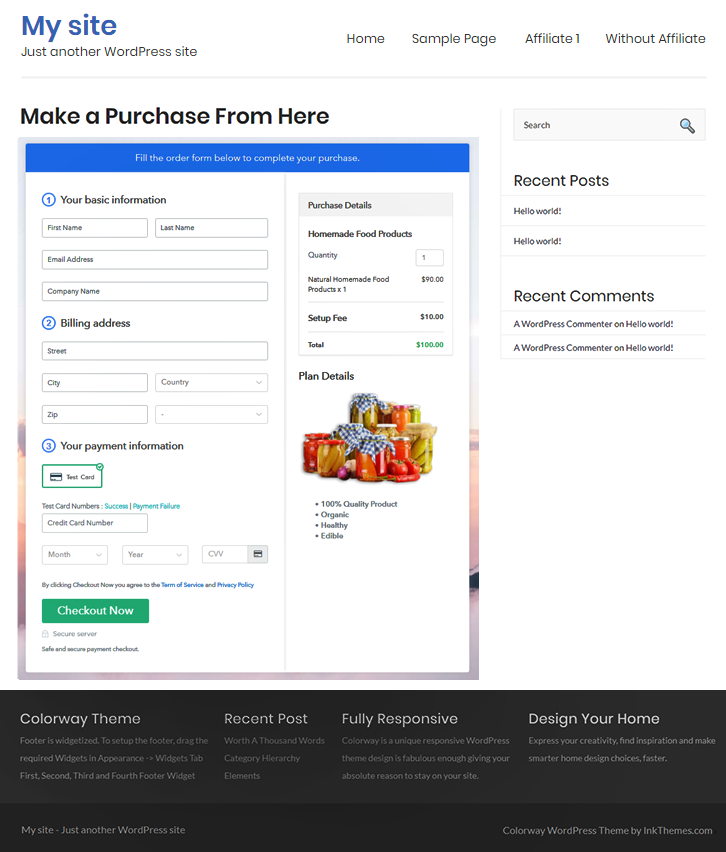
This is How your Checkout Page will Look Like After Creation
Step 1: Login to Pabbly Subscription Billing

The primary step is to visit the Pabbly Subscription Billing site and click on the “Sign Up Free” button. Then enter the software by manually filling the details or use your Gmail credentials.
Sign Up For Free!
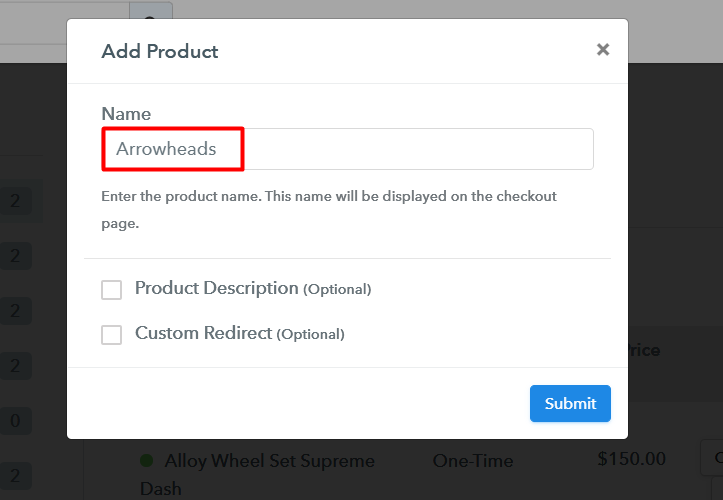
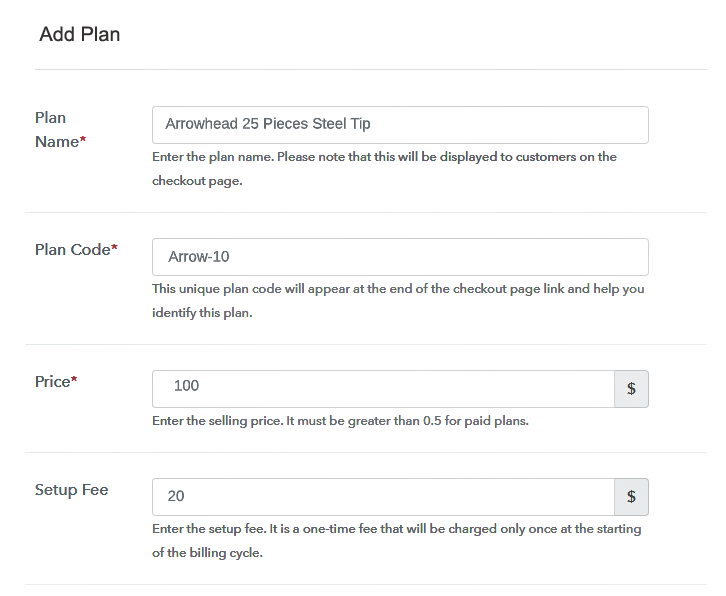
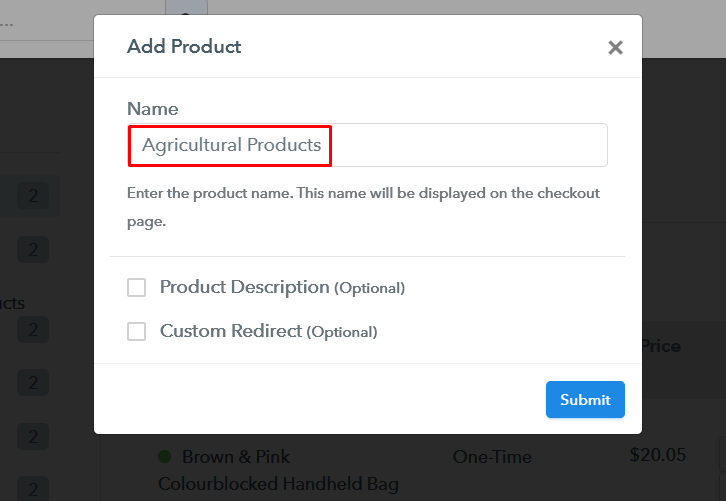
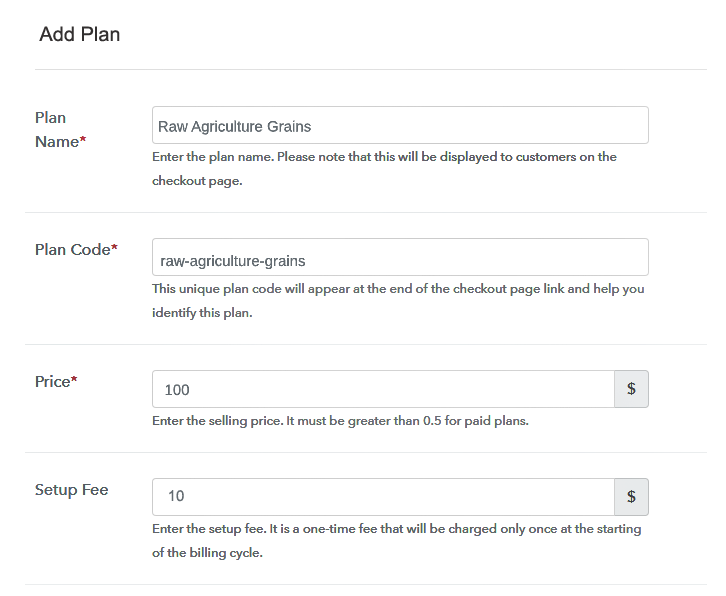
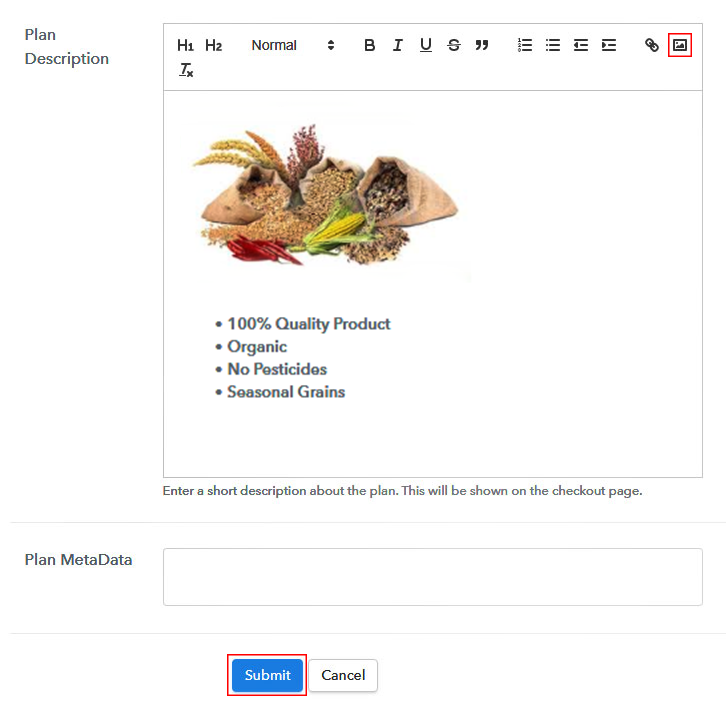
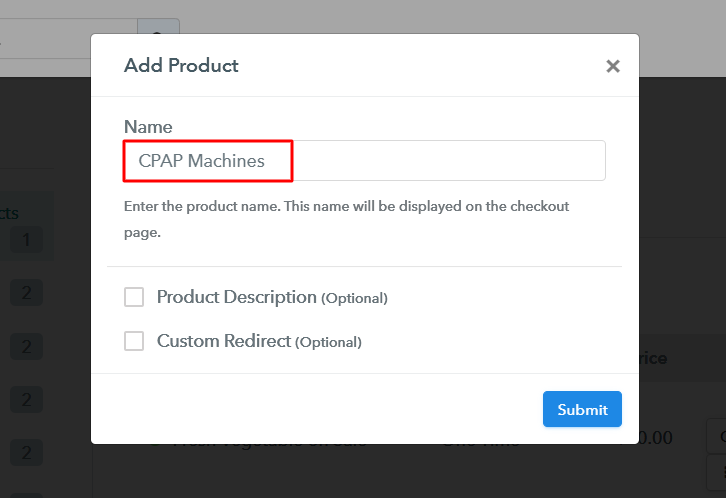
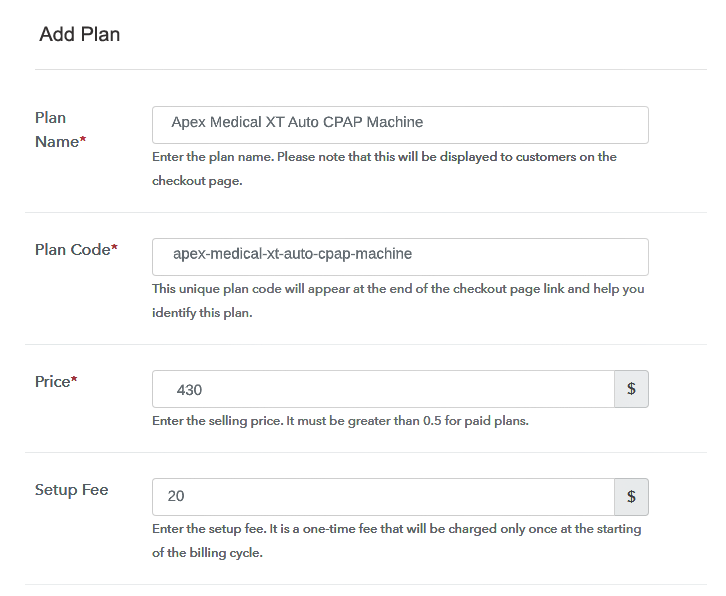
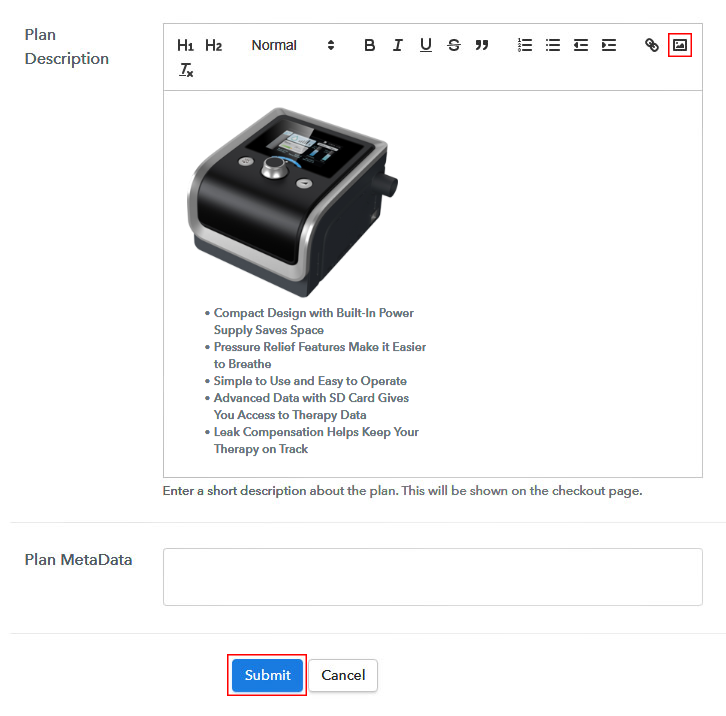
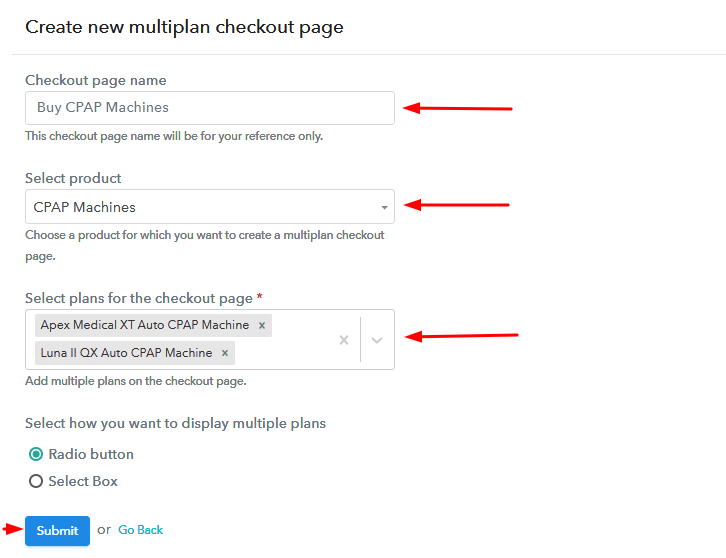
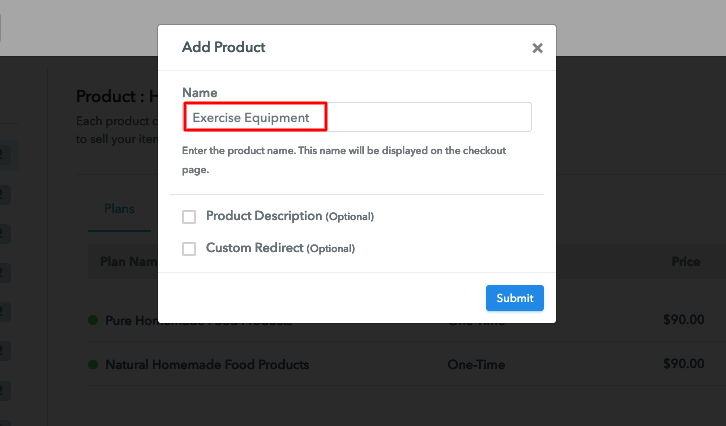
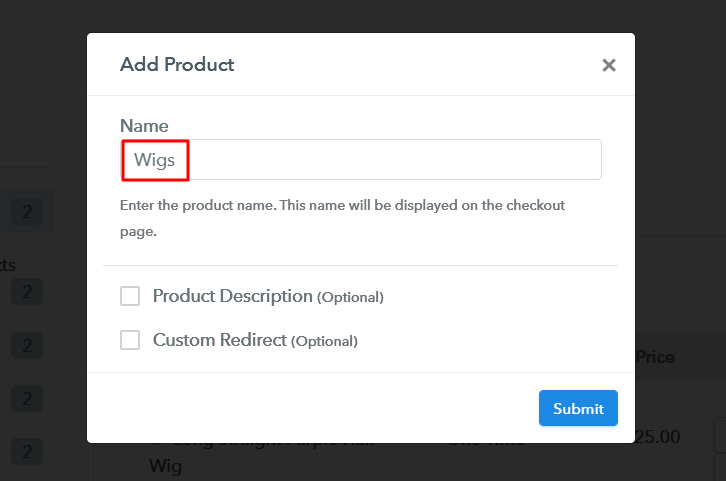
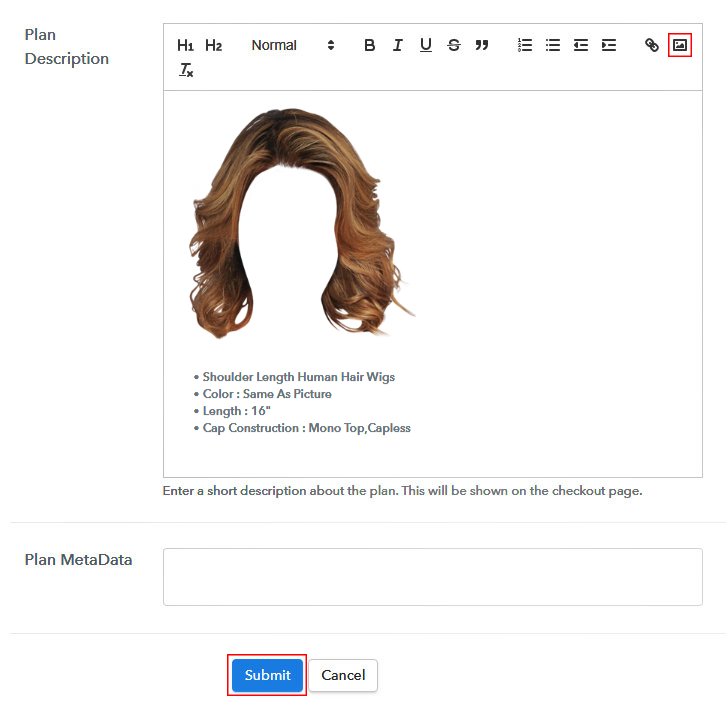
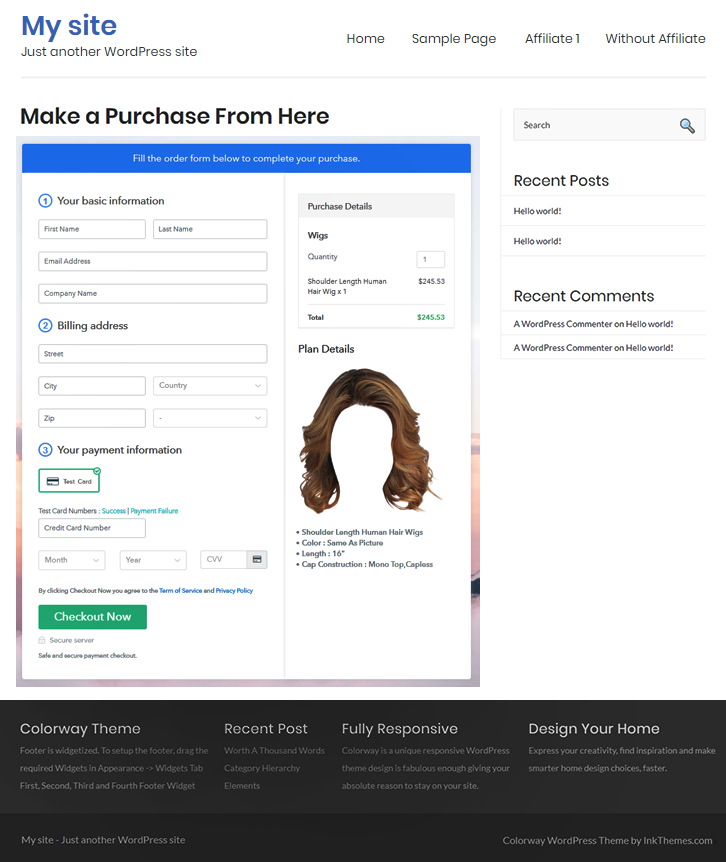
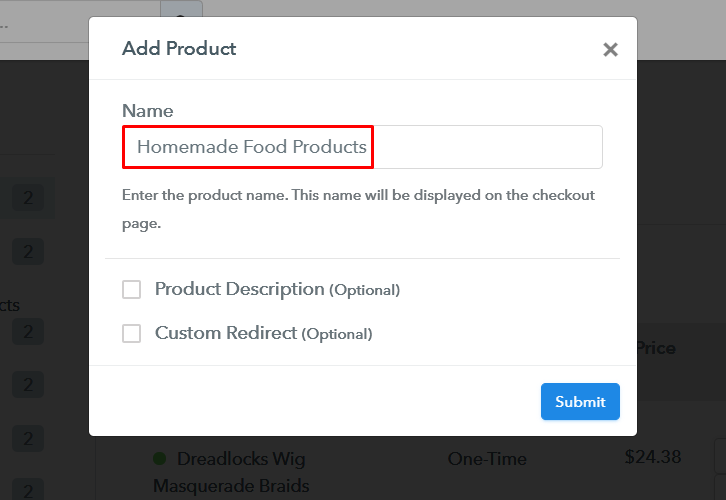
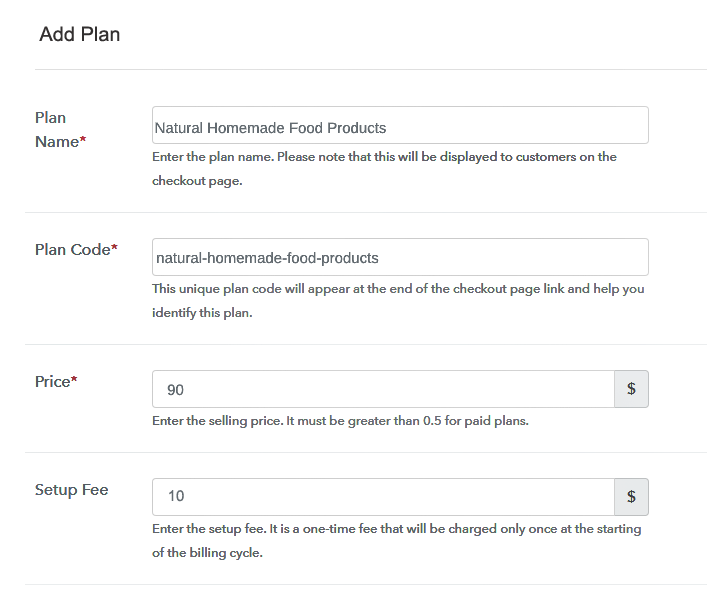
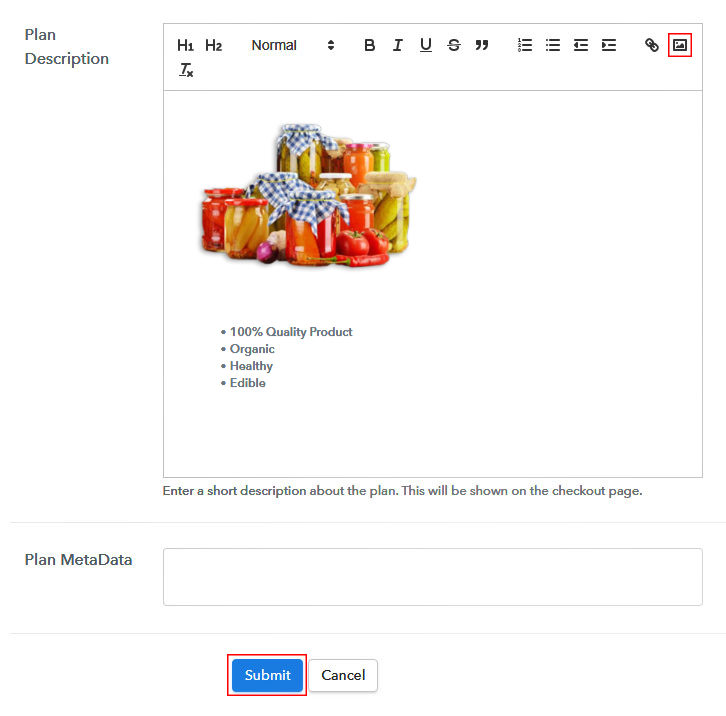
Jump to the process of clicking on the “Access Now” button of the software, it will open the page with details like company name, select currency, and phone number. Just press “continue” to proceed. Next, the software is packed with multiple payment gateways like PayPal, Stripe, etc but as a beginner, it is suitable to go with the “test payment” mode to gain the knowledge of the software. Here, we are also using the test payment mode to explain the procedure. Additionally, we provided the payment integration guides to help you out. Moreover, add the name, which in our case is homemade food products. Here you can specify the type like natural homemade dairy products, vegan food products, etc. Also, write a short description of the product to grab the buyer’s attention. Subsequently, click on the “Submit” button after filling the details. Note: Here you can add all the products related to the similar category by creating plans for each of them. Let’s unfold out plans for different kinds of homemade food products available in your store. Following, fill all the details like plan name, code, price, set-up fee, and much more to move on. Furthermore, it is necessary to write a brief description of homemade food products using bullets, images, etc, to bring natural buyers to the checkout page. Following, click the “Submit” button to add a product on the checkout page. Additionally, you can add multiple plans and types of homemade food products in your product list which you want to sell online. Follow up the suggested steps to preview the checkout page: Just copy the link and add the checkout page to sell handmade products online at any decent place on your WordPress site. Then paste the plan link on a text editor of the WordPress dashboard. After doing all the changes, simply hit the “Publish” button. Note: In case you want to sell multiple products via a single checkout page, you can create a multi-plan checkout page otherwise skip this step. As it was said “Food brings different cultures together” and it would be the icing on the cake if it’s homemade food products. There are huge demands for homemade products and that’s why people opening their own store. But, our advice here is to take an advanced step by making a digital presence. Since you all know starting homemade food product business is not that tough using the Pabbly Subscription Billing tool. So, follow all these steps and let us know your reaction in the comments section.Step 2: Select Subscription Billing

Step 3: Account Setup

Step 4: Connect Payment Gateways To Sell Homemade Food Products Online

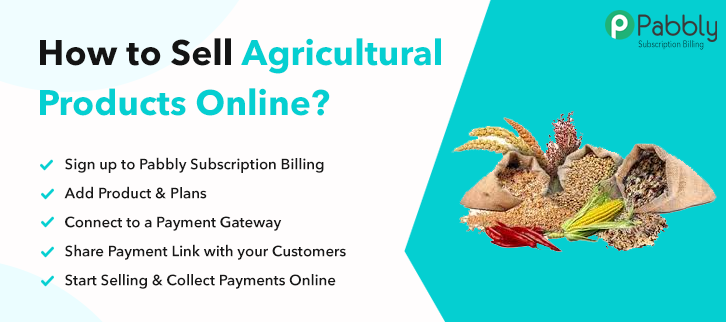
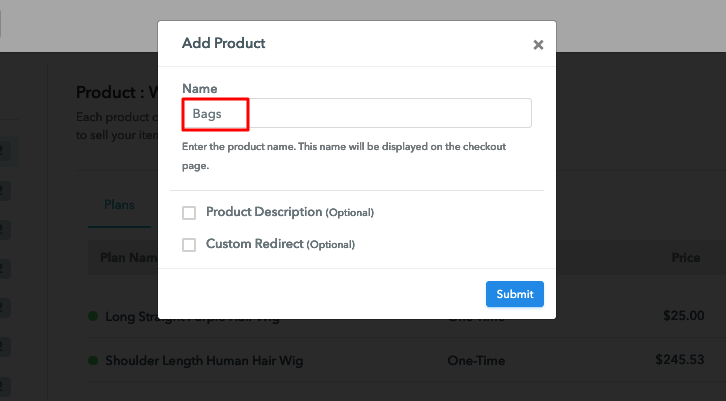
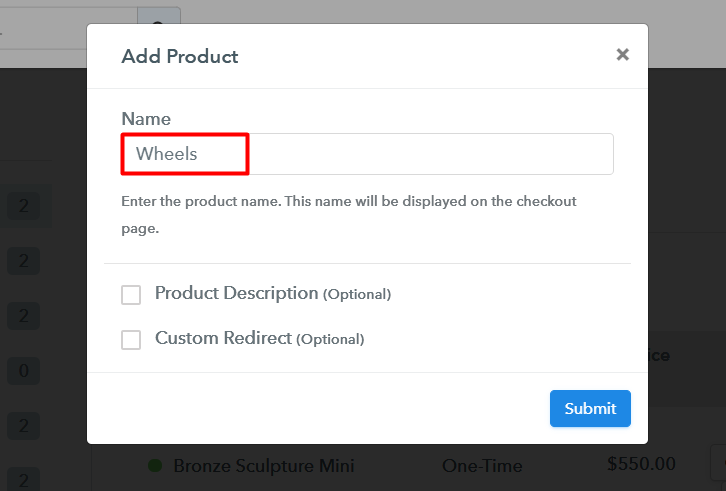
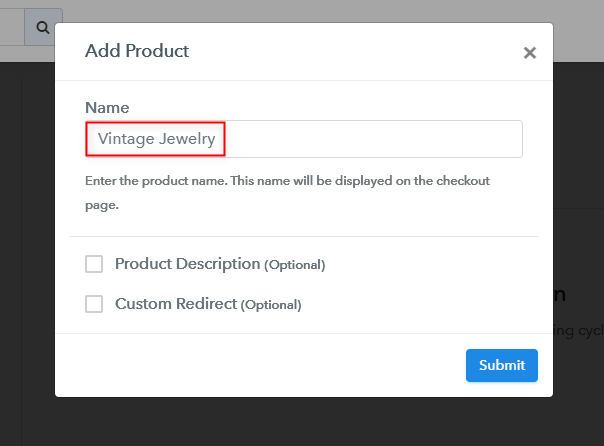
Step 5: Add Your Product

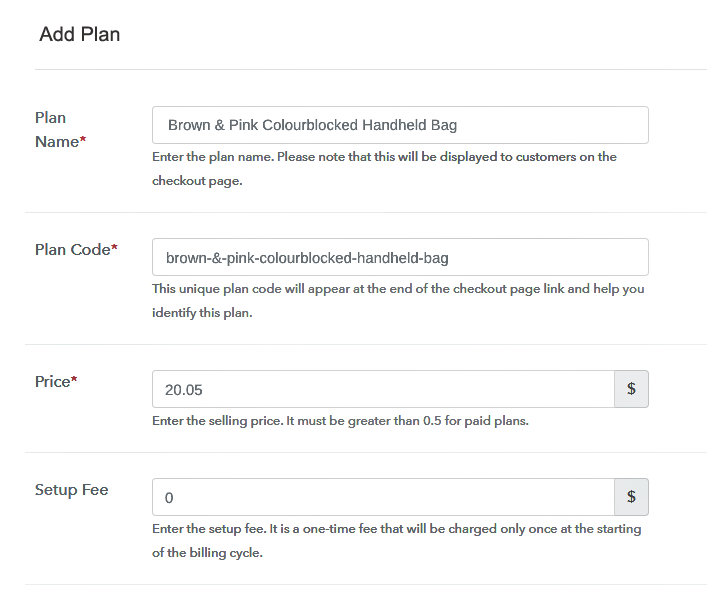
Step 6: Add Plans
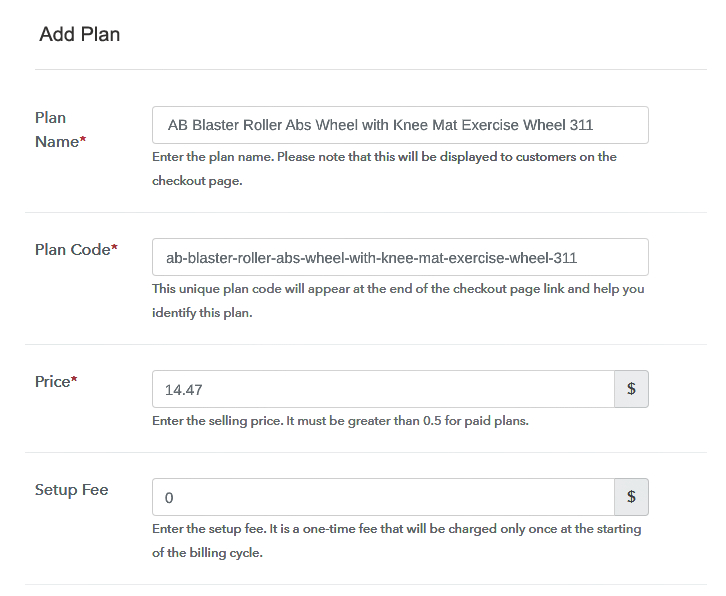
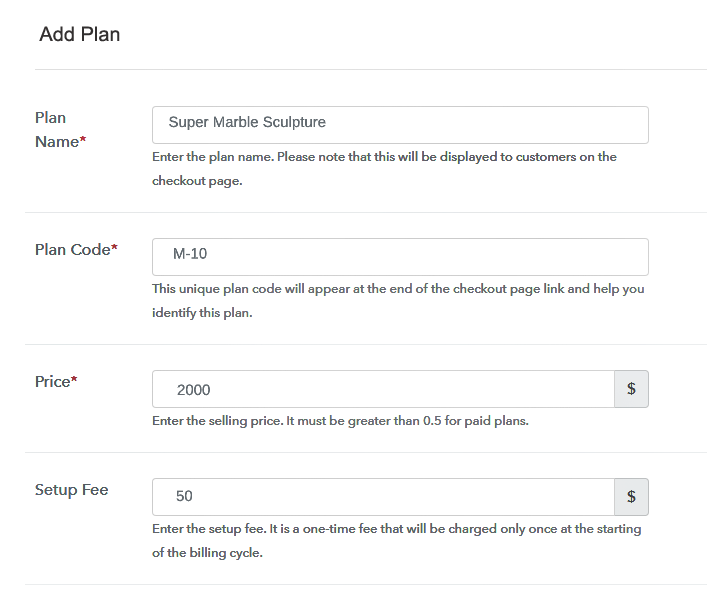
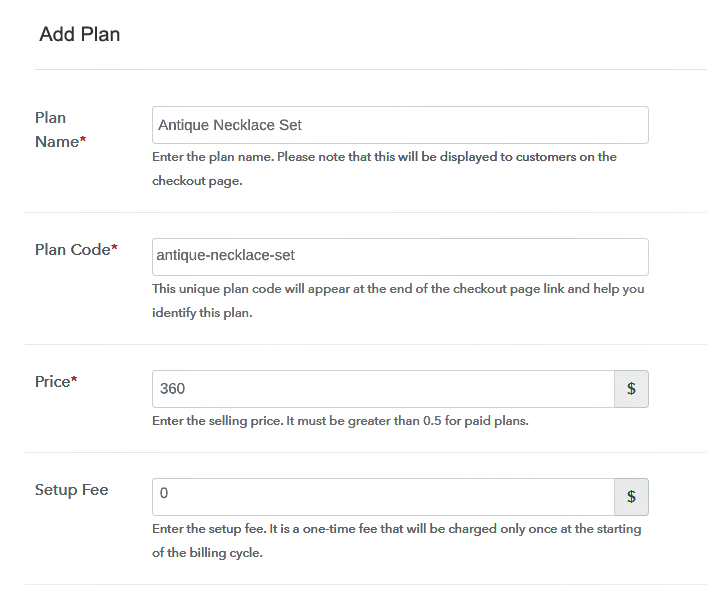
(a) Select Add New Plan

(b) Specify the Plan & Pricing Details
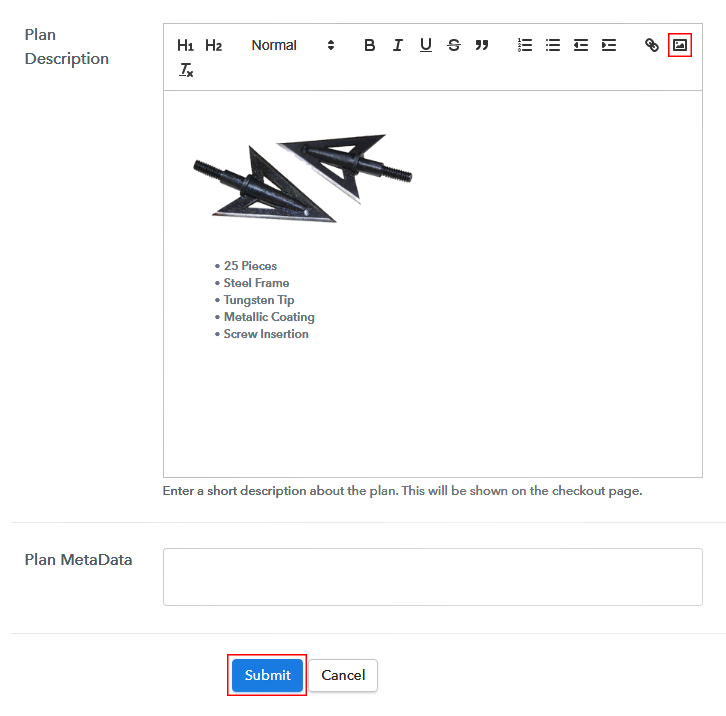
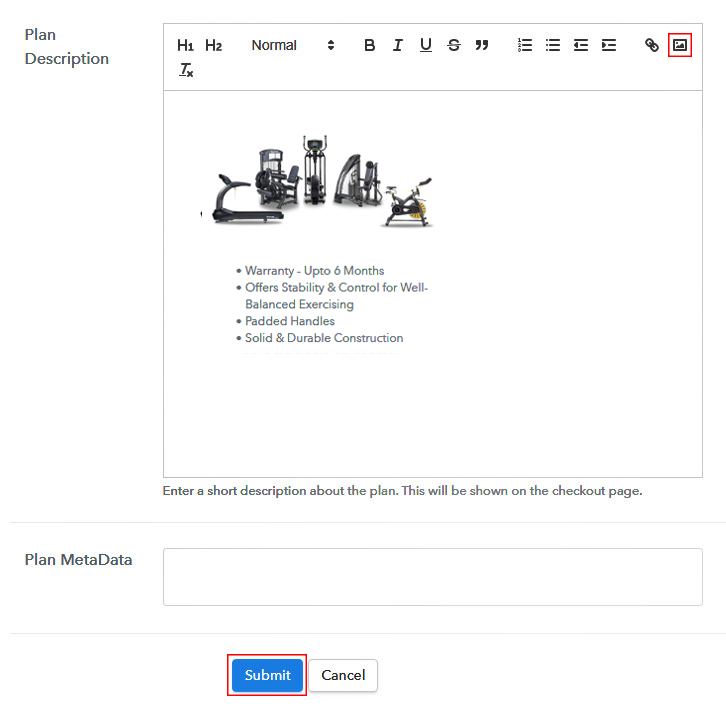
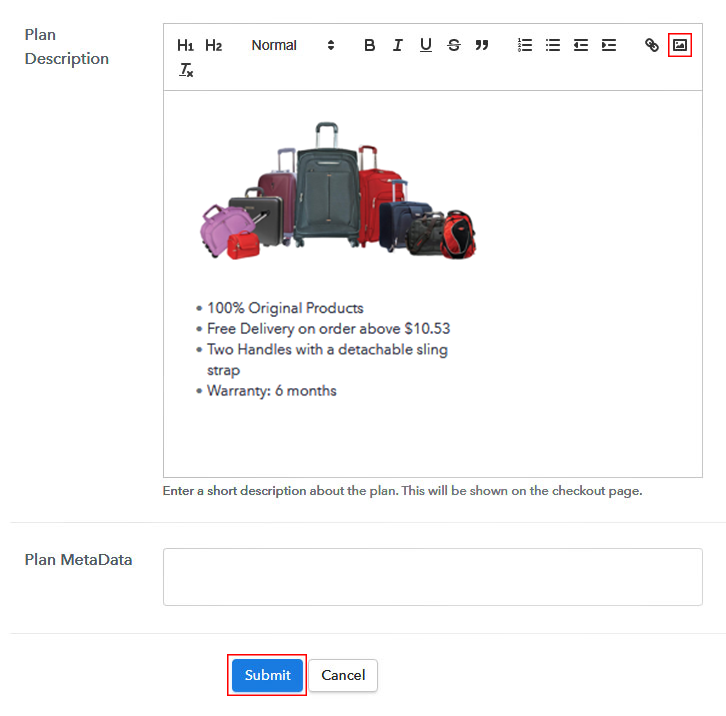
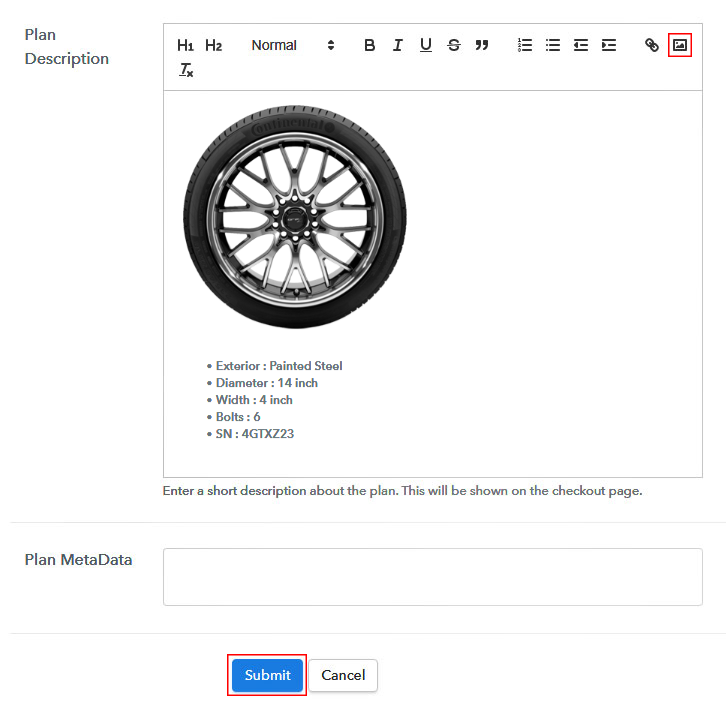
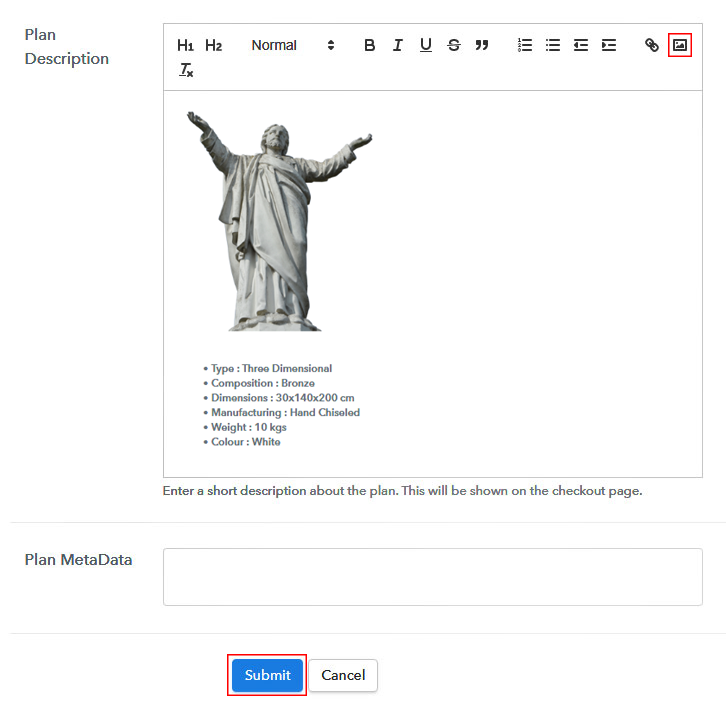
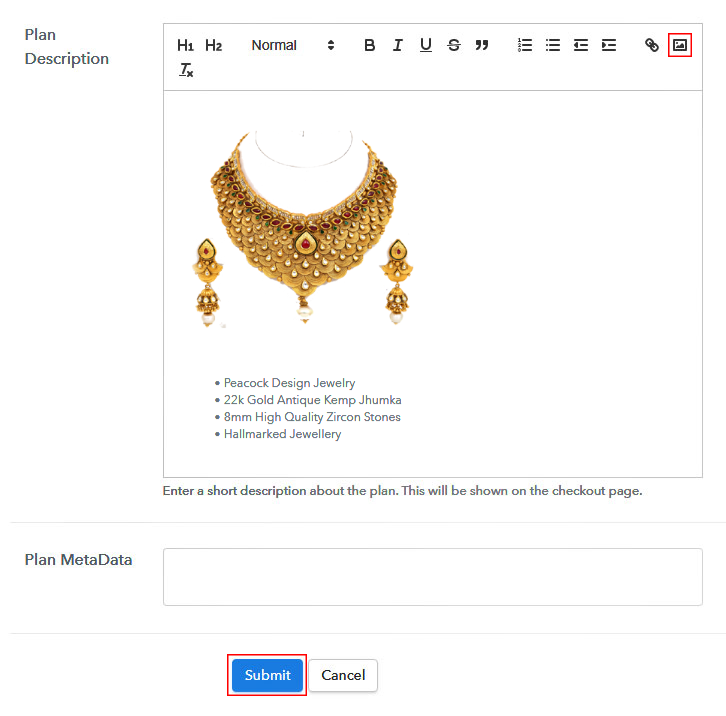
(c) Add Image & Description
Step 7: Share your Checkout Page

Step 8: Preview Checkout Page
(a) Click on the View Button

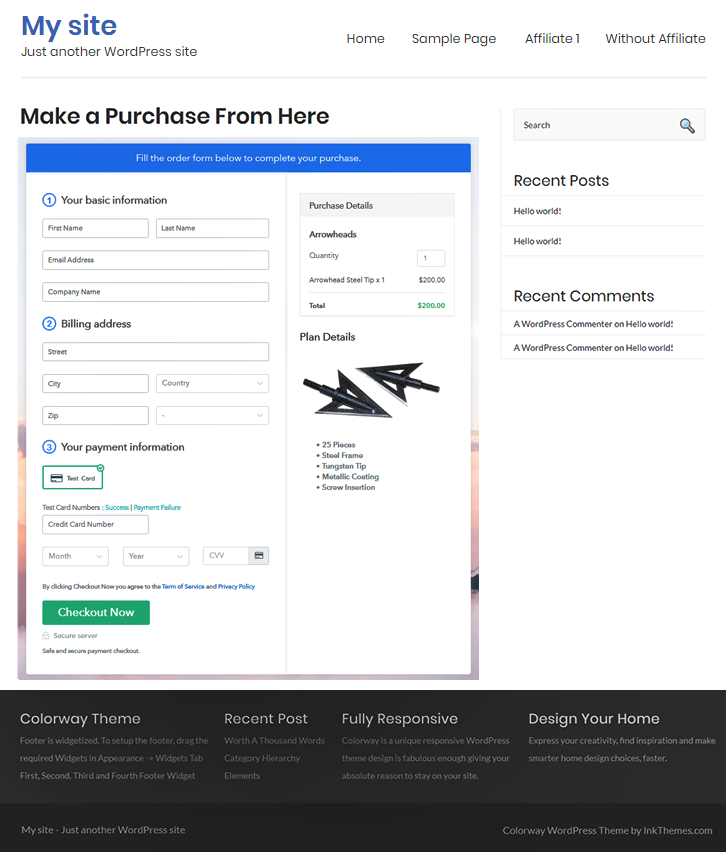
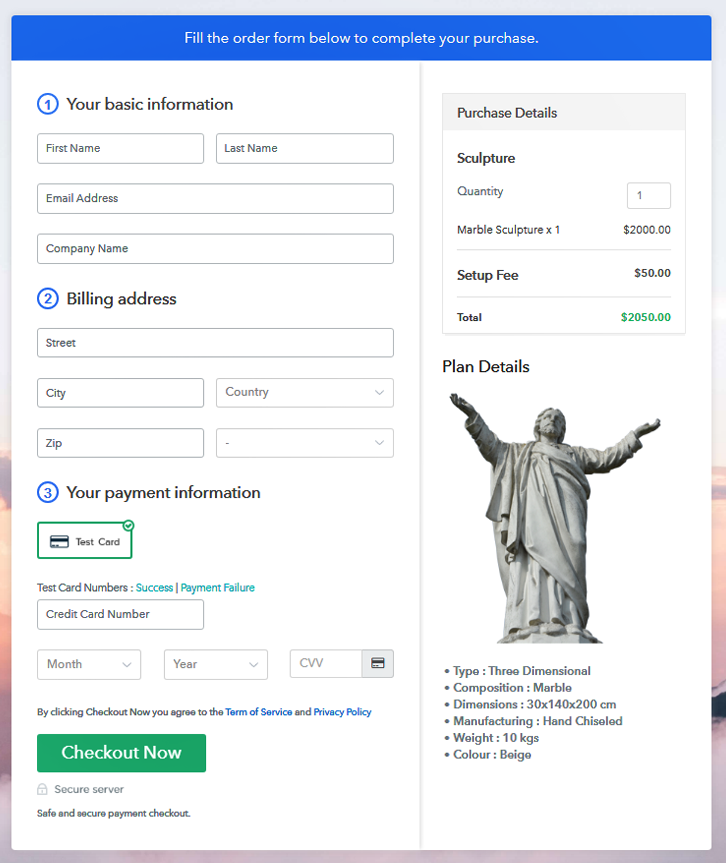
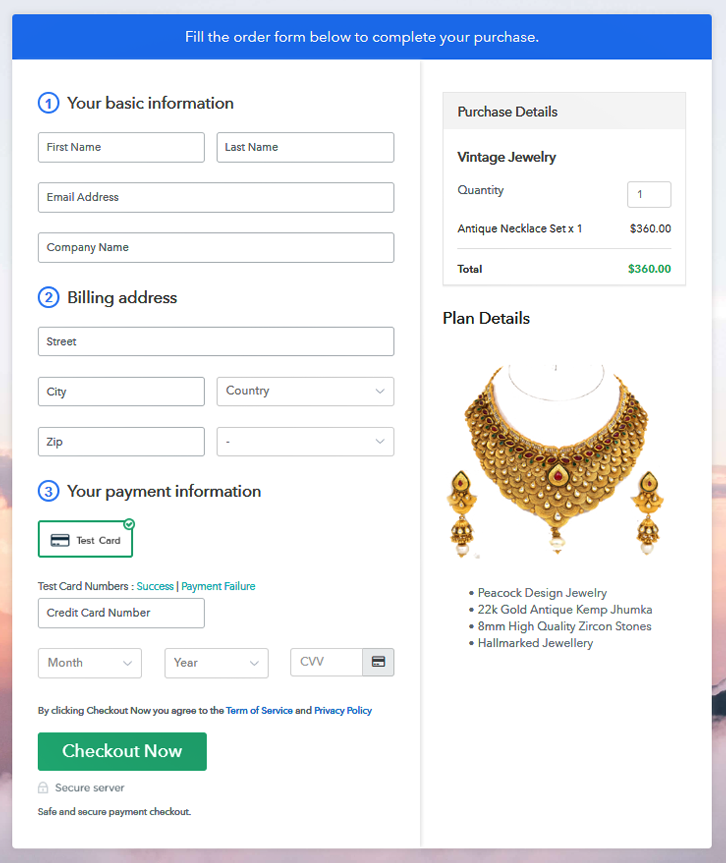
(b) Take a Look at the Checkout Page
Step 9: Embed Checkout Page in Site & Sell Homemade Food Products Online

(a) Edit the Page & Paste the Copied Link

(b) Save & Publish the Checkout Page

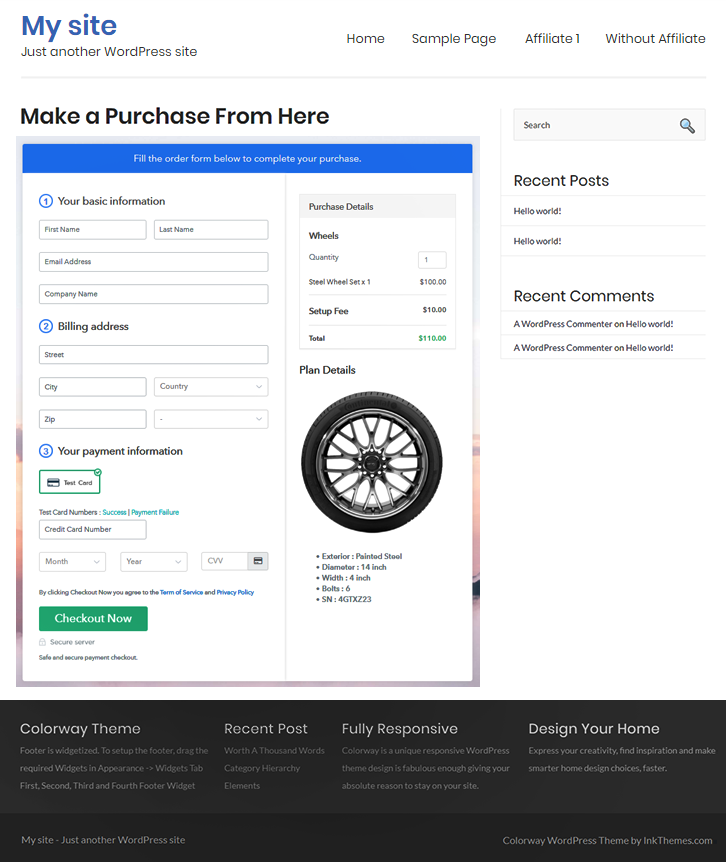
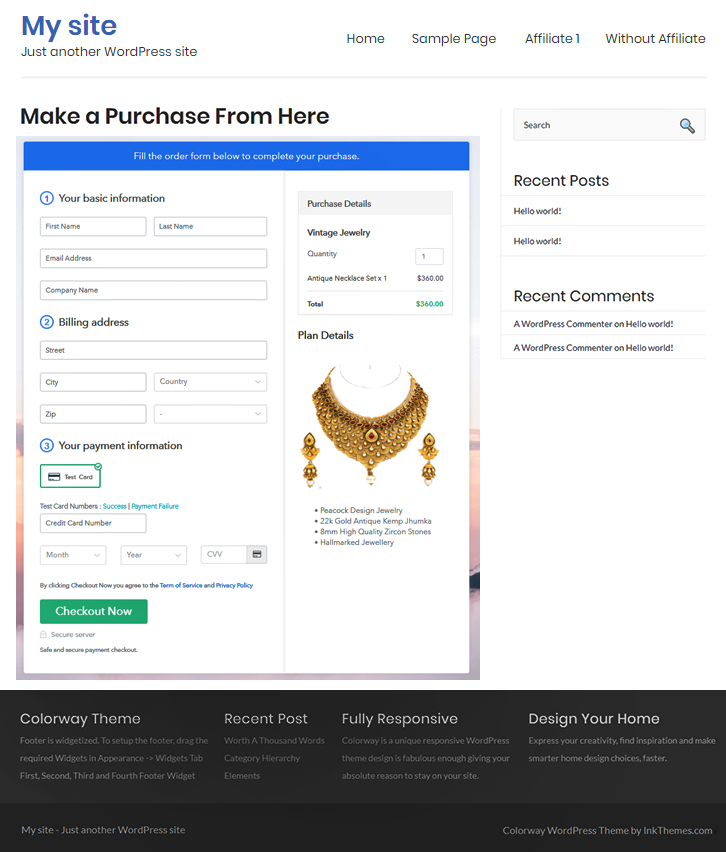
(c) Check out the Final Look of your Checkout Page on WordPress Site
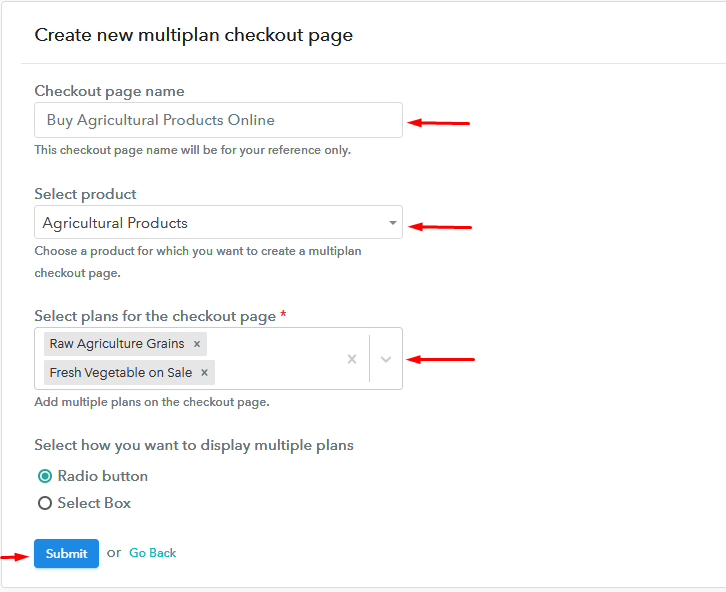
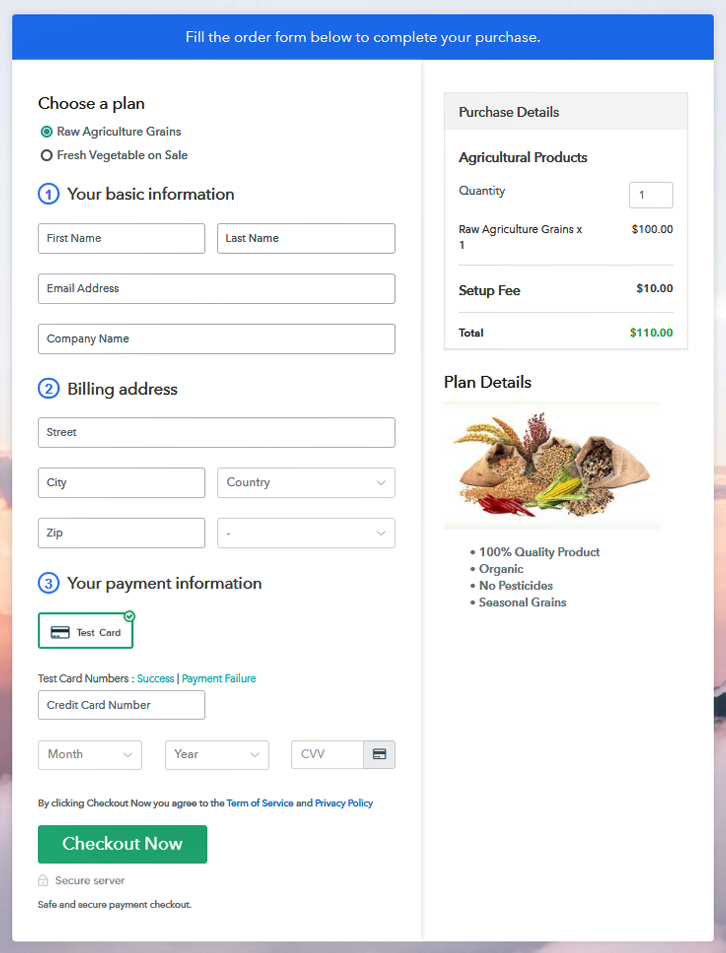
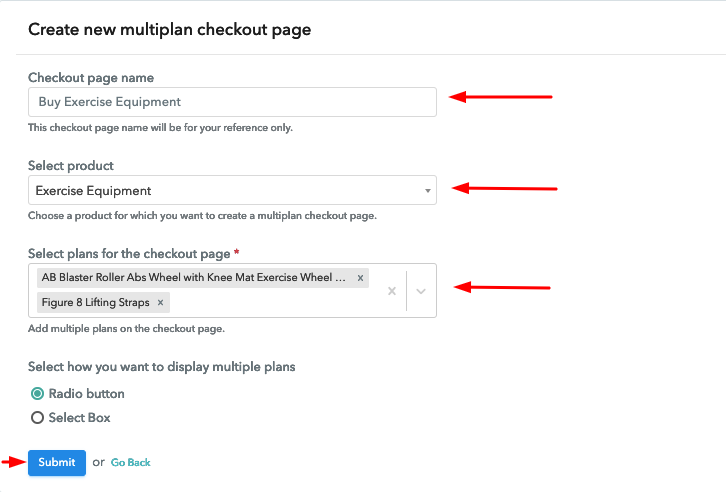
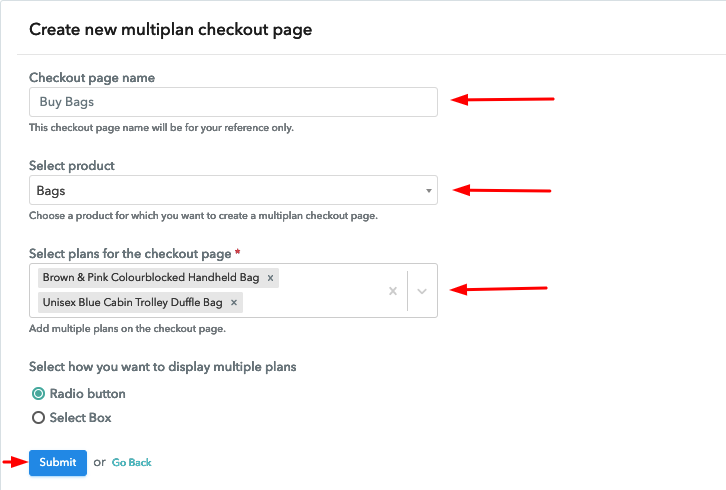
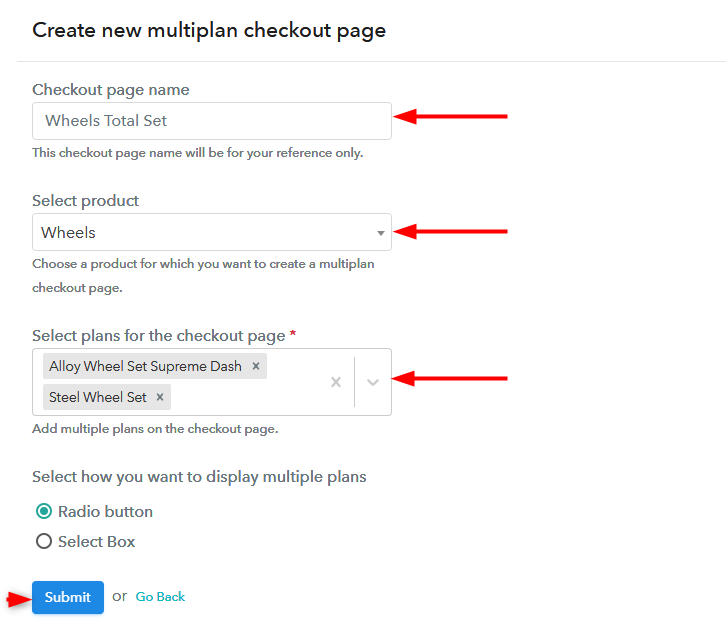
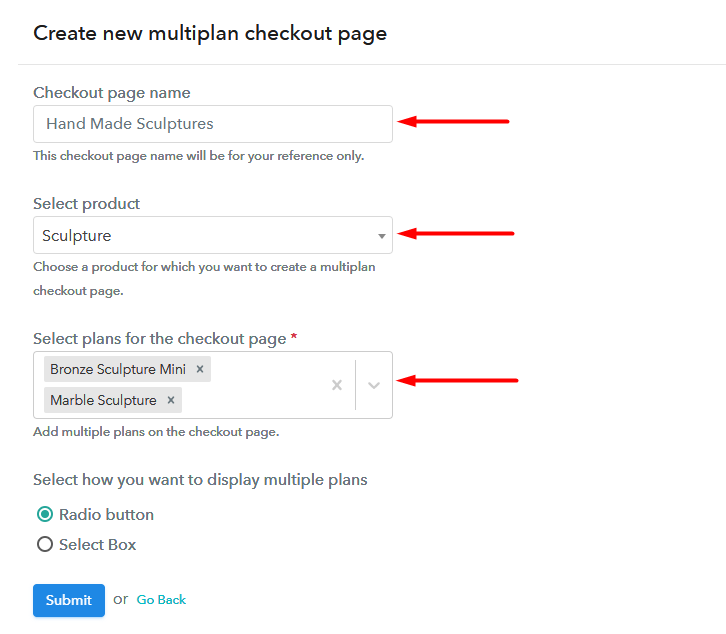
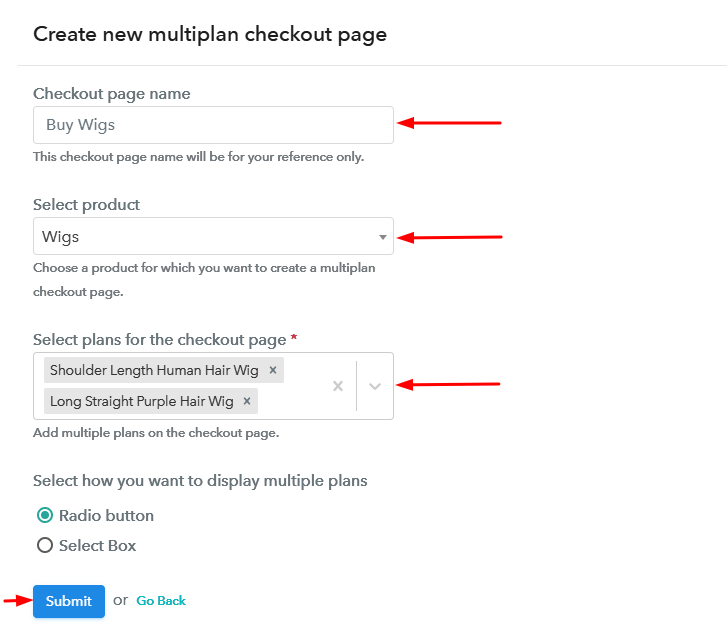
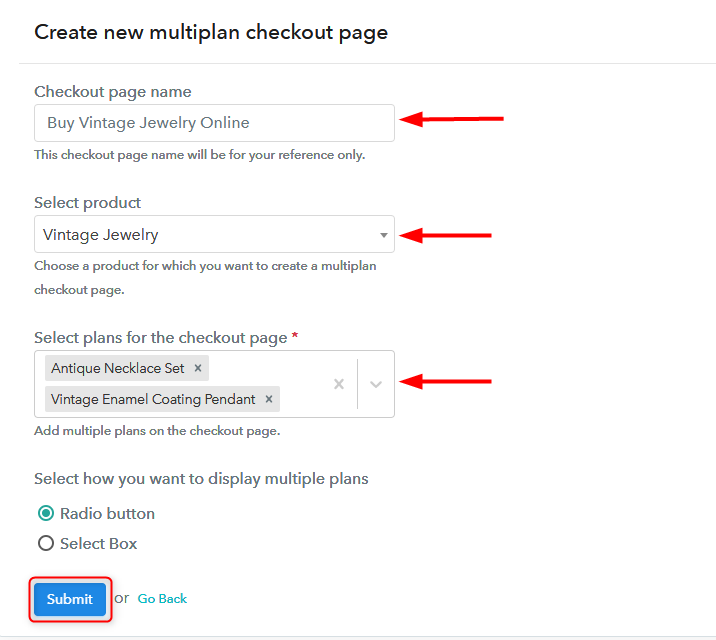
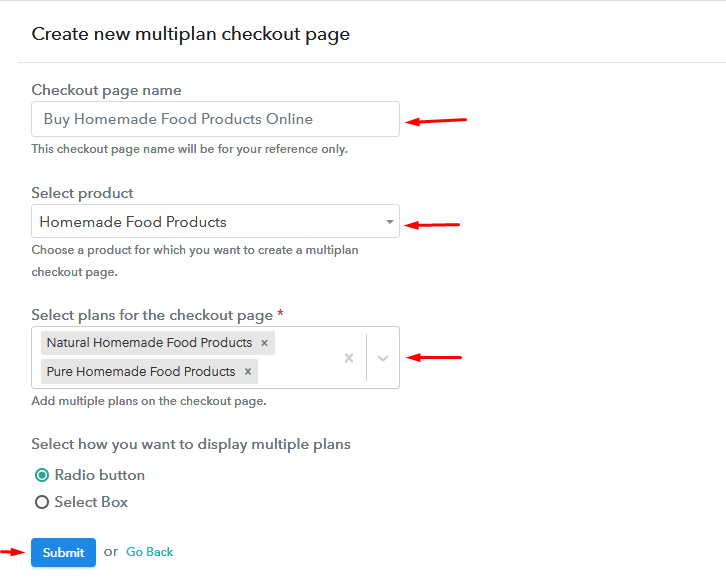
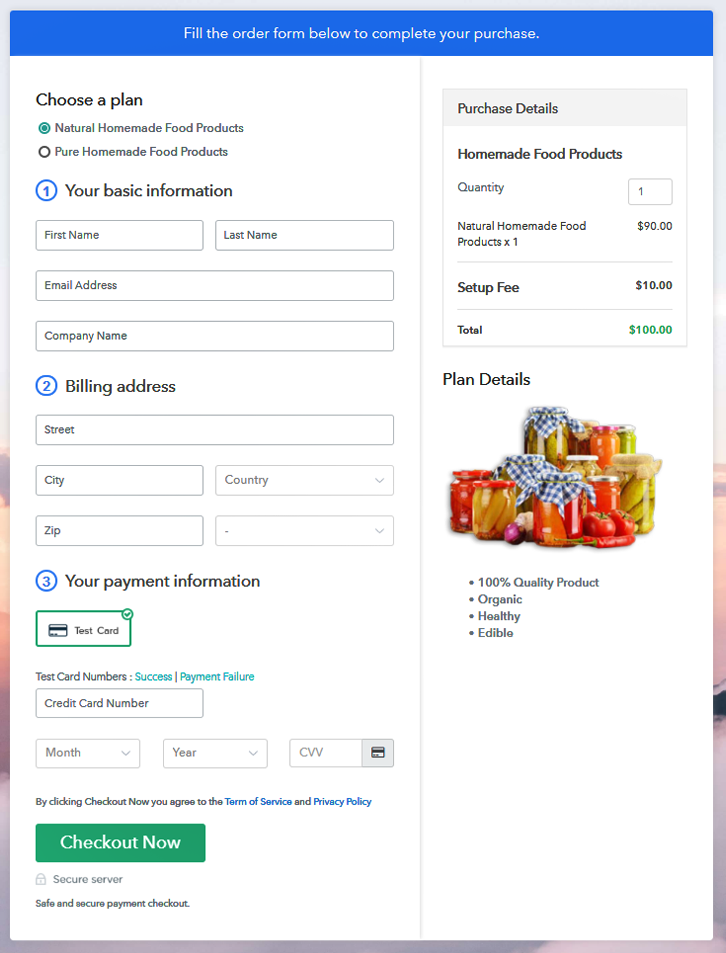
Step 10: Multiplan Checkout Page
(a) Click on Add Mutiplan Checkout

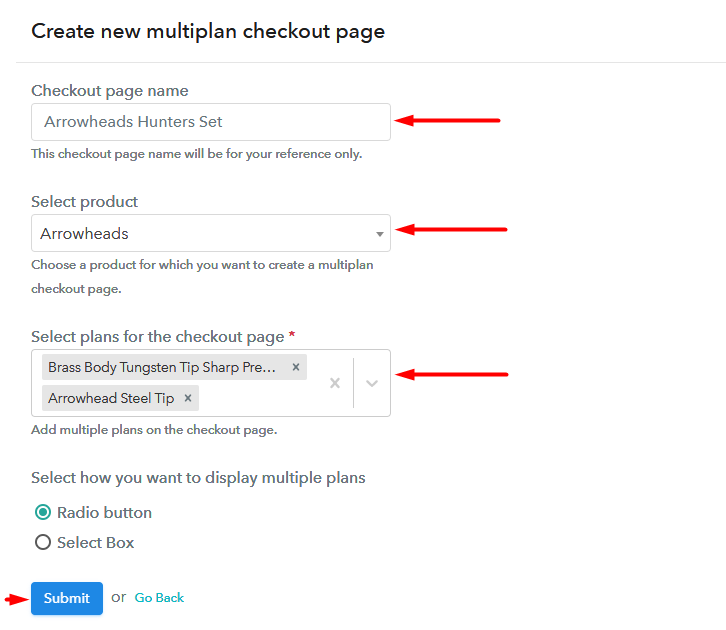
(b) Add Plans to Sell Multiple Homemade Food Products from Single Checkout Page
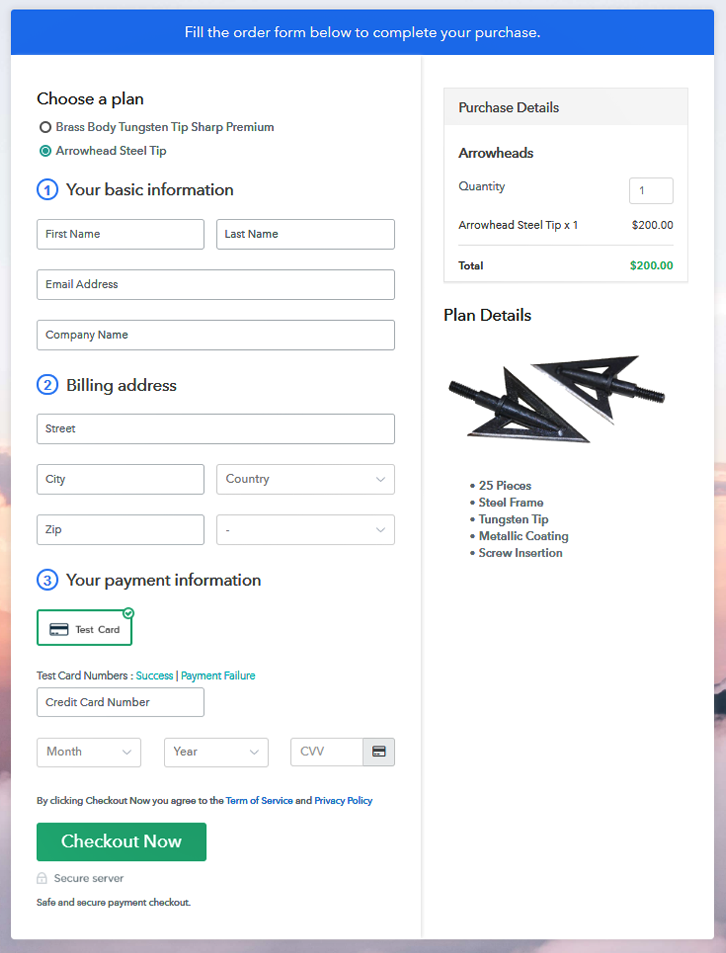
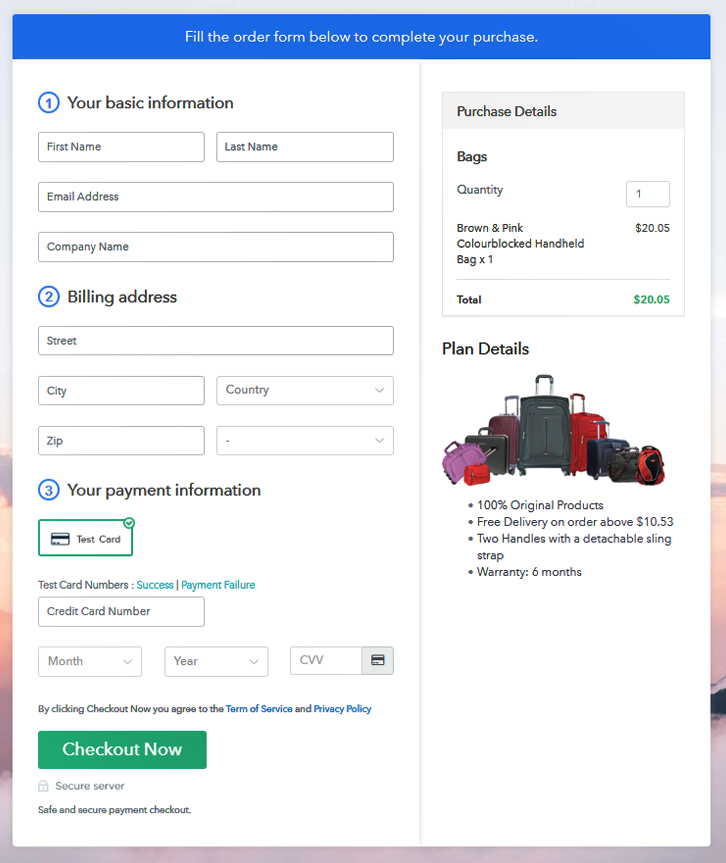
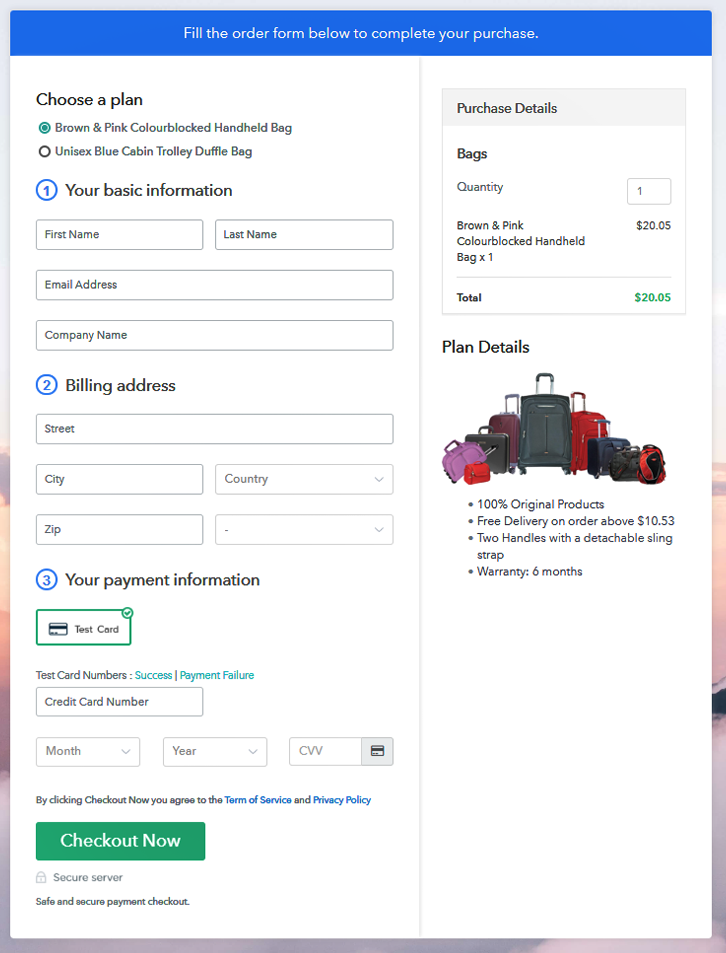
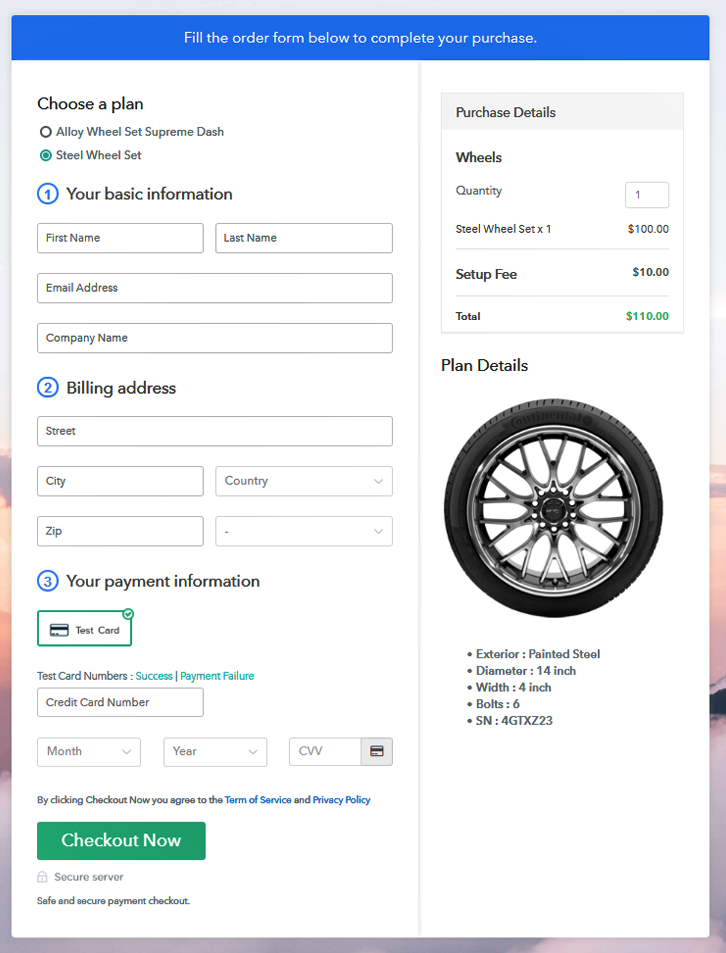
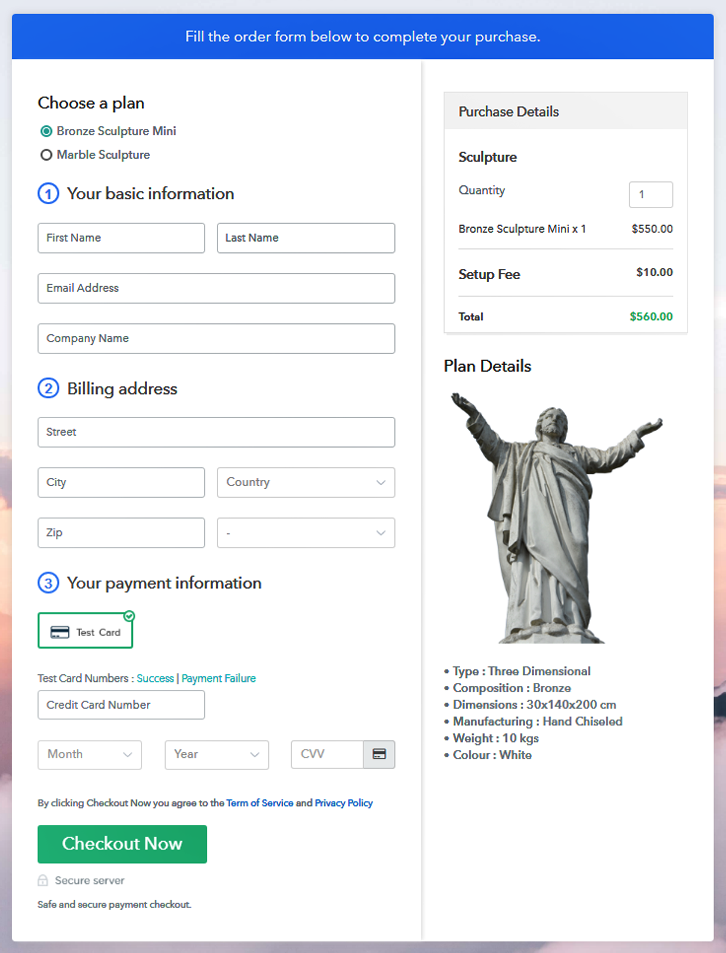
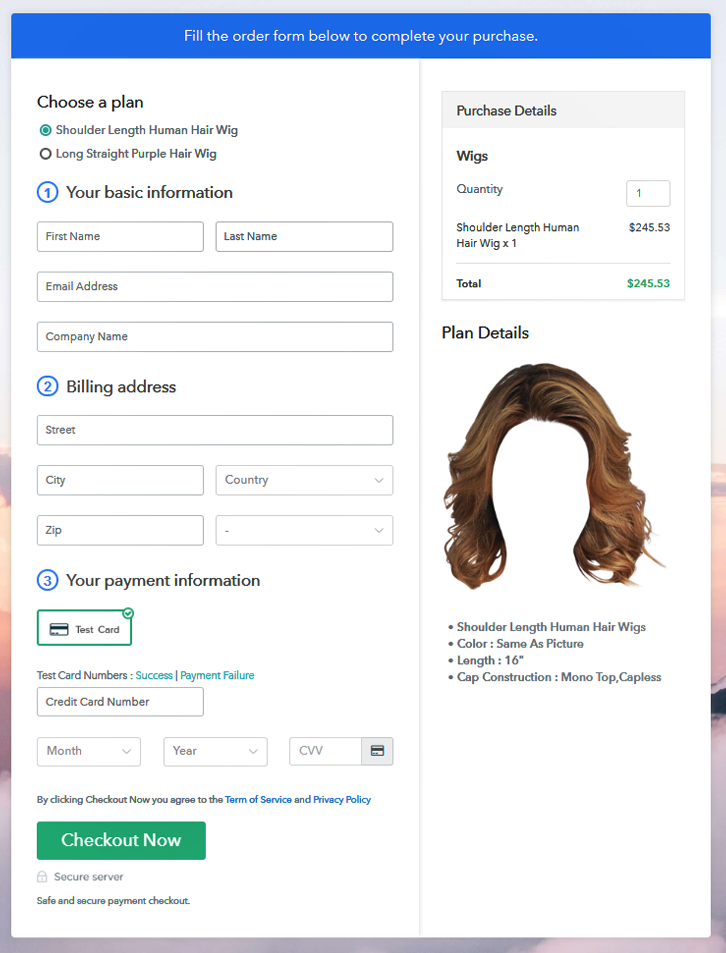
(c) Take a Look at the Checkout Page
Wrapping Up
You May Also Like To Read –