You can add the Razorpay payment gateway with your Pabbly Subscriptions account in a simple and easy way. All you have to do is to follow the steps to add & activate the Razorpay payment gateway.
This integration will help your customers to make a trouble-free purchase.
Isn’t it amazing! That, if you use Razorpay within Pabbly Subsciption Billing, the transaction charges will be reduced to 0.2% rather than the actual transaction charges of 2%. Please note that this offer is no longer valid.
For example:
Suppose you need to collect a sum of 20000 INR.
If you use the Razorpay payment gateway directly then it will cost you 400 INR as transaction charges.
But, if you connect your Razorpay account inside Pabbly Subscription Billing then you only have to pay: 40 INR.
UPI is just 0.2% transaction charges & Debit Card is just 0.7% with Pabbly.
Please note that this offer is no longer valid, as it was a limited-time promotion that has now expired.
Follow These Guidelines To Integrate Razorpay In Your Account:
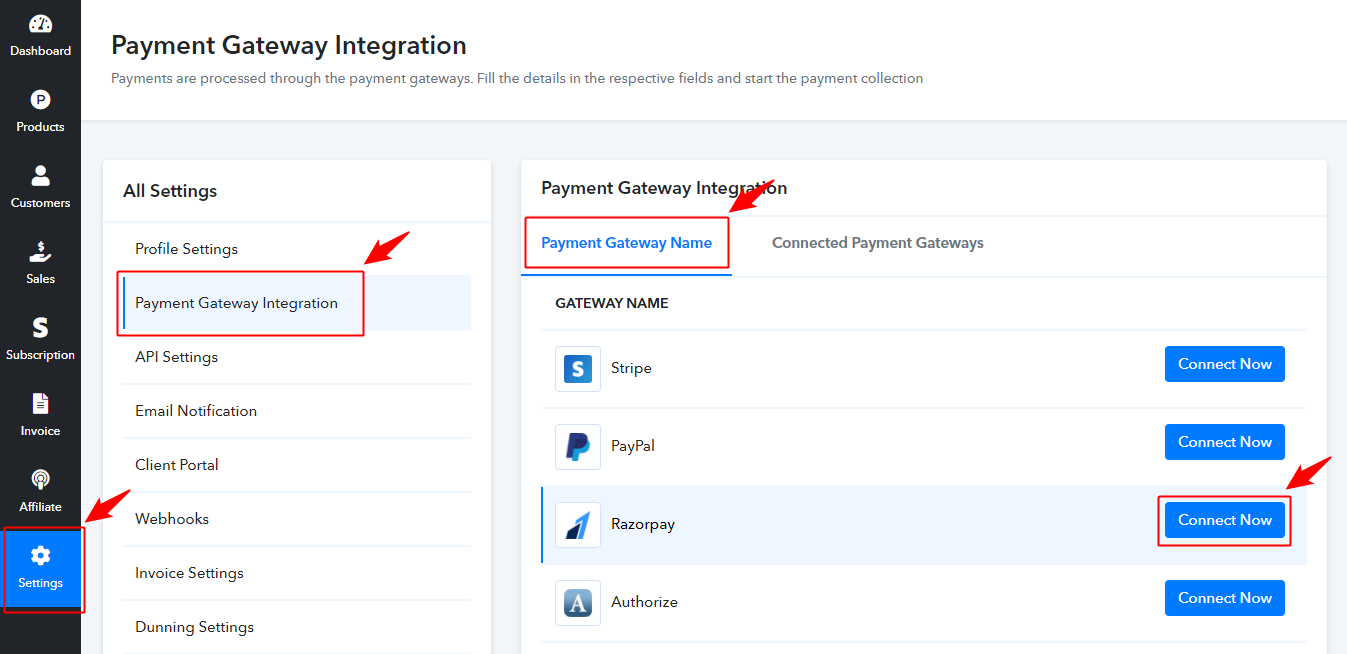
- Just go to Settings and click on Payment Gateway Integration.
- Then click on the ‘Connect Now’ button next to “Razorpay” under Payment Gateway Name tab.
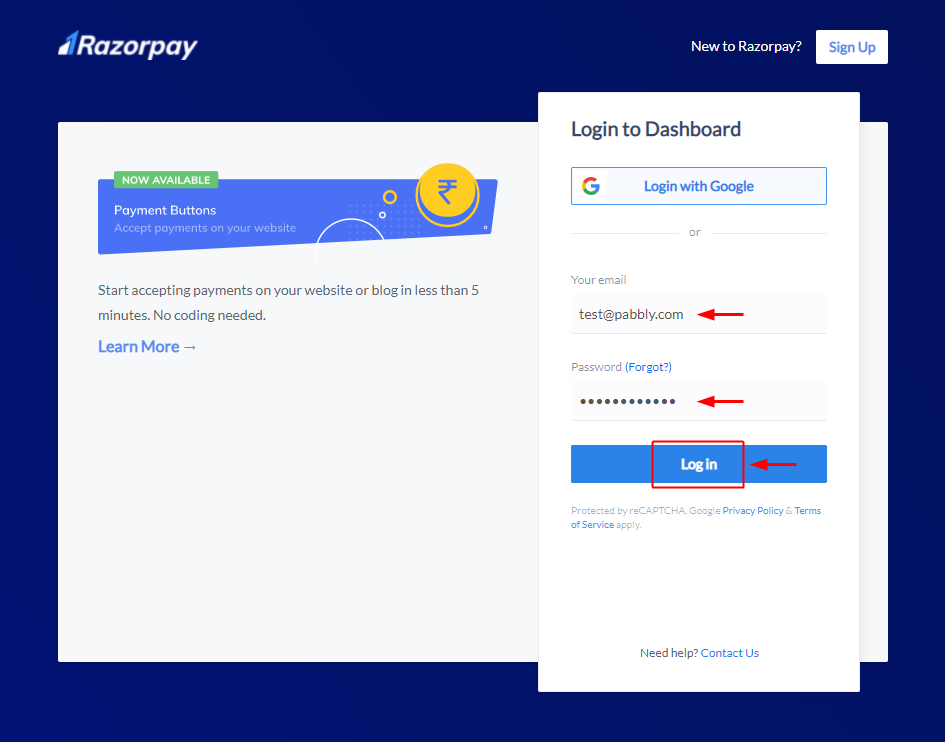
- Once you click on the ‘Connect Now’ button next to Razorpay, it will redirect you to the Razorpay login window.
- Fill in your Razorpay login credentials and click on ‘Log In’.
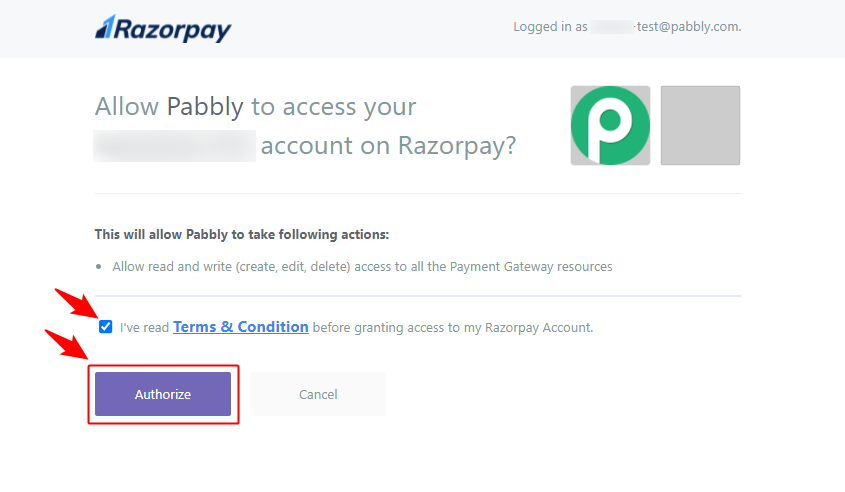
- Next, an authorization window will appear, select the ‘Terms & Condition’ checkbox and click on the ‘Authorize’ button.
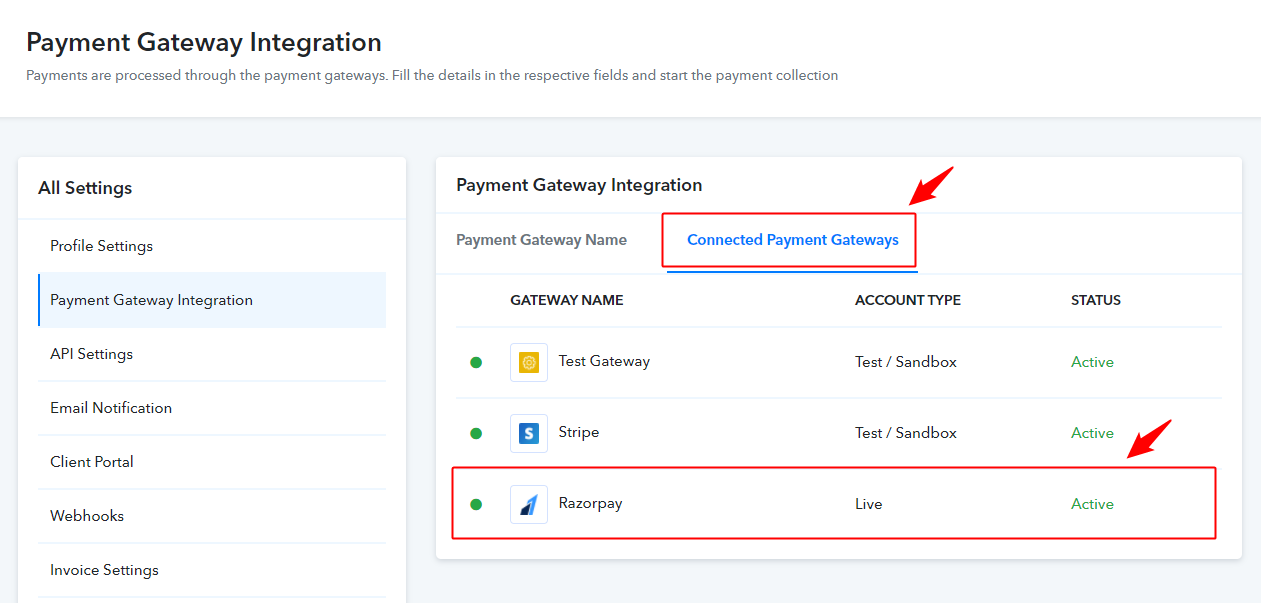
- Now, your Razorpay payment gateway integration is successfully completed and the status of your payment gateway will be shown “Active”.
The Razorpay payment option on the checkout and on other payments page will look like –
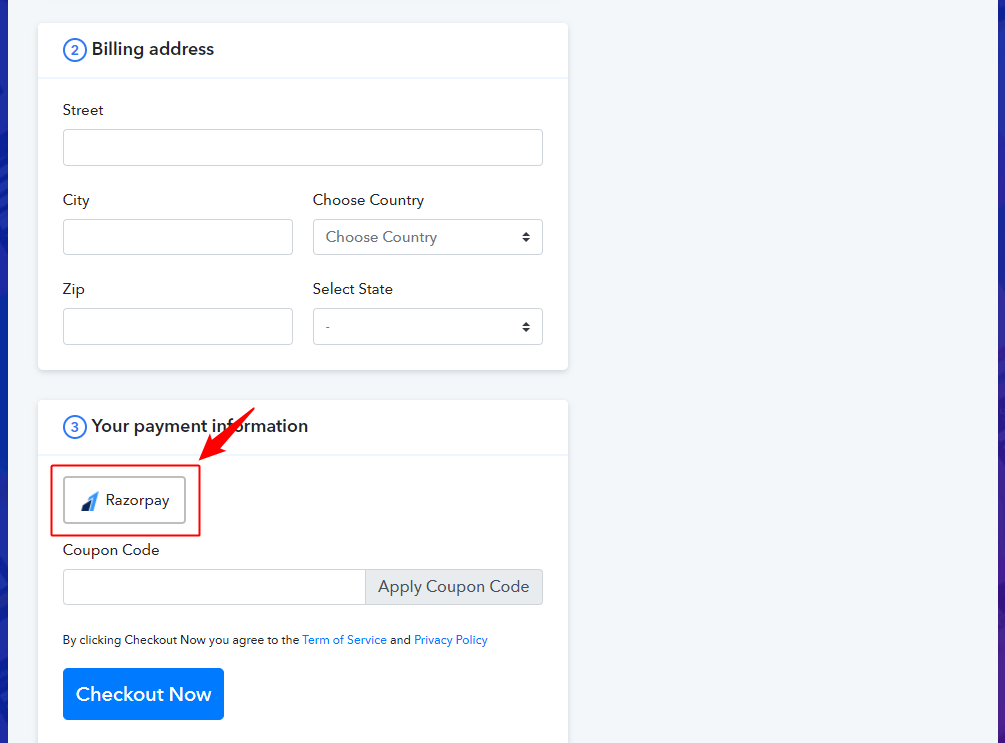
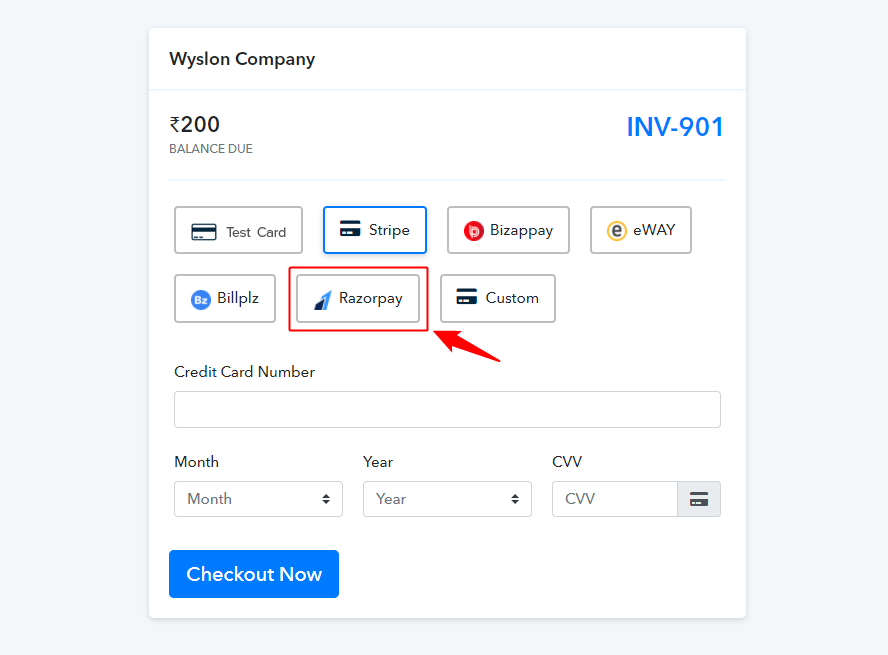
Your customer will be redirected the Razorpay servers to complete the payment. Once the processing is completed the customer will get to the default thank you page of Pabbly Subscriptions.
Please login into your account and check the integration for a better understanding.
How to Activate the Razorpay Payment Gateway for Recurring Payments
This is an integration guide using which you can easily activate the Razorpay payment gateway for your recurring payments.
These steps are prerequisites and you’ll need to activate the settings before any payment processes. After activating this setting, you’ll end up accepting recurring payments from your customers via Razorpay payment gateway.
For this, you’ll need to follow a simple two-step procedure given below:
1. First, you need to activate the recurring subscription setting for the first successful Razorpay payment. Consequently, you’ve to add a webhook URL to your Razorpay settings.
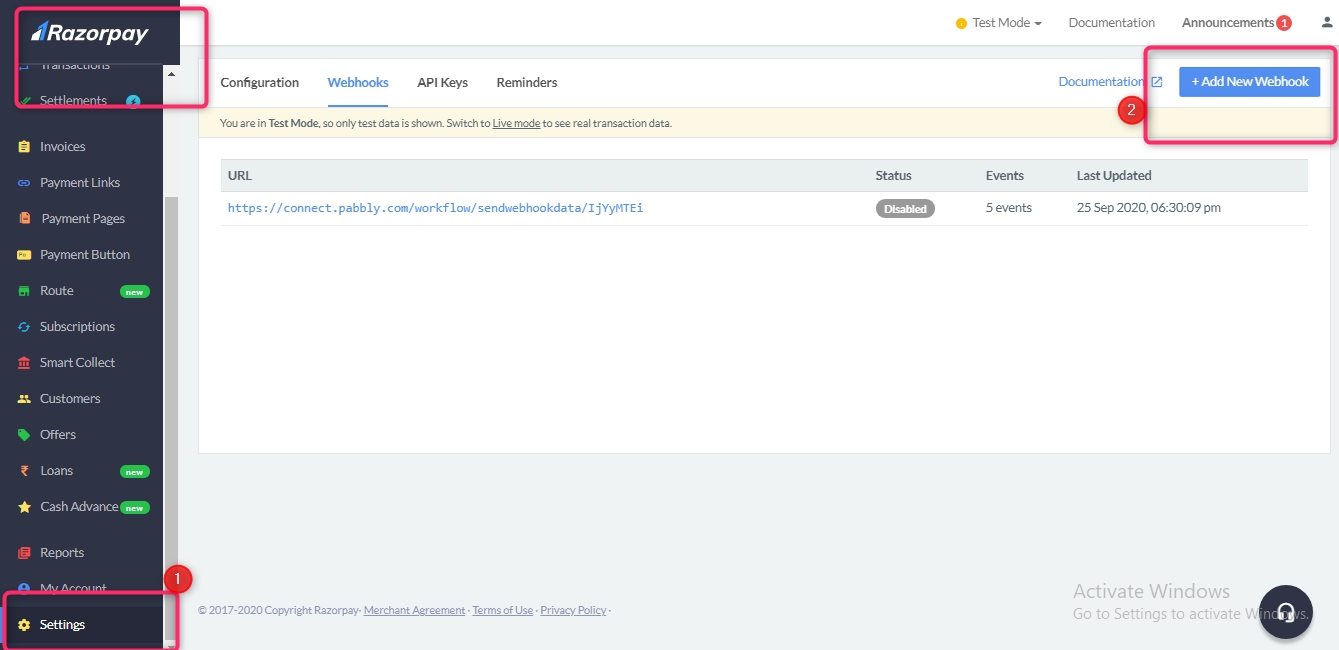
To do so, go to your Razorpay dashboard -> Settings -> Webhooks -> Add New Webhook
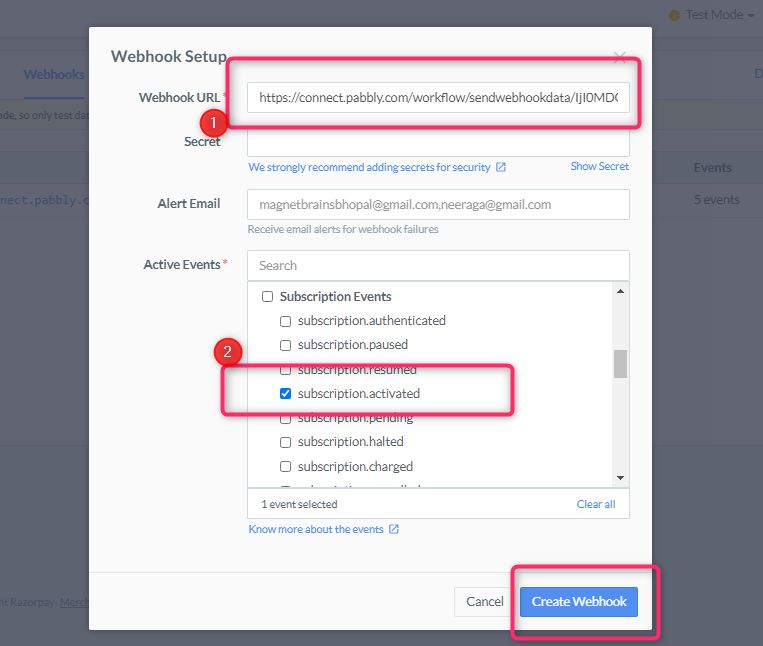
Now, add the following webhook link in the ‘Webhook URL’ field.
https://connect.pabbly.com/workflow/sendwebhookdata/IjI0MDQzIg_3D_3D
Also, select the ‘Active Events’ field’s value as ‘subscription.activated’.
Then, click on the ‘Create Webhook’ button.
2. Next, you’ll need to activate the recurring subscription setting for the second & subsequent successful Razorpay payments. This step will be responsible for capturing the data of the subsequent recurring payments.
Go to your Razorpay dashboard -> Settings -> Webhooks -> Add New Webhook
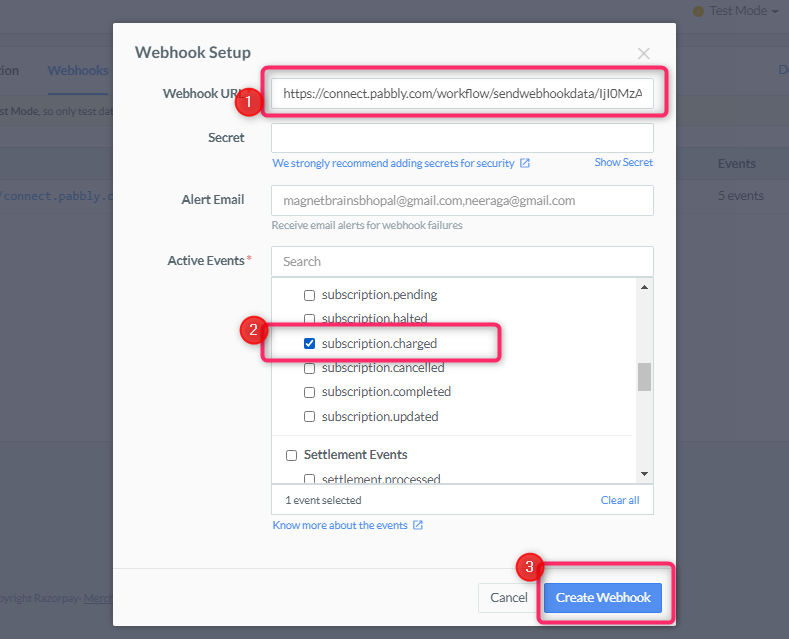
Add the following webhook link in the ‘Webhook URL’ field of the webhook setup window.
https://connect.pabbly.com/workflow/sendwebhookdata/IjI0MzA2Ig_3D_3D
Remember to select the ‘Active Events’ field’s value as ‘subscription.charged’.
Lastly, hit the Create Webhook’ button.
Completing these two steps will result in automating the recurring payments on Pabbly Subscription Billing.
How to Resolve the ‘Payment Blocked’ Customer Issue

Your customers can encounter this issue only while making a payment through a card. Moreover, they won’t face it if they are using UPI or other methods for collecting payments.
To resolve this issue, re-integrate your Razorpay account using the above-mentioned integration procedure and the problem will be resolved automatically.
How to resolve the ‘Razorpay Error: Check plan type with supported currency or some fields are missing’?
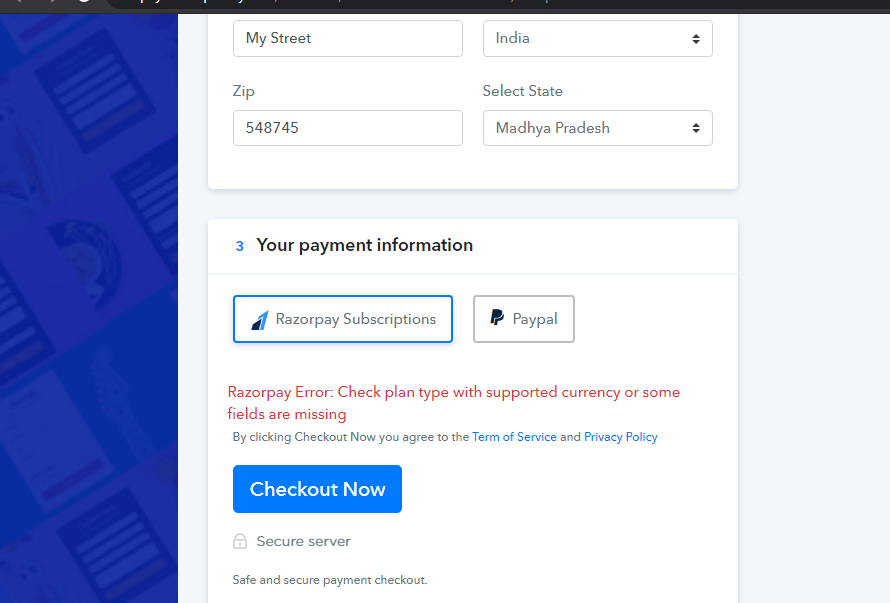
If your customers are facing this error while using Razorpay payment gateway on Pabbly Subscription Billing during payments then you haven’t enabled the Razorpay international payments settings yet.
To resolve this issue you can follow the steps mentioned below:
- Sign-in to your Razorpay Dashboard.
- Go to the ‘Settings’ option available on the left verticle menu.
- Scroll down to ‘International Payments’ section & click on ‘Request Access’.
- Provide details in the onscreen request steps.
- Lastly, submit the required details.
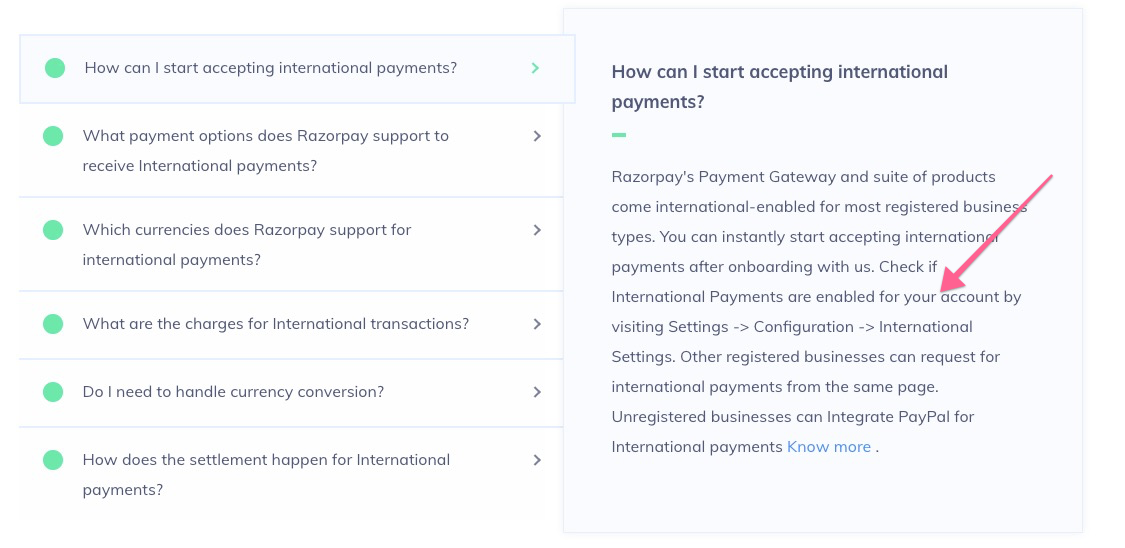
For more reference, you can also refer to the Razorpay documentation on Accept International Payments.
Completing these steps will place your request to enable the Razorpay international payment setting option. Consequently, the Razorpay will accept your request and the error will get resolved.
Moreover, Razorpay may contact you via email if they need any clarifications.


