Ideal For: All garment manufacturers, MSME, home enterprises, retail garment traders and other merchants can use this method to sell garments online.
Why Choose this Method for Selling Over any Other Solution?
Unlike any other solution, this method allows you to:
- List and sell your garments for FREE. Absolutely no payment required.
- No commission deducted on sales.
- Collect payment through multiple payment modes from a single checkout page.
- Sell one time or recurring subscriptions of your garments.
- Sell and collect payment in any currency as per your requirement.
- Give discounts on your products by offering special coupon codes.
- Add sales commission agents to help you in selling your garments.
Garments here is a generic term to denote clothes from summer, spring, and winter collections. It doesn’t matter what era or time you are living in, humans need clothing and therefore garment manufacturers are never out of business.
Why would you like to sell garments online?
Well, there can be many reasons for you to start selling garments online like to increase the sales and therefore looking at new areas for expansion. Or maybe you are trying to control logistics costs to a certain limit. Also, it can be possible that a particular stock of garments has run out of fashion in your area but still trendy in other places.
Furthermore, you know that 21st-century customer is picky because he/she has a ton of alternatives around him. Also in the traditional way of brick and mortar business, you will have these additional problems.
- Maintaining an inventory of all the garments in stock
- Setting up, delivery or extra charges
- Getting payments both in offline and online mode
- Creating professional invoices to be used as tax receipts.
- Giving comprehensive description per product
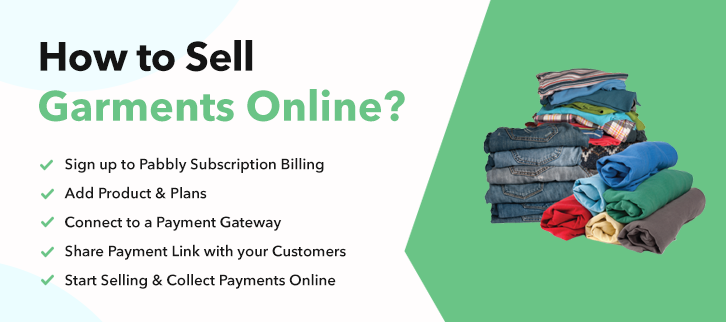
Now with Pabbly Subscription Billing, you can not only fix these problems but also create brand awareness by sharing the checkout pages on Twitter or Facebook. Likewise, there may be a ton of reasons for you to move your business channels to an online mode. So why wait, let get down to brass tacks to help you start garment business online.
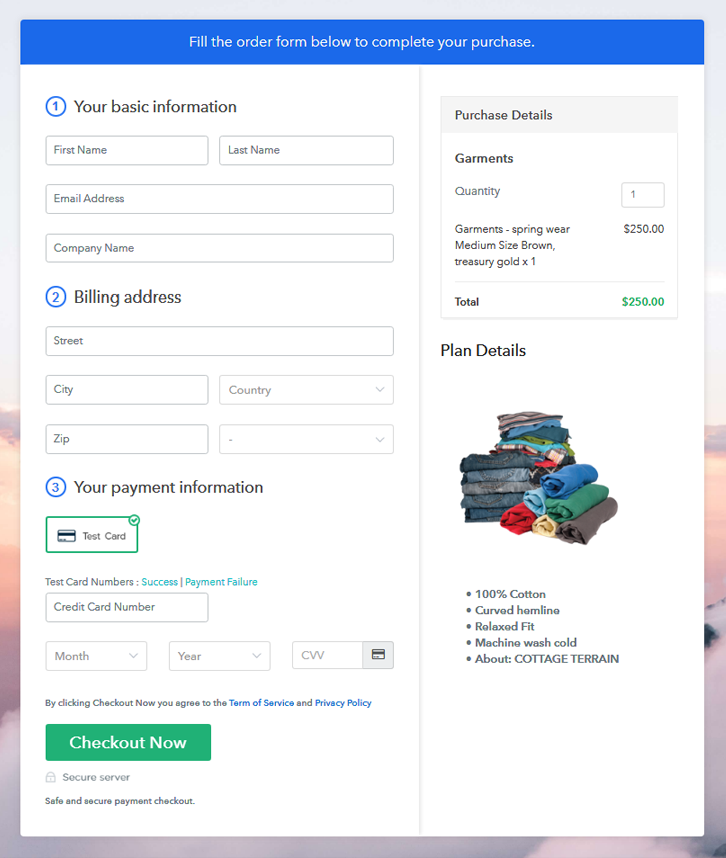
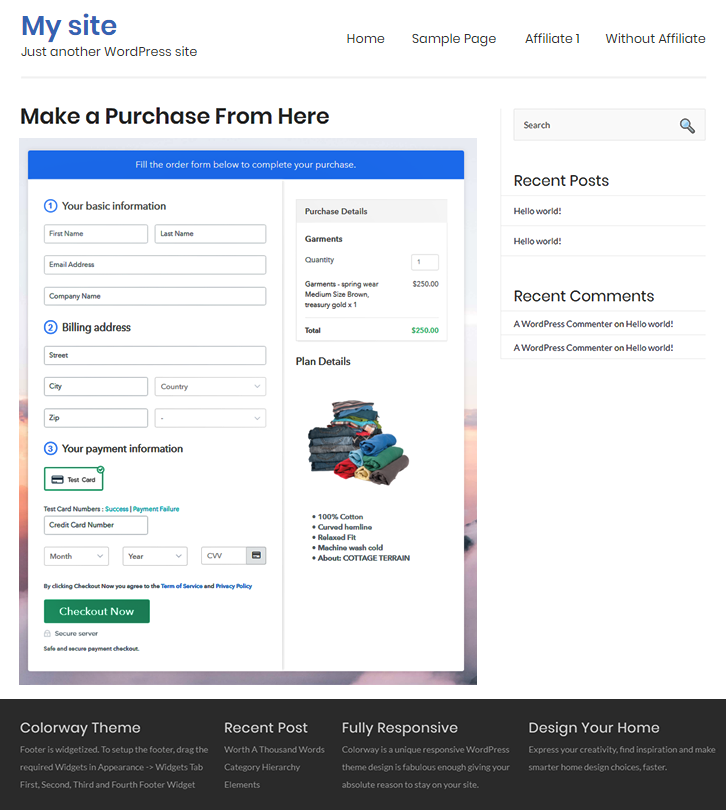
This is How your Checkout Page will Look Like After Creation
Step 1: Log in to Pabbly Subscription Billing

Browse in Google for Pabbly Subscription Billing and on their website click on the button “Sign up Free“. When you click on the button, a sign-up page opens and fill in the required fields or simply sign in using Gmail account.
Sign Up For Free!
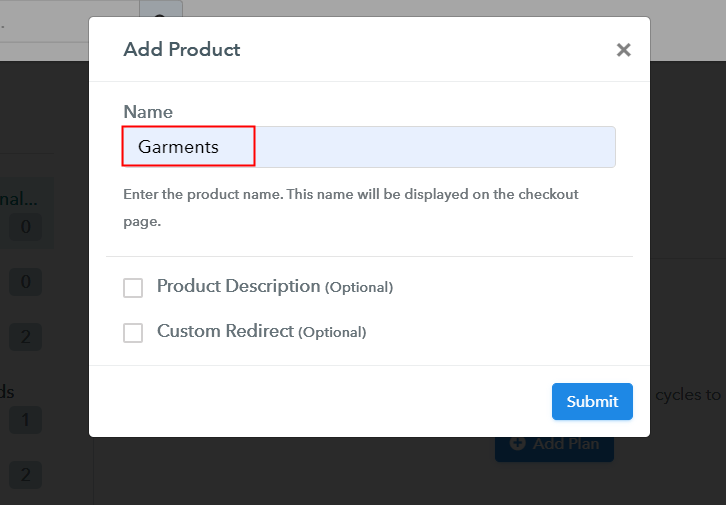
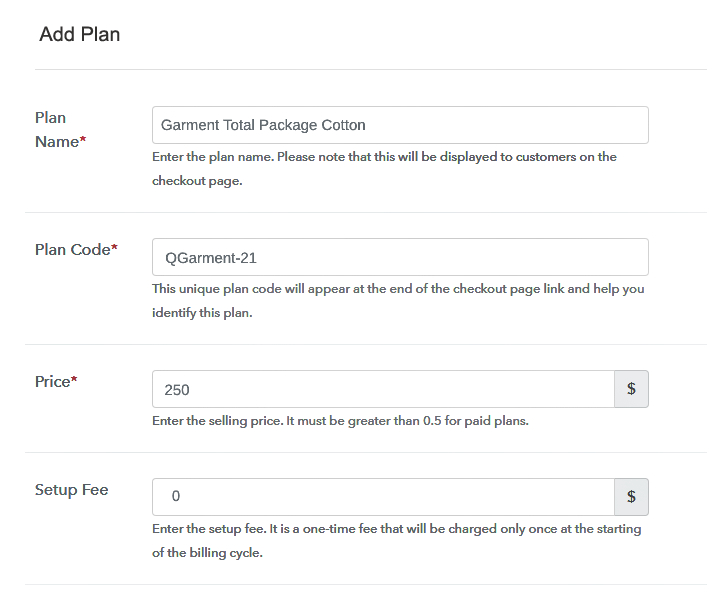
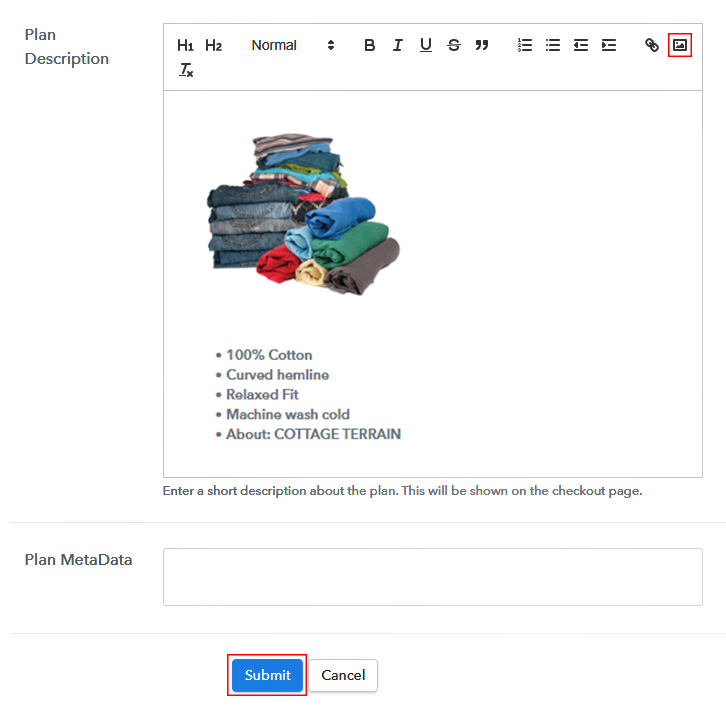
Now that you have entered into the dashboard, click on “Access Now” button on the Subscription Billing option. This will generate a dialog box that requires you to fill the company details like name, currency standards, and phone number. Easily fill these parts and click on continue to complete the process. Of course, as a merchant, you should always test the payment gateway to stimulate the whole payment experience of a customer. Furthermore, with Pabbly Subscription Billing, you can connect with multiple payment gateways for selling garments online, with the help of the articles given below. Meanwhile, I am going ahead with enabling test payment gateway to showcase the process. Since you have successfully embedded your payment gateway, its time to add your product. Click on the “Add New Product” button to generate a dialog box. In this box, you can enter the name of the garment, provide a product description, and even redirect to a particular website. Fill up the details and your product is created. Note: Here you can add all the products related to the similar category by creating plans for each of them. Now, we are going to create plans for garments available in your store. For adding a plan you will be redirected to plan page where you have to fill details like plan name, code, price, setup fees, billing cycle, etc. This is one of the most important steps for selling garments online. Now paste the best image possible of the garments you want to sell. Furthermore, it will also help the customers if you provide some product description of the garments in bullet points like size, possible wear, and tear, dry cleaning requirements, additional collar buttons, etc. After filling out the description, press the submit button. Follow up these steps to preview checkout page: Just copy the embedding link to insert the check out page on your WordPress website. Now, when the link is copied, then paste it to the text area of the editor. Simply hit the ‘Publish’ button after pasting the code. Your checkout page is embedded. Note: In case you want to sell multiple products via a single checkout page, you can create a multi-plan checkout page otherwise skip this step. Now, this is an easy and free method to sell garments online with integrated payment gateways like Stripe, Razorpay, Paypal, Authorize.net, etc. Moreover, your customers can pay in any currency or denomination as they like. Furthermore, you have to realize that when you start selling garments online even more opportunities will come up gradually, making your business even more prosperous. Also, for any queries related to e-commerce and payment gateways, drop a comment below, I will immediately respond at the earliest of convenience.Step 2: Select Subscription Billing

Step 3: Account Setup

Step 4: Connect Payment Gateways To Sell Garments Online

Step 5: Add Your Product

Step 6: Add Plans
(a) Select Add New Plan

(b) Specify the Plan & Pricing Details
(c) Add Image & Description
Step 7: Share your Checkout Page

Step 8: Preview Checkout Page
(a) Click on the View Button

(b) Take a Look at the Checkout Page

Step 9: Embed Checkout Page in Site & Sell Garments Online

(a) Edit the Page & Paste the Copied Link

(b) Save & Publish the Checkout Page

(c) Check out the Final Look of your Checkout Page on WordPress Site
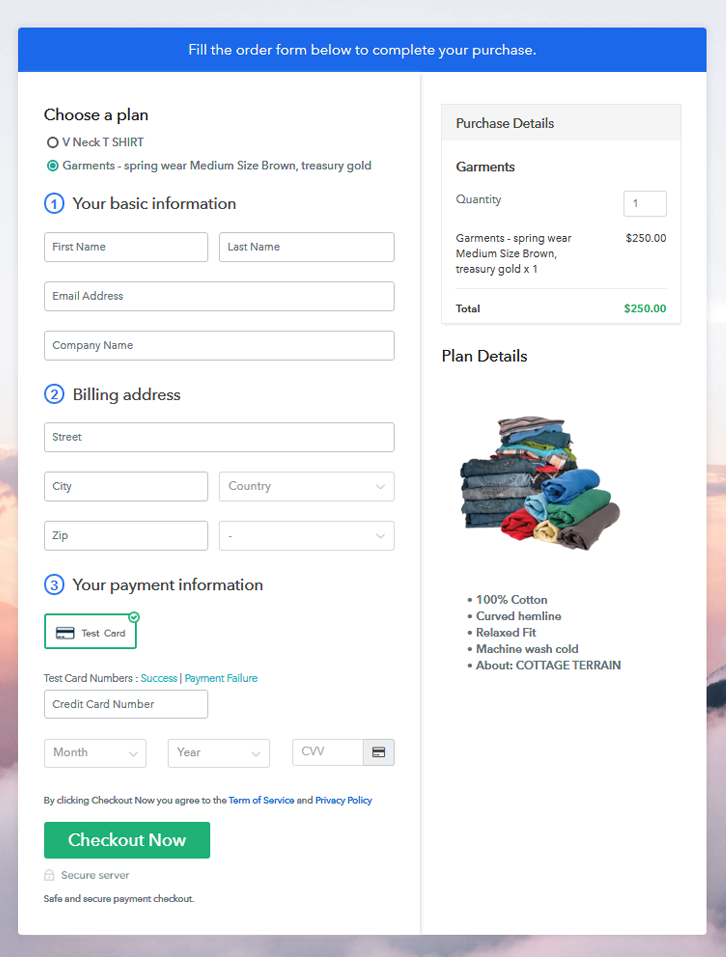
Step 10: Multiplan Checkout Page
(a) Click on Add Mutiplan Checkout

(b) Add Plans to Sell Garments from Single Checkout Page

(c) Take a Look at the Checkout Page
Wrapping Up
You May Also Like To Read –


