Ideal For: All weavers, sock traders, sock manufacturers and other merchants can use this method to sell socks online.
Why Choose this Method for Selling Over any Other Solution?
Unlike any other solution, this method allows you to:
- List and sell your socks for FREE. Absolutely no payment required.
- No commission deducted on sales.
- Collect payment through multiple payment modes from a single checkout page.
- Sell one time or recurring subscriptions of your socks.
- Sell and collect payment in any currency as per your requirement.
- Give discounts on your products by offering special coupon codes.
- Add sales commission agents to help you in selling your socks.
“Piloi” is the term used by the Ancient Greeks when they started wearing socks in 8th century BC. Now fast-forwarding to the modern era, pretty much everyone from the babies, millennials, boomers to office goers wear socks. So as a sock manufacturer, you should consider selling socks online.
Why would you like to sell socks online?
Well, this is the best time to start selling socks online because if you don’t then you are likely to perish in the long term. According to Forbes, the B2B e-commerce industry will be $1.8 trillion by 2023 and will consume a massive 17% of B2B sales. Simply put, you don’t want to miss the bus. Other important benefits include omitting middleman’s commission, no rent or set up charges, lower taxes, lesser emissions, etc. Exciting isn’t it?
But, how do you set up an e-store to start selling socks online? Well, actually it is pretty easy with an online tool called Pabbly Subscription Billing. This software can list an unlimited number of products online with other additional benefits like:
- Creating unlimited products and plans
- Building coupons and discounts per product
- Building different billing models like recurring, one time, or based on cycles
- Sending/Receiving automatic email alerts on completion/failure of product transactions
- Auto Reminding the customer on the impending removal of credit cards due to consistent failure of transactions
- Unlimited integrations with third-party services
See, these important features will put in leagues with other big products sellers like Amazon and Walmart. So what are we waiting for, let’s help to build an online store that sells socks online.
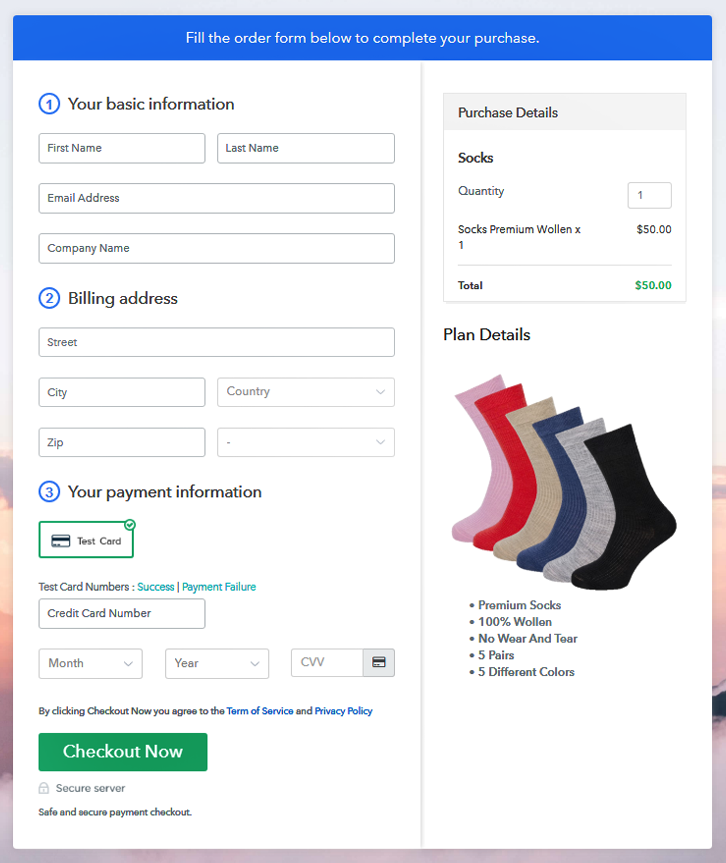
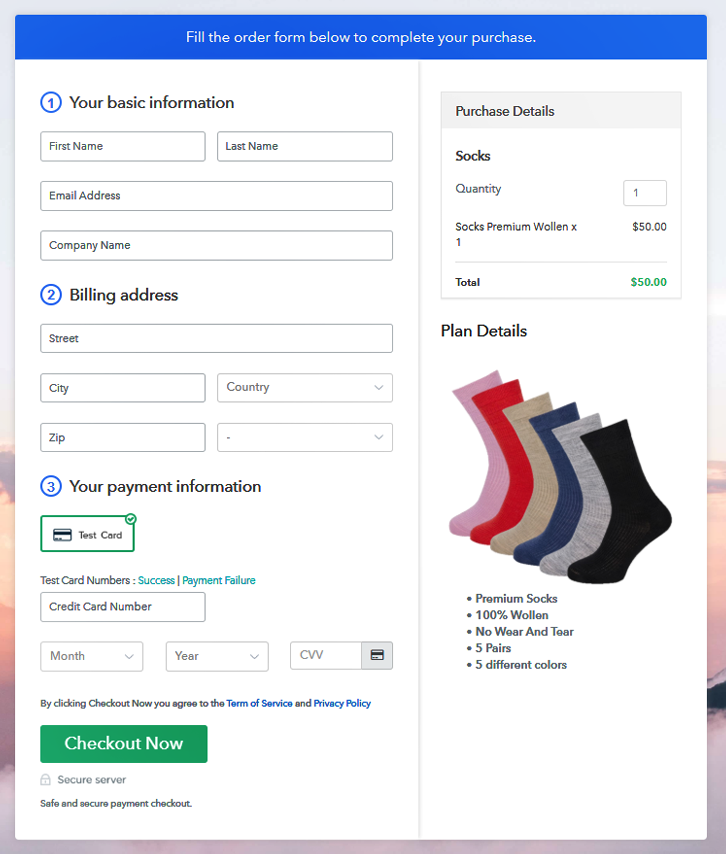
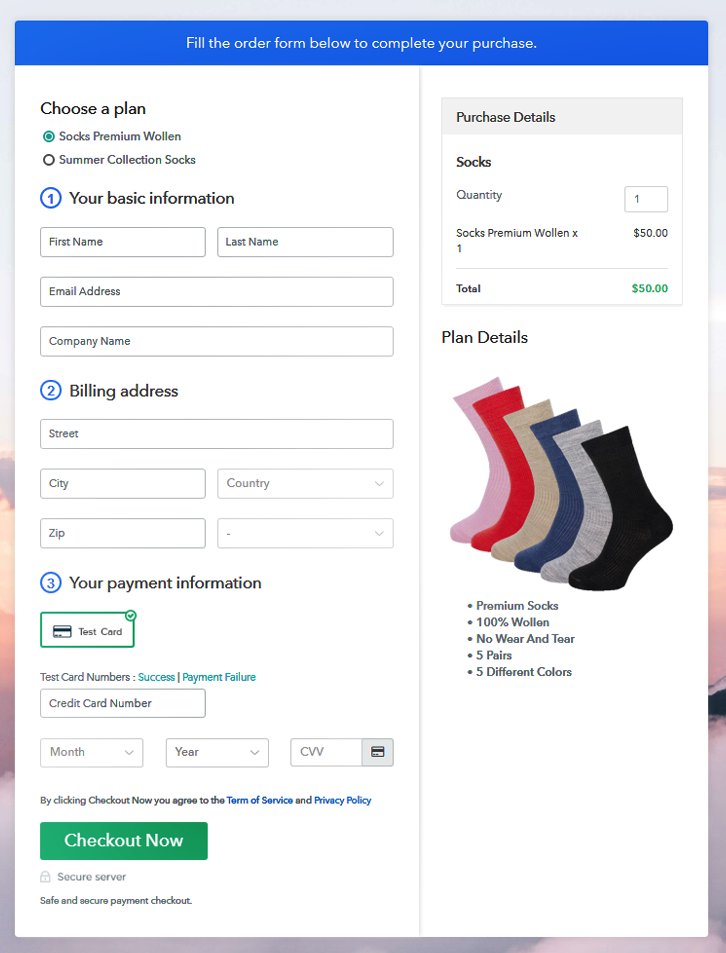
This Is How Your Checkout Page will Look Like After Creation
Step 1: Log in to Pabbly Subscription Billing

Search in Google for Pabbly Subscription Billing and on their website click on the button “Sign up Free“. Here simply sign in through your, Gmail account or you can fill in the blanks like name, email address and then press the “Sign Up” button.
Sign Up For Free!
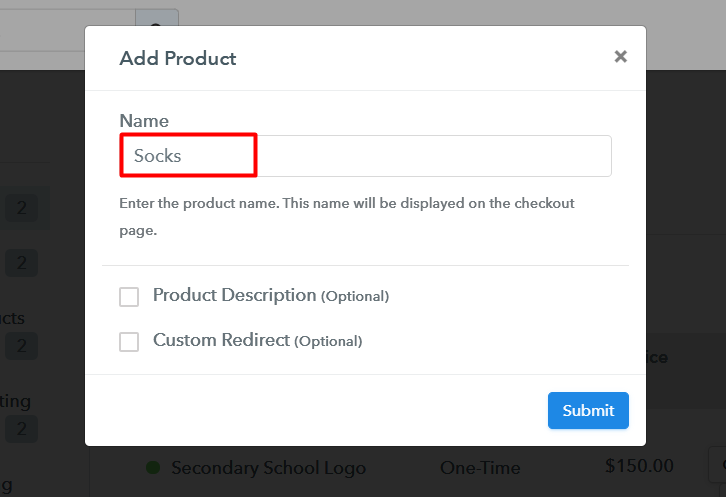
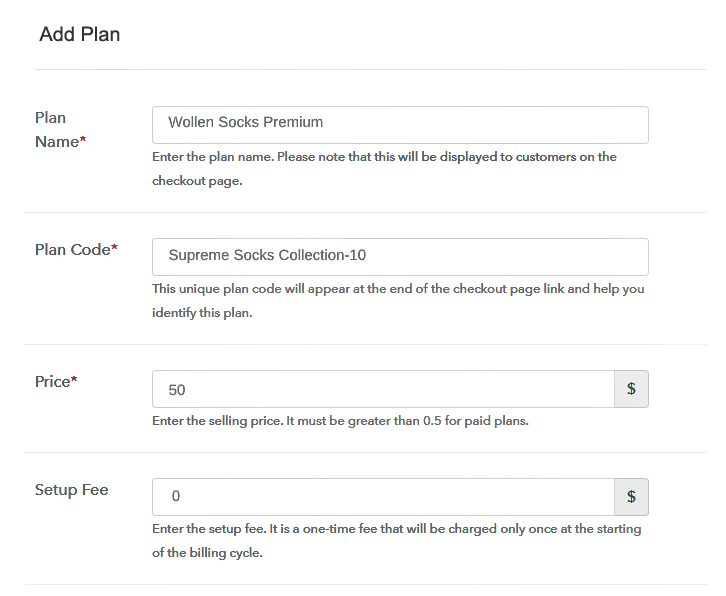
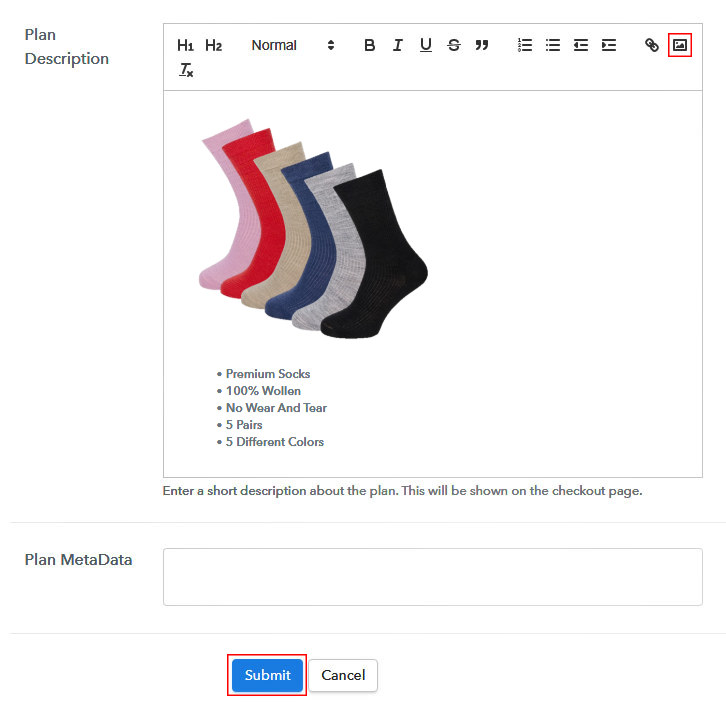
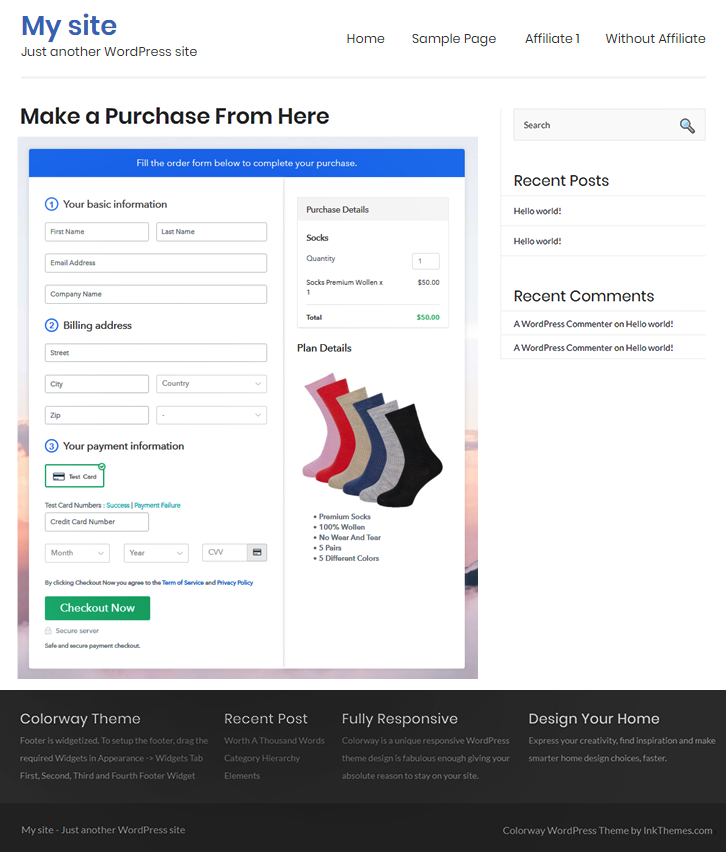
Now that you have entered into the dashboard, click on the “Access Now” button on the Subscription Billing option. A dialog box will open you, that will require you to fill the company details like name, currency, and phone number. After filing in the details press the “Continue” button to complete the process. So, you should know that an average customer has a low tolerance for any inconveniences especially during payments, and can leave the transactions half completed. As a merchant, you should avoid any kind of glitches and make the whole payment experience streamlined. That is why with Pabbly Subscription Billing, you can beta test the whole payment experience of a customer using dummy payment gateways. You can do this by clicking on “Enable Test Payment” option Now, with Pabbly Subscription Billing, you can integrate with a ton of payment gateways like Stripe, Razorpay, PayPal, Authorize.net, etc. These payment gateways can be easily integrated using the help of the articles given below. But since we have to set up the payment process, we will click on the “Enable Test Payment” option. So I hope payment integration went well, now let’s move on to add products. Below “Enable Payments” you will find the section “Add your product” click on it. This will generate a dialog box with a blue button “Add New Product”. Click it. This will summon a pop-up box and you can fill the required product title like socks then tick on the checkboxes if you want to add product description and custom redirect. Fill up the details and your product is created. Note: Here you can add all the products related to the similar category by creating plans for each of them. Now, we are going to create plans for selling socks online, directly from your desktop. Next, you will be brought to the plan page, here you have to fill in details like plan name, code, price, setup fees. Coming down to the section below, here you can see the choice to change the billing models like one-time payment, recurring, based on cycles, etc. Also, you can give a free trial of your products. Furthermore, you can confirm the status of products like active or inactive. Here, upload the best image possible of your socks, preferably add different variants and types. So, after inserting the image, give a concise description of the products preferably in bullets points, like the build, wear&tear, dry cleaning requirements, etc. Later press the “Submit” button. Likewise, following the same method, you can add multiple products, one at a time. Follow up these steps to preview checkout page: Now, copy the embed plan link to insert the checkout page on your WordPress website. Now, when the link is copied, then paste it to the text area of the editor. After pasting the code, now hit the ‘Publish’ button. Your checkout page is embedded. Note: In case you want to sell multiple products via a single checkout page, you can create a multi-plan checkout page otherwise skip this step. Now, this is perhaps the cheapest and easiest method to start selling socks online. Not only you can list unlimited variants of your socks in the e-store generated by Pabbly Subscription Billing but also expand product awareness through mediums like Whatsapp, Twitter, SMS etc. Please, don’t be overwhelmed by the steps, since you are a newcomer you may have doubts. Therefore message us your queries in the comment section below. Thank youStep 2: Select Subscription Billing

Step 3: Account Setup

Step 4: Connect Payment Gateways To Sell Socks Online

Step 5: Add Your Product

Step 6: Add Plans
(a) Select Add New Plan

(b) Specify the Plan & Pricing Details
(c) Add Image & Description
Step 7: Share your Checkout Page

Step 8: Preview Checkout Page
(a) Click on the View Button

(b) Take a Look at the Checkout Page
Step 9: Embed Checkout Page in Site & Sell Socks Online

(a) Edit the Page & Paste the Copied Link

(b) Save & Publish the Checkout Page

(c) Check out the Final Look of your Checkout Page on WordPress Site
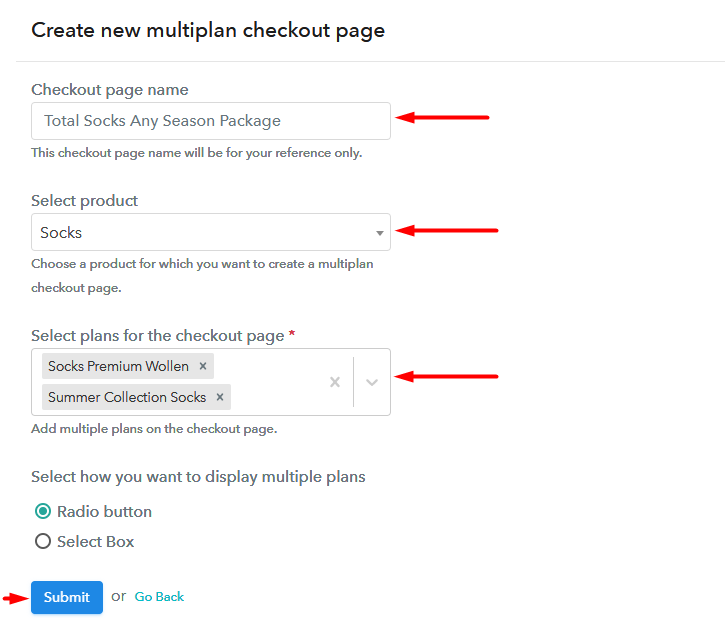
Step 10: Multiplan Checkout Page
(a) Click on Add Mutiplan Checkout

(b) Add Plans to Sell Socks Online from Single Checkout Page
(c) Take a Look at the Checkout Page
Wrapping Up
You May Also Like To Read –


