Send Instant WhatsApp Alerts from Form Submissions via Pabbly Connect

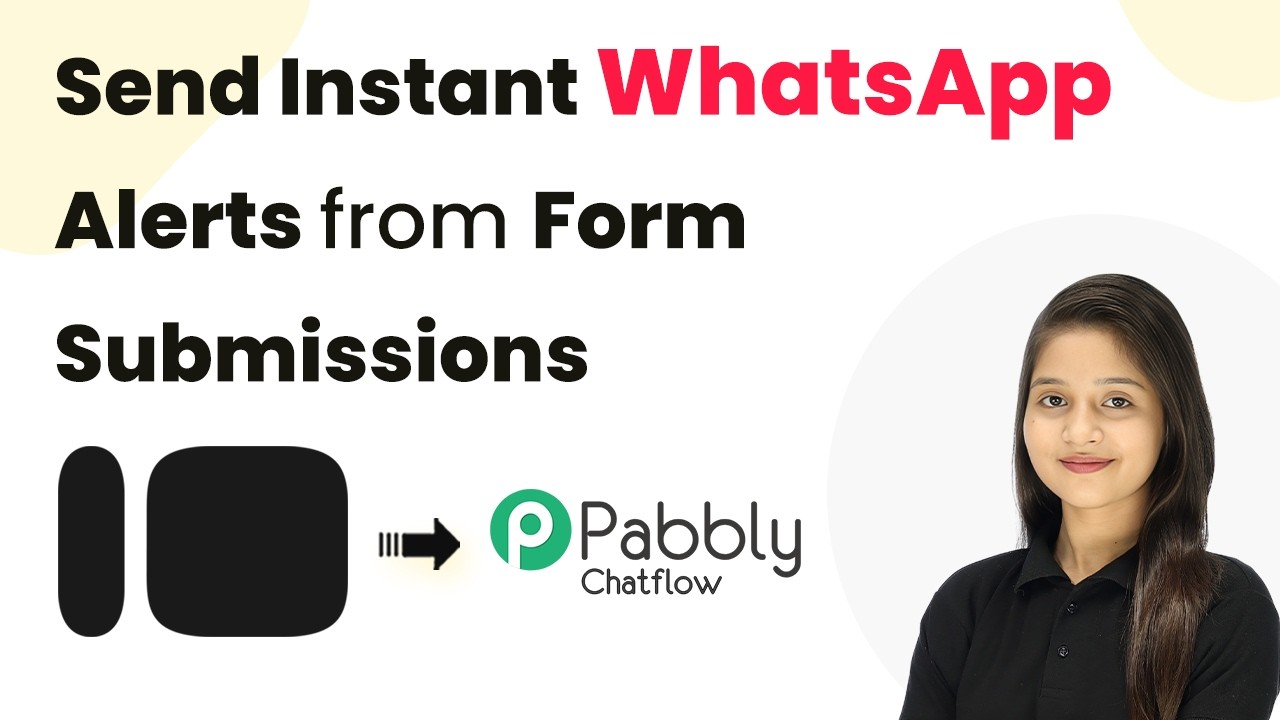
Learn how to send instant WhatsApp alerts from form submissions using Pabbly Connect. Follow this detailed tutorial for seamless integration. This comprehensive guide reveals exactly how to connect your applications and automate repetitive tasks — accessible for professionals of all technical backgrounds.

Watch Step By Step Video Tutorial Below


1. Accessing Pabbly Connect for Automation

To send instant WhatsApp alerts from form submissions, first access Pabbly Connect. Start by opening a new tab and navigating to pabby.com/connect.

Once on the Pabbly Connect page, you’ll see options to sign in or sign up. If you are new to Pabbly Connect, click on ‘Sign Up Free’ to create your account and explore the platform with 100 free tasks every month.


2. Creating a New Workflow in Pabbly Connect

After signing in to Pabbly Connect, click on the ‘Access Now’ button to navigate to your dashboard. Here, you can create a new workflow by clicking the ‘+ Create Workflow’ button.

  • Select the new beta version for the workflow builder.
  • Name your workflow ‘Send Instant WhatsApp Alerts from Form Submissions via Pabbly Connect’.
  • Choose the folder as Pabbly Connect and click ‘Create’.

Your workflow is now successfully created. The next step is setting up the trigger, which is essential for any automation in Pabbly Connect.


3. Setting Up the Trigger in Pabbly Connect

In this section, select Typeform as your trigger application in Pabbly Connect. Choose the app event as ‘New Entry’ to trigger the workflow upon form submission.

Click on the ‘Connect’ button, and select ‘Add New Connection’ to connect to Typeform. You will need to authorize Pabbly Connect to access your Typeform account by clicking on the ‘Accept’ button.

  • Choose the specific form from Typeform that you want to connect.
  • Select the response format as ‘Simple’.
  • Click on ‘Save and Send Test Request’ to wait for the webhook response.

Once the form is submitted in Typeform, you will see the response captured in Pabbly Connect, indicating that the trigger is functioning correctly.


4. Setting Up the Action Step to Send WhatsApp Alerts

Now that the trigger is set up, the next step is to configure the action within Pabbly Connect. Click on the plus icon to add a new application and select Pabbly Chatflow.

Choose the app event as ‘Send Text Message’ and click on the ‘Connect’ button. Similar to the previous steps, select ‘Add New Connection’ to establish a link between Pabbly Connect and Pabbly Chatflow.

Obtain the API token from your Pabbly Chatflow dashboard under settings. Paste the API token into the connection field and click ‘Save’. Map the recipient’s mobile number and WhatsApp message using the responses from Typeform.

After configuring these settings, click on ‘Save and Send Test Request’ to verify that the WhatsApp message is sent successfully.


5. Finalizing Your Workflow in Pabbly Connect

After confirming that the WhatsApp message is sent successfully, ensure to enable the toggle for your workflow in Pabbly Connect. This step is crucial; if the toggle is not enabled, your automation will not function.

Now, you can test your entire setup by submitting another form entry in Typeform. You should receive an instant WhatsApp alert with the personalized message based on the form submission.

Make sure to enter the mobile number in the correct format, including the country code without the plus sign. Check your WhatsApp account to confirm receipt of the message.

Your workflow is now complete, and you have successfully integrated Typeform with WhatsApp using Pabbly Connect to automate alerts for form submissions.


Conclusion

In this tutorial, we explored how to send instant WhatsApp alerts from form submissions using Pabbly Connect. By following the steps outlined above, you can automate your notifications seamlessly and enhance your communication processes.

Ensure you check out Pabbly Connect to create business automation workflows and reduce manual tasks. Pabbly Connect currently offer integration with 2,000+ applications.

Lead Tracking System for Small Businesses

Learn how to set up a lead tracking system for small businesses using Pabbly Connect to integrate Google Sheets, Zoho CRM, and Gmail effectively. Eliminate manual repetitive tasks from your workflow. Discover proven automation methods with intuitive steps designed for efficiency-minded professionals.

Watch Step By Step Video Tutorial Below


1. Accessing Pabbly Connect for Your Lead Tracking System

To create a lead tracking system for small businesses, the first step is to access Pabbly Connect. If you are a new user, open your browser and visit pabbl.com/connect. Click on the ‘Sign Up for Free’ option in the top right corner. This gives you access to 100 free tasks per month, allowing you to explore the capabilities of Pabbly Connect.

Existing users can simply log in to their account. Once logged in, navigate to the workflow builder. This is where you will set up the integration process. By using Pabbly Connect, you can automate the addition of new lead details into Google Sheets, your CRM, and send automated emails.


2. Setting Up the Trigger in Pabbly Connect

The next step in your lead tracking system involves setting up a trigger in Pabbly Connect. Click on the ‘Add Trigger’ button and search for ‘Google Ads.’ Select it and choose the event as ‘New Lead Form Entry.’ Click on ‘Connect’ to generate a webhook URL.

  • Copy the webhook URL provided by Pabbly Connect.
  • Open your Google Ads campaign and add a lead form.
  • Paste the webhook URL into the lead delivery section of Google Ads.

After pasting the URL, enter the key and click on ‘Send Test Data.’ This allows Pabbly Connect to capture the test lead details, which you can use to configure subsequent actions in your workflow.


3. Adding Lead Data to Google Sheets via Pabbly Connect

With the trigger set up, the next step is to add the lead data into Google Sheets using Pabbly Connect. Click on ‘Add New Action Step’ and search for ‘Google Sheets.’ Select it and choose the event as ‘Add New Row.’ Click on ‘Connect’ to link your Google Sheets account.

If you have an existing connection, select it; otherwise, create a new connection by signing in with your Google account. Once connected, select the spreadsheet where you want to store the lead details. For example, choose the ‘Real Estate Leads’ spreadsheet and specify the sheet as ‘Sheet1.’ You will then map the lead details such as name, phone, email, and area.

  • Map the lead data dynamically by using the slash feature to insert data from the previous step.
  • Click on ‘Save’ and send a test request to verify the integration.

Upon success, check your Google Sheets to confirm that the lead details are added correctly. This integration showcases how Pabbly Connect can streamline your lead management process.


4. Integrating Zoho CRM with Pabbly Connect

Next, you will integrate Zoho CRM to manage your leads effectively. In Pabbly Connect, click on ‘Add New Action Step’ and search for ‘Zoho CRM.’ Select it and choose the event as ‘Create Contact.’ Click on ‘Connect’ to establish a connection with your Zoho CRM account.

If you have an existing connection, select it; if not, create a new one by entering your Zoho domain. You can find this domain in your Zoho CRM URL. After connecting, you will need to map the lead details to the respective fields in Zoho CRM.

Map the first name, last name, email, and phone number from the lead data. Click on ‘Save’ and send a test request to confirm that the contact is created successfully in Zoho CRM.

Check your Zoho CRM contact list to ensure that the new contact appears. This step illustrates how Pabbly Connect enhances your CRM capabilities by automating lead entries.


5. Sending Automated Emails Using Gmail via Pabbly Connect

The final step in setting up your lead tracking system is to send automated emails using Gmail through Pabbly Connect. Click on ‘Add New Action Step’ and search for ‘Gmail.’ Select it and choose the event as ‘Send Email.’ Click on ‘Connect’ to link your Gmail account.

After connecting, configure the email settings. For the sender’s name, enter your business name. For the recipient’s email, map the email address of the lead. You can also customize the email subject and content, including advanced HTML formatting if needed.

Map the lead’s name and other relevant details into the email content. Click on ‘Save’ and send a test request to verify that the email is sent successfully.

Check your Gmail account to confirm that the email was sent. This final integration showcases how Pabbly Connect can automate your communication process, ensuring that leads receive timely follow-ups.


Conclusion

In conclusion, using Pabbly Connect to create a lead tracking system for small businesses allows for seamless integration between Google Sheets, Zoho CRM, and Gmail. This automation enhances efficiency and ensures timely communication with leads. Start using Pabbly Connect today to streamline your lead management process!

Ensure you check out Pabbly Connect to create business automation workflows and reduce manual tasks. Pabbly Connect currently offer integration with 2,000+ applications.

Personalized WhatsApp Messaging Automation Setup

Learn how to automate personalized WhatsApp messaging using Pabbly Connect. Follow our step-by-step tutorial to set up your workflow effortlessly. This comprehensive guide reveals exactly how to connect your applications and automate repetitive tasks — accessible for professionals of all technical backgrounds.

Watch Step By Step Video Tutorial Below


1. Accessing Pabbly Connect for WhatsApp Automation

To start your personalized WhatsApp messaging automation, first access Pabbly Connect by visiting pabby.com/connect. Here, you can create a free account if you are a new user. This allows you to utilize 100 free tasks monthly to set up your workflows.

If you already have an account, click on the sign-in button to enter the dashboard. Once inside, locate the ‘Create Workflow’ button on the right side of the dashboard. This will begin the process of creating your personalized messaging automation.


2. Creating Your Workflow in Pabbly Connect

After accessing your Pabbly Connect dashboard, click on the ‘Create Workflow’ button. You will be prompted to choose between the new beta version and the classic version of the workflow builder. For this tutorial, select the beta version for a more streamlined experience.

  • Name your workflow, e.g., ‘Urban Gadget WhatsApp Personalization System’.
  • Select a folder to keep your workflow organized.
  • Press the ‘Create’ button to finalize your workflow setup.

Now, you can begin integrating applications to automate personalized WhatsApp messages based on customer preferences. This is where Pabbly Connect shines, enabling seamless integration with various applications.


3. Triggering Automation with Typeform

For this automation, you will use Typeform as the trigger application. Click the plus button to add Typeform as your trigger app. Select the ‘New Entry’ event to ensure the workflow triggers when a new form entry is submitted.

Next, connect Typeform to Pabbly Connect by pressing the ‘Connect’ button. If you are creating a new connection, choose ‘Add New Connection’ and log into your Typeform account. Once connected, select your product inquiry form to proceed.


4. Setting Up Router in Pabbly Connect

To send personalized messages based on product selections, utilize the router feature in Pabbly Connect. Click the plus button to add a router, which will allow conditional workflow execution based on customer choices.

  • Set up filters for each product option available in your Typeform.
  • For each filter, select the ‘Product Interest’ label and set conditions based on the customer’s selection.

After configuring the filters, you can now proceed to send personalized WhatsApp messages using the next action application, which will be Pabbly Chatflow.


5. Sending Personalized WhatsApp Messages via Pabbly Chatflow

To send WhatsApp messages, select Pabbly Chatflow as your action application. Choose the ‘Send Text Message’ event, and connect it to Pabbly Connect using your API token from the Chatflow dashboard.

Map the recipient’s WhatsApp number and message content dynamically using the mapping feature in Pabbly Connect. This ensures that each message is personalized based on the customer’s details captured in the Typeform submission.


Conclusion

In this tutorial, we demonstrated how to set up personalized WhatsApp messaging automation using Pabbly Connect. By following these steps, you can enhance customer engagement through instant, tailored communications based on their preferences.

Ensure you check out Pabbly Connect to create business automation workflows and reduce manual tasks. Pabbly Connect currently offer integration with 2,000+ applications.

AI-Powered WhatsApp Agent for Clothing Manufacturers

Learn how to set up an AI-powered WhatsApp agent for clothing manufacturers with Pabbly Connect. Step-by-step guide for seamless integration. Discover how to seamlessly connect your essential tools through accessible instructions that make powerful automation available to professionals at every skill level.

Watch Step By Step Video Tutorial Below


1. Setting Up Pabbly Connect for WhatsApp Integration

To create an AI-powered WhatsApp agent for clothing manufacturers, you first need to access Pabbly Connect. Begin by visiting the Pabbly website and signing in to your account. If you’re a new user, you can sign up for free, allowing you to explore Pabbly’s features, including 100 free tasks each month.

Once logged in, navigate to the Pabbly Connect dashboard. This is where the integration process will take place. Click on the option to create a new workflow, and you will be prompted to set up the connection between your WhatsApp account and the AI agent. Ensure you have your WhatsApp number ready for linking.


2. Creating Your AI Agent with Pabbly Connect

Next, you will create your AI agent within Pabbly Connect. Click on the ‘AI Assistant’ option from the left sidebar. This will lead you to a page where you can manage your AI agents. Select the option to create a new AI assistant and name it appropriately, such as ‘Clothing Manufacturers Chatbot’.

  • Click on the ‘Add AI Assistant’ button.
  • Set the instruction type to ‘AI Agent’.
  • Configure the AI settings, including temperature and model preferences.

After naming your assistant, you will be taken to a configuration page. Here, you can customize various settings, including the AI’s creativity level and the model it will use. Ensure you enter your OpenAI API key to enable the AI functionalities.


3. Configuring Knowledge Source for the AI Agent

In this section, you will set up the knowledge source that your AI agent will use to respond to queries. This is crucial for providing accurate information to users. Within Pabbly Connect, navigate to the knowledge source section and select the option to upload a file containing your company details.

  • Include information such as fabric options, pricing structure, and company details.
  • Ensure the file is formatted correctly for the AI to interpret.
  • Upload the document to the knowledge source section in Pabbly Connect.

This setup allows the AI agent to pull relevant information when responding to user queries. Once the knowledge source is uploaded, your AI agent will be equipped to handle various questions related to your clothing manufacturing business.


4. Finalizing Your AI Assistant Configuration

After setting up the knowledge source, it’s time to finalize your AI assistant’s configuration in Pabbly Connect. You will need to customize the interface and initial messages that the AI will display to users. This includes setting a welcome message and any footer information.

Make sure to enable the option to display that your AI is powered by Pabbly. This not only gives credit to the platform but also enhances credibility. Adjust the styling of your assistant to match your brand’s identity, including colors and fonts.


5. Assigning Your AI Assistant to WhatsApp Contacts

The final step involves assigning your newly created AI assistant to your WhatsApp contacts through Pabbly Connect. Navigate to the inbox settings and select the AI auto-reply settings. Here, you can choose which contacts or groups will receive automated responses from your AI agent.

Select the specific contact list or group for assignment. Save the settings to activate the AI assistant for those contacts.

By completing this step, your AI-powered WhatsApp agent is now fully operational, ready to assist customers with their inquiries about your clothing products.


Conclusion

In this tutorial, we’ve explored how to create an AI-powered WhatsApp agent for clothing manufacturers using Pabbly Connect. By following these detailed steps, you can automate your customer interactions effectively. This setup enhances customer service and streamlines communication, making it easier for your business to thrive.

Ensure you check out Pabbly Connect to create business automation workflows and reduce manual tasks. Pabbly Connect currently offer integration with 2,000+ applications.

How to Automatically Add Subscribers to Mailchimp

Learn how to automatically add subscribers to Mailchimp using Pabbly Connect with this detailed step-by-step tutorial. Streamline your subscriber management today! Revolutionize your productivity approach with just a few strategic clicks. Uncover professional methods for connecting applications and creating workflows that reclaim hours of your week.

Watch Step By Step Video Tutorial Below


1. Accessing Pabbly Connect for Automation

To start adding subscribers to Mailchimp automatically, you need to access Pabbly Connect. If you’re a new user, open a new tab and go to pabbl.com/connect. Click on the ‘Sign Up for Free’ button in the top right corner to create your account.

Once signed up, you will get 100 tasks free every month, allowing you to add up to 100 subscribers to your Mailchimp account. This is a great way to explore the capabilities of Pabbly Connect without any cost.


2. Creating Your Workflow in Pabbly Connect

After logging into Pabbly Connect, navigate to the workflow builder, which is essential for setting up your automation. In this interface, you will define a trigger and an action. The trigger starts the workflow, while the action is the outcome.

Click on the ‘Add Trigger’ button and search for Google Ads. Select it, and for the event, choose ‘New Lead Form Entry’. After this, click on ‘Connect’. You will receive a webhook URL to connect your Google Ads account.

  • Open your Google Ads campaign.
  • Locate the lead form and paste the webhook URL in the lead delivery settings.
  • Send test data to confirm the connection.

Once the test data is sent, return to Pabbly Connect, where you will see the captured response. This indicates that the connection between Google Ads and Pabbly Connect is successful.


3. Adding Mailchimp as the Action Step

Next, you need to add Mailchimp as the action step in your workflow. Click on ‘Add New Action Step’ and search for Mailchimp. Select it, and for the event, choose ‘Add New Member with Custom Fields’. Click ‘Connect’ to link Mailchimp with Pabbly Connect.

If you have an existing connection, select it; otherwise, create a new connection. To do this, you will need your Mailchimp API key and data center. Access your Mailchimp account, go to your profile, then Extras, and API keys to generate a new key.

  • Copy the generated API key and paste it into Pabbly Connect.
  • Identify and enter your data center from your Mailchimp URL.
  • Click on ‘Save’ to finalize the connection.

Now your Mailchimp account is successfully connected to Pabbly Connect, allowing you to add new subscribers automatically.


4. Mapping Fields for Subscriber Details

With your Mailchimp connection established, it’s time to map the fields for the new subscriber. You will need to select your audience list and map the email address of the new lead. Instead of entering the email manually, use the mapping feature to dynamically insert the data from the previous step.

In the mapping section, you can also add additional details like first name, last name, and phone number if needed. This ensures that every new subscriber added to Mailchimp has all the relevant information.

Select the audience list from Mailchimp. Map the email address and any other required fields. Click on ‘Save and Send Test Request’ to verify the setup.

After clicking save, you should receive a confirmation that a new subscriber has been created in your Mailchimp audience, demonstrating the effectiveness of Pabbly Connect in automating your subscriber management.


5. Finalizing Your Automation Workflow

Finally, after ensuring that all fields are correctly mapped and your workflow is functioning as expected, save your workflow in Pabbly Connect. This will ensure that every time a new lead is generated through Google Ads, the information will automatically be sent to Mailchimp as a new subscriber.

Make sure to test your workflow with real data to confirm that everything operates smoothly. Once satisfied, you can rely on Pabbly Connect to handle your subscriber additions seamlessly in the future.

By following these steps, you can leverage the power of Pabbly Connect to automate your subscriber management process, saving you time and ensuring you never miss a lead.


Conclusion

In this tutorial, we demonstrated how to automatically add subscribers to Mailchimp using Pabbly Connect. By following the detailed steps outlined, you can streamline your subscriber management process and enhance your marketing efforts.

Ensure you check out Pabbly Connect to create business automation workflows and reduce manual tasks. Pabbly Connect currently offer integration with 2,000+ applications.

With Pabbly Connect, integrating applications like Google Ads and Mailchimp becomes effortless, allowing you to focus on growing your business.

Automate Customer Support Using WhatsApp AI

Learn how to automate customer support using WhatsApp AI with Pabbly Chatflow. Follow this step-by-step tutorial for seamless integration. Learn step-by-step how to create, test, and optimize chatbots that enhance customer experience while reducing support workload.

Watch Step By Step Video Tutorial Below


1. Accessing Pabbly Chatflow for Customer Support Automation

To automate customer support using WhatsApp AI, you first need to access Pabbly Chatflow. Start by visiting the Pabbly Chatflow website. If you are a new user, click on the ‘Sign Up Free’ button to create your account.

Once signed up, you will receive 100 free credits each month to explore the features of Pabbly Chatflow. If you already have an account, simply click on ‘Sign In’ to access the dashboard. Here, you can manage your automated customer support systems.


2. Setting Up WhatsApp Integration in Pabbly Chatflow

After logging into Pabbly Chatflow, the next step is to integrate your WhatsApp account. Click on the ‘Add WhatsApp Number’ button on the right side of the dashboard. You will be presented with two methods to connect your WhatsApp account.

  • Select the method that suits your requirements.
  • Follow the on-screen instructions to complete the integration.

Once your WhatsApp number is successfully added, you can start creating your AI assistant within Pabbly Chatflow. This integration allows you to automate responses and manage customer queries efficiently.


3. Creating Your AI Assistant in Pabbly Chatflow

To create your AI assistant, navigate to the ‘Assistant’ section in Pabbly Chatflow. Click on the ‘Add Assistant’ button and name your assistant, for example, ‘Automate Customer Support Using WhatsApp AI’. After naming, click on ‘Add Assistant’ to proceed.

You will be guided through four steps: AI Instructions, Knowledge Source, Assistant Interface, and Styling. Start with AI Instructions, where you will define how your assistant should respond to customer queries.

  • Select the role and constants for your AI assistant.
  • Adjust the temperature setting to control creativity.

Finish configuring your AI assistant by uploading a knowledge base file that includes your business FAQs and details. This will help your AI assistant provide accurate information to customers.


4. Testing Your AI Assistant with Pabbly Chatflow

Once your AI assistant is set up, it’s crucial to test its functionality. Go back to your WhatsApp account and send a keyword, such as ‘support’. This action should trigger your AI assistant, which will respond with a welcome message and prompt the user to describe their issue.

By testing, you can ensure that the AI assistant created in Pabbly Chatflow is functioning properly. If everything works as expected, your customers will receive timely responses to their queries without manual intervention.


5. Finalizing Your Customer Support Automation

After successfully testing your AI assistant, you can finalize your automation setup. Click on the ‘Emit’ button in Pabbly Chatflow to obtain the script needed to embed your assistant on your website.

Once embedded, your AI assistant will be fully operational, allowing it to respond to customer inquiries via WhatsApp. This setup enables you to automate customer support efficiently, ensuring that your business can handle inquiries at scale.


Conclusion

In conclusion, automating customer support using WhatsApp AI with Pabbly Chatflow streamlines your customer service process. By following the steps outlined in this tutorial, you can create an efficient AI assistant that responds to customer queries automatically, enhancing your overall support experience.

Ensure you check out Pabbly Connect to create business automation workflows and reduce manual tasks. Pabbly Connect currently offer integration with 2,000+ applications.

How Facebook Leads Help You Grow Your Business

Learn how to use Pabbly Connect to automate your Facebook leads and grow your business efficiently. Step-by-step guide included! Implement the precise methodologies leading organizations use to automate repetitive tasks, illustrated with practical examples designed for immediate application.

Watch Step By Step Video Tutorial Below


1. Introduction to Pabbly Connect for Facebook Leads

To effectively manage Facebook leads, you need to utilize Pabbly Connect. It automates the process of capturing leads and ensures instant responses to inquiries. This is crucial because timely responses significantly increase conversion rates.

Using Pabbly Connect, businesses can integrate their Facebook leads with various applications such as Google Sheets, email services, and CRMs. This integration allows for seamless data management and communication, ensuring no leads are missed and responses are immediate.


2. Setting Up Pabbly Connect for Facebook Integration

To get started with Pabbly Connect, you first need to create an account. Go to the Pabbly website and sign up for a free account. Once you are logged in, navigate to the workflow builder.

  • Open the Pabbly Connect dashboard.
  • Select ‘Create New Workflow’ and name it.
  • Choose Facebook Lead Ads as your trigger application.

With Pabbly Connect, you will connect your Facebook account to capture leads automatically. This setup allows you to receive notifications and manage leads effectively without manual intervention.


3. Automating Lead Management with Pabbly Connect

After setting up your workflow in Pabbly Connect, the next step is to automate lead management. When a lead is captured through Facebook, it triggers several actions automatically. This can include sending an email to the lead and notifying your sales team.

  • Configure email notifications to send instant responses to leads.
  • Add lead details to Google Sheets for easy tracking.
  • Set up notifications on platforms like Slack or Discord.

This automation ensures that your team is always informed and can respond to leads promptly, enhancing the likelihood of conversion. With Pabbly Connect, you can manage these tasks effortlessly.


4. Monitoring Results and Adjustments

Monitoring the performance of your automated workflows is essential for continuous improvement. With Pabbly Connect, you can track how quickly leads are being contacted and adjust your processes accordingly. This data is crucial for understanding the effectiveness of your lead management strategy.

Utilizing analytics tools within Pabbly Connect, you can identify bottlenecks and improve response times. Adjusting your email templates or notification settings based on this data can lead to better engagement and conversion rates.


5. Conclusion: Enhance Your Business with Pabbly Connect

In conclusion, using Pabbly Connect to automate your Facebook leads can significantly enhance your business efficiency. By responding to leads instantly, you improve your chances of conversion and customer satisfaction.

Ensure you check out Pabbly Connect to create business automation workflows and reduce manual tasks. Pabbly Connect currently offer integration with 2,000+ applications.

Start leveraging Pabbly Connect today to streamline your lead management process and watch your business grow. Embrace automation and ensure no lead goes unattended, maximizing your revenue potential.


Your First No-Code AI Assistant for Sales and Support Automation

Learn how to create a no-code AI assistant for sales and support automation using Pabbly Connect. Step-by-step guide with detailed instructions! Master proven automation processes with practical implementation examples and strategic recommendations you can apply immediately in your workflow.

Watch Step By Step Video Tutorial Below


1. Accessing Pabbly Connect for Your AI Assistant

To create your first no-code AI assistant for sales and support automation, you will first need to access Pabbly Connect. Open a new tab in your browser and type the URL Pabbly.com/chatflow. This will take you to the Pabbly homepage where you can either sign in or sign up for free.

If you are a new user, click on the ‘Sign Up Free’ button to create your account. By signing up, you will receive 100 free credits every month to practice using Pabbly Connect. Existing users can simply sign in to access their dashboard.


2. Creating Your AI Assistant with Pabbly Connect

Once logged in to Pabbly Connect, navigate to the sidebar and select the ‘AI Assistant’ option. Here, you will see the total number of AI assistants you have created. To create a new one, click on the ‘Add Assistant’ button. You will be prompted to enter a name for your assistant; for this tutorial, let’s name it ‘Sales and Support AI’.

  • Click on ‘Add Assistant’ and enter the assistant name.
  • Select the instruction type as ‘AI Agent’.
  • Adjust the temperature setting to 0.5 for a friendly AI response.

After entering the necessary details, click on the ‘Save AI Assistant’ button to create your AI assistant. This step is crucial as it sets the foundation for your automation process using Pabbly Connect.


3. Configuring Your Knowledge Base in Pabbly Connect

Next, you need to configure the knowledge base for your AI assistant. This is essential as it allows the assistant to respond accurately to customer inquiries. In the AI configuration section, you will find an option to upload a file containing your business details. Ensure that the file is in either TXT or PDF format.

To upload your knowledge base, click on the upload button and select your file. Once the file is uploaded successfully, you will see a confirmation message. This knowledge base will serve as the reference for your AI assistant’s responses, making it a critical component of your Pabbly Connect setup.


4. Customizing Your AI Assistant Interface

After configuring the knowledge base, you can customize the interface of your AI assistant. In the ‘Assistant Interface’ tab, you can modify various elements such as the header display name, subheading, and initial message. For example, you may want to set the header display name to ‘Sales and Support’ and the initial message to ‘Hi there, how can I help you today?’

  • Change the header display name and subheading as desired.
  • Enable or disable the ‘Powered by Pabbly’ label.
  • Enter footer links if necessary.

Once you are satisfied with the customization, save your changes. This will ensure that your AI assistant is visually appealing and user-friendly while being powered by Pabbly Connect.


5. Enabling Your AI Assistant for Customer Interactions

The final step is to enable your AI assistant for customer interactions. Navigate to the settings and select ‘Inbox Settings’. Here, ensure that the ‘Enable AI Auto Replies’ option is toggled on. You can also select your preferred contact list for which the AI assistant will respond.

To enable the AI assistant for specific chats, go to the inbox, select a chat, and choose the AI assistant you created. Click on the save button to apply these settings. With these steps completed, your AI assistant is now fully operational, thanks to Pabbly Connect, allowing you to automate customer interactions effectively.


Conclusion

In this tutorial, we explored how to create your first no-code AI assistant for sales and support automation using Pabbly Connect. By following these steps, you can enhance your business operations and provide 24/7 support to your customers.

Ensure you check out Pabbly Connect to create business automation workflows and reduce manual tasks. Pabbly Connect currently offer integration with 2,000+ applications.

Automatically Track New Member Joins Your Discord Server

Learn how to automatically track new members joining your Discord server using Pabbly Connect. Follow this detailed tutorial for seamless integration with Google Sheets. Revolutionize your productivity approach with just a few strategic clicks. Uncover professional methods for connecting applications and creating workflows that reclaim hours of your week.

Watch Step By Step Video Tutorial Below


1. Setting Up Pabbly Connect for Discord Integration

To automatically track new members joining your Discord server, you need to set up Pabbly Connect. Start by visiting the Pabbly Connect website at www.Pabbly.com/connect. Once there, create a new workflow to begin the integration process.

After logging in, you will need to set up a trigger. For this automation, select Discord as the trigger application. You will then choose the event labeled ‘Member Join Server’ or ‘Guild’ as the action that will initiate the workflow.


2. Connecting Discord to Pabbly Connect

Once you have selected the trigger event, click on the ‘Connect’ button to link your Discord account with Pabbly Connect. A new window will appear prompting you to authorize the connection.

  • Scroll down and click on ‘Connect with Discord’.
  • Select the server where you want to track new members.
  • Click on the ‘Authorize’ button to grant necessary permissions.

After authorizing, Pabbly Connect will be set to capture the details of new members joining your selected Discord server. This connection ensures that the data is securely processed and stored.


3. Testing the Discord Member Join Trigger

To verify that the connection works, you need to test the trigger in Pabbly Connect. Invite a different Discord account to your server using the invitation link. This step will help you check if the trigger captures the new member’s details successfully.

After the new member joins, return to Pabbly Connect and check if the response from Discord has been recorded. You should see the details of the new member, including their username and ID, confirming that the integration is functioning correctly.


4. Recording New Member Data in Google Sheets

After confirming that Pabbly Connect captures the member’s details, the next step is to log this information in Google Sheets. Set up the action step in your workflow by selecting Google Sheets as the action application.

  • Select the existing connection for your Google Sheets.
  • Choose the spreadsheet where you want to record the data.
  • Map the fields such as User ID and Username from the previous step.

Once the data fields are mapped, click on the ‘Save and Send Test Request’ button. This action will send the data to your Google Sheets, confirming that the new member details are logged successfully.


5. Monitoring Task History in Pabbly Connect

To ensure everything is working smoothly, you can monitor the task history in Pabbly Connect. This feature allows you to see when tasks were executed and the details of each trigger and action.

Access the task history section to view the date, time, and results of the automation processes. You will find the information regarding the newly added member, including their username and the action taken in Google Sheets.

Keep in mind that the task history will only be available for 15 days, after which it will be automatically deleted. This feature helps you keep track of your automation without cluttering your workspace.


Conclusion

By following this tutorial, you have learned how to automatically track new members joining your Discord server using Pabbly Connect and log their details in Google Sheets. This seamless integration enhances your server management and ensures you stay updated with member activities.

Ensure you check out Pabbly Connect to create business automation workflows and reduce manual tasks. Pabbly Connect currently offer integration with 2,000+ applications.

Create a WhatsApp AI Agent from Scratch Without Coding

Learn how to create a WhatsApp AI agent from scratch without coding using Pabbly Connect. Follow this step-by-step tutorial for seamless integration. Learn to create powerful connections between your critical applications without requiring specialized programming knowledge or extensive technical background.

Watch Step By Step Video Tutorial Below


1. Accessing Pabbly Connect for WhatsApp AI Agent

To create a WhatsApp AI agent without coding, you first need to access Pabbly Connect. Start by searching for Pabbly.com in your browser and navigate to the homepage. Here, you will find options to sign in or sign up for a free trial if you are a new user.

Click on ‘Sign Up Free’ if you are new. Existing users can simply sign in. After signing in, you will be directed to the Pabbly dashboard where you can access all applications. To create the WhatsApp AI agent, locate and click on the ‘Access Now’ button for Pabbly Chatflow.


2. Creating Your WhatsApp AI Agent Using Pabbly Connect

Once you are in the Pabbly Chatflow dashboard, you can start creating your WhatsApp AI agent. Click on the ‘Add’ button to create a new assistant. You will be prompted to name your assistant, which you can customize according to your business needs.

  • Select ‘AI Agent’ from the instruction type dropdown.
  • Configure the assistant’s settings, including temperature and AI model.
  • Input your OpenAI API key to connect Pabbly Connect with the AI.

After these configurations, click on the ‘Save’ button to save your settings. This step is critical as it allows Pabbly Connect to facilitate communication with your AI model effectively.


3. Setting Up the Knowledge Source for Your AI Agent

Next, you need to provide a knowledge source for your AI agent. This is essential for the agent to respond accurately to customer queries. In Pabbly Connect, upload a document containing FAQs and details about your services.

  • Download the required file in plain text or PDF format.
  • Select the file from your device and click ‘Open’ to upload it.

This knowledge base will enable your Pabbly Connect powered AI agent to provide precise answers to customer inquiries, enhancing customer satisfaction.


4. Activating Your WhatsApp AI Agent

After the setup, activate your WhatsApp AI agent by enabling the assistant. This is done by clicking on the ‘Activate’ button within the Pabbly Chatflow interface. Ensure all settings are correct before activation. using Pabbly Connect

Once activated, you can assign your AI agent to specific WhatsApp chats or groups. This ensures that your customers can interact with the AI assistant seamlessly. Use the ‘Settings’ section to manage contact lists and assign the assistant to the desired WhatsApp channels.


5. Testing Your WhatsApp AI Agent

Finally, it’s crucial to test your WhatsApp AI agent to ensure it functions as expected. Initiate a conversation with your assistant on WhatsApp and ask various questions related to your services.

Monitor the responses provided by your AI agent. This testing phase is vital to ensure that Pabbly Connect is effectively facilitating the communication between your customers and the AI agent. Make any necessary adjustments based on the feedback received during testing.


Conclusion

Creating a WhatsApp AI agent from scratch without coding is made easy with Pabbly Connect. By following the steps outlined in this tutorial, you can set up an efficient AI assistant for your business, enhancing customer interactions and support.

Ensure you check out Pabbly Connect to create business automation workflows and reduce manual tasks. Pabbly Connect currently offer integration with 2,000+ applications.