Ideal For: All headphone manufacturers, electronic goods sellers, gift shops,music stores, and other merchants can use this method to sell headphones online.
Why Choose this Method for Selling Over any Other Solution?
Unlike any other solution, this method allows you to:
- List and sell your headphones for FREE. Absolutely no payment required.
- No commission deducted on sales.
- Collect payment through multiple payment modes from a single checkout page.
- Sell one time or recurring subscriptions of your headphones
- Sell and collect payment in any currency as per your requirement.
- Give discounts on your products by offering special coupon codes.
- Add sales commission agents to help you in selling your headphones.
As someone doing business in the audio industry, you may have come across some news where multinational audio equipment manufacturing companies like Bose, Skullcandy, Sony, JBL are shutting down their retails stores and moving their products online. So, it might have given you an idea to start selling headphones online.
Why would you like to sell headphones online?
The benefits are obviously manifold like higher product outreach to a global audience, better price discovery, lower merchant commission, lesser rent and utility costs, higher sales, etc. So, if you are tinkering with the idea of selling headphones online, you should act fast now.
But, how will you build an e-store to sell headphones online in the first place? Well, the answer is easy, one can start an online business through an awesome tool called Pabbly Subscription Billing. This Saas product can build an e-store with an unlimited number of products in minutes. Not just unlimited listing, there are many unique features that will put you ahead of your competitors like:
- Creating unlimited product listing
- Building an unlimited plan, discounts, and coupons
- Generating unlimited revenues
- Easy tax management system
- Custom Domains
- Creating customizable checkout page
- Importing and exporting customers data with ease
- Multiple integrations through Webhooks
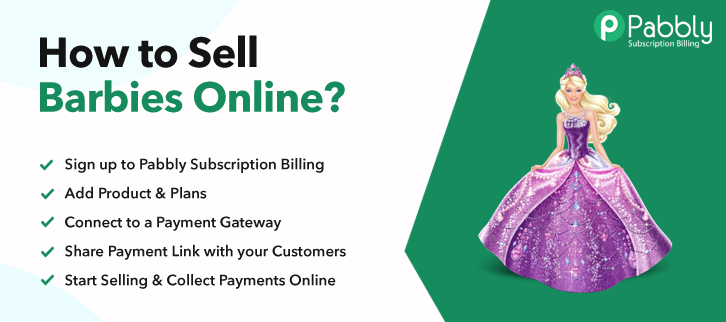
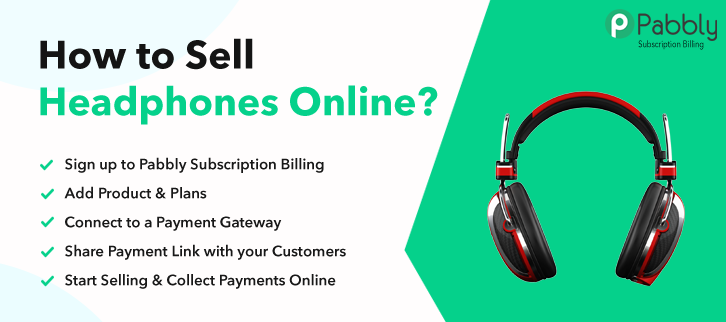
Now, that you are amazed by Pabbly Subscription Billing extravagant features, let us build an e-store to start selling headphones online.
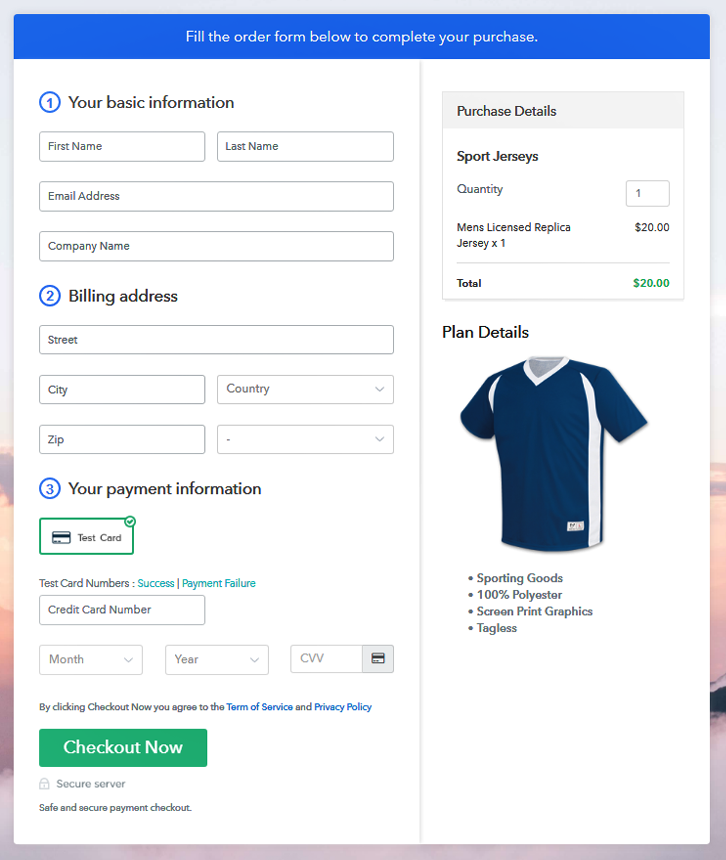
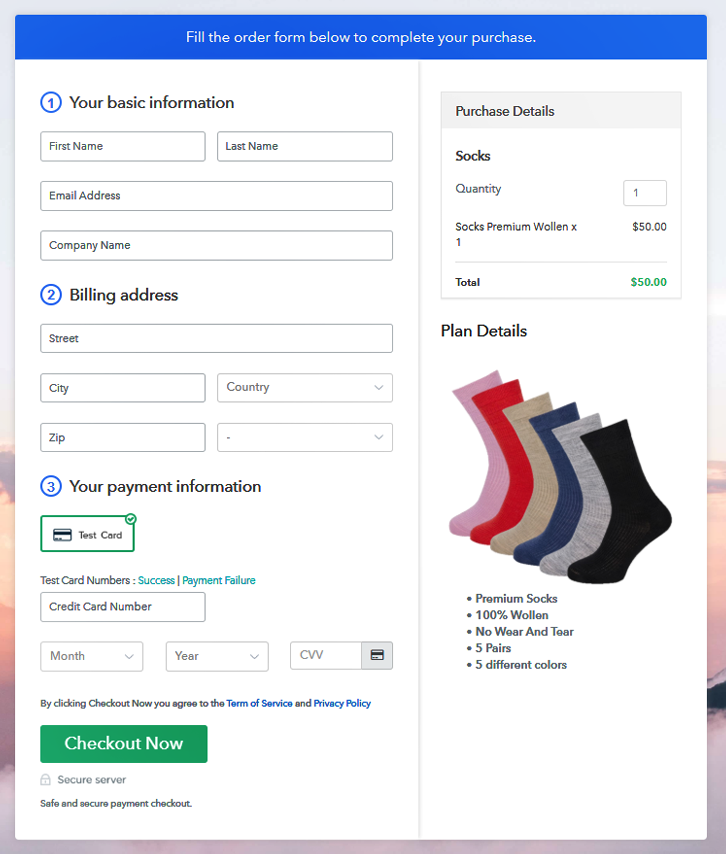
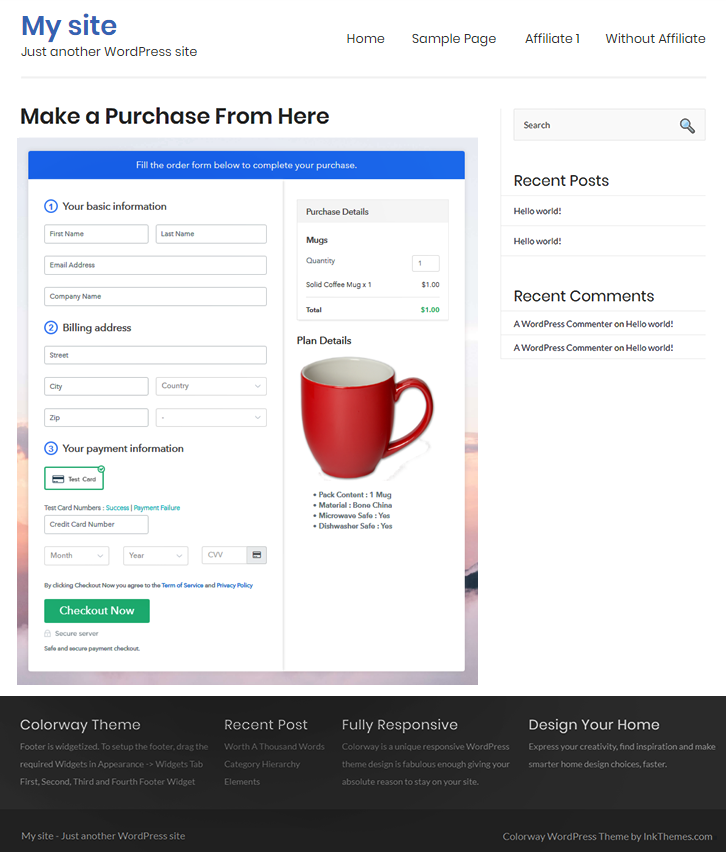
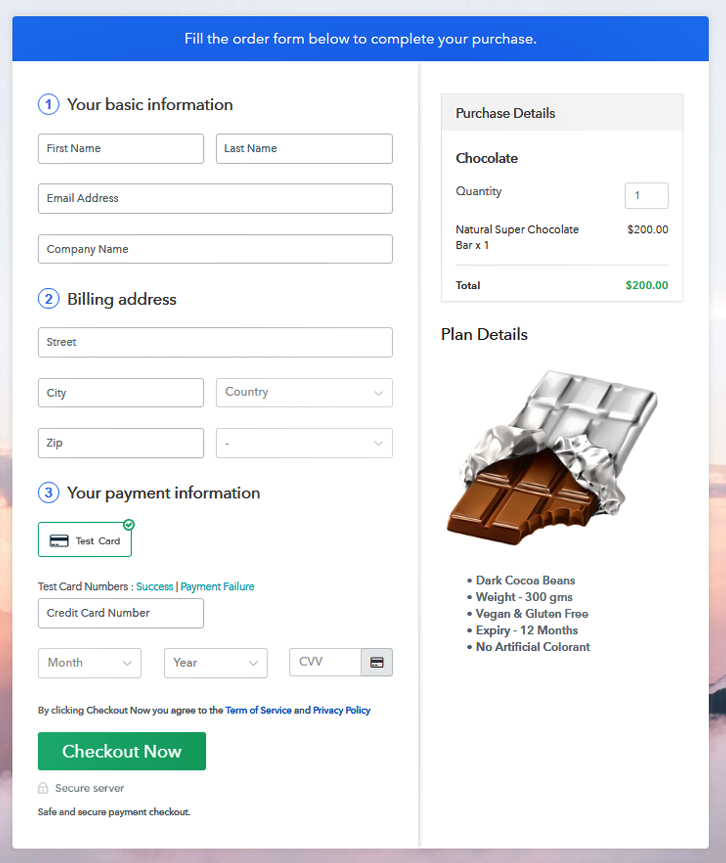
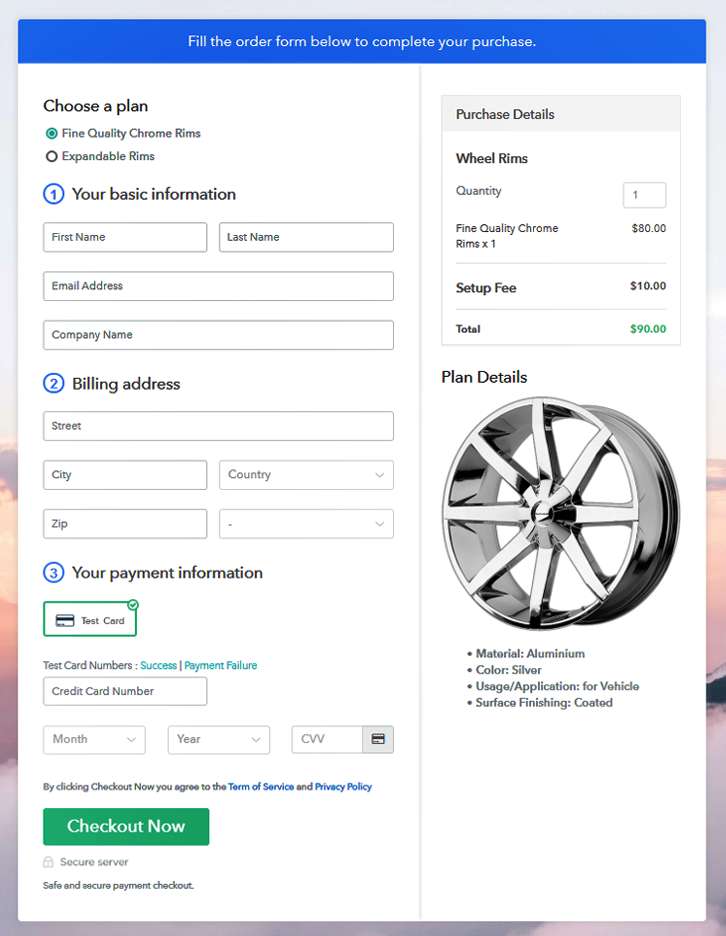
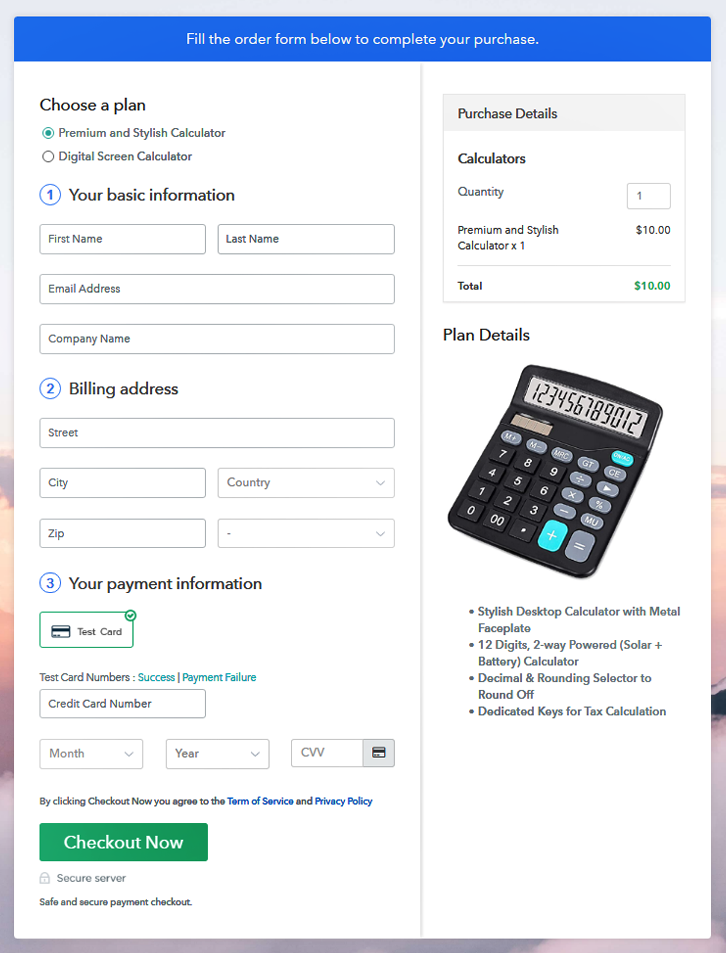
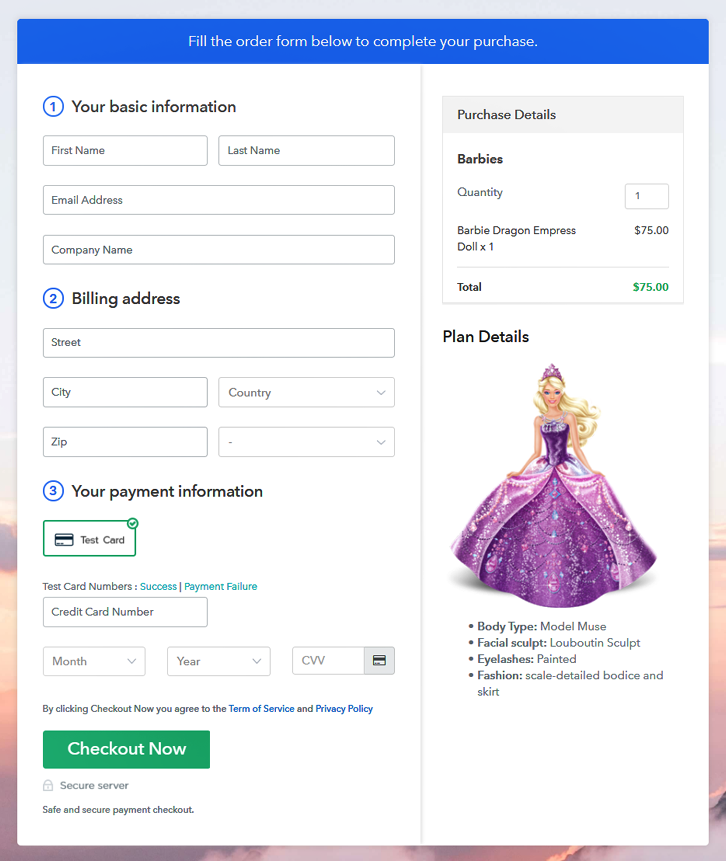
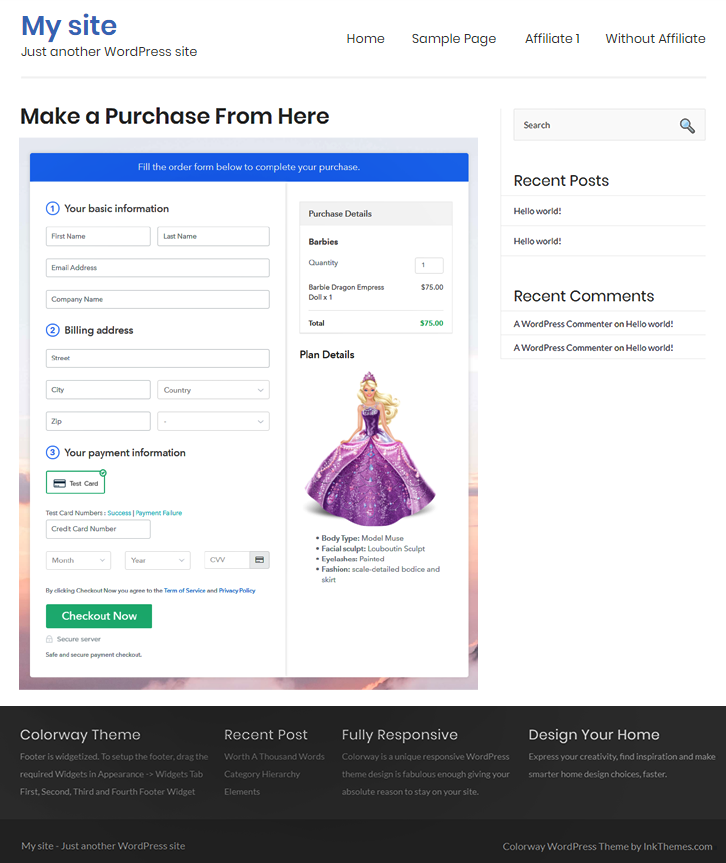
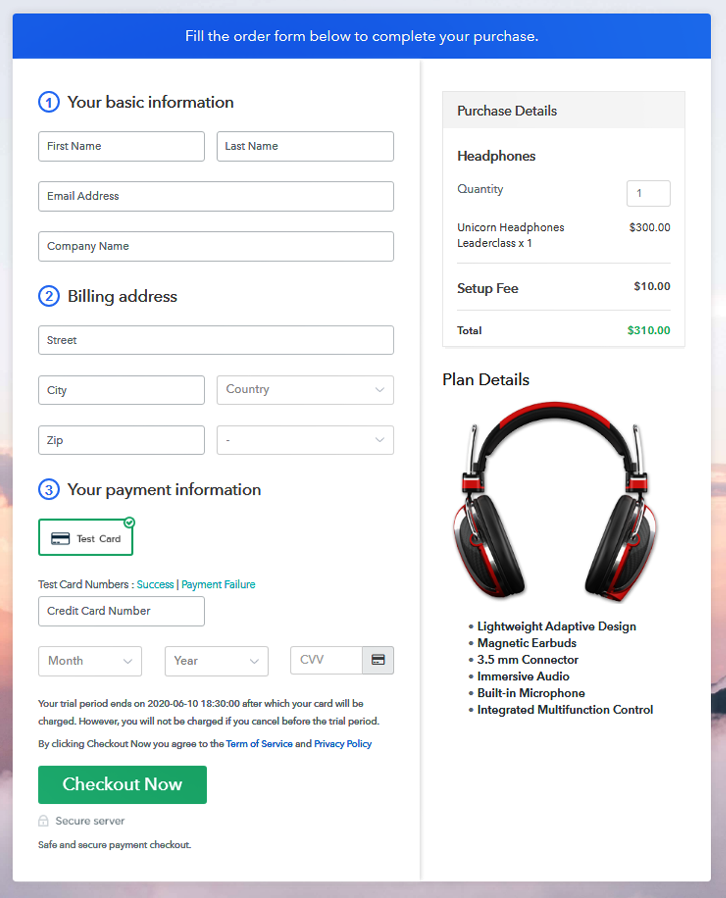
This is How your Checkout Page will Look Like After Creation
Step 1: Log in to Pabbly Subscription Billing

First, search in your browser for Pabbly Subscription Billing and on reaching its website click on the button “Sign up Free“. Here, you have two option either simply sign in through your, Gmail account or fill the blanks like name, email address and then press the “Sign Up” button.
Sign Up For Free!
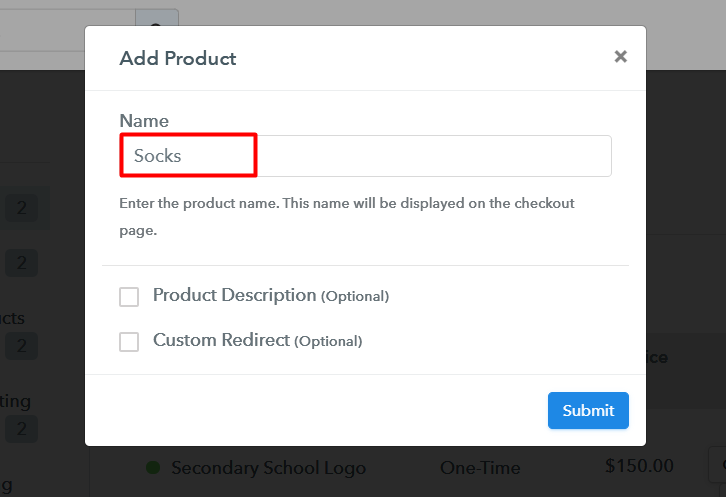
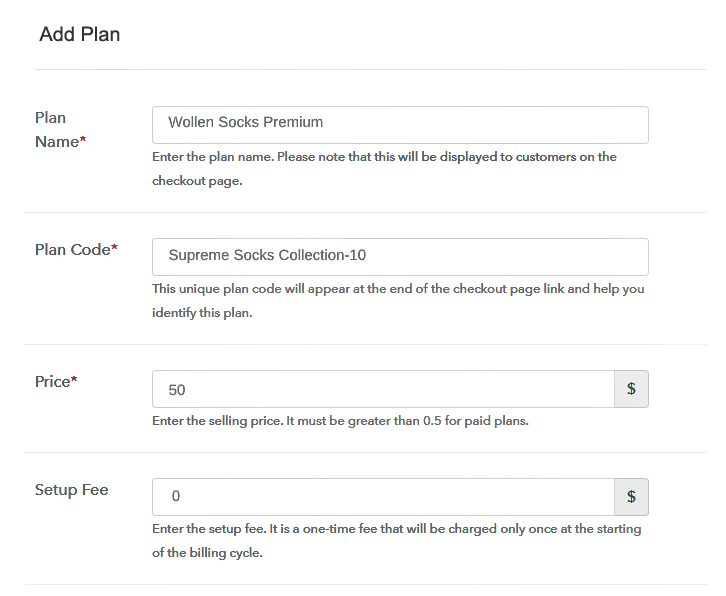
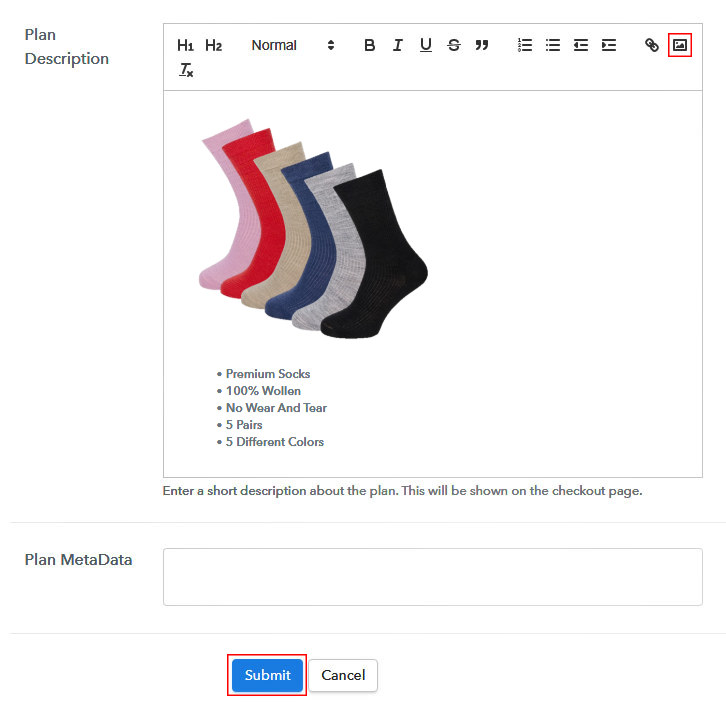
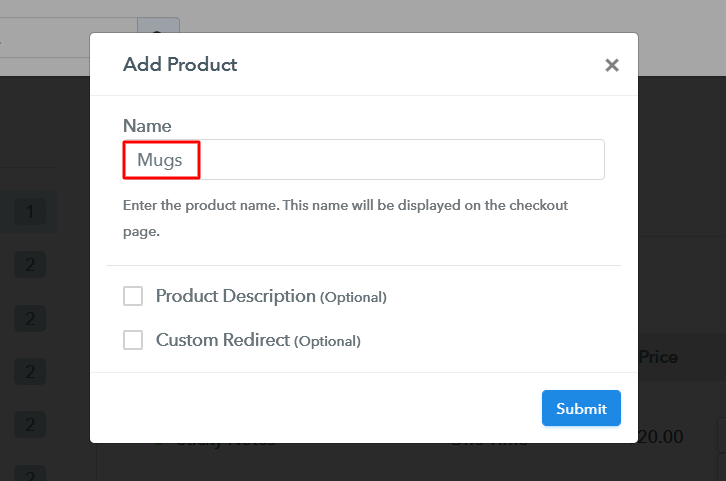
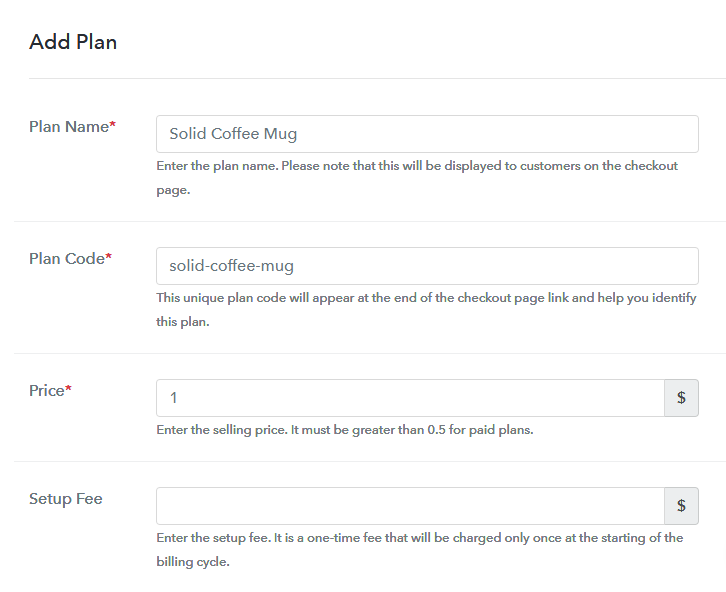
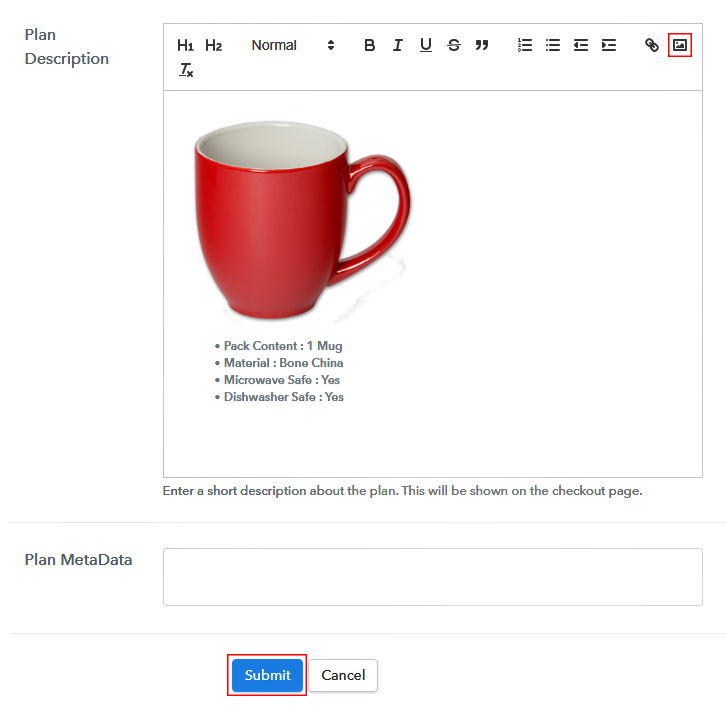
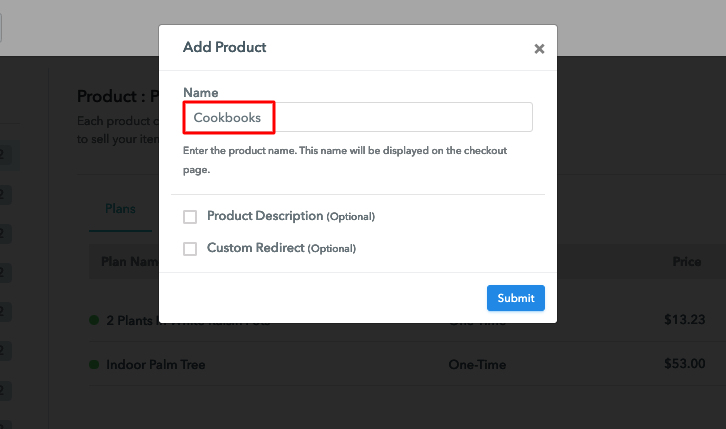
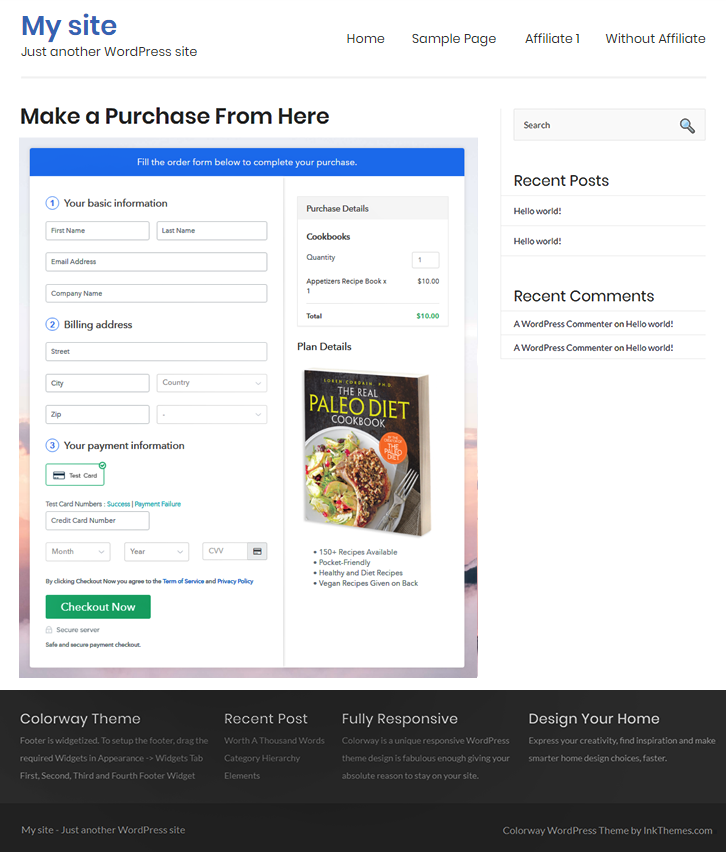
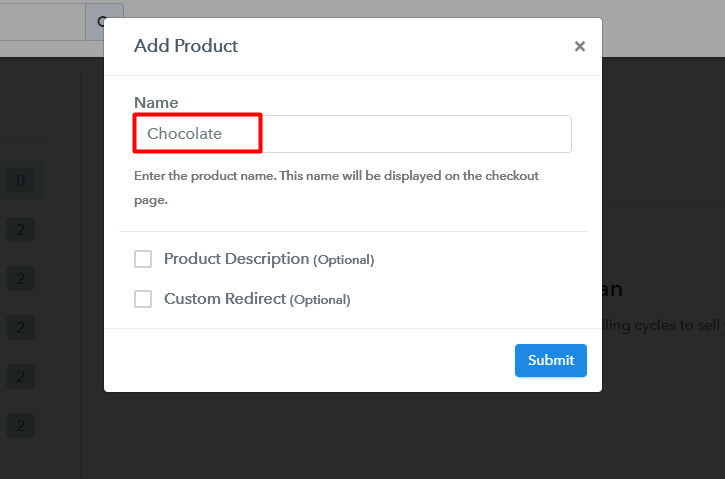
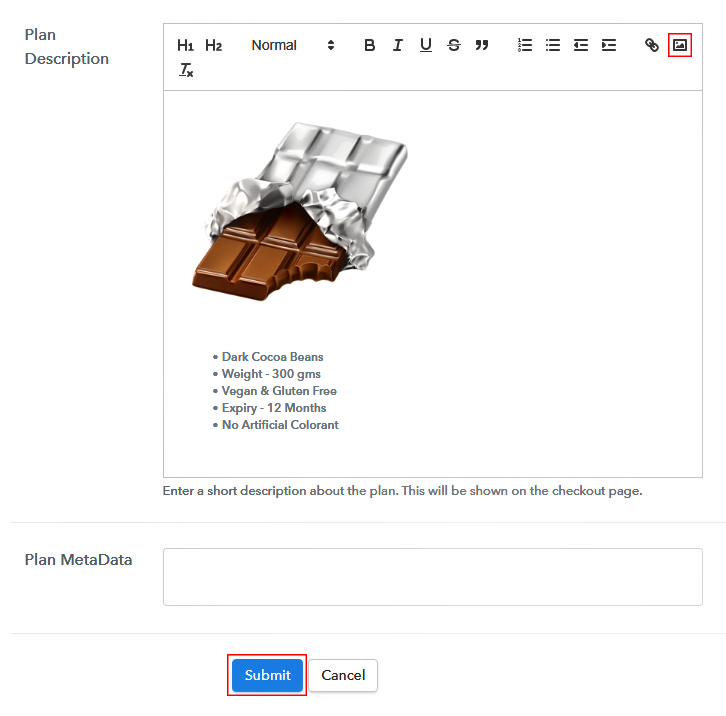
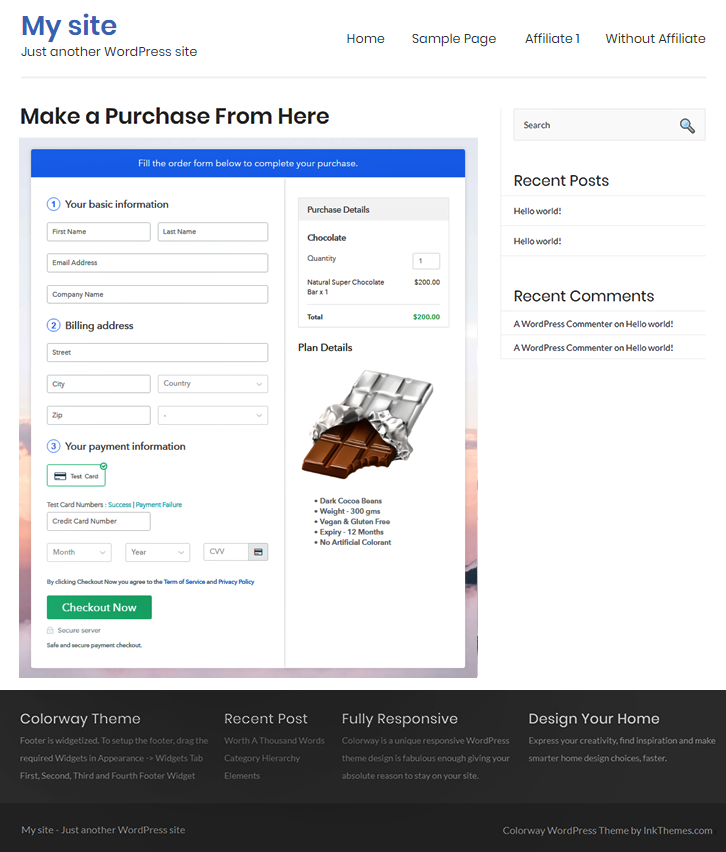
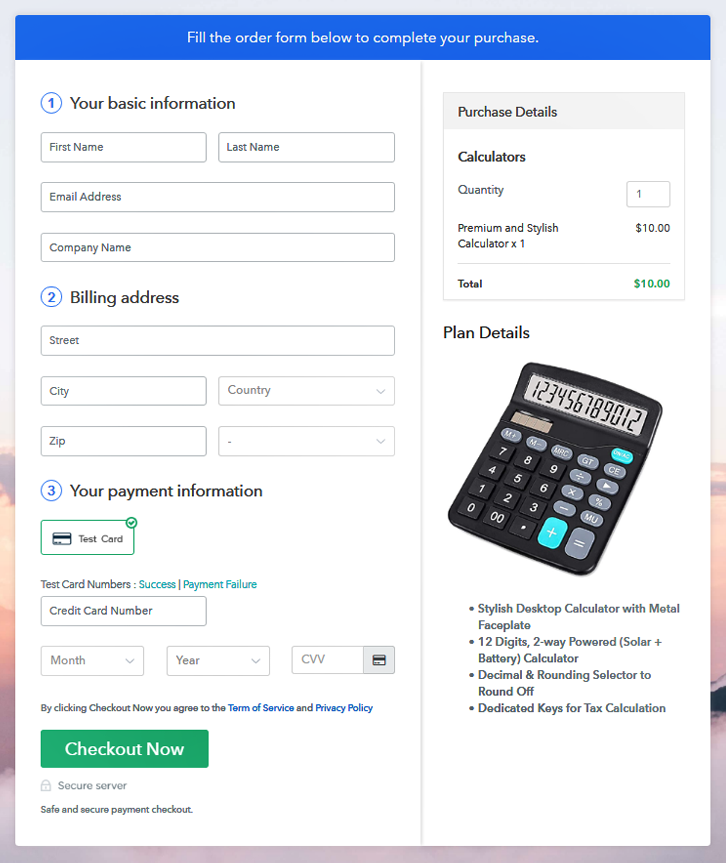
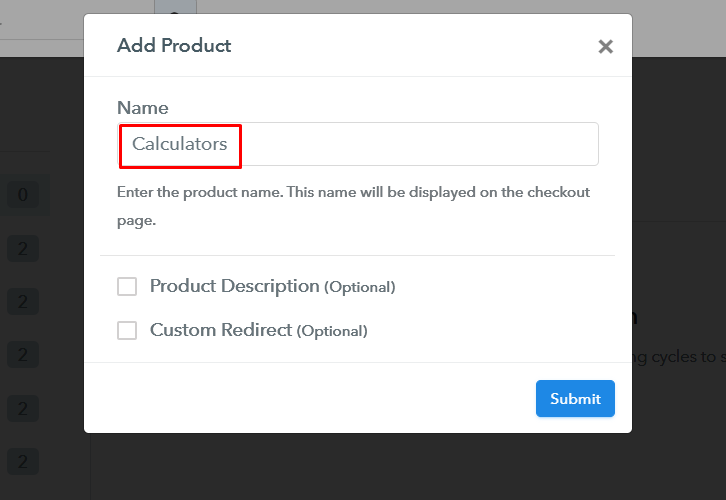
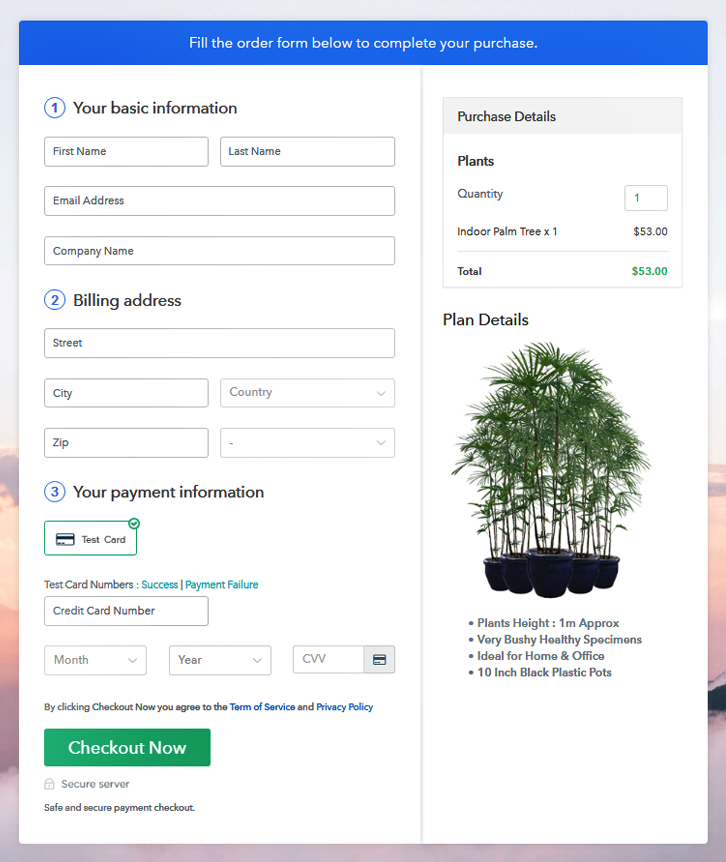
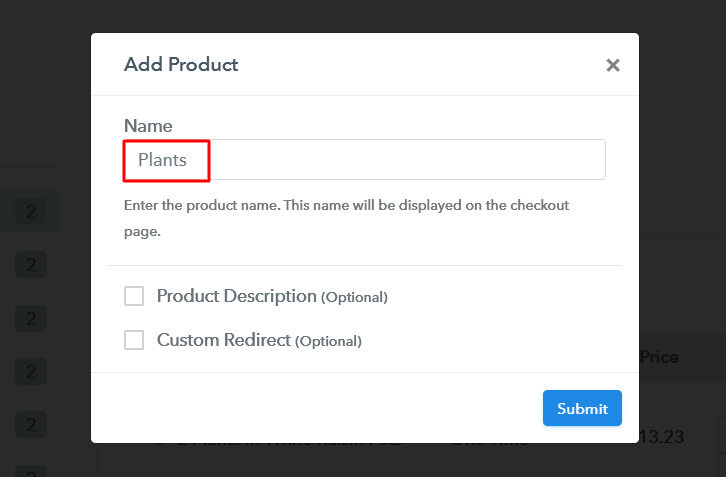
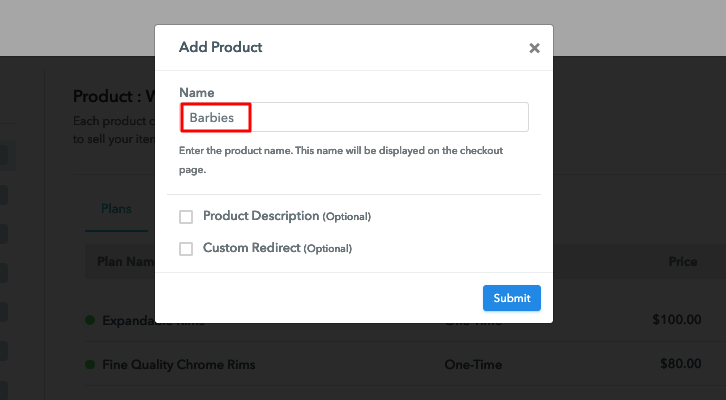
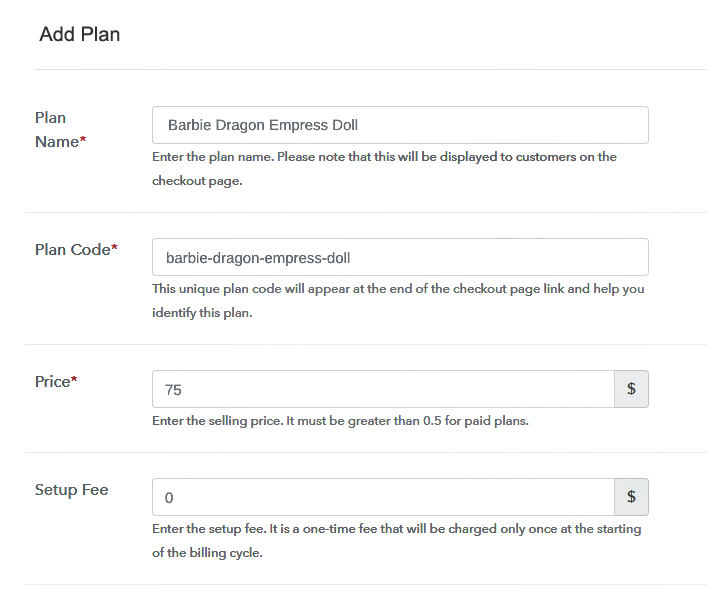
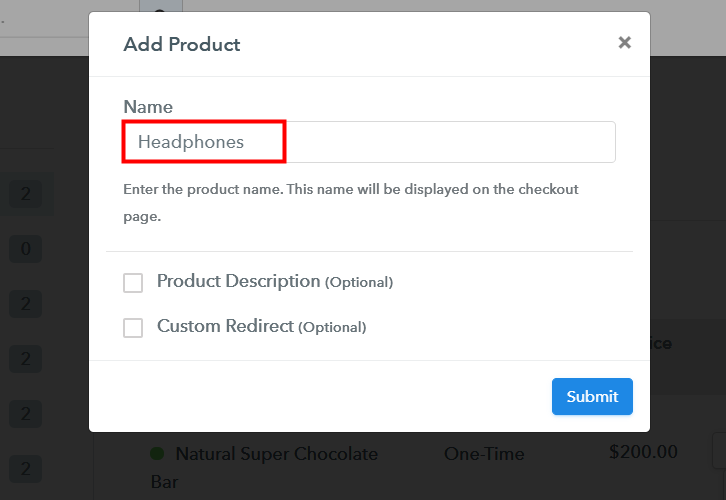
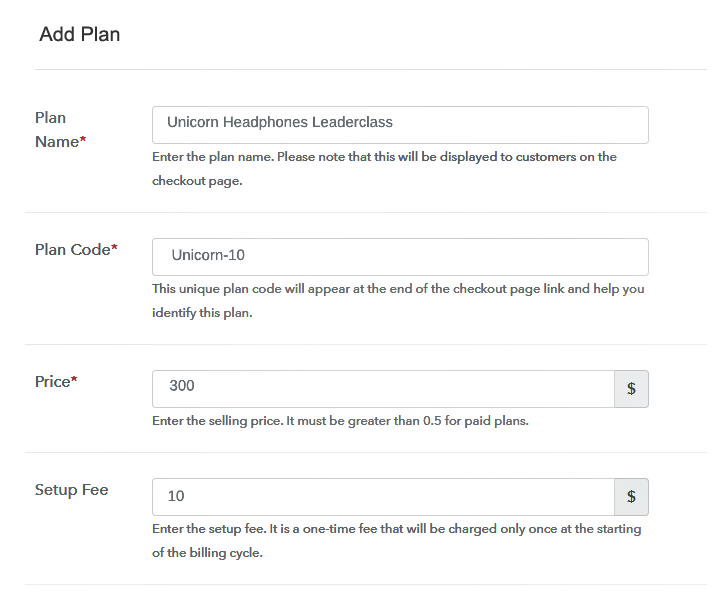
Now that you have entered into the dashboard, click on the “Access Now” button on the Subscription Billing option. In this dialog box, you may want to fill in details like name, currency, and phone number. After filing in the information press “Continue” button to complete the process. Obviously, you want your customers to enjoy a smooth payment experience without any snag. That is why Pabbly Subscription Billing comes here for your rescue by providing a dummy payment gateway where you can pilot test the whole customer experience in advance. To avail, this functionality, just click on the “Enable Test Payment” option to start testing. You can have access to any payment gateway of your choice like Razorpay, PayPal, Authorize.net, Stripe, etc. Beneath this paragraph, you will find a complete integration guide for each of them. Now, I am going ahead, by enabling the test payment option to continue the process. After, payment gateway integration, lets’ forge ahead to add products. Below the “Enable Payments” section you will find the section “Add your product” click on it. This will summon a dialog box with a blue button “Add New Product”. Click on it. A pop up will spring out and here you will have to fill the required product title like headphones. You may also tick on various checkboxes like “product description” and “custom redirect” to give more information about your products. Fill up the details and your product is created. Note: Here you can add all the products related to the similar category by creating plans for each of them. Now, we are going to create plans for selling headphones online After finishing these steps, you will be directed to the plan page, here you have to fill in details like plan name, code, price, setup fees. Coming down to the section below you will different billing models like one-time payment, recurring, based on cycles, etc. Now click on the preferred billing model and yes at any point of your business you can change it. Take some amazing snapshots of your headphones and upload it here using the upload image option. Now after uploading the image, please provide some description of your headphones, preferably in bullet points like material used, cords, battery requirements, etc. Later press the “Submit” button. Likewise, following the same method, you can add multiple products, one at a time. Follow up these steps to preview checkout page: Now, copy the embed plan link to insert the checkout page on your WordPress website. Now, when the link is copied, then paste it to the text area of the editor. After pasting the code, now hit the ‘Publish’ button. Your checkout page is embedded. Note: In case you want to sell multiple products via a single checkout page, you can create a multi-plan checkout page otherwise skip this step. The online economy has wrecked the traditional brick & mortar stores and in the coming years if you don’t adapt, then your business is going to perish as well. So stop dilly rallying, buckle up and build your first e-store selling headphones using Pabbly Subscription Billing. Also, since you are new to this endeavor, you may have plenty of doubts regarding the online economy and the steps listed above. So, feel free to place your queries in the comment section below. Thank YouStep 2: Select Subscription Billing

Step 3: Account Setup

Step 4: Connect Payment Gateways To Sell Headphones Online

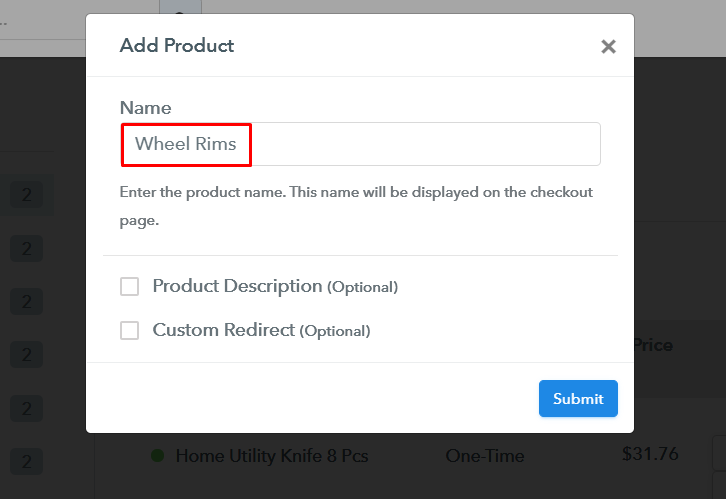
Step 5: Add Your Product

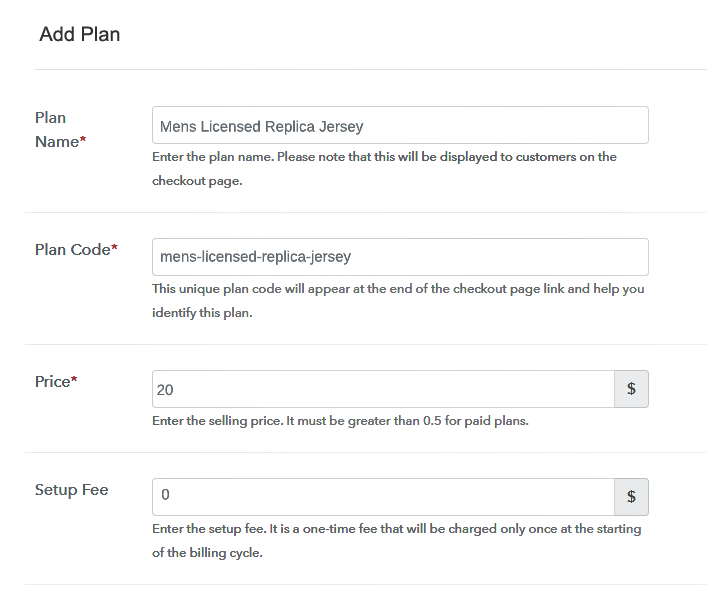
Step 6: Add Plans
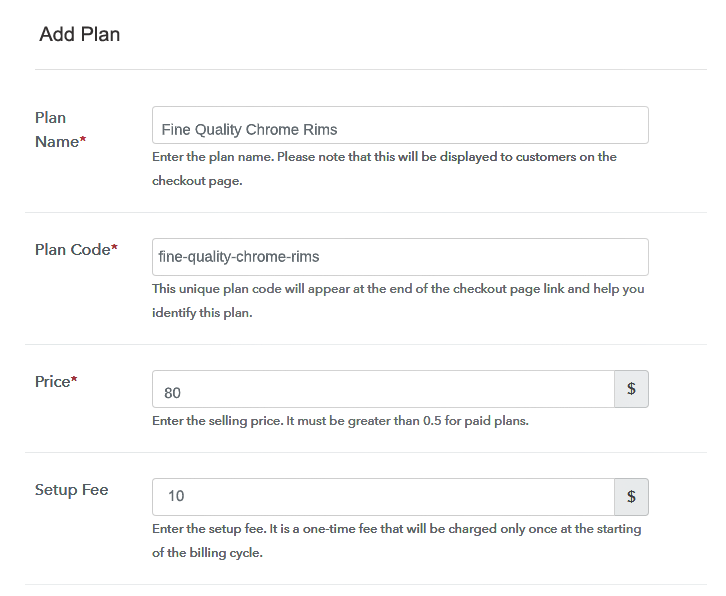
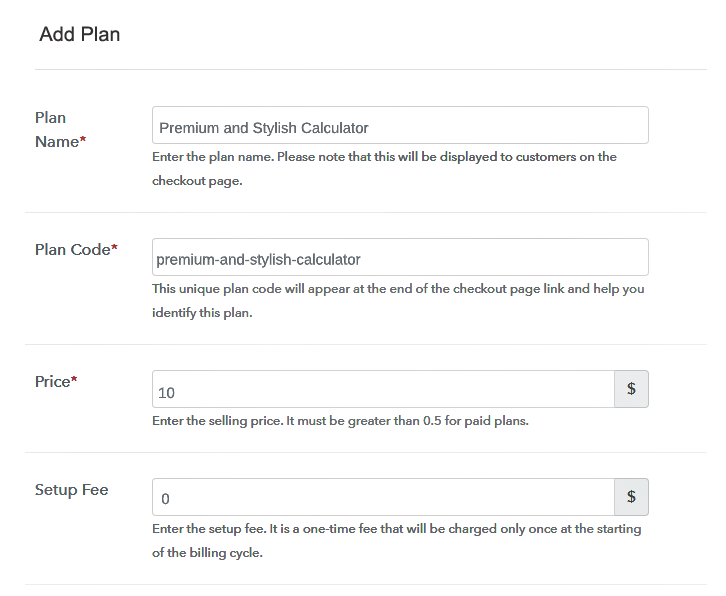
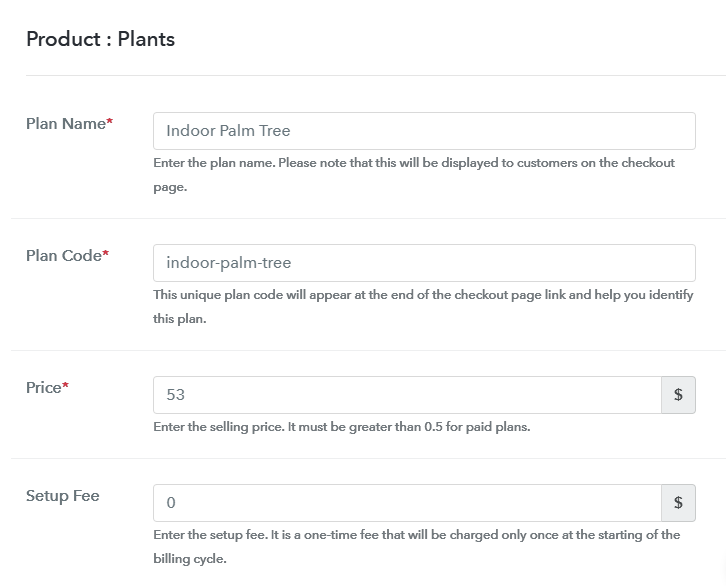
(a) Select Add New Plan

(b) Specify the Plan & Pricing Details
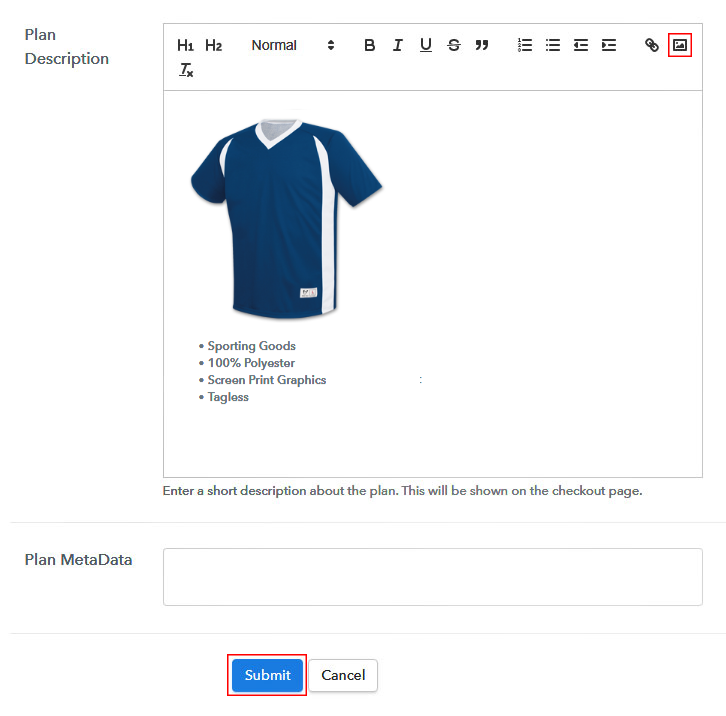
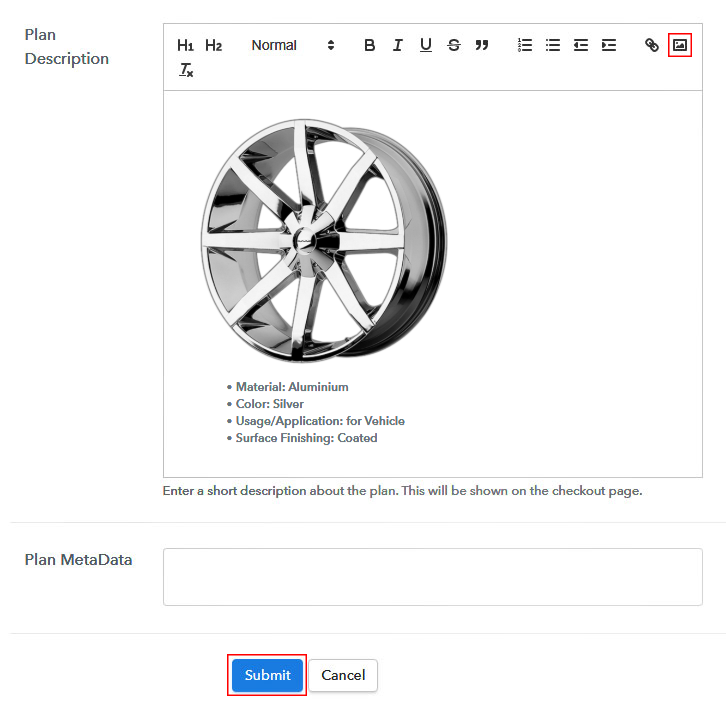
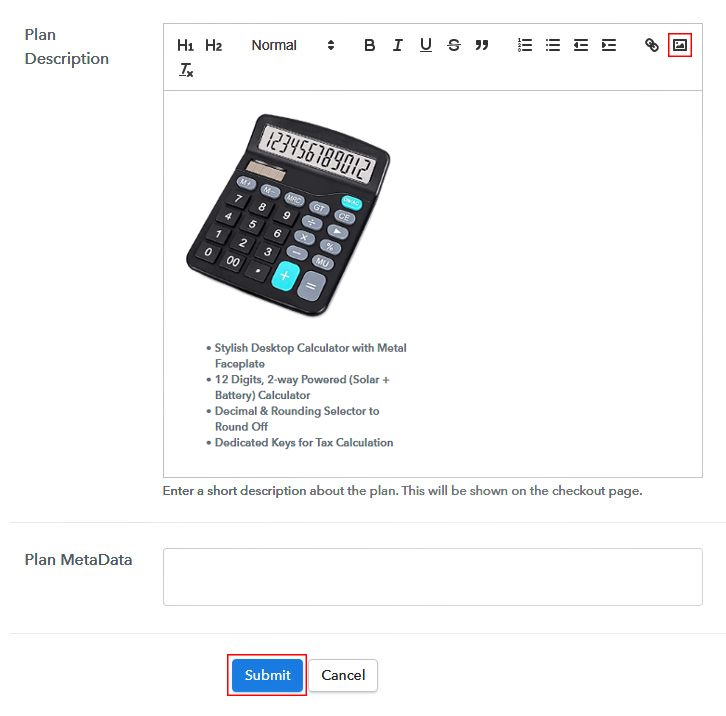
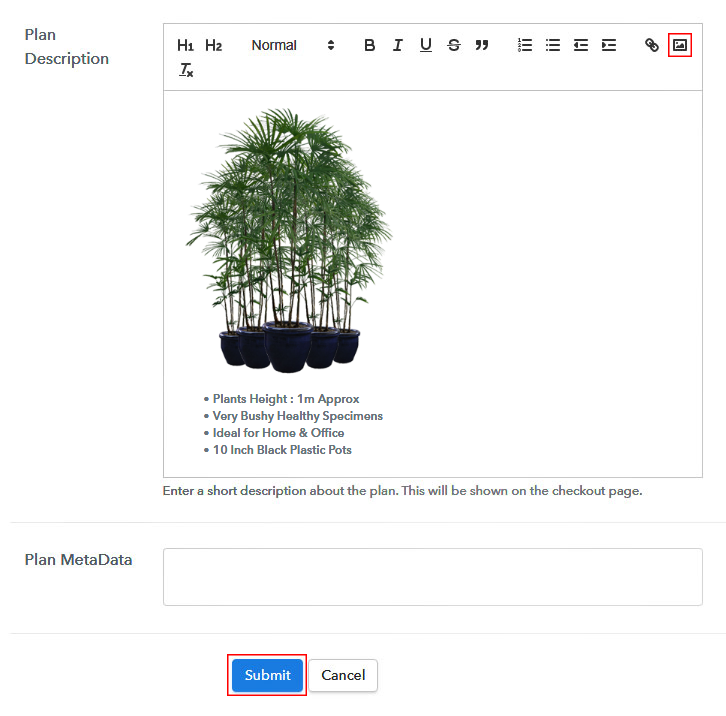
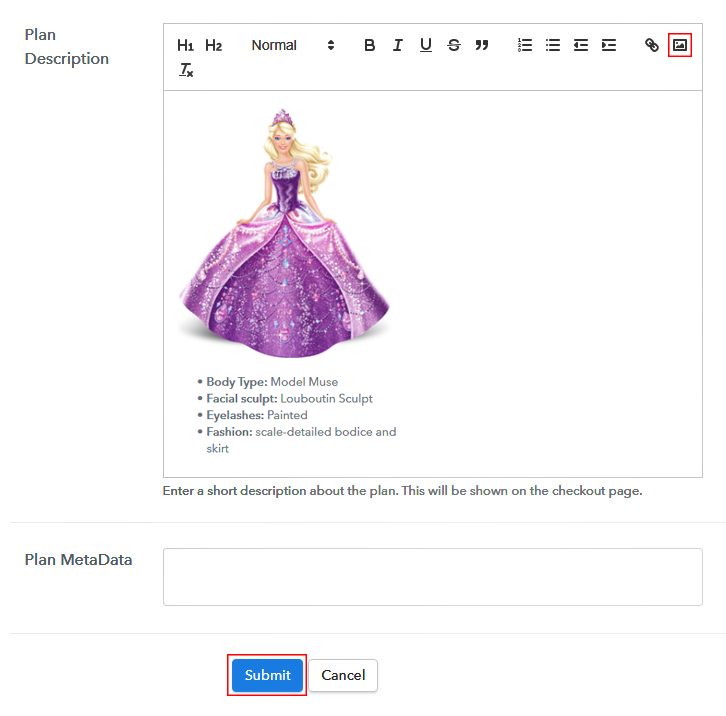
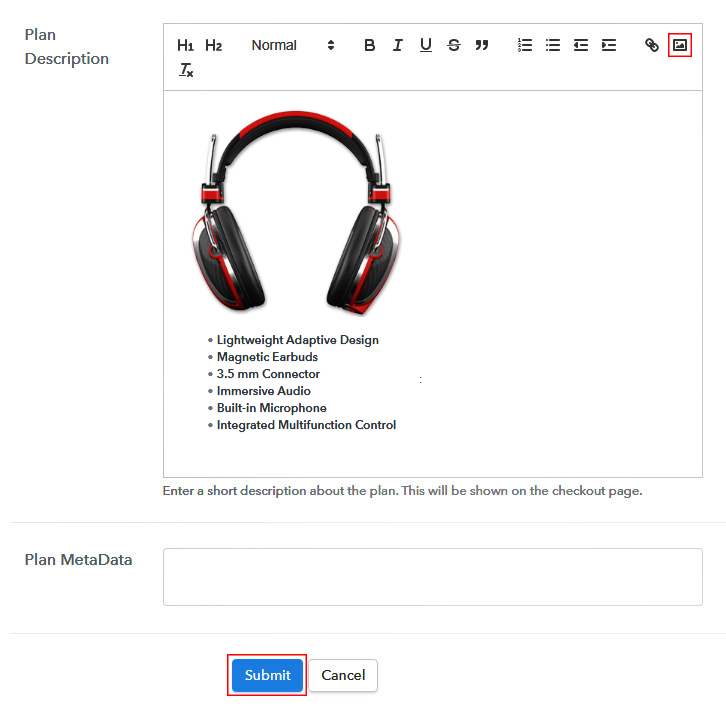
(c) Add Image & Description
Step 7: Share your Checkout Page

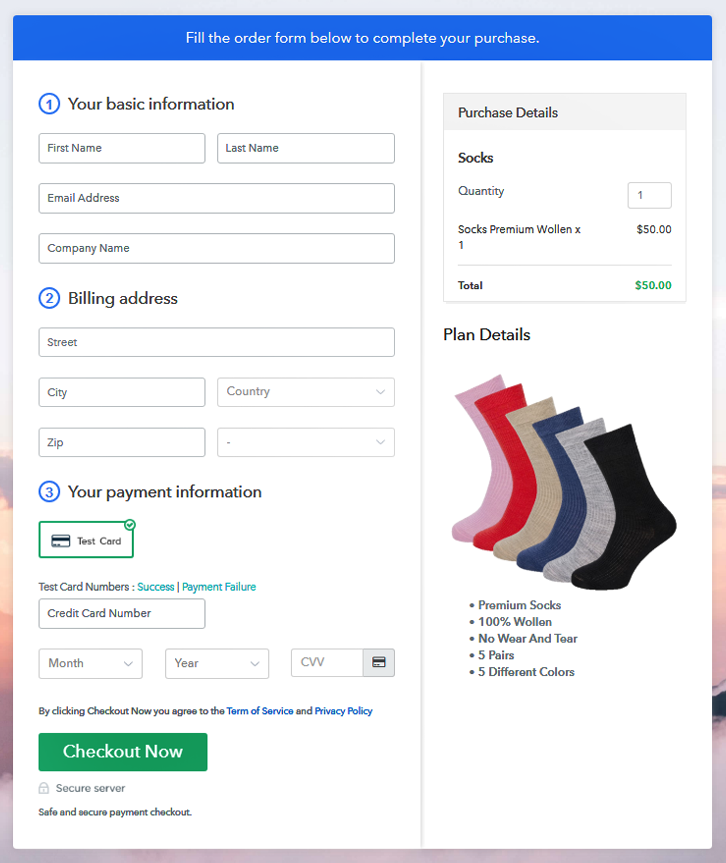
Step 8: Preview Checkout Page
(a) Click on the View Button

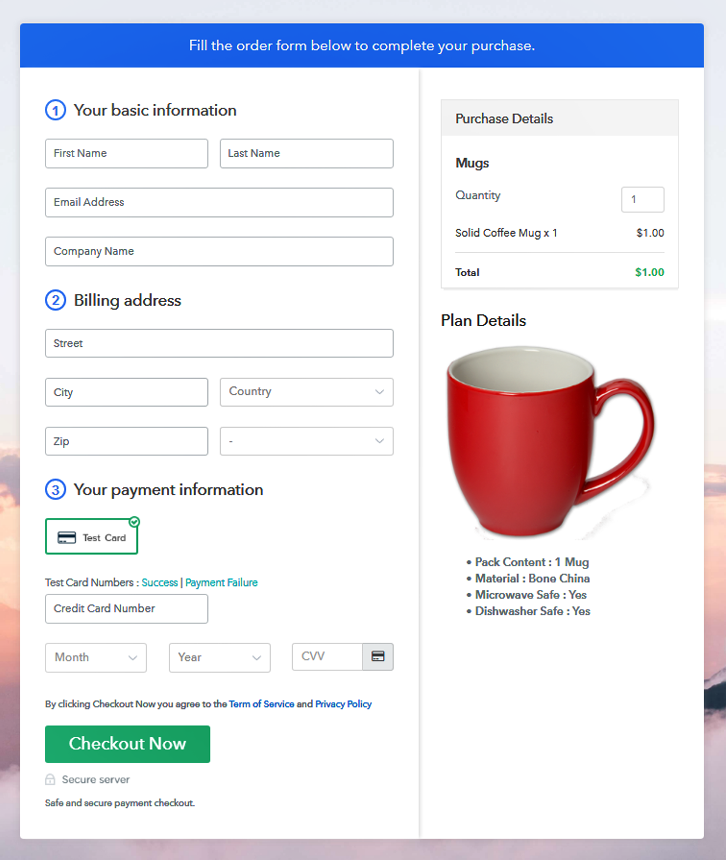
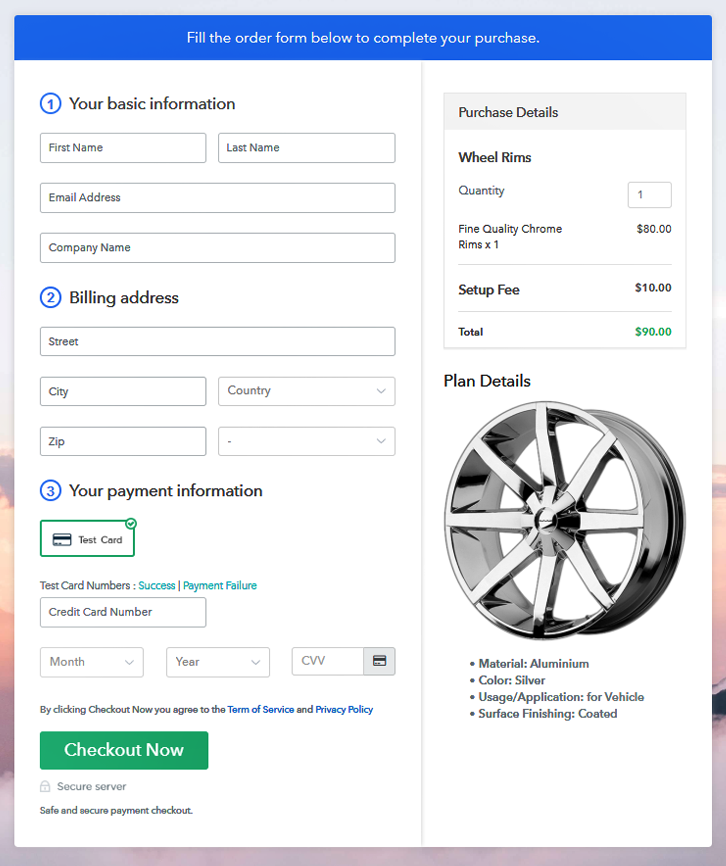
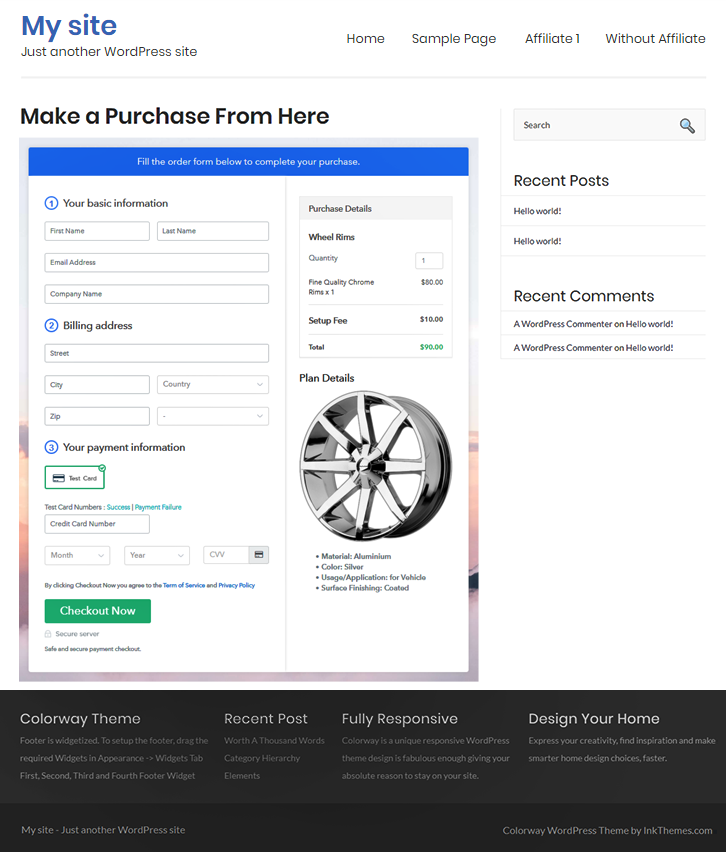
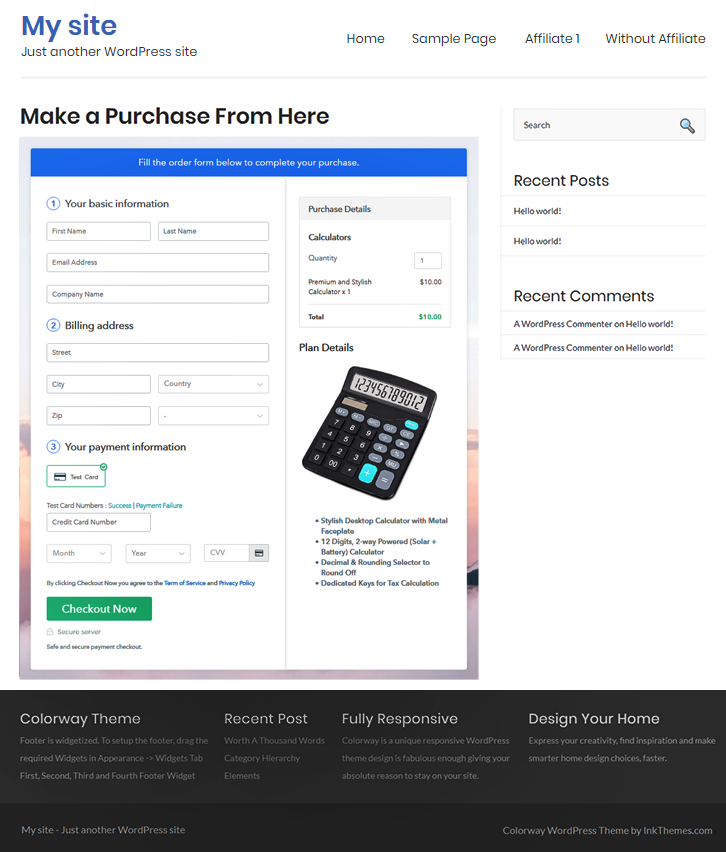
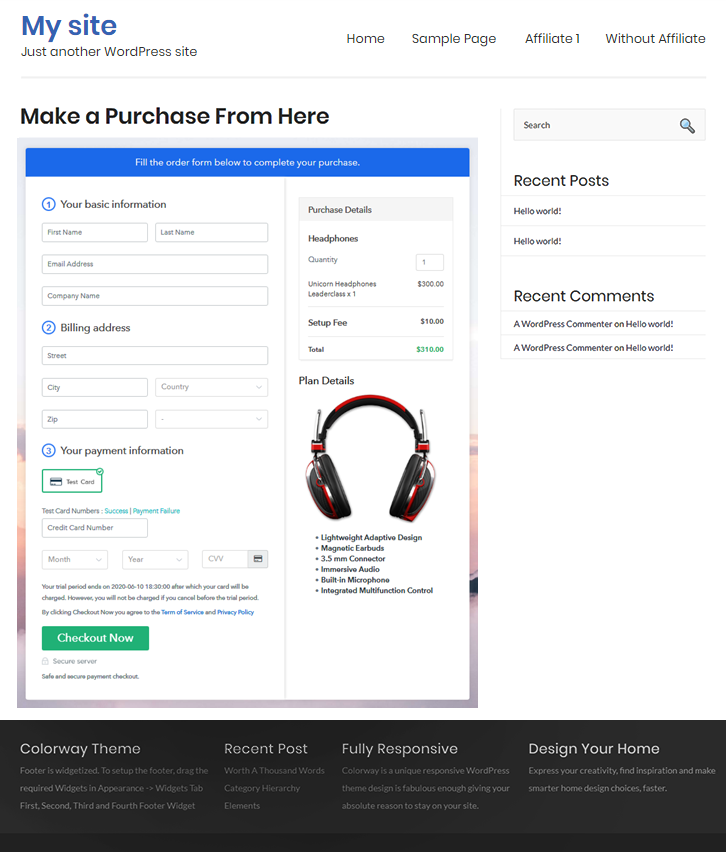
(b) Take a Look at the Checkout Page
Step 9: Embed Checkout Page in Site & Sell Headphones Online

(a) Edit the Page & Paste the Copied Link

(b) Save & Publish the Checkout Page

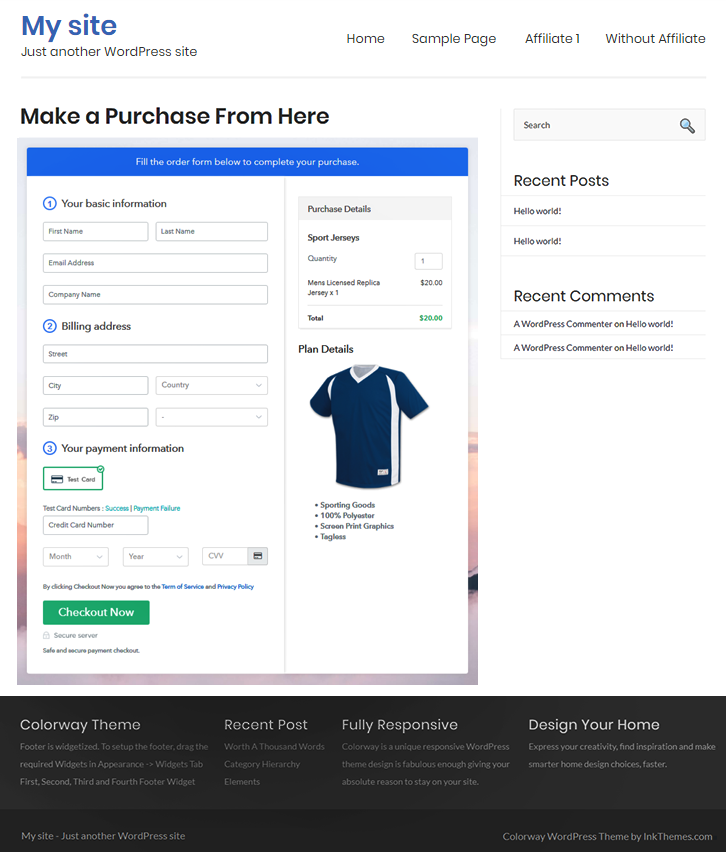
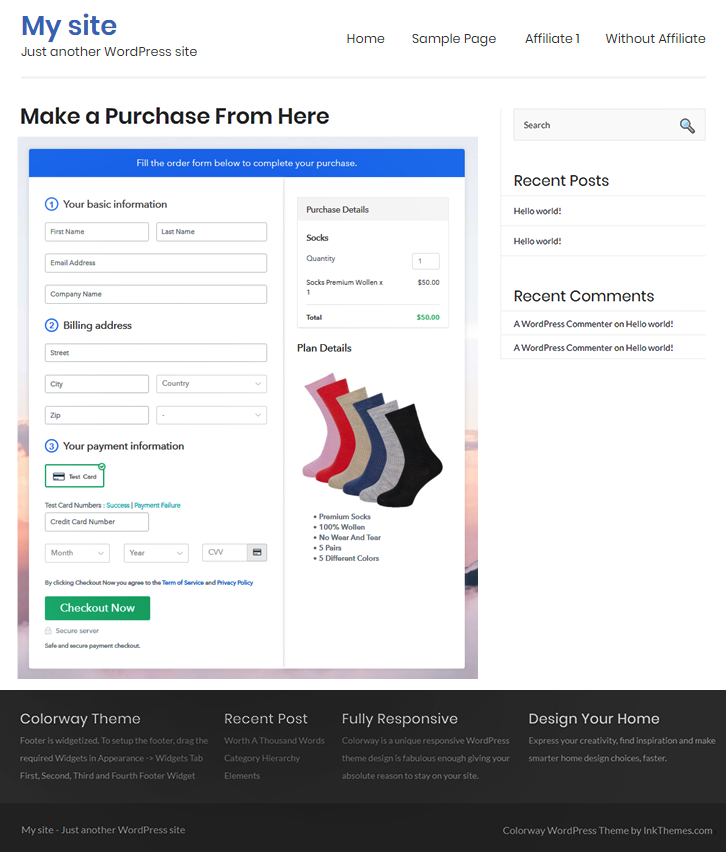
(c) Check out the Final Look of your Checkout Page on WordPress Site
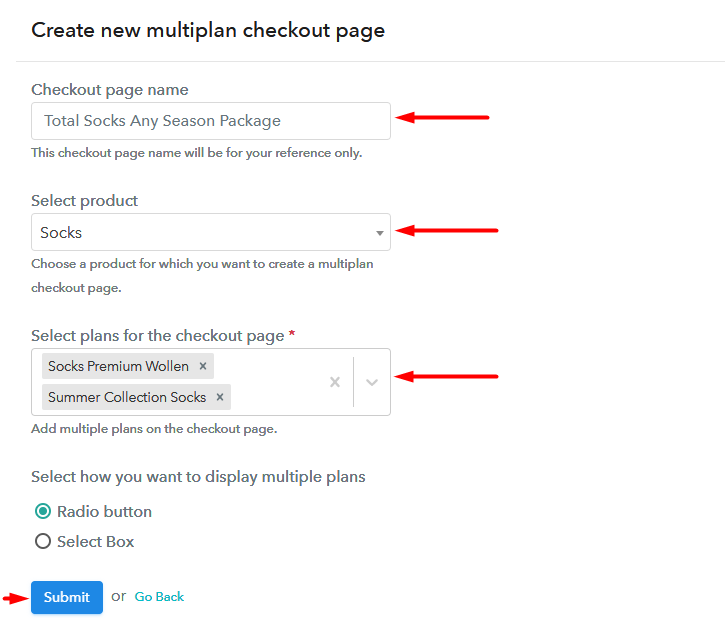
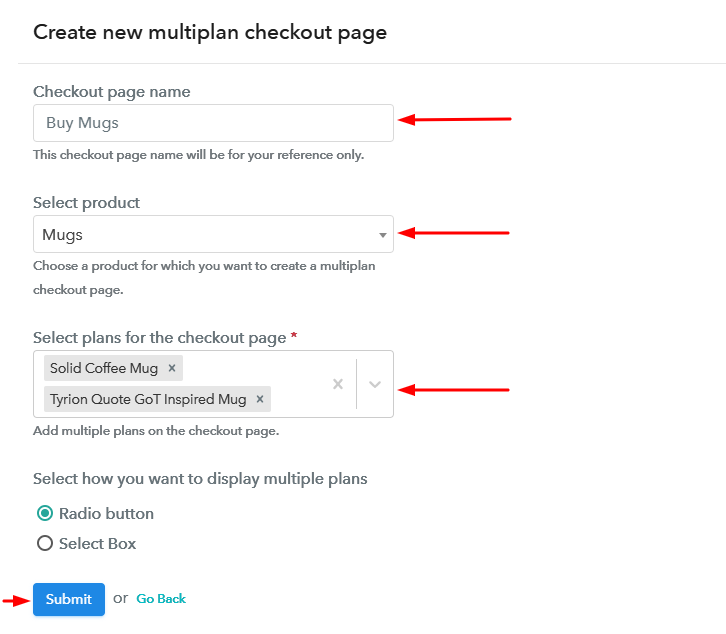
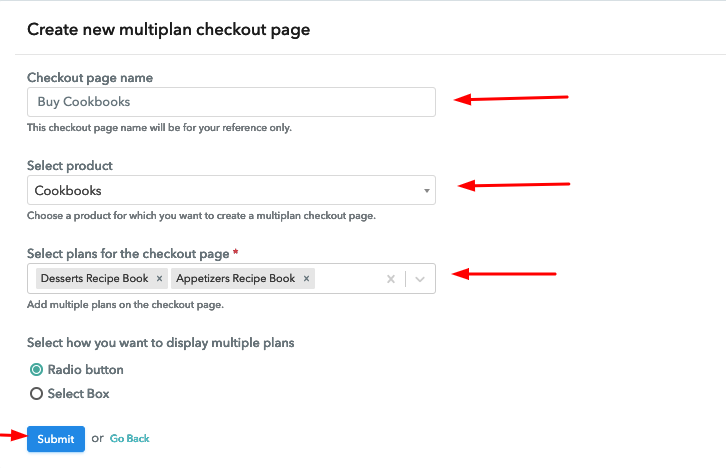
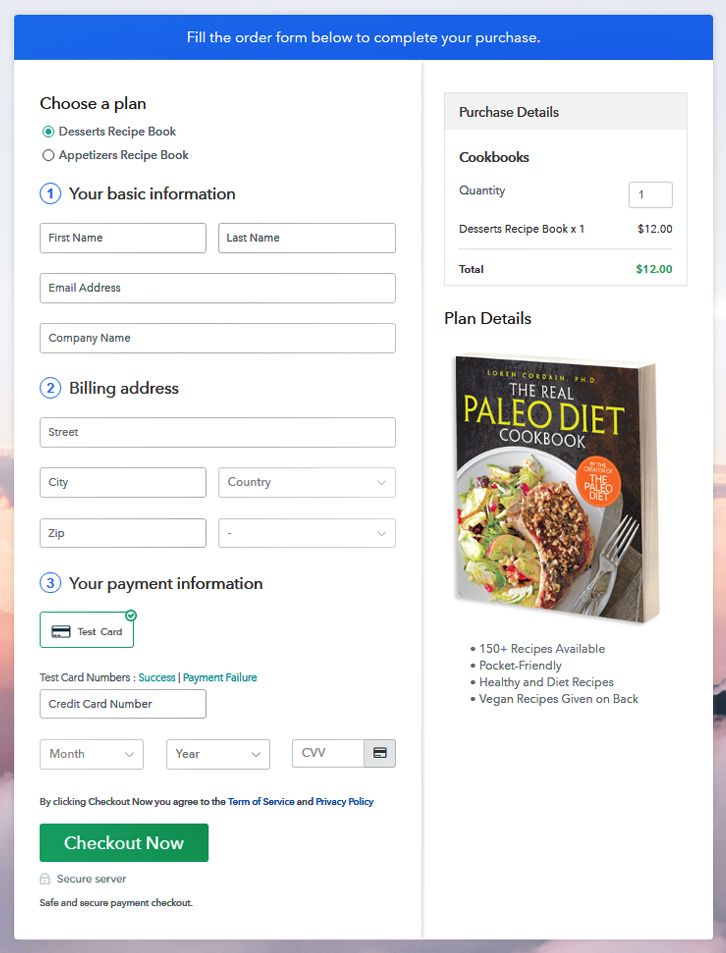
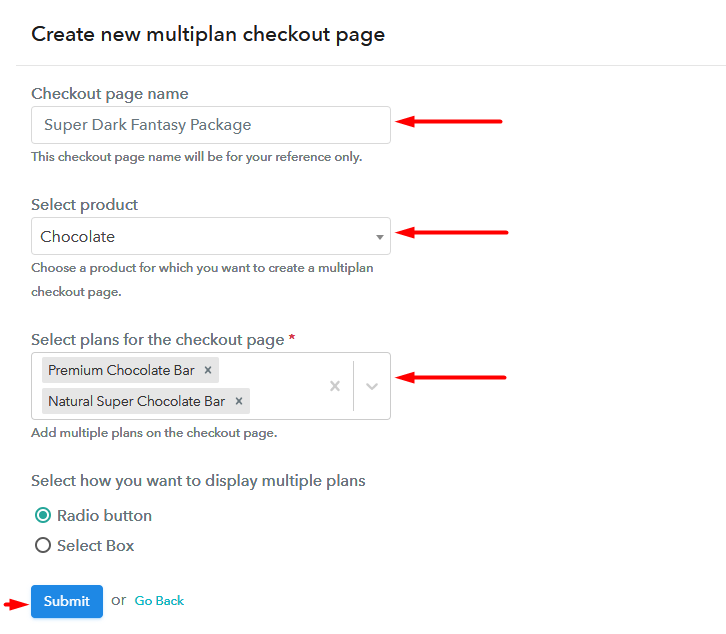
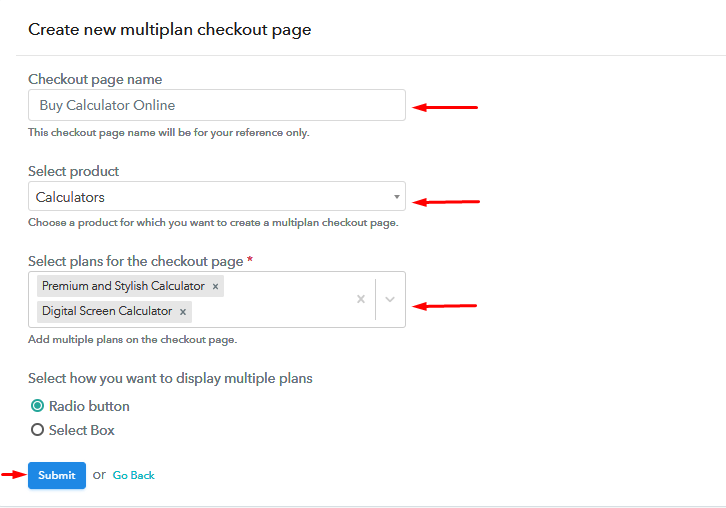
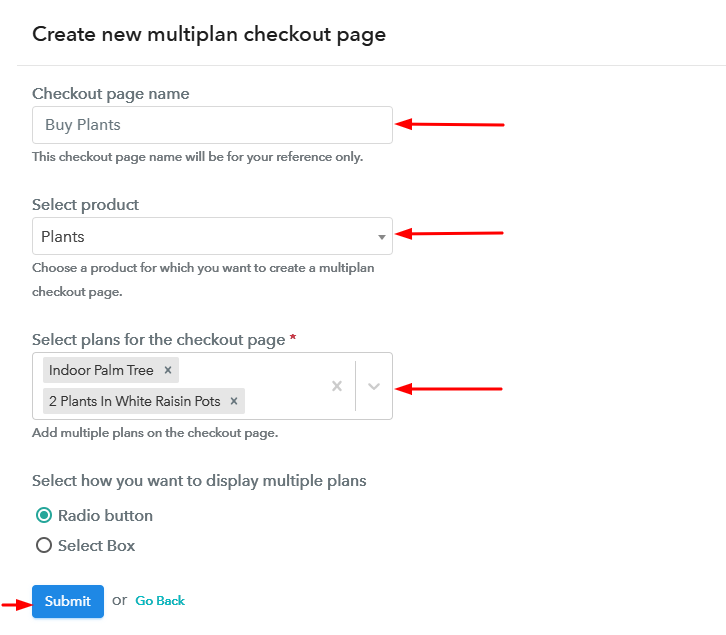
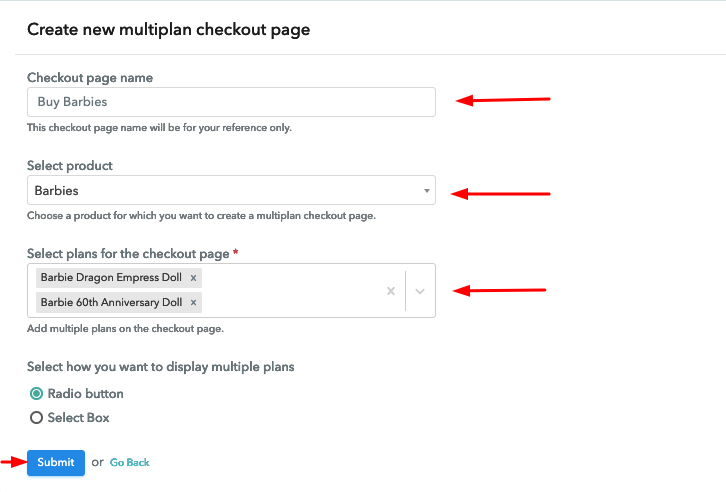
Step 10: Multiplan Checkout Page
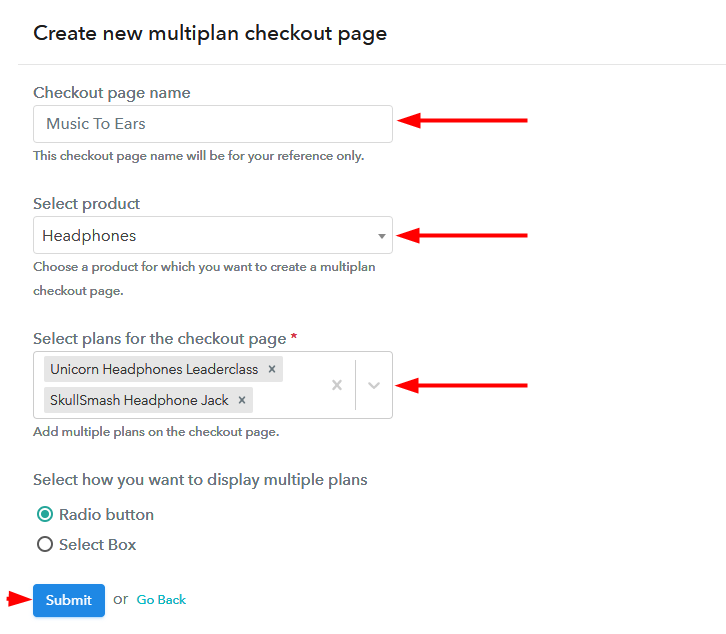
(a) Click on Add Mutiplan Checkout

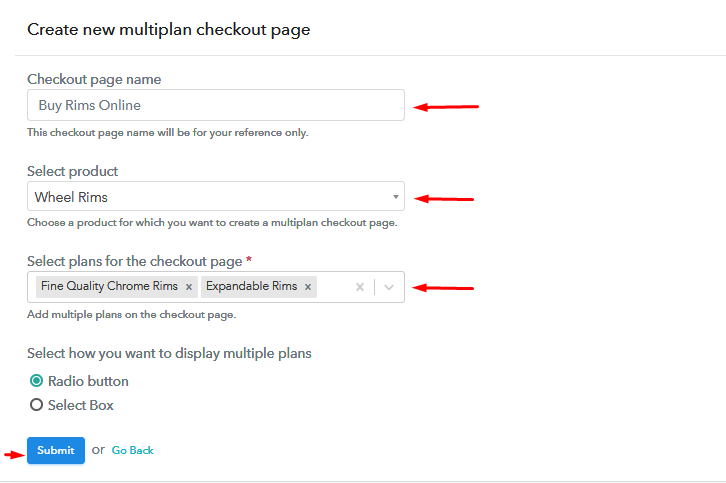
(b) Add Plans to Sell Headphones Online from Single Checkout Page
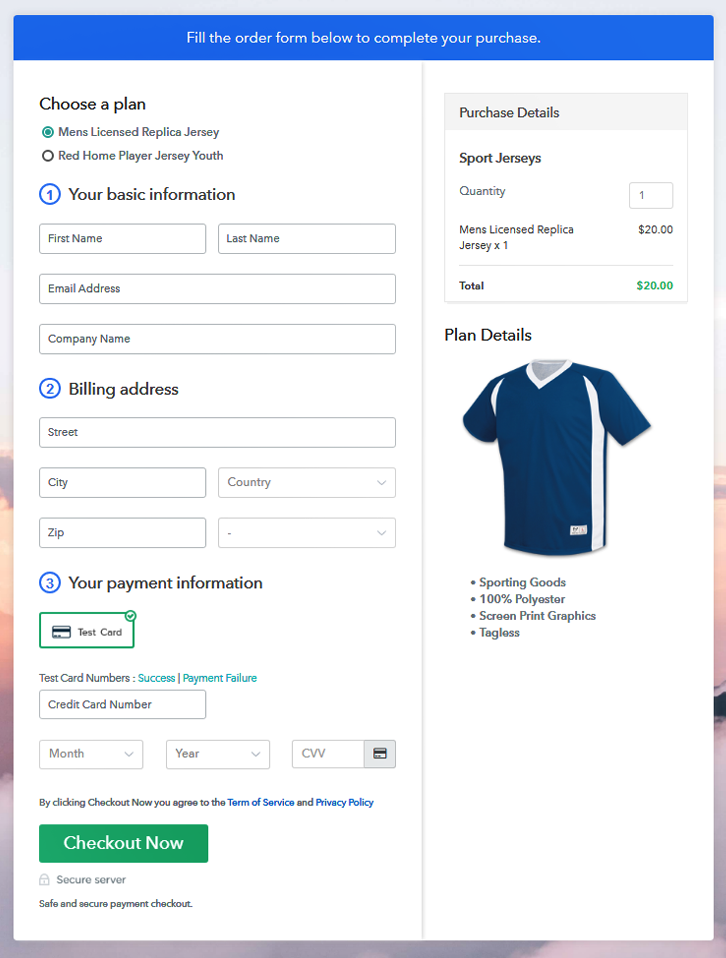
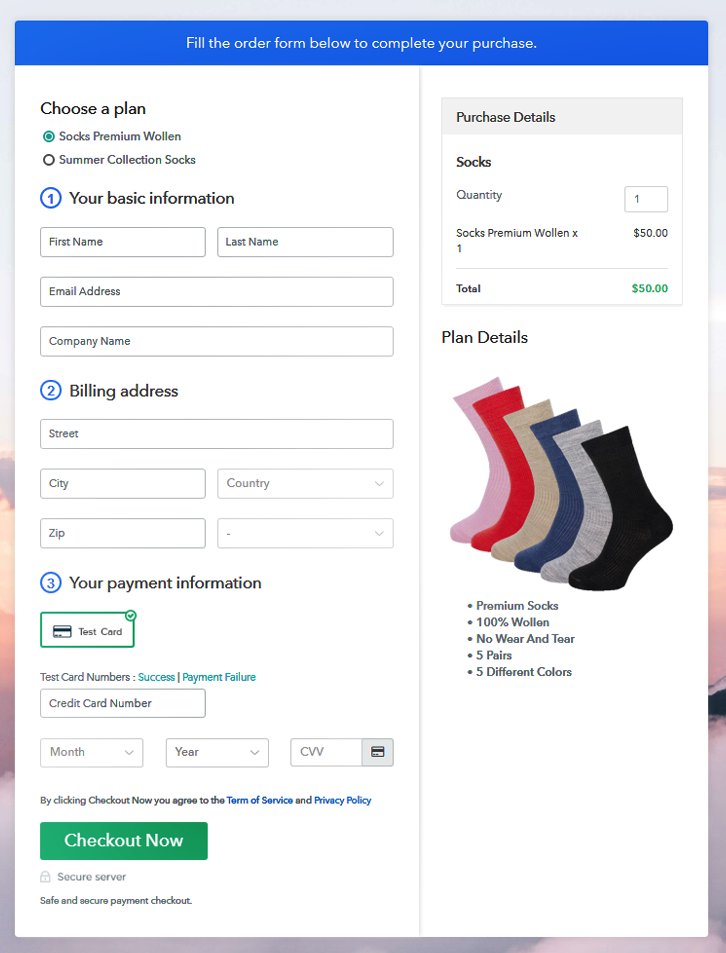
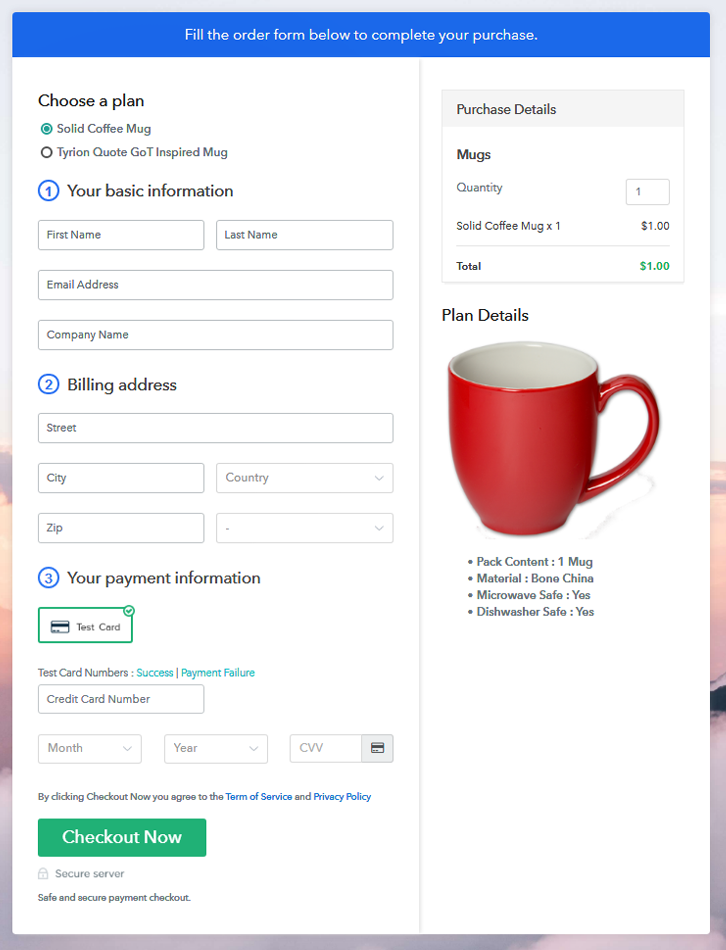
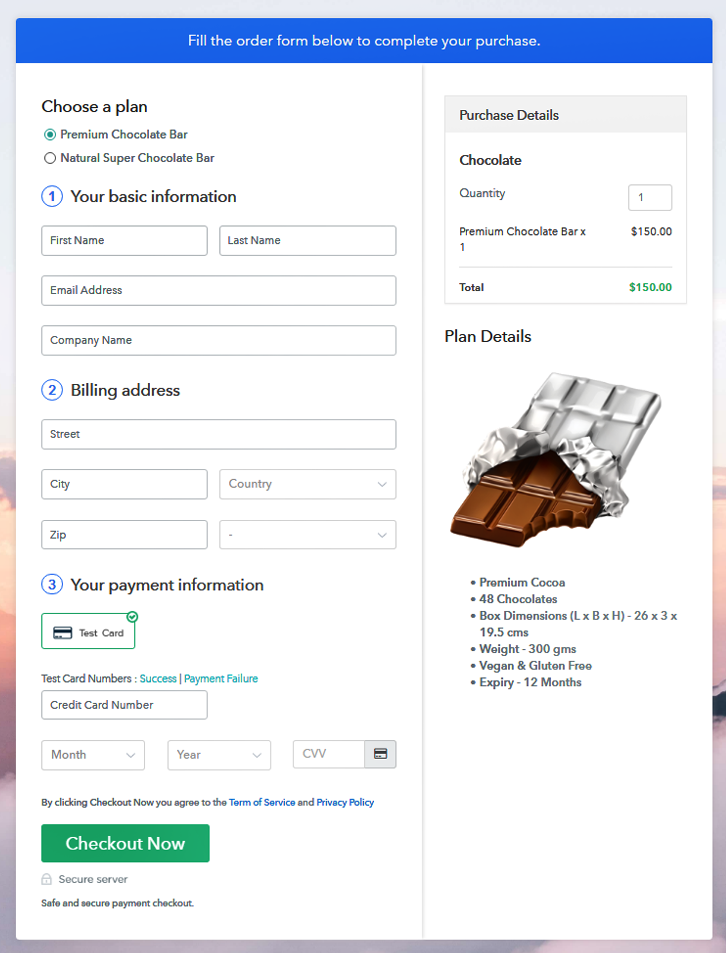
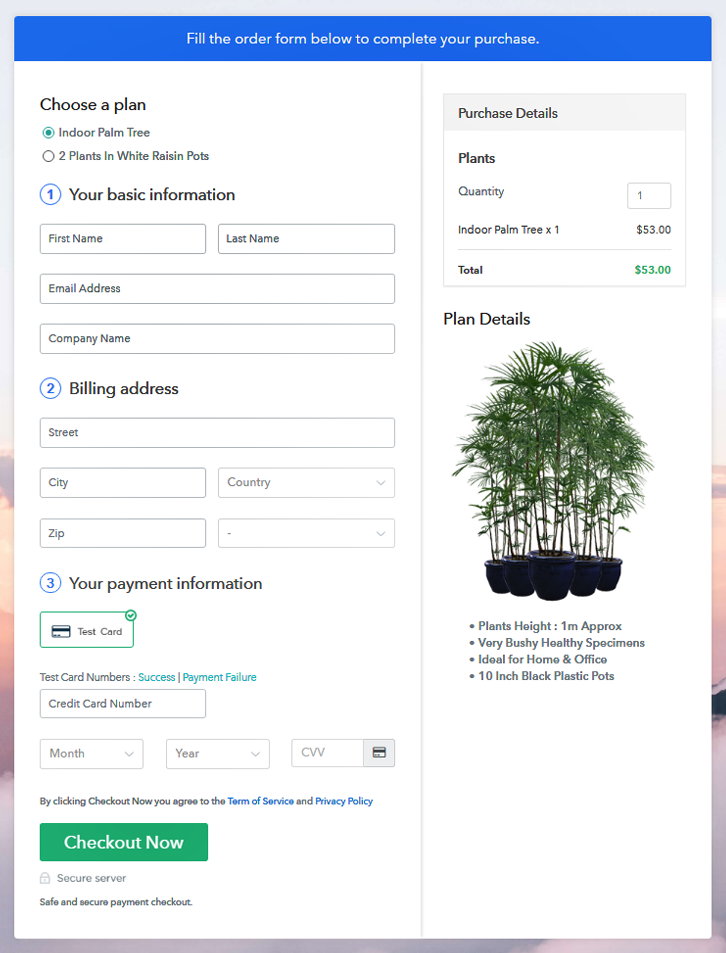
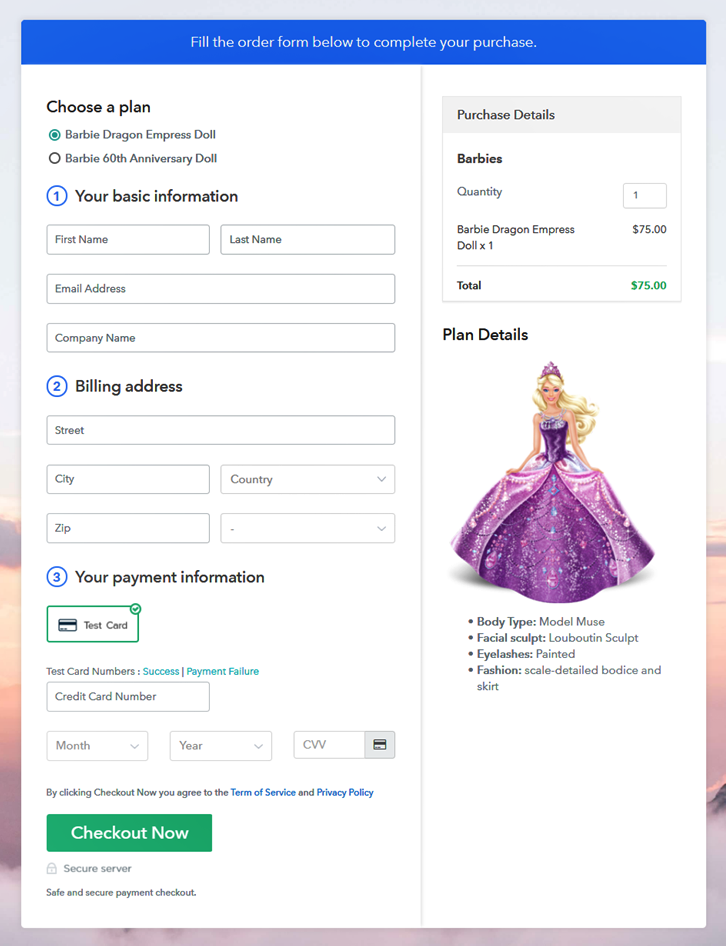
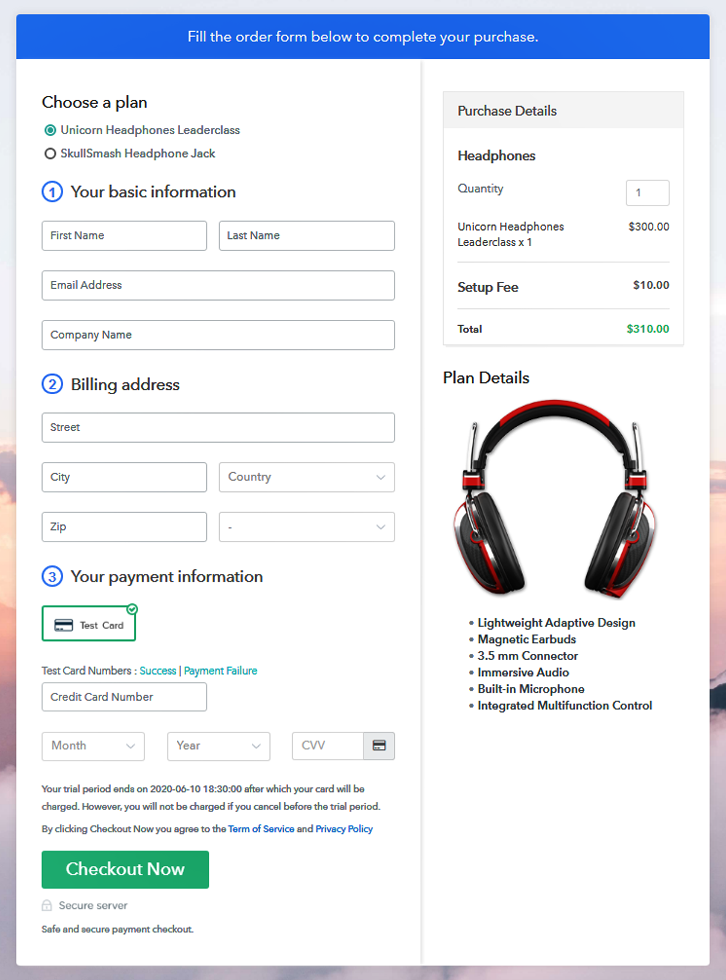
(c) Take a Look at the Checkout Page
Wrapping Up
You May Also Like To Read –