Ideal For: All digital art studios, logo makers, digital artists and other merchants can use this method to sell logos online.

Why Choose this Method for Selling Over any Other Solution?
Unlike any other solution, this method allows you to:
- List and sell your logos for FREE. Absolutely no payment required.
- No commission deducted on sales.
- Collect payment through multiple payment modes from a single checkout page.
- Sell one time or recurring subscriptions of your logos.
- Sell and collect payment in any currency as per your requirement.
- Give discounts on your products by offering special coupon codes.
- Add sales commission agents to help you in selling your logos.
On a product package, the very first thing that captures visitors’ attention is the company’s logo. As a matter of fact, the ever-increasing number of companies are demanding premium custom logos for their service. That is why, as a digital artist, you are tinkering with the idea of start selling logos online.
Why would you like to sell logos online?
Ever heard of a popular phrase ‘What is seen is sold’. Your logos may be stunning, looks highly professional yet no one is buying it. That is because no one is seeing your product. Now the best approach is you start selling your logos online. Obviously duh!! That is why you are here. But the question is, what is the best possible way?
Well, you can always approach professional channels that display and sells logos. However, the problem with these third party online websites are they charge a minimum of 40% of your revenue. That is outrageous, obviously, you are not going pay this exorbitant amount as commission. So, let us go for the better yet cheaper approach.
There is an online tool called Pabbly Subscription Billing that can list unlimited products without charging any excess commission. Other important feature includes:
- List unlimited, products, and plans
- Get unlimited revenues from different billing models like single, recurring, etc
- Track payments and revenue
- Receive automatic email alerts in case of payment failure/completion
- The system automatically reattempts credit card in 3,5,7 days after the decline.
Since you all are fired up, let us help you to set up the online store to start selling logos online.
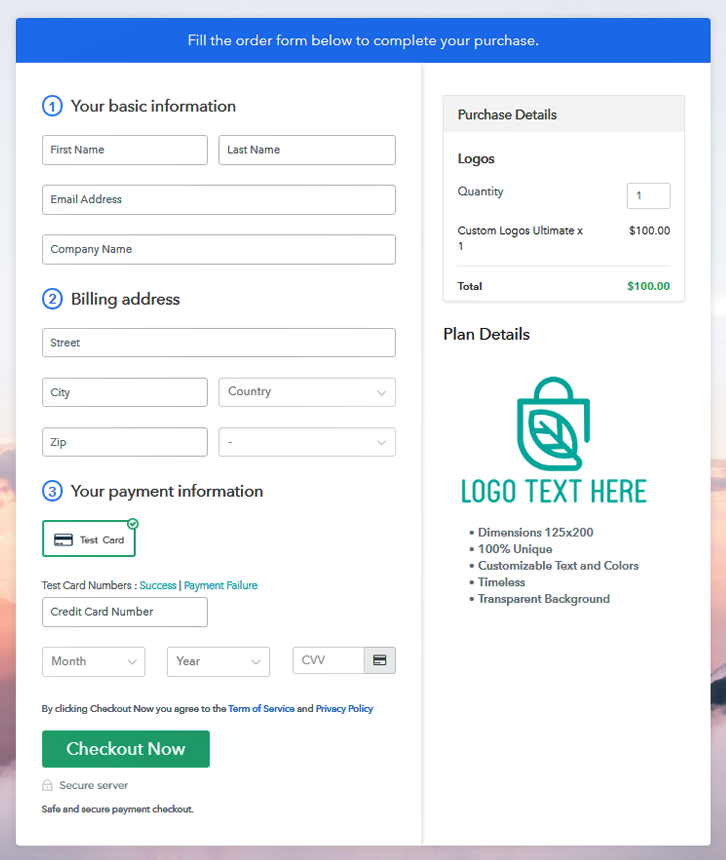
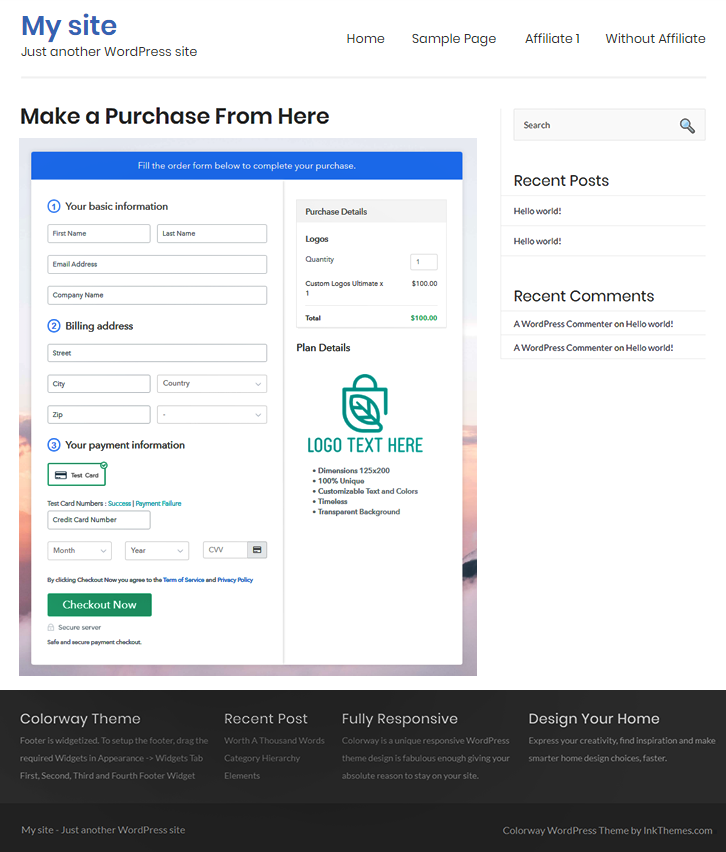
This is How your Checkout Page will Look Like After Creation

Step 1: Log in to Pabbly Subscription Billing

Search in Google for Pabbly Subscription Billing and on their website click on the button “Sign up Free“. Here simply sign in through your, Gmail account or you can fill in the blanks like name, email address and then press the “Sign Up” button.
Sign Up For Free!
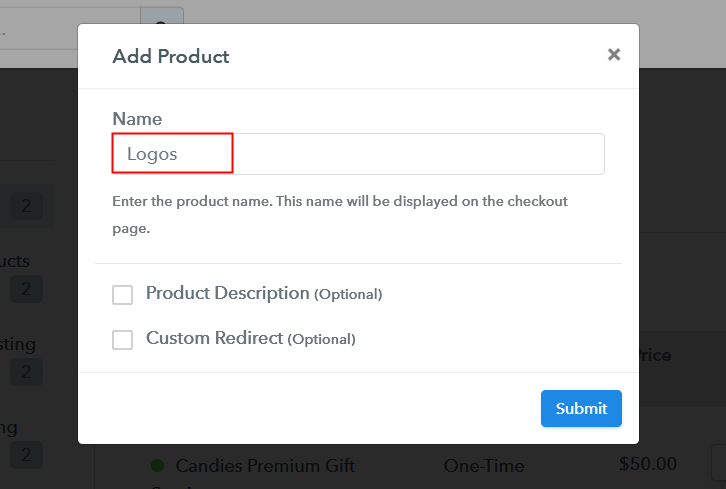
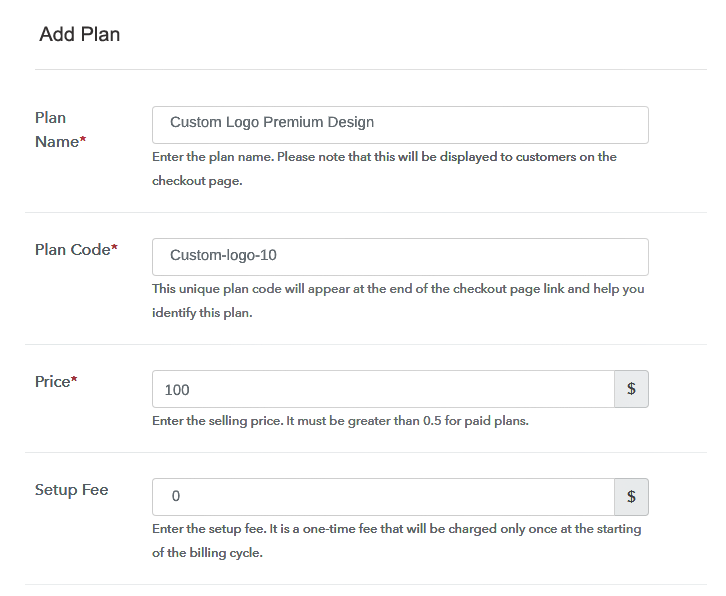
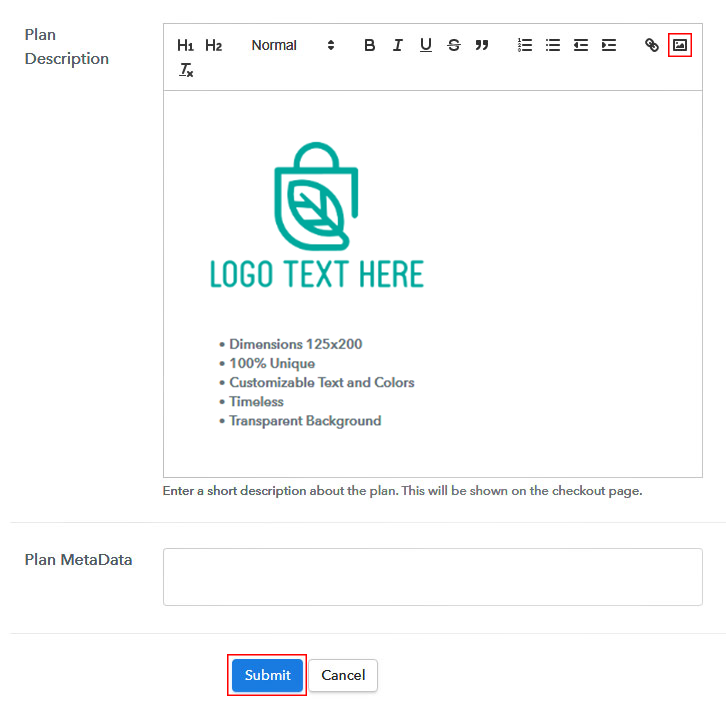
Now that you have entered into the dashboard, click on the “Access Now” button on the Subscription Billing option. Here a dialog box will open up that mandates you to fill the company details like name, currency, and phone number. After filing in the details press the “Continue” button to complete the process. Now, since customers have limited patience and won’t tolerate any inconveniences during payments, therefore you need to ensure that they enjoy a seamless payment process. This can be done using a dummy payment gateway in Pabbly Subscription Billing, where you can pilot test the whole payment experience before giving it to your customers. Here, with Pabbly Subscription Billing, you can integrate with a ton of payment gateways like Razorpay, PayPal, Authorize.net, etc. With the help of the articles mentioned below, you can easily integrate with your preferred ones. But I am going ahead, by enabling the test payment option to continue the process. Excellent, now that you have integrated your payment gateway, let’s move on to add products. Here at the section below the “Enable Payments” click on “Add your product”. This will redirect you a dialog box with a blue button “Add New Product”. Click it. Another pop-up box emerges and here fill the required product information like logos then provide a small description, and redirect to a particular website by ticking on the checkboxes. Fill up the details and your product is created. Note: Here you can add all the products related to the similar category by creating plans for each of them. Now, we are going to create plans for selling logos online, directly from your desktop. Later, you will reach the plan page, here you have to fill in details like plan name, code, price, setup fees. Scrolling down to the section below, here you can see the choice to change the billing models like one-time payment, recurring, etc. Here click on the preferred revenue model and yes, you can change it any time. Upload the logo, using the image option (red box). Now after inserting the image, provide comprehensive details of the logo preferably in bullets points, background, customizable texts, colors, etc. After describing the product details press the “Submit” button. Likewise, following the same method, you can add multiple products, one at a time. Follow up these steps to preview checkout page: Now, copy the embed plan link to insert the checkout page on your WordPress website. Now, when the link is copied, then paste it to the text area of the editor. After pasting the code, now hit the ‘Publish’ button. Your checkout page is embedded. Note: In case you want to sell multiple products via a single checkout page, you can create a multi-plan checkout page otherwise skip this step. This is a very easy and cheap method to start selling logos online. Now the advantage of using Pabbly Subscriptions Billing over other platforms includes higher currency standards, brand awareness through Whatsapp, no commissions etc. Now, since you are a beginner, these steps might be a bit overwhelming for you. But relax, you got us. If you have any queries, just give us a comment in the section below. We will answer at the earliest.Step 2: Select Subscription Billing

Step 3: Account Setup

Step 4: Connect Payment Gateways To Sell Logos Online

Step 5: Add Your Product

Step 6: Add Plans
(a) Select Add New Plan

(b) Specify the Plan & Pricing Details
(c) Add Image & Description
Step 7: Share your Checkout Page

Step 8: Preview Checkout Page
(a) Click on the View Button

(b) Take a Look at the Checkout Page
Step 9: Embed Checkout Page in Site & Sell Logos Online

(a) Edit the Page & Paste the Copied Link

(b) Save & Publish the Checkout Page

(c) Check out the Final Look of your Checkout Page on WordPress Site
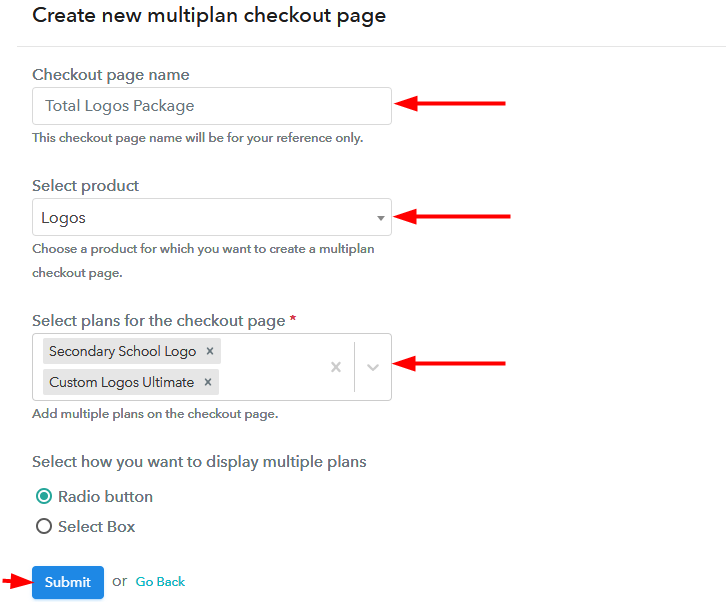
Step 10: Multiplan Checkout Page
(a) Click on Add Mutiplan Checkout

(b) Add Plans to Sell Logos Online from Single Checkout Page
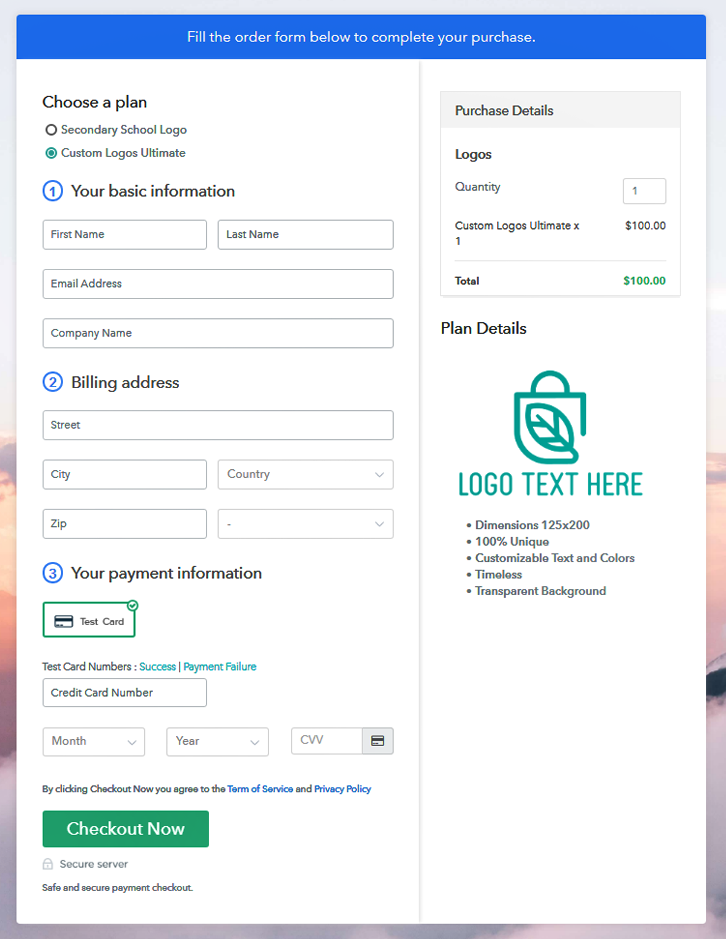
(c) Take a Look at the Checkout Page
Wrapping Up
You May Also Like To Read –


