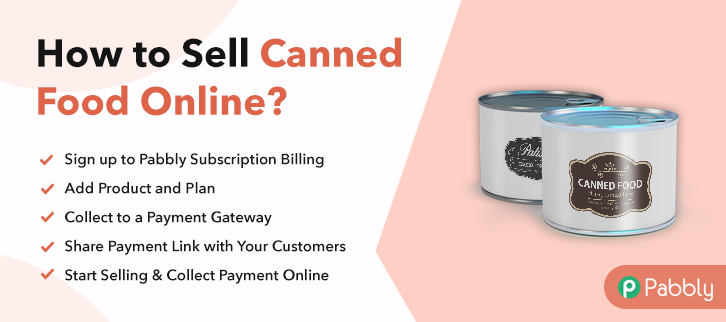
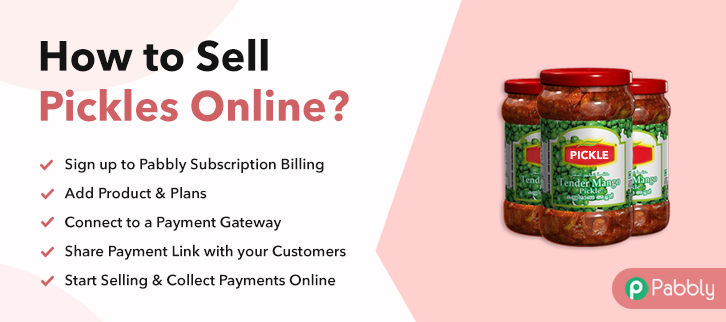
Ideal For: All wholesale pickles buyers, homemade pickle manufacturers, pickle suppliers, grocery & gourmet food sellers, and other merchants can use this method to start selling pickles online.
Why Choose this Method for Selling Over any Other Solution?
Unlike any other solution, this method allows you to:
- List and sell your pickles for FREE. Absolutely no payment required.
- No commission on sales.
- Collect payment through multiple payment modes from a single checkout page.
- Sell one time or recurring subscriptions of your pickles.
- Sell and collect payment in any currency as per your requirement.
- Give discounts on your products by offering special coupon codes.
- Add sales commission agents to help you in selling pickles online.
If you have always enjoyed vegetables or are enamored of gourmet pickles, then think about starting your own pickles business. Pickle is a trendy food and has a unique taste, which enhances the taste of any food, no matter how tasteless it is. Selling homemade pickles online is one of the best ways to reach out to thousands of food-lovers, no matter where you are based out of.
Why would you like to sell pickles online?
As time passes technology is evolving and online marketing gives you an opportunity to start your home-based business of selling food items. Therefore, if you are skilled at cooking, you can also turn your hobby of making pickles into a profitable online business. But when we think of starting a business, the first question that arises in everyone’s mind is from where and how to start a business.
So, here is a solution, which can help you in selling pickles online within just clicks. All you need to do is create a checkout page to sell pickles and share their links on social media or your website so that consumers can buy it directly through links. And all you have to do with the help of Pabbly Subscription Billing Software. With this, you can sell unlimited products online, accept online or offline payments without charging any extra fee. Some of its advanced features are given below:
- Easily create single/multi-plan checkout pages
- Collect one-time or recurring payments
- Keep records for all your sales & products
- Offer coupons, and discounts
- Share automatic invoices with users
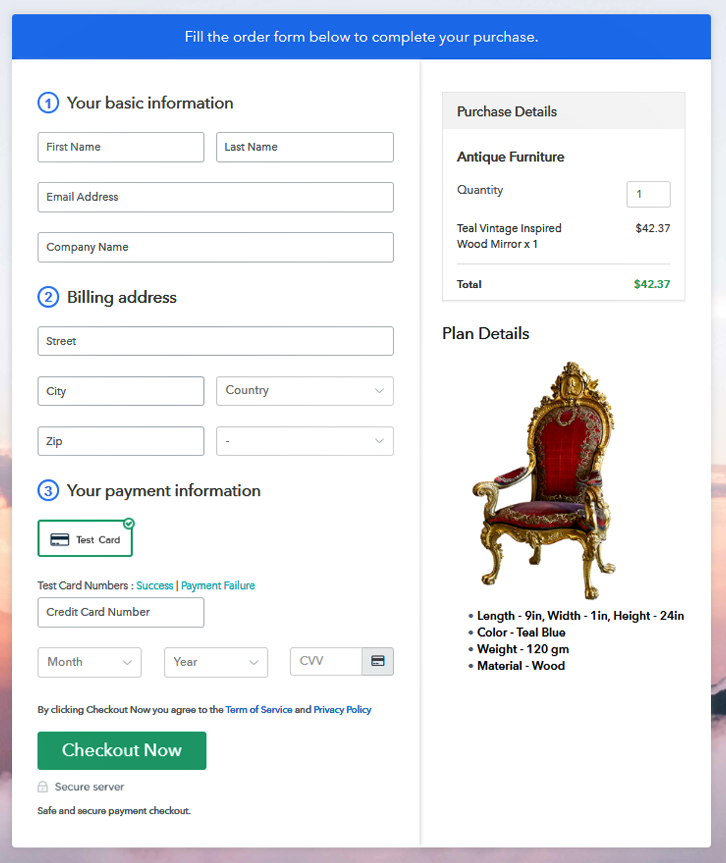
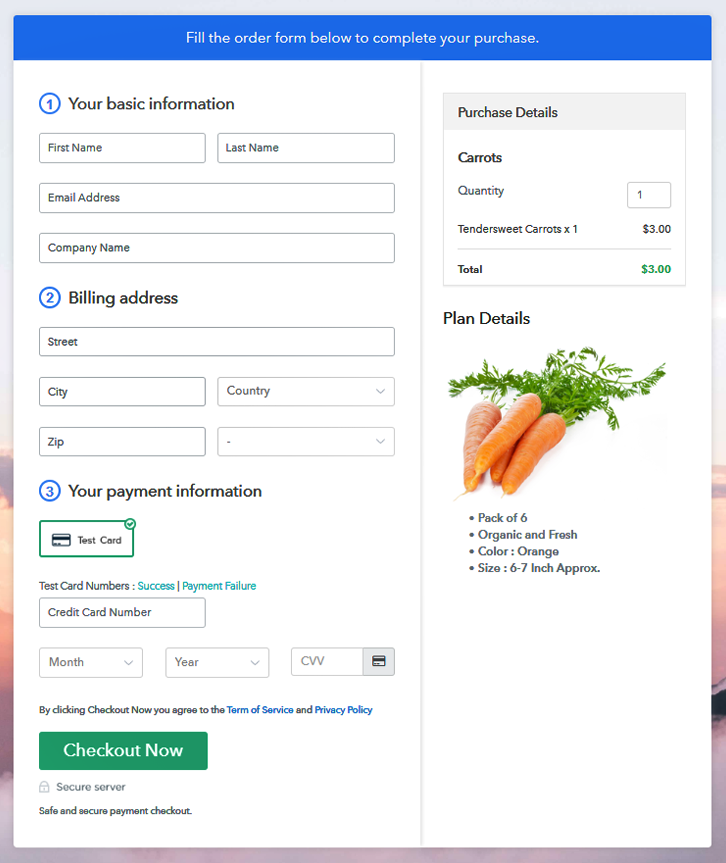
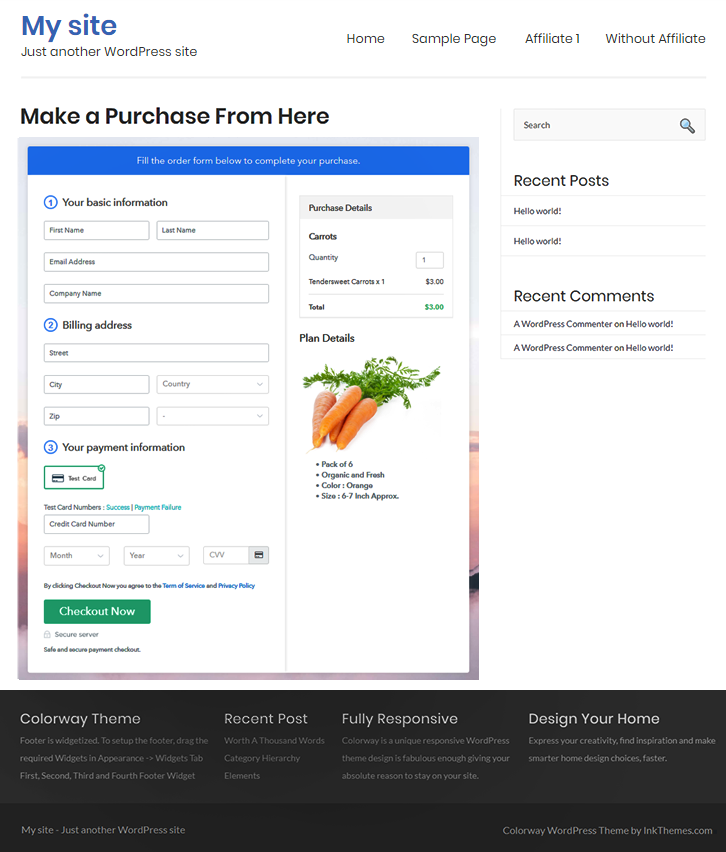
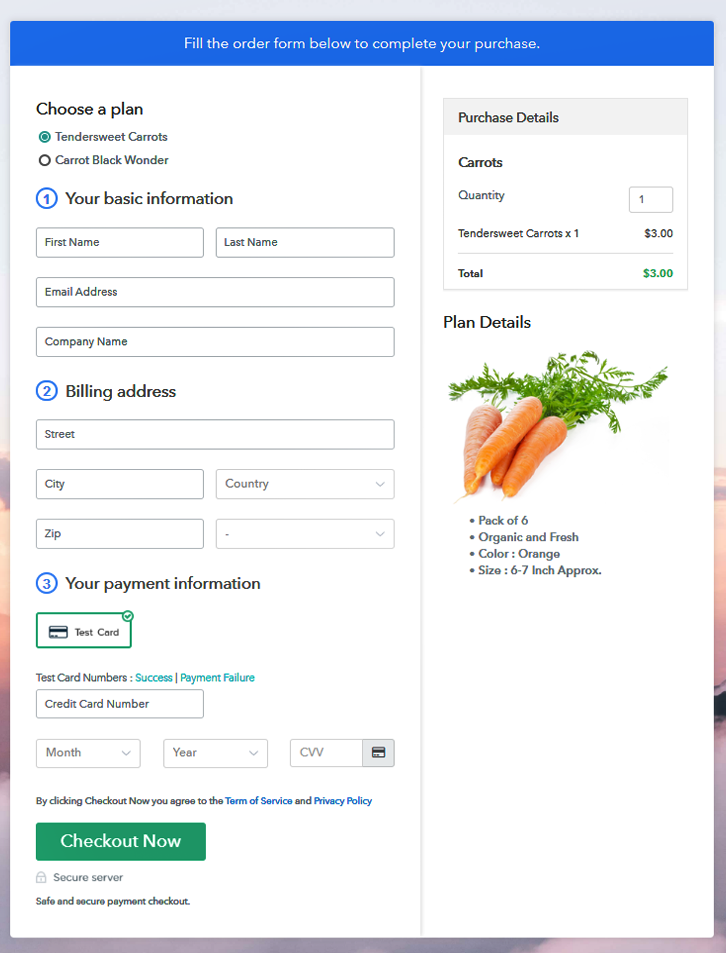
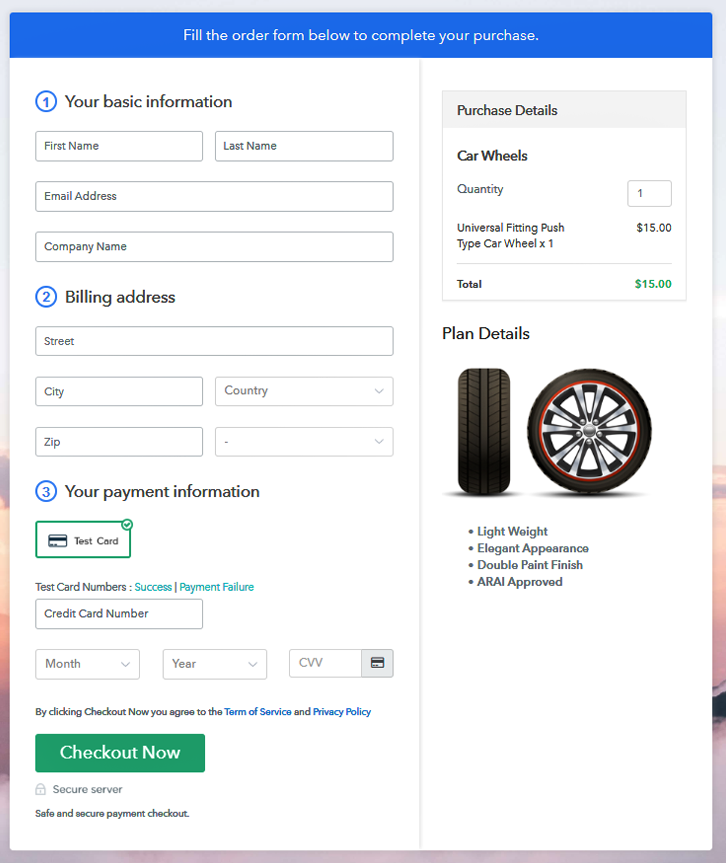
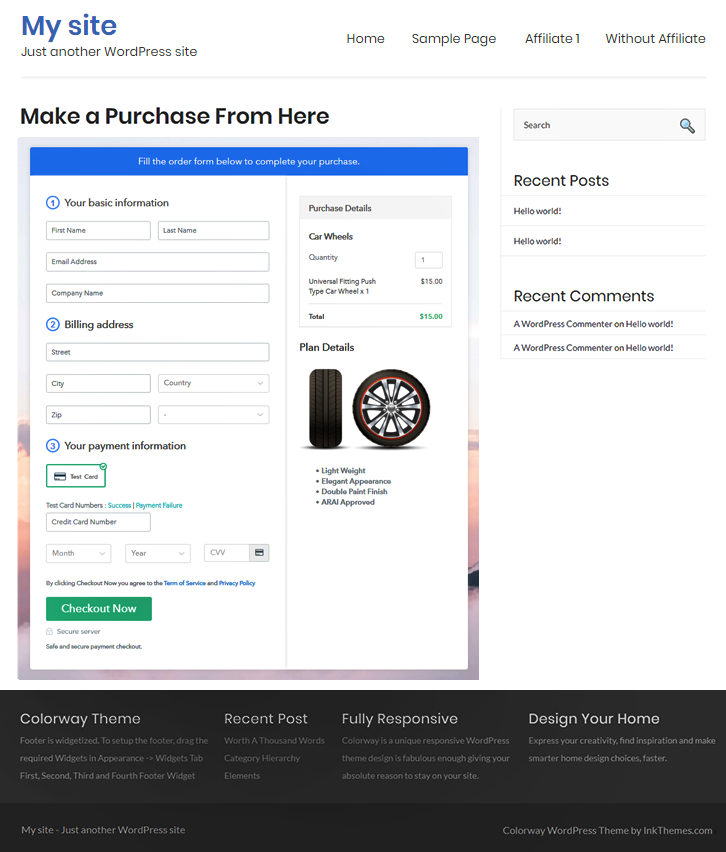
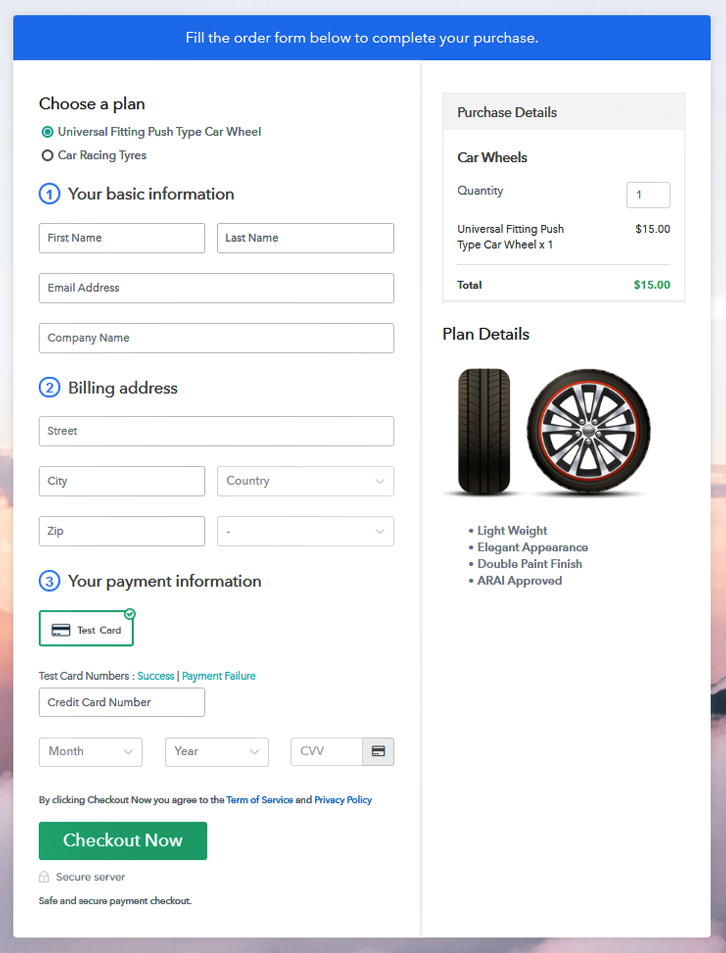
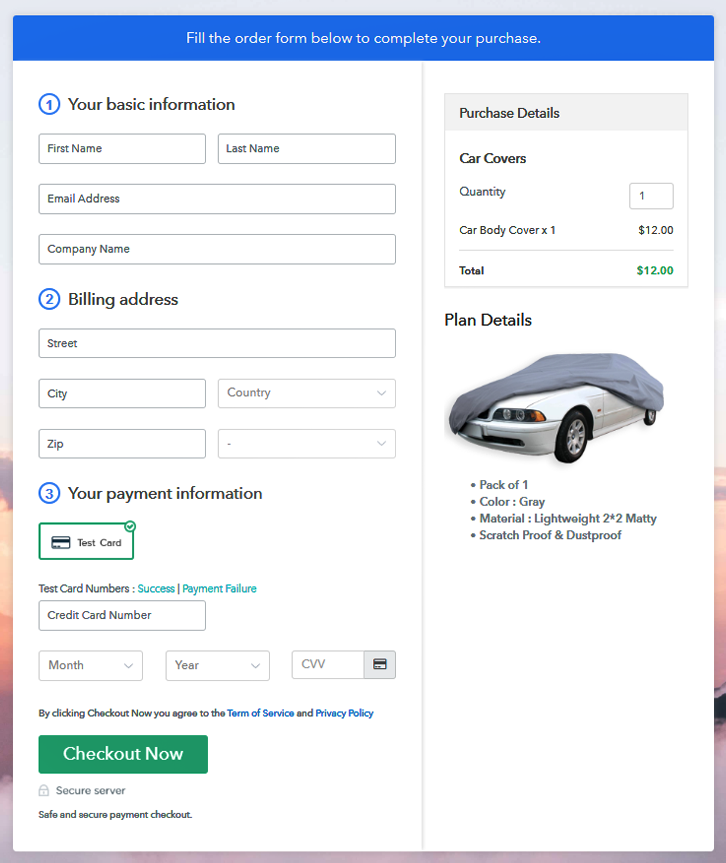
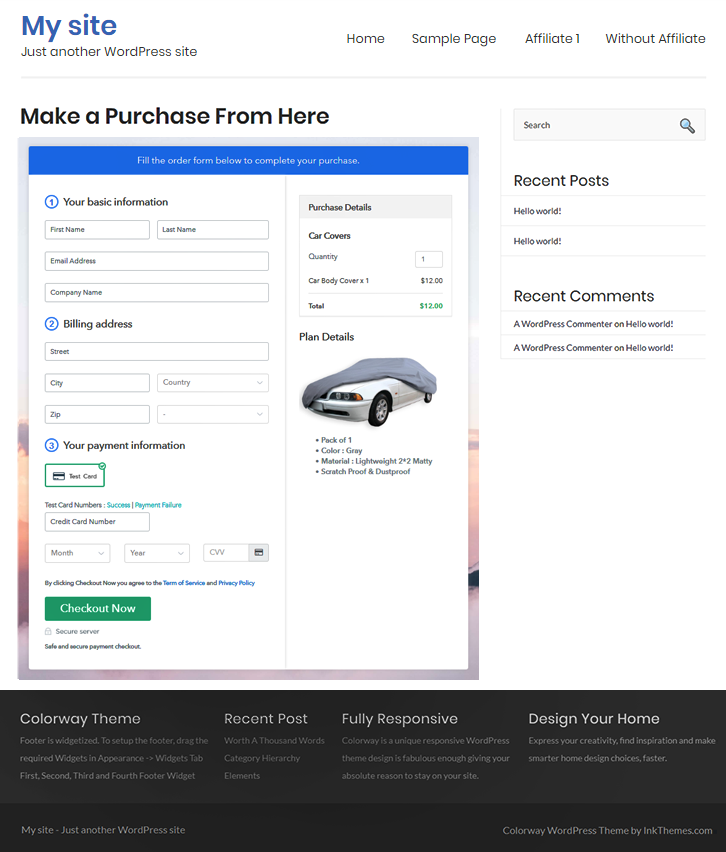
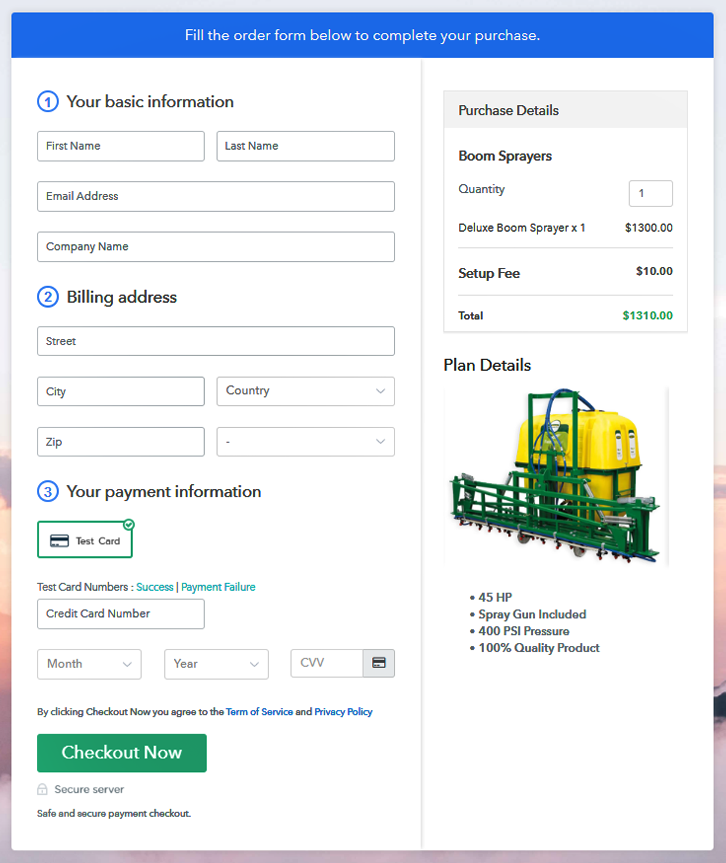
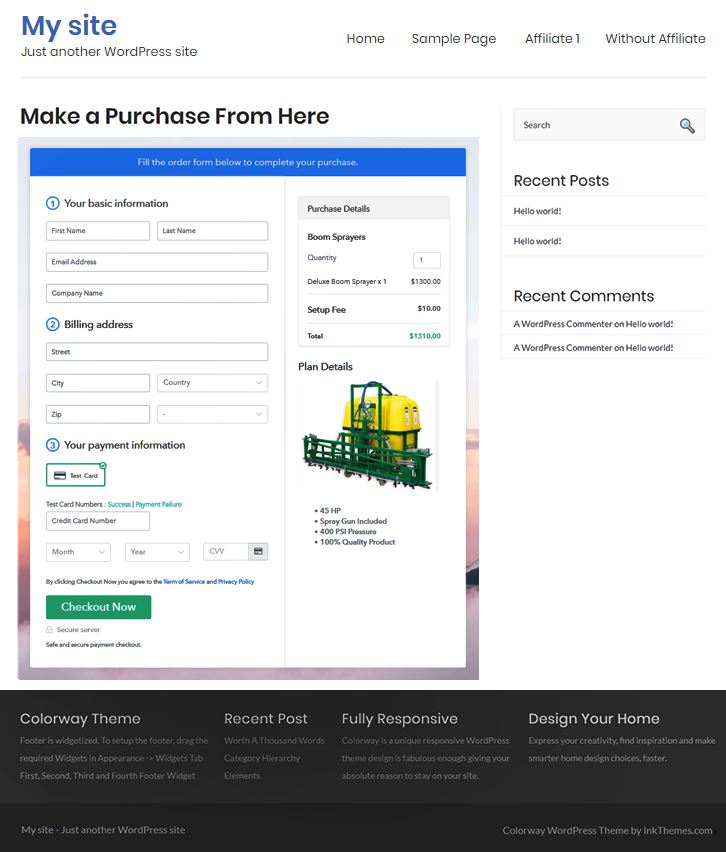
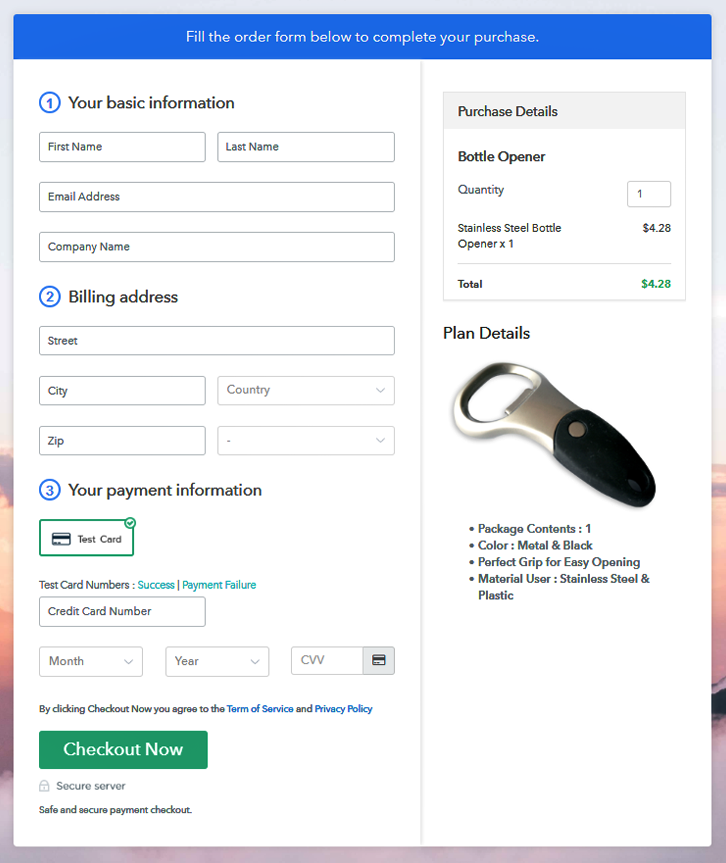
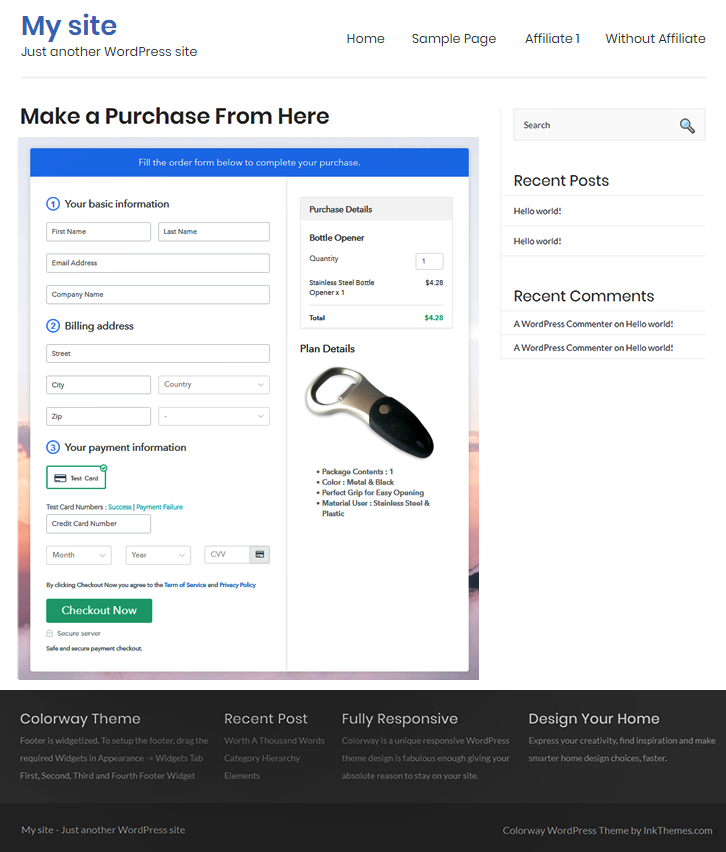
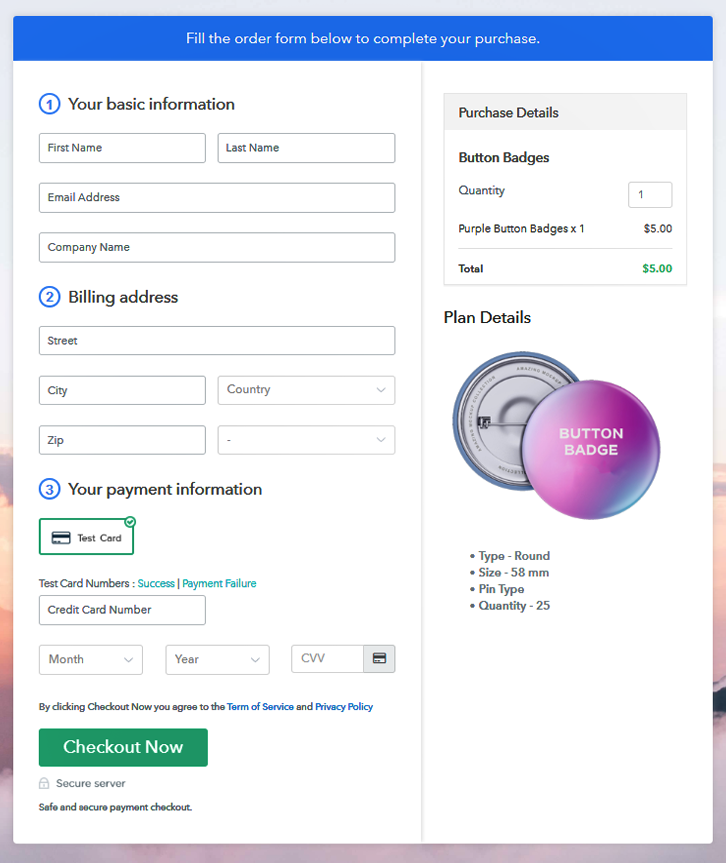
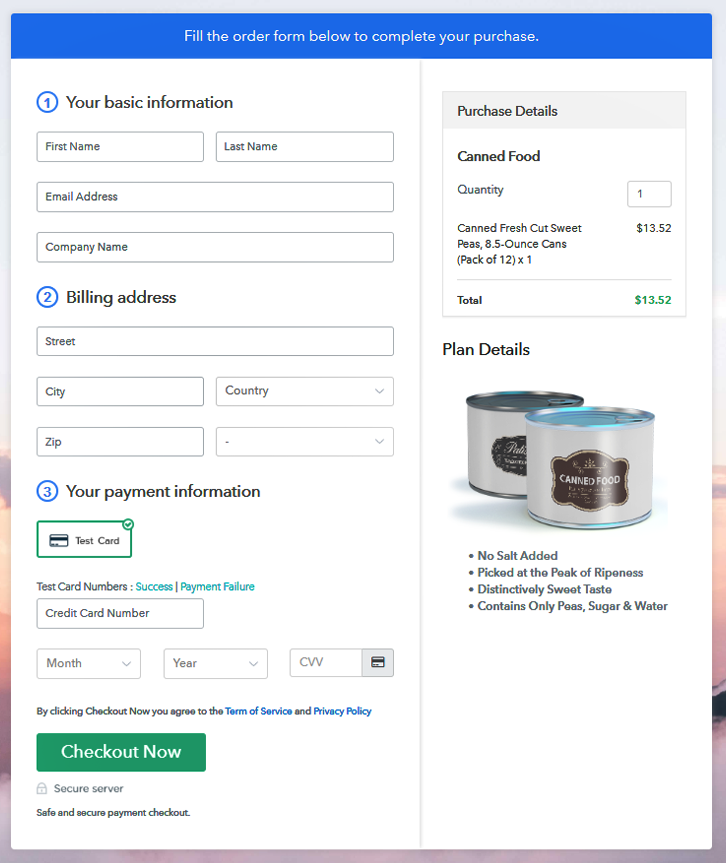
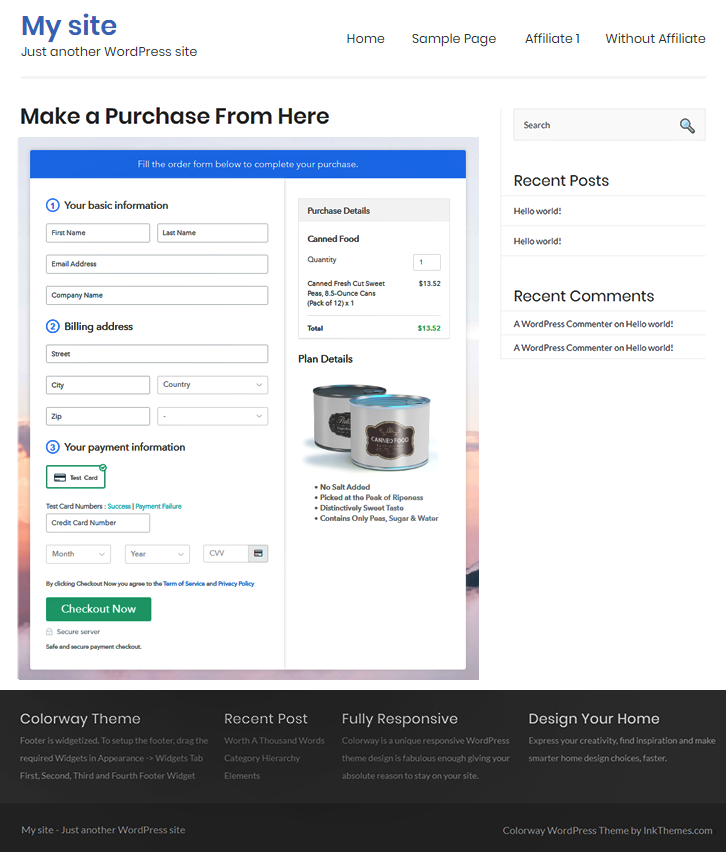
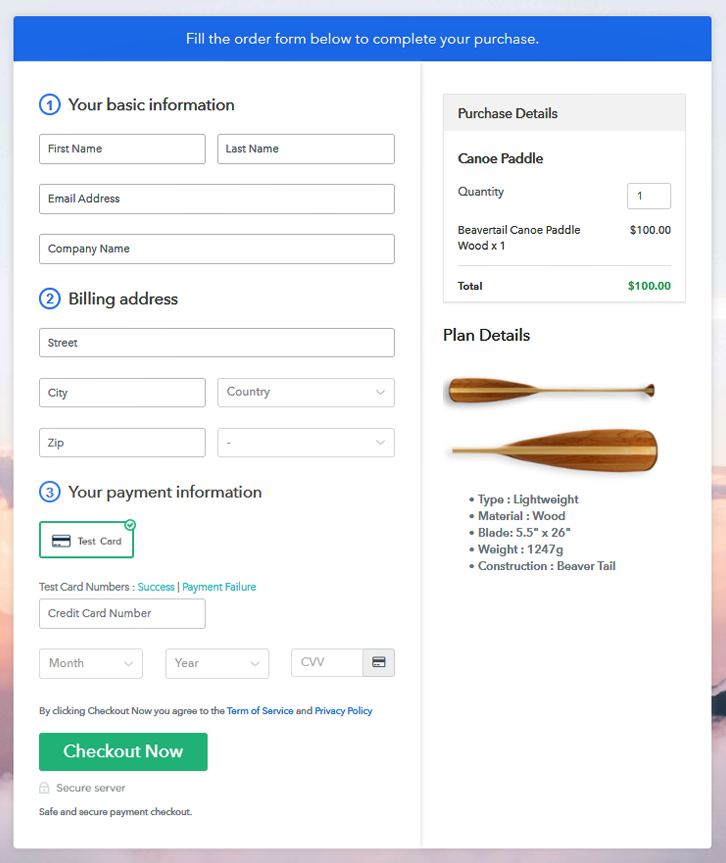
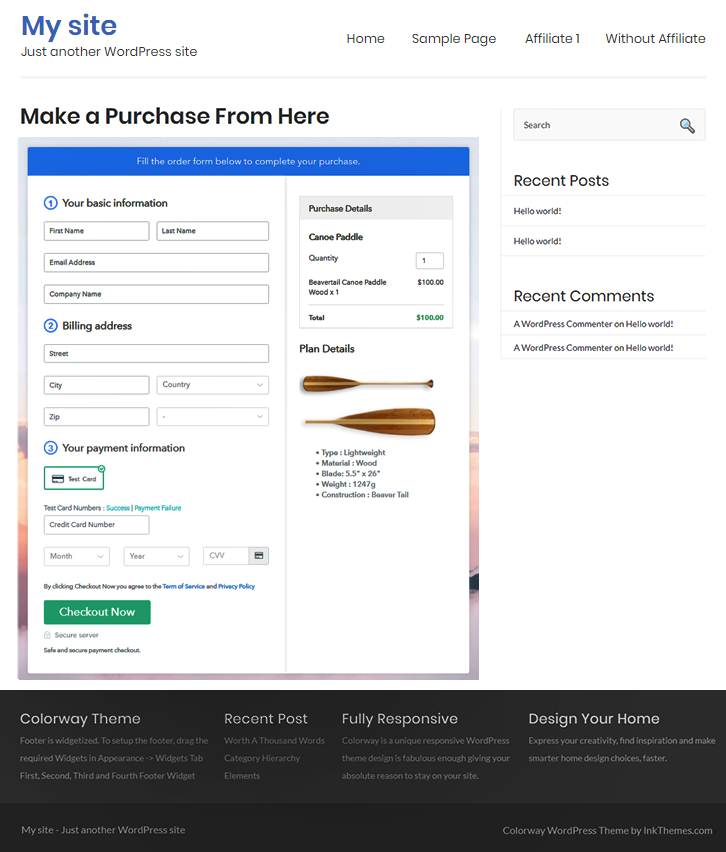
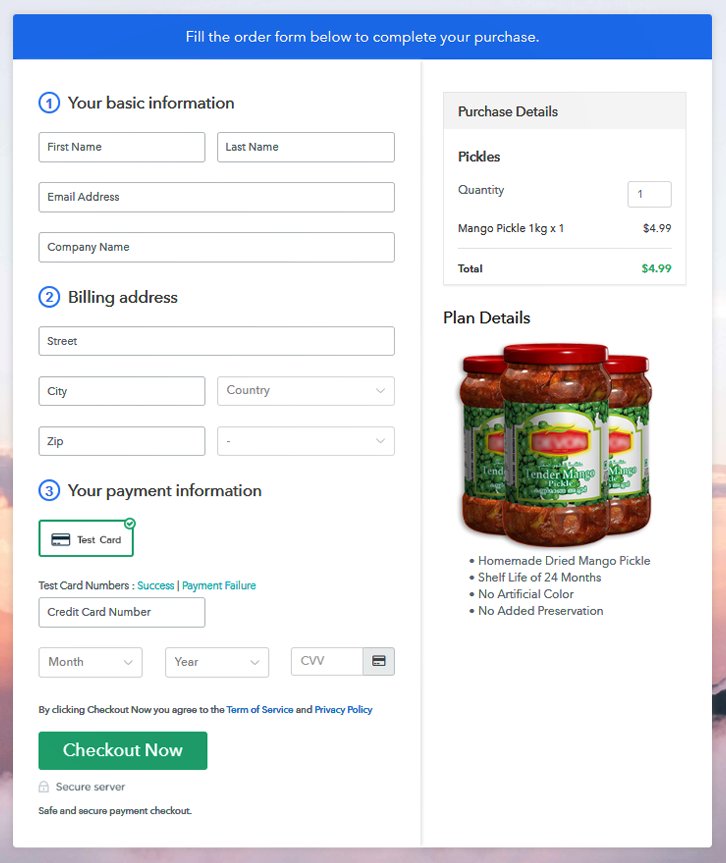
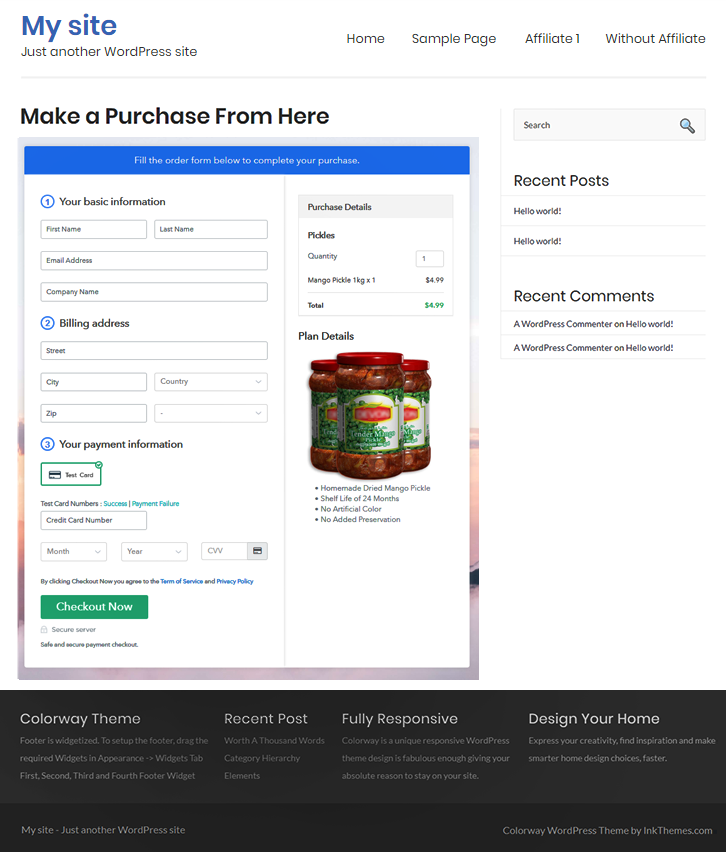
This is How your Checkout Page will Look Like After Creation
Step 1: Login to Pabbly Subscription Billing

Start creating the checkout page by visiting the Pabbly Subscription Billing website and then click on the “Sign-Up Free” button. You can sign-in to the software with your Gmail account or manually filled out the details.
Step 2: Select Subscription Billing

Step 3: Account Setup

Next, when you click on the “Access Now” button, a popup window will appear on the screen with basic information like company name, currency, and phone number.
Step 4: Connect Payment Gateway to Sell Pickles Online

After setting up your account, connect the payment gateway for collecting payments. Here, you can connect multiple payment gateways like PayPal, Stripe, Razorpay, etc., whichever you prefer. Furthermore, Pabbly Subscription Billing provides the “Enable Test Payment” button for testing the payment mode. The complete integration guide for payment gateways is provided below.
Pabbly Subscription Billing offers multiple payment gateways like PayPal, Stripe, Razorpay, Authorize.net, etc. for collecting payments. Additionally, it provides test payment gateway to learn all about the software payment procedure. Further, below we are providing the complete payment integration guides to help you out.
- PayPal integration guide
- Stripe integration guide
- Razorpay integration guide
- Authorize.net integration guide
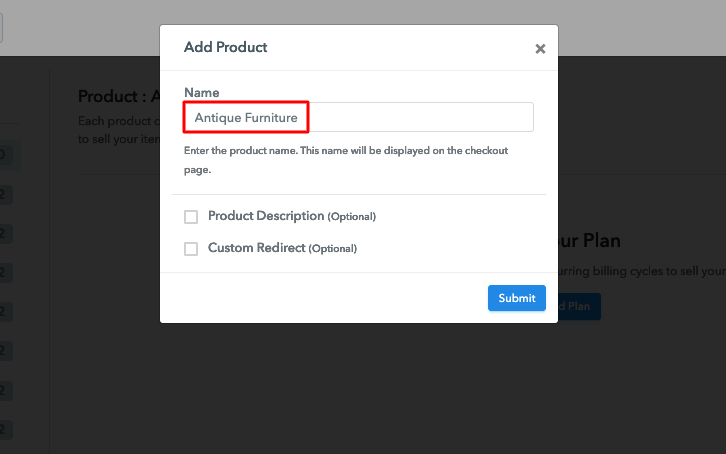
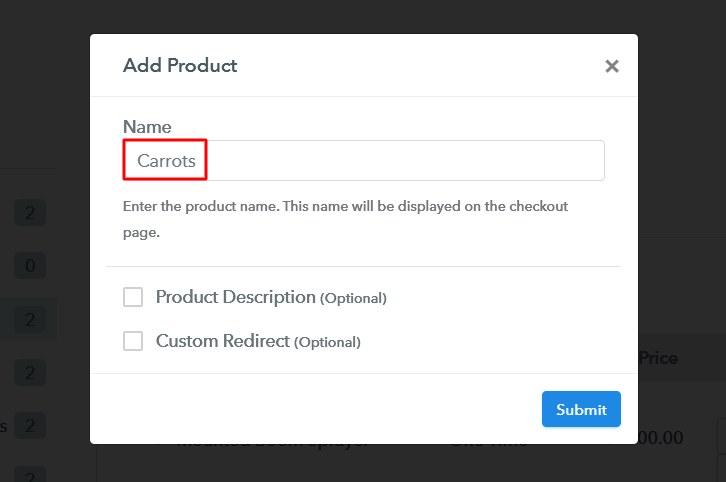
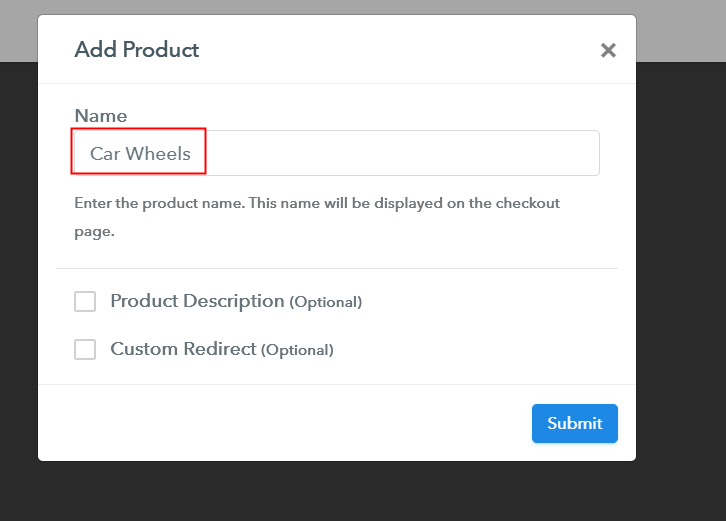
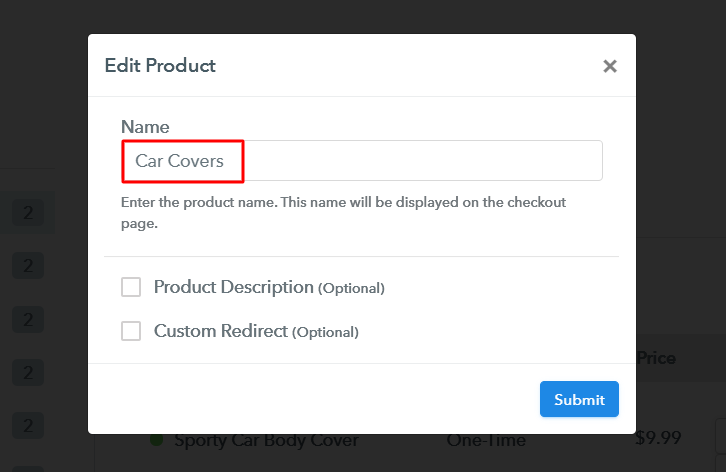
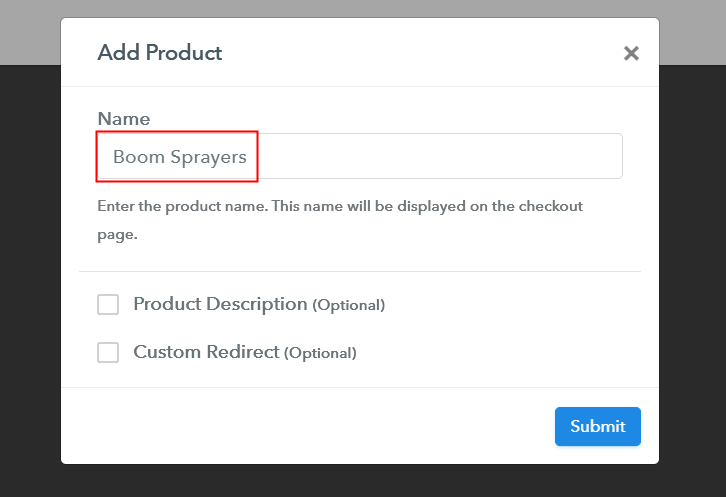
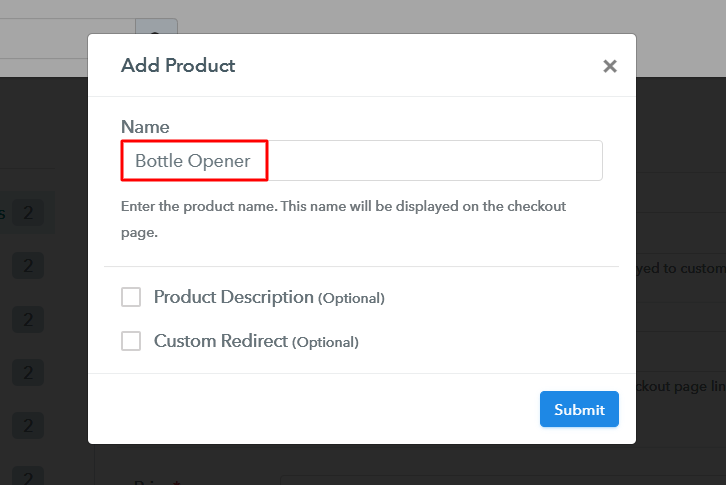
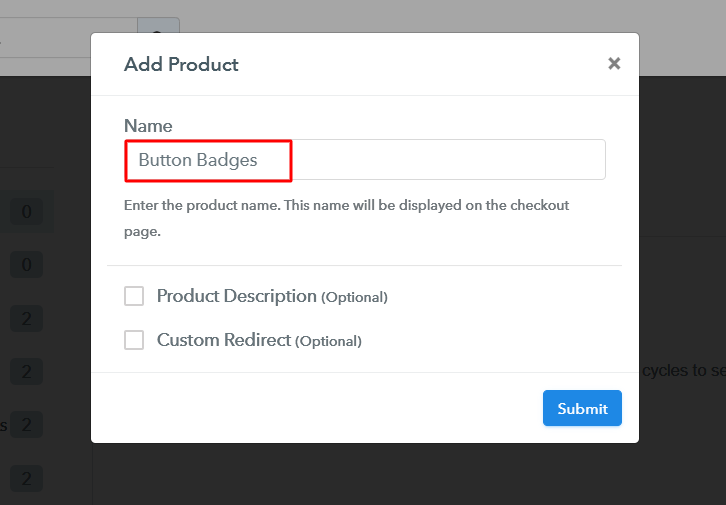
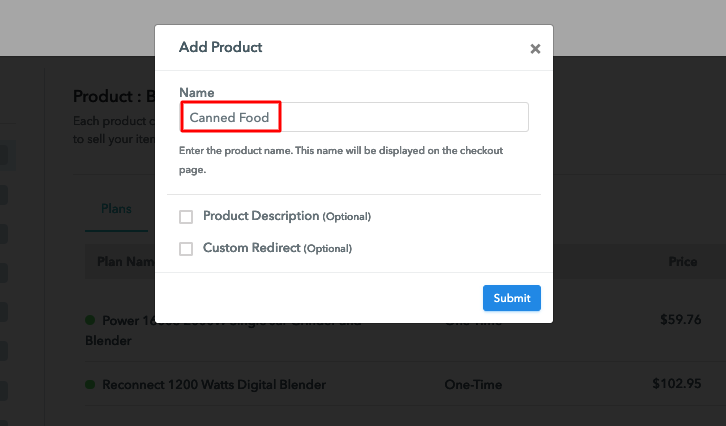
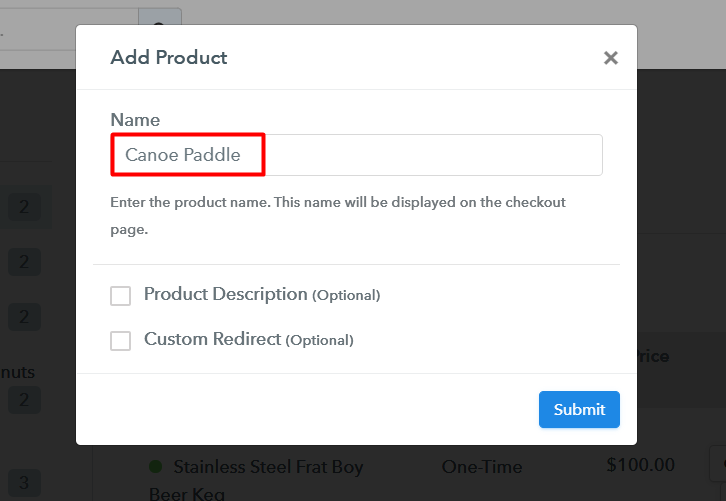
Step 5: Add Your Product
Momentarily, add the product name according to your business like mango pickle, lemon pickle, etc. Moreover, you can also write the description of the pickle and add a custom redirect link. Also, you can add multiple plans in the same product category.
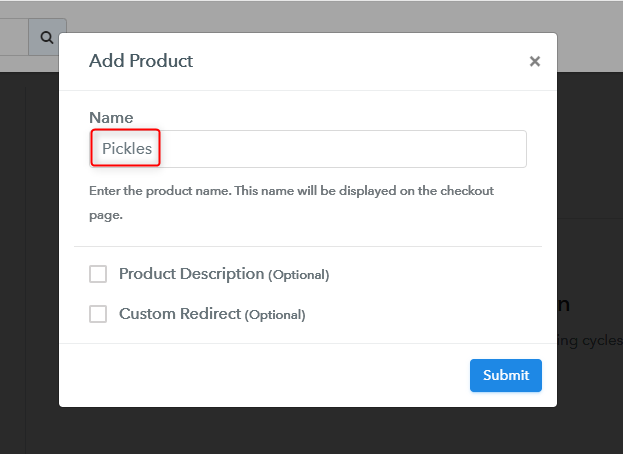
Afterward, click on the “Submit” button after filling all the details.
Note: Here you can add all the products related to the similar category by creating plans for each of them.
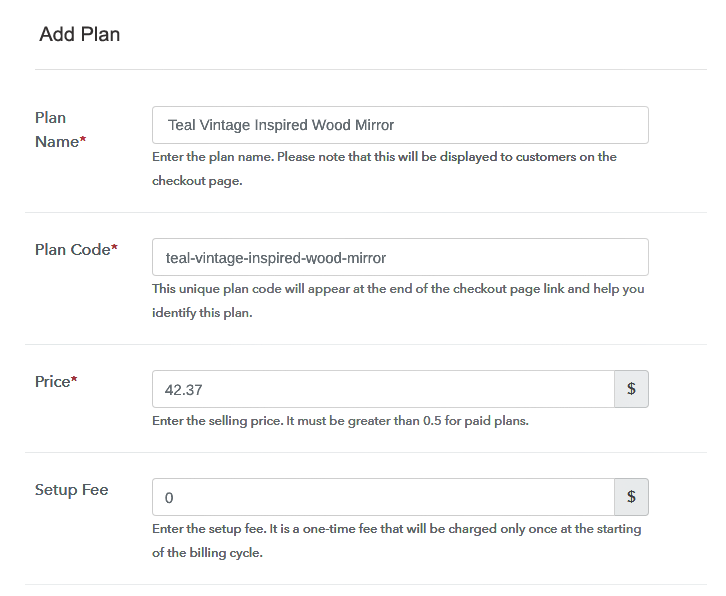
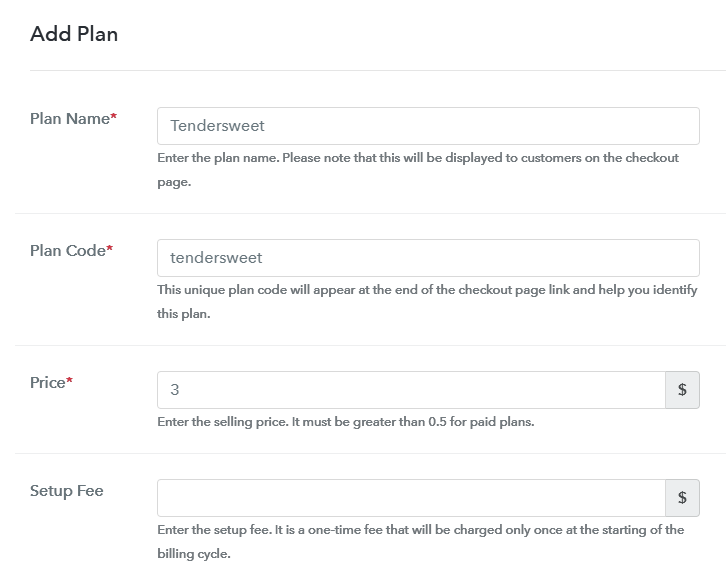
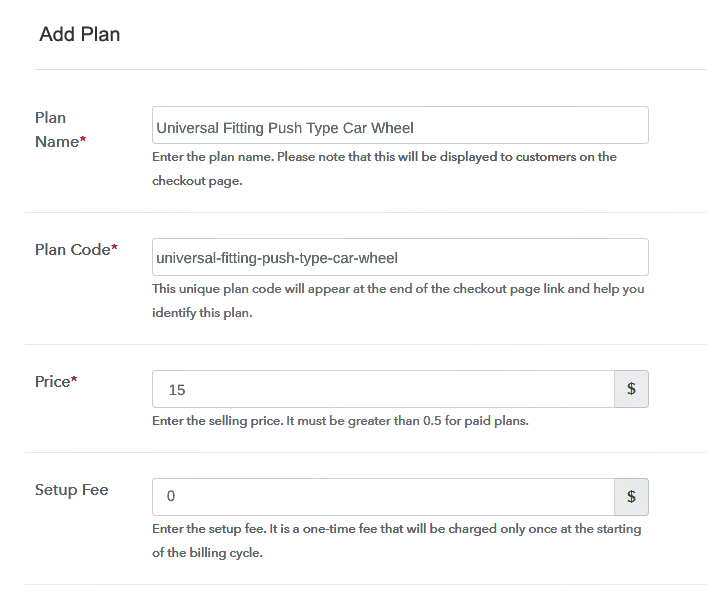
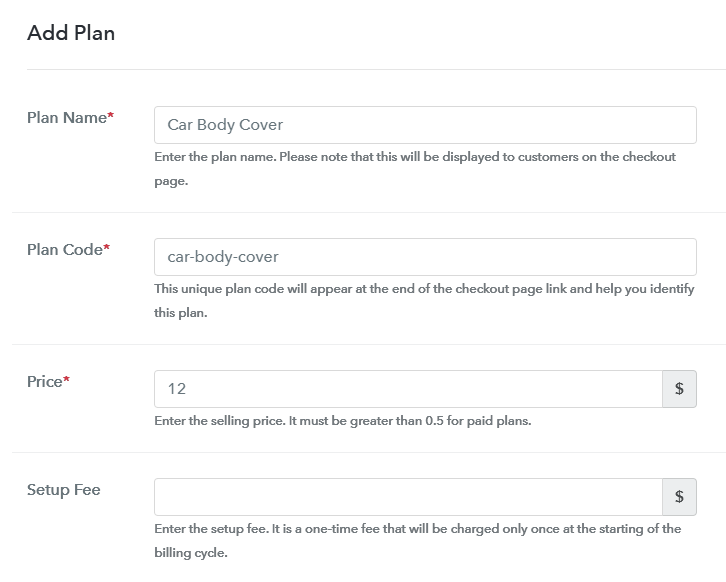
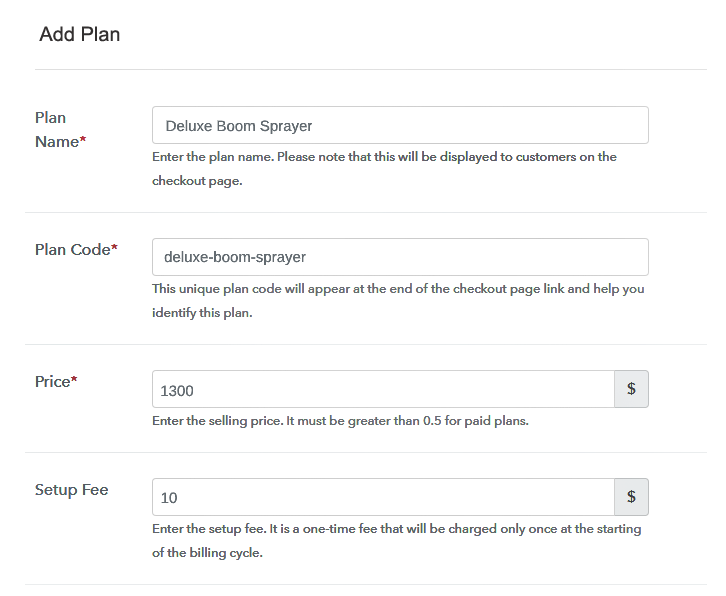
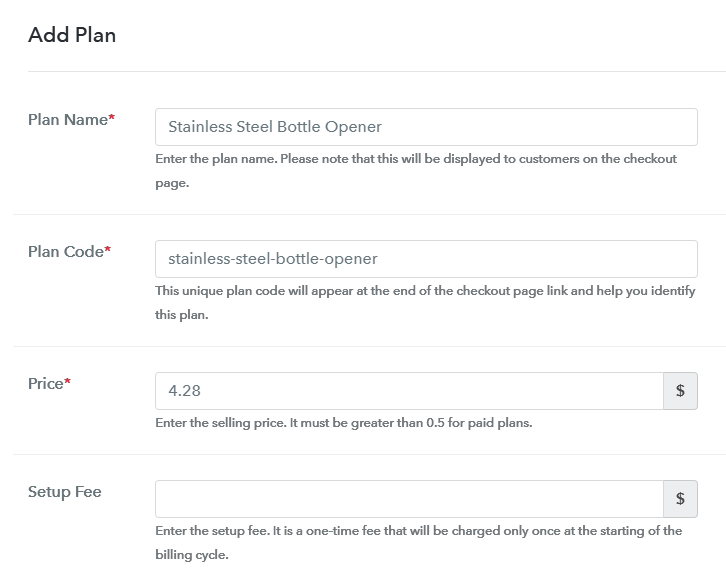
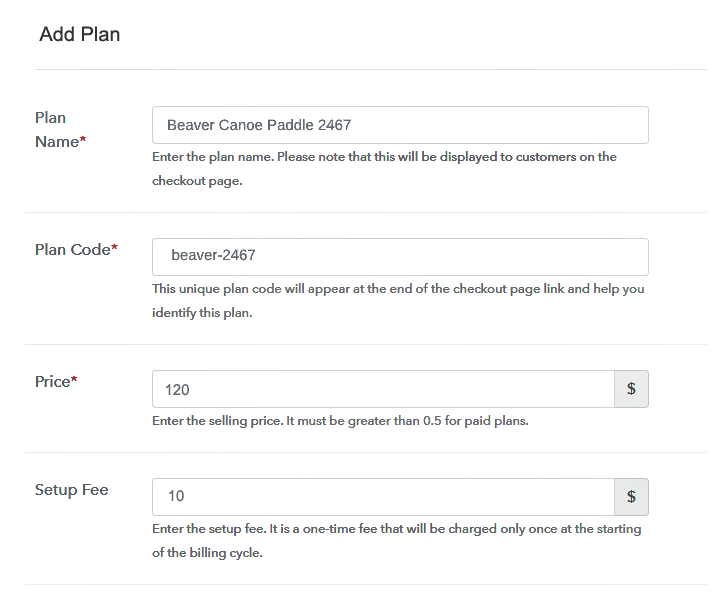
Step 6: Add Plans
Now, create various plans for all types of pickles like mango, lemon, gooseberries, etc., that you want to sell.
(a) Select Add New Plan

(b) Specify the Plan & Pricing Details
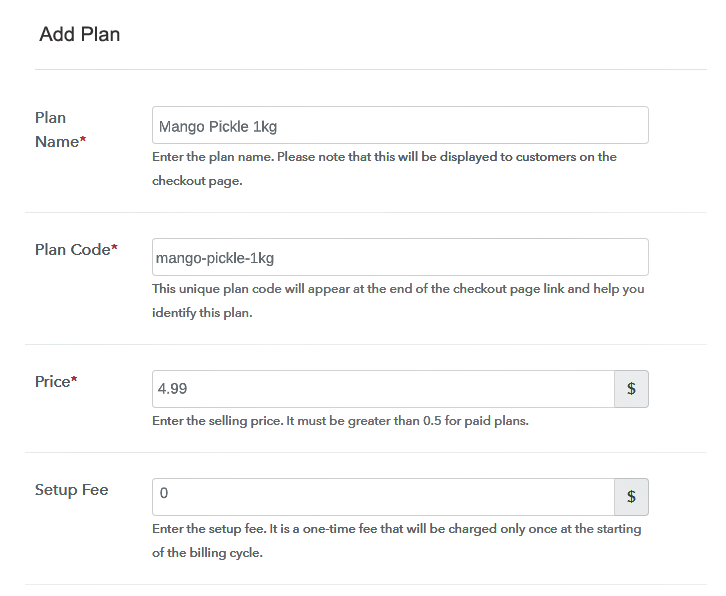
Now, specify the plan details like plan name, plan code, price, setup fee, etc., for selling pickles online.
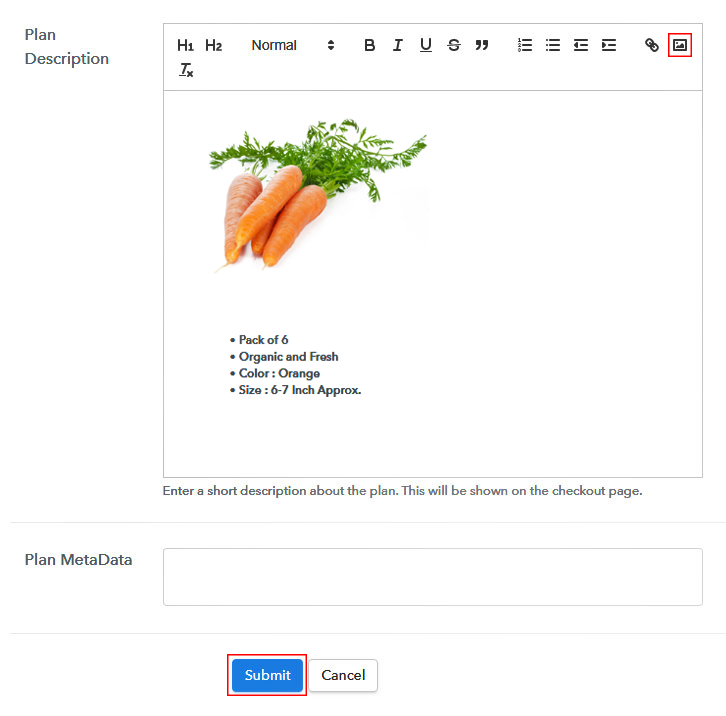
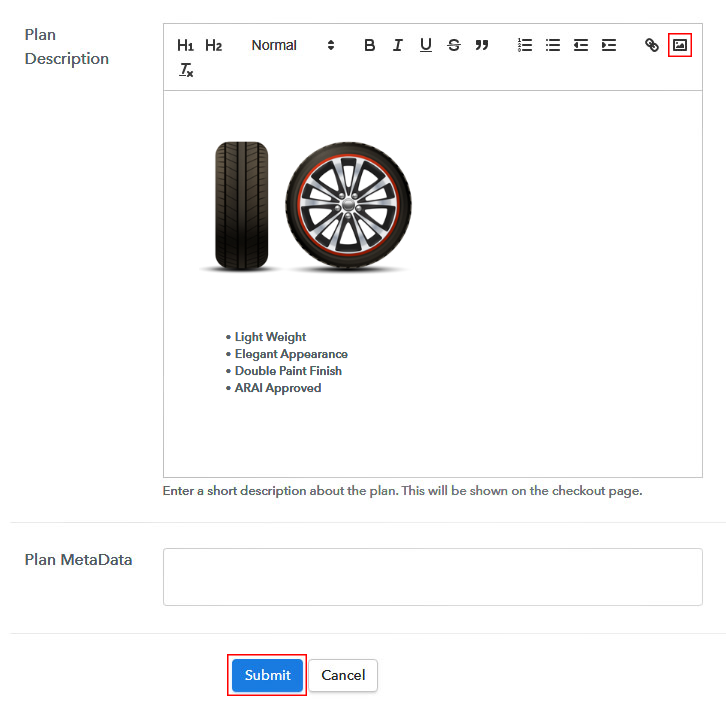
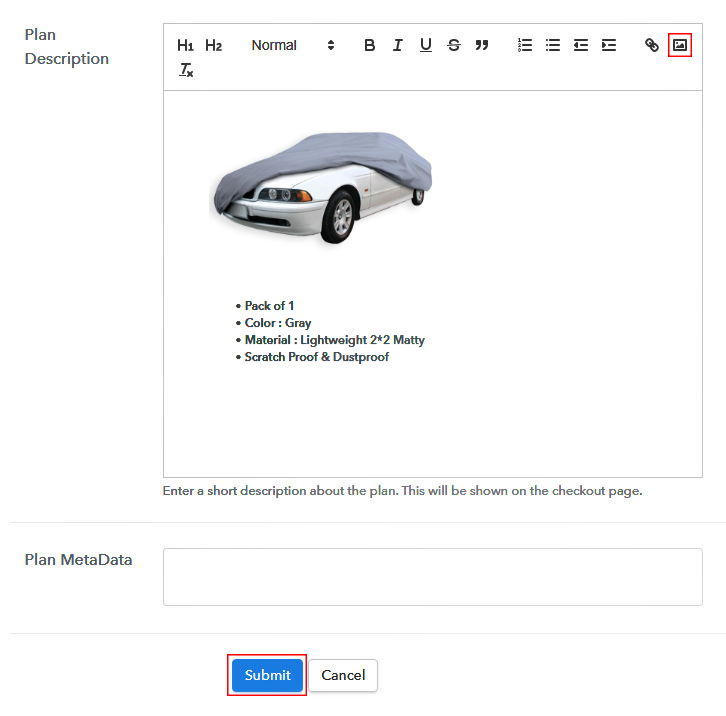
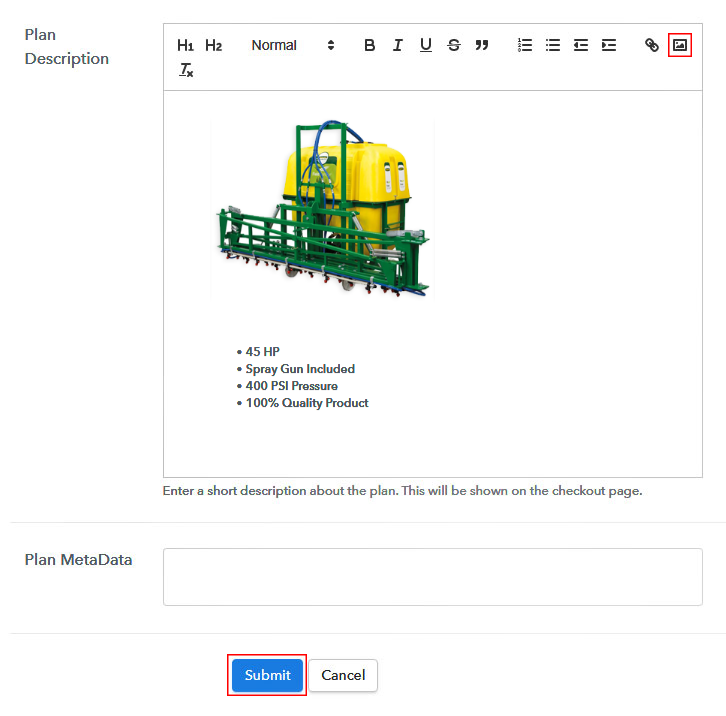
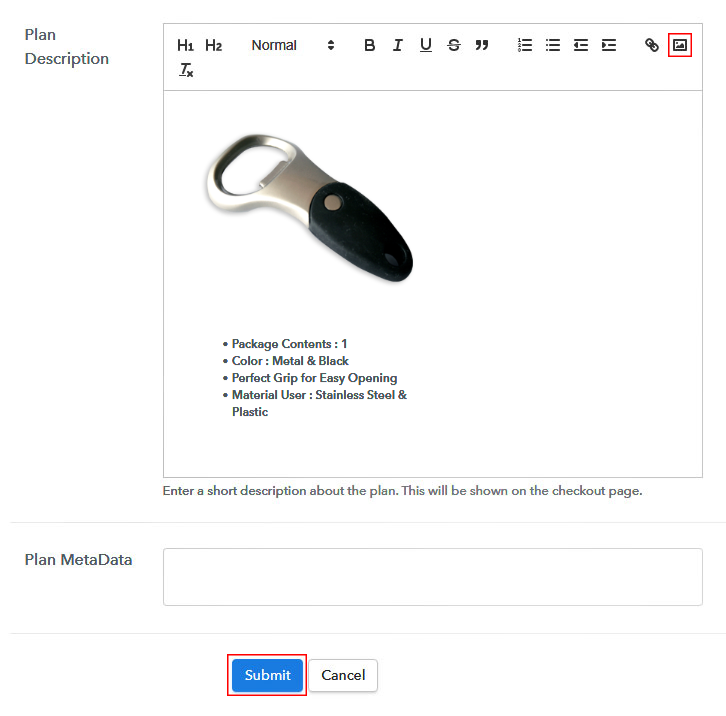
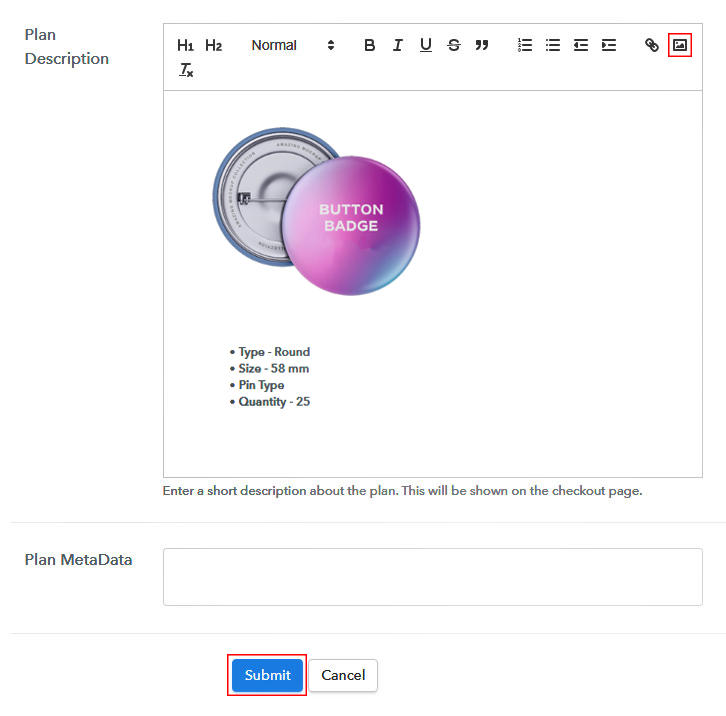
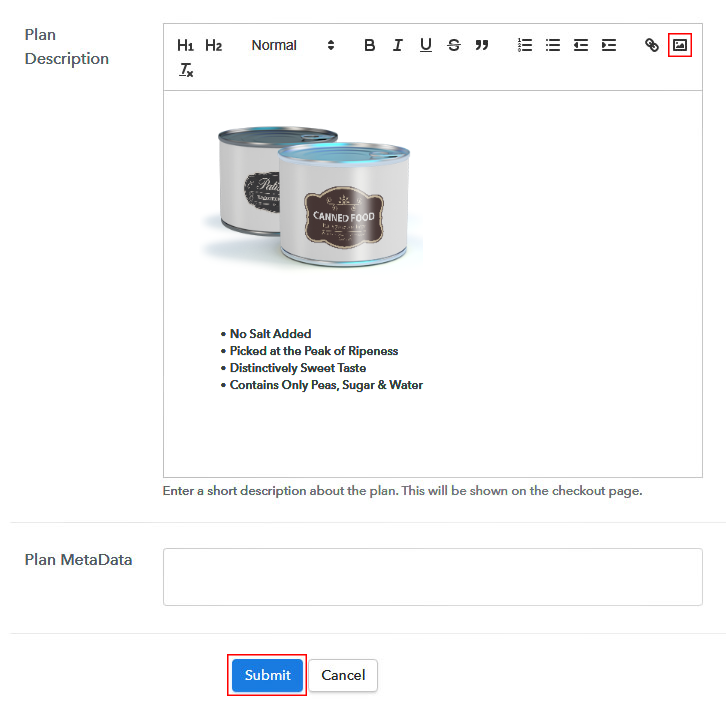
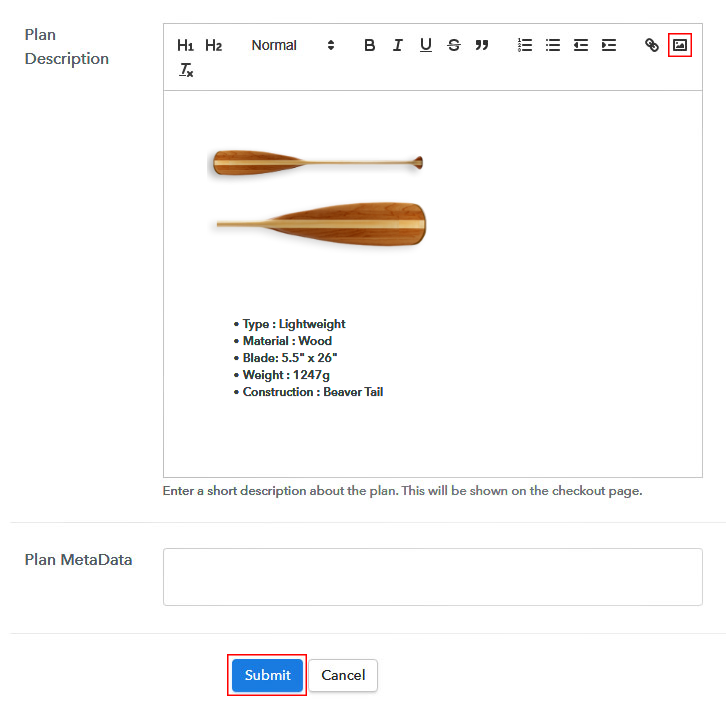
(c) Add Image & Description
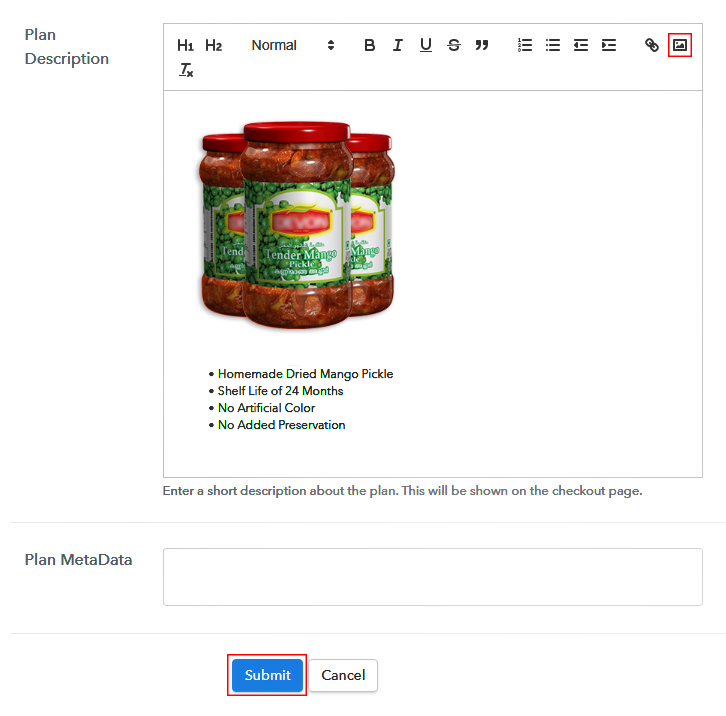
Moreover, you can write a brief description of your product, add the product image, customize the text, and add product links.
Following, click on the “Submit” button to add product description and your checkout page is ready to sell pickles online.
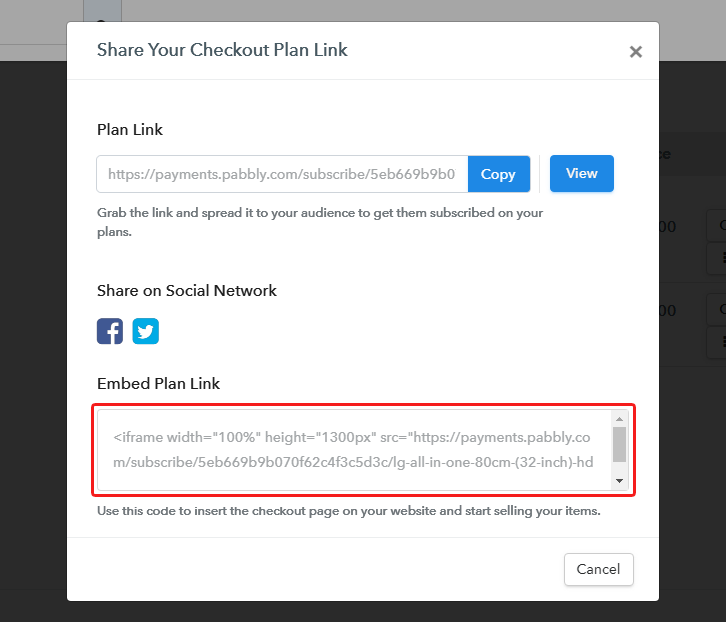
Step 7: Share your Checkout Page

- Share the link of the checkout page on social media platforms, SMS, emails, etc.
- Besides, you can send the checkout page link directly on Facebook and Twitter.
- Moreover, embed the plan link on your website as a button & text anchors so that your customers can be landed on the checkout page directly.
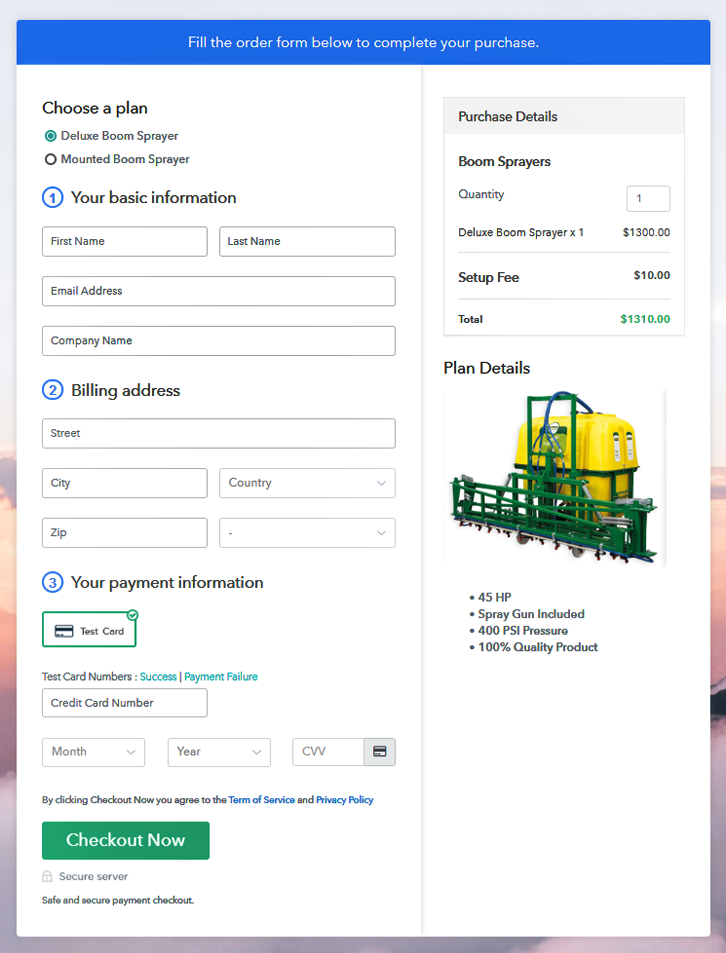
Step 8: Preview Checkout Page
Follow up the suggested steps to preview the checkout page:
(a) Click on the View Button

(b) Take a Look at the Checkout Page

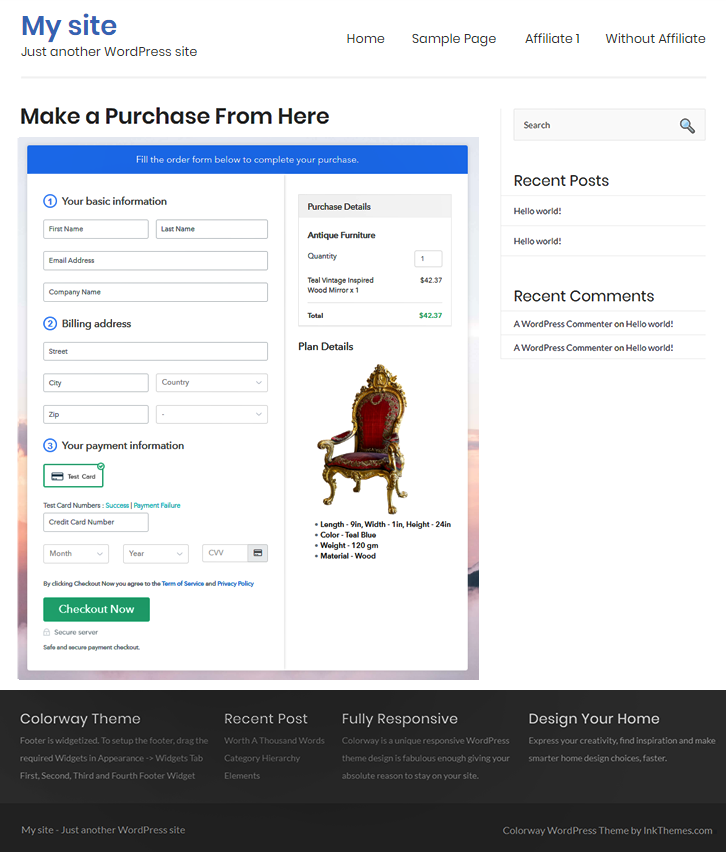
Step 9: Embed Checkout Page in Site & Sell Pickles Online

Now, copy the checkout page link to sell pickles online given under the “Embed Plan Link” window for embedding the plan on your WordPress.
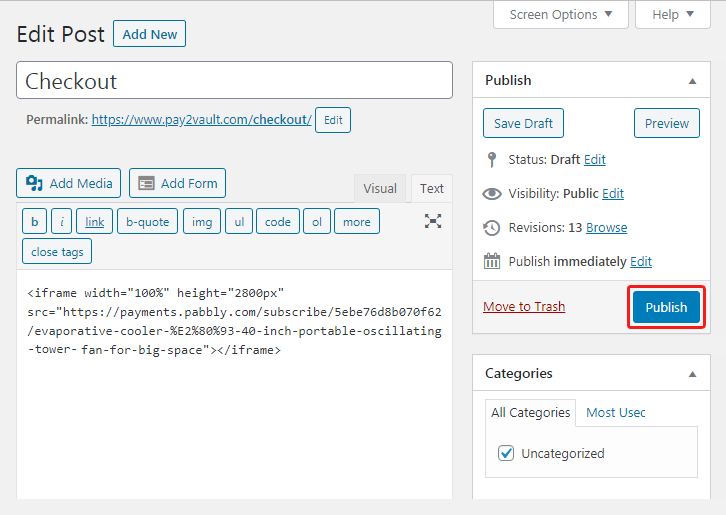
(a) Edit the Page & Paste the Copied Link

Now, paste the copied link on your WordPress text editor.
(b) Save & Publish the Checkout Page

Hit the “Publish” button after doing the changes to embed your checkout page.
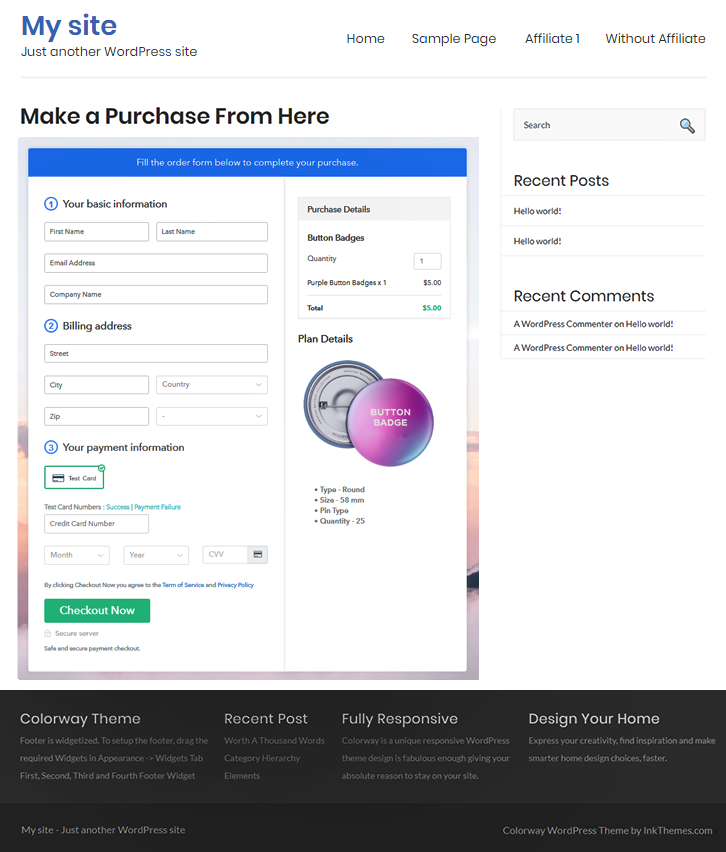
(c) Check out the Final Look of your Checkout Page on WordPress Site
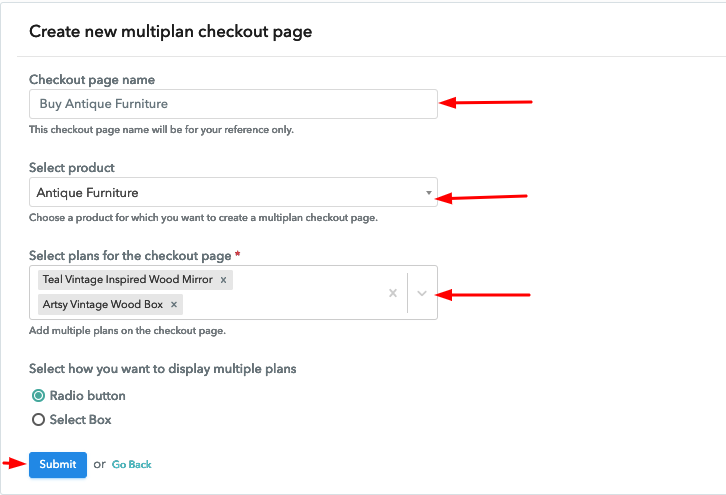
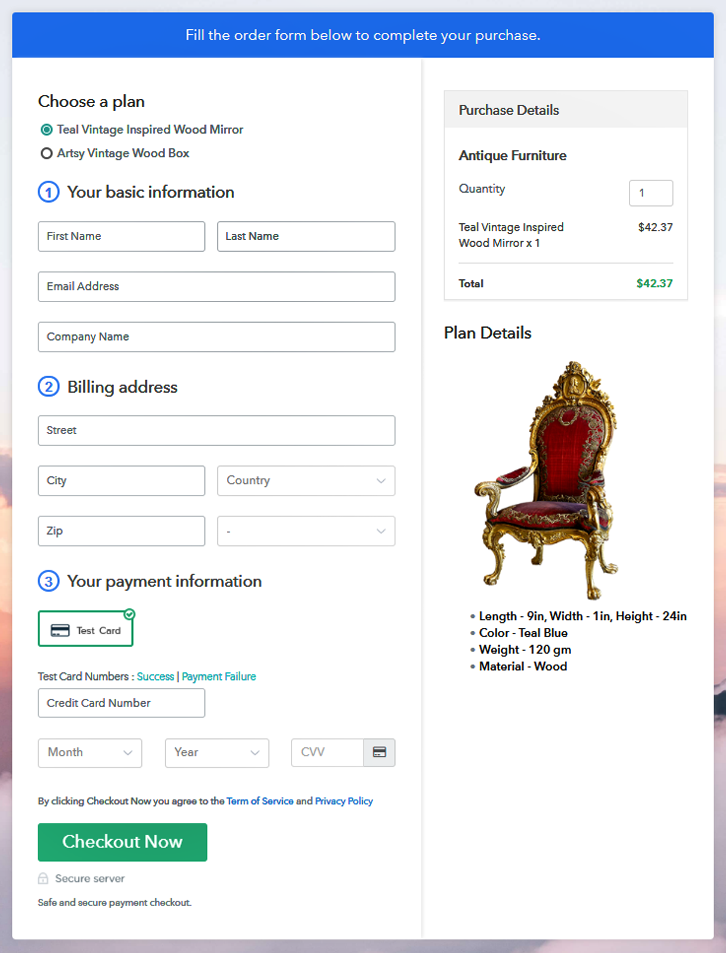
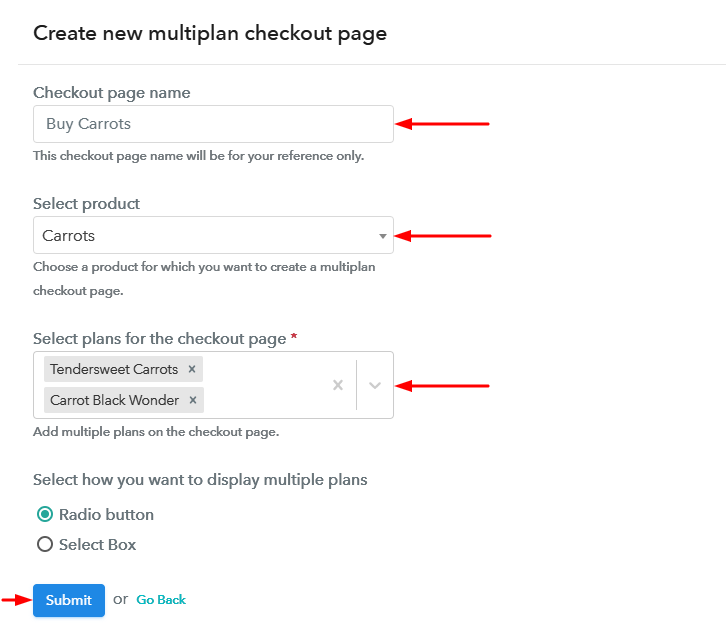
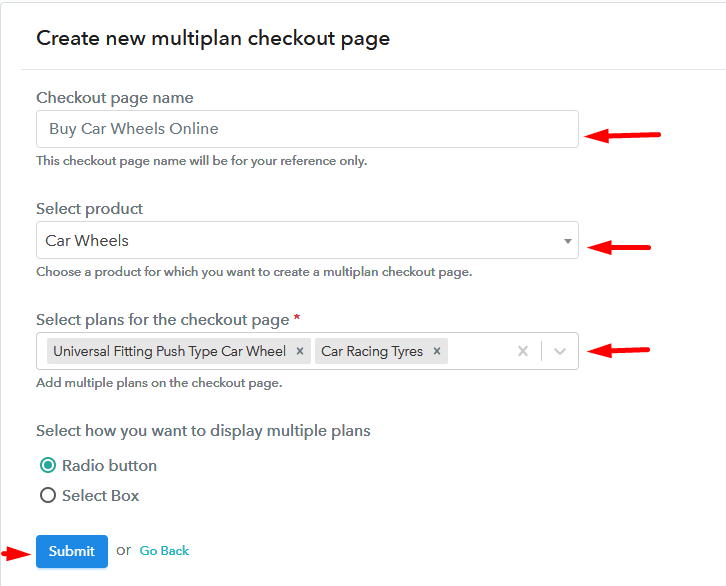
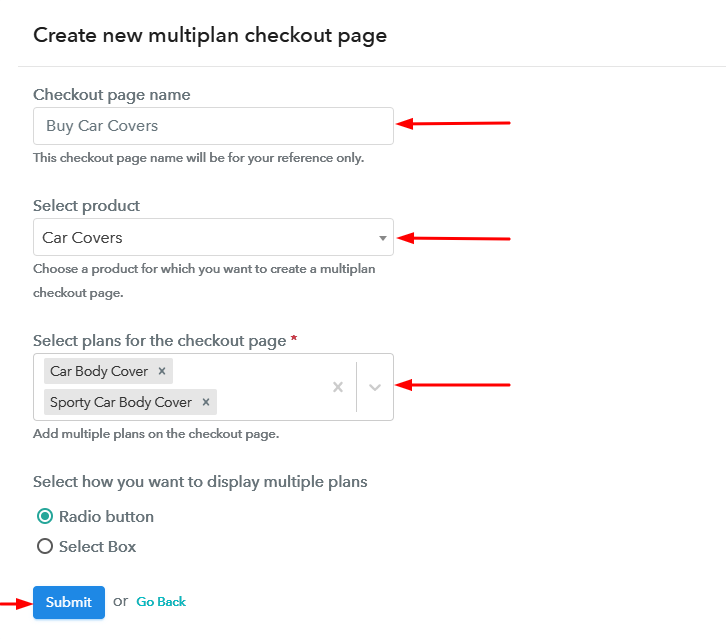
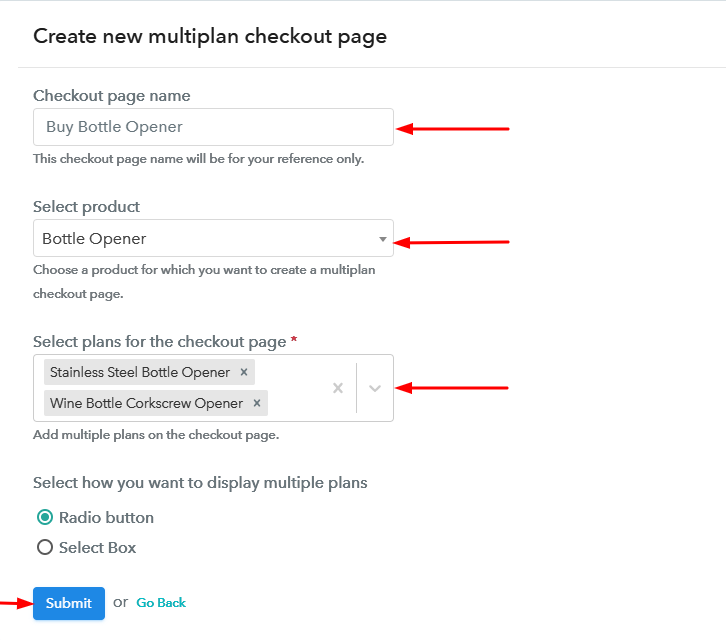
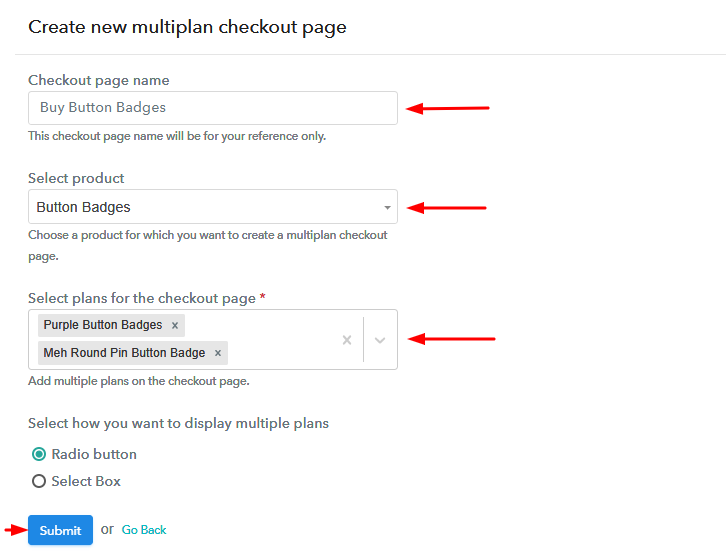
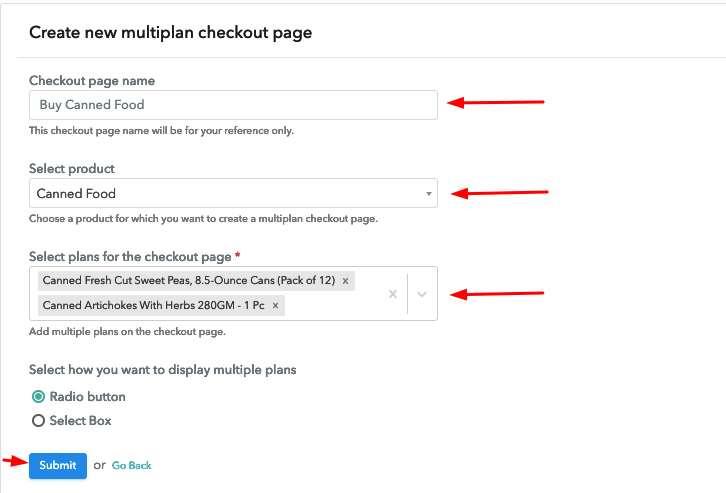
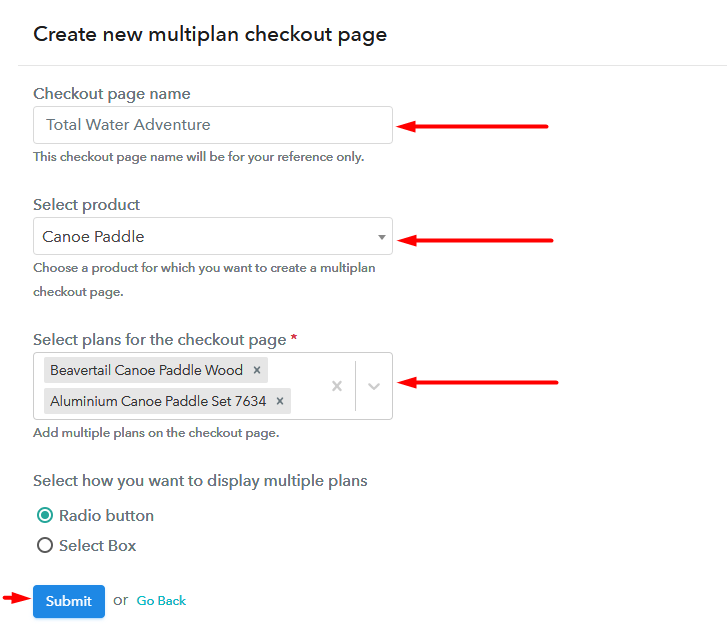
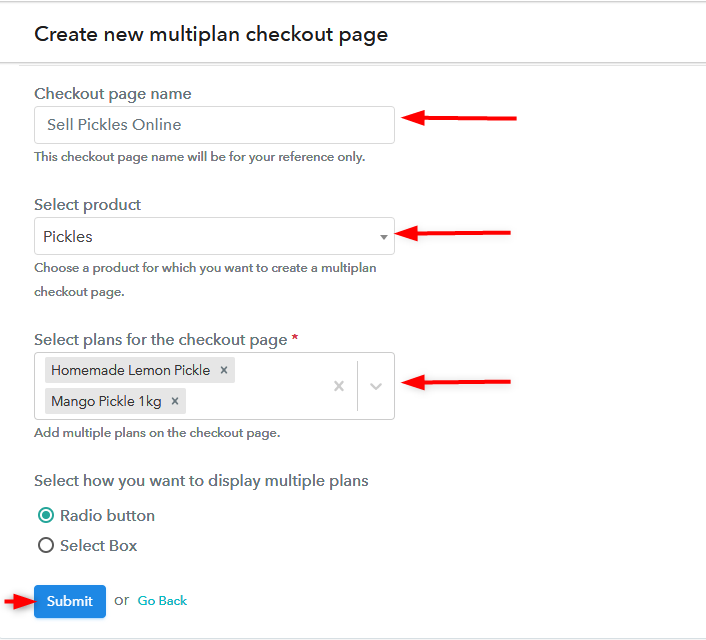
Step 10: Multiplan Checkout Page
Note: In case you want to sell multiple products via a single checkout page, you can create a multi-plan checkout page otherwise skip this step.
(a) Click on Add Mutiplan Checkout

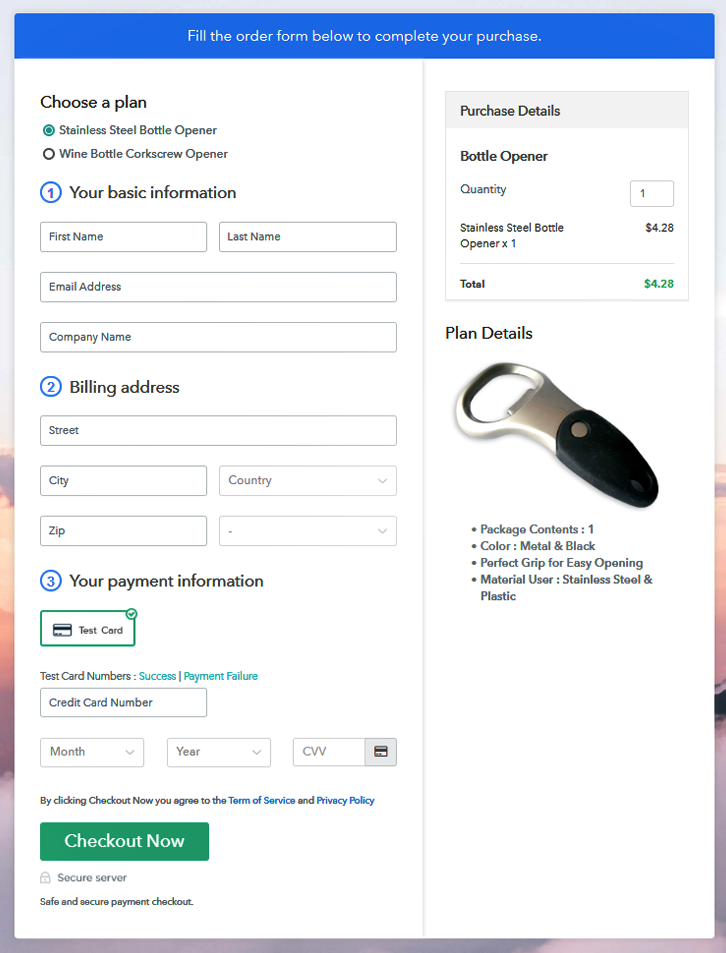
(b) Add Plans to Sell Multiple Pickles from Single Checkout Page
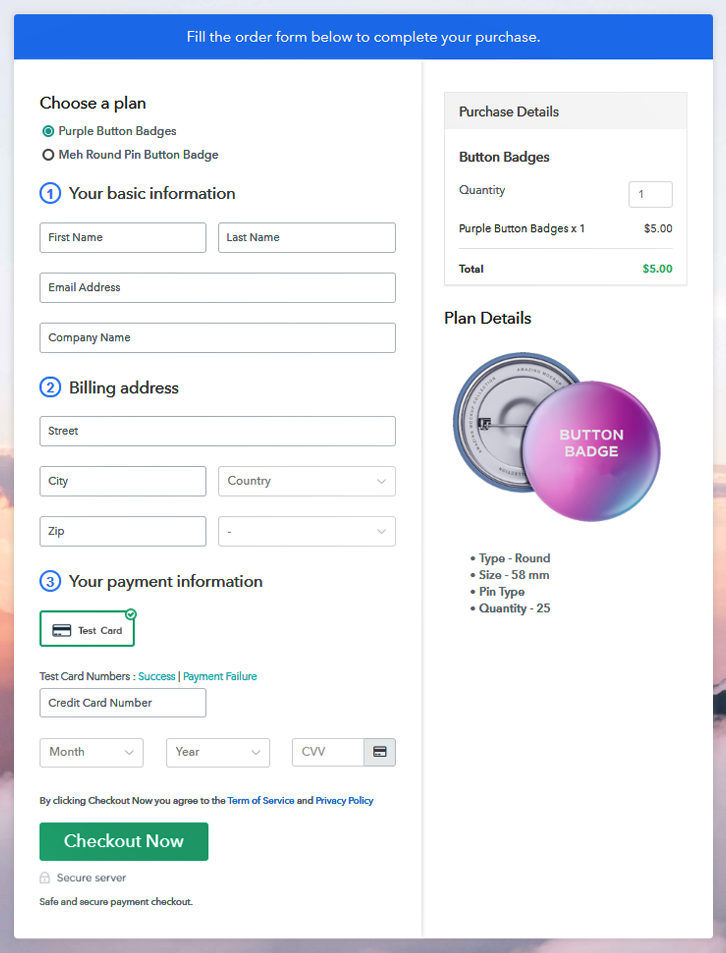
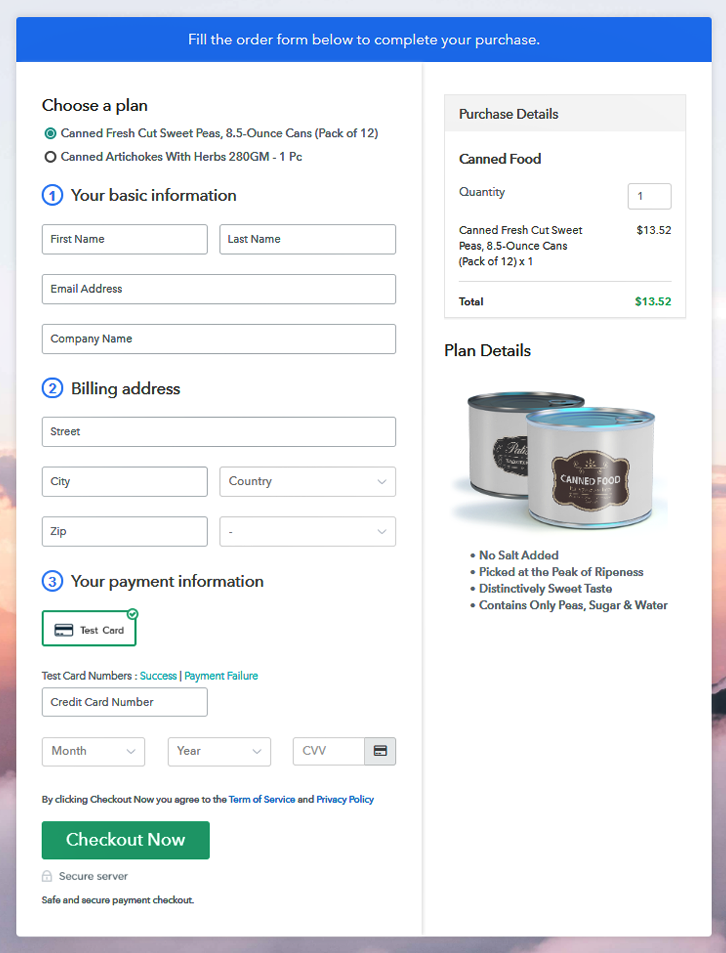
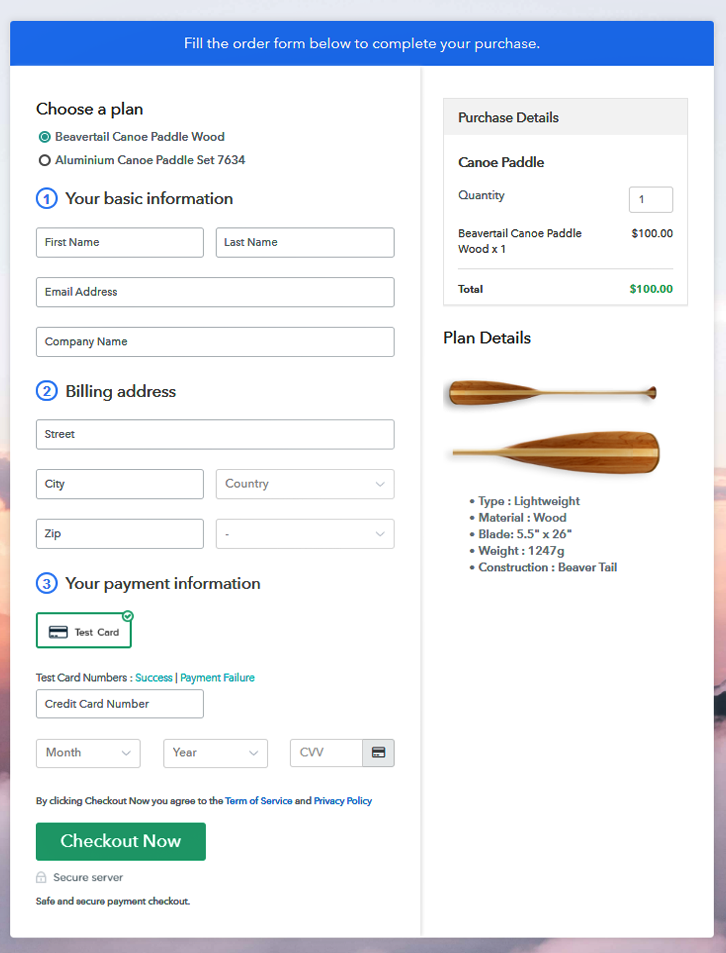
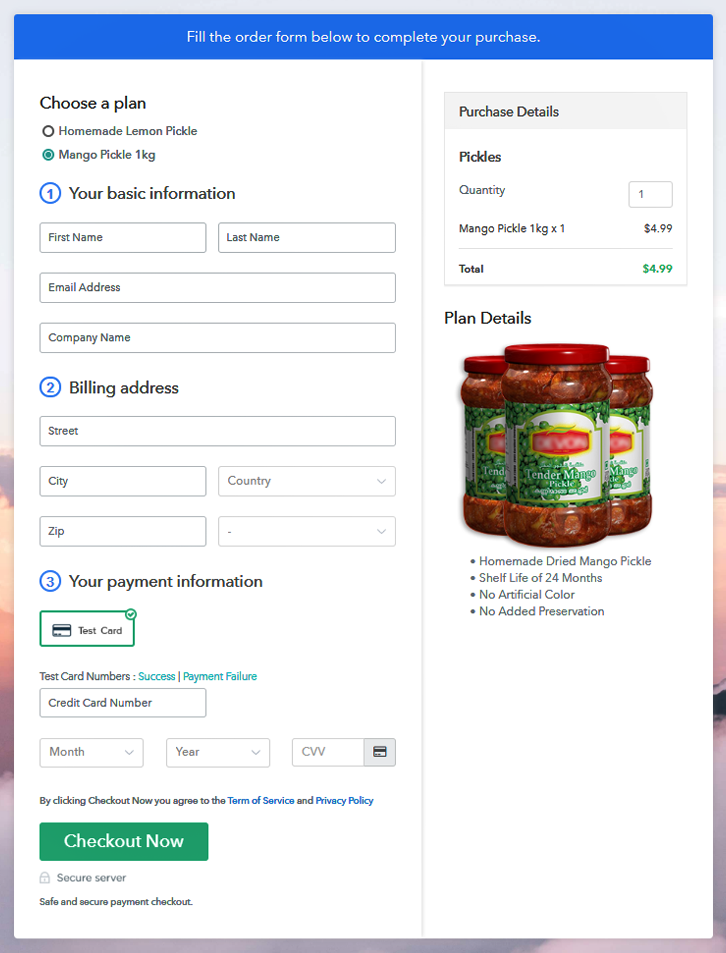
(c) Take a Look at the Checkout Page
Wrapping Up
Now that we’ve gone through the rules, laws, regulations, permits, and design aspects to selling food online, you should be ready to get creative and start making money by selling pickles online.
Follow these steps to create a checkout page using the Pabbly Subscription Billing software without worrying about any extra commissions. Besides, you can accept safe and secure online payments using multiple payment gateways.
If you have any further questions on how to sell pickles online, please let me know in the comment section below.
You May Also Like To Read –
- Sell Airbags Online
- Sell Vitamins And Supplements Online
- Best Subscription Management Software
- Sell Processed Groundnuts Online