How to Connect Typeform with GoHighLevel Easily

Watch Step By Step Video Tutorial Below


1. Accessing Pabbly Connect for Integration

To start integrating Typeform with GoHighLevel, you first need to access Pabbly Connect. Open your browser and go to pabbly.com/connect. If you’re a new user, click on the “Sign up for free” option in the top right corner.

Once you sign up, you will receive 100 free tasks each month to explore Pabbly Connect. This means you can create up to 100 automations for free, allowing you to test the integration capabilities of the platform.


2. Creating Your Workflow in Pabbly Connect

After logging into Pabbly Connect, navigate to the workflow builder. This is where you will set up your automation between Typeform and GoHighLevel. Click on the “Add Trigger” button to begin.

  • Select Typeform as your trigger application.
  • Choose the event “New Entry”.
  • Click on “Connect” to establish the connection.

Ensure that you are logged into your Typeform account to provide necessary permissions. After connecting, select the specific form you want to automate, such as the registration form, and click “Save and Send Test Request” to capture the webhook response.


3. Capturing Webhook Response from Typeform

Once you have set up the trigger in Pabbly Connect, it will wait for a webhook response. To capture this response, open your Typeform and submit a test entry.

After submitting the form, go back to your workflow in Pabbly Connect. You should see that it has successfully captured the response, displaying all the details you entered, such as name, email, and phone number.


4. Adding Action Step to Connect with GoHighLevel

Next, you will need to add an action step to send the captured data to GoHighLevel. In Pabbly Connect, click on “Add New Action Step” and select “Lead Connector” as your action application.

  • Choose the event “Create or Update a Contact”.
  • Click on “Connect” to link it with GoHighLevel.
  • Select your sub-account for GoHighLevel.

Make sure you are logged into your GoHighLevel account to grant the necessary permissions. After connecting, map the fields from the Typeform response to the corresponding fields in GoHighLevel.


5. Testing the Integration in Real Time

Once everything is set up in Pabbly Connect, it’s time to test the integration. Submit another entry through your Typeform to see if the data is correctly added to GoHighLevel.

After submitting the form, refresh your GoHighLevel contacts list. You should see the new contact added with the details you entered. This confirms that the automation is functioning correctly, allowing you to create a new contact in GoHighLevel every time a new entry is submitted in Typeform.


In this tutorial, we demonstrated how to integrate Typeform with GoHighLevel using Pabbly Connect. This powerful automation tool allows you to streamline your workflows and enhance productivity by connecting your favorite applications seamlessly. Try it out today and experience the benefits of automation!
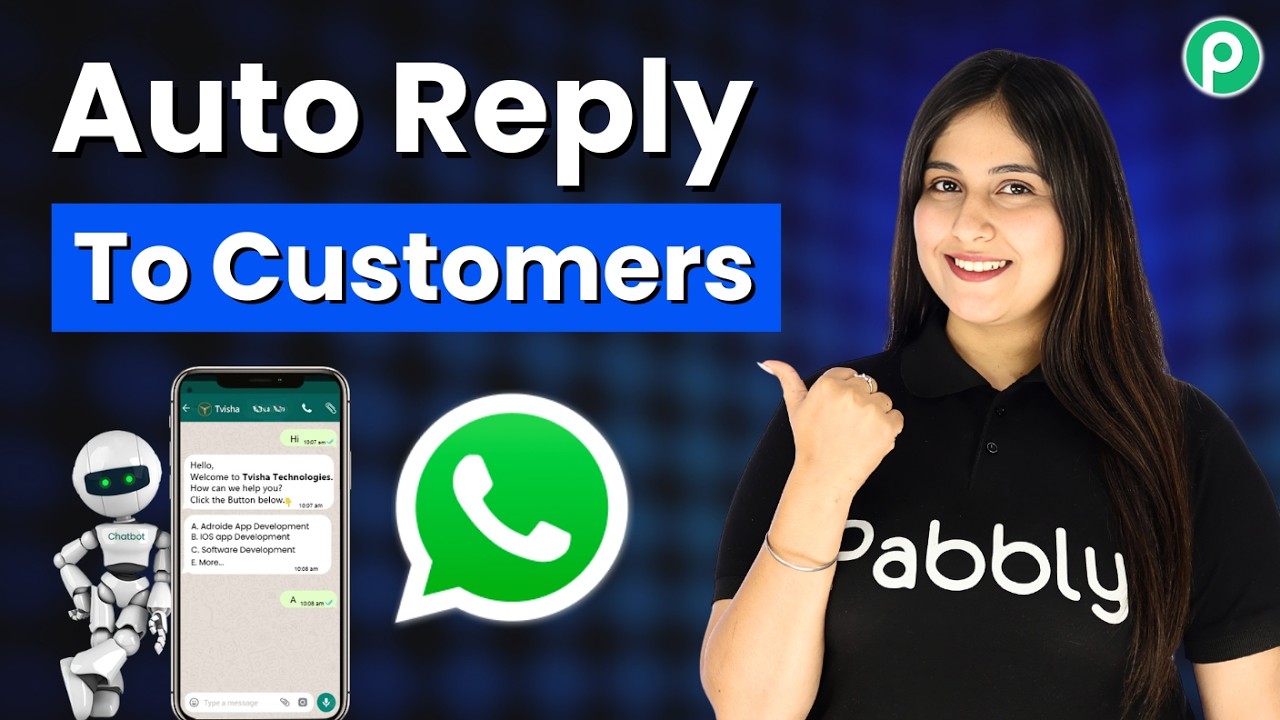
Auto Reply to Customers on WhatsApp using AI Chatbot

Watch Step By Step Video Tutorial Below


1. Accessing Pabbly Connect to Create Your WhatsApp AI Chatbot

To start creating your WhatsApp AI chatbot, you first need to access Pabbly Connect. Open your browser and go to pabby.com/chartflow. This takes you to the Pabbly Chartflow homepage.

If you are a new user, click on “Sign Up Free” to create an account. Existing users can simply sign in. Make sure to check for any promotional codes that can provide discounts for your Pabbly subscription.


2. Navigating the Pabbly Connect Dashboard

Upon signing in, you’ll see various Pabbly applications. Click on “Access Now” for Pabbly Chartflow, leading you to the dashboard. Here, you can manage your WhatsApp integration.

  • Click on the “Add” button to connect your WhatsApp number.
  • Choose between the two methods provided for integration.
  • Explore the sidebar for additional features of Pabbly Chartflow.

Make sure to familiarize yourself with these features to enhance your WhatsApp AI chatbot’s functionality.


3. Creating Your AI Assistant in Pabbly Connect

To create your WhatsApp AI assistant, select the “AI Assistant” feature in Pabbly Connect. Click on the “Add” button to start the process. Name your assistant and proceed to the flow window.

Here, you will choose the instruction type from a dropdown. Select “AI Agent” to get predefined instructions. Adjust the AI configuration, including the temperature setting to control response creativity.

  • Set the temperature to 0.4 for focused answers.
  • Select “Open AI” and choose the model “GPD 5.2” from the dropdown.
  • Add your Open AI API key for integration.

These settings will help ensure your AI assistant responds accurately to customer queries on WhatsApp.


4. Configuring Your AI Assistant Settings

In this section, you will configure various settings for your AI assistant in Pabbly Connect. Enable the header message option and enter your desired text, keeping in mind the 60-character limit.

Set up the stop keywords that will allow users to end the assistant’s responses. For example, adding “human” as a stop keyword will enable human intervention when needed.

  • Specify retry attempts for fallback responses (1 to 10).
  • Include a fallback message for API failures.
  • Upload a knowledge source document to enhance response accuracy.

These configurations will ensure your assistant operates smoothly and effectively handles customer inquiries.


5. Assigning Your Assistant to WhatsApp Chats

After creating your AI assistant in Pabbly Connect, the next step is to assign it to your WhatsApp chats. Navigate to the inbox settings in the Pabbly Chartflow dashboard.

Enable the auto-reply feature and select the contact list for which the assistant will be active. Click the save button to finalize the assignment.

  • You can also assign the assistant to individual chats by selecting specific contacts.
  • Ensure all settings are saved to activate the assistant.
  • Test the assistant by sending a message to see its responses.

This method will allow your WhatsApp AI assistant to respond to customer queries automatically, enhancing customer service efficiency.


Conclusion

By following this tutorial, you can effectively integrate a WhatsApp AI chatbot using Pabbly Connect. This integration automates customer queries, improving response time and customer satisfaction.

New Lead Received? Send Emails Automatically in Seconds

Watch Step By Step Video Tutorial Below


1. Accessing Pabbly Connect for Automation

To automate your lead emails, the first step is accessing Pabbly Connect. Open a new tab and enter the URL pabbly.com/connect.

Once on the homepage, you will see options for sign in and sign up free. If you are a new user, click on sign up free to create your account and receive 100 free tasks every month to explore Pabbly Connect.


2. Creating Your Workflow in Pabbly Connect

After logging into Pabbly Connect, navigate to the workflow page. This is where you will set up the automation for sending emails to your leads.

  • Click on Add New Workflow.
  • Name your workflow appropriately.
  • Select Contact Form 7 as your trigger application.

This setup will allow Pabbly Connect to capture new leads from your Contact Form 7 submissions.


3. Setting Up the Trigger in Pabbly Connect

Now, let’s set up the trigger in Pabbly Connect. Choose New Form Submission as the event from Contact Form 7.

Next, click on the Connect button. You will receive a webhook URL that acts as a bridge between Contact Form 7 and Pabbly Connect. Copy this URL.

  • Log in to your WordPress account.
  • Navigate to your Contact Form 7 settings.
  • Paste the webhook URL in the Webhooks section and enable it.

By completing this step, you’re ensuring that every new lead will be captured by Pabbly Connect.


4. Configuring Email Action in Pabbly Connect

Now it’s time to set up the email action using Pabbly Connect. Click on Add New Action Step and select Gmail as your action application.

Choose Send Email as the action event. You will then need to connect your Gmail account to Pabbly Connect.

  • Enter the sender’s name and email address.
  • Map the recipient’s email address from Contact Form 7 responses.
  • Fill in the email subject and content.

By mapping the recipient’s email, you ensure that each lead receives a personalized email, enhancing their experience with your business through Pabbly Connect.


5. Testing Your Automation with Pabbly Connect

Finally, it’s time to test your automation. Click on Save and Send Test Request in Pabbly Connect. This will send a test email to ensure everything is working correctly.

Check your Gmail account to confirm that the email has been received. You should see the email with the subject and content you configured earlier.

If the test is successful, your automation is ready to go! Now, every time you receive a new lead through Contact Form 7, Pabbly Connect will automatically send an email, saving you time and effort.


Conclusion

In this tutorial, we explored how to automate lead emails using Pabbly Connect. By integrating Contact Form 7 and Gmail, you can enhance user experience and streamline your business processes. Start using Pabbly Connect today to automate your workflows!

How to Check Flow History in Pabbly Chatflow (Step-by-Step Guide)

Watch Step By Step Video Tutorial Below


1. Accessing Pabbly Connect for Integration

To start integrating WhatsApp, Pabbly, Ple, and YouTube, you need to access Pabbly Connect. Begin by visiting Pabbly.com/chatflow in your browser. This will take you to the Pabbly Chatflow homepage.

If you are a new user, click on the ‘Sign Up Free’ button to create your account. Existing users can simply sign in. Once logged in, you can explore various options and features available in Pabbly Connect.


2. Setting Up WhatsApp Integration with Pabbly Connect

Now that you have accessed Pabbly Connect, the next step is to set up your WhatsApp integration. In your Pabbly Chatflow account, locate the ‘Add’ button to connect your WhatsApp number. You will see two methods for integration.

  • Click on the ‘Access Now’ option under all apps.
  • Choose your preferred method for WhatsApp integration.

After selecting your method, follow the prompts to connect your WhatsApp account. This integration is crucial as it allows you to send messages and notifications through WhatsApp using Pabbly Connect.


3. Using Ple with Pabbly Connect for Enhanced Automation

With your WhatsApp connected, it’s time to integrate Ple. Pabbly Connect facilitates the connection between Ple and WhatsApp seamlessly. Navigate to the automation section and select Ple from the list of applications.

Follow these steps to set up the integration:

  • Select Ple as your application.
  • Choose the relevant trigger events that will initiate actions in WhatsApp.
  • Configure the action settings to define how messages will be sent through WhatsApp.

Once the setup is complete, you can automate your communications between Ple and WhatsApp using Pabbly Connect. This integration enhances your workflow significantly.


4. Integrating YouTube with Pabbly Connect

Next, we will integrate YouTube with Pabbly Connect. This integration allows you to automate notifications and updates from your YouTube channel directly to WhatsApp. In your Pabbly Chatflow account, select YouTube as your application.

To set up this integration, follow these steps:

  • Choose the trigger event from YouTube, such as ‘New Video Uploaded’.
  • Link it to the action in WhatsApp to send notifications.
  • Test the integration to ensure everything is working correctly.

This integration not only saves time but also keeps your audience updated using Pabbly Connect.


5. Viewing Flow History in Pabbly Connect

After setting up your integrations, you can monitor their performance using Pabbly Connect. Navigate to the flow history section to view the total number of times your WhatsApp bot has executed and the credits consumed.

To view your flow history, follow these steps:

  • Click on the ‘View History’ button in your Pabbly Chatflow dashboard.
  • Check the total executions and credits used for each flow.
  • Review the contact details of users who interacted with your WhatsApp bot.

This feature helps you analyze the effectiveness of your integrations and optimize them further using Pabbly Connect.


Conclusion

Integrating WhatsApp, Pabbly, Ple, and YouTube using Pabbly Connect streamlines your communication processes. By following these steps, you can automate interactions and enhance your business efficiency.

WhatsApp Chatbot Setup | Easy Fast Free

Watch Step By Step Video Tutorial Below


1. Introduction to Pabbly Connect for WhatsApp Integration

Pabbly Connect is an essential tool for integrating various applications, including WhatsApp. By using Pabbly Connect, businesses can automate their customer interactions effectively. This tutorial will guide you through creating a WhatsApp chatbot that operates 24/7.

To begin, access Pabbly Connect by visiting the official website. Once logged in, you can start setting up your WhatsApp integration. Follow the steps outlined in this tutorial to ensure a smooth setup process.


2. Setting Up Your WhatsApp Number in Pabbly Connect

Before creating your WhatsApp chatbot, you need to add your WhatsApp number in Pabbly Connect. This step is crucial as it allows the chatbot to communicate with your customers. Navigate to the settings section within Pabbly Connect to do this.

  • Access the settings in Pabbly Connect.
  • Select the WhatsApp integration option.
  • Enter your WhatsApp number and save the changes.

Once your WhatsApp number is added, you can proceed to create the chatbot flow, ensuring that Pabbly Connect is the backbone of this integration.


3. Creating Your WhatsApp Chatbot Flow in Pabbly Connect

To create a WhatsApp chatbot, navigate to the flow builder within Pabbly Connect. This user-friendly interface allows you to design conversation flows without any coding knowledge. Click on the “Add Flow” button to begin.

After naming your flow, you will have several options to customize your chatbot. The flow builder includes various actions and triggers, enabling you to create a dynamic interaction with your users. Make sure to activate your flow after saving it.

  • Select a trigger event for your chatbot.
  • Choose the template for your business needs.
  • Design your conversation flow using drag-and-drop elements.

With Pabbly Connect, you can create a seamless experience for your customers, ensuring that they receive prompt replies and assistance.


4. Designing Message Templates for Your Chatbot

Templates are essential for guiding conversations in your WhatsApp chatbot. Within Pabbly Connect, you can create message templates tailored to your business. These templates can be used to initiate conversations and provide essential information to users.

To create a template, navigate to the templates section and click on “Add Template.” Fill in the necessary fields, including template name, category, and content. Ensure that your template is engaging and includes a clear call to action.

  • Select the template category relevant to your business.
  • Design the template content to attract users.
  • Submit the template for approval before use.

Using Pabbly Connect to manage your templates streamlines the process, allowing you to focus on customer engagement.


5. Testing Your WhatsApp Chatbot with Pabbly Connect

After setting up your chatbot and message templates, it’s time to test the functionality. Use Pabbly Connect to send a test message to your WhatsApp number. This step ensures that all flows and templates are working correctly.

When testing, pay attention to how the chatbot responds to user inputs. Ensure that it captures necessary information and provides appropriate replies. This testing phase is crucial for refining your chatbot’s performance.

  • Send a test message using the inbox feature in Pabbly Connect.
  • Monitor the chatbot’s responses to user interactions.
  • Make adjustments to the flow as needed based on test results.

Pabbly Connect allows you to refine your chatbot, ensuring it meets the needs of your customers effectively.


Conclusion

In this tutorial, we explored how to integrate a WhatsApp chatbot using Pabbly Connect. By following the steps outlined, you can automate customer interactions and enhance your business’s efficiency. Pabbly Connect serves as the central platform for this integration, making it easy to manage and optimize your chatbot workflows.

Pabbly Chatflow: Build an AI FAQ Chatbot for WhatsApp

Watch Step By Step Video Tutorial Below


1. Accessing Pabbly Connect for WhatsApp Integration

To create an AI-powered WhatsApp assistant, you first need to access Pabbly Connect. This platform allows seamless integration between WhatsApp and various applications, including AI assistants.

Begin by navigating to the Pabbly Connect website. If you’re a new user, you can sign up for a free account to explore its features. Existing users can simply log in. Once logged in, you will be ready to set up your integration.


2. Setting Up Your WhatsApp Assistant Using Pabbly Connect

After accessing Pabbly Connect, you will need to set up your WhatsApp assistant. This involves creating an AI assistant using Pabbly Chatflow, which is integrated with Pabbly Connect.

  • Navigate to the AI assistant page in Pabbly Chatflow.
  • Select the instruction type as AI agent.
  • Set the temperature for your AI responses to determine creativity.

Once you have configured these settings, you can proceed to define the API key for integration. This key is essential for connecting your AI assistant with Pabbly Connect and enabling it to respond to queries.


3. Creating a Knowledge Base for Your AI Assistant

The next step involves creating a knowledge base that will serve as the brain of your AI assistant. This knowledge base is crucial for providing accurate responses to user queries through Pabbly Connect.

Ensure that your knowledge base includes:

  • Business overview and target audience details.
  • Service details, pricing structures, and common customer queries.
  • Frequently asked questions to guide the AI’s responses.

Your AI assistant will use this information to respond effectively to customer inquiries, significantly reducing manual interactions.


4. Finalizing and Activating Your AI Assistant

After setting up your knowledge base, the next phase is to finalize and activate your AI assistant through Pabbly Connect. This is where you can customize the appearance and functionality of your assistant.

In this section, you can:

  • Add header and footer messages for a personalized touch.
  • Enable auto-replies for all contacts or specific chats.

>Once these settings are configured, click on the save button to activate your AI assistant. Your assistant is now ready to interact with clients on WhatsApp.


5. Embedding Your AI Assistant on Your Website

Finally, you can embed your AI assistant into your website using Pabbly Connect. This allows users to interact with your assistant directly from your site, enhancing customer experience.

To embed the assistant, simply click on the embed button in Pabbly Chatflow. Copy the provided script code and paste it into your website’s HTML. This integration ensures your assistant is readily available for customer inquiries at all times.


Conclusion

By following these steps, you can successfully create an AI-powered WhatsApp assistant using Pabbly Connect. This integration not only automates customer interactions but also enhances the overall efficiency of your business.

Get More Bookings Without Ads Using WhatsApp AI (Hotel Owners Must Watch)

Watch Step By Step Video Tutorial Below


1. Accessing Pabbly Connect for Hotel Automation

To begin using Pabbly Connect for your hotel business, first navigate to the Pabbly Chartflow website. This platform allows you to automate responses and manage inquiries seamlessly through WhatsApp.

If you are a new user, click on the ‘Sign Up Free’ option to get started. Existing users can simply sign in. After signing in, you will be directed to the Pabbly Chartflow dashboard where all your WhatsApp numbers can be managed.


2. Creating Your AI Assistant with Pabbly Connect

Once you are in the Pabbly Chartflow dashboard, the next step is to create your AI assistant. Click on the ‘Add Assistant’ button and give your assistant a name that reflects its purpose, such as “AI Booking Assistant for Hotels”.

  • Select the assistant type as “AI Agent”.
  • Set the temperature to 0.5 for balanced responses.
  • Choose the model provider as OpenAI and select GPT-4 Mini.

This setup allows your assistant to respond accurately to guest inquiries, simulating human-like interactions. Customizing these settings is crucial as it defines how the assistant behaves.


3. Uploading Knowledge Base for Accurate Responses

For the AI assistant to provide accurate replies, you need to upload a knowledge base file. This file serves as the information bank for your assistant, containing necessary details about your hotel.

Ensure your knowledge base file is in PDF format and less than 90 MB. Once prepared, upload it by clicking the ‘Add New File’ option and dragging your file into the upload area. After uploading, select the file and click ‘Insert’.

  • The knowledge base should include FAQs, room details, and pricing.
  • Make sure the content is specific to your hotel operations.

This knowledge base ensures that your AI assistant can provide tailored responses to inquiries, enhancing customer satisfaction.


4. Configuring Assistant Settings in Pabbly Connect

After uploading the knowledge base, configure your assistant settings. This includes setting up the header and footer messages, which will be displayed during conversations with guests.

Enable the toggle for the header message if you wish to send a welcome message. Additionally, set up stop keywords that will halt the assistant’s responses if needed. You can also define retry attempts for the assistant to ensure it tries multiple times to respond correctly.

  • Header messages can include greetings or introductions.
  • Footer messages should thank users or provide additional information.

These settings allow for a more personalized interaction, making guests feel valued and understood.


5. Finalizing Your AI Assistant Setup with Pabbly Connect

Once all settings are configured, enable your assistant and save the setup. This action activates your AI assistant, allowing it to start responding to inquiries immediately.

To embed the assistant on your website, click the ‘Embed’ button to get the necessary code. This code can be pasted into your website, enabling guests to interact with your assistant directly.

By utilizing Pabbly Connect, your hotel can now respond to inquiries in real-time, providing potential guests with instant information and enhancing the booking process.


Conclusion

In conclusion, using Pabbly Connect to automate hotel inquiries through WhatsApp AI dramatically improves customer engagement. This setup allows for instant replies, enhancing the booking experience and increasing customer satisfaction.

Send WhatsApp Messages in Bulk Without Manual Work

Watch Step By Step Video Tutorial Below


1. Accessing Pabbly Connect for WhatsApp Integration

To begin integrating WhatsApp with Pabbly Connect, first visit the Pabbly website. Here, you’ll find options to sign in or create a free account. If you’re a new user, click on “Sign Up Free” to get started with the platform.

Once logged in, navigate to the Pabbly Connect dashboard. This is where all your integrations will be managed. Click on the “Access Now” button to enter the Pabbly Connect interface, where you will set up your WhatsApp integration.


2. Setting Up WhatsApp in Pabbly Connect

In this section, you will learn how to connect your WhatsApp account with Pabbly Connect. Begin by selecting the “Add” button in the dashboard. This will provide you with connection methods for WhatsApp.

  • Choose the method that suits your needs for integrating WhatsApp.
  • Follow the prompts to authenticate your WhatsApp account.
  • Ensure your WhatsApp account is properly linked to Pabbly Connect for seamless messaging.

After successfully connecting your WhatsApp account, you can start creating templates for your messages. This is crucial for sending personalized messages to your customers through Pabbly Connect.


3. Creating Message Templates in Pabbly Connect

With your WhatsApp account connected, the next step is to create message templates. Navigate to the template section and click on “Add Template”. Here, you can draft your message for various customer interactions.

  • Input your message details, ensuring it meets WhatsApp’s guidelines.
  • Submit the template for approval to start using it for broadcasts.
  • Once approved, you can send personalized messages using this template.

Using Pabbly Connect, you can easily manage multiple templates for different campaigns. This flexibility allows you to tailor your messaging effectively.


4. Broadcasting Messages via Pabbly Connect

Now that your templates are ready, it’s time to broadcast messages to your contacts. In the Pabbly Connect dashboard, locate the “Broadcast” section and click on “Add Broadcast”. Choose the type of broadcast campaign you want to run.

  • Select your contact list from the options available.
  • Choose your message template for the broadcast.
  • Schedule or send the broadcast immediately based on your preference.

Pabbly Connect allows you to monitor the status of your broadcasts, providing insights into delivery and engagement metrics. This ensures you can refine your approach for future communications.


5. Testing and Scheduling Broadcasts

Before sending out your broadcast to all contacts, it’s essential to test your messages. In the broadcast setup, you can add your own number for a test message. This ensures that everything appears as intended.

After testing, you can choose to schedule your broadcast. Select a future date and time to send your messages, ensuring they reach your audience at the optimal moment. Pabbly Connect facilitates this scheduling, making it easy to manage your messaging campaigns.


In conclusion, using Pabbly Connect to integrate WhatsApp allows businesses to automate their messaging effectively. By following these steps, you can streamline communication with your customers and enhance engagement.

Capture, Qualify & Prioritize Website Leads Automatically

Watch Step By Step Video Tutorial Below


1. Accessing Pabbly Connect to Start Automating

To begin automating your lead qualification process, you need to access Pabbly Connect. Simply go to the Pabbly Connect website and sign up for a free account if you don’t have one.

Once you’re logged in, you will be directed to your dashboard. Here, you can create a new workflow by clicking on the “Create Workflow” button. This is the first step in setting up your lead qualification automation.


2. Setting Up Google Sheets as a Trigger in Pabbly Connect

In this step, you will select Google Sheets as your trigger application in Pabbly Connect. This means that every time a new row is added to your Google Sheet, it will trigger the workflow.

Follow these steps to configure Google Sheets:

  • Click on the plus button to add a new trigger.
  • Search for and select Google Sheets as the application.
  • Choose the event “New or Updated Spreadsheet Row”.

After selecting the event, you need to create a connection between Google Sheets and Pabbly Connect by clicking on the “Connect” button. You’ll receive a webhook URL that you’ll need to use in your Google Sheets setup.


3. Configuring Google Forms and Sheets for Lead Collection

Next, you will link your Google Form to Google Sheets to collect leads effectively. This integration is crucial for the automation to work with Pabbly Connect.

To set up the integration:

  • Open your Google Form and navigate to the “Responses” tab.
  • Click on the “Link to Sheets” option and choose your existing spreadsheet.
  • Copy the webhook URL from Pabbly Connect and paste it in the Google Sheets add-on for Pabbly Connect.

After setting this up, every new lead submitted through your Google Form will be added to your Google Sheet, which will trigger your workflow in Pabbly Connect.


4. Using Pabbly Connect to Filter and Route Leads

Now that your Google Sheets is set up, you can create filters in Pabbly Connect to categorize leads as hot, warm, or cold. This is done using the router feature in your workflow.

To set up the router:

  • Add a router to your workflow by clicking the plus button.
  • Create three branches for hot, warm, and cold leads based on urgency and budget.
  • Set conditions for each filter to classify leads appropriately.

This allows you to automate responses and actions based on the lead’s urgency and budget, enhancing your lead management process.


5. Sending Notifications via Slack and WhatsApp Using Pabbly Connect

In the final step, you will configure notifications to be sent to your team via Slack and to your leads via WhatsApp using Pabbly Connect.

Follow these steps to set up notifications:

  • Select Slack as your action application and choose “Send Channel Message”.
  • Connect your Slack account to Pabbly Connect and specify the channel.
  • Add Pabbly Chatflow to send WhatsApp messages to leads.

By mapping the necessary fields from Google Sheets, you can send personalized messages to both your team and leads, ensuring efficient communication and follow-up.


Conclusion

In conclusion, using Pabbly Connect to automate lead qualification helps streamline your sales process. By integrating Google Sheets, Slack, and WhatsApp, you can efficiently manage leads and improve conversion rates.

How to Send Bulk WhatsApp Messages in 5 Minutes

Watch Step By Step Video Tutorial Below


1. Accessing Pabbly Connect for WhatsApp Integration

To send bulk WhatsApp messages, you first need to access Pabbly Connect. Open your browser and type in pabbl.com/chartflow to reach the Pabbly Chartflow landing page.

Once there, sign up for free to receive 100 credits each month. This allows you to explore the features of Pabbly Connect and send up to 100 WhatsApp messages for free. After testing, you can opt for a subscription plan if needed.


2. Setting Up Your WhatsApp Number in Pabbly Connect

Before sending messages, ensure your WhatsApp number is added to Pabbly Connect. This is crucial for the integration process.

If you need guidance on how to add your WhatsApp number, refer to the detailed video tutorial provided in the description box. This ensures you have everything set up correctly before proceeding.


3. Creating a Broadcast in Pabbly Connect

Next, navigate to the broadcast feature in Pabbly Connect. Here, you will see existing broadcasts, but you need to create a new one. Click on ‘Add Broadcast’ to start.

  • Select ‘Broadcast Campaign’ as the type.
  • Name your broadcast (e.g., ‘New Offer’).
  • Choose your contact list.

Once the broadcast is set up, you can select the message type. You can either choose a regular message or a pre-approved template message. Make sure to follow the steps accurately to ensure everything functions smoothly.


4. Sending Broadcast Messages via Pabbly Connect

After creating your broadcast, it’s time to send out your messages. Enter the username and mobile number for testing. Click on ‘Send Test Message’ to verify that everything is working correctly.

Once the test is successful, you can proceed to send the broadcast to multiple users. You have the option to send instantly or schedule for later. This flexibility allows you to manage your messaging effectively.

  • Choose ‘Send Instantly’ or ‘Schedule for Later’.
  • Select the date and time if scheduling.

After scheduling, you can check the stats of your broadcast, including sent, delivered, read, and failed messages. This feature provides valuable insights into your messaging campaigns.


5. Exploring More Features of Pabbly Connect

In addition to sending bulk messages, Pabbly Connect offers various other features. You can create templates and manage your contact list directly within the platform.

If you want to dive deeper into any specific feature like templates or contacts, check the additional video tutorials linked in the description. This will enhance your understanding and usage of Pabbly Connect.


Conclusion

In this tutorial, we explored how to send bulk WhatsApp messages using Pabbly Connect. By following these steps, you can efficiently manage your communication strategy and reach multiple clients with ease.