Turn Google Ads Leads into Avaza Contacts Automatically

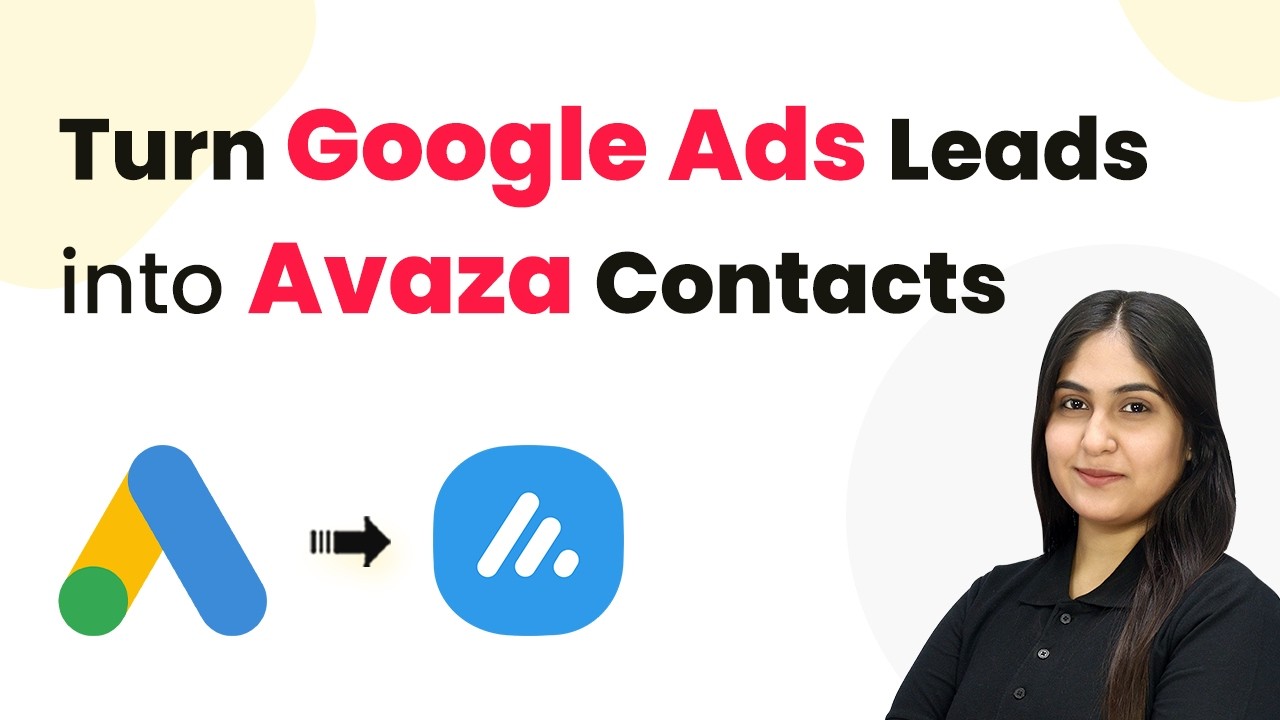
Learn how to automatically turn Google Ads leads into Avaza contacts using Pabbly Connect with this detailed tutorial. Follow the steps for seamless integration. Follow this definitive guide to creating powerful automated workflows with straightforward, efficiency-focused solutions that save valuable time.

Watch Step By Step Video Tutorial Below


1. Access Pabbly Connect for Automation

To begin automating the process of turning Google Ads leads into Avaza contacts, first, access Pabbly Connect. You can do this by visiting Pabbly.com/connect in your browser. This will take you to the Pabbly Connect homepage where you have two options: ‘Sign In’ or ‘Sign Up Free’.

If you are a new user, click on ‘Sign Up Free’ to receive 100 free tasks every month. Existing users can simply sign in. After signing in, navigate to the Pabbly applications where you will find the option to access Pabbly Connect.


2. Create a Workflow in Pabbly Connect

Once you are on the Pabbly Connect dashboard, the next step is to create a new workflow. Click on the ‘Create’ button to start this process. You will be presented with options to choose between the new beta version or the classic version. For this tutorial, select the beta version for a more modern experience.

  • Click on the ‘Select’ button to proceed with the beta version.
  • Name your workflow as ‘Turn Google Ads Leads into Avaza Contacts Automatically’.
  • Choose a folder for your workflow, such as ‘Contacts’.

After naming your workflow and selecting a folder, click on the ‘Create’ button. This will successfully create your workflow in Pabbly Connect.


3. Set Up the Trigger for Google Ads

Next, it’s time to set up the trigger for your workflow. Since you are receiving new leads through Google Ads, select Google Ads as your trigger application and then choose the event as ‘New Lead Form Entry’. Click on ‘Connect’ to proceed.

You will receive a webhook URL from Pabbly Connect. This URL is essential for connecting your Google Ads account with the Pabbly platform. Copy this webhook URL and head over to your Google Ads account where you can set up the webhook in your lead form.


4. Configure Google Ads for Webhook

In your Google Ads account, navigate to the lead form you have set up. Under the lead delivery options, select the webhook integration. Paste the webhook URL you copied from Pabbly Connect into the designated field.

  • Set the key name as ‘test’.
  • Click on ‘Send Test Data’ to send a dummy response to your webhook URL.

Once you send the test data, return to Pabbly Connect to verify that the data was received successfully. You should see a response indicating that the dummy lead details have been captured.


5. Create Avaza Contact from Google Ads Leads

Now that your trigger is set up, it’s time to create a new contact in Avaza using the lead details. Add a new action step in Pabbly Connect and select Avaza as the application. Choose ‘Create Contact’ as the action event and click ‘Connect’.

To establish a connection, you will need a personal access token from your Avaza account. Navigate to the settings in Avaza, select ‘Manage Developer Apps’, and create a new token. Copy this token back to Pabbly Connect to finalize the connection.


Conclusion

In this tutorial, we explored how to use Pabbly Connect to automate the process of turning Google Ads leads into Avaza contacts. By following the steps outlined, you can seamlessly integrate these applications and streamline your lead management process.

Ensure you check out Pabbly Connect to create business automation workflows and reduce manual tasks. Pabbly Connect currently offer integration with 2,000+ applications.

Auto-Send Welcome Emails When a New Lead Is Received from Google Forms | Pabbly Connect

Learn how to automate welcome emails using Pabbly Connect when a new lead is received from Google Forms. Step-by-step guide to streamline your email process.

Watch Step By Step Video Tutorial Below


1. Accessing Pabbly Connect for Automation

To start automating welcome emails using Pabbly Connect, first, visit the Pabbly Connect website at www.Pabbly.com/connect. This platform allows you to create workflows that connect various applications seamlessly.

Once on the site, you can either sign in or sign up for a free account. New users receive 100 free tasks monthly, enabling them to explore the functionalities of Pabbly Connect without any cost. This is an excellent way to get started with automating your email processes.


2. Creating a Workflow in Pabbly Connect

After logging into your Pabbly Connect account, navigate to the dashboard and select the option to create a new workflow. Choose the Beta version for a modern experience, and name your workflow, such as “Send Welcome Emails to New Form Submission.”

  • Select the trigger application as Google Forms.
  • Choose the event as New Response Received.
  • Copy the generated webhook URL.

This setup allows Pabbly Connect to listen for new responses submitted via Google Forms, ensuring that your email automation is triggered correctly.


3. Connecting Google Forms to Pabbly Connect

To connect Google Forms with Pabbly Connect, go to your Google Form responses and click on the option to view in Sheets. This will open a Google Sheet linked to your form.

Next, navigate to Extensions and select Add-ons, then Get Add-ons. Search for the Pabbly Connect Webhooks add-on and install it. Once installed, go back to Extensions, find Pabbly Connect Webhooks, and click on Initial Setup. Paste the webhook URL you copied earlier and set the Trigger Column to E, which is your final data column.

Make sure to click send test to verify the connection. This step ensures that new submissions in Google Forms are communicated to Pabbly Connect effectively.


4. Setting Up Email Action in Pabbly Connect

With Google Forms connected, it’s time to set up the action in Pabbly Connect. Click on the plus icon to add an action application and select Gmail. Choose the event as Send Email.

During setup, you can create a new connection by signing in with your Google account. Fill in the sender’s name and email address, which is automatically retrieved from your Gmail account.

  • Map the recipient email address from the Google Forms response.
  • Enter a subject line for the email, like “Welcome! Thanks for signing up.”
  • Write the email content and map the user’s details dynamically.

These steps utilize Pabbly Connect to ensure that each new lead receives a personalized welcome email without manual effort.


5. Testing and Activating Your Workflow

After configuring your email action, it’s crucial to test the workflow. Click on Save and Send Test Request to send a test email. Check your Gmail inbox to ensure that the email was sent successfully.

Finally, to ensure that your workflow runs smoothly, make sure the Send on Event option is enabled in the Pabbly Connect Webhooks settings. This setting allows new form submissions to trigger the email sending process automatically.

By following these steps, you will have a fully functional workflow in Pabbly Connect that sends welcome emails automatically whenever a new lead is received through Google Forms.


Conclusion

In this tutorial, we explored how to automate sending welcome emails using Pabbly Connect when a new lead is received from Google Forms. This process enhances engagement and ensures timely communication with your leads. By leveraging the features of Pabbly Connect, you can streamline your email workflows effectively.

Ensure you check out Pabbly Connect to create business automation workflows and reduce manual tasks. Pabbly Connect currently offer integration with 2,000+ applications.

Automatically Send Discount Coupons via Email

Learn how to automatically send discount coupons via email using Pabbly Connect, Google Sheets, Gmail, and more in this detailed tutorial. Eliminate manual repetitive tasks from your workflow. Discover proven automation methods with intuitive steps designed for efficiency-minded professionals.

Watch Step By Step Video Tutorial Below


1. Accessing Pabbly Connect for Automation

To automatically send discount coupons via email, you first need to access Pabbly Connect. If you are a new user, go to pabbl.com/connect to sign up for free and explore the features.

Once signed up, you will receive 100 tasks free every month. This allows you to send up to 100 emails without any cost. If you find Pabbly Connect useful, you can opt for a subscription plan later.


2. Setting Up Google Sheets with Pabbly Connect

The next step is to set up Google Sheets as the trigger application in Pabbly Connect. Click on the ‘Add Trigger’ button and select Google Sheets. Choose the event as ‘New or Updated Spreadsheet Row’.

  • Search for Google Sheets in the trigger application.
  • Select the event as New or Updated Spreadsheet Row.
  • Click on ‘Connect’ to establish the connection.

After connecting, copy the webhook URL provided by Pabbly Connect. This URL will be used to send data from Google Sheets to Pabbly Connect.


3. Configuring Google Sheets for Webhook

Now, go to your Google Sheets and install the Pabbly Connect Webhooks extension. After installation, refresh your spreadsheet to see the new option.

  • Navigate to Extensions > Add-ons > Get Add-ons.
  • Search for ‘Pabbly Connect Webhooks’ and install it.
  • After installation, go to Extensions > Pabbly Connect Webhooks > Initial Setup.

In the initial setup, paste the webhook URL and specify the trigger column (for example, column D). Click on ‘Submit’ to finalize the setup. This will connect Google Sheets to Pabbly Connect.


4. Sending Emails with Gmail via Pabbly Connect

After configuring Google Sheets, the next step is to send emails using Gmail through Pabbly Connect. Add a new action step and select Gmail as the action application.

Choose the event as ‘Send Email’ and connect your Gmail account. If you have previously connected, you can select the existing connection; otherwise, create a new one by signing in with Google.

Select Gmail as the action application. Choose ‘Send Email’ as the action event. Map the recipient email address and other details from the previous step.

Fill in the email subject and content, making sure to map the customer’s name dynamically for personalized emails. Finally, click on ‘Save and Send Test Request’ to send a test email.


5. Sending Discount Coupons to All Customers

Once the test email is successful, you can send discount coupons to all customers listed in your Google Sheets. Go back to Extensions > Pabbly Connect Webhooks and select ‘Send All Data’.

This will trigger Pabbly Connect to send automated emails to all customers in the spreadsheet. To ensure future entries are also sent emails, enable the ‘Send on Event’ option in the Pabbly Connect Webhooks settings.

This automation allows you to efficiently manage your customer communications and ensure everyone receives their discount codes in real-time.


Conclusion

Using Pabbly Connect, you can easily automate the process of sending discount coupons to your customers via email. This tutorial demonstrated how to set up Google Sheets and Gmail integration through Pabbly Connect, streamlining your marketing efforts.

Ensure you check out Pabbly Connect to create business automation workflows and reduce manual tasks. Pabbly Connect currently offer integration with 2,000+ applications.

Reply to Bakery Orders Automatically Using a WhatsApp Assistant

Learn how to automate bakery orders using Pabbly Connect and WhatsApp Assistant. Step-by-step tutorial for seamless integration. Implement the precise methodologies leading organizations use to automate repetitive tasks, illustrated with practical examples designed for immediate application.

Watch Step By Step Video Tutorial Below


1. Accessing Pabbly Connect for Your Bakery Orders

To automate bakery orders, the first step is to access Pabbly Connect. Open your browser and navigate to pav.com/chartflow, where you will find options to sign in or sign up. If you are a new user, click on ‘Sign Up Free’ to create an account and explore the features of Pabbly Connect. Existing users can sign in directly.

Once logged in, you will be directed to the Pabbly apps window. Here, click on ‘Access Now’ for Pabbly Chatflow to begin setting up your WhatsApp assistant. This integration will allow you to manage customer queries efficiently through WhatsApp, enhancing your bakery’s customer service capabilities.


2. Creating Your WhatsApp Assistant Using Pabbly Connect

After accessing Pabbly Chatflow, you can create your WhatsApp assistant. Start by clicking the ‘Add’ button to create a new assistant. Name your assistant appropriately, and you will be redirected to a flow window. This is where Pabbly Connect facilitates the setup of your assistant’s responses.

  • Choose the instruction type from the dropdown menu.
  • Set the temperature for the AI responses to control creativity.
  • Select OpenAI as the AI to use and choose the model.

Once you have configured these settings, you will need to enter your OpenAI API key to connect the assistant. This key is crucial for Pabbly Connect to access the AI functionalities necessary for responding to customer inquiries accurately.


3. Configuring Your WhatsApp Assistant Settings

With your assistant created, the next step is to configure its settings. In this section, Pabbly Connect allows you to customize how your assistant interacts with customers. You can enable header and footer messages, define stop keywords to halt automated replies, and set retry attempts for failed responses.

For instance, the stop keyword can be set to ‘human’, allowing customers to request human intervention at any point. You can also define fallback messages that the assistant will send if it fails to respond correctly. This ensures that your customers always receive a prompt reply, maintaining a high level of service.

  • Define a knowledge source document for FAQs and information about your bakery.
  • Upload this document in plain text or PDF format.
  • Customize the assistant’s interface with your bakery’s branding.

By following these steps, you ensure that your WhatsApp assistant is equipped to handle a variety of customer queries effectively, thanks to the powerful integration capabilities of Pabbly Connect.


4. Assigning Your Assistant to WhatsApp Contacts

After setting up your WhatsApp assistant, the next step is to assign it to your WhatsApp contacts. This can be done in bulk through the inbox settings in Pabbly Connect. Navigate to the settings section, scroll to the AI auto-reply settings, and enable auto replies. Select the contact list and the assistant you wish to assign.

Click ‘Save’ to apply these settings. This allows your assistant to automatically respond to inquiries from all contacts in the selected list, ensuring that your bakery’s customer service remains efficient and responsive.

Additionally, you can assign the assistant to individual chats by selecting a specific chat in the inbox section. Turn on the assistant button and choose the appropriate assistant to activate it for that chat. This flexibility allows you to tailor customer interactions based on specific needs.


5. Conclusion: Automate Your Bakery Orders with Pabbly Connect

In conclusion, integrating a WhatsApp assistant for your bakery using Pabbly Connect is a straightforward process that enhances customer engagement. By following the steps outlined, you can automate responses to common queries and streamline order management, making your bakery more efficient.

Ensure you check out Pabbly Connect to create business automation workflows and reduce manual tasks. Pabbly Connect currently offer integration with 2,000+ applications.

Check out Pabbly Connect – Automate your business workflows effortlessly! Sign Up Free – Start your journey with ease! 10,000+ Video Tutorials – Learn step by step! Join Pabbly Facebook Group – Connect with 21,000+ like minded people!

Utilizing Pabbly Connect not only saves time but also ensures that your customers receive timely and accurate information, leading to improved satisfaction and loyalty. Start automating your bakery orders today!

Stop Answering Repeated Queries — Let AI Handle Support

Learn how to automate your WhatsApp support using Pabbly Chatflow. This detailed tutorial shows you how to build powerful chat automation that engages visitors and converts prospects—without any coding required.

Watch Step By Step Video Tutorial Below


1. Accessing Pabbly Chatflow for WhatsApp Automation

To start automating your WhatsApp support, you need to access Pabbly Chatflow. Open your browser and navigate to www.Pabbly.com/chatflow. Once on the site, you can either sign in if you’re an existing user or sign up for a free account that provides 100 tasks monthly.

After logging in, you’ll see the Pabbly apps page. Click on Pabbly Chatflow to enter the app dashboard. Here, you can manage your WhatsApp connections and settings efficiently. Make sure to add your WhatsApp number by clicking on the ‘Add WhatsApp Number’ option, which is crucial for setting up the AI assistant.


2. Creating Your AI Assistant in Pabbly Chatflow

Once you are in Pabbly Chatflow, the next step is to create your AI assistant. On the left sidebar, click on the ‘AI Assistant’ option. This will take you to the AI assistant page where you can view existing assistants. To create a new one, click on ‘Add AI Assistant’ and name it ‘Let AI Handle Support’.

  • Click on ‘Add AI Assistant’.
  • Enter the name of your assistant.
  • Proceed to configure AI instructions and settings.

After naming your assistant, you’ll be directed to a configuration page. Here, select the instruction type as ‘AI Agent’ and adjust the AI’s answer style according to your preference. Set the creativity level and choose OpenAI as the AI to use, specifically selecting the GPT-5 mini model for optimal responses.


3. Configuring Your AI Assistant Settings

In this section, you will configure your AI assistant settings within Pabbly Chatflow. After selecting your AI model, you need to enter your OpenAI API key. If you haven’t generated one yet, follow the prompts to create a new secret key. Once your API key is saved successfully, proceed to customize the assistant’s response settings.

  • Set the stop keywords that users can type to stop receiving responses.
  • Configure retry attempts for API responses.
  • Add fallback messages for unresolved queries.

These settings will help ensure your AI assistant responds accurately and maintains user engagement. Make sure to toggle on necessary options for header messages and configure knowledge sources to enhance the assistant’s ability to provide relevant information.


4. Uploading Your Knowledge Base in Pabbly Chatflow

To empower your AI assistant, you need to upload a knowledge base. This is done through Pabbly Chatflow by selecting the ‘Knowledge Source’ option. Here, you can upload a file containing FAQs, pricing, and other relevant information about your services.

Ensure that the knowledge base is comprehensive and well-structured. For example, include sections on company information, product details, and frequently asked questions. Upload the file in a supported format, such as TXT or PDF, with a maximum of 10 pages if it includes images.


5. Assigning Your AI Assistant to Contacts in Pabbly Chatflow

After setting up your AI assistant, the final step is to assign it to specific contacts or groups. Within Pabbly Chatflow, navigate to the ‘Inbox’ settings. Here, you can enable the AI assistant for individual chats or for all contacts.

Toggle the AI assistant on for specific chats. Select the AI assistant from the dropdown menu. Save your settings to apply the changes.

By following these steps, you can effectively automate your WhatsApp support using Pabbly Chatflow. This AI integration will allow you to handle repeated queries efficiently, freeing up your time for more complex customer interactions.


Conclusion

In conclusion, automating your WhatsApp support with Pabbly Chatflow is a straightforward process. By creating an AI assistant and configuring it with the right settings and knowledge base, you can efficiently manage customer queries and improve response times. This integration not only enhances customer service but also streamlines your workflow.

Ensure you check out Pabbly Connect to create business automation workflows and reduce manual tasks. Pabbly Connect currently offer integration with 2,000+ applications.

This Instagram Automation Works for Every Business

Learn how to automate your Instagram posts using Pabbly Connect with this detailed tutorial. Follow the steps to integrate AI and streamline your content creation process.

Watch Step By Step Video Tutorial Below


1. Accessing Pabbly Connect for Your Instagram Automation

To start automating your Instagram posts, you first need to access Pabbly Connect. Simply open your browser and navigate to pave.com/connect. Here, you’ll find options to either sign in or sign up for a free account.

If you are new to Pabbly Connect, click on the ‘Sign Up Free’ button to create an account. Once logged in, you will have access to all Pabbly applications. Locate Pabbly Connect and click on the ‘Access Now’ button to enter the dashboard.


2. Creating a New Workflow in Pabbly Connect

After accessing the dashboard, you need to create a new workflow for your Instagram automation. Click on the ‘Create’ button to start. You will see two options: ‘New Beta’ and ‘Classic’. For this tutorial, select the ‘New Beta’ option. using Pabbly Connect

  • Click on the ‘Create’ button to initiate a new workflow.
  • Name your workflow, such as ‘This Instagram Automation Works for Every Business’.
  • Select a folder for organization, like ‘Automations’.

Once you have set up the initial details, click on the ‘Create’ button to finalize your workflow setup. This establishes the foundation for your automation process.


3. Setting Up the Trigger in Pabbly Connect

To automate your Instagram posting, you will need to set up a trigger in Pabbly Connect. For this tutorial, we will use the ‘Schedule by Pabbly’ feature to run the automation daily at a specific time.

Choose ‘Schedule Workflow’ as your app event. You will be prompted to select how often you want the workflow to run. Select ‘Every Day’ and set the time to 12 PM. Click ‘Save’ to confirm your trigger settings.


4. Generating Content for Instagram Using AI

Now that your trigger is set, you can use an AI tool, such as Google Gemini, to generate content for your Instagram post. In Pabbly Connect, select Google Gemini as your action application and choose ‘Generate Content’ as the app event.

  • Connect your Google Gemini account.
  • Enter a relevant prompt for the AI to generate an Instagram caption.
  • Select the model version, such as ‘Gemini 2.5 flash’.

Once you have filled out the required fields, click on ‘Save and Send Request’. You will receive a successful response with the AI-generated caption, which will be used in your Instagram post.


5. Posting to Instagram Using Pabbly Connect

After generating the caption, you will need to post it on your Instagram account. In Pabbly Connect, select ‘Instagram for Business’ as your action application and choose ‘Create and Publish Photo’ as the app event.

Connect your Instagram account and map the previously generated caption and image URL from the AI tool. Click on ‘Save and Send Request’ to finalize the post. Upon success, your new Instagram post will be live with the AI-generated content.


Conclusion

In this tutorial, we demonstrated how to automate your Instagram posts using Pabbly Connect. By integrating AI tools, you can streamline your content creation process and enhance your social media presence. Follow these steps to set up your own automation and save time on your Instagram management.

Ensure you check out Pabbly Connect to create business automation workflows and reduce manual tasks. Pabbly Connect currently offer integration with 2,000+ applications.

They Messaged at 2 AM — And Still Got a Reply

Learn how to set up a WhatsApp chatbot using Pabbly Connect for instant replies to customer inquiries, no matter the time. Learn to create powerful connections between your critical applications without requiring specialized programming knowledge or extensive technical background.

Watch Step By Step Video Tutorial Below


1. Accessing Pabbly Connect for WhatsApp Automation

To create a WhatsApp chatbot that responds instantly to customer inquiries, you need to access Pabbly Connect. Start by navigating to the Pabbly website and selecting the Pabbly Chatflow application. If you are a new user, click on ‘Sign Up Free’ to create an account, which will give you 100 free credits monthly for practice.

Once logged in, you will see the Pabbly apps page. From here, select the ‘Access Now’ button for Pabbly Chatflow. This will take you to the dashboard where you can begin setting up your WhatsApp number for automation. Click on the ‘Add WhatsApp Number’ button to integrate your business WhatsApp account.


2. Creating the Chatbot Flow with Pabbly Connect

In this section, you will create a flow for your WhatsApp chatbot using Pabbly Connect. Click on the ‘Flows’ option in the sidebar to enter the flow builder. Here, you can add a new flow by clicking the ‘Add Flow’ button. Name your flow ‘They Messaged at 2:00 AM and Still Got a Reply’ to indicate its purpose.

  • Name your flow appropriately.
  • Select a trigger for the chatbot, such as keyword or quick reply.
  • Set the keyword to initiate the chatbot, like ‘hello’.

After setting the trigger, you can drag and drop message and action blocks to build your flow. For instance, add a welcome message that greets users when they initiate a conversation. This setup ensures that customers receive immediate responses, enhancing their experience.


3. Adding Buttons and Course Lists in Pabbly Connect

Once your welcome message is set, you can enhance user interaction by adding buttons and course lists in your WhatsApp chatbot using Pabbly Connect. After the welcome message, create a button labeled ‘View Courses’ that users can click. This button should be configured as a quick reply.

  • Add a list node to display courses when the button is clicked.
  • Create sections for each course with titles and descriptions.
  • Connect each course item to a custom field for better data management.

This structured approach allows users to select a course and receive detailed information, ensuring a smooth flow of communication. By utilizing Pabbly Connect, you can effectively manage customer interactions and data collection seamlessly.


4. Finalizing Your WhatsApp Chatbot Flow with Pabbly Connect

After adding the course details, it’s time to finalize your WhatsApp chatbot flow using Pabbly Connect. You will need to create additional buttons for actions such as ‘Enroll Now’ and ‘Fees and Duration’. Each button should lead to a corresponding message node that provides the necessary information.

Once all messages and buttons are configured, ensure to save your flow by clicking the ‘Save’ button. A confirmation popup will indicate that your flow has been successfully saved. With this setup, your WhatsApp chatbot is ready to engage with customers at any time, providing them with the information they need.


5. Sharing Your Pabbly Connect Chatbot Flow

Lastly, you can share your WhatsApp chatbot flow created with Pabbly Connect with others. Go back to the flow builder page, find your flow, and click on the three dots for options. Select ‘Share Flow’ to generate a shareable link that you can distribute to team members or colleagues.

This sharing feature allows others to benefit from your automation setup, encouraging collaboration and knowledge sharing. Make sure to provide support resources for anyone who might have questions about using Pabbly Connect or the chatbot flow you created.


Conclusion

In conclusion, using Pabbly Connect to create a WhatsApp chatbot allows businesses to respond to customer inquiries instantly, no matter the time. This automation enhances customer engagement and ensures no opportunities are missed. Start utilizing Pabbly Connect today to streamline your customer interactions.

Ensure you check out Pabbly Connect to create business automation workflows and reduce manual tasks. Pabbly Connect currently offer integration with 2,000+ applications.

Turn Cold Ad Leads into Customers Automatically

Learn how to automate the process of turning cold ad leads into customers using Pabbly Connect. Step-by-step guide to integrate Facebook, Zoho CRM, and more!

Watch Step By Step Video Tutorial Below


1. Accessing Pabbly Connect for Automation

To turn your cold ad leads into customers automatically, start by accessing Pabbly Connect. This platform allows you to integrate various applications seamlessly. If you’re a new user, visit pabbl.com/connect to sign up for free and explore its features with 100 free tasks every month.

Once you’re on the Pabbly Connect landing page, click on the ‘Sign Up for Free’ option in the top right corner. After signing up, you can explore how Pabbly Connect can help automate your lead management process. Remember, if you find it useful, you can purchase a subscription plan using the discount code R I T YT for additional savings!


2. Setting Up Facebook Lead Ads in Pabbly Connect

Next, set up your Facebook Lead Ads as the trigger in Pabbly Connect. Click on the ‘Add Trigger’ button and search for ‘Facebook Lead Ads’. Select this application and choose the trigger event as ‘New Lead Instant’. Click on ‘Connect’ to link your Facebook account.

  • Ensure your Facebook account is logged in before connecting.
  • Select your Facebook page and lead generation form.
  • Keep the response format as simple and click ‘Save and Send Test Request’.

After clicking ‘Save and Send Test Request’, Pabbly Connect will wait for a webhook response. To capture this response, open the Meta for Developers lead ads testing tool and create a test lead. This step is crucial for ensuring that your automation workflow is correctly set up.


3. Integrating Zoho CRM with Pabbly Connect

Now, it’s time to integrate Zoho CRM into your workflow using Pabbly Connect. Click on the ‘Add New Action’ step and search for ‘Zoho CRM’. Choose the action event as ‘Create Contact’ and click on ‘Connect’. If you have an existing connection, select it; otherwise, create a new connection by entering your Zoho CRM domain.

Once connected, you need to fill in the lead details. Instead of manually typing the lead information, use the mapping feature in Pabbly Connect. This allows you to dynamically insert data from the previous step. For instance, map fields like first name, last name, and email directly from the Facebook lead data.

  • Select the lead source as Facebook.
  • Map the required details and click ‘Save and Send Test Request’.
  • Check Zoho CRM for the newly created contact.

After successfully creating a contact, you can see that the lead details from Facebook are now in your Zoho CRM. This integration streamlines the process of managing leads and allows your sales team to contact potential customers quickly.


4. Automating Lead Management with Pabbly Connect

With Pabbly Connect, every Facebook lead detail will automatically be added to your CRM. This automation ensures that your sales team can focus on converting leads into customers without manually entering data. As soon as a new lead is generated, it appears in your Zoho CRM, ready for follow-up.

This automated workflow not only saves time but also minimizes errors associated with manual data entry. Your sales team can access complete lead details instantly, allowing them to reach out to potential customers without delay. This integration enhances efficiency and improves the chances of converting cold leads into paying customers.

Leads are captured in real-time. Sales team can act quickly on new leads. Improved lead conversion rates.

By utilizing Pabbly Connect, you can efficiently manage your leads and enhance your overall sales process. This automation allows you to focus on growth rather than administrative tasks.


5. Conclusion: Transforming Cold Leads into Customers

In conclusion, using Pabbly Connect to automate the process of turning cold ad leads into customers is a game-changer for businesses. By integrating Facebook Lead Ads with Zoho CRM, you ensure that every lead is captured and managed effectively. This streamlined process not only saves time but also increases the likelihood of converting leads into paying customers.

Ensure you check out Pabbly Connect to create business automation workflows and reduce manual tasks. Pabbly Connect currently offer integration with 2,000+ applications.

With the steps outlined in this tutorial, you can set up your own automated workflow and start benefiting from the efficiency of Pabbly Connect. Don’t miss out on the opportunity to enhance your lead management strategy and grow your customer base!

Close More Deals with AI-Powered Personalized Emails

Learn how to automate email responses using Pabbly Connect and various applications like Google Forms and Perplexity AI for personalized customer interactions. Follow this definitive guide to creating powerful automated workflows with straightforward, efficiency-focused solutions that save valuable time.

Watch Step By Step Video Tutorial Below


1. Accessing Pabbly Connect for Email Automation

To start automating your email responses using Pabbly Connect, first, visit the Pabbly website by typing Pabbly.com in your browser. Once on the site, you can sign in or sign up for a free account, which grants you 100 tasks monthly. This is a great way to explore how Pabbly Connect can fit into your business needs.

After signing in, navigate to the Pabbly Connect dashboard. Here, you can create workflows that will automate your email responses. Click on the ‘Create Workflow’ button, select the new beta workflow builder, and name your workflow as ‘Close More Deals with AI Powered Personalized Emails.’ This sets the stage for integrating various applications with Pabbly Connect.


2. Setting Up Google Forms as a Trigger

In this section, we will set Google Forms as the trigger application in Pabbly Connect. The trigger will activate the workflow whenever a new form submission is received. Select Google Forms as your trigger application and choose the event ‘New Response Received.’ This means every time a customer fills out your Google Form, the workflow will initiate.

  • Select Google Forms as the trigger application.
  • Choose ‘New Response Received’ as the trigger event.
  • Connect Pabbly Connect to your Google Forms using the webhook URL provided.

Make sure to toggle the required button on the last field of your Google Form. This ensures all necessary information is collected. Once the form is set up, do a test submission to verify that the data is being captured correctly in Pabbly Connect.


3. Integrating Perplexity AI for Email Generation

Next, we will integrate Perplexity AI into our workflow to generate personalized email responses. After your Google Forms trigger is set, add a new action step and select Perplexity AI as your action application. Choose the ‘Create Chat Completion’ event, which will allow you to generate the email content based on the form responses. using Pabbly Connect

To connect to Perplexity AI, you will need an API key. If you don’t have an existing connection, click on the provided hyperlink to create a new token. Once connected, fill in the necessary fields, including the model selection and user role. Here’s how to set it up:

  • Select ‘Sonar Pro’ as the model.
  • Enter the prompt for generating the email, including customer details.
  • Map the fields from Google Forms to ensure dynamic responses.

After filling in the details, click on ‘Save and Send Request’ to generate the email content. This email will be personalized based on the customer’s query, allowing you to respond effectively.


4. Sending Emails via Gmail

Once you have generated the email content using Perplexity AI, the next step is to send it through Gmail. Add another action step in your workflow and select Gmail as your action application. Choose ‘Send Email’ as the action event, which allows you to send the generated email directly to the customer.

Connect your Gmail account to Pabbly Connect by signing in and granting the necessary permissions. Fill in the required fields, such as the sender email address, recipient email address, and email subject. Ensure that you map the email content generated by Perplexity AI into the email body. This ensures that each email is personalized based on the customer’s query.


5. Summary of the Workflow

In this final section, we summarize how to effectively use Pabbly Connect to automate email responses. The workflow starts with Google Forms capturing customer queries, which triggers the integration. Perplexity AI then generates a personalized email based on the query, and Gmail sends this email to the customer.

This automation not only saves time but also enhances customer satisfaction by providing quick and personalized responses. By following these steps, you can set up a seamless workflow using Pabbly Connect to close more deals with AI-powered personalized emails.

Conclusion

This guide summarizes the key points and helps you understand the essential features and benefits of using this tool.

Ensure you check out Pabbly Connect to create business automation workflows and reduce manual tasks. Pabbly Connect currently offer integration with 2,000+ applications.


In conclusion, using Pabbly Connect effectively integrates Google Forms, Perplexity AI, and Gmail to automate personalized email responses. This process enhances customer engagement and helps in closing more deals efficiently.

Automatically Generate Product Descriptions Using Gemini

Learn how to use Pabbly Connect to automatically generate product descriptions with Gemini, integrating Google Sheets and more seamlessly. Explore efficient methods for automating routine tasks with clear, concise instructions suited for both newcomers and experienced professionals.

Watch Step By Step Video Tutorial Below


1. Getting Started with Pabbly Connect

To automatically generate product descriptions using Pabbly Connect, the first step is to access the platform. If you’re new, visit Pabbly’s website and navigate to the Pabbly Connect section. Click on the ‘Sign up for free’ option in the top right corner. This allows you to explore Pabbly Connect with 100 free tasks per month, enabling you to generate numerous product descriptions without any cost.

Once you’ve created your account, log in to the Pabbly Connect dashboard. Here, you will find the workflow builder, which is essential for setting up your automation. The workflow consists of two main components: triggers and actions. A trigger starts the process, while actions are the outcomes of that trigger. This setup will allow you to create a seamless integration for generating product descriptions.


2. Setting Up Google Sheets with Pabbly Connect

The next step is to configure Google Sheets within Pabbly Connect. Click on the ‘Add Trigger’ button in your workflow and select Google Sheets as the app. Choose the event as ‘New or Updated Spreadsheet Row’ and connect your Google account. This connection enables Pabbly Connect to monitor changes in your Google Sheets.

  • Search for Google Sheets in the trigger application.
  • Select ‘New or Updated Spreadsheet Row’ as the event.
  • Connect your Google account by allowing necessary permissions.

After setting up the trigger, you will receive a webhook URL. Copy this URL and head to your Google Sheets. Install the Pabbly Connect Webhooks extension by navigating to Extensions > Add-ons > Get Add-ons, and search for Pabbly Connect Webhooks. After installation, refresh the sheet to see the new option under Extensions. This integration allows Pabbly Connect to send data from Google Sheets for product description generation.


3. Configuring Pabbly Connect Webhooks

Once the Pabbly Connect Webhooks extension is installed, it’s time to configure it. Go to Extensions > Pabbly Connect Webhooks > Initial Setup. Here, paste the webhook URL you copied earlier. Specify the trigger column, which is the final data column in your Google Sheets where the product details will be entered. This setup ensures that when you add new product details, they are sent to Pabbly Connect for processing.

After entering the webhook URL and trigger column, click on the submit button. You will receive a confirmation stating that the setup is configured successfully. To test the connection, click on the ‘Send Test’ button. This action sends sample data to Pabbly Connect, allowing you to verify that the integration is working correctly.


4. Using Gemini to Generate Product Descriptions

With the connection established, the next step is to generate product descriptions using Gemini through Pabbly Connect. Add a new action step in your workflow and search for Gemini. Choose the event as ‘Generate Content’ and connect it to your existing Gemini API key. If you haven’t created a connection yet, follow the prompts to obtain your API key from Google AI Studio.

Once connected, you will need to set up the content generation prompt. This involves mapping the product details from Google Sheets into the prompt fields. For instance, include the product name, type, features, and target audience. Mapping ensures that the data is dynamic and updates with each new entry. After configuring the prompt, click on ‘Save and Send Test Request’ to generate the product description.

  • Add Gemini as the action application.
  • Select ‘Generate Content’ as the event.
  • Map product details from Google Sheets into the prompt fields.

After generating the product description, you can move to the final step of adding this description back into Google Sheets. This integration showcases how Pabbly Connect effectively links these applications to automate your workflow.


5. Updating Google Sheets with Product Descriptions

The last step is to update your Google Sheets with the generated product descriptions. Add another action step in your Pabbly Connect workflow and select Google Sheets again. This time, choose the event as ‘Update Cell Value’. Connect your Google account if prompted, and specify the same spreadsheet and sheet where you want to add the product descriptions.

In the action settings, you will need to specify the range for the cell where the description will be updated. For example, if the description should be added to column F, enter ‘F’ followed by the row index. Make sure to map the row index dynamically so it updates with each new entry. After configuring this, click on ‘Save and Send Test Request’ to finalize the integration.

Once completed, every time you add new product details in Google Sheets, Pabbly Connect will automatically generate the product description using Gemini and update it in your sheet. This automation saves time and enhances productivity for online store owners.


Conclusion

Using Pabbly Connect, you can effortlessly automate the generation of product descriptions with Gemini. This integration with Google Sheets streamlines your workflow, allowing you to focus on other important aspects of your business. Experience the efficiency of automation with Pabbly Connect today!

Ensure you check out Pabbly Connect to create business automation workflows and reduce manual tasks. Pabbly Connect currently offer integration with 2,000+ applications.