How to Instantly Respond to Facebook Leads Using WhatsApp Automation

Watch Step By Step Video Tutorial Below


1. Accessing Pabbly Connect for Integration

To begin, you need to access Pabbly Connect. Open a new tab and navigate to pabblabi.com/connect. If you’re a new user, sign up for a free account to get started. This account will provide you with 100 free credits every month, perfect for testing your automation workflows.

Once logged in, you will see the dashboard of Pabbly Connect. Here, you can manage all your automation workflows. To create a new workflow, click on the “+ Create Workflow” button. You will have three options: create from scratch, create using AI, or create using quick builder. For this tutorial, we will use the quick builder for its efficiency.


2. Setting Up Your Workflow in Pabbly Connect

In the quick builder, enter a prompt like “instantly respond to Facebook leads using WhatsApp automation”. Pabbly Connect will analyze your request and suggest relevant triggers. Select the Facebook lead ads trigger as “New Lead”.

  • Choose the Facebook page where your ads are running.
  • Select the lead generation form you are using.
  • Choose the response format (simple, advanced, or raw).

After making these selections, click on the “Save and Send Test Request” button. You will receive a positive response, indicating that the connection is successfully established.


3. Connecting WhatsApp Using Pabbly Connect

Next, we will connect WhatsApp through Pabbly Connect using Pabbly Chatflow. Click on the application and then the “Connect” button. You will need to add a new connection by clicking on “Add New Connection”.

Here, you will be prompted to enter your API token from Pabbly Chatflow. To get this token, log in to your Pabbly Chatflow dashboard and navigate to the settings option. Under the API and Webhooks section, you will find your API token. Copy it and paste it into the required field in Pabbly Connect.


4. Mapping Data for WhatsApp Messages

Once connected, you need to map the data received from Facebook leads to WhatsApp. In the recipient WhatsApp mobile number field, map the mobile number from the lead form. This mapping is essential as it allows Pabbly Connect to send personalized messages based on the lead’s submitted information.

  • Enter a personalized message for the lead.
  • Use mapping to include the lead’s name and location in the message.
  • Ensure the mobile number includes the country code without the plus sign.

After completing the mapping, click on the “Save and Send Test Request” button. You should receive a successful response, confirming that the message was sent to WhatsApp.


5. Finalizing Your Pabbly Connect Workflow

After testing, ensure to enable the toggle for your workflow in Pabbly Connect. This step is crucial because if the toggle is disabled, your automation will not run. With everything set up, your workflow is now fully operational.

If you encounter any issues during this process, feel free to reach out for assistance. Remember, the power of Pabbly Connect lies in its ability to automate thousands of applications without coding, enhancing your business efficiency.


Conclusion

Integrating WhatsApp with Facebook leads using Pabbly Connect automates your messaging process, ensuring timely responses to potential customers. This setup enhances customer engagement and streamlines your sales process. Try it out today for a more efficient workflow!
Bulk WhatsApp Messages for NGOs

Watch Step By Step Video Tutorial Below


1. Accessing Pabbly Chatflow for WhatsApp Integration

To begin using Pabbly Chatflow for scheduling WhatsApp messages, first, you need to log in to your Pabbly Chatflow account. If you are a new user, visit the Pabbly Chatflow landing page and click on the “Sign Up for Free” button in the top right corner.

Once you have your account, you can access the dashboard. If you haven’t added your WhatsApp number yet, follow the video instructions to connect it. This is crucial as Pabbly Chatflow will use this number to send messages on your behalf.


2. Creating a Broadcast in Pabbly Chatflow

Now that you have accessed Pabbly Chatflow, the next step is to create a broadcast. Navigate to the “Broadcast” section on the left side of the dashboard and click on the “Add Broadcast” button.

  • Select “Broadcast Campaign” as the broadcast type.
  • Name your broadcast, for example, “Free Health Checkup Camp”.
  • Choose the contact list you want to notify.

After selecting the contact list, you can refine your audience by excluding certain contacts if necessary. This feature ensures that your broadcast reaches the intended recipients efficiently through Pabbly Chatflow.


3. Setting Up Your Message in Pabbly Chatflow

Once your broadcast is set up, it’s time to configure the message. In the broadcast setup, you will be prompted to choose the message type. You can opt for either a pre-approved template message or a regular message.

  • For a pre-approved template, create and submit it for approval from the “Template” section.
  • For a regular message, select the text format and input your message directly.

To format your message, use asterisks for bold text and underscores for italic. This allows you to create an engaging message that captures attention. After formatting, you can test the message before sending it out using Pabbly Chatflow.


4. Scheduling Your Broadcast in Pabbly Chatflow

After testing your message, decide whether to send it instantly or schedule it for later. If you choose to schedule, click on “Yes, schedule for later” and select your desired date and time from the calendar.

For example, you might set the broadcast for 1:00 PM on August 1st. After confirming the schedule, click the “Add Broadcast” button. This ensures that your message will be sent at the specified time, keeping your audience informed through Pabbly Chatflow.


5. Monitoring Broadcast Results in Pabbly Chatflow

Once your broadcast is scheduled, you can monitor its performance. Navigate to the “Sent” section in Pabbly Chatflow to view statistics such as how many messages were sent, delivered, read, or failed.

This data is crucial for assessing the effectiveness of your communication. You can check for any no-shows or ignored messages, allowing you to refine future broadcasts. With Pabbly Chatflow, you can ensure your NGO’s messages reach the right audience effectively.


Conclusion

Using Pabbly Chatflow allows NGOs to efficiently schedule WhatsApp notifications, ensuring timely communication with members. This step-by-step guide highlights the ease of setting up broadcasts and monitoring their effectiveness.

Capture TikTok Leads Automatically and Add Them to Your CRM

Watch Step By Step Video Tutorial Below


1. Accessing Pabbly Connect for Integration

To start integrating TikTok leads into your HubSpot CRM, the first step is to access Pabbly Connect. Open your browser and navigate to www.pabbly.com/connect. If you’re a new user, sign up for free to receive 100 tasks each month, allowing you to test the integration.

Once logged in, you can create your automation setup. Pabbly Connect simplifies the process of connecting different applications without any coding skills. For this tutorial, we will set up a workflow that captures TikTok leads and automatically adds them to HubSpot CRM.


2. Creating the Connection with TikTok Lead Generation

The next step is to create a connection with TikTok Lead Generation through Pabbly Connect. In your dashboard, click on the “Connect” option and select “TikTok Lead Generation” as your trigger application. You will then need to authorize the connection.

  • Click on “Add New Connection” and then select “Connect with TikTok Lead Generation”.
  • Grant permission by clicking the “Confirm” button.
  • Choose the advertisement ID and form ID from your TikTok account.

After connecting, generate a test lead to ensure that the integration works correctly. This test lead will be captured by Pabbly Connect and used in the next steps for mapping data into HubSpot.


3. Mapping Data to HubSpot CRM

Now that the test lead is captured, the next step is to map this data to your HubSpot CRM using Pabbly Connect. Add an action step and select “HubSpot CRM” as the action application. Click on “Connect” to establish a connection.

In the connection window, select your HubSpot account. You will then be prompted to fill in the details for the contact you want to create. The most important field is the email address, which you will map from the previous step.

  • Map the email address from the TikTok lead response.
  • Fill in other fields like first name and last name, which may require additional steps to split the name.
  • Set the lead status and timezone as needed.

Once all required fields are filled, click “Save and Send Test Request”. If successful, you will see a confirmation that a new contact has been added to HubSpot.


4. Testing the Integration Workflow

After mapping the data, it’s crucial to test the integration workflow using Pabbly Connect. Ensure that the test lead you generated appears in your HubSpot CRM. This step verifies that the connection between TikTok and HubSpot is functioning correctly.

To test, refresh your HubSpot contacts page. You should see the new contact created from the test lead. This confirms that the integration is successful and that any new leads from TikTok will automatically sync to your CRM.

Additionally, you can monitor the workflow in Pabbly Connect to ensure that all leads are captured in real-time. This automation saves valuable time and allows your team to focus on lead management without manual entry.


5. Finalizing the Setup for Future Leads

Now that the integration is tested and working, you can finalize the setup in Pabbly Connect. Make sure to remove any unnecessary test leads from your workflow to keep it clean and efficient.

With the integration complete, every new lead generated from your TikTok ads will automatically be added to your HubSpot CRM. This seamless process ensures that you never miss a potential client and can manage your leads effectively.

By utilizing Pabbly Connect, you can create multiple automations for other applications as well, enhancing your overall business efficiency.


Conclusion

In this tutorial, we demonstrated how to integrate TikTok leads with HubSpot CRM using Pabbly Connect. This automation streamlines your lead management process, ensuring that every lead is captured and organized effectively.

Send WhatsApp Messages from Google Sheets in 5 Minutes

Watch Step By Step Video Tutorial Below


1. Accessing Pabbly Connect for Google Sheets and WhatsApp Integration

To begin automating WhatsApp messages based on Google Sheets entries, you first need to access Pabbly Connect. Go to pabbly.com/connect in your browser. If you are new, sign up for a free trial, or log in if you already have an account.

Once logged in, navigate to the workflow page where you can create a new automation. This automation will connect Google Sheets and WhatsApp, allowing you to send messages automatically. Ensure you have a Google Sheet ready with the necessary data for the automation to work.


2. Setting Up Google Sheets as the Trigger in Pabbly Connect

In this step, you will set up Google Sheets as the trigger application in Pabbly Connect. Start by selecting Google Sheets from the list of applications. Choose the event as “New or Updated Spreadsheet Row” to initiate the workflow whenever a new lead is added.

  • Select Google Sheets as the trigger application.
  • Choose “New or Updated Spreadsheet Row” as the event.
  • Copy the webhook URL provided by Pabbly Connect.

After copying the webhook URL, you will need to set it up in your Google Sheet. This involves using the Pabbly Connect Webhooks add-on, which you can find in the Google Workspace Marketplace. This step ensures that your Google Sheet can send data to Pabbly Connect whenever a new entry is added.


3. Configuring Google Sheets to Send Data to Pabbly Connect

Now, you will configure your Google Sheet to send data to Pabbly Connect. Open your Google Sheet, go to Extensions, and select Pabbly Connect Webhooks. Click on “Initial Setup” and paste the webhook URL you copied earlier.

  • Paste the webhook URL in the provided field.
  • Set the trigger column to the last column of your data.
  • Submit the setup to finalize the configuration.

Once the setup is complete, send test data from your Google Sheet to ensure that Pabbly Connect receives the data correctly. This step is crucial for verifying that the integration is functioning as expected before moving to the next stage.


4. Sending WhatsApp Messages Using Pabbly Connect

With Pabbly Connect configured to receive data from Google Sheets, the next step is to send WhatsApp messages through the Pabbly Chat Flow application. In Pabbly Connect, choose Pabbly Chat Flow as the action application and select “Send Text Message” as the action event.

To establish a connection, you will need an API token from Pabbly Chat Flow. Access your Pabbly Chat Flow dashboard, navigate to settings, and find the API and webhooks section to copy your API token. Paste this token back in Pabbly Connect to create a secure connection.


5. Finalizing the Integration and Testing

After establishing the connection with Pabbly Chat Flow, you need to map the fields for the WhatsApp message. This includes the recipient’s phone number and the message content. Use the mapping feature in Pabbly Connect to dynamically insert data from the Google Sheets entry.

Finally, click on “Save and Send Test Request” to send a test WhatsApp message. Check your WhatsApp to confirm that the message has been received successfully. This step ensures that your automation is working correctly, allowing you to send messages to leads directly from Google Sheets.


Conclusion

This tutorial demonstrated how to use Pabbly Connect to automate WhatsApp messages based on entries in Google Sheets. By following these steps, you can streamline your communication with leads and enhance your customer engagement effectively.

The Automation Every Real Estate Agent Should Use

Watch Step By Step Video Tutorial Below


1. Accessing Pabbly Connect for Automation

To automate your real estate lead management, start by accessing Pabbly Connect. Open your browser and visit pabbly.com/connect to reach the Pabbly Connect landing page.

Once there, if you’re a new user, click on the ‘Sign Up for Free’ button to create your account. This will give you a free trial of Pabbly Connect. After trying it out, you can choose a subscription plan. Remember, there’s a special discount code available for users who watch our YouTube videos!


2. Creating Your Workflow in Pabbly Connect

After signing up, navigate to the workflow builder in Pabbly Connect. To create your automation, click on the ‘Add Trigger’ button. Select the application from which you collect real estate leads.

  • Choose your lead source, such as 99acres.
  • Select the event as ‘New Leads’ and click ‘Connect.’
  • Copy the webhook URL provided.

To automate lead capture, configure this webhook URL in your 99acres account. If you need help, contact your account manager to activate your integration. Once activated, you will receive lead details directly in Pabbly Connect.


3. Adding Lead Details to Google Sheets and CRM

After receiving the lead details, the next step is to add them to your Google Sheets. Click on ‘Add New Action Step’ and choose Google Sheets as your action application. Select ‘Add New Row’ as the event and click ‘Connect.’

  • If you’ve already connected Google Sheets with Pabbly Connect, select the existing connection.
  • If not, create a new connection by signing in with your Google account.
  • Map the lead details to the appropriate columns in your spreadsheet.

Once the details are mapped, click on ‘Save and Send Test Request’ to ensure the lead is added to your spreadsheet. You can check your Google Sheets to confirm that the details have been successfully added.


4. Integrating HubSpot CRM with Pabbly Connect

Next, you can add the lead details to your CRM. Click on ‘Add New Action Step’ again and select HubSpot as your action application. Choose ‘Create a Contact’ as the event and click ‘Connect.’

If you’ve previously connected HubSpot with Pabbly Connect, select the existing connection. If not, create a new connection and ensure you’re logged into your HubSpot account. Allow the necessary permissions for Pabbly Connect to access your HubSpot account.

Fill in the lead details such as first name, last name, email, phone number, and city. You can leave other fields blank if you don’t have that information. After filling in the required fields, click ‘Save and Send Test Request’ to confirm that the contact has been created in HubSpot.


5. Sending Automated WhatsApp Messages via Pabbly Chat Flow

Finally, to nurture your leads, automate WhatsApp messages. Click on ‘Add New Action Step’ and select Pabbly Chat Flow to send automated messages. Choose ‘Send Text Message’ as the event and click ‘Connect.’

If you haven’t connected Pabbly Chat Flow with Pabbly Connect, create a new connection by obtaining your API token from the Pabbly Chat Flow dashboard. After connecting, enter the recipient’s WhatsApp number and map it to the lead’s mobile number from the previous steps.

Compose your WhatsApp message, including dynamic elements like the lead’s name and area. After setting everything up, click ‘Save and Send Test Request’ to send the message. You should see a success message confirming that the message has been sent to the lead.


Conclusion

This tutorial has shown you how to automate your real estate lead management using Pabbly Connect, WhatsApp, and Pabbly Chat Flow. By following these steps, you can ensure that every new lead is captured, recorded, and nurtured efficiently.

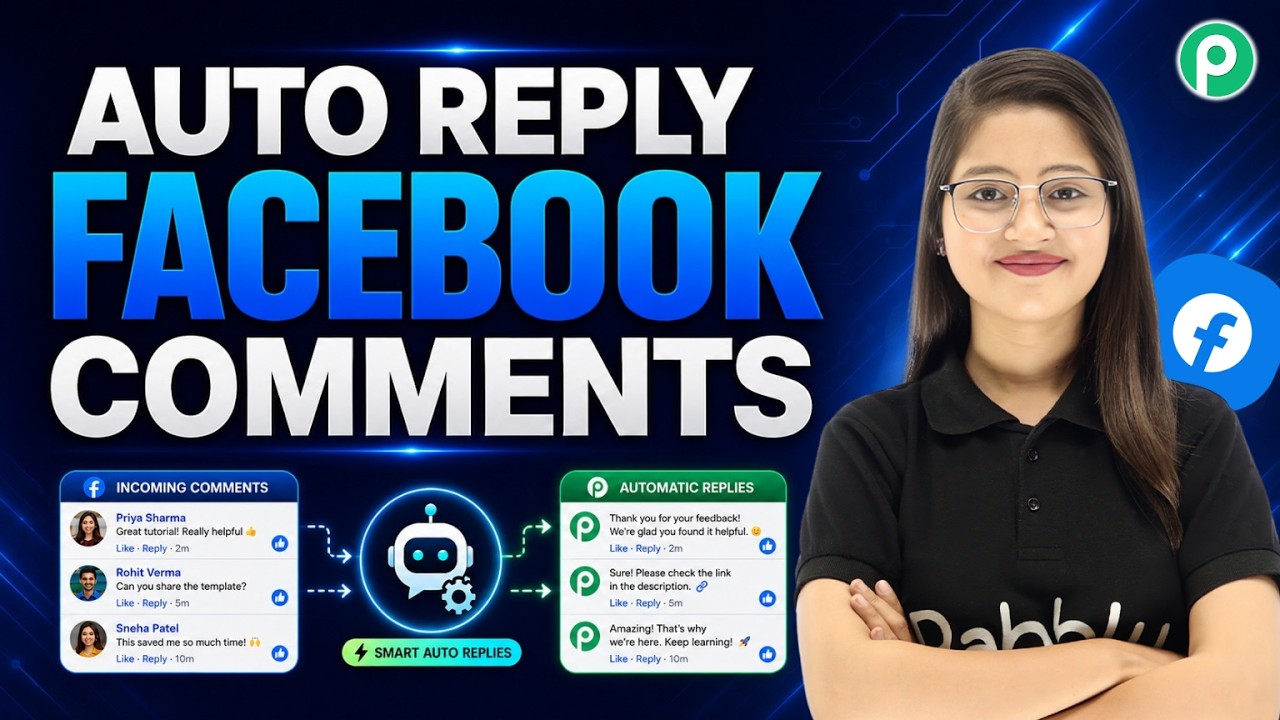
Automatically Reply to Facebook Comments Using AI

Watch Step By Step Video Tutorial Below


1. Accessing Pabbly Connect for Automation

To start automating your Facebook comment replies, you first need to access Pabbly Connect. This platform allows you to integrate various applications seamlessly. Simply visit the Pabbly website and sign up for a free account.

After signing up, you will have access to 100 free tasks per month, which is perfect for testing your automations. Once logged in, you will be directed to the Pabbly Connect dashboard where you can manage all your workflows.


2. Creating a Workflow in Pabbly Connect

To create a new workflow in Pabbly Connect, click on the “+ Create Workflow” button. You have three options: create from scratch, using AI, or using the quick builder. For this tutorial, we will create a workflow from scratch.

  • Select the option to create from scratch.
  • Name your workflow, e.g., “Automatically Reply to Facebook Comments Using AI.”
  • Choose a folder for your workflow and click the create button.

Your workflow will now be created successfully, setting the stage for the next steps in automation.


3. Setting Up the Trigger in Pabbly Connect

The next step in using Pabbly Connect is to set up the trigger. This is the first application you will select, which in this case is Facebook Pages. The trigger will activate whenever a new comment is received on your Facebook post.

Select the app event as “New Post” and click on the connect button. If you don’t have an existing connection, choose to add a new one by logging into your Facebook account. Once connected, select the Facebook page you want to monitor for comments. For instance, you might select a page named “Digital Dynamics.”

  • Choose the response format: simple, advanced, or raw.
  • Select simple format for ease of use.
  • Click on “Save and Send Test Request” to check if the connection is successful.

Once you receive a positive response, it confirms that the connection between your Facebook account and Pabbly Connect is working perfectly.


4. Integrating OpenAI with Pabbly Connect

Now that you have set up the trigger, the next action is to integrate OpenAI with Pabbly Connect. This allows you to generate relevant replies based on the comments received on Facebook. Select OpenAI as the next action application.

Choose the app event as “Generate Response Using Text Input” and connect your OpenAI account. You will need to enter your OpenAI API token, which can be obtained from the OpenAI API keys page. Copy the token and paste it into the required field in Pabbly Connect.

  • Select the OpenAI model, such as GPT-4 Mini.
  • Enter a prompt that includes the Facebook comment field.
  • Map the response from the previous application to ensure dynamic replies.

Click on “Save and Send Request” to check if the OpenAI integration is functioning correctly. You should receive a positive response along with a generated reply based on the Facebook comment.


5. Replying to Facebook Comments Automatically

The final step in this automation process involves replying to the Facebook comments using the AI-generated responses from OpenAI through Pabbly Connect. Select Facebook Comments as your next action application.

Choose the app event as “Reply Comment on Page Post” and connect your Facebook account again. Map the necessary fields, such as post ID and comment ID, from the previous steps. Make sure to enable the mapping toggle to dynamically pull the required values.

  • Map the OpenAI generated response to the comment field.
  • Click on “Save and Send Request” to finalize the automation.
  • Check your Facebook page to confirm the reply has been posted.

Once the comment is successfully posted, your automation workflow is complete. Now, every time someone comments on your Facebook post, Pabbly Connect will capture the comment, send it to OpenAI for a relevant response, and automatically reply on Facebook without any manual effort.


Conclusion

In this tutorial, we demonstrated how to automate Facebook comment replies using Pabbly Connect and OpenAI. This integration not only saves time but also enhances engagement on your social media platform. By setting up this workflow, you can ensure timely responses to your audience, improving overall communication and customer satisfaction.

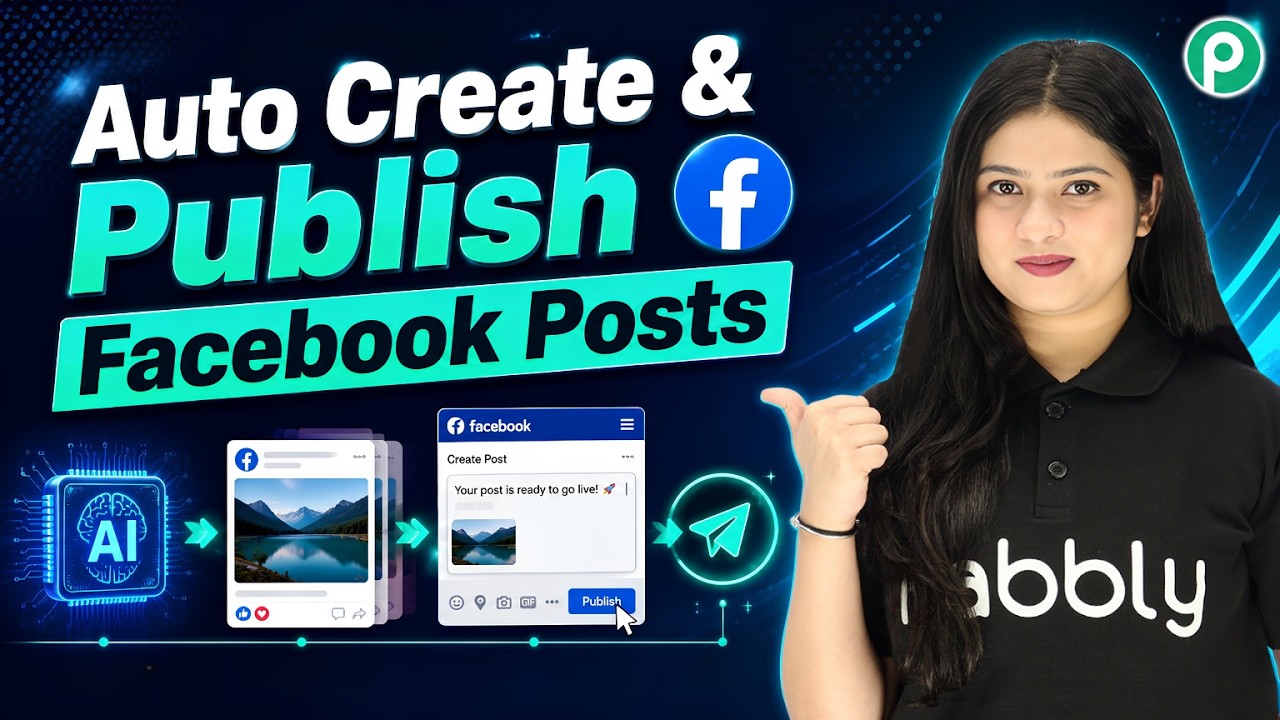
Automatically Create and Publish Facebook Posts with AI

Watch Step By Step Video Tutorial Below


1. Accessing Pabbly Connect for Automation

To begin automating your Facebook posts, you first need to access Pabbly Connect. This platform allows you to integrate various applications seamlessly. Simply type “Pabbly Connect” in your browser and navigate to its landing page.

Once there, you will find options to sign in or sign up for free. If you’re a new user, clicking on “Sign up for free” will create your account in just a couple of minutes, giving you access to 100 free tasks each month to explore the platform.


2. Setting Up the Workflow in Pabbly Connect

After logging into Pabbly Connect, you can start creating your automation workflow. Click on the large blue button to create a new workflow. You will be presented with three options: “Create from Scratch,” “Create Using AI,” and “Create Using Quick Builder.” For this tutorial, we will use the “Quick Builder” option.

In the Quick Builder, you will need to specify the applications to connect. For this integration, you will connect Google Sheets, OpenAI (ChatGPT), and Facebook Pages. Type the command: “Connect Google Sheets, OpenAI, and Facebook Pages” to begin.

  • Select the trigger event from Google Sheets.
  • Choose the action from OpenAI for text generation.
  • Select the action for posting on Facebook Pages.

After configuring these steps, your workflow will begin to take shape, linking all necessary applications through Pabbly Connect.


3. Connecting Google Sheets to Pabbly Connect

Next, you will need to connect Google Sheets to your Pabbly Connect workflow. Choose the event “New and Updated Spreadsheet Row” from the Google Sheets options. This event will trigger your workflow whenever a new row is added to your specified Google Sheet.

To establish this connection, copy the Webhook URL provided by Pabbly Connect and navigate to your Google Sheets. Under the “Extensions” menu, select “Get Add-ons” and search for “Pabbly Connectbooks” to install the necessary add-on. Once installed, refresh your spreadsheet to see the Pabbly option.

  • Paste the Webhook URL into the Pabbly Connectbooks setup.
  • Define the trigger column where the new data will be sent.
  • Test the connection to ensure data is sent correctly.

With these steps completed, your Google Sheets is now fully integrated with Pabbly Connect, ready to automate data transfer.


4. Generating Content with OpenAI

Now that Google Sheets is connected, the next step is to generate content using OpenAI through Pabbly Connect. Select the OpenAI action to generate text. You will need to provide an API key from your OpenAI account to establish this connection.

Once connected, specify the model you want to use for content generation. For this tutorial, we will use the ChatGPT model. Enter the prompt that includes all necessary details for generating a Facebook post, such as business name, industry, and target audience.

  • Include specific instructions in your prompt for clarity.
  • Use mapping to ensure dynamic data from Google Sheets is included.
  • Test the content generation to verify results.

After testing, you will have a generated caption ready for your Facebook post, showcasing the power of Pabbly Connect in automating content creation.


5. Posting to Facebook Using Pabbly Connect

The final step is to post the generated content to your Facebook page. In your Pabbly Connect workflow, select the Facebook Pages action to create a post. Ensure you are logged into your Facebook account and select the appropriate page from the dropdown menu.

Map the generated caption and image URL from OpenAI to the Facebook post fields. After mapping all necessary information, click on “Save and Send Test Request” to verify that everything works correctly.

  • Refresh your Facebook page to see the new post live.
  • Ensure the post includes the caption and image as intended.
  • Repeat the process for future posts automatically.

With this setup, your Facebook page will now automatically receive posts whenever a new idea is added to your Google Sheets, demonstrating the efficiency of Pabbly Connect in automating social media management.


Conclusion

In this tutorial, we learned how to automate Facebook posts using Pabbly Connect, Google Sheets, and OpenAI. By following these steps, you can streamline your social media presence effortlessly. This automation ensures consistent engagement on your platforms without manual effort.

Stop Manually Handling Google Ads Leads

Watch Step By Step Video Tutorial Below


1. Accessing Pabbly Connect for Google Ads Integration

To start integrating Google Ads with HubSpot, you need to access Pabbly Connect. Simply open your browser and navigate to pabbly.com/connect. If you’re a new user, click on the “Sign Up for Free” button to create an account.

After signing up, you’ll receive a free trial of Pabbly Connect. If you find the platform helpful, you can move on further and purchase a subscription plan. Remember to use the discount coupon code, RITYT, for a great deal!


2. Creating a Workflow in Pabbly Connect

Once logged into Pabbly Connect, navigate to the workflow builder. This is where you will set up the automation between Google Ads and HubSpot. Click on the “Add Trigger” button to begin the process.

  • Select Google Ads as the trigger application.
  • Choose “New Lead Form Entry” as the event.
  • Click on “Connect” to generate a webhook URL.

Copy the webhook URL provided by Pabbly Connect and proceed to your Google Ads campaign to set up the lead form.


3. Setting Up Google Ads Lead Form

In your Google Ads campaign, ensure you have a lead form created. To do this, click on “See More” and select the lead forms option. Here, you can add a new lead form.

When adding the lead form, make sure to collect all the necessary details from your leads. After setting up the form, you will need to connect it with Pabbly Connect. Scroll down to the lead delivery section and paste the webhook URL you copied earlier.


4. Connecting HubSpot to Pabbly Connect

After setting up your Google Ads lead form, it’s time to connect HubSpot. In Pabbly Connect, click on “Add New Action Step” and select HubSpot as the action application. Choose “Create a Contact” as the action event.

  • If you haven’t connected HubSpot yet, click on “Add New Connection”.
  • Log in to your HubSpot account when prompted.
  • Grant necessary permissions to Pabbly Connect.

Once connected, map the lead details collected from Google Ads to the corresponding fields in HubSpot. This mapping process ensures that your data remains dynamic and updates with each new lead.


5. Finalizing the Integration and Testing

After mapping the necessary fields, click on “Save and Send Test Request” in Pabbly Connect. This will create a new contact in HubSpot using the test data received from Google Ads.

Check your HubSpot account to confirm that the new contact has been added successfully. Refresh the contact list to see the updated information. This automation will ensure that every new lead from Google Ads is automatically added to your HubSpot CRM without manual input.


Conclusion

In this tutorial, we explored how to automate the integration of Google Ads leads into HubSpot using Pabbly Connect. This setup not only saves time but also minimizes the risk of errors in manual data entry. Streamline your lead management today with Pabbly Connect.

The Easiest Way to Build a Personalized WhatsApp AI Agent

Watch Step By Step Video Tutorial Below


1. Accessing Pabbly Connect for WhatsApp AI Integration

To begin using Pabbly Connect for integrating WhatsApp AI, first visit the Pabbly website. By accessing Pabbly Connect, you can streamline the integration process between various applications like WhatsApp and OpenAI.

If you are a new user, sign up for a free account. Existing users can simply sign in. Once logged in, you will be able to create automation workflows that connect WhatsApp AI with other applications through Pabbly Connect.


2. Creating an AI Assistant with Pabbly Chatbot

Next, navigate to the Pabbly Chatbot page by entering the URL pabbly.com/chatbotflow. Here, you can create your AI assistant tailored for your business needs. This assistant will respond to customer inquiries seamlessly.

  • Select ‘Sign Up Free’ for new users or ‘Sign In’ for existing users.
  • Once logged in, access the AI assistant settings.
  • Add your WhatsApp number to the Pabbly Chatbot account.

By utilizing Pabbly Connect, you can ensure your AI assistant interacts effectively with your customers on WhatsApp.


3. Configuring AI Settings in Pabbly Chatbot

In this section, you will configure the AI settings for your assistant. Set the temperature to determine the creativity of responses. A setting of 0.5 is recommended for balanced answers.

Next, enter your OpenAI API key to connect the AI model. To obtain this key, visit the OpenAI API key page and create a new secret key. Once you have the key, return to Pabbly Chatbot and connect it.

  • Set the AI temperature for response creativity.
  • Enter the OpenAI API key in the designated field.
  • Save the settings to activate your AI assistant.

By following these steps using Pabbly Connect, you can ensure your AI assistant is well-configured to handle customer queries effectively.


4. Managing Knowledge Base for Effective Responses

To make your AI assistant effective, you need to manage its knowledge base. This base contains all the information your assistant will use to respond to customer inquiries. Upload your knowledge base in .txt or .pdf format.

Once uploaded, ensure that the knowledge base includes essential details about your business, such as room categories and pricing. This information helps the AI provide relevant answers to customer questions on WhatsApp.

  • Upload the knowledge base file in the supported format.
  • Verify that all necessary business details are included.
  • Save the knowledge base settings.

Utilizing Pabbly Connect for managing your knowledge base ensures your AI assistant can respond accurately to customer inquiries.


5. Enabling Your AI Assistant on WhatsApp

Finally, to enable your AI assistant on WhatsApp, navigate to the settings and select the option for enabling AI auto replies. You can choose to enable this feature for all contacts or specific contact lists.

Once enabled, your AI assistant will start responding to customer inquiries on WhatsApp. This feature automates the communication process, allowing you to focus on other aspects of your business.

  • Navigate to the inbox settings in Pabbly Chatbot.
  • Select the contacts for which you want to enable the AI assistant.
  • Confirm the activation of the AI assistant.

By using Pabbly Connect, you can effectively enable your AI assistant to automate customer interactions on WhatsApp, enhancing your service quality.


Conclusion

In this tutorial, we covered how to integrate Pabbly Connect with WhatsApp AI using Pabbly Chatbot. By following these steps, you can create a responsive AI assistant that enhances customer interaction and automates communication.

Automate Solar Installation Enquiries on WhatsApp

Watch Step By Step Video Tutorial Below


1. Accessing Pabbly Connect for WhatsApp Integration

To begin creating your automated WhatsApp chatbot, you first need to access Pabbly Connect. This platform allows seamless integration between various applications, including WhatsApp. Start by visiting the Pabbly website and signing up for an account.

Once registered, you’ll be granted 100 free credits each month to explore Pabbly Connect’s features. Navigate to the Pabbly Connect dashboard to initiate your chatbot creation process. This platform is designed to help automate responses and facilitate customer interactions without manual intervention.


2. Setting Up the Chatbot Flow in Pabbly Connect

In this section, you’ll set up the chatbot flow using Pabbly Connect. Begin by clicking on the ‘Add Flow’ button to create a new chatbot flow. Name your flow appropriately to reflect its purpose, such as “Solar Inquiry Chatbot”.

  • Click on the ‘Add Flow’ button.
  • Name your flow (e.g., “Solar Inquiry Chatbot”).
  • Select the trigger event for your chatbot.

After naming your flow, select the trigger event that will start the chatbot. Choose the appropriate template, such as the “Solar Installation Alert” template, to streamline the setup process. This template will guide the interaction with customers effectively.


3. Customizing the Chatbot Responses and Actions

Once your flow is set up, the next step is to customize the responses and actions within Pabbly Connect. This involves adding buttons that the customer can click, such as “Get Free Estimate” or “Solar Packages”. Each button will trigger specific actions in the chatbot.

For example, when a customer clicks on the “Get Free Estimate” button, you can set the action to assign an AI assistant to handle the conversation. You’ll need to create a welcome message that the assistant will send to the customer. This message can be personalized to enhance customer engagement.

  • Add buttons for customer interaction.
  • Assign an AI assistant to handle queries.
  • Create personalized welcome messages.

After setting up the buttons and actions, connect them to ensure a smooth flow of conversation. This step is crucial for maintaining a natural dialogue with customers as they inquire about solar solutions.


4. Finalizing the Chatbot Flow and Testing

After customizing the responses, it’s time to finalize your chatbot flow in Pabbly Connect. Review the entire flow to ensure all buttons and actions are correctly linked. This includes verifying that each button leads to the appropriate response or document, such as PDFs for solar packages.

Once you are satisfied with the setup, click the ‘Save’ button to store your changes. Testing the flow is essential to ensure that it operates as intended. Interact with the chatbot as a customer would to identify any areas needing adjustment.

  • Review the entire flow for accuracy.
  • Click ‘Save’ to store your changes.
  • Test the chatbot interaction.

Testing helps to ensure that your chatbot provides accurate information and responds appropriately to customer inquiries. This will enhance the customer experience and streamline the inquiry process.


5. Launching Your WhatsApp Chatbot with Pabbly Connect

With your chatbot fully set up and tested, you can now launch it using Pabbly Connect. This platform enables you to automate responses and engage with customers around the clock. Your chatbot will handle inquiries about solar packages, providing instant replies without manual input.

Additionally, Pabbly Connect allows you to broadcast messages to multiple contacts simultaneously. This feature is beneficial for reaching a wider audience with your solar solutions. By utilizing the broadcast feature, you can send promotional messages or updates effectively.

To finalize, ensure that all settings are correctly configured in Pabbly Connect to maximize your chatbot’s efficiency. This automation will save time and enhance customer satisfaction as they receive immediate responses to their queries.


Conclusion

In this tutorial, we explored how to create an automated WhatsApp chatbot using Pabbly Connect. This integration streamlines customer inquiries about solar solutions, providing instant responses and enhancing engagement.