Automatically Add Shopify Orders to Google Sheets | No-Code Automation

Watch Step By Step Video Tutorial Below


1. Accessing Pabbly Connect for Integration

To start integrating Shopify with Google Sheets, you’ll need to access Pabbly Connect. Begin by visiting pabbly.com and signing in to your account. If you’re a new user, you can sign up for free to explore the features.

After logging in, navigate to the Pabbly Connect dashboard. Here, you will find options to create workflows. Click on the “Create Workflow” button to initiate the integration process.


2. Creating a New Workflow in Pabbly Connect

Once you’re in Pabbly Connect, you can create a new workflow to connect Shopify with Google Sheets. Name your workflow something like “Automatically Add Shopify Orders to Google Sheets”. Select the appropriate folder for better organization.

  • Click on the “Create” button to finalize the workflow setup.
  • You will see a box prompting you to select a trigger application.

In this case, select Shopify as the trigger application and choose “New Order” as the trigger event. This means that whenever a new order is placed on Shopify, it will activate the workflow created in Pabbly Connect.


3. Setting Up Webhook in Shopify

The next step is to connect Shopify with Pabbly Connect using a webhook. After selecting Shopify as the trigger application, you will receive a webhook URL. This URL acts as a bridge between Shopify and Pabbly Connect.

To set this up, go to your Shopify admin panel. Click on “Settings” and then navigate to “Notifications”. Here, find the option for “Webhooks” and click on “Create Webhook”.

  • Select “Order Creation” as the event.
  • Set the format to JSON and paste the webhook URL from Pabbly Connect.

After saving the webhook, you can test it by placing a new order in your Shopify store. This will send the order details to Pabbly Connect, confirming that the connection is successful.


4. Adding Google Sheets as an Action in Pabbly Connect

With the webhook set up, the next step is to add Google Sheets as an action application in Pabbly Connect. Select Google Sheets and choose the action event “Add New Row”. This will allow you to automatically add new order details to your Google Sheets spreadsheet.

Click on “Connect” to link your Google Sheets account. If you don’t have an existing connection, follow the prompts to sign in to your Google account and grant the necessary permissions.

  • Choose the spreadsheet where you want to store the order details.
  • Map the order details from Shopify to the corresponding fields in Google Sheets.

For instance, map the customer’s name, email, phone number, product, and price. This ensures that every new order will automatically populate the spreadsheet without manual input, showcasing the efficiency of Pabbly Connect.


5. Testing the Integration Setup

After setting up the Google Sheets action, it’s time to test the integration. Click on “Save and Send Test Request” in Pabbly Connect. This will send a test order to your Google Sheets to verify that everything works correctly.

Check your Google Sheets to confirm that the order details have been added successfully. You should see the name, email, phone number, product, and price listed in the spreadsheet. This confirms that the integration between Shopify and Google Sheets via Pabbly Connect is functioning as expected.

Once confirmed, you can start using this automated workflow. Now, every time a new order is placed on Shopify, the details will automatically be recorded in your Google Sheets, streamlining your order management process.


Conclusion

This tutorial has guided you through the steps to integrate Shopify with Google Sheets using Pabbly Connect. By following these steps, you can automate order tracking and enhance your business efficiency.
Bulk WhatsApp Video Messaging (Step-by-Step)

Watch Step By Step Video Tutorial Below


1. Accessing Pabbly Connect to Start Your Integration

To begin using Pabbly Connect for sending bulk WhatsApp video messages, first, access your Pabbly Chatbot dashboard. If you are a new user, visit pabbly.com/chatflow and sign up for a free trial. This allows you to explore the features of Pabbly Connect and Pabbly Chatbot.

Once you have signed up, you can log in to your dashboard. Ensure that you have your WhatsApp number added to Pabbly Chatbot. If you need assistance with this step, you can request a tutorial on adding your WhatsApp number. This is crucial for using Pabbly Connect to send messages.


2. Setting Up Broadcasts in Pabbly Connect

After logging into your Pabbly Chatbot dashboard, navigate to the broadcast section. Click on the ‘Add Broadcast’ button to initiate the process. Here, you will select the broadcast type as a broadcast campaign, which is essential for sending bulk messages through Pabbly Connect.

  • Choose a broadcast name (e.g., “Video Message”).
  • Select the contact list you want to send the message to.
  • Refine your audience by excluding certain lists or contacts.

After setting up these options, you can proceed to select the message type. For video messages, you can either use a pre-approved template or select a regular message type directly. This flexibility is one of the key features of Pabbly Connect.


3. Composing Your Video Message in Pabbly Connect

In this step, you will compose your video message. Start by entering a caption that will accompany your video. You can format the text using stars for bolding specific parts. This makes your message more engaging and visually appealing.

Next, attach the video by uploading it from your media library. You can either choose an existing video or upload a new one. Once uploaded, select the video and click on the insert button to add it to your message. This seamless integration is made possible by Pabbly Connect.


4. Testing and Sending Your Bulk WhatsApp Messages

Before sending your bulk messages, it’s crucial to test the setup. Enter a username and mobile number to send a test message. This step ensures that everything is functioning correctly. Once you receive the test message, check the format and content to confirm it meets your expectations.

After successful testing, you can choose to send the message instantly or schedule it for a later date. If you opt for scheduling, select the desired date and time. Remember, only contacts who messaged you within the last 24 hours will receive the broadcast. This feature helps maintain effective communication through Pabbly Connect.


5. Monitoring Your Broadcast Results with Pabbly Connect

Once your broadcast is sent, you can monitor its performance using Pabbly Connect. Navigate to the send section to view statistics such as how many messages were sent, delivered, read, or failed. This data is invaluable for assessing the effectiveness of your campaigns.

Additionally, you can resend messages to invalid contacts. The ability to track and analyze these metrics is a significant advantage of using Pabbly Connect for your bulk messaging needs. This ensures that your marketing efforts are optimized for better results.


Conclusion

In this tutorial, we covered how to use Pabbly Connect to send bulk WhatsApp video messages effectively. From accessing Pabbly Chatbot to monitoring broadcast results, each step is designed to enhance your marketing strategy. Utilize these features to stand out and engage your audience effectively.

Analyze Lead Feedback with AI and Send Personalized Emails

Watch Step By Step Video Tutorial Below


1. Accessing Pabbly Connect for Automation

To start automating customer feedback responses, first access Pabbly Connect by navigating to pabbly.com/connect. This platform is essential for integrating various applications seamlessly.

Once on the homepage, you can either sign in if you are an existing user or click on “Sign Up Free” to create a new account. New users can enjoy 100 free tasks each month, allowing you to explore the features of Pabbly Connect without any cost.


2. Creating a Workflow in Pabbly Connect

After logging into Pabbly Connect, you will be directed to the workflow page. Here, you can create a new workflow to analyze customer feedback and send automated emails. Start by selecting Google Forms as your trigger application.

  • Choose “New Response Received” as the trigger event.
  • Click the connect button to generate a webhook URL.
  • Copy the webhook URL to link it with Google Forms.

This setup allows Pabbly Connect to automatically fetch responses from Google Forms, streamlining your feedback analysis process.


3. Setting Up Google Forms with Pabbly Connect

Next, head to your Google Forms and navigate to the responses section. Here, you can link your form to Google Sheets, which acts as the data repository.

  • Select “View in Sheets” to create a Google Sheet for responses.
  • Go to Extensions, then Add-ons, and search for “Pabbly Connect Webhooks”.
  • Install the add-on and set up the webhook URL in the initial setup dialog.

By doing this, Pabbly Connect will receive real-time data from Google Forms, enabling you to automate your email responses based on customer feedback.


4. Generating Email Content Using OpenAI

Now that you have set up the Google Forms integration, it’s time to generate personalized email content using OpenAI. In Pabbly Connect, select OpenAI as the action application.

  • Choose “Chat GPT” as the action event.
  • Connect your OpenAI account by entering your API key.
  • Map the feedback details from Google Forms to the prompt for dynamic content generation.

This integration allows Pabbly Connect to utilize AI for crafting tailored email responses based on each customer’s feedback, enhancing engagement and satisfaction.


5. Sending Emails via Gmail

Finally, to send the generated email content, select Gmail as the action application in Pabbly Connect. This step finalizes the automation process.

  • Choose “Send Email” as the action event.
  • Connect your Gmail account, either by signing in or using an existing connection.
  • Map the recipient’s email address and the generated content to the email fields.

By completing these steps, Pabbly Connect ensures that your customers receive timely and relevant responses, keeping them engaged with your business.


Conclusion

In this tutorial, we explored how to automate customer feedback responses using Pabbly Connect, integrating Google Forms and OpenAI for efficient email communication. This automation enhances customer engagement and streamlines your business processes.

Send Instant Slack Alerts for New Shopify Orders

Watch Step By Step Video Tutorial Below


1. Accessing Pabbly Connect for Integration

To begin integrating Shopify with Slack, you need to access Pabbly Connect. Start by visiting the Pabbly Connect website by typing its URL, pabbly.com/connect, in your browser.

Once you reach the homepage, you will see options for signing in or signing up. If you are a new user, click on “Sign Up Free” to create an account. Existing users can simply sign in. Pabbly Connect offers 100 free tasks every month, allowing you to explore its features without any cost.


2. Creating the Workflow in Pabbly Connect

After signing in, navigate to the workflow page in Pabbly Connect. Here, you will set up the automation that connects Shopify with Slack. Begin by clicking on the “Create Workflow” button.

  • Select Shopify as your trigger application.
  • Choose the event as “New Order” to initiate the workflow.
  • Click on the “Connect” button to obtain your webhook URL.

Now, head over to your Shopify account to set up the webhook. This step is crucial as it enables Pabbly Connect to fetch order details automatically. In Shopify, go to Settings, then Notifications, and find the Webhooks section to create a new webhook.


3. Setting Up the Shopify Webhook

In the Shopify Webhooks section, you will create a new webhook that connects to Pabbly Connect. Select the event as “Order Creation” and paste the webhook URL you obtained earlier.

After saving the webhook, return to Pabbly Connect. You should see that it is waiting for a response from Shopify. To test this setup, place a new order in your Shopify store.


4. Sending Notifications to Slack

After placing a test order, check Pabbly Connect for the order details. Once the data is received, you can set up Slack to notify your team about the new order.

  • Select Slack as your action application in Pabbly Connect.
  • Choose “Send Channel Message” as the action event.
  • Connect to your Slack account by entering your token.

Map the order details received from Shopify to the message fields in Slack. This will ensure that every time a new order is placed, your team receives a notification with all relevant details, streamlining your workflow.


5. Conclusion

In this tutorial, we explored how to integrate Shopify with Slack using Pabbly Connect. By following these steps, you can automate order notifications and enhance your business workflow.

Utilizing Pabbly Connect not only saves time but ensures your team is always updated about new orders, making your operations smoother and more efficient.

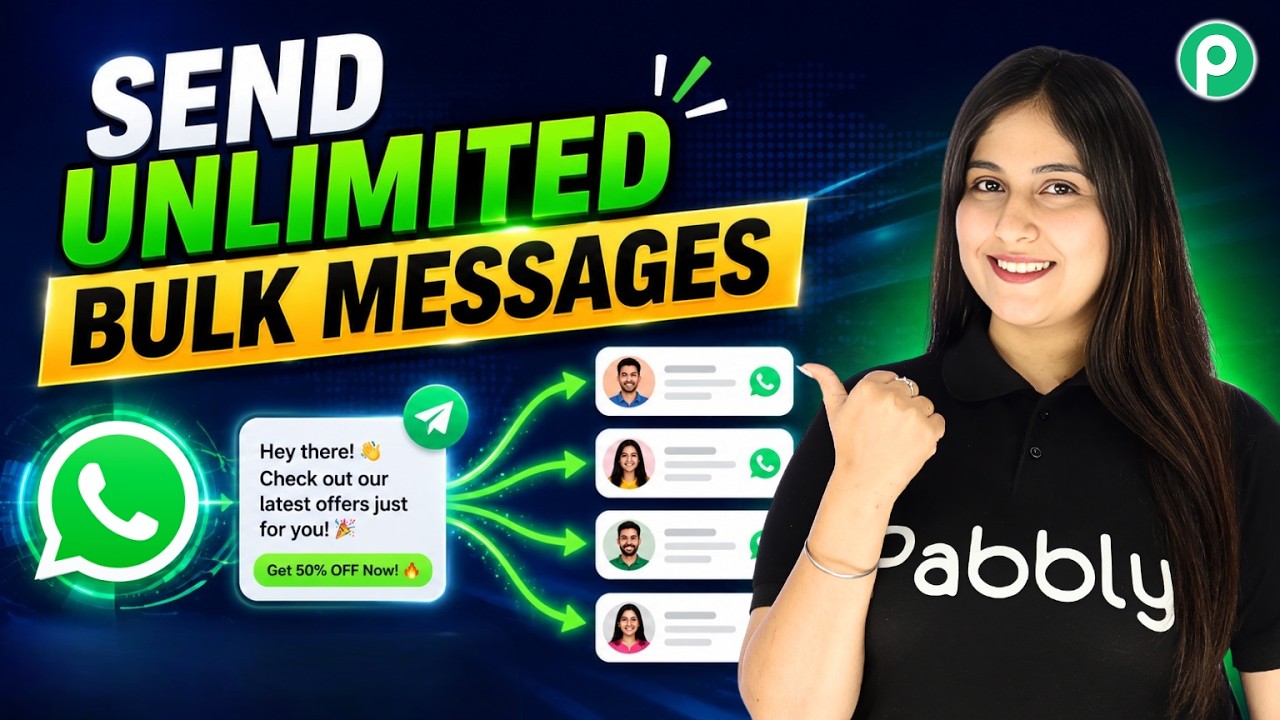
Send Unlimited Bulk WhatsApp Messages

Watch Step By Step Video Tutorial Below


1. Accessing Pabbly Chatflow for WhatsApp Integration

To start using Pabbly Chatflow for WhatsApp integration, first, open your web browser and navigate to pabbly.com/chatflow. This will take you to the home page of Pabbly Chatflow.

If you are a new user, you can click on the “Sign Up for Free” button to create an account. Existing users should simply sign in. After signing in, you will see all Pabbly applications, where you need to click on “Access Now” for Pabbly Chatflow.


2. Creating a WhatsApp Broadcast in Pabbly Chatflow

Once in Pabbly Chatflow, you will need to create a WhatsApp broadcast to send personalized messages. First, ensure you have connected your WhatsApp number in your Chatflow account. Then, navigate to the broadcast section.

  • Click on “Add Broadcast” to create a new broadcast.
  • Choose “Broadcast Campaign” as the type.
  • Name your broadcast, for example, “New Discount Offer”.

After naming your broadcast, select the contact list you wish to send messages to. You can either add contacts manually or upload them in bulk using a CSV file. Ensure that you have your contact data ready in a Google Sheet to download it as a CSV.


3. Setting Up Your Message Template in Pabbly Chatflow

In Pabbly Chatflow, message templates are essential for sending personalized messages via WhatsApp. You can create a template by navigating to the templates section. Ensure your template is approved by Meta to use it.

To create a new template, click on “Add Template” and draft your message. Use variables in your template for personalization, such as the recipient’s name. This makes your message dynamic and tailored to each customer.

  • Use the variable for the name in your message template.
  • Make sure to save your template once it is approved.

Once your template is ready, you can proceed to the broadcast section to select it for your campaign.


4. Testing and Scheduling Your WhatsApp Broadcast

Before sending your broadcast to all contacts, it’s crucial to test it. In Pabbly Chatflow, you can send a test message to your own WhatsApp number. Enter your contact details and click on “Send Test Message”. You should receive a personalized message confirming that your template works correctly.

After successful testing, you can schedule your broadcast. You have the option to send it immediately or select a future date and time. Make sure to choose a future date to avoid sending it instantly.

  • Select “Yes” to schedule the broadcast for later.
  • Choose a specific date and time for the broadcast.

Click the “Add Broadcast” button to finalize your scheduling. You can track the status of your broadcast, including metrics like sent, delivered, and read messages.


5. Conclusion

In this tutorial, we discussed how to use Pabbly Chatflow for WhatsApp integration. By following the steps outlined, you can easily send personalized messages to your customers, enhancing your communication strategy.

Utilizing Pabbly Chatflow simplifies the process of managing your WhatsApp broadcasts, ensuring a professional and efficient approach to customer engagement.


Build an OpenAI-Powered WhatsApp Assistant

Watch Step By Step Video Tutorial Below


1. Setting Up Pabbly Connect for WhatsApp Integration

To start integrating WhatsApp with Pabbly Connect, you must first access the Pabbly Connect platform. This is the central hub where all integrations occur, making it easy to connect various applications seamlessly. Begin by logging into your Pabbly Connect account or signing up if you are a new user.

Once logged in, navigate to the dashboard. Here, you will find options to create a new workflow. Click on the ‘Create Workflow’ button, which will lead you to a setup page where you can define the specifics of your WhatsApp integration.


2. Creating Your AI Assistant with Pabbly Chatflow

Next, you will use Pabbly Chatflow to create an AI assistant for WhatsApp. This assistant will automate responses to customer inquiries. Access the Pabbly Chatflow page by entering the URL in your browser. If you are a first-time user, click on ‘Sign Up Free’ to create an account.

  • Enter your WhatsApp number in the Pabbly Chatflow account settings.
  • Select the AI agent option in the AI instructions tab.
  • Configure the AI settings, including temperature and model selection.

After setting up your AI assistant, you will need to upload a knowledge base document. This document contains the information your assistant will use to respond to customer queries. Make sure to customize it according to your business needs.


3. Configuring AI Settings for Optimal Performance

Once your AI assistant is created, the next step is configuring the settings to ensure it operates effectively. Within the Pabbly Chatflow interface, you can adjust several parameters, including the creativity level of the AI, which is controlled by the temperature setting. A temperature of 0.5 is recommended for balanced responses.

Additionally, you can set stop keywords to halt the assistant’s responses when necessary. For instance, if a customer types “stop,” the assistant will cease interaction. You can also define fallback messages for scenarios where the AI cannot provide an answer.

  • Upload your knowledge base in TXT or PDF format.
  • Customize the visual appearance of your assistant, including header and footer messages.
  • Choose whether to display the “Powered by Pabbly” label.

After configuring these settings, save your AI assistant to ensure all changes are applied. This process makes your WhatsApp assistant ready to engage with customers effectively.


4. Embedding Your AI Assistant on Your Website

After successfully creating and configuring your AI assistant, you may want to embed it on your website. This allows customers to interact with your assistant directly from your site. To do this, navigate to the embed option in the Pabbly Chatflow interface.

You will be provided with a script code. Copy this code and paste it into the HTML of your website. This integration is facilitated by Pabbly Connect, ensuring that your assistant is fully functional and responsive.


5. Enabling Auto Replies for All Contacts

The final step in this integration process is enabling auto replies for your contacts on WhatsApp. Go to the settings in your Pabbly Chatflow account and select the inbox settings option.

Here, you can enable AI auto replies for all contacts or select specific contact lists. After selecting the appropriate settings, save your changes. This feature ensures that your customers receive instant responses, enhancing their experience with your business.

By using Pabbly Connect, you automate your customer interactions, allowing for 24/7 support without manual input. This integration saves time and improves efficiency for your business.


Conclusion

Integrating WhatsApp with Pabbly Connect allows businesses to automate customer interactions effectively. This step-by-step guide provides a clear path to creating an AI assistant that enhances customer support. Start using Pabbly Connect today to streamline your business communications.

Create a WhatsApp Bot That Collects Customer Details

Watch Step By Step Video Tutorial Below


1. Setting Up Pabbly Connect for Integration

To begin the integration process using Pabbly Connect, you first need to access the platform. Start by visiting Pabbly Connect’s website and signing up for an account. This will allow you to create automated workflows that connect different applications.

Once logged in, navigate to the dashboard where you can initiate a new workflow. Click on the ‘Create Workflow’ button, and give your workflow a descriptive name. This is where you will set up the integration between your WhatsApp chatbot and Google Sheets.


2. Creating the WhatsApp Chatbot with Pabbly Chartflow

Next, you will create a WhatsApp chatbot using Pabbly Chartflow. This tool allows you to build chatbots without any coding knowledge. Start by selecting the ‘Flows’ feature from the left-hand menu and click on ‘Add Flow’.

  • Click on the ‘Add Flow’ button to start a new flow.
  • Name your flow and select the trigger event as ‘Keyword’.
  • Enter keywords that will trigger the chatbot when received.

After setting the keywords, design the welcome message that the chatbot will send to users. You can personalize the message, making it relevant to your business. This setup ensures that your chatbot is ready to engage with customers as soon as they initiate a conversation.


3. Collecting Customer Details through the Chatbot

Once the chatbot is set up, it is time to configure it to collect customer information. Using Pabbly Connect, you can create a series of questions that the chatbot will ask users. For example, you can ask for their full name, contact number, and property type.

For each question, use the ‘Ask Question’ button and define the custom fields. This allows you to collect data in a structured format. Ensure that the responses are stored correctly by linking each question to the corresponding custom field.

  • Add questions using the ‘Ask Question’ button.
  • Link each question to a specific custom field for accurate data collection.
  • Ensure to validate responses to maintain data quality.

This structured approach minimizes errors and ensures that all necessary information is collected efficiently.


4. Integrating Google Sheets with Pabbly Connect

After collecting customer details, the next step is to integrate Google Sheets using Pabbly Connect. This integration will automatically save all the collected information into a designated Google Sheet. To set this up, navigate back to your Pabbly Connect dashboard.

Click on ‘Create Workflow’ and select Google Sheets as the action application. You will then need to set up the connection by choosing the option to add a new connection. Sign in to your Google account and grant the necessary permissions. Once connected, select the specific Google Sheet where you want the data to be stored.


5. Finalizing the Integration and Testing

With the integration set up, it is essential to test the workflow to ensure everything is functioning correctly. Use the ‘Test’ button in Pabbly Connect to simulate a customer interaction. This will allow you to verify that the data is being sent to Google Sheets as expected.

Once the test is successful, finalize your workflow by clicking on the ‘Save’ button. This ensures that all settings are applied and your integration is live. You can now confidently use your WhatsApp chatbot to collect customer details and store them in real-time.

This setup allows your business to operate more efficiently, as customer information is collected automatically without manual intervention.


Conclusion

In this tutorial, we explored how to integrate a WhatsApp chatbot with Google Sheets using Pabbly Connect. By automating customer data collection, businesses can save time and enhance efficiency. This integration allows for seamless communication and data management, ensuring that customer information is always up-to-date.

Auto-Post Blogger Articles to Facebook in 10 Minutes

Watch Step By Step Video Tutorial Below


1. Setting Up Pabbly Connect for Google Blogger and Facebook Integration

To automate your blog posting, first, access Pabbly Connect by visiting its official website. If you are a new user, sign up for a free account to explore its features. Existing users can simply log in to their accounts.

Once logged in, navigate to the workflow page. Here, you will set up the automation between Google Blogger and Facebook. This process will significantly reduce the manual effort involved in posting your articles across platforms.


2. Creating a New Blog Post in Google Blogger

Start by creating a new article in your Google Blogger account. Title your post as ‘Beginner’s Guide to Planning Your First Trip’ and provide an engaging description. Once completed, publish the blog.

  • Log in to Google Blogger.
  • Create a new post with a title and description.
  • Publish the post to make it live.

After publishing, wait a few minutes for Pabbly Connect to fetch the new post. This automation allows your blog to be shared seamlessly on Facebook, reaching a wider audience without extra work.


3. Configuring Pabbly Connect Workflow

Now, return to Pabbly Connect and select Google Blogger as your trigger application. Choose ‘New Post Added’ as the event that will initiate the workflow. This step is crucial for linking your blog with Facebook.

Next, build a connection by signing in with your Google account. Allow necessary permissions to enable Pabbly Connect to access your Blogger posts. After establishing the connection, select the specific blog you want to monitor for new posts.

  • Select the trigger application as Google Blogger.
  • Choose the event ‘New Post Added’.
  • Sign in to your Google account to build the connection.

Finally, set the polling interval for Pabbly Connect to check for new posts. Setting it to every 90 minutes ensures timely updates for your Facebook page.


4. Posting the Blog to Facebook Automatically

With your Google Blogger setup ready, it’s time to add Facebook as your action application in Pabbly Connect. Choose ‘Create Page Post’ as the event for this action. This step completes the integration, allowing automatic posting of your blog to Facebook.

Connect to your Facebook account by selecting the page where you want to share the blog. Enter a message for the post, incorporating dynamic fields for the blog title and URL using the mapping feature in Pabbly Connect. This feature allows you to create dynamic content that updates automatically with each new blog post.

  • Choose Facebook as the action application.
  • Select ‘Create Page Post’ as the event.
  • Map the blog title and URL in the message field.

Once done, click on ‘Save and Send Test Request’ to ensure everything is functioning correctly. This will create a test post on Facebook, confirming that your automation setup is successful.


5. Verifying the Integration Success

After setting up the workflow, check your Facebook page to verify that the blog post has been published. Refresh your page and look for the new post with the title and URL of your latest blog article. This confirms that Pabbly Connect has successfully automated the process.

With this integration, every time you publish a new article on Google Blogger, it will automatically appear on your Facebook page. This automation saves you time and effort, allowing you to focus on creating more content.

Utilizing Pabbly Connect for this integration not only streamlines your workflow but also enhances your online presence by reaching more readers efficiently. Now, you can automate multiple applications using the same principles!


Conclusion

By following this tutorial, you can effectively use Pabbly Connect to automate your blog posts from Google Blogger to Facebook. This integration significantly reduces manual tasks and enhances your content’s reach.

Automatically Add Justdial Leads to Google Sheets

Watch Step By Step Video Tutorial Below


1. Accessing Pabbly Connect for Automation

To begin automating your lead management, first access Pabbly Connect by visiting pabby.com/connect. This platform allows you to seamlessly integrate Just Dial with Google Sheets for efficient data management.

Once on the Pabbly Connect homepage, you have two options: sign up for free if you are a new user or log in if you are an existing user. New users can benefit from 100 free tasks every month to explore the software.


2. Creating a Workflow in Pabbly Connect

After logging in, navigate to the Pabbly Connect dashboard. Here, you can create a new workflow by selecting the option to create from scratch. This is where you will set up the automation between Just Dial and Google Sheets.

  • Choose the trigger event as “New Leads” from Just Dial.
  • Select the action event as “Add a New Row” in Google Sheets.
  • Review the workflow preview and click “Approve” to create.

With this setup, you have successfully created a workflow that will automatically add new leads from Just Dial to your Google Sheets, streamlining your lead management process.


3. Setting Up the Trigger for Just Dial

Once your workflow is created, the next step involves setting up the trigger in Just Dial. Pabbly Connect provides a unique webhook URL that you will need to configure in your Just Dial account.

To do this, copy the webhook URL displayed in Pabbly Connect and send it to your Just Dial account manager. Since Just Dial does not allow direct configuration of webhook URLs in its user interface, this step is crucial. Once the backend team sets it up, you will be able to receive leads directly into Pabbly Connect.


4. Integrating Google Sheets with Pabbly Connect

After setting up the trigger, the next step is to integrate Google Sheets. In Pabbly Connect, click on “Sign in with Google” to connect your Google account. This allows Pabbly Connect to access your Google Sheets securely.

Upon successful connection, you will be prompted to select the specific spreadsheet and sheet where the new leads will be stored. For instance, choose the spreadsheet titled “New Leads” and select “Sheet1” from the dropdown menu.

  • Map the fields in Google Sheets to the lead details received from Just Dial.
  • Ensure you map fields such as name, email, and contact number for accurate data entry.

By mapping these details, you ensure that every new lead is automatically recorded in Google Sheets without manual entry, making your process efficient and error-free.


5. Conclusion: Automate Your Lead Management with Pabbly Connect

In this tutorial, we explored how to automate lead management by integrating Just Dial and Google Sheets using Pabbly Connect. By following the steps outlined, you can streamline your lead capturing process effectively.

With Pabbly Connect, you can ensure that every new lead from Just Dial is instantly added to your Google Sheets, allowing for better organization and follow-up. This setup not only saves time but also enhances productivity for your business.


In summary, using Pabbly Connect to automate the integration between Just Dial and Google Sheets can significantly improve your lead management process. Start automating today and enjoy the benefits of seamless data management!