Send Bulk Promotional WhatsApp Messages for Your Restaurant 🤯

Watch Step By Step Video Tutorial Below


1. Accessing Pabbly Connect for WhatsApp Integration

To start using Pabbly Connect for WhatsApp marketing, first, you need to access the platform. Open your browser and go to the Pabbly Connect website. If you don’t have an account, sign up for free to get started.

Once you have signed up, log in to your account. Pabbly Connect will allow you to automate your WhatsApp messages efficiently. You can use it to send bulk promotional messages to your customers without the risk of getting banned.


2. Creating a WhatsApp Template in Pabbly Connect

In order to send bulk WhatsApp messages, you must first create a template in Pabbly Connect. Go to the “Templates” section and click on the “Add Template” button. This is where you will define the message you want to send to your customers.

  • Select the category as “Marketing” for promotional messages.
  • Name your template using lowercase letters and underscores for spaces.
  • Choose the language for your template.

After filling in these details, you can add the message content and any attachments such as images. This ensures that your WhatsApp messages are compliant with Meta’s guidelines, reducing the risk of account bans.


3. Broadcasting Messages Using Pabbly Connect

To send your promotional messages, navigate to the “Broadcast” section in Pabbly Connect. Click on the “Add Broadcast” button, and choose the type of broadcast you want to create. This is where Pabbly Connect shines, allowing you to send messages to multiple contacts at once.

  • Select the broadcast name, which reflects the purpose of your campaign.
  • Choose the contact list that you want to send the message to.
  • Select the pre-approved message template you created earlier.

After setting up your broadcast, you can test it by sending a message to yourself. This feature allows you to ensure that everything looks perfect before sending it to your entire customer list.


4. Scheduling Your WhatsApp Broadcast with Pabbly Connect

Once your broadcast is ready, you have the option to send it immediately or schedule it for a later date. If you choose to schedule, select the date and time when you want the message to be sent.

For example, if you want to send a promotional message on a specific date, just set the date and time in the scheduling options. This flexibility allows you to plan your marketing campaigns effectively without manual intervention.

Pabbly Connect ensures that your messages are sent at the right time, maximizing engagement and response rates. This is crucial for any marketing strategy, especially in the competitive restaurant industry.


5. Conclusion: Automate Your WhatsApp Marketing with Pabbly Connect

Using Pabbly Connect for WhatsApp marketing automation can significantly enhance your communication strategy. By following the steps outlined above, you can send bulk messages safely and effectively.

With Pabbly Connect, you can streamline your marketing efforts and reach your customers directly on WhatsApp. This automation not only saves time but also ensures you are compliant with Meta’s guidelines.

Start leveraging Pabbly Connect today to elevate your restaurant’s marketing game!
How to Create API Email Campaigns in Pabbly Email Marketing

Watch Step By Step Video Tutorial Below


1. Understanding API Workflows with Pabbly Connect

In this section, we will explore how to use Pabbly Connect for API workflows. API workflows are crucial for automating email campaigns, allowing for seamless integration between different applications. This automation ensures that emails are sent without manual intervention, making it efficient for businesses.

When you access Pabbly Connect, you will notice options for creating workflows. Here, you can set conditions for email campaigns based on various triggers, such as adding subscribers to specific lists. This capability enhances user engagement and streamlines communication.


2. Creating Email Campaigns in Pabbly Connect

To create an email campaign using Pabbly Connect, navigate to the email campaigns section. Here’s how you can create a campaign:

  • Click on ‘Create Email’ to start a new campaign.
  • Name your campaign and select the campaign type (Regular or API Workflow).
  • Enter the subject line and preheader text for your email.

After entering these details, you can choose to create your email from scratch or use a template. Using Pabbly Connect, you can design your email using the drag-and-drop builder or rich text editor. This flexibility allows you to customize your email to fit your brand.


3. Setting Up Workflows in Pabbly Connect

Setting up workflows in Pabbly Connect is straightforward. Start by defining triggers that will initiate the email campaigns. For example, you can set a trigger for when a subscriber joins a specific list. This automation allows you to send targeted emails based on user behavior.

To set this up, follow these steps:

  • Select the trigger event (e.g., subscriber added).
  • Choose the list to which the subscriber will be added.
  • Define the email to be sent based on the condition.

With Pabbly Connect, you can easily manage these workflows, ensuring that emails are sent automatically whenever the specified conditions are met. This feature is particularly useful for lead generation and follow-ups.


4. Personalizing Emails with Pabbly Connect

Personalization is key to effective email marketing. With Pabbly Connect, you can easily customize emails to include subscriber information. This makes your communication feel more personal and engaging.

To personalize your emails, use custom fields in Pabbly Connect. Here’s how:

  • Access the custom fields section to create fields for subscriber data.
  • Copy the personalization tag and paste it into your email content.
  • Save your campaign and preview it.

Using these custom fields ensures that each subscriber receives a unique email tailored to their preferences, enhancing engagement and conversion rates.


5. Testing and Launching Campaigns with Pabbly Connect

Before launching your email campaigns, it’s essential to test them to ensure everything functions as expected. Pabbly Connect allows you to run tests to verify that your workflows are working correctly.

To test your campaigns:

  • Add a test subscriber to your chosen list.
  • Check if the email is sent automatically based on the workflow.
  • Review the email for personalization and content accuracy.

Once you confirm that everything is working, you can launch your campaign confidently. Pabbly Connect simplifies this process, making it easy to manage your email marketing efforts effectively.


Conclusion

In summary, using Pabbly Connect for your email campaigns allows for efficient automation and personalized communication. This integration simplifies workflows, ensuring timely and relevant messaging to your subscribers.

WhatsApp Booking Bot Setup for Beginners

Watch Step By Step Video Tutorial Below


1. Accessing Pabbly Connect for Your Booking Automation

To start automating your booking process, first, you need to access Pabbly Connect. This integration platform allows you to connect various applications seamlessly. Open your browser and visit the Pabbly website, where you can either sign in if you are an existing user or create a new account.

Once logged in, navigate to the Pabbly Connect dashboard. This is where you will initiate your integration with Pabi Chatflow. Ensure you have your WhatsApp number ready, as you will need it to set up your chatbot for booking appointments.


2. Creating Your WhatsApp Chatbot Using Pabi Chatflow

Next, you will create a WhatsApp chatbot using Pabbly Connect and Pabi Chatflow. Start by accessing the Pabi Chatflow page at pave.com/chatflow. Here, you will find options to sign up or log in. New users can sign up for free and receive 100 credits for testing.

  • Sign up for a free account to get started.
  • Log in to access the flow creation page.
  • Add your WhatsApp number to your Pabi account.

After logging in, you can create a new flow for your WhatsApp booking bot. Name your flow appropriately, such as “WhatsApp Booking Bot Setup for Beginners.” This will help you easily identify it later in your Pabbly Connect dashboard.


3. Setting Up Triggers in Pabbly Connect

Triggers are essential for initiating your WhatsApp chatbot. In Pabbly Connect, you will set a trigger event that starts the chatbot interaction. Choose a keyword that will activate the chatbot, such as “hello.” This is the word customers will type in WhatsApp to start booking.

Once the trigger is set, you will drag and drop action blocks to build your chatbot flow. For example, you can create a welcome message that users will receive when they initiate the conversation. Make sure to test the flow to ensure that it responds correctly to the trigger.


4. Collecting User Data for Bookings

After setting up the welcome message, your next step is to collect essential user data. Using Pabbly Connect, you will ask users for their preferred date and time for the appointment. Create a series of questions to gather this information, ensuring that you have fields for date, time, and full name.

  • Ask users for their preferred date.
  • Request their preferred time for the appointment.
  • Collect their full name for booking confirmation.

This data will be crucial for managing appointments effectively. Once the user provides their information, you will need to integrate this data with Google Sheets using Pabbly Connect.


5. Integrating with Google Sheets Using Pabbly Connect

The final step involves integrating your WhatsApp chatbot with Google Sheets through Pabbly Connect. This integration allows you to automatically save booking data in a structured format. Use the API request feature in Pabbly Connect to send data to your Google Sheets.

In the API request node, select the POST method and enter the webhook URL generated by Pabbly Connect. Map the data collected from users to the appropriate fields in Google Sheets. This ensures that every booking is accurately recorded.


Conclusion

By following this tutorial, you can effectively automate your booking process using Pabbly Connect and Pabi Chatflow. This integration not only saves time but also enhances user experience, allowing customers to book appointments effortlessly. Start using Pabbly Connect today to streamline your business operations.

Instagram Automation: The Unlimited Lead Tracking Secret

Watch Step By Step Video Tutorial Below


1. Accessing Pabbly Connect for Instagram Lead Automation

To start automating your Instagram leads, first, you need to access Pabbly Connect. This platform allows you to seamlessly integrate various applications, including Instagram and Google Sheets.

If you are a new user, visit Pabbly’s official website and sign up. You will receive 100 free tasks every month, which is perfect for exploring the software. Existing users can simply log in to their Pabbly Connect dashboard to proceed.


2. Creating a Workflow in Pabbly Connect

After logging into Pabbly Connect, you can create a new workflow to capture leads from Instagram. Click on the ‘+ Create Workflow’ button to begin. You will be given two options: create from scratch or create using AI.

  • Select ‘Create using AI’ for a streamlined setup.
  • Enter the prompt: ‘automatically capture new Instagram lead ad submission and add all leads details to Google Sheets in real time.’
  • Approve the workflow created by Pabbly Connect.

This feature allows you to quickly set up the integration without needing coding skills. Once approved, you will see your trigger as Instagram lead ads and action as Google Sheets.


3. Connecting Instagram Lead Ads to Pabbly Connect

To connect Instagram lead ads, click on the connect button in Pabbly Connect. If you have an existing connection, you can select that; otherwise, create a new one. Make sure your Instagram and Facebook accounts are linked and logged in.

Select the specific page from which you want to capture leads, such as the ‘Magic Maker’ page. Choose the lead generation form labeled ‘New Leads’ and set the response format to simple. Click on the ‘Save and Send Test Request’ button to proceed.


4. Setting Up Google Sheets Integration in Pabbly Connect

Next, you will set up Google Sheets as the action application in Pabbly Connect. Click on the connect button and sign in with your Google account. Allow the necessary permissions for Pabbly Connect to access your Google Sheets.

Select the spreadsheet named ‘Instagram Leads’ and ensure the columns are set up correctly. You will need to map the responses from Instagram lead ads to the corresponding columns in Google Sheets.

  • Map the first name, last name, phone number, email, and city fields.
  • Use the slash command to access previous application responses for mapping.
  • Click ‘Save and Send Test Request’ to test the integration.

After mapping, you will see a new entry in your Google Sheets, confirming that the integration is working perfectly.


5. Finalizing Your Workflow in Pabbly Connect

After testing your workflow, ensure to enable the toggle in Pabbly Connect so that your automation runs smoothly. If this toggle is not enabled, your workflow will become inactive.

This setup allows you to automatically capture leads from Instagram ads into Google Sheets without any manual effort. If you have any questions or issues during setup, feel free to reach out for assistance.


Conclusion

In this tutorial, we explored how to automate Instagram lead data capture into Google Sheets using Pabbly Connect. This integration streamlines your workflow, saving time and ensuring no leads are missed. Start using Pabbly Connect today to enhance your business efficiency.

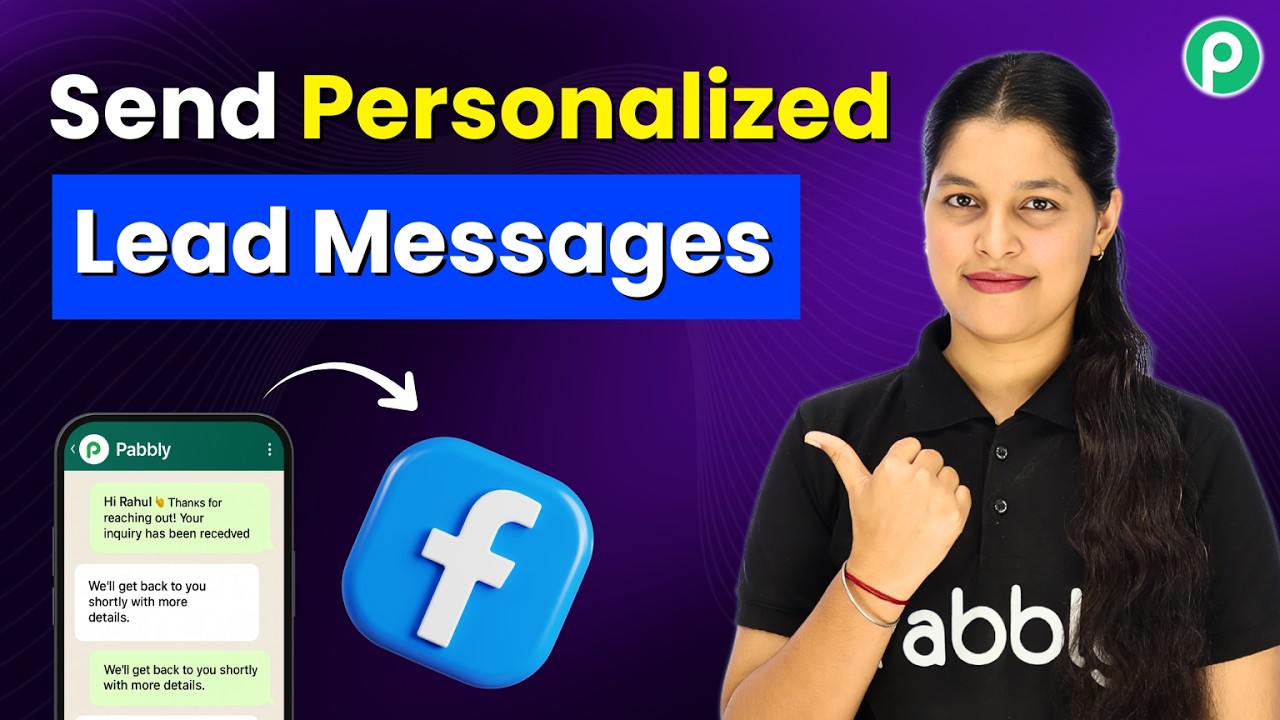
Send Personalized WhatsApp Messages to Facebook Leads 💬

Watch Step By Step Video Tutorial Below


1. Accessing Pabbly Connect for Integration

To start using Pabbly Connect, open a new tab and navigate to the URL pabbly.com/connect. This is the central hub for creating automations between different applications.

If you are a new user, click on the “Sign up free” button to create your account. Existing users can simply sign in. By signing up, you receive 100 free tasks per month to explore the functionalities of Pabbly Connect.


2. Setting Up Facebook Lead Ads in Pabbly Connect

After logging into Pabbly Connect, navigate to the workflow page. Here, you will add a trigger that initiates the workflow. For this integration, select “Facebook Lead Ads” as your trigger application.

  • Choose “New Lead Instant” as the app event.
  • Click on the “Connect” button to set up the connection.
  • Select your Facebook account and the specific page for lead generation.

Once connected, choose the form from which you want to receive leads. After selecting the appropriate form, click on “Save and Send Test Request”. This will set the stage for the WhatsApp integration through Pabbly Connect.


3. Integrating WhatsApp Cloud API with Pabbly Connect

Next, you will set up the action application, which is the WhatsApp Cloud API. Search for it in Pabbly Connect and select it. Choose the app event “Test Send Text Message”.

To connect, you will need to enter your WhatsApp Cloud API token, phone number ID, and WhatsApp business account ID. If you haven’t set these up yet, refer to the documentation provided by Pabbly Connect for detailed instructions.

After entering the required information, click on the “Save” button to establish the connection. This allows Pabbly Connect to send messages directly to your leads via WhatsApp.


4. Mapping Data for Personalized WhatsApp Messages

To send personalized messages, you need to map the data from the Facebook lead response into your WhatsApp message template. Start by selecting the recipient’s mobile number field and map it to the phone number received from Facebook.

  • Insert a dynamic message that includes the lead’s first and last name.
  • Ensure that the mobile number is also dynamically mapped to avoid manual entry.

After setting up the message, click on “Save and Send Test Request” to verify the integration. This will send a test message to your WhatsApp, confirming that the setup is successful through Pabbly Connect.


5. Verifying Successful Integration of WhatsApp and Facebook Leads

Check your WhatsApp to see if the personalized message has been received. If everything is set correctly, you should see a message welcoming the lead by name, confirming that the integration via Pabbly Connect is working perfectly.

This automation allows you to instantly engage with leads generated from your Facebook ads, enhancing your communication strategy. With Pabbly Connect, you can automate this process efficiently and effectively.


Conclusion

In conclusion, using Pabbly Connect to integrate WhatsApp with Facebook leads allows for seamless communication. This tutorial provided a clear step-by-step guide to automate sending personalized messages, enhancing your lead engagement strategy.

Get Instant Shopify Order Alerts on Telegram 🔥

Watch Step By Step Video Tutorial Below


1. Accessing Pabbly Connect for Integration

To integrate Shopify with Telegram using Pabbly Connect, start by accessing the Pabbly Connect dashboard. Open a new tab and navigate to the Pabbly Connect website. If you are new, create an account to gain access to the dashboard.

Once logged in, locate the “Create Workflow” button on the right side of the dashboard. This is where you will initiate the integration setup. Click this button to begin creating your workflow.


2. Creating a New Workflow in Pabbly Connect

After clicking “Create Workflow”, you have the option to start from scratch or use AI assistance. For this tutorial, select the AI option to help generate your workflow. You will then be prompted to describe your workflow.

  • Start a new chat by clicking “Start Fresh”.
  • Enter a prompt like “Create a workflow where only Shopify orders will get shared to Telegram group”.
  • Submit the prompt to let the AI analyze and generate your workflow.

Once the AI has generated your workflow, select the trigger event as “New Order” from Shopify and the action event as “Send Message” to Telegram. Approve the workflow to proceed to the next step.


3. Setting Up Shopify in Pabbly Connect

Open the Shopify application within Pabbly Connect to set up the trigger. Press the “Connect” button to receive a webhook URL. Copy this URL as you will need it for Shopify settings.

Log into your Shopify store and navigate to Settings > Notifications. Here, find the “Webhooks” section and click on “Create Webhook”. Paste the copied webhook URL into the appropriate field.

  • Select “Order Creation” as the event.
  • Set the format to JSON.
  • Choose the latest API version and save the webhook.

After saving, return to Pabbly Connect and wait for a webhook response. You will need to make a test purchase to capture the order details.


4. Connecting Telegram to Pabbly Connect

With the webhook setup in Shopify, it’s time to connect Telegram in Pabbly Connect. Open the Telegram application within your workflow and click “Connect”. Choose to add a new connection.

To establish this connection, you will need a token from the Telegram BotFather. In Telegram, search for “BotFather” and send the command “/newbot” to create a new bot. Follow the prompts to get your token.

  • Copy the token provided by BotFather.
  • Paste the token back into Pabbly Connect.
  • Save the connection to finalize it.

Now, you can set up the message details that will be sent to your Telegram group whenever a new order is placed.


5. Sending Order Details to Telegram

After successfully connecting Telegram, you need to configure the message that will be sent to your team. In the Telegram setup within Pabbly Connect, add the chat ID of your group. If you don’t have this, use the “Get ID Bot” to retrieve it.

Next, compose the message you want to send. You can include static text and map dynamic data such as customer name, email, and order details. To map data, use the slash button to insert values from the previous steps.

  • Map customer name and email to personalize the message.
  • Ensure all mapped fields are correct before sending.

Finally, click “Save and Send Test Request” to check if the message is sent successfully to your Telegram group. This completes the integration setup.


Conclusion

In this tutorial, we showed you how to integrate Shopify with Telegram using Pabbly Connect. This automation helps your team receive instant order notifications, improving order management and communication.

By following these steps, you can streamline your workflow, ensuring that your team is always updated on new orders without any manual effort.

Reach 1000+ Users on WhatsApp With Just One Click 🚀

Watch Step By Step Video Tutorial Below


1. Accessing Pabbly Chatflow for WhatsApp Integration

To start creating your WhatsApp broadcast campaign, first access Pabbly Chatflow by navigating to the Pabbly website. This powerful tool helps automate WhatsApp messaging efficiently.

If you are new to Pabbly, click on the ‘Sign Up Free’ option to create your account. This will give you access to 100 free credits every month, perfect for testing your campaigns.


2. Adding Your WhatsApp Number in Pabbly Chatflow

After signing in, the next step is to add your WhatsApp number to your Pabbly Chatflow account. This is essential for sending messages through the platform.

  • Navigate to the settings menu.
  • Select the option to add a new WhatsApp number.
  • Follow the prompts to verify your number.

Once your number is added, you can access the broadcast feature from the left-hand menu. This feature allows you to send WhatsApp messages to a predefined list of contacts without getting banned.


3. Creating a Broadcast Campaign in Pabbly Chatflow

To create a new broadcast in Pabbly Chatflow, click on the ‘Add Broadcast’ button. This will take you to the campaign setup page where you can customize your message.

  • Select the type of broadcast campaign.
  • Name your broadcast (e.g., “Season Finale Sale”).
  • Choose your contact list.

After naming your campaign, you can refine your audience by excluding certain contacts if needed. This allows for a targeted approach in your messaging strategy.


4. Uploading Contacts to Pabbly Chatflow

The next step is to upload your contacts to Pabbly Chatflow. You can do this by navigating to the contacts feature and selecting ‘Add Contacts’.

  • Choose to upload contacts in bulk using a CSV file.
  • Ensure your CSV file includes first name, last name, and phone number.
  • Upload the file and click ‘Insert’ to add your contacts.

With your contacts uploaded, you can now proceed to schedule your broadcast campaign. This is where Pabbly Chatflow truly shines, allowing you to reach thousands of customers simultaneously.


5. Scheduling Your WhatsApp Broadcast Using Pabbly Chatflow

Once your contacts are in place, it’s time to schedule your broadcast in Pabbly Chatflow. You can choose to send the message instantly or schedule it for a later date.

To schedule, select the date and time for your broadcast. For example, you might set it for May 28th at 5:00 PM. After confirming your schedule, click on the ‘Add Broadcast’ button to finalize.

Finally, you can view the stats of your broadcast and track its performance. This feature in Pabbly Chatflow allows you to see delivery rates, read statuses, and even resend messages to failed contacts.


Conclusion

In this tutorial, we explored how to create a WhatsApp broadcast campaign using Pabbly Chatflow. By following these steps, you can effectively engage with your customers and enhance your marketing efforts.

Automatically Publish Daily Blogs with ChatGPT & Blogger

Watch Step By Step Video Tutorial Below


1. Accessing Pabbly Connect for Automation

To start automating your Google Blogger posts, first access Pabbly Connect by visiting pabby.com/connect. This is the central platform that facilitates the integration between various applications, including OpenAI and Google Blogger.

Once on the homepage of Pabbly Connect, you will find options to either sign in or sign up for free. If you are a new user, click on “Sign Up Free” to get started with 100 free tasks each month. Existing users can simply sign in to access their dashboard.


2. Creating a Workflow in Pabbly Connect

After signing in, navigate to the Pabbly Connect dashboard. Here, you will create a new workflow to automate your blogging tasks. Click on “Create from Scratch” or use the AI workflow builder. For this tutorial, we will select the AI workflow builder.

  • Select the option to start a fresh chat.
  • Describe your desired automation, such as generating blog content daily.
  • Choose the trigger for your workflow, which will be a schedule.

Once you have set up your workflow, select the appropriate applications: OpenAI for generating content and Google Blogger for posting. Review the workflow preview and click “Approve and Create” to finalize your setup.


3. Configuring the Trigger in Pabbly Connect

Next, you will configure the trigger for your workflow in Pabbly Connect. This step defines when your automation will run. Choose the frequency of the trigger, such as daily at a specific time, like 10:00 AM.

After setting the frequency, save your configuration. You will receive a confirmation response indicating that your workflow is successfully scheduled. This ensures that your automation will run as planned every day.


4. Generating Blog Title and Content Using OpenAI

With the trigger set, it’s time to generate your blog title and content using OpenAI. In this step, you will connect OpenAI to Pabbly Connect. First, obtain your API key from your OpenAI account.

  • Click on the link provided to access the API keys section.
  • Create a new secret key and copy it into Pabbly Connect.
  • Select the appropriate model, such as GPT-5.

After configuring the model, input the prompt for generating your blog title. Click “Save and Send Test Request” to generate the title. Repeat the process for the blog content, ensuring to map the title dynamically from the previous step.


5. Posting to Google Blogger Through Pabbly Connect

Finally, you will set up the connection to Google Blogger in Pabbly Connect. Click on “Sign in with Google” and select your Google account to grant access to Pabbly Connect.

Once connected, specify your blog ID and map the title and content generated by OpenAI. Choose the status of the post, such as “Live” or “Draft,” and finalize by clicking on “Save and Send Test Request.” You will receive a successful response indicating that your post has been created.


Using Pabbly Connect, you have successfully automated the process of generating and publishing your blog posts on Google Blogger using OpenAI. This integration streamlines your blogging tasks, saving you valuable time.

By following these steps, you can easily manage your blog content without manual intervention. Automate your blogging process today with Pabbly Connect and OpenAI!

Connect Facebook Leads to Google Sheets in Just 5 Minutes

Watch Step By Step Video Tutorial Below


1. Accessing Pabbly Connect for Integration

To begin integrating Facebook Lead Ads with Google Sheets, you first need to access Pabbly Connect. Visit pabbly.com in your browser and log into your account. If you are new, you can sign up for free, which provides you 100 tasks monthly to get started.

Once logged in, navigate to the Pabbly apps page and select Pabbly Connect. This will take you to the dashboard where you can create your workflow for the integration. Click on ‘Create New Workflow’ to start setting up your automation.


2. Setting Up Your Workflow in Pabbly Connect

In your new workflow, name it “Connect Facebook Leads to Google Sheets in Just 5 Minutes” and choose a folder for organization. The trigger application is crucial as it starts the automation process. Here, select Facebook Lead Ads as your trigger application.

  • Select the trigger event as “New Lead Instant”.
  • Click on “Connect” to link your Facebook account.
  • Authorize the connection when prompted.

Once connected, you will need to enter the Facebook page and lead form details. This is done by selecting the relevant page where your lead ads are running. After setting these details, click on “Save and Send Test Request” to confirm the connection works.


3. Testing the Facebook Lead Ads Connection

After setting up the trigger, it’s essential to test the connection to ensure everything is functioning correctly. To do this, you will need to generate a test lead by submitting a form through your Facebook Lead Ads.

Open the lead form and fill it out with test data, such as:

Once you submit the form, go back to Pabbly Connect and check if the response is captured. If successful, you will see the test lead details reflected in your workflow, confirming that the integration is working properly.


4. Connecting Google Sheets as Action Application

Now that you have confirmed the trigger works, the next step is to set up Google Sheets as your action application in Pabbly Connect. Select Google Sheets and choose the action event as “Add New Row”.

Click on “Connect” to link your Google account. Make sure to allow permissions for Pabbly Connect to access your Google Sheets. Once connected, select the spreadsheet where you want the leads to be added.

Map the fields from the test lead to the corresponding columns in your Google Sheets. Ensure that each detail, such as name, email, and phone number, is mapped correctly to maintain data integrity. Once everything is set, click on “Save and Send Test Request” to finalize the setup.


5. Finalizing Your Automation with Pabbly Connect

With the Google Sheets action set up, you can now finalize your automation in Pabbly Connect. Review all the mappings and configurations to ensure they are correct. This step is crucial for maintaining the accuracy of the data being transferred.

Once satisfied, click on “Save” to activate your workflow. Now, every time a new lead comes in through Facebook Lead Ads, the details will automatically populate in your Google Sheets without any manual effort. This automation saves time and reduces the risk of errors in data entry.


Conclusion

Using Pabbly Connect, you can seamlessly integrate Facebook Lead Ads with Google Sheets, automating your lead capture process. This setup not only saves time but also ensures accurate data management for your business.

Send WhatsApp Messages from Google Sheets Automatically

Watch Step By Step Video Tutorial Below


1. Accessing Pabbly Connect for WhatsApp Integration

To begin using Pabbly Connect for sending WhatsApp messages, first visit pabbly.com/connect in your browser. This will take you to the Pabbly Connect homepage where you can either sign in or sign up for free.

If you are a new user, click on the “Sign up for free” option to get started with 100 free tasks every month. Once you are signed in, you will have access to all Pabbly applications including Pabbly Connect.


2. Creating a Workflow in Pabbly Connect

After accessing Pabbly Connect, you need to create a new workflow. Click on “Create from scratch” or use the AI workflow builder. Type in a prompt such as “When a new row is added in Google Sheets, send WhatsApp message via Pabbly Chartflow”.

  • Select the trigger event as “New or Updated Spreadsheet Row”.
  • For the action, choose “Send Text Message” from Pabbly Chartflow.

Review the workflow preview and select “Approve and Create” to finalize your setup. You will receive a unique workflow link for further actions.


3. Setting Up Google Sheets with Pabbly Connect

Next, you need to connect your Google Sheets to Pabbly Connect. Start by copying the webhook URL provided in your workflow. Open your Google Sheets and click on “Extensions” to access add-ons.

  • Select “Get Add-ons” and search for “Pabbly Connect Webhooks”.
  • Install the add-on and refresh your Google Sheets.

Once installed, navigate back to “Extensions” and select “Pabbly Connect Webhooks” to set up the webhook URL and trigger column. Input the copied URL and set the trigger column to the last data column (e.g., Column C). Click on “Submit” to complete the setup.


4. Sending WhatsApp Messages Using Pabbly Connect

With your Google Sheets connected, it’s time to send WhatsApp messages. Go back to your Pabbly Connect workflow and click on the action to send a WhatsApp message via Pabbly Chartflow.

Here, you’ll need to enter the WhatsApp mobile number and the message. Instead of typing the number manually, map the data from the previous step to make it dynamic. This way, the message will include personalized details for each customer.

  • Ensure to format the message correctly, using asterisks for bold text where necessary.
  • Click “Save and Send Test Request” to verify if the message is sent successfully.

Check your WhatsApp to confirm that the message has been received with the correct details. If successful, you can now automate sending messages to all contacts in one click.


5. Finalizing the Automation Process

To complete the automation, return to your Google Sheets and ensure the “Send on Event” option is turned on. This will allow new entries to trigger the automation instantly.

After confirming the setup, you can select “Send All Data” from the Pabbly Connect Webhooks menu to send the same message to multiple contacts automatically. This feature enhances efficiency and ensures timely communication with your customers.

With these steps, you have successfully set up an automation that allows you to send personalized WhatsApp messages directly from Google Sheets using Pabbly Connect. This integration not only saves time but also enhances customer engagement.


Conclusion

In this tutorial, we explored how to use Pabbly Connect to automate sending WhatsApp messages from Google Sheets. By following these steps, you can streamline communication and enhance customer engagement effectively.