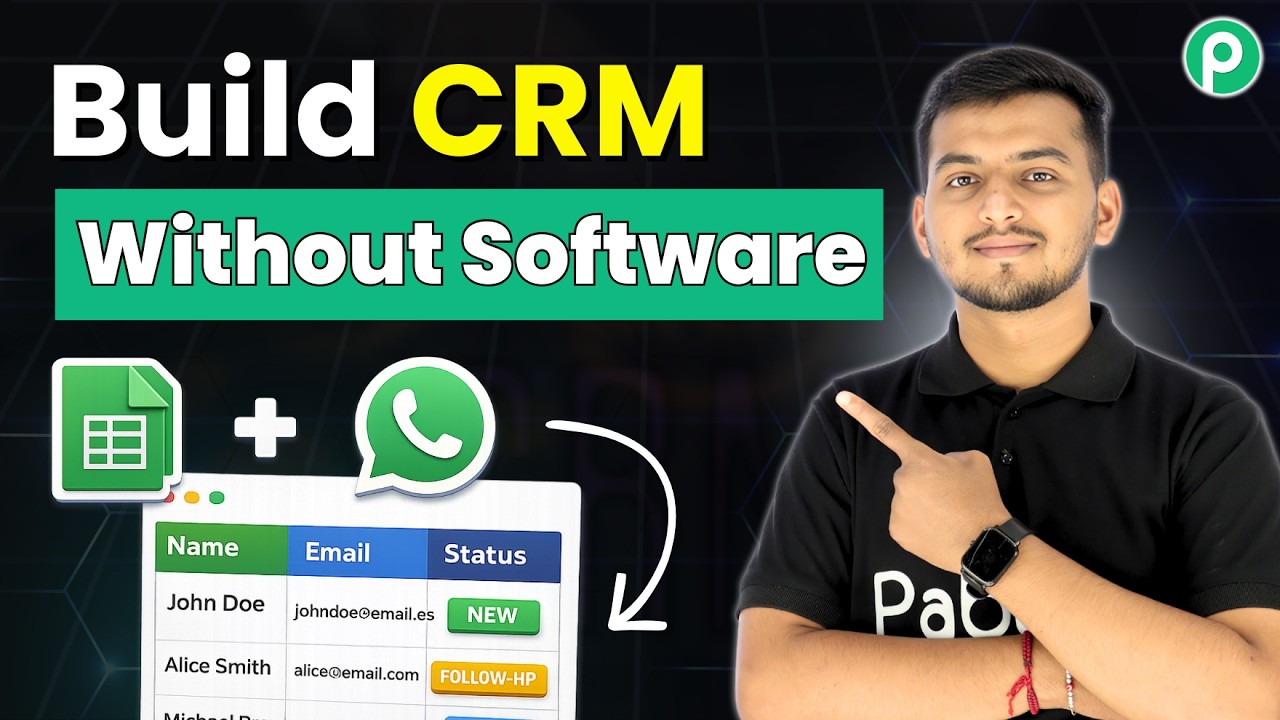
Add Facebook Lead Ads to Google Sheets for Digital Marketing Agencies

Learn how to integrate Facebook Lead Ads with Google Sheets using Pabbly Connect, a step-by-step tutorial for digital marketing agencies. Eliminate manual repetitive tasks from your workflow. Discover proven automation methods with intuitive steps designed for efficiency-minded professionals.

Watch Step By Step Video Tutorial Below


1. Accessing Pabbly Connect for Integration

To integrate Facebook Lead Ads with Google Sheets, you first need to access Pabbly Connect. Start by navigating to the Pabbly Connect website by entering ‘Pabbly.com/connect’ in your browser. This will direct you to the Pabbly Connect homepage where you can either sign in or sign up for a free account.

If you’re new to Pabbly Connect, click on the ‘Sign Up Free’ option. This allows you to explore the platform with 100 free tasks every month. Existing users can simply sign in to access their dashboard.


2. Creating a New Workflow in Pabbly Connect

Once you are logged into Pabbly Connect, you will see the dashboard. To create a new workflow, click on the ‘Create Workflow’ button. You will then be prompted to select a workflow builder; choose the ‘New Beta’ option for a modern experience.

  • Click on the ‘Select’ button for the New Beta version.
  • Name your workflow, for example, ‘Add Facebook Lead Ads to Google Sheets for Digital Marketing Agencies’.
  • Select a folder for organization, such as ‘Facebook Lead Ads’.

After entering the necessary details, click on the ‘Create’ button to finalize your new workflow.


3. Setting Up the Trigger for Facebook Lead Ads

In this step, you’ll set up the trigger for your workflow using Pabbly Connect. Click on the trigger app and select ‘Facebook Lead Ads’. Choose the event ‘New Lead Instant’ to capture new leads as they come in.

To connect your Facebook account, click on ‘Connect’ and select ‘Add New Connection’. After that, log into your Facebook account to give Pabbly Connect access. Make sure your Facebook account is already logged in for a seamless connection.

  • Select your Facebook page, for example, ‘Digital Dynamics’.
  • Choose the lead form you want to use, such as ‘New Lead Ads Form’.

After selecting the page and form, click on ‘Save and Send Test Request’ to check if the connection is successful. You may need to generate a test lead using the Meta leads testing tool to proceed.


4. Adding the Action Step to Google Sheets

After successfully setting up the trigger with Pabbly Connect, you need to add an action step to log the lead details into Google Sheets. Select Google Sheets as your action app and choose the event ‘Add a New Row’.

Click on ‘Connect’ to build a new connection with your Google account. Select ‘Sign in with Google’ and grant access to Pabbly Connect. Once connected, choose the spreadsheet where you want to log the leads, for instance, ‘New Digital Marketing Leads’.

Select the specific sheet, like ‘Sheet1’. Map the fields from the Facebook lead to the corresponding columns in Google Sheets.

Once mapping is done, click on ‘Save and Send Test Request’ to confirm that the lead details are being captured correctly in Google Sheets.


5. Testing the Integration Workflow

To ensure your integration is working correctly, it’s crucial to test the entire setup using Pabbly Connect. Start by generating a new test lead through the Meta leads testing tool. Make sure to delete any previous test leads to avoid conflicts.

Once you have entered the test lead details, submit the form. After submission, check your Google Sheets to see if the new lead details appear as expected. This confirms that the integration is functioning smoothly.

In summary, with Pabbly Connect, you can easily automate the process of adding Facebook Lead Ads to Google Sheets, ensuring that no leads are missed for your digital marketing agency.


Conclusion

In this tutorial, we explored how to integrate Facebook Lead Ads with Google Sheets using Pabbly Connect. By following these steps, digital marketing agencies can streamline their lead management process effectively.

Ensure you check out Pabbly Connect to create business automation workflows and reduce manual tasks. Pabbly Connect currently offer integration with 2,000+ applications.

I Asked Gemini Nano Banana to Generate Images… The Results Are Crazy!

Learn how to automate image generation using Pabbly Connect and Gemini Nano Banana with this step-by-step tutorial. No coding required! Build sophisticated automated workflows in less time than you think. This guide translates complex integrations into straightforward steps for immediate implementation.

Watch Step By Step Video Tutorial Below


1. Setting Up Pabbly Connect for Automation

To automate the image generation process using Pabbly Connect, first, access it by navigating to www.Pabbly.com/connect. Here, you can either sign in if you’re an existing user or sign up for free to explore the features. Once logged in, click on the ‘Access Now’ button for Pabbly Connect.

After accessing Pabbly Connect, create a new workflow by clicking the ‘Create Workflow’ button. Name your workflow; for instance, ‘Generate AI Images Nano Banana.’ Select the new beta method for a more modern experience. This will set the stage for integrating Google Sheets with Gemini Nano Banana through Pabbly Connect.


2. Integrating Google Sheets with Pabbly Connect

The first step in your automation is to set Google Sheets as the trigger application in Pabbly Connect. Choose ‘Google Sheets’ as the trigger app and select the event ‘New or Updated Spreadsheet Row.’ This will allow Pabbly Connect to monitor your Google Sheets for any new entries.

  • Click on the ‘Connect’ button to establish a connection.
  • Copy the webhook URL provided by Pabbly Connect.
  • Open your Google Sheets, go to Extensions > Add-ons > Get Add-ons, and search for Pabbly Connect Webhooks.

After installing the add-on, refresh your Google Sheet and set up the webhook by going to Extensions > Pabbly Connect Webhooks > Initial Setup. Paste the webhook URL and specify the trigger column (e.g., Column C). Click ‘Submit’ to complete the setup, ensuring that Pabbly Connect can receive data from your Google Sheets.


3. Generating Images Using Gemini Nano Banana

Next, you will configure the action step in Pabbly Connect to generate images using Gemini Nano Banana. Add an action step and select ‘Google Gemini’ as the application, then choose the event ‘Generate and Edit Images Nano Banana.’ This will allow you to create images based on the prompts entered in Google Sheets.

To connect to Gemini, you will need an API key. Click on the provided link to obtain your API key and paste it into Pabbly Connect. Once the connection is established, you will set up the prompt for the image generation.

  • Enter the prompt for the image, such as ‘An astronaut holding colorful balloons on Mars.’
  • Specify the style (e.g., surreal) and image type (e.g., illustration).

After entering the details, click on ‘Save and Send Test Request’ to generate the image. You will see a response containing the image URL, demonstrating that Pabbly Connect has successfully facilitated the image generation.


4. Updating Google Sheets with the Generated Image URL

Now that the image has been generated, the next step is to update your Google Sheets with the image URL. In Pabbly Connect, add another action step and select ‘Google Sheets’ again, choosing the event ‘Update Row.’ This will allow you to send the generated image URL back to your spreadsheet.

Connect your Google account and select the spreadsheet you wish to update. You will need to map the row index and specify the column for the generated image URL. After mapping the data, click on ‘Test Request’ to send the image URL back to Google Sheets.

Upon successful execution, you will see the generated image URL appear in your Google Sheets, confirming that Pabbly Connect has completed the automation process effectively.


5. Conclusion: Streamline Your Image Generation Process

By following the steps outlined in this tutorial, you can easily set up an automated workflow using Pabbly Connect to generate images with Gemini Nano Banana and update Google Sheets seamlessly. This automation not only saves time but also ensures that you have a systematic record of your generated images.

Ensure you check out Pabbly Connect to create business automation workflows and reduce manual tasks. Pabbly Connect currently offer integration with 2,000+ applications.

Utilizing Pabbly Connect allows anyone, regardless of technical skill, to create an efficient workflow for image generation. Start automating your image creation process today and explore further possibilities with Pabbly Connect!

How to Send WhatsApp Messages to All Your Contacts Instantly

Learn how to send bulk WhatsApp messages to all your contacts instantly using Pabbly Chatflow. Follow this step-by-step tutorial for seamless integration! Learn step-by-step how to create, test, and optimize chatbots that enhance customer experience while reducing support workload.

Watch Step By Step Video Tutorial Below


1. Accessing Pabbly Chatflow for WhatsApp Integration

To send WhatsApp messages to all your contacts instantly, you first need to access Pabbly Chatflow. Start by navigating to the Pabbly website and selecting the Chatflow option. This platform is designed specifically for automating WhatsApp communications.

Once you’re on the Pabbly Chatflow homepage, you can either sign up for a new account or log in if you’re an existing user. After signing up, you will receive 100 free credits to start using the platform. This allows you to send your first 100 messages without any cost.


2. Connecting Your WhatsApp Number in Pabbly Chatflow

After logging into Pabbly Chatflow, the next step is to connect your WhatsApp number. This is essential for sending messages through the platform. Click on the WhatsApp Connect option and follow the prompts to add your number securely.

  • Select the WhatsApp Connect option.
  • Follow the instructions to verify your number.
  • Ensure you have the necessary permissions set for sending messages.

Once your number is connected, you can easily manage and send messages to your contacts using Pabbly Chatflow. This feature makes it simple to automate your communication processes.


3. Creating a Broadcast Message in Pabbly Chatflow

To send bulk messages, you will need to create a broadcast message using Pabbly Chatflow. Start by navigating to the Broadcast section and clicking on the Add Broadcast button. This is where you will set up your message template and select your target contacts.

When creating your broadcast, you have the option to use either a pre-approved template or a regular message. If you choose a template, ensure it meets WhatsApp’s guidelines for bulk messaging.

  • Click on the Add Broadcast button.
  • Select the type of broadcast: Campaign or Regular.
  • Enter your message details and select your contacts.

After configuring your broadcast, you can preview the message to ensure it appears correctly. This step is crucial to avoid any errors before sending the message to all your contacts.


4. Scheduling Your Broadcast Message with Pabbly Chatflow

Once your broadcast message is ready, Pabbly Chatflow allows you to schedule it for immediate or future delivery. You will be prompted to select the date and time for your broadcast. Make sure to choose a future date and time to avoid sending it instantly if that’s not your intention.

For scheduling, enter the date in the format of month, day, year, and the time in hours and minutes. This flexibility ensures that you can reach your audience at the most opportune time.

Select a future date and time for your broadcast. Double-check your time zone settings. Click on Schedule Broadcast to finalize the setup.

After scheduling, you can view the status of your broadcast messages and track engagement rates through Pabbly Chatflow’s dashboard, providing valuable insights into your messaging campaigns.


5. Testing Your Broadcast Message Before Sending

Before sending out your broadcast message, it’s essential to test it using Pabbly Chatflow. You can do this by adding your own number and sending a test message to see how it appears on WhatsApp. This step ensures that your message format and content are correct.

To test, simply enter your name and mobile number, then click on Send Test Message. This allows you to confirm that everything is working as intended before launching your full broadcast.

Enter your name and mobile number for testing. Click on Send Test Message. Check your WhatsApp for the test message.

Once you confirm that the test message is received correctly, you can proceed to send your broadcast to all contacts instantly, ensuring a smooth communication process through Pabbly Chatflow.


Conclusion

Using Pabbly Chatflow, you can effortlessly send WhatsApp messages to all your contacts instantly. This tutorial has guided you through accessing the platform, connecting your WhatsApp number, creating and scheduling broadcasts, and testing your messages. Enjoy seamless communication with your audience!

Ensure you check out Pabbly Connect to create business automation workflows and reduce manual tasks. Pabbly Connect currently offer integration with 2,000+ applications.

AI Agent for Co-Living & Student Housing Operators

Learn how to use Pabbly Chatflow to create an AI agent for managing queries from co-living and student housing operators effectively. Explore how leading businesses automate customer interactions with carefully designed chat sequences that feel natural and helpful.

Watch Step By Step Video Tutorial Below


1. Accessing Pabbly Chatflow for AI Agent Creation

To create an AI agent for co-living and student housing operators, you first need to access Pabbly Chatflow. Begin by navigating to www.Pabbly.com/chatflow in your browser. This platform allows you to automate responses to student queries effectively.

Once on the site, sign in to your account. If you’re a new user, you can sign up for free and receive 100 credits monthly to explore Pabbly Chatflow. Existing users should click on the ‘Sign In’ button located at the top right corner of the page.


2. Creating Your AI Agent in Pabbly Chatflow

After signing into Pabbly Chatflow, you can start creating your AI agent. Click on the ‘AI Assistant’ option on the left sidebar. Here, you will see the option to create a new AI assistant. Click on the ‘Add AI Assistant’ button to proceed.

  • Name your AI agent, for example, ‘AI Agent for Co-Living & Student Housing Operators’.
  • Select the instruction type as ‘AI Agent’.
  • Set the AI configuration creativity level to 0.7 for balanced responses.

After filling out these details, click on the ‘Create’ button to save your AI agent. Now, you can customize its settings to enhance its performance in answering queries.


3. Configuring AI Agent Settings in Pabbly Chatflow

In this section, you will configure your AI agent’s settings in Pabbly Chatflow. Set the AI to use OpenAI and enter your API key. To obtain an API key, click on the provided link to the OpenAI API key page, create a new secret key, and copy it into the respective field in Pabbly Chatflow.

  • Toggle on the header and footer messages if desired.
  • Set a stop keyword to cease AI responses when requested by users.
  • Define retry attempts in case of failed responses, typically set to 1.

These configurations ensure that your AI agent operates smoothly and meets user expectations. Don’t forget to save your settings to activate the changes made in Pabbly Chatflow.


4. Uploading Knowledge Base for AI Agent

Next, you will upload a knowledge base to your AI agent in Pabbly Chatflow. This knowledge base contains essential information about your co-living and student housing operations. Click on the ‘Knowledge Source’ section and select ‘Upload File’ to add your pre-prepared document.

Ensure that your knowledge base includes detailed information such as:

Business details, target audience, and room types. Booking processes, house rules, and payment policies. General queries and core queries relevant to students.

This comprehensive knowledge base will empower your AI agent to provide accurate and relevant responses to user inquiries. Once uploaded, proceed to finalize your AI agent’s settings in Pabbly Chatflow.


5. Testing Your AI Agent in Pabbly Chatflow

After setting up and configuring your AI agent, it’s time to test its functionality using Pabbly Chatflow. Send a message through WhatsApp to check if your AI agent responds accurately. For instance, ask, ‘Can I move in immediately?’ and observe the response.

Your AI agent should reply with relevant information based on the knowledge base, confirming its effectiveness. Test various queries to ensure the AI agent handles both general and specific inquiries efficiently. This will demonstrate the capabilities of your AI agent and the seamless integration provided by Pabbly Chatflow.


Conclusion

In conclusion, using Pabbly Chatflow to create an AI agent for co-living and student housing operators streamlines communication and improves response times. By following the steps outlined above, you can automate student queries effectively, enhancing your operational efficiency.

Ensure you check out Pabbly Connect to create business automation workflows and reduce manual tasks. Pabbly Connect currently offer integration with 2,000+ applications.

WhatsApp AI Agent for Travel Package Enquiries

Learn how to set up a WhatsApp AI agent for travel package enquiries using Pabbly Chatflow. Follow this detailed step-by-step tutorial for seamless integration. Learn step-by-step how to create, test, and optimize chatbots that enhance customer experience while reducing support workload.

Watch Step By Step Video Tutorial Below


1. Accessing Pabbly Chatflow for Integration

To create a WhatsApp AI agent for travel package enquiries, first access Pabbly Chatflow. Go to the Pabbly website and sign in or sign up for a new account. This platform is essential for setting up automated responses to customer queries on WhatsApp.

Once logged in, navigate to the Pabbly Chatflow dashboard. Here, you can manage your WhatsApp number and set up the AI agent. Follow these steps to begin:

  • Sign in to Pabbly Chatflow.
  • Click on ‘Add WhatsApp Number’ to connect your business number.
  • Select the preferred connection method.

After connecting your WhatsApp number, you are ready to create your AI agent. Pabbly Chatflow makes this process straightforward and efficient.


2. Creating Your WhatsApp AI Agent

Next, you’ll create your WhatsApp AI agent using Pabbly Chatflow. Click on the ‘Add Assistant’ button to start the setup. This assistant will handle customer queries automatically, providing instant responses.

In the assistant setup window, you need to name your assistant and configure its settings. Here are the critical elements to set up:

  • Name your assistant appropriately for your travel business.
  • Select the instruction type, such as ‘Custom Prompt’ or predefined examples.
  • Set your AI’s creativity level based on your business needs.

Once you have configured these settings, click ‘Save’ to create your AI agent. This agent will now be ready to respond to customer queries on WhatsApp.


3. Configuring AI Settings for Effective Responses

Configuring the AI settings in Pabbly Chatflow is crucial for accurate responses. You will set up the knowledge base, which the AI will use to answer customer queries. This includes uploading documents with FAQs and service details.

To configure the AI settings, follow these steps:

Upload a knowledge source document in supported formats. Set fallback messages for when the AI cannot respond. Define stop keywords to halt the AI’s responses when necessary.

After setting these configurations, your AI agent will be equipped to handle a variety of customer inquiries effectively.


4. Testing Your WhatsApp AI Agent

Testing is a vital step in ensuring your WhatsApp AI agent functions correctly. Use Pabbly Chatflow to simulate customer interactions and verify the responses from your AI agent. This helps identify any issues before going live.

To test your AI agent, send sample queries from your WhatsApp account. Observe how the AI responds and make adjustments as needed. Here’s how to conduct your tests:

Send questions regarding travel packages and services. Check if the AI provides accurate and timely answers. Make note of any queries the AI struggles to answer.

After testing, refine your AI’s knowledge base and settings in Pabbly Chatflow to enhance its performance further.


5. Deploying Your AI Agent on WhatsApp

Once testing is complete, it’s time to deploy your AI agent. Use Pabbly Chatflow to assign the assistant to your WhatsApp contacts, allowing it to respond to customer queries automatically.

To deploy your AI agent, follow these steps:

Access the settings and navigate to inbox settings. Enable AI auto-reply for your contact list. Save the settings to activate the AI assistant.

Your AI agent is now live on WhatsApp, ready to assist customers with travel package enquiries efficiently.


Conclusion

In this tutorial, we explored how to create a WhatsApp AI agent for travel package enquiries using Pabbly Chatflow. By following these detailed steps, you can enhance customer interactions and streamline your travel business operations.

Ensure you check out Pabbly Connect to create business automation workflows and reduce manual tasks. Pabbly Connect currently offer integration with 2,000+ applications.

How to Create an AI WhatsApp Chatbot Using Pabbly Chatflow

Learn how to create an AI WhatsApp chatbot using Pabbly Chatflow with this detailed step-by-step tutorial, including integration with YouTube, Google, and more. Discover how to design chat experiences that feel personal and responsive while handling customer inquiries automatically around the clock.

Watch Step By Step Video Tutorial Below


1. Accessing Pabbly Chatflow for Your AI WhatsApp Chatbot

To create an AI WhatsApp chatbot, begin by accessing Pabbly Chatflow. Open your browser and navigate to Pabbly.com/chatflow. This platform provides the essential tools to integrate various applications, including WhatsApp, Google, and YouTube.

Once on the Pabbly Chatflow landing page, you will see two options: ‘Sign In’ and ‘Sign Up for Free.’ If you’re new, select ‘Sign Up for Free’ to receive 100 free credits monthly, allowing you to explore the features of Pabbly Chatflow. Existing users can simply sign in to their accounts.


2. Adding Your WhatsApp Number in Pabbly Chatflow

After signing into Pabbly Chatflow, the next step is to add your WhatsApp number. Click on the ‘Add WhatsApp Number’ option located in the top right corner of the dashboard. This will allow you to connect your WhatsApp account to Pabbly Chatflow.

  • Choose between two methods provided for adding your WhatsApp number.
  • Follow the prompts to successfully integrate your WhatsApp account.

Once your WhatsApp number is added, you can proceed to set up your AI assistant. This feature is vital for creating a responsive chatbot capable of handling customer queries effectively through WhatsApp using Pabbly Chatflow.


3. Creating Your AI Assistant in Pabbly Chatflow

To create an AI assistant, navigate to the AI assistant feature in Pabbly Chatflow and click on the ‘Add AI Assistant’ button. You will then be prompted to name your assistant. For example, you might name it ‘AI Chatbot’ to reflect its purpose.

Upon naming your assistant, a configuration window will appear. Here, you can set AI instructions, choose a temperature setting for responses, and select the AI model. For instance, you can opt for the GPT-4 mini model, which enhances the chatbot’s ability to generate creative responses.

  • Enter the API key obtained from your OpenAI account.
  • Adjust the temperature slider to control the creativity of responses.

These settings allow you to customize how the AI assistant interacts with users, making it a crucial step in utilizing Pabbly Chatflow effectively.


4. Setting Up Your Knowledge Base in Pabbly Chatflow

Next, you need to create a knowledge base for your AI chatbot. This knowledge base will include all relevant information that the chatbot will use to respond to user queries. In Pabbly Chatflow, you can upload a text or PDF file containing your business details, menu items, prices, and FAQs.

To upload your knowledge base, prepare a document with all necessary information. Once ready, click on the upload option in Pabbly Chatflow and select your file. Ensure that the details are accurate, as this will directly impact the chatbot’s ability to provide correct responses.

Include menu items, prices, and any other relevant business information. Make sure to add FAQs to enhance user experience.

With a well-structured knowledge base, your AI chatbot will be equipped to handle inquiries effectively, showcasing the capabilities of Pabbly Chatflow.


5. Embedding Your AI WhatsApp Chatbot on Your Website

Finally, to make your AI WhatsApp chatbot accessible to users, you need to embed it on your website. In Pabbly Chatflow, navigate to the embedding section to obtain the script required for integration.

Copy the provided script and paste it into your website’s HTML where you want the chatbot to appear. Once implemented, users can click on the ‘Chat with Us’ button, which will redirect them to WhatsApp with a pre-defined message ready to send.

This seamless integration allows your AI assistant to interact with customers directly through WhatsApp, demonstrating the powerful capabilities of Pabbly Chatflow in enhancing customer service.


Conclusion

Creating an AI WhatsApp chatbot using Pabbly Chatflow is a straightforward process that enhances customer interaction. By following these steps, you can effectively integrate various applications and provide instant responses to your clients.

Ensure you check out Pabbly Connect to create business automation workflows and reduce manual tasks. Pabbly Connect currently offer integration with 2,000+ applications.

Create Your Entire Social Media Plan with AI in Just 10 Minutes

Learn how to create your entire social media plan in just 10 minutes using Pabbly Connect. Step-by-step guide to integrate Google, Facebook, Instagram, and more!

Watch Step By Step Video Tutorial Below


1. Accessing Pabbly Connect for Your Social Media Plan

To create your entire social media plan, start by accessing Pabbly Connect. This automation platform allows you to integrate various applications seamlessly. Simply search for Pabbly.com in your browser to reach the home page.

Once on the home page, you will see options to either sign in or sign up for free. If you are a new user, click on ‘Sign Up Free’ to get started with 100 free tasks every month. For existing users, click on ‘Sign In’ to access your account.


2. Creating Your Automation Workflow with Pabbly Connect

After signing in, navigate to the dashboard of Pabbly Connect. Here, you can create a new workflow by clicking on the ‘Create Workflow’ button located at the top right corner. Select the ‘Workflow Builder’ option to proceed.

  • Choose the ‘Beta Version’ for the latest features.
  • Name your workflow according to your social media plan.
  • Click on the ‘Create’ button to initiate your workflow.

This will direct you to the flow window where you can set up triggers and actions. The first step is to select your trigger application, which will be Google Sheets, as this is where you will input your social media post ideas.


3. Setting Up Google Sheets as a Trigger

In this section, you will configure Google Sheets as the trigger application in Pabbly Connect. This setup allows you to automate the process of generating social media posts whenever you add a new entry in your Google Sheets.

To connect Google Sheets, you will need to install the Pabbly Connect add-on. Click on ‘Extensions’ in your Google Sheets, select ‘Get Add-ons’, and search for Pabbly Connect. Install the add-on and refresh your Google Sheets to proceed.

  • Access the Pabbly Connect add-on from the Extensions menu.
  • Select ‘Initial Setup’ to configure your webhook URL.
  • Input the trigger column and submit to set up the connection.

After setting up, test the connection to ensure everything is working correctly. This step is crucial to capture responses from Google Sheets in your Pabbly Connect workflow.


4. Integrating AI Tools for Content Generation

Once Google Sheets is set up, the next step is to integrate AI tools like Google AI to generate post captions and images. In Pabbly Connect, add an action step to connect with Google AI Studio.

Log in to your Google AI Studio account and generate an API key that will be required for the integration. After obtaining the API key, return to Pabbly Connect and input the key in the designated section to establish the connection.

Select the action event as ‘Generate Content’. Map the data from your Google Sheets to the AI tool’s input fields. Click ‘Save and Send Request’ to generate the content.

This integration allows you to automatically generate captions and images based on the data you input in Google Sheets, streamlining your social media planning process.


5. Posting on Social Media Platforms

The final step is to post the generated content to your chosen social media platforms like Facebook, Instagram, and LinkedIn using Pabbly Connect. You will create separate action steps for each platform.

For each social media platform, select the corresponding action event and connect your accounts. Map the generated content from the AI tool to the post fields for each platform.

Select the platform (e.g., Facebook, Instagram, LinkedIn). Map the caption and image URL to the post fields. Click ‘Save and Send Request’ to publish the post.

This automation enables you to efficiently manage your social media presence by posting across multiple platforms with just a few clicks, thanks to the power of Pabbly Connect.


Conclusion

In conclusion, using Pabbly Connect allows you to create an entire social media plan in just 10 minutes by integrating Google Sheets, AI tools, and various social media platforms. This streamlined process saves time and enhances your social media strategy.

Ensure you check out Pabbly Connect to create business automation workflows and reduce manual tasks. Pabbly Connect currently offer integration with 2,000+ applications.

How to Send New Property Listings to All Customers in Bulk

Learn how to automate sending new property listings to customers in bulk using Pabbly Connect and Pabbly Connect. Step-by-step guide included. This comprehensive guide reveals exactly how to connect your applications and automate repetitive tasks — accessible for professionals of all technical backgrounds.

Watch Step By Step Video Tutorial Below


1. Accessing Pabbly Connect for Property Listings

To send new property listings to all customers in bulk, start by accessing Pabbly Connect. Open your web browser and navigate to Pabbly.com/chartflow. This will take you to the Pabbly Chatflow landing page.

If you are a new user, click on the ‘Sign up for free’ option to create an account. You will receive 100 free credits every month to explore Pabbly Connect. Existing users can click on the ‘Sign in’ button to access their dashboard.


2. Setting Up WhatsApp Integration with Pabbly Connect

Once logged into Pabbly Connect, it’s crucial to add your WhatsApp number. Navigate to the dashboard and locate the ‘Add WhatsApp Number’ button. Here, you will have two methods: manual connect and WhatsApp connect. Choose the method that suits you best.

  • Select the method to add your WhatsApp number.
  • Follow the instructions provided for the chosen method.

After adding your WhatsApp number, ensure that you create a contact list for the broadcast. This is essential for sending messages to your customers. You can manage your contacts directly within Pabbly Connect.


3. Creating a Contact List in Pabbly Connect

To effectively send new property listings, you must create a contact list in Pabbly Connect. Go to the contact section and click on the ‘Add Contact’ button. You can add contacts in bulk by uploading a CSV file.

  • Prepare a Google Sheet with contact details including phone numbers and names.
  • Download the sheet as a CSV file.
  • Upload the CSV file in the contact section of Pabbly Connect.

This process allows you to upload up to 200,000 contacts at once, making it efficient for bulk messaging.


4. Sending Broadcast Messages with Pabbly Connect

Now that your contact list is ready, you can send broadcast messages using Pabbly Connect. Navigate to the broadcast section and click on the ‘Add Broadcast’ button. Select the broadcast type as ‘Broadcast Campaign’.

Enter a name for your broadcast, such as ‘New Listings’, and choose the contact list you created earlier. You can also select multiple lists if needed. Next, choose the message type; you can either use a pre-approved template message or a regular message.


5. Testing and Scheduling Your Broadcast

Before sending the broadcast, it’s important to test it. Enter a username and phone number for testing, then click on the ‘Send Test Message’ button. This allows you to verify that everything is functioning correctly.

If you want to schedule the broadcast for later, select the ‘Schedule for Later’ option and enter the desired date and time. Ensure you follow the correct format: Month, Date, Year, Hour, Minute. Click on the ‘Add Broadcast’ button to finalize the scheduling.

With Pabbly Connect, you can easily manage your broadcasts and view their stats to track delivery and engagement.


Conclusion

Using Pabbly Connect to send new property listings to customers in bulk streamlines your communication process. By following the steps outlined, you can automate your listings effectively, ensuring no customer is missed. This automation saves time and enhances your real estate business efficiency.

Ensure you check out Pabbly Connect to create business automation workflows and reduce manual tasks. Pabbly Connect currently offer integration with 2,000+ applications.

How to Add Payment Gateway in Pabbly Chatflow

Learn how to integrate payment gateways like PayPal and Stripe in Pabbly Chatflow with this detailed tutorial. Step-by-step instructions included. Learn step-by-step how to create, test, and optimize chatbots that enhance customer experience while reducing support workload.

Watch Step By Step Video Tutorial Below


1. Introduction to Pabbly Chatflow Payment Gateway Integration

In this tutorial, we will explore how to add payment gateways using Pabbly Chatflow. This powerful tool allows businesses to collect payments directly through WhatsApp, enhancing customer experience and streamlining payment processes.

The new WhatsApp payment module in Pabbly Chatflow enables users to create invoices, track order history, and manage payments efficiently. Let’s dive into the setup process.


2. Accessing the WhatsApp Payment Section in Pabbly Chatflow

To start using the payment gateway feature, navigate to the WhatsApp payment section within Pabbly Chatflow. This is where you will configure your payment gateways.

Follow these steps to access the payment configuration:

  • Log in to your Pabbly Chatflow account.
  • Locate the WhatsApp payment section.
  • Click on the ‘Add WhatsApp Payment’ button.

By following these steps, you will be ready to set up your payment gateways using Pabbly Chatflow.


3. Configuring Payment Gateways in Pabbly Chatflow

Once you are in the WhatsApp payment section, the next step is to configure your payment gateways. Click on the ‘Add Payment Method’ button to proceed.

Here’s how to set up your payment configuration:

  • Enter a name for your payment configuration, for example, ‘New AI Flow’.
  • Select the payment gateway you wish to use; currently, Pabbly Chatflow supports Razorpay.

After entering the necessary details, click on ‘Get Started’ to create your payment configuration. This will sync your settings with Pabbly Chatflow.


4. Setting Up Order and Invoice Prefixes in Pabbly Chatflow

In this step, you will define the order and invoice prefixes. This is crucial for maintaining unique identifiers for each transaction processed through Pabbly Chatflow.

To set up your prefixes:

Choose a custom prefix for order numbers, such as ‘PAB-2025’. Set the starting order number, for instance, ‘1’ for the first order.

These prefixes will help you track your transactions effectively within Pabbly Chatflow. Make sure to maintain unique values to avoid conflicts.


5. Finalizing Your Payment Configuration in Pabbly Chatflow

After setting up your prefixes and entering business details, it’s time to finalize your payment configuration. Click on ‘Add and Next’ to proceed.

Ensure that all information is accurate, as Pabbly Chatflow will use these details for generating invoices and tracking orders. If you need to edit any configuration, you can do so from the main payment settings page.

Once you click ‘Add’, your payment configuration will be saved in Pabbly Chatflow, allowing you to start processing payments through WhatsApp.


Conclusion

In this guide, we have demonstrated how to add payment gateways in Pabbly Chatflow, focusing on the integration process with Razorpay. By following these steps, you can streamline your payment collection directly through WhatsApp, enhancing your business operations.

Ensure you check out Pabbly Connect to create business automation workflows and reduce manual tasks. Pabbly Connect currently offer integration with 2,000+ applications.

Make Your WhatsApp Smarter – Build an Interactive Chatbot in Minutes!

Learn how to create an interactive WhatsApp chatbot using Pabbly Chatflow in minutes with this step-by-step tutorial. Automate responses effortlessly! Explore how leading businesses automate customer interactions with carefully designed chat sequences that feel natural and helpful.

Watch Step By Step Video Tutorial Below


1. Accessing Pabbly Chatflow for WhatsApp Automation

To start building your interactive WhatsApp chatbot, first access Pabbly Chatflow by visiting Pabbly.com/chatflow. This powerful tool allows you to automate your WhatsApp responses effortlessly.

If you’re a new user, click on the ‘Sign Up Free’ option to receive 100 free credits monthly. Existing users can simply click on ‘Sign In’ to access the flow builder page. Once logged in, you can begin creating your chatbot.


2. Creating Your WhatsApp Chatbot Flow in Pabbly Chatflow

In the Pabbly Chatflow flow builder, click on the ‘Flows’ option and then select the ‘Add Flow’ button. Name your flow ‘Make Your WhatsApp Smarter’ to identify it easily. This is the starting point for your interactive chatbot.

  • Click the ‘Add Flow’ button.
  • Enter the flow name in the designated box.
  • Enable the active toggle to ensure your flow works.

After naming your flow, you will set the trigger event. Choose ‘Keywords’ as the trigger, which allows your chatbot to respond when specific words are sent by users. Add keywords like ‘hi’ and ‘hello’ to initiate the flow.


3. Designing Responses for Your Chatbot in Pabbly Chatflow

Now that your flow is set up, it’s time to design how your chatbot will respond. In Pabbly Chatflow, you can add a welcome message and media elements to engage users. Drag the media button into your flow and upload an image relevant to your business.

  • Select the media type as ‘Image’.
  • Write a welcome message in the text box.
  • Add quick response buttons for user interaction.

For example, your welcome message could be ‘Hello, welcome to Prime Fix Renovation! How can we assist you today?’ Then, create buttons for options like ‘Renovation Services’, ‘Book Site Visit’, and ‘Contact Support’. This interaction encourages users to engage with your chatbot effectively.


4. Collecting User Information with Pabbly Chatflow

After your welcome message is set, you will want to collect user information. In Pabbly Chatflow, you can ask users for their renovation type by creating a list button. When users select their renovation type, your chatbot can ask for their location, full name, contact number, and booking date.

Use the ‘Ask Question’ button to prompt for user input. Set custom fields for capturing user details. Ensure to save your flow regularly to avoid data loss.

For instance, ask, ‘Could you please share your location where the renovation is needed?’ Then, set up fields to capture their full name and contact number. These steps ensure you gather all necessary details to provide personalized service.


5. Finalizing Your Chatbot Flow in Pabbly Chatflow

Once all user inputs are collected, finalize your chatbot flow in Pabbly Chatflow. Create a confirmation message that summarizes the details users provided. This message can dynamically include their renovation type, location, and contact information.

For example, your confirmation message might read, ‘Your renovation consultation is confirmed. Here are your details: Name: [Full Name], Contact Number: [Contact Number], Renovation Type: [Renovation Type], Location: [Location], Booking Date: [Booking Date].’ This personalized touch enhances customer experience.

Finally, test your flow by sending the keywords you set earlier to your WhatsApp number. Ensure that the bot responds correctly and that all interactions work as intended. With Pabbly Chatflow, your WhatsApp automation is now complete and ready to serve your customers 24/7.


Conclusion

In this tutorial, we covered how to create an interactive WhatsApp chatbot using Pabbly Chatflow. By following these steps, you can automate customer interactions and enhance your business efficiency. Start building your chatbot today to provide instant responses and improve customer satisfaction!

Ensure you check out Pabbly Connect to create business automation workflows and reduce manual tasks. Pabbly Connect currently offer integration with 2,000+ applications.