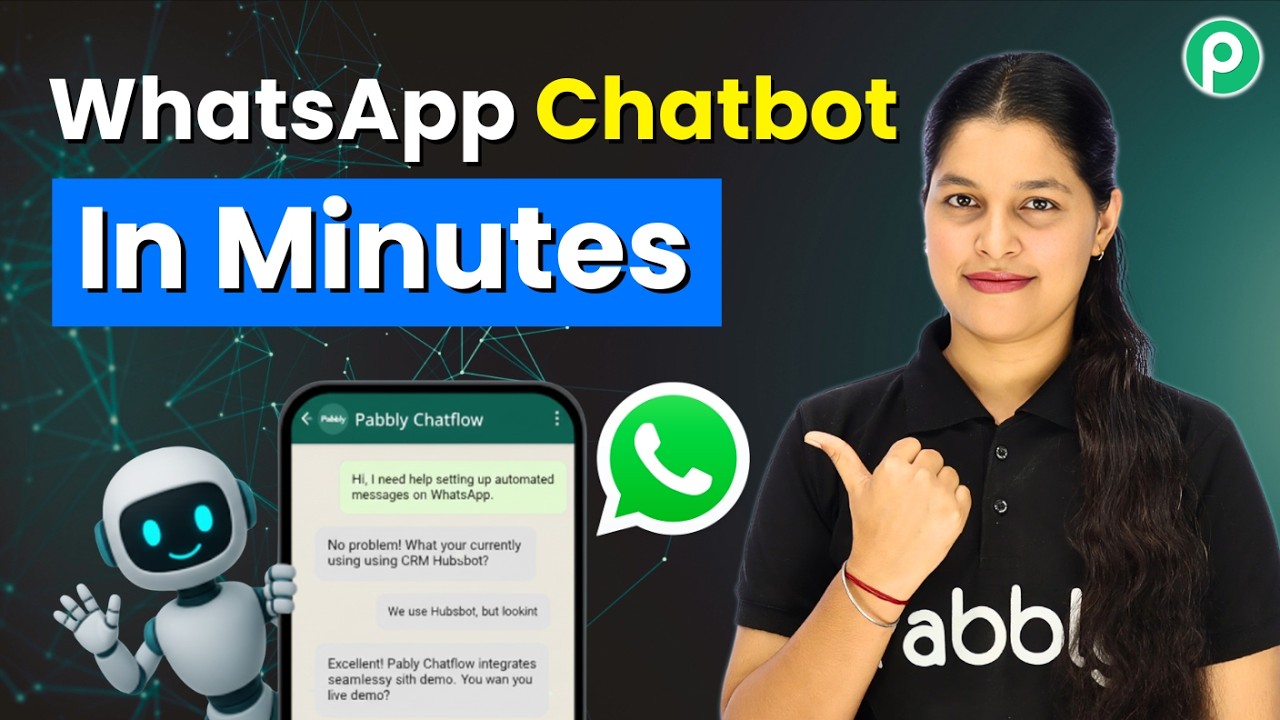
I Built a WhatsApp Chatbot in Just 10 Minutes 🔥

Watch Step By Step Video Tutorial Below


1. Creating a WhatsApp Chatbot with Pabbly Connect

To create a WhatsApp chatbot, you will first need to access Pabbly Connect. This platform enables you to automate tasks and integrate various applications. Start by logging into your Pabbly account and navigating to the Pabi Chatflow section.

Once you’re in Pabbly Connect, you can set up the initial flow for your WhatsApp chatbot. This involves defining triggers and actions that will dictate how your chatbot interacts with users. Make sure to have your WhatsApp number linked to your Pabbly account for seamless integration.


2. Setting Up the Trigger for Your Chatbot in Pabbly Connect

In this step, you’ll define the trigger that initiates your WhatsApp chatbot. Using Pabbly Connect, select the trigger event to be a keyword match, like ‘hello’, which will start the conversation. This is crucial for ensuring that your chatbot responds appropriately to user input.

  • Choose ‘Keyword Regex Match’ as your trigger type.
  • Enter the keyword that will activate the chatbot.
  • Test the trigger to ensure it’s working as expected.

After setting up the trigger, you can proceed to design the welcome message that users will see when they initiate a conversation. This is a key part of your chatbot’s functionality, enhancing user experience.


3. Designing the Chatbot Flow Using Pabbly Connect

Now that you have your trigger set up, it’s time to design the chatbot flow. This is where Pabbly Connect shines, allowing you to drag and drop various action blocks to create the conversation flow. You can send welcome messages, ask questions, and provide options to users.

For instance, after the welcome message, you can add buttons for users to select options like booking a car. This interaction is essential for guiding users through the process. Here’s how to set it up:

  • Add a text block for the welcome message.
  • Create buttons for user actions, such as ‘Book Cars’.
  • Link these buttons to corresponding actions or messages.

By effectively designing the flow, you ensure that users have a seamless experience while interacting with your WhatsApp chatbot. This is a critical component of using Pabbly Connect efficiently.


4. Integrating Google Sheets with Pabbly Connect

Once your chatbot flow is designed, you can integrate Google Sheets to store user data. This is where Pabbly Connect facilitates the connection between Pabi Chatflow and Google Sheets. You’ll need to set up an API request to send data from the chatbot to your Google Sheet.

Begin by creating a new API request in your Pabbly Connect workflow. You will need to provide the Google Sheets webhook URL and define the parameters for the data you want to store, such as user name, rental duration, and pickup date.

Here’s how to do it:

  • Set up a new API request in your Pabbly Connect workflow.
  • Enter the Google Sheets webhook URL.
  • Map the data fields from your chatbot to the corresponding columns in Google Sheets.

This integration allows you to automatically save user responses directly into your Google Sheet, streamlining your data management process.


5. Finalizing Your WhatsApp Chatbot with Pabbly Connect

After setting up the integration, it’s time to finalize your WhatsApp chatbot. In this step, you will review all the components you have created within Pabbly Connect. Ensure that every part of the flow works as intended and that the data is correctly being sent to Google Sheets.

Finally, save your flow in Pabbly Connect. This is the last step to ensure that your WhatsApp chatbot is ready for use. Once saved, you can start interacting with your chatbot and see how it performs.

To conclude:

  • Review all chatbot messages and actions.
  • Test the integration with Google Sheets.
  • Save your flow and start using your chatbot.

This process demonstrates the power of using Pabbly Connect to create an efficient WhatsApp chatbot that can handle user inquiries and store data seamlessly.


Conclusion

In this tutorial, we explored how to create a WhatsApp chatbot using Pabbly Connect. By integrating Pabi Chatflow with Google Sheets, you can automate responses and manage data efficiently. This powerful combination enhances customer interaction and streamlines your business operations.

Build Your Own AI FAQ Bot with Pabbly 🤖

Watch Step By Step Video Tutorial Below


1. Accessing Pabbly Connect for WhatsApp Integration

The first step to integrating WhatsApp with AI assistance is to access Pabbly Connect. Start by visiting the Pabbly website and logging into your account. If you don’t have an account, create one to proceed with the integration.

Once logged in, navigate to the dashboard where you can set up your integrations. Ensure you have a WhatsApp number ready to link with your Pabbly Connect account. This step is crucial for enabling the AI assistant to interact with your customers seamlessly.


2. Creating an AI Assistant with Pabbly Connect

To create an AI assistant, select the option for AI assistants in your Pabbly Connect dashboard. Click on the “Add Assistant” button to begin the setup process. You will be prompted to name your assistant; for example, you can name it “Academic Assistant”.

  • Choose the instruction type for your AI assistant.
  • Set the AI configuration, including the temperature and model type.
  • Add your API key to connect with OpenAI.

Once these steps are completed, your assistant will be set up to respond to customer queries effectively. This setup allows your AI assistant to provide instant answers and engage with customers through WhatsApp.


3. Uploading Knowledge Base in Pabbly Connect

The next step involves uploading a knowledge base that will serve as the brain of your AI assistant. In Pabbly Connect, navigate to the knowledge source section and upload your prepared file, which should contain all necessary information about your business.

Ensure that the file is in an acceptable format, such as PDF or plain text, and does not exceed the size limit. Once uploaded, the knowledge base will be processed, allowing your AI assistant to access the information needed to assist customers.


4. Testing Your AI Assistant on WhatsApp

After setting up your AI assistant, it’s essential to test its functionality. In Pabbly Connect, create a flow that triggers your assistant when a specific keyword is sent via WhatsApp. This keyword will activate the assistant to respond automatically.

  • Add a flow trigger based on keywords.
  • Connect the action step to assign the created assistant.
  • Save the flow to finalize the setup.

Once the flow is saved, send the designated keyword through your WhatsApp account to see if your AI assistant responds correctly. This step confirms that the integration is functioning as intended.


5. Conclusion: Enhance Customer Engagement with Pabbly Connect

Integrating WhatsApp with AI assistance through Pabbly Connect is a game-changer for customer engagement. By following the steps outlined in this tutorial, you can create an effective AI assistant that responds to customer queries instantly, providing exceptional support.

With Pabbly Connect, businesses can automate customer interactions, ensuring no lead is lost due to slow response times. Start enhancing your customer engagement today!

How to Send Bulk Festival Offers on WhatsApp 🎉✨

Watch Step By Step Video Tutorial Below


1. Setting Up Pabbly Connect for WhatsApp Integration

To begin using Pabbly Connect for WhatsApp broadcasts, first access the Pabbly Chartflow dashboard. This powerful tool allows you to automate WhatsApp messages efficiently.

Sign up for Pabbly Chartflow if you haven’t already, which provides 100 free credits monthly. Once signed in, ensure your WhatsApp number is added to your account. This step is crucial for sending personalized messages.


2. Creating a Broadcast Campaign in Pabbly Connect

In this section, you will learn how to create a broadcast campaign using Pabbly Connect. Start by navigating to the “Broadcast” feature on the left-hand side of the dashboard.

  • Click on the plus button to add a new broadcast.
  • Select the broadcast type as “Broadcast Campaign”.
  • Name your broadcast (e.g., “Festival Broadcast”).

Next, select the contact list you want to use for this broadcast. If you haven’t uploaded your contacts yet, you can do so by navigating to the “Contacts” feature and clicking on “Add Contacts”.


3. Uploading Contacts to Pabbly Connect

To upload your contacts, you will need a CSV file containing your users’ details. Pabbly Connect allows you to upload up to 200,000 contacts in a single click.

Once your CSV file is ready, return to the “Contacts” section and click “Add New File”. Drag and drop your CSV file here and click on “Upload File”.

After the upload, select your newly uploaded file and click “Insert”. This process adds all your contacts to Pabbly Connect, preparing them for broadcast.


4. Sending Personalized WhatsApp Messages

With your contacts uploaded, it’s time to send personalized messages. Pabbly Connect allows you to create templates that include dynamic fields, such as user names.

  • Choose between a pre-approved template or a regular message.
  • Select the pre-approved template for compliance with WhatsApp guidelines.
  • Use variables like $name to personalize messages.

After setting up your message, you can test it by sending a test broadcast to your number. This ensures everything is functioning as expected before the actual send.


5. Scheduling and Managing Your Broadcasts

Pabbly Connect allows you to schedule your broadcasts for later. You can set a specific date and time for your messages to be sent, ensuring timely delivery.

After scheduling, you can view the status of your broadcasts, including whether they were sent, delivered, or read. This feature is essential for tracking the effectiveness of your campaigns.

To manage your broadcasts, click on the “View Stats” button to see detailed reports and resend messages to any failed contacts. This ensures you reach your audience effectively.


Conclusion

Using Pabbly Connect, you can easily send personalized WhatsApp messages to thousands of users with just a few clicks. This tool streamlines the process, making it efficient and effective for your marketing campaigns.

Send Bulk WhatsApp Messages with Images for Free (Full Setup)

Watch Step By Step Video Tutorial Below


1. Accessing Pabbly Connect for WhatsApp Messaging

To start sending bulk WhatsApp messages with images, first, you need to access Pabbly Connect. Open your web browser and type in ‘pabbly.com/chatflow’. This will take you to the Pabbly Chatflow landing page, which is the official WhatsApp marketing tool verified by Meta.

Once on the landing page, you can either sign up for a free trial or log in if you are an existing user. New users can receive 100 free credits monthly for their broadcasting needs. After logging in, you will be directed to the Pabbly Chatflow dashboard, where you can manage your WhatsApp messaging tasks efficiently.


2. Uploading Contacts to Pabbly Connect

Before sending messages, you need to upload your contacts to Pabbly Connect. Click on ‘Add Contacts’ and then select ‘Add Bulk Contacts’. You can upload a CSV file containing your customer data. Pabbly Connect allows you to upload up to 200,000 contacts at once.

  • Create a Google Sheet with your customer data.
  • Download the Google Sheet as a CSV file.
  • Upload the CSV file to Pabbly Connect.

After uploading, ensure to map your data correctly in Pabbly Connect. This allows you to personalize your messages using dynamic fields, such as the customer’s name, when sending out broadcasts.


3. Creating a Broadcast in Pabbly Connect

Now that your contacts are uploaded, it’s time to create a broadcast in Pabbly Connect. Click on ‘Broadcast’ and then select ‘Add Broadcast’. Provide a name for your broadcast, for example, “Test Broadcast”. Choose the contact list you uploaded earlier.

Under the broadcast settings, you can opt to exclude specific contacts if needed. Choose whether to send a regular message or a template message. Regular messages require that you have had a conversation with the user within the last 24 hours. You can then select the type of message you wish to send, such as a message with images.


4. Sending Your Broadcast with Images

To send your broadcast, you will need to add your message and any images. In the message field, type your message or paste it from your previous notes. Then, click on ‘Upload from Library’ to insert your images. You can choose from previously uploaded images or add new ones.

After setting everything up, you can test your broadcast by sending a message to yourself. If successful, you will see the message received on your WhatsApp. If you want to schedule the broadcast for a later time, select ‘Schedule for Later’ and choose your date and time.


5. Monitoring Broadcast Status in Pabbly Connect

After sending your broadcast through Pabbly Connect, you can monitor its status. Check how many messages were sent, delivered, read, or pending. This data is crucial for understanding the effectiveness of your messaging campaigns.

If you wish to export this data for further analysis, Pabbly Connect allows you to do that easily. This way, you can refine your future broadcasts based on performance metrics.


Conclusion

In summary, using Pabbly Connect to send bulk WhatsApp messages with images is a straightforward process. By following these steps, you can effectively reach your customers without any coding skills. This automation can significantly enhance your marketing efforts.

Turn Shopify Customers into Sales Funnels Automatically

Watch Step By Step Video Tutorial Below


1. Accessing Pabbly Connect for Integration

To integrate Shopify with System.io CRM, you first need to access Pabbly Connect. Start by visiting the Pabbly website at paby.com and sign in to your account. If you are new, you can sign up for free and get 100 tasks monthly to test the platform.

Once logged in, navigate to the Pabbly Apps page and select Pabbly Connect. This will take you to the dashboard where you can manage your workflows. Click on the ‘Create Workflow’ button to start setting up your automation.


2. Creating a New Workflow in Pabbly Connect

In this section, you will create a workflow to connect Shopify and System.io. Name your workflow something descriptive, such as “Shopify to System.io Automation”. Then, select a folder for organization.

  • Choose a descriptive name for your workflow.
  • Select the folder for better organization.
  • Click on ‘Create’ to finalize your workflow setup.

After creating the workflow, you will see a prompt to set your trigger application. This is where Pabbly Connect begins to automate your tasks. Select Shopify as your trigger application and choose the event as “New Order”.


3. Setting Up Shopify with Pabbly Connect

Next, you need to connect Shopify to Pabbly Connect. A webhook URL will be generated, which acts as a bridge between Shopify and Pabbly. Copy this URL for later use.

Now, go to your Shopify admin panel. Navigate to Settings > Notifications, and create a new webhook. Select the event as “Order Creation” and choose JSON as the format. Paste the webhook URL you copied from Pabbly Connect and save the changes.


4. Testing the Integration

To ensure that the integration works, you need to test the connection. Place a test order on your Shopify store. Enter dummy customer details, such as name, address, and payment information.

Once the order is confirmed, return to your Pabbly Connect workflow. You should see that it is now waiting for a webhook response. Check if the details from the test order have been captured successfully.

  • Ensure the order details appear correctly in Pabbly Connect.
  • Verify that all necessary information is captured.

If everything is correct, you are ready to proceed with the next steps in your workflow.


5. Adding Action Steps to Complete the Integration

Now that your Shopify trigger is set up, it’s time to add the action step in Pabbly Connect. Select System.io as the action application and choose the event “Create Contact”.

You will need to connect your System.io account by entering the API key. Navigate to your System.io profile settings to generate this key. Once connected, map the fields from Shopify to System.io to ensure that the correct data is transferred.

Mapping is crucial as it allows dynamic data transfer every time a new order is placed. Click on ‘Save and Send Request’ to finalize the setup. You should see a confirmation response indicating that the contact has been created successfully in System.io.


Conclusion

In this tutorial, you learned how to integrate Shopify with System.io CRM using Pabbly Connect. By following these steps, you can automate the process of adding new orders to your CRM, saving you time and effort. This integration allows you to manage customer data efficiently and streamline your sales process.

Build Your Own WhatsApp AI Assistant (Full Tutorial) 🚀

Watch Step By Step Video Tutorial Below


1. Accessing Pabbly Connect for Integration

To begin using Pabbly Connect for your WhatsApp AI assistant, first, navigate to the Pabbly website. If you don’t have an account, complete the signup process to access the dashboard.

Once logged in, locate the Pabbly Connect section. This platform allows you to integrate various applications seamlessly. You will be able to connect WhatsApp with other services, ensuring your assistant responds promptly to user queries.


2. Setting Up Your WhatsApp Assistant in Pabbly Connect

Now, let’s create your WhatsApp AI assistant using Pabbly Connect. In the dashboard, click on the assistant feature. Here, you will train your assistant to respond to common questions.

  • Click on the ‘+ Add Assistant’ button.
  • Enter a descriptive name for your assistant.
  • Select the instruction type as ‘AI agent’.

After setting the assistant’s name, you will configure the instruction type. This defines how the AI behaves when interacting with users. Ensure to set the temperature to control the creativity of the responses, with a recommended value of 0.5 for balanced replies.


3. Configuring API Key and Assistant Settings

Next, you will need to set up the API key for your assistant in Pabbly Connect. Go to your OpenAI platform to generate this key. Click on the ‘+ Create New Secret Key’ button and follow the prompts.

Once you have your API key, paste it into the designated field in Pabbly Connect. This key is crucial for the AI to function correctly. After entering the key, click on the connect button to save it successfully.

  • Enable any desired header or footer messages.
  • Set stop keywords to manage conversation flow.
  • Define retry attempts for the assistant’s responses.

These settings will help refine how your assistant interacts with users, ensuring it provides accurate and relevant information.


4. Uploading Knowledge Base for Your Assistant

The next step in setting up your WhatsApp assistant with Pabbly Connect is to upload a knowledge base file. This file contains all the necessary information your assistant will use to answer user queries effectively.

Ensure that your knowledge base file is in PDF format and under 90 MB. You can create this document using Google Docs, including FAQs and product details relevant to your business. Once ready, upload it by clicking on the ‘Add New File’ option.

  • Drag and drop your knowledge base file into the upload area.
  • Select the uploaded file and click on the ‘Insert’ button.

This knowledge base is essential for your assistant to provide specific answers tailored to your business, enhancing user experience significantly.


5. Finalizing Your WhatsApp AI Assistant Setup

After configuring the knowledge base, you can now finalize your WhatsApp AI assistant in Pabbly Connect. Customize the interface by adding headings, subheadings, and initial messages that will greet users.

Make sure to enable the assistant and save your settings. You can also embed your assistant into your website, allowing users to access it from multiple platforms.

  • Enable AI auto-reply settings in the inbox settings.
  • Select your assistant from the contact list.

With these final touches, your assistant will be ready to provide instant responses to user queries, ensuring efficient customer support.


Conclusion

By following these steps, you can successfully create an automated WhatsApp assistant using Pabbly Connect. This setup enhances customer interaction and ensures timely responses to queries, benefiting your business significantly.

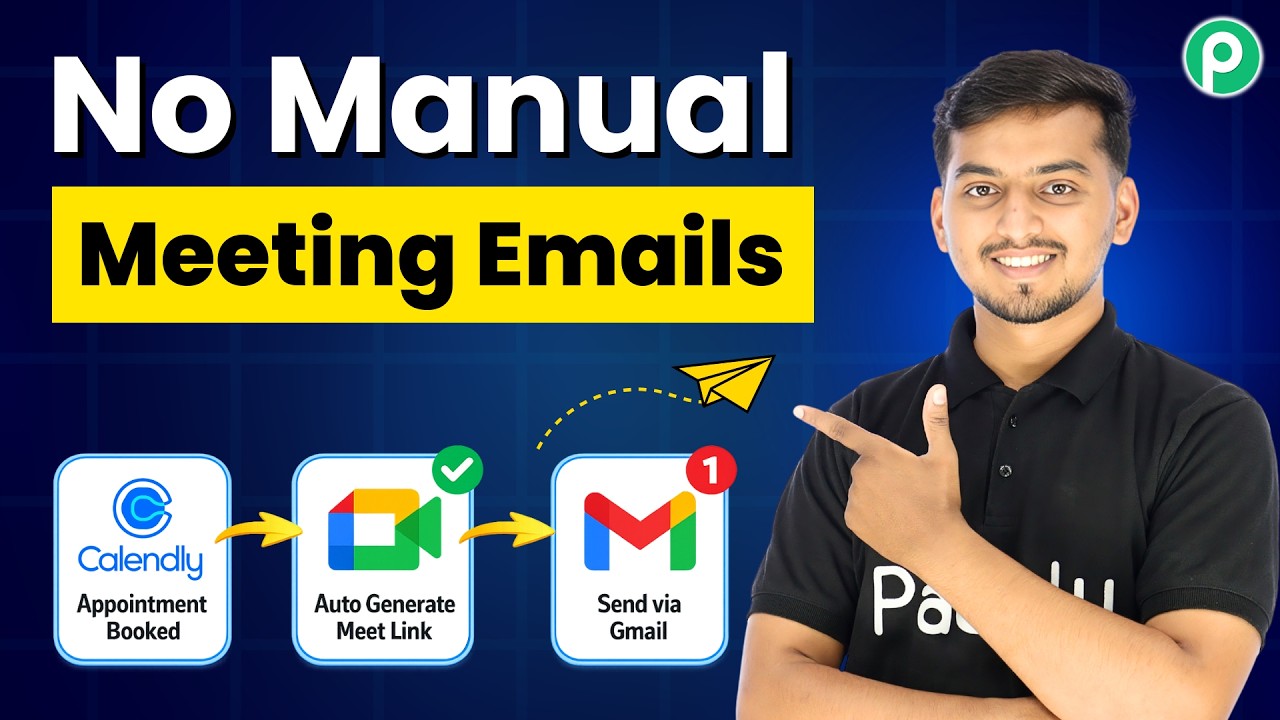
This Workflow Emails Meet Links Automatically

Watch Step By Step Video Tutorial Below


1. Setting Up Pabbly Connect for Automation

To automate meeting link generation, start by accessing Pabbly Connect. This platform allows you to integrate various applications seamlessly. First, go to the Pabbly Connect dashboard and create your free account to get started.

Once logged in, click on the “Create Workflow” button. This initiates the process of setting up your automation. Make sure you have the necessary applications ready, including Calendly, Google Calendar, and Gmail, as they will be integrated through Pabbly Connect.


2. Creating the Workflow in Pabbly Connect

Now, we will create a workflow that triggers when a new meeting is booked in Calendly. In Pabbly Connect, select “Create Using AI” to generate the structure for your workflow. Enter a prompt describing the integration you want, such as “Create a workflow that triggers on new Calendly bookings and sends a Google Meet link via Gmail.”

  • Select “Invite Created” as the trigger event from Calendly.
  • Choose “Create Detailed Event” in Google Calendar.
  • Select “Send Email” in Gmail for sending the meeting details.

After configuring these settings, approve the generated workflow structure and proceed to integrate the required applications with Pabbly Connect.


3. Integrating Calendly with Pabbly Connect

To connect Calendly to Pabbly Connect, click on the connect button. If you have an existing connection, you can select that; otherwise, choose “Add New Connection”. After that, press the “Connect with Calendly” button. Ensure you are logged into your Calendly account for a smooth connection.

Once connected, select your organization and user, then click on “Save and Send Test Request”. This action will wait for a webhook response, so you need to book a test meeting in Calendly to capture the details.


4. Integrating Google Calendar for Meeting Links

Next, we will set up Google Calendar to generate a Google Meet link. In Pabbly Connect, click the connect button for Google Calendar, choose “Add New Connection”, and sign in with your Google account. Once connected, you can set the details for the meeting.

  • Set the title as “New Consultation with [Customer Name]” using mapping.
  • Add a description such as “Google Meet conference for [Meeting Name]”.
  • Select “Yes” for adding conferencing to generate a Google Meet link.

After setting these parameters, click “Save and Send Test Request” to generate the meeting link, which Pabbly Connect will use in the email.


5. Sending the Email via Gmail

Finally, we will set up the Gmail integration to send the meeting details to the client. In Pabbly Connect, click the connect button for Gmail and select “Add New Connection”. Sign in with your Google account to establish the connection.

Fill in the sender name and email address. Use mapping to insert the recipient’s email address and add the subject and body of the email. The email should include the meeting time and Google Meet link generated earlier. After filling in these details, click “Save and Send Test Request” to send the email.


Conclusion

By following this tutorial, you can automate the process of sending Google Meet links using Pabbly Connect. This setup streamlines your scheduling process, ensuring clients receive their meeting details without delay. Automate your workflow today for enhanced productivity!

Automatically Add Google Ads Leads to Flodesk for Email Marketing

Watch Step By Step Video Tutorial Below


1. Accessing Pabbly Connect to Start Integration

To begin integrating Google Ads leads with Flodesk, you first need to access Pabbly Connect. Visit the Pabbly website by typing pabbly.com in your browser. Once on the homepage, sign in to your existing account or create a new one for free, which gives you 100 tasks monthly.

After signing in, navigate to the Pabbly apps page and select Pabbly Connect to access the dashboard. Here, you can manage your workflows and create new ones. This platform is essential for automating the flow of data between Google Ads and Flodesk.


2. Creating a Workflow for Google Ads Leads

In this section, you will create a new workflow in Pabbly Connect to automatically add Google Ads leads to Flodesk. Click on the ‘Create Workflow’ button and name it appropriately, such as “Automatically Add Google Ads Leads to Flodesk for Email Marketing”. Select a folder for organization, then click ‘Create’.

  • Name your workflow for easy identification.
  • Select a folder to keep your workflows organized.
  • Click ‘Create’ to initiate the workflow.

Once the workflow is created, you will need to set up the trigger application, which in this case is Google Ads. This trigger will activate the workflow whenever a new lead is generated from your Google Ads campaign.


3. Setting Up Google Ads as the Trigger Application

Now, configure Google Ads as the trigger application in Pabbly Connect. Select Google Ads and choose the trigger event as “New Lead Form Entry”. Click on ‘Connect’ to establish the connection.

Pabbly Connect will provide you with a webhook URL that acts as a bridge between Google Ads and Pabbly Connect. You will need to copy this URL and set it up in your Google Ads lead form settings.

  • Select Google Ads as your trigger application.
  • Choose “New Lead Form Entry” as your trigger event.
  • Copy the webhook URL provided by Pabbly Connect.

After setting up the webhook URL in Google Ads, send a test lead to ensure the connection is working properly. This will confirm that your Google Ads leads are being captured successfully in Pabbly Connect.


4. Adding Flodesk as the Action Application

After successfully configuring the trigger, the next step is to add Flodesk as your action application in Pabbly Connect. Click on ‘Add New Action Step’ and search for Flodesk. Select “Create/Update Subscriber” as your action event.

Connect to your Flodesk account by clicking on ‘Connect’. If you already have a connection, select it; otherwise, create a new one. Grant the necessary permissions for Pabbly Connect to access your Flodesk account, allowing it to add leads automatically.

  • Choose Flodesk as your action application.
  • Select “Create/Update Subscriber” as the action event.
  • Connect your Flodesk account to Pabbly Connect.

Once connected, you will need to map the fields from the Google Ads lead to the corresponding fields in Flodesk. This ensures that the data is transferred accurately and efficiently.


5. Testing the Integration and Finalizing

With both applications set up, it’s time to test the integration. In Pabbly Connect, enter the required subscriber details using the data received from Google Ads. This includes the email address, first name, last name, and any other relevant information.

Click ‘Save and Send Test Request’ to verify that the data is being sent correctly to Flodesk. After successfully sending the test data, check your Flodesk account to confirm that the new subscriber has been added. This step is crucial to ensure that your automation is functioning as intended.

  • Enter subscriber details in Pabbly Connect.
  • Click ‘Save and Send Test Request’ to validate the integration.
  • Verify the new subscriber in your Flodesk account.

Once confirmed, your automation workflow between Google Ads and Flodesk using Pabbly Connect is complete. You can now capture leads seamlessly and automate your email marketing efforts.


Conclusion

This tutorial demonstrated how to integrate Google Ads leads with Flodesk using Pabbly Connect. By following these steps, you can automate lead capture and enhance your email marketing strategies effectively.

Send Emails Automatically Using Google Sheets & Zoho Mail

Watch Step By Step Video Tutorial Below


1. Access Pabbly Connect for Google Sheets and Zoho Mail Integration

To start integrating Google Sheets with Zoho Mail, you need to access Pabbly Connect. Open a new tab and navigate to the Pabbly Connect website. If you are a new user, you can sign up for free, which gives you access to 100 free tasks to test the integration.

Once you are signed up, log in to your Pabbly Connect account. This platform allows you to create automated workflows without any coding skills. You will be able to set up the integration between Google Sheets and Zoho Mail seamlessly.


2. Creating a Workflow in Pabbly Connect

After logging into Pabbly Connect, click on the “Create Workflow” option. You can use the AI workflow builder by entering a prompt that describes what you want to achieve. For this integration, write, “I want to send emails automatically using Google Sheets and Zoho Mail.”

This will prompt the AI to set up the required events in your workflow. Once you approve the workflow, you will be able to set up the connection between Google Sheets and Zoho Mail.

  • Click on the “Create Workflow” button.
  • Enter your prompt for the AI to generate the workflow.
  • Approve the AI-generated workflow.

After the workflow is created, you will need to set up the trigger from Google Sheets that will initiate the email sending process through Zoho Mail.


3. Setting Up Google Sheets with Pabbly Connect

To connect Google Sheets with Pabbly Connect, you will need to copy the webhook URL provided by Pabbly Connect. Open your Google Sheets and go to Extensions > Add-ons > Get Add-ons. Search for the Pabbly Connect Webhooks add-on and install it.

After installation, refresh your Google Sheets. Navigate back to Extensions > Pabbly Connect Webhooks and select the “Initial Setup” option. Paste the webhook URL and set the trigger column, which is the final data column where new leads will be added.

  • Paste the webhook URL from Pabbly Connect.
  • Set the trigger column (e.g., Column D).
  • Click “Submit” to complete the initial setup.

Finally, ensure to enable the “Send on Event” option to allow Google Sheets to send data to Pabbly Connect whenever a new entry is made in the specified column.


4. Testing the Connection Between Google Sheets and Zoho Mail

Once you have set up the trigger in Google Sheets, go back to Pabbly Connect and click on the “Recapture” button to check if the connection is successful. Enter a new lead’s details in Google Sheets to test the integration.

For example, you can enter the name as “Demo User”, email as “[email protected]”, and a dummy phone number along with the company name. After entering the details, check back in Pabbly Connect to see if the data is captured successfully.

  • Enter lead details in Google Sheets.
  • Check Pabbly Connect for captured data.
  • Ensure the data matches what was entered.

This step confirms that Google Sheets is successfully connected to Pabbly Connect and is ready to send data to Zoho Mail.


5. Sending Email Using Zoho Mail via Pabbly Connect

After confirming the connection, you can now set up the action step to send an email using Zoho Mail through Pabbly Connect. Click on the “Connect” button and select “Add New Connection” for Zoho Mail.

Enter your Zoho Mail account domain and log in to grant permission for Pabbly Connect to access your account. You will then map the email address from the previous step to specify the recipient of the email.

  • Connect to Zoho Mail by entering your domain.
  • Map the recipient email address from Google Sheets.
  • Configure the email subject and body content.

Once everything is set up, click on “Save and Send Test Request” to send a test email. If successful, you will receive the email in your Zoho Mail inbox, confirming that the integration is working perfectly.


Conclusion

This guide has walked you through the process of integrating Google Sheets with Zoho Mail using Pabbly Connect. By following these steps, you can automate your email sending process and improve your workflow efficiency. Enjoy seamless automation and boost your productivity with Pabbly Connect.

Automatically Store Google Forms Leads in Notion Database 🤯

Watch Step By Step Video Tutorial Below


1. Accessing Pabbly Connect for Automation

To start automating Google Form responses to Notion, first access Pabbly Connect by visiting the Pabbly Connect website. Create a free account to get 100 free tasks every month, allowing you to explore its features.

After creating your account, navigate to the dashboard. Here, you will find the “Create Workflow” button on the right side. Click this to begin setting up your automation.


2. Creating a Workflow in Pabbly Connect

In this section, you will create a workflow in Pabbly Connect that connects Google Forms to Notion. Click on the “Create Workflow” button and select “Create from Scratch” or “Create using AI.” For this tutorial, we will use the AI option.

  • Select the AI option to generate a workflow.
  • Input the prompt: “Create a workflow where every Google Form submission gets stored inside Notion database.”
  • Choose the trigger as “New Response Received” from Google Forms.
  • Select the action event as “Create Database Item” for Notion.

Once you have entered the necessary details, approve and create the workflow. This will set up the integration between Google Forms and Notion through Pabbly Connect.


3. Integrating Google Forms with Pabbly Connect

Next, you will integrate Google Forms with Pabbly Connect. First, copy the webhook URL provided by Pabbly Connect. Then, open your Google Form and navigate to the “Responses” tab.

  • Click on “Link to Sheets” to integrate your form with a Google Sheet.
  • Choose to create a new spreadsheet or select an existing one.
  • Ensure the Google Form is linked to the selected Google Sheet for data collection.

Once linked, you can return to your Google Sheet and install the Pabbly Connect webhook add-on. Go to “Extensions,” then “Add-ons,” and search for “Pabbly Connect Webhook.” Install it and set it up using the webhook URL you copied earlier.


4. Integrating Notion with Pabbly Connect

Now, let’s integrate Notion with Pabbly Connect. In your Pabbly Connect dashboard, select Notion as your action application. Click on the “Connect” button and choose to add a new connection.

You will need to allow access to your Notion account. Select the appropriate database where you want the Google Form responses to be stored. After granting access, you can see all the columns of your Notion database.

Map the fields from Google Forms to Notion by selecting the corresponding columns. This allows the data to flow dynamically, ensuring that new responses are added to your database automatically. Once everything is mapped, click on “Save and Send Test Record” to confirm the integration is working.


5. Conclusion: Automate Your Lead Management

By following these steps, you can effectively automate the process of capturing Google Form responses into Notion using Pabbly Connect. This integration saves time and keeps your lead management organized.

Now, you can focus on your business while Pabbly Connect handles the data transfer automatically. This simple yet powerful automation can greatly enhance your workflow efficiency.

In summary, using Pabbly Connect to automate Google Form submissions to Notion allows for seamless data management and organization. Start your automation journey today!