Ideal For: All herbal soap manufacturers, cottage industries, MSMEs, herbal soap merchants and other traders can use this method to sell herbal soaps online.
Why Choose this Method for Selling Over any Other Solution?
Unlike any other solution, this method allows you to:
- List and sell your herbal soaps for FREE. Absolutely no payment required.
- No commission deducted on sales.
- Collect payment through multiple payment modes from a single checkout page.
- Sell one time or recurring subscriptions of your herbal soap.
- Sell and collect payment in any currency as per your requirement.
- Give discounts on your products by offering special coupon codes.
- Add sales commission agents to help you in selling your herbal soap.
Herbal soaps are becoming the best source of natural cleansing and nourishment for our skin. It is no wonder that by 2025 herbal beauty products will be $132.56 billion industry and 20% of these purchases will be made online. That is why as a manufacturer you are looking for methods to sell herbal soaps online.
Why would you like to sell herbal soaps online?
Well, simply put if you are not keen on selling herbal soaps online, you are going to miss a lot of business opportunities in the coming years and will likely perish due to stiff competition. Therefore you need an accessory to start selling herbal soaps online. That is why I would like to recommend you an awesome software called Pabbly Subscription Billing. Here, I am going to provide you some of its features which will not only bring your products online but also give a headstart over your competitors.
- You can collect payments both in online and offline mode
- Add product details without any hassle
- Not just one time payments, but can add multiple billing models
- Track details related to sales and revenues
- Moreover, you can add delivery and set up charges per product
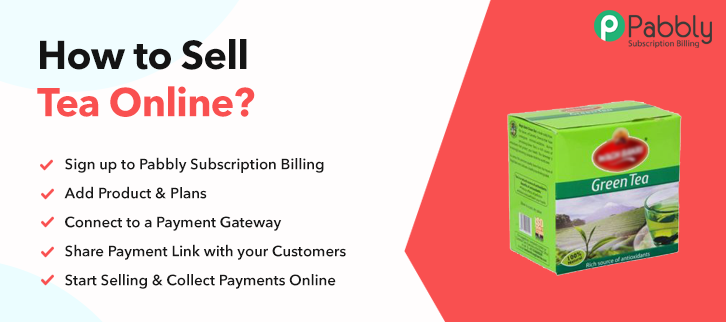
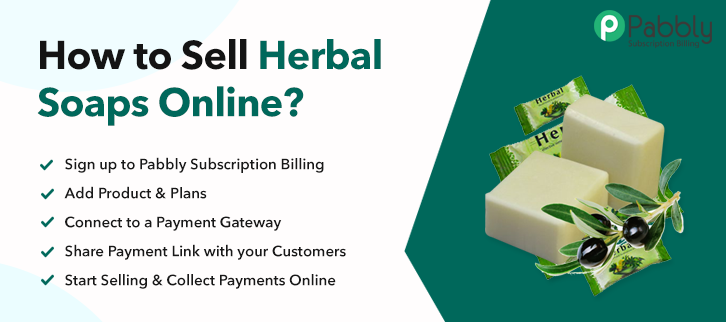
Well, now that you are amazed by these features we will go through 10 really easy steps to help you start selling herbal soaps online.
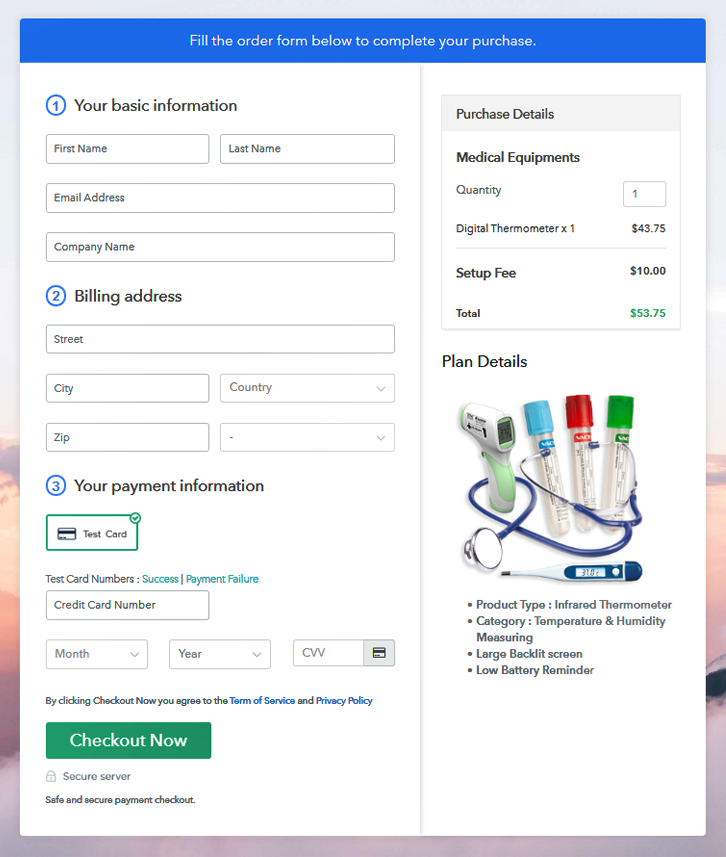
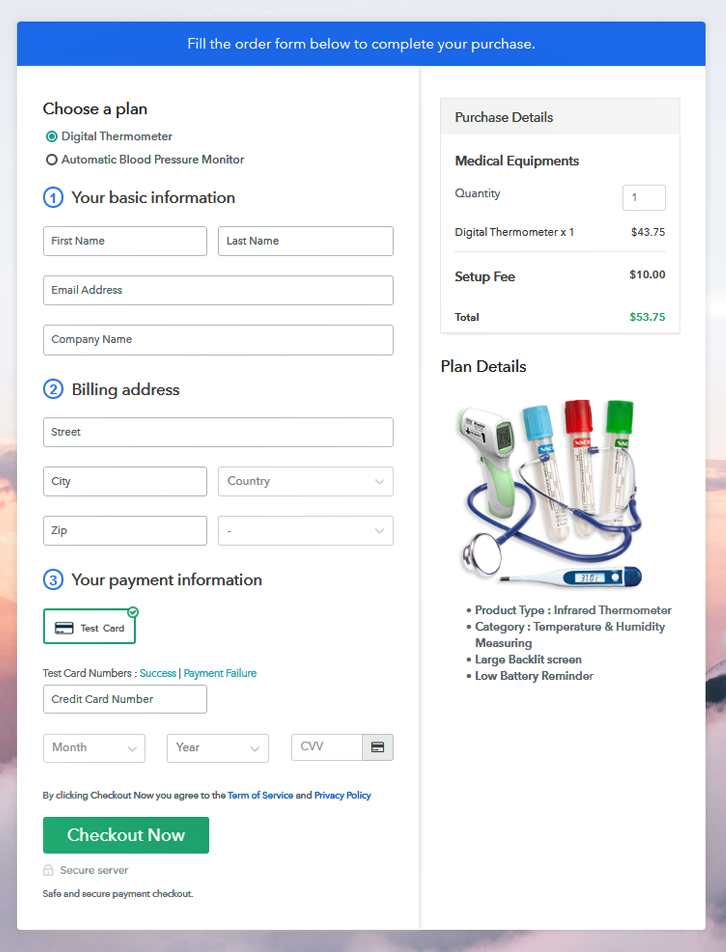
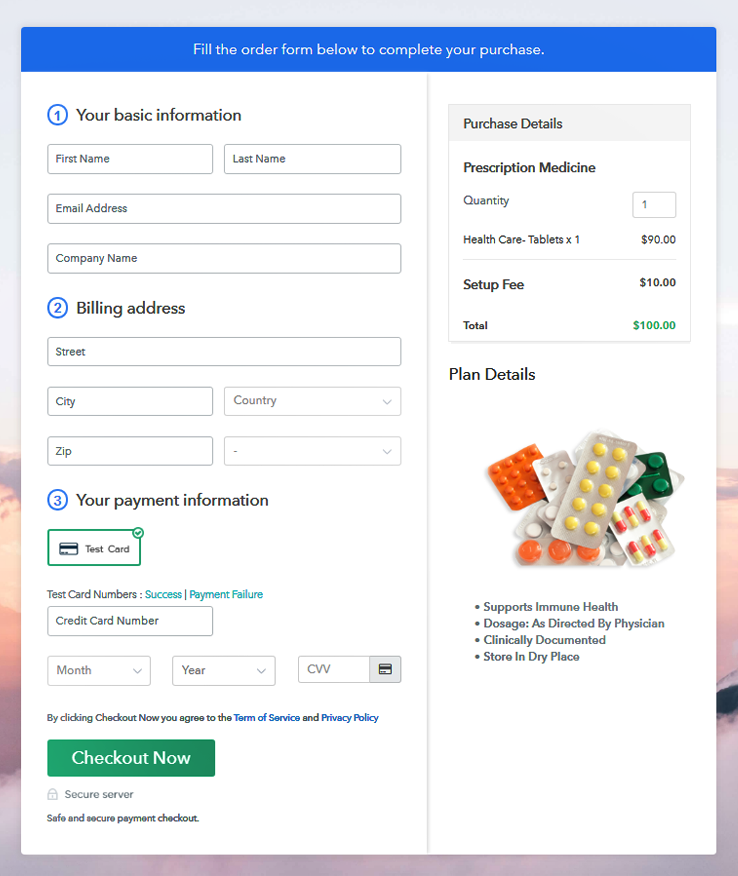
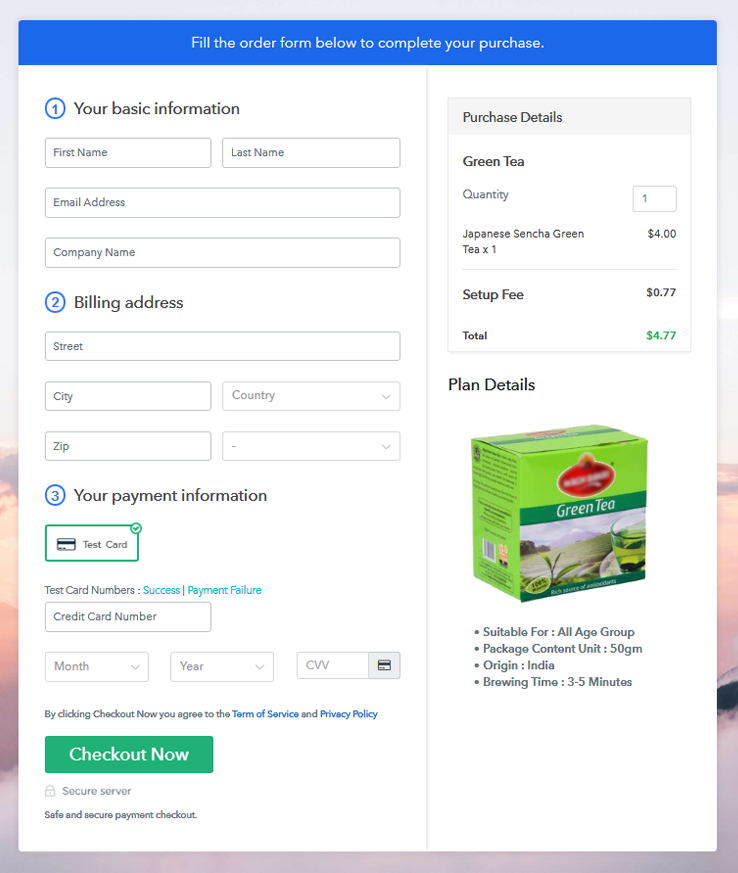
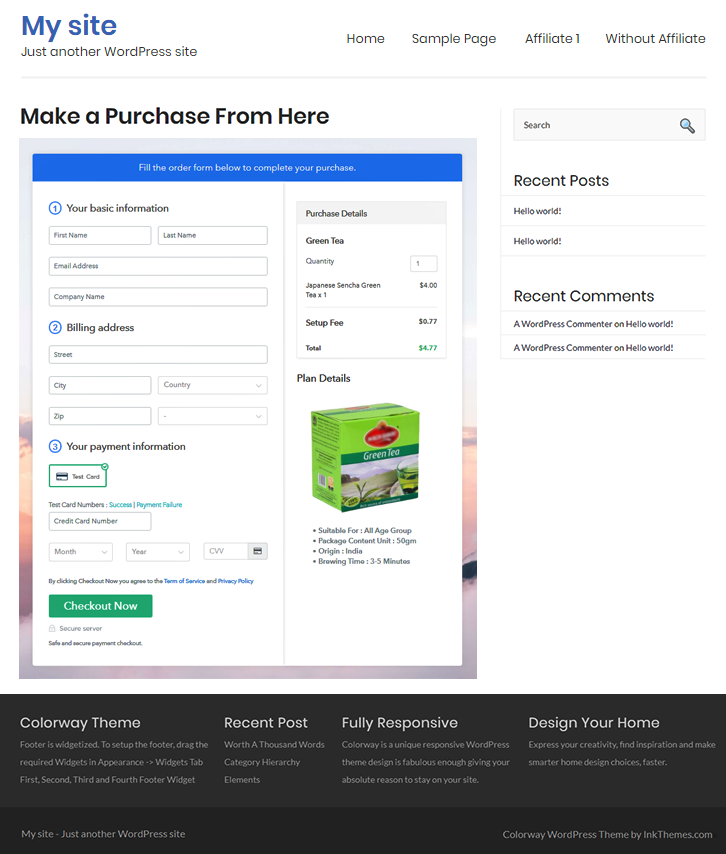
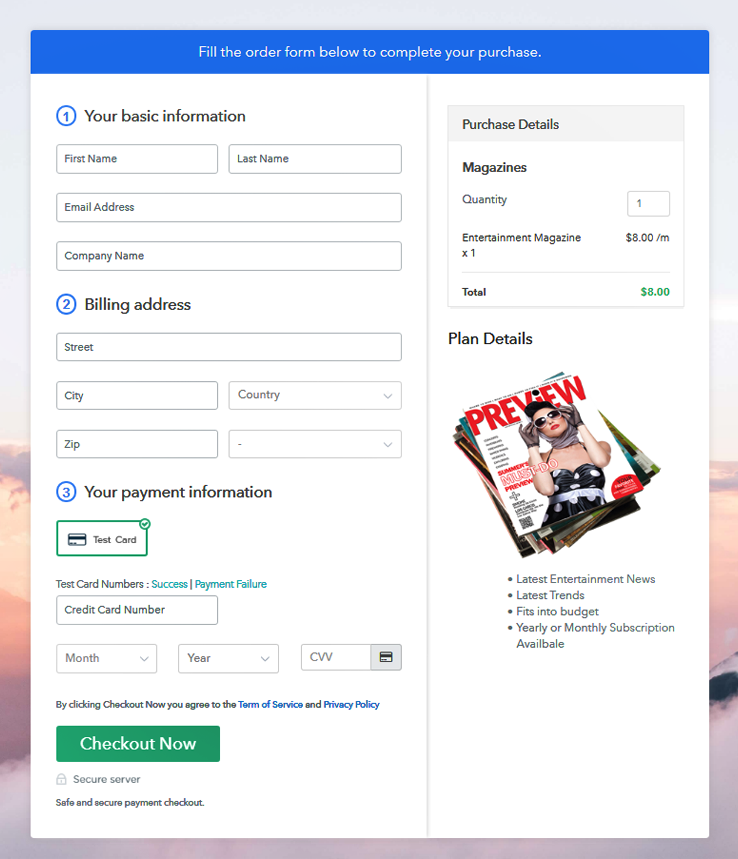
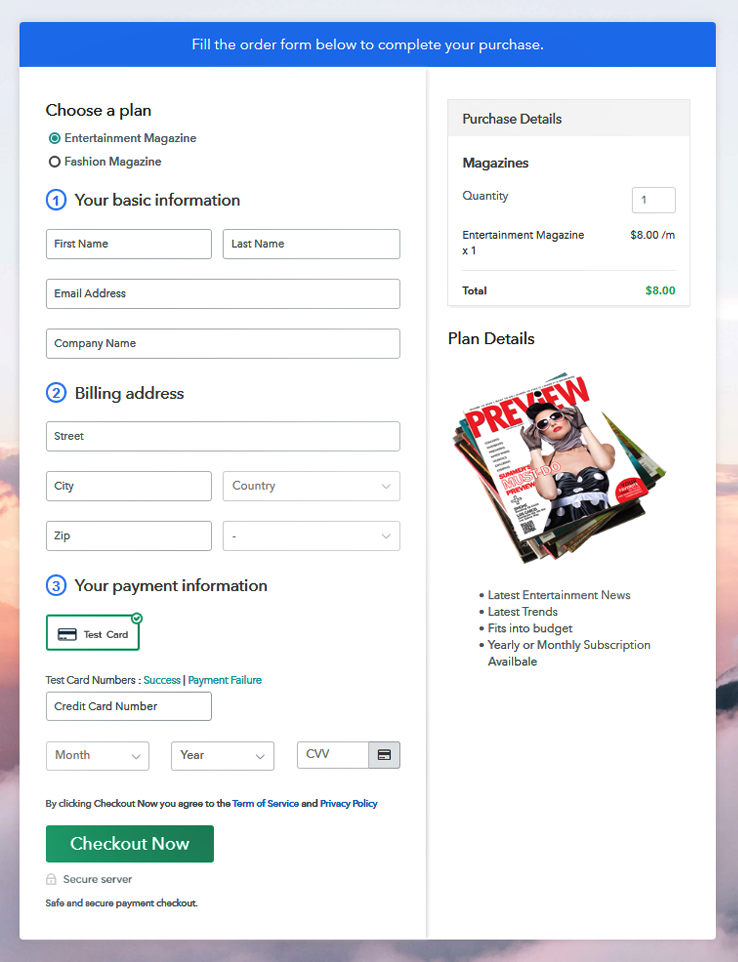
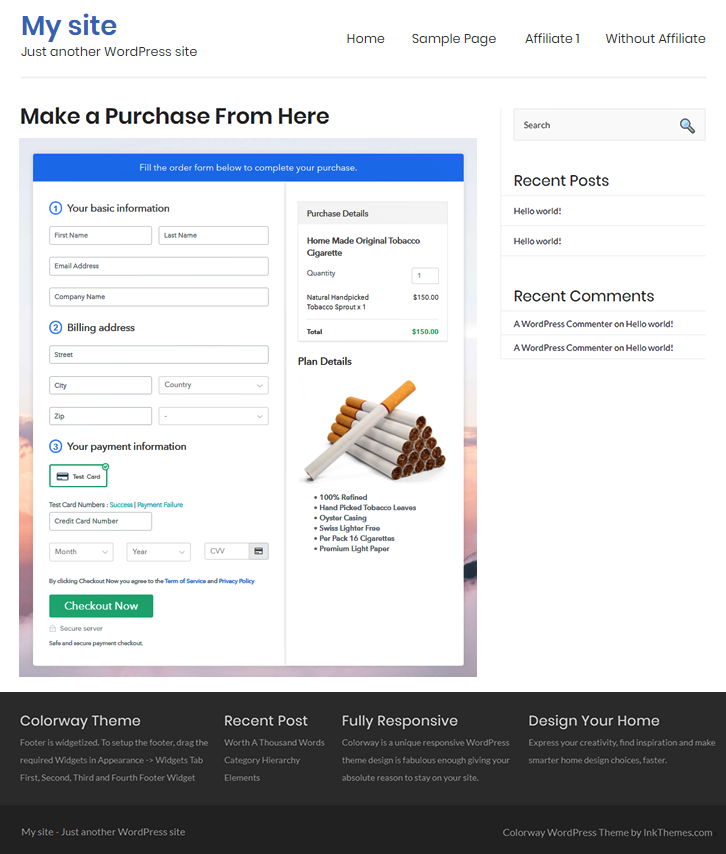
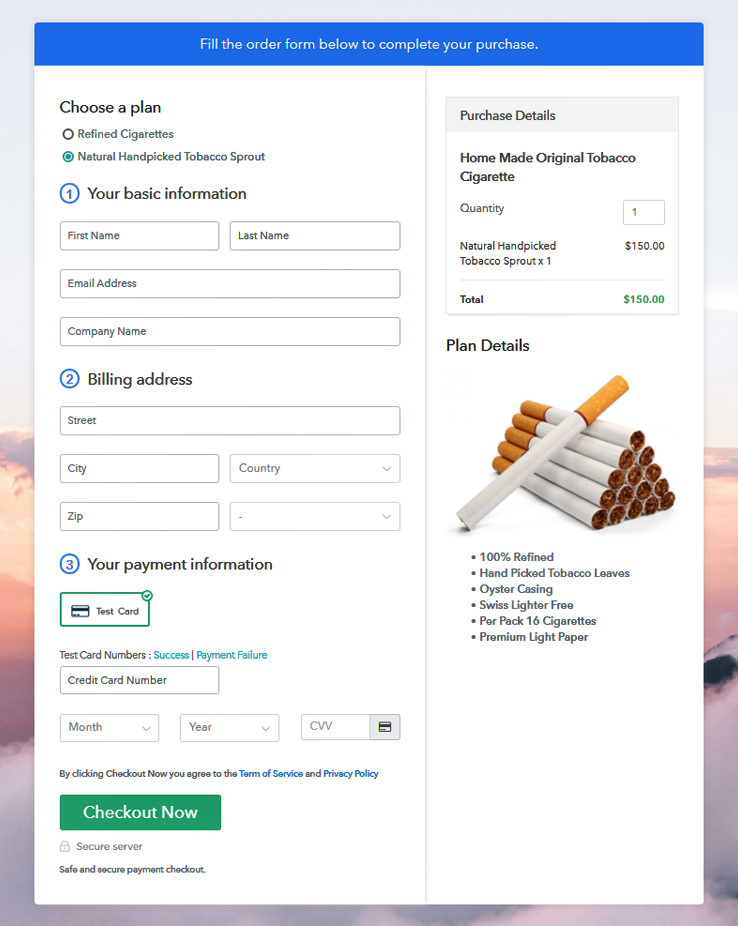
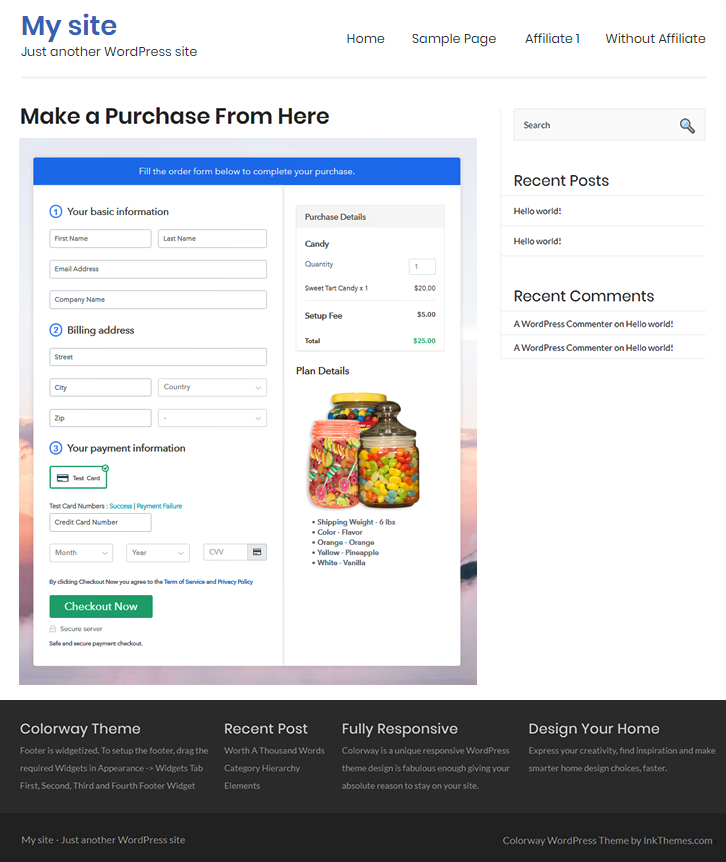
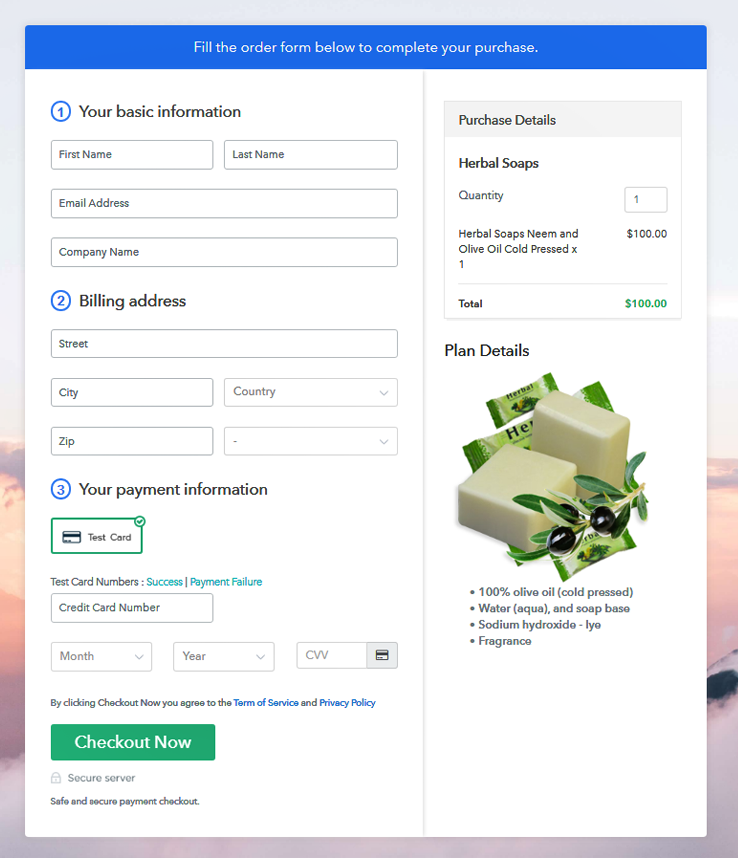
This is How your Checkout Page will Look Like After Creation
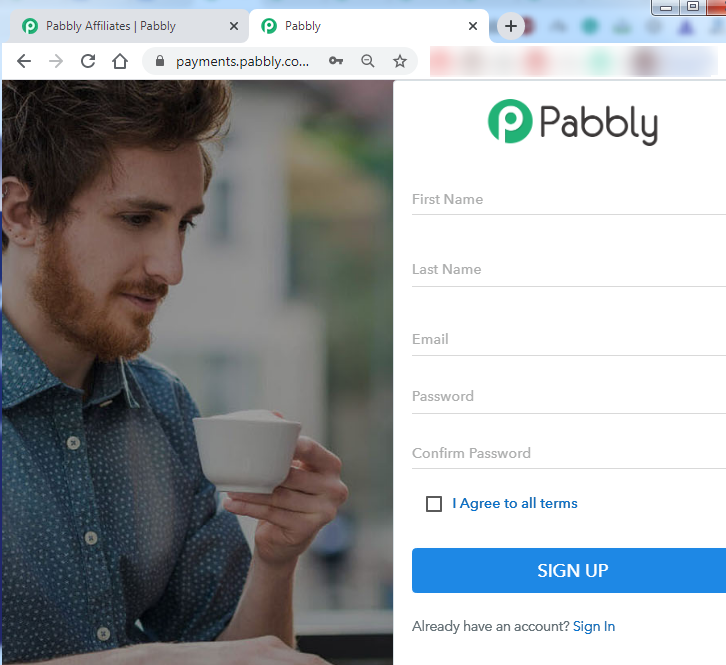
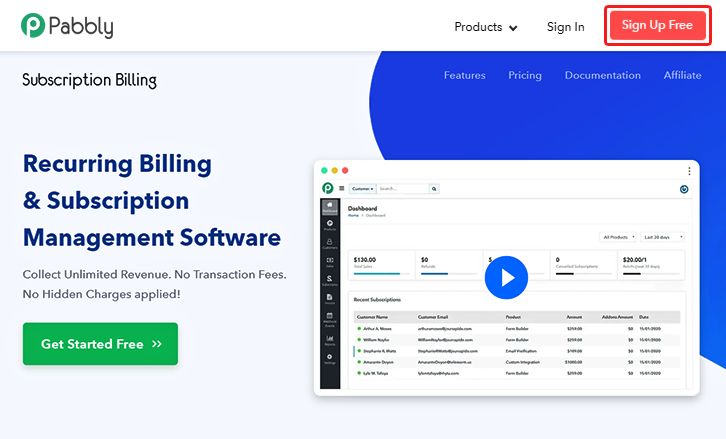
Step 1: Log in to Pabbly Subscription Billing

Browse in Google for Pabbly Subscription Billing and on their website click on the button “Sign up Free“. When you click on the button, a sign-up page opens to fill in the required fields or simply sign in using Gmail account.
Sign Up For Free!
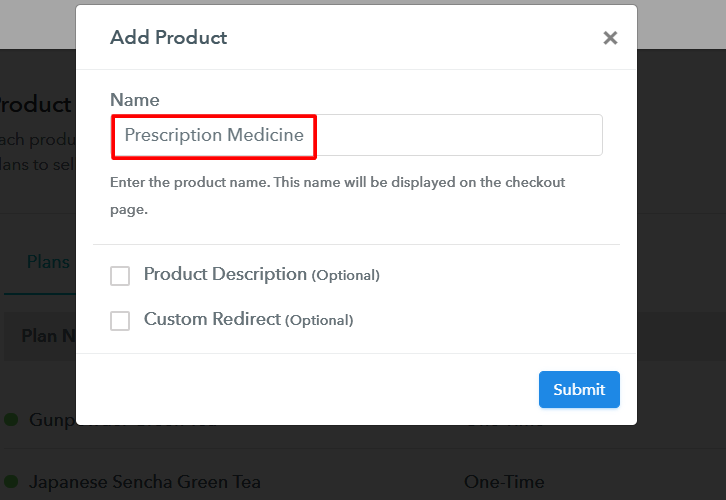
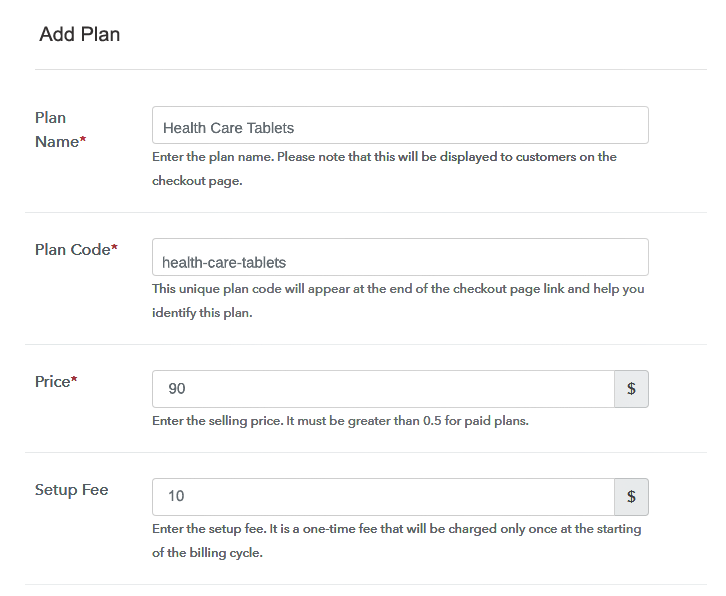
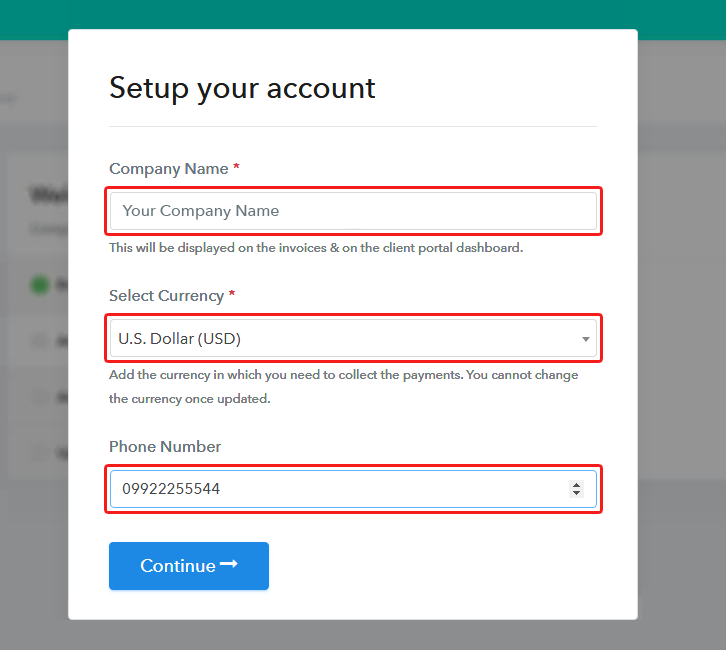
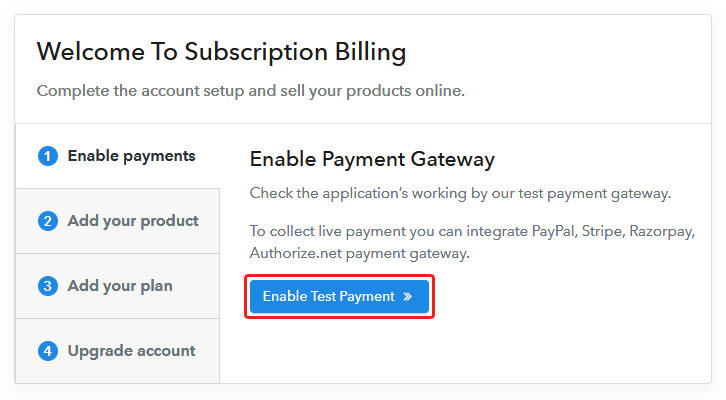
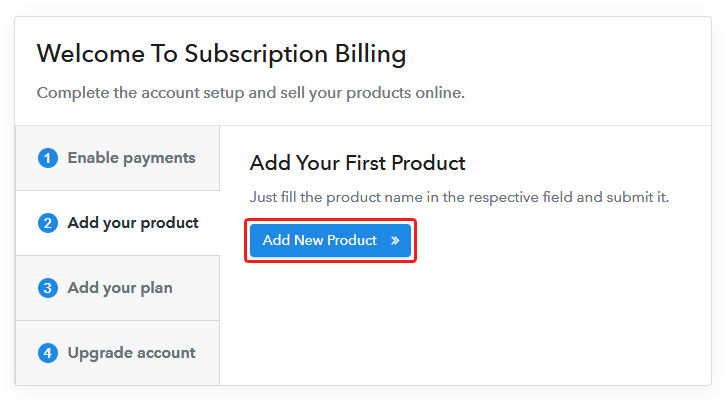
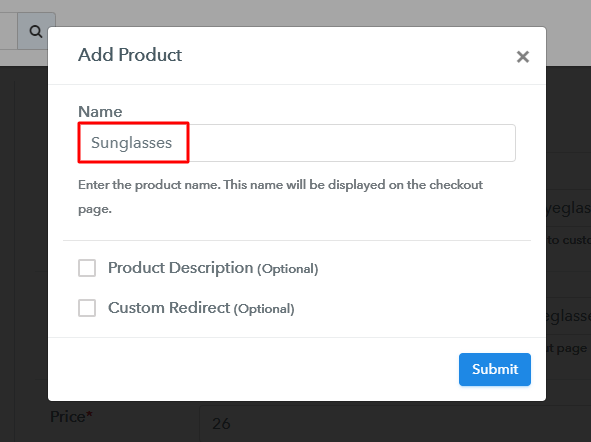
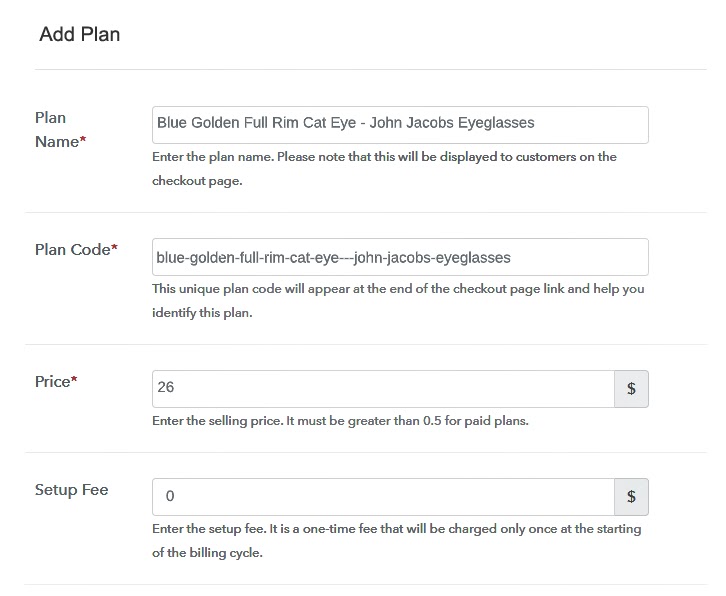
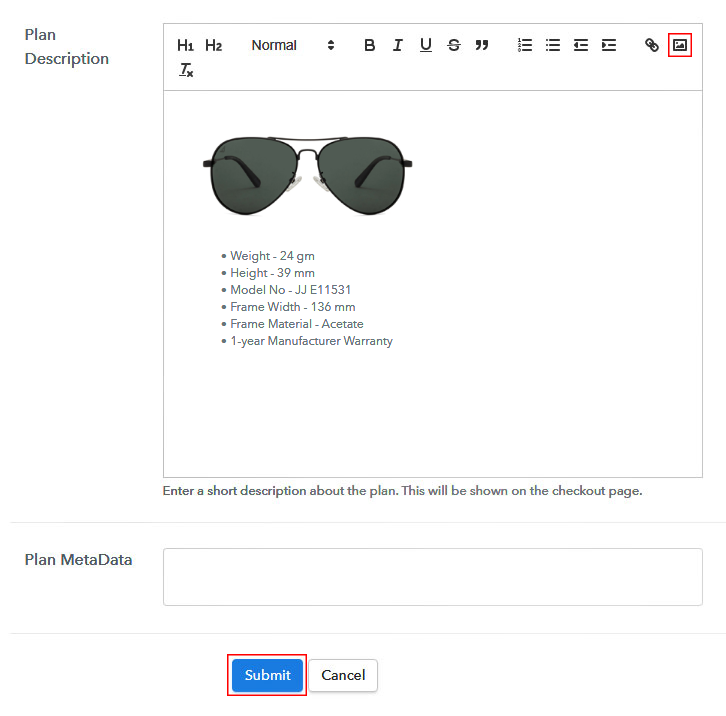
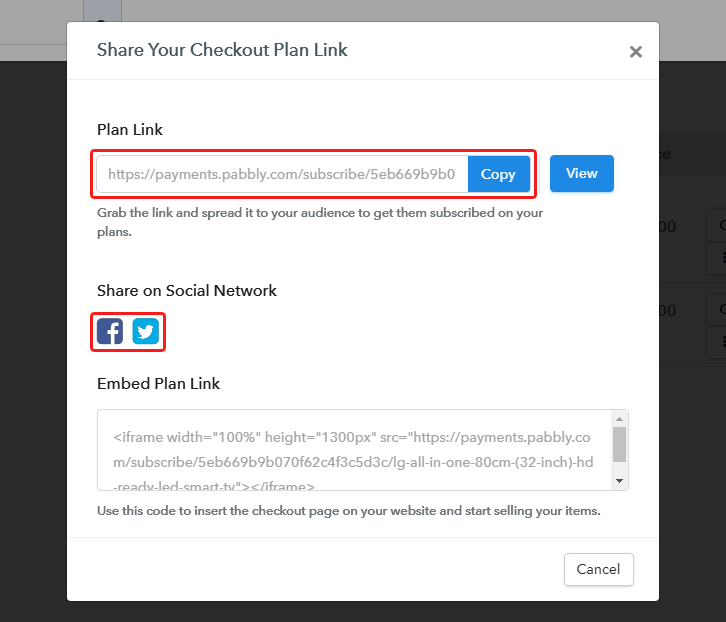
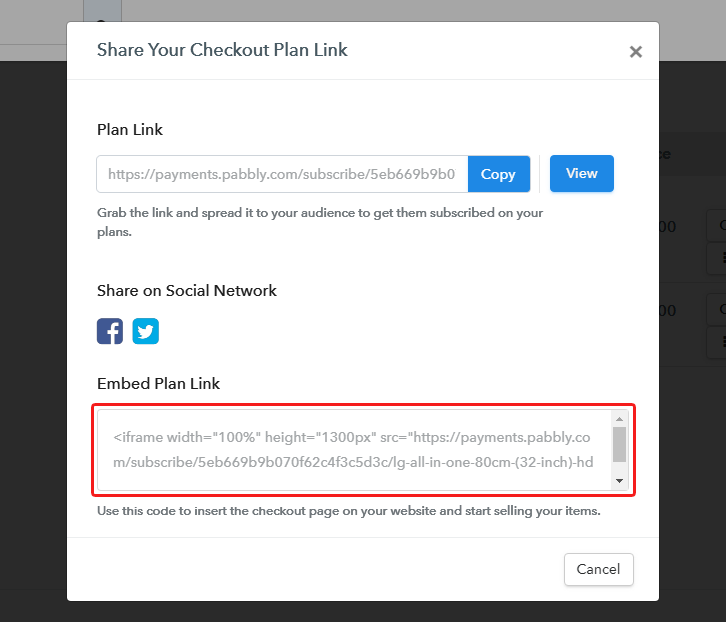
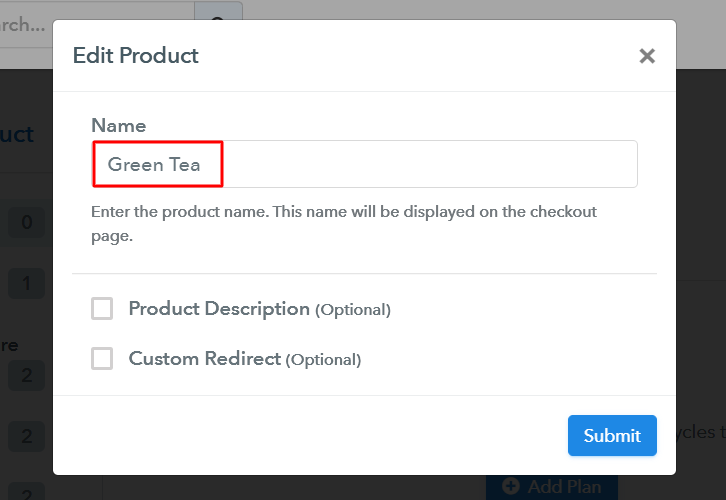
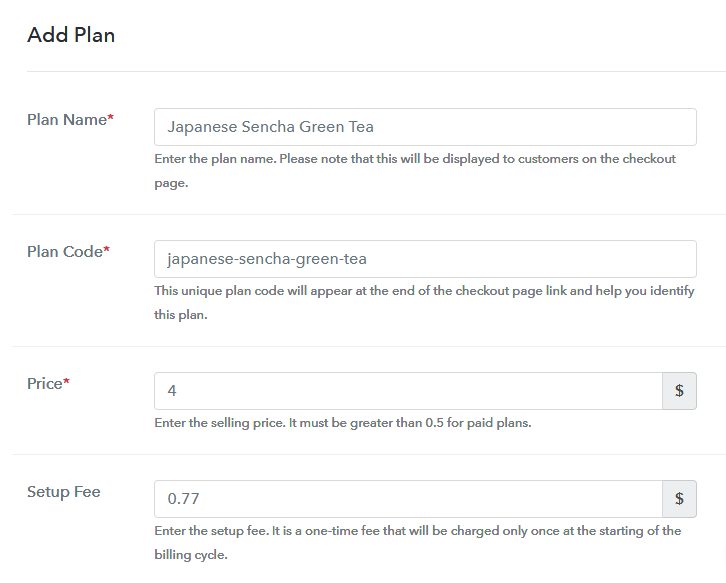
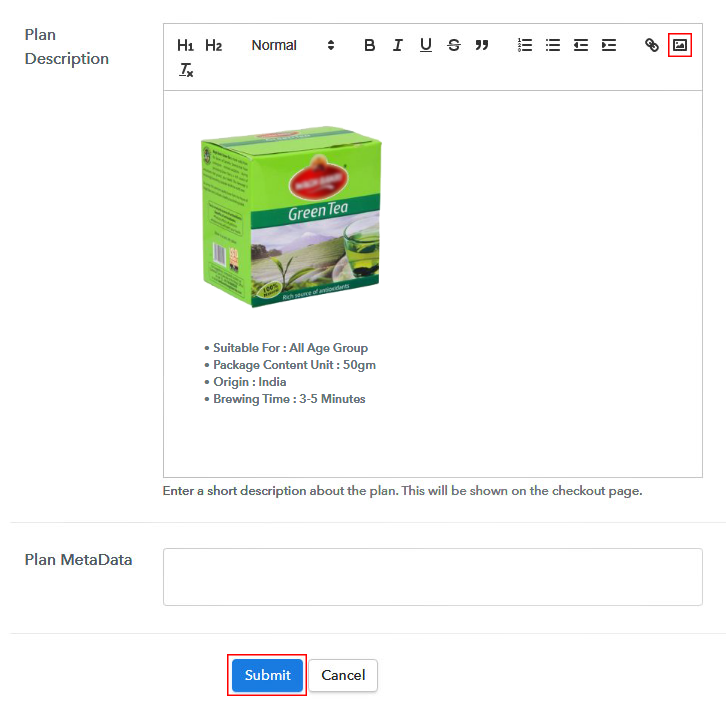
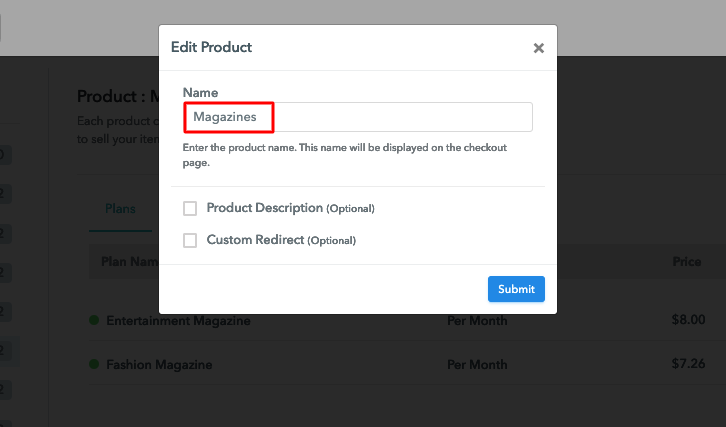
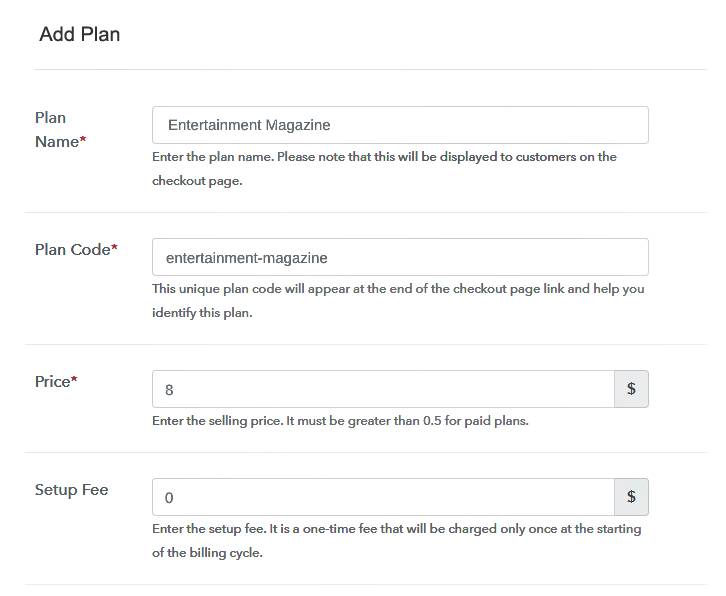
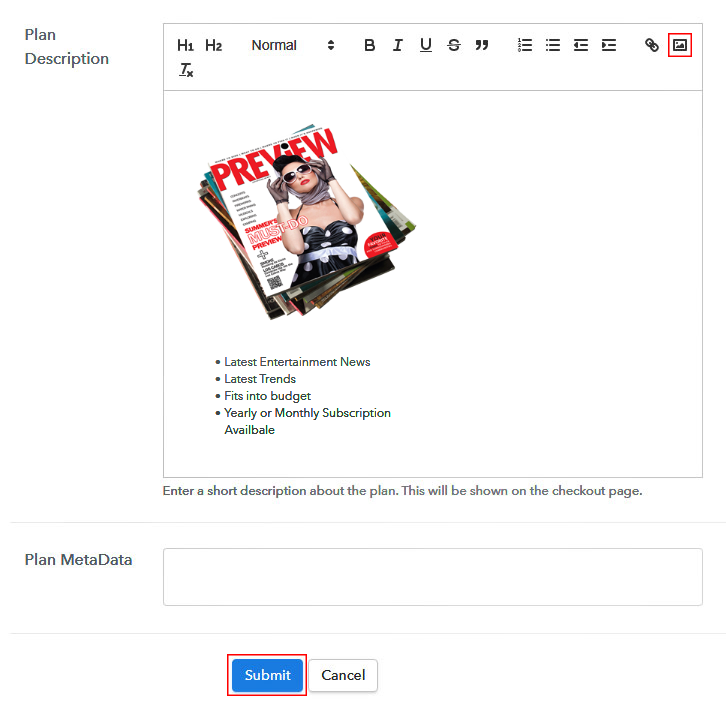
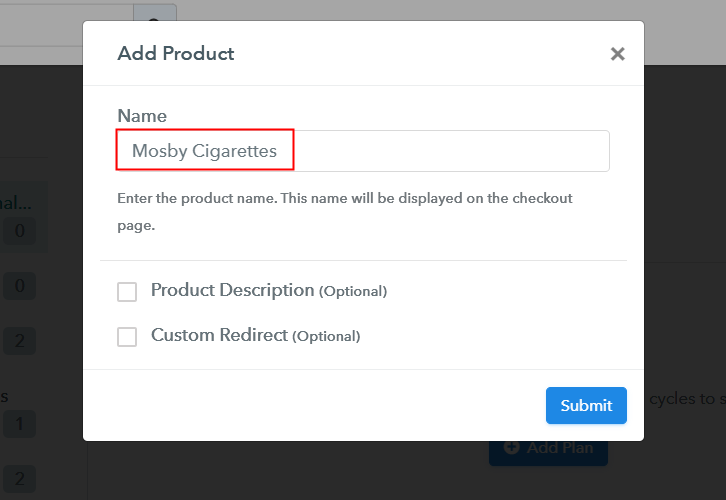
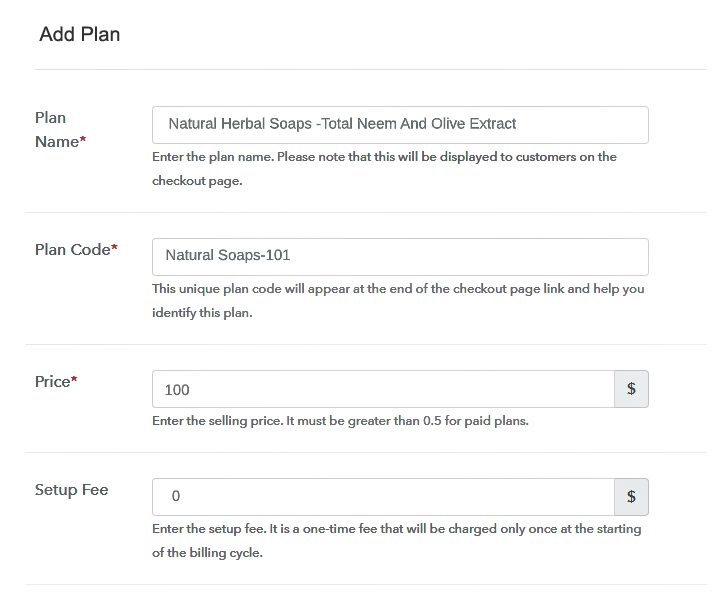
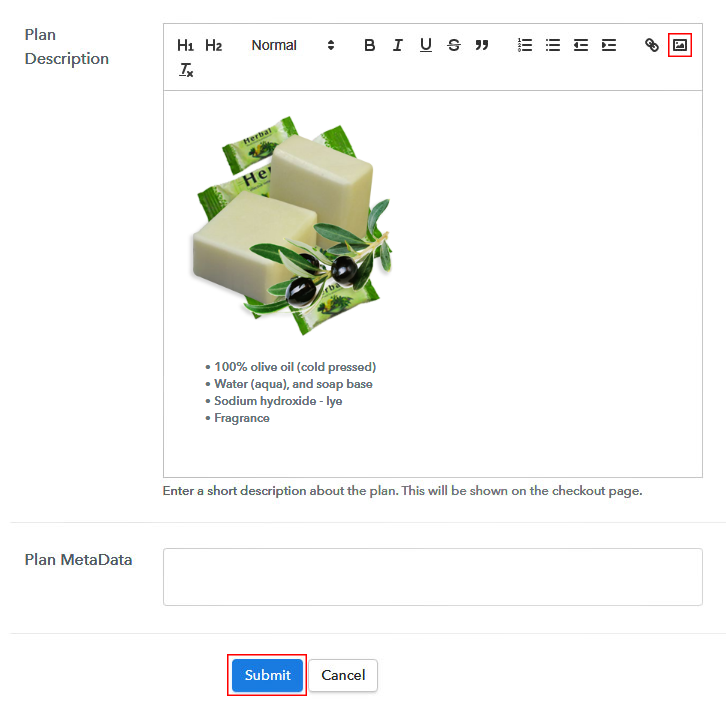
Now that you have entered into the dashboard, click on the “Access Now” button on the Subscription Billing option. This will generate a dialog box that requires you to fill the company details like name, currency standards, and phone number. Easily fill these parts and click on continue to complete the process. Of course, as a merchant, you should always test the payment gateway to stimulate the whole payment experience of a customer. Moreover, with Pabbly Subscription Billing, you can connect with multiple payment gateways for selling herbal soaps online, with the help of the articles given below. Meanwhile, I am going ahead with enabling test payment gateway to show you the process. Now that you have successfully embedded your payment gateway, its time to add your product. Click on the “Add New Product” button which summons a dialog box. Here, in this box, you can enter the name of the herbal soap type, provide a small description, and even redirect to a particular website. Fill up the details and your product is created. Note: Here you can add all the products related to the similar category by creating plans for each of them. Now, we are going to create plans for herbal soaps available in your store. For adding a plan you will be redirected to plan page where you have to fill details like plan name, code, price, setup fees, billing cycle, etc. This is one of the most important steps for selling herbal soaps online. Here, some high-quality snapshots of the herbal soaps you want to sell and paste it. Moreover, for customers, it will be very helpful if you provide some product description of the herbal soaps in bullet points like quantity per package, natural ingredients, foam, and lather, humidity requirements, etc. Now having filled out the description, press the “Submit” button. Following the same method, you can add multiple stacks of herbal soaps. Follow up these steps to preview checkout page: Now, copy the embed plan link to insert the check out page on your WordPress website. Now, when the link is copied, then paste it to the text area of the editor. After pasting the code, now hit the ‘Publish’ button. Your checkout page is embedded. Note: In case you want to sell multiple products via a single checkout page, you can create a multi-plan checkout page otherwise skip this step. Well, don’t be overwhelmed by the steps, as this perhaps the cheapest and easiest way to start selling herbal soaps online. Not only you can integrate with a ton of payment gateways like PayPal, Stripe, etc. But also can create awareness about your brands by sharing checkout links on Whatsapp. Also, not just sell herbal soaps online but also sell pretty much all products (digital and physical) in a few clicks. But, if you have any doubts regarding any of these step please leave a comment below. I will reply you, as soon as possible.Step 2: Select Subscription Billing

Step 3: Account Setup

Step 4: Connect Payment Gateways To Sell Herbal Soaps Online

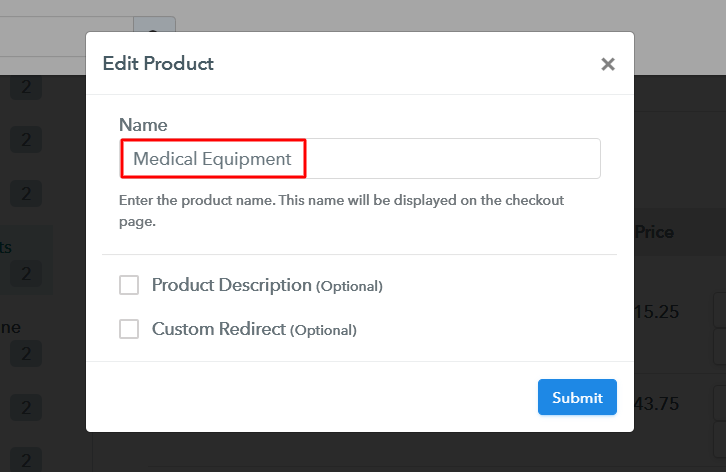
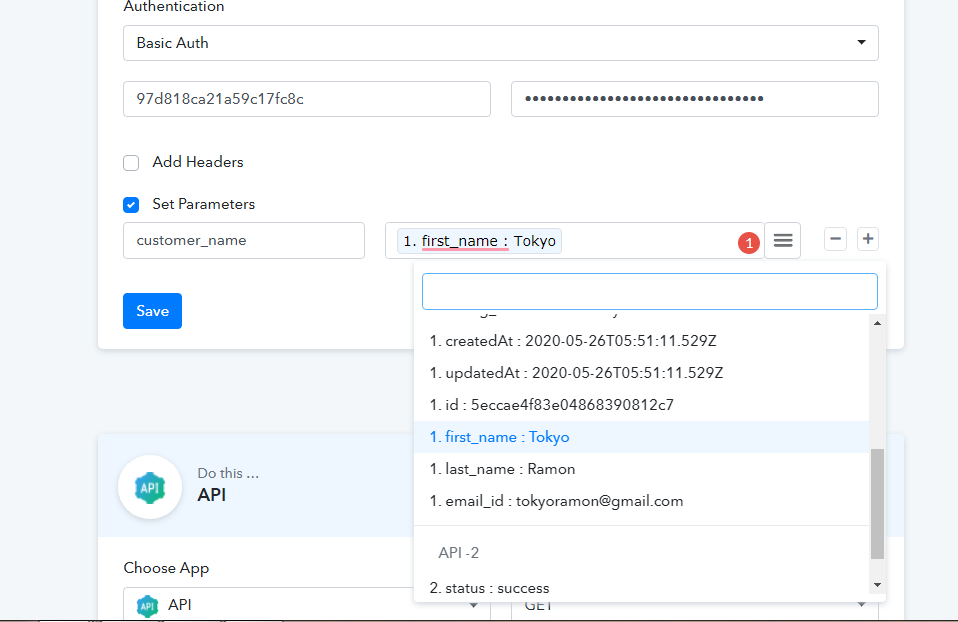
Step 5: Add Your Product


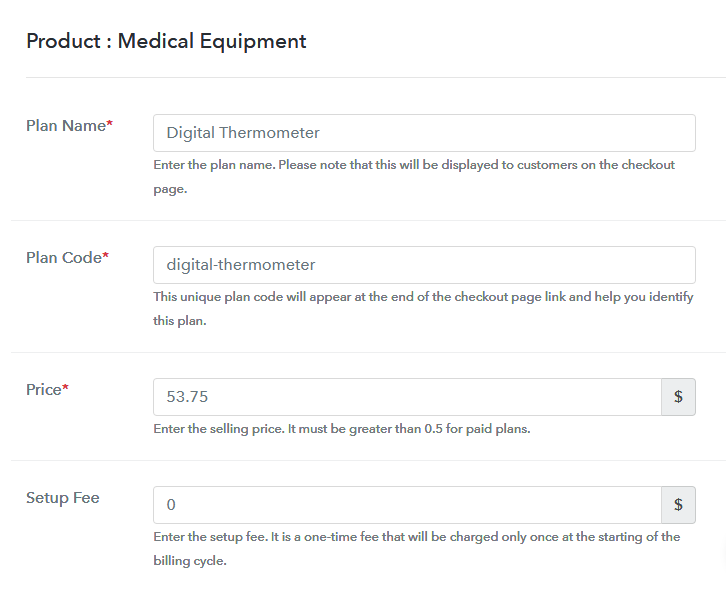
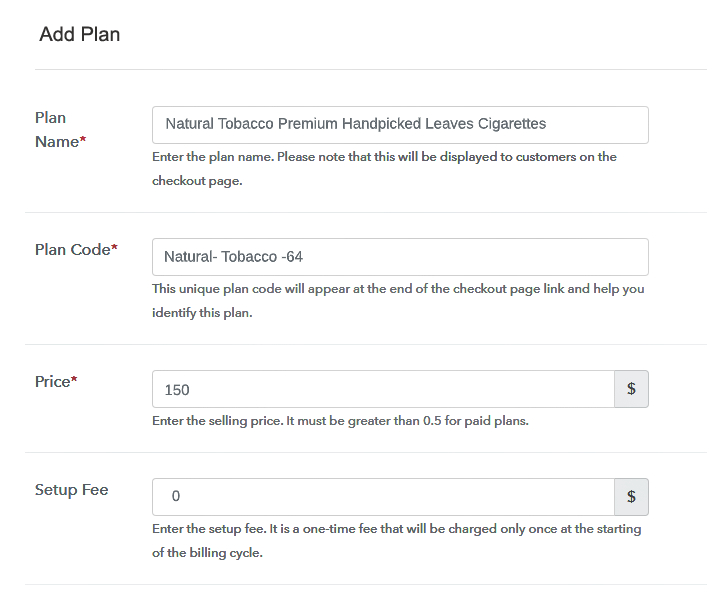
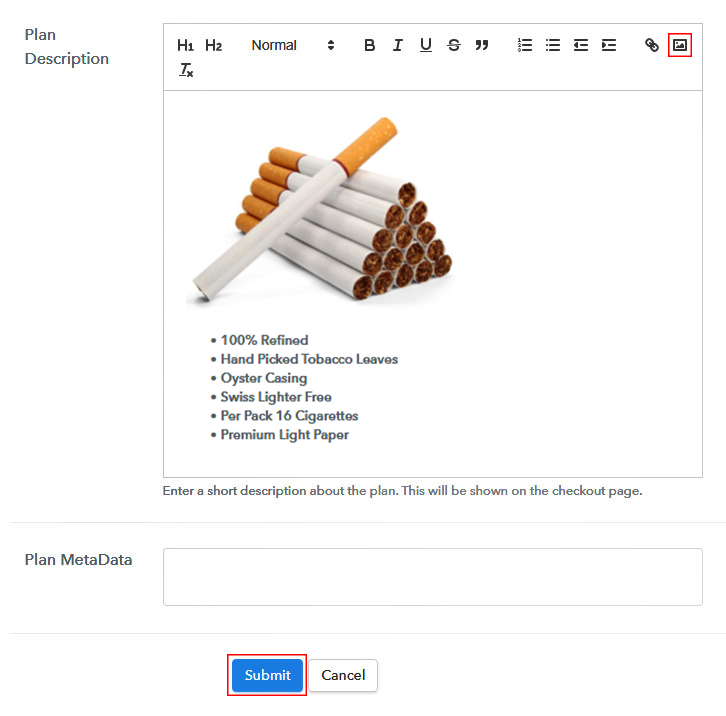
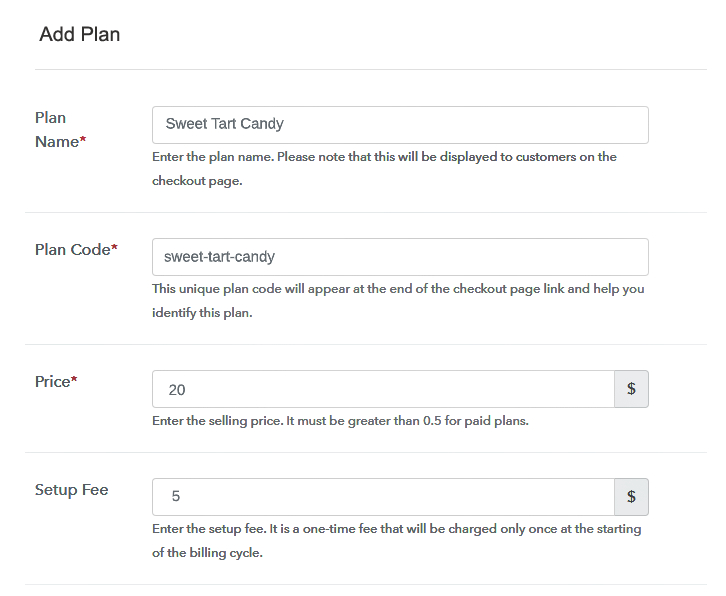
Step 6: Add Plans
(a) Select Add New Plan

(b) Specify the Plan & Pricing Details
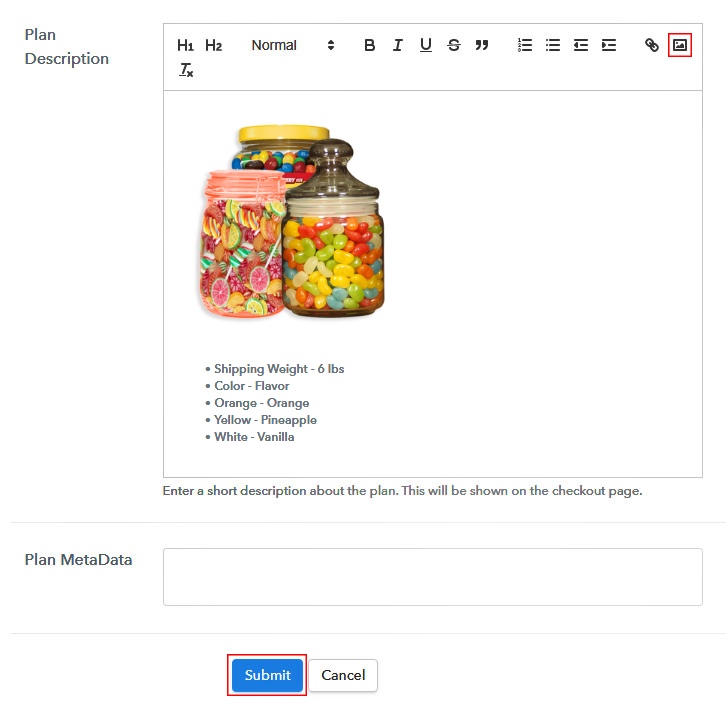
(c) Add Image & Description
Step 7: Share your Checkout Page

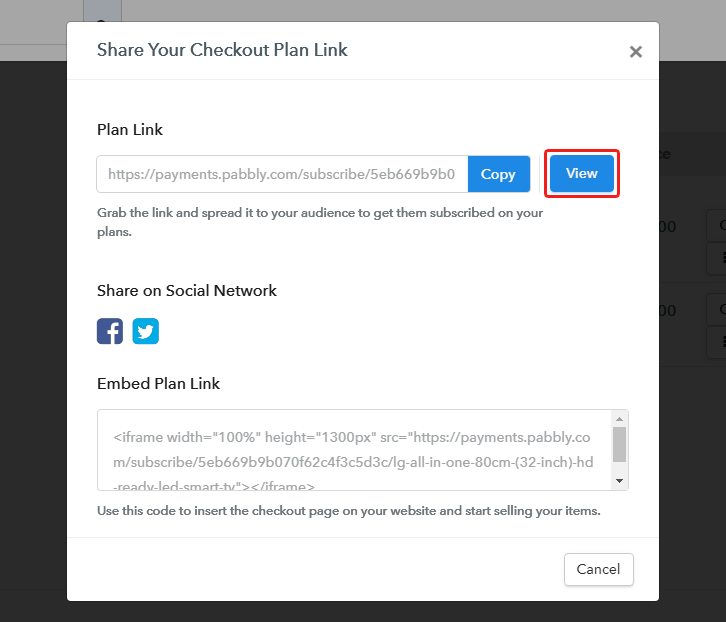
Step 8: Preview Checkout Page
(a) Click on the View Button

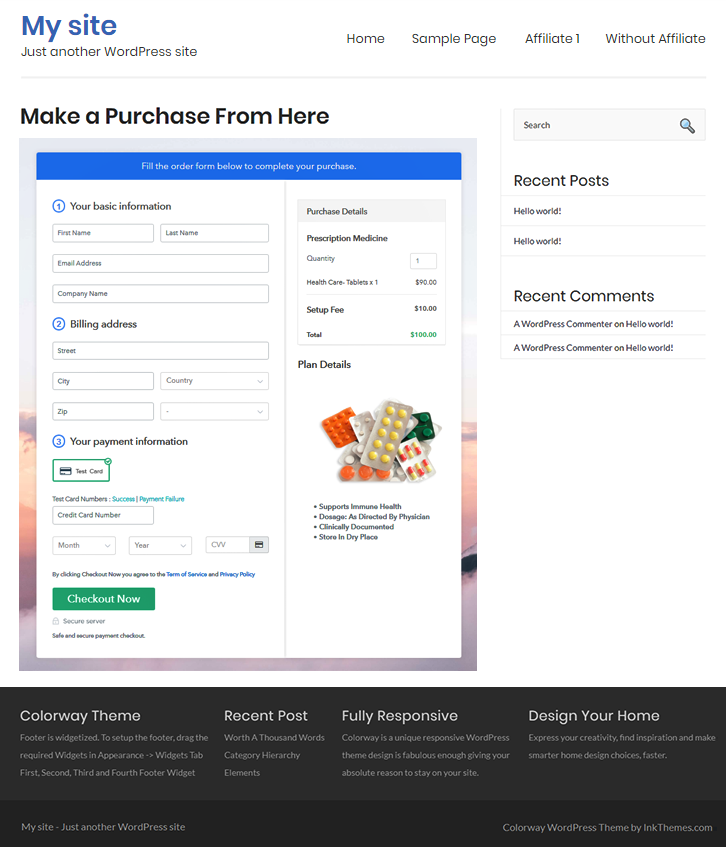
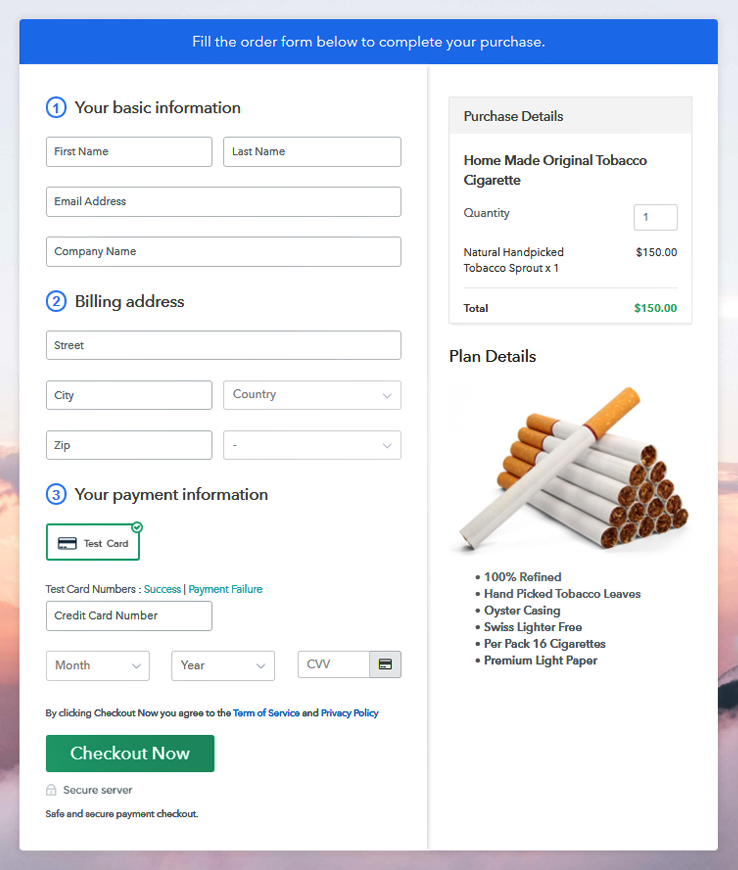
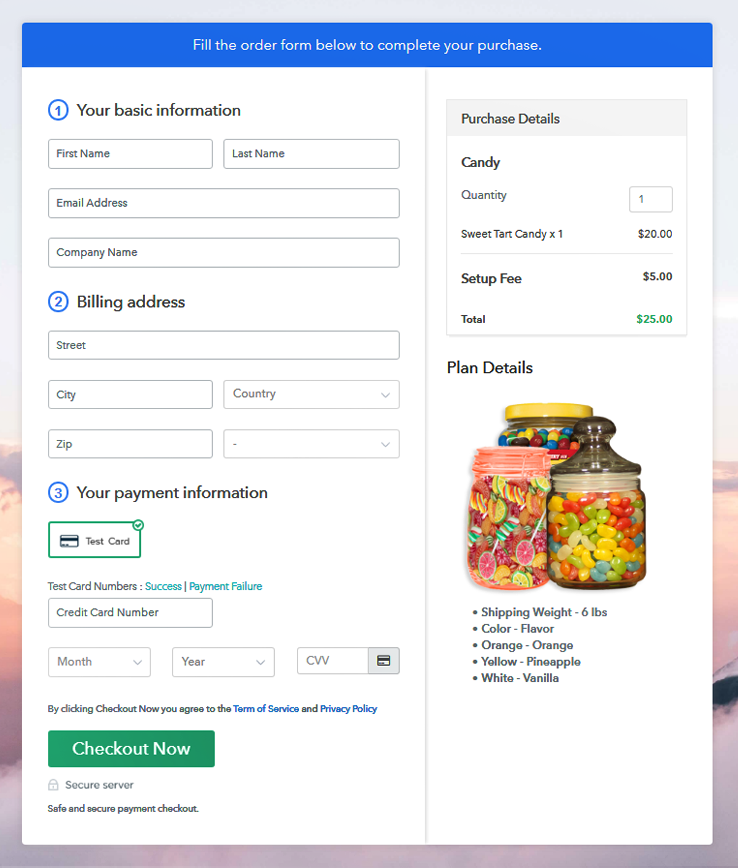
(b) Take a Look at the Checkout Page
Step 9: Embed Checkout Page in Site & Sell Herbal Soaps Online

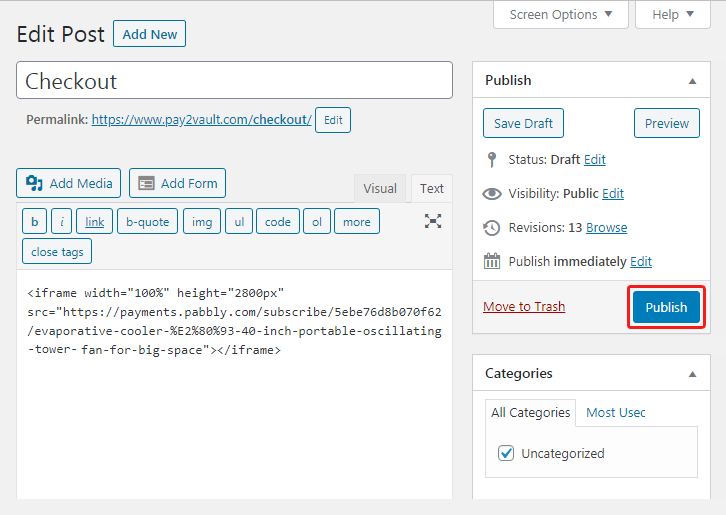
(a) Edit the Page & Paste the Copied Link

(b) Save & Publish the Checkout Page

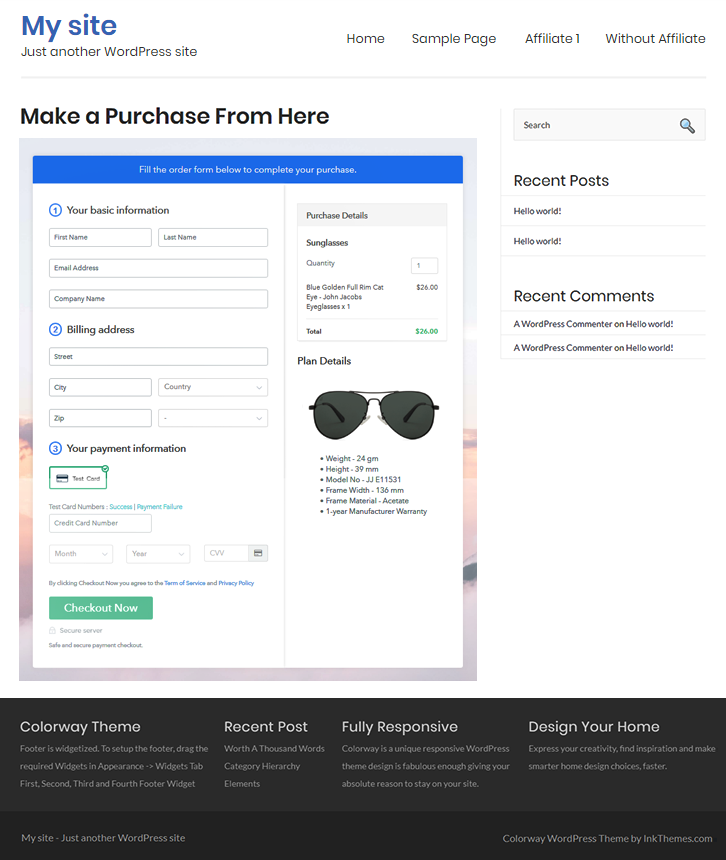
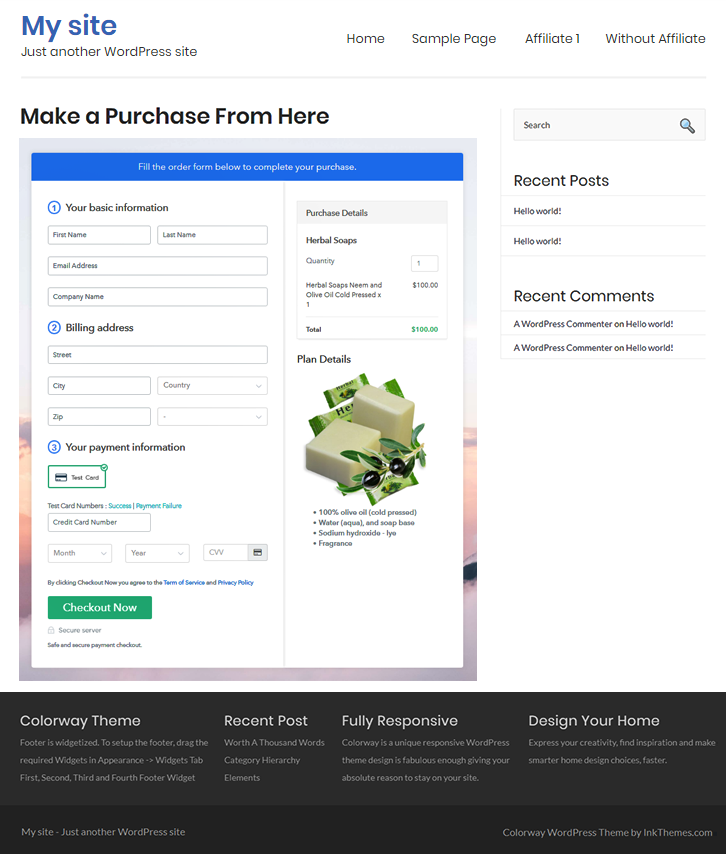
(c) Check out the Final Look of your Checkout Page on WordPress Site
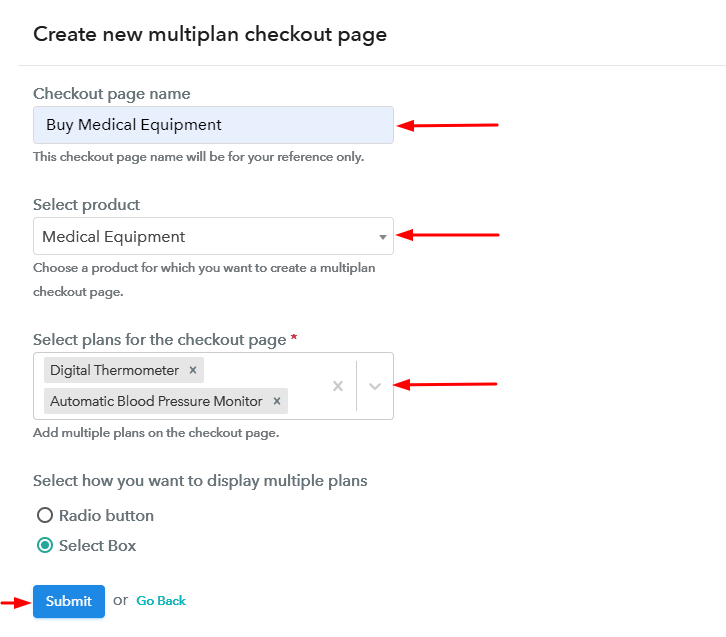
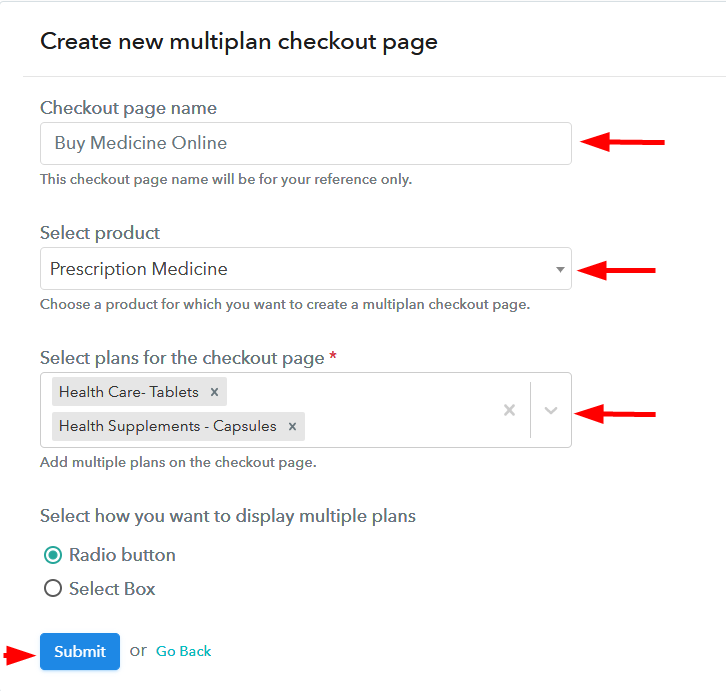
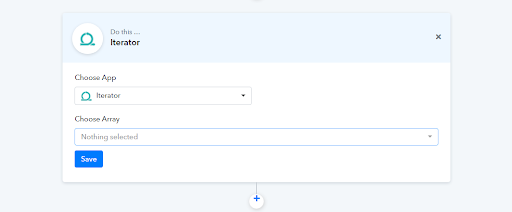
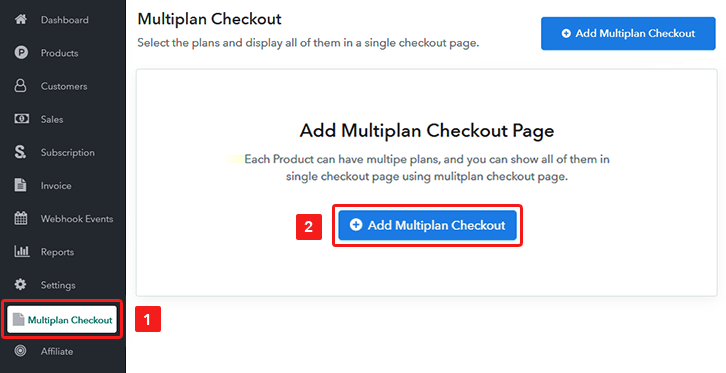
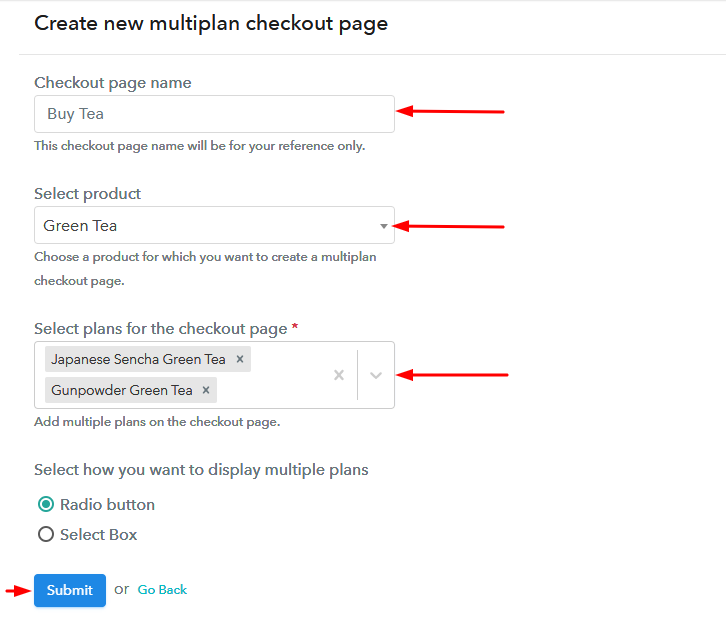
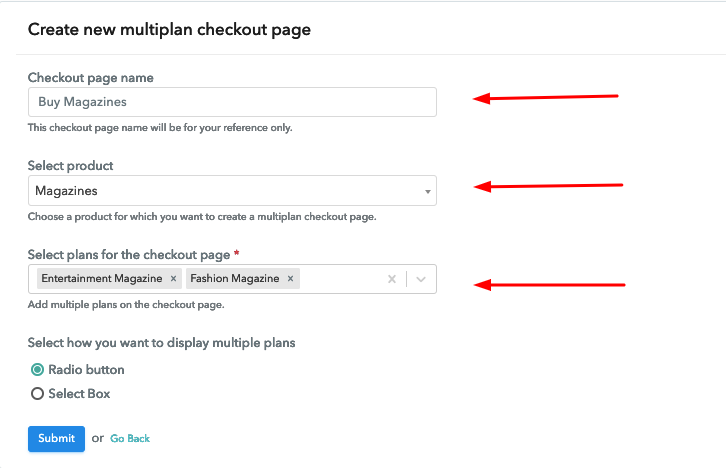
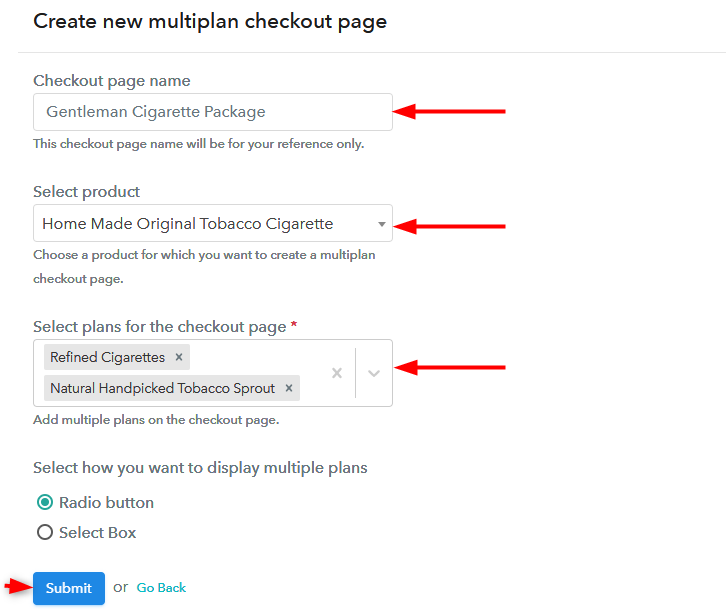
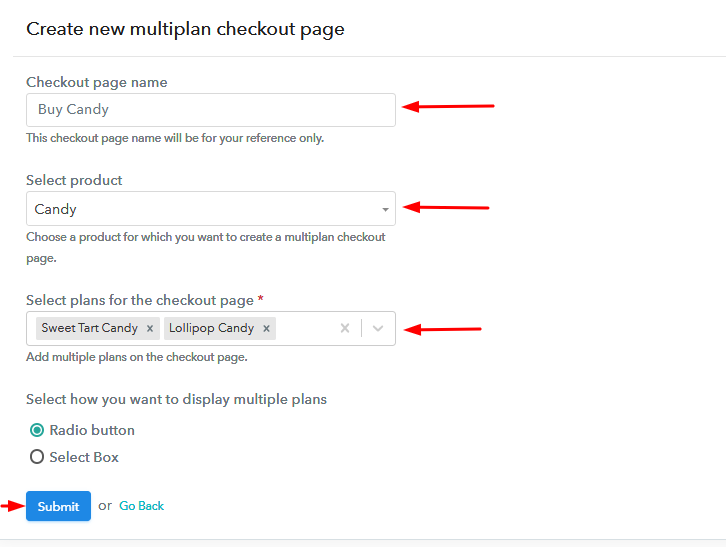
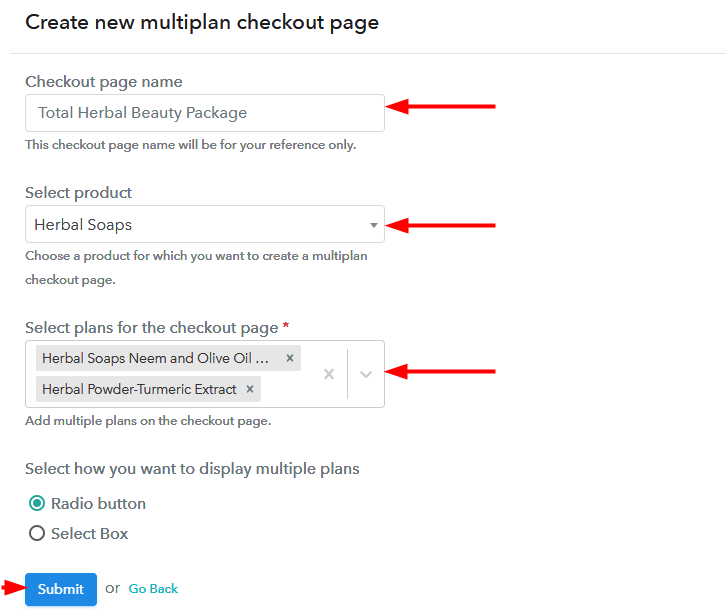
Step 10: Multiplan Checkout Page
(a) Click on Add Mutiplan Checkout

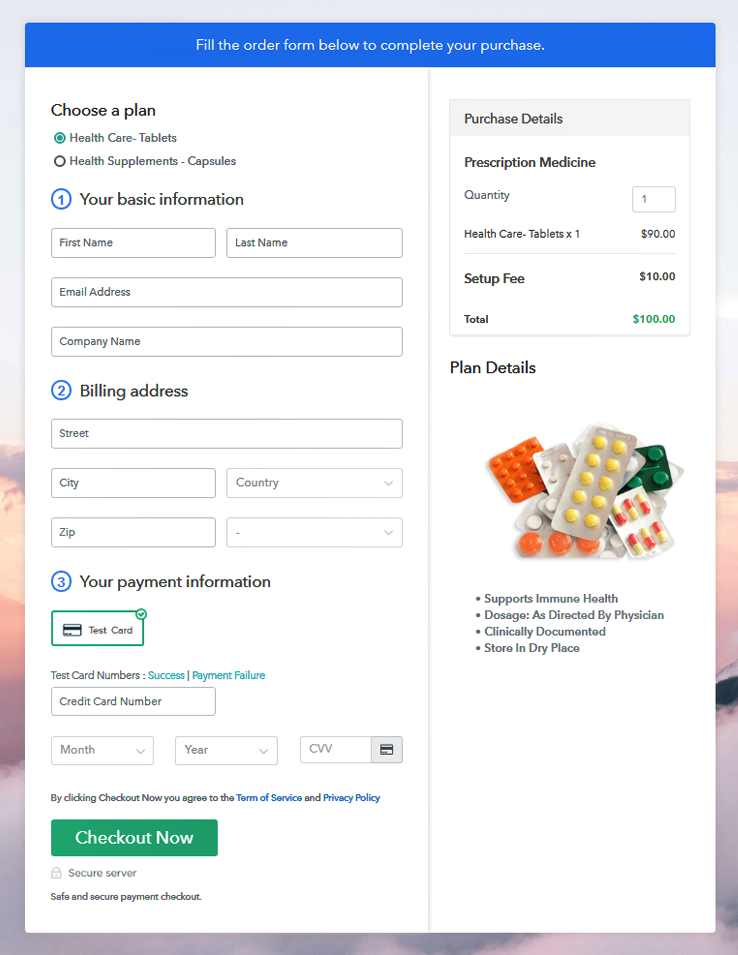
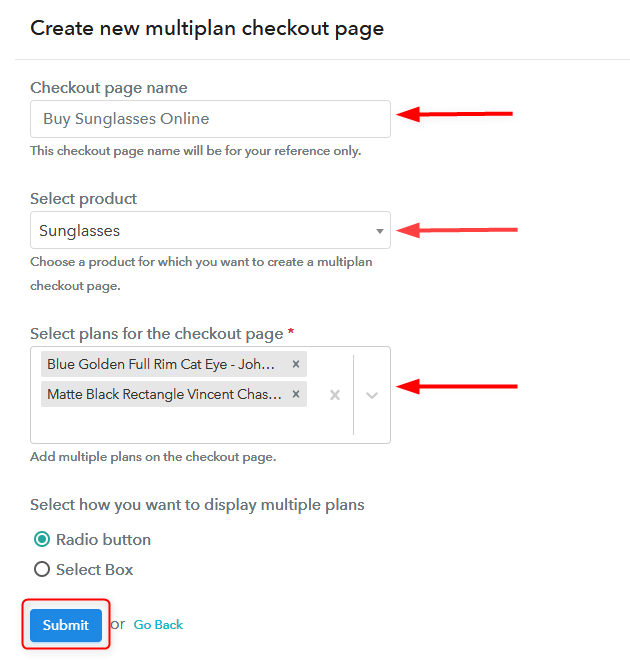
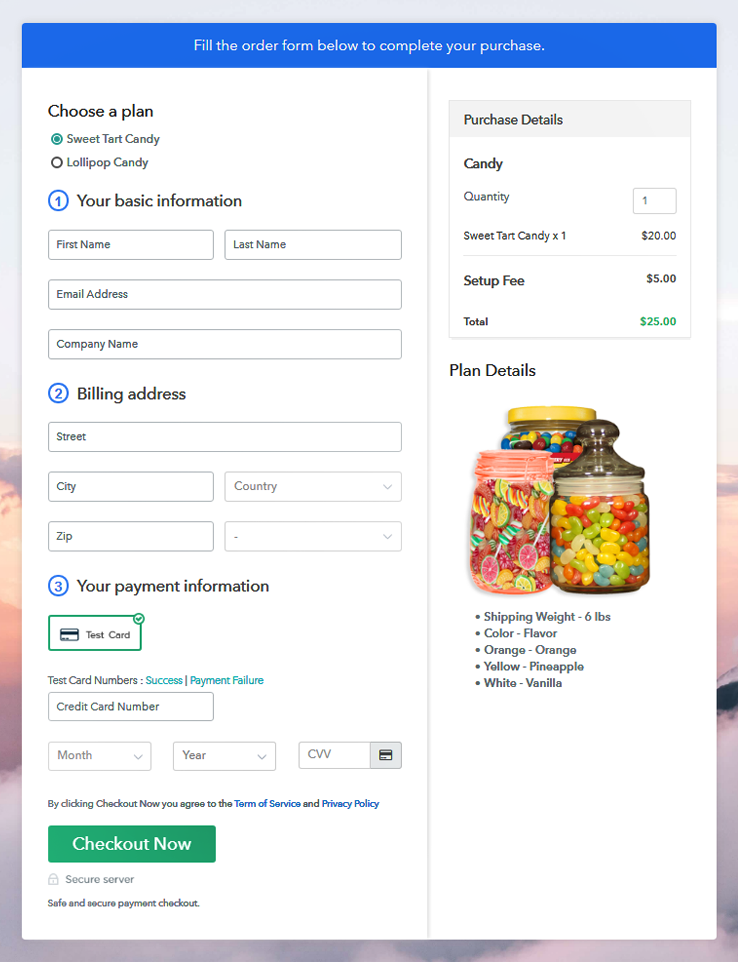
(b) Add Plans to Sell Herbal Soaps from Single Checkout Page
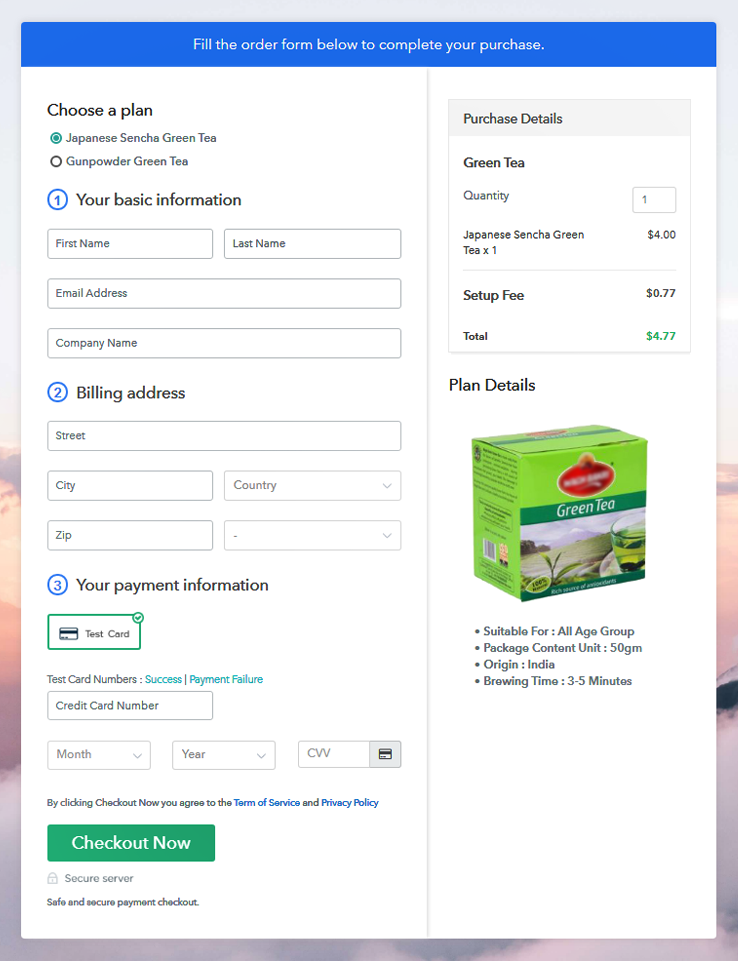
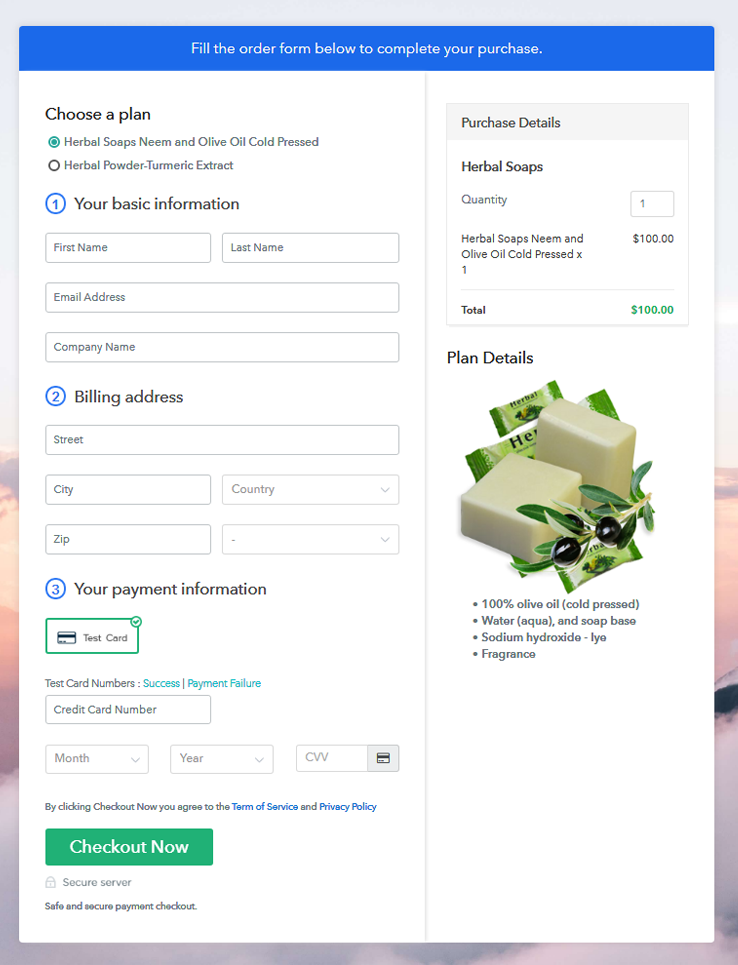
(c) Take a Look at the Checkout Page
Wrapping Up
You May Also Like To Read –