Introduction
Pabbly Connect provides you the ability to integrate multiple applications by managing the data flow smoothly.
You can connect two or more apps and get the repetitive task done through automation and that too without depending on developers and any coding work.
This documentation will help you to learn about the basic working of Pabbly Connect.
Also, it will introduce you to some general terms used in the application.
1. Workflow
This refers to the sequence of actions performed according to the setup.
In Pabbly Connect, a Workflow is a bundle of triggers, actions, and scheduler, which will perform a complete action to connect your applications.
A workflow can be simply created by adding any text (application name, the purpose for the integration, etc) according to your needs.
2. App
It is the initial action of your workflow. The action in your application starts with the statement “When this happens”
The Choose app drop-down has 2 options: Webhook and Scheduler.
If you select Webhook then your workflow will be “When webhook happens…”.
And if you select Schedule then your workflow will be “When Schedule happens….”
- When webhook happens – This will generate a webhook link, which can be added in the triggering app. The data of all/selected action will be sent on this webhook URL. You can capture the webhook response and use them for your further actions in the workflow.
- When Schedule happens – This has the ability to perform a particular action at regular intervals. You can fire a repeated task in the set time interval.
Note –
– The app which sends data on webhook URL is the Triggering App
– The app which receives data is Pabbly Connect
– The app which performs further action is the Action App
- Triggering apps – Pabbly Connect offers various pre-integrated triggering services. These are listed below –
- Pabbly Subscriptions
- Woo Commerce
- WordPress
- Survey Anyplace
- Aida Form
These services can be directly selected as Triggering apps and you can add further action for it. We are looking to add more services as Triggering apps in a few days.
This is all about the basic terminology related to the apps.
Now let’s learn about the second step (Action app) of your workflow.
3. Action
This is the next step of your workflow. When you complete the setup of triggering app (When this happens…..) you need to define further actions (Do this……)
Suppose you have selected webhooks as the trigger and API as action then the workflow will be like –
“When webhooks happens, do API action……”
Thus the initial fields in the action block (Do this…….) are “Choose APP” and “Choose Method”.
Now to define the action you need to select an app from the “Choose App” drop-down and its respective method from the “Choose Method” drop-down.
Note: There are several options in the “Choose App” drop-down, and according to the option you select the option in the “Choose Method” drop-down field will vary.
- Choose App – All the available integrations with different apps are listed here. With that, there is a custom selection between API, Router, Mapping, etc. These will help in designing the workflow according to your needs.
-
- API – With this option, you can fire the endpoint of any third-party applications.
Almost all the application provide their API to perform the actions from the backend.
In this, you get an endpoint URL and a method.
For example, you can check the API of Pabbly Subscriptions – https://www.pabbly.com/subscriptions/api/
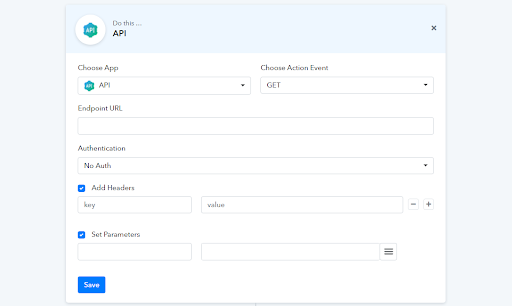
When you select API you will get to see the following fields –
2. Choose Action Event – The request type for the API. It can be POST, GET, PUT, DELETE, PATCH, and any custom request.
3. End Point URL – Simply add the request URL of the application.
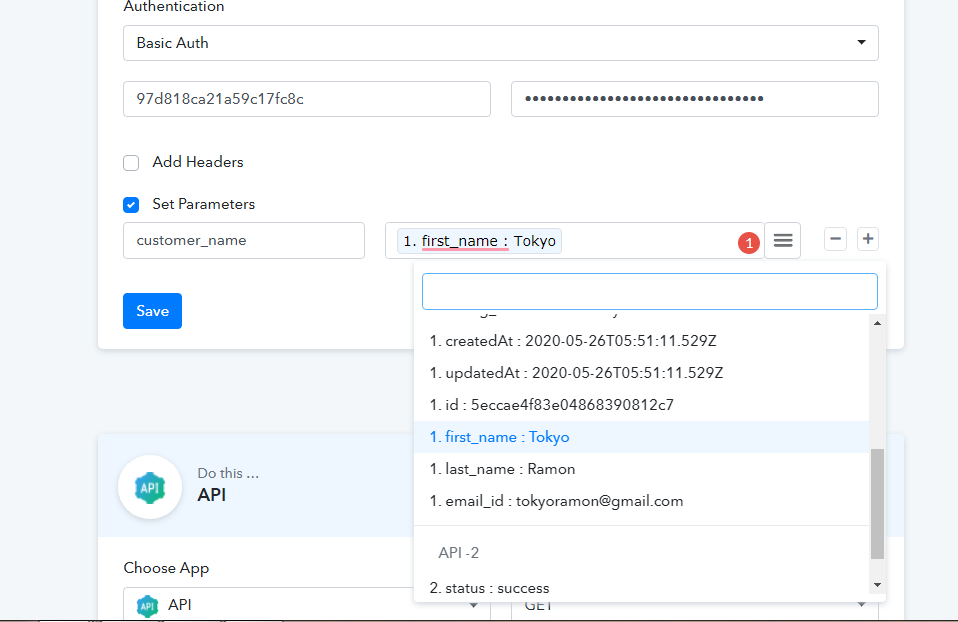
4. Authentication – Different applications have their own authentication types. For the API option, we support -Basic Auth – Need to add the API key and Secret key. You will get this in the application account.No Auth – Sometimes there is no authentication required. So here you select this option.
5. Add Headers – It is an optional field. This depends on the API parameter. Some API has a header parameter. If needed you can add the key and the value in the respective field.
6. Set Parameters – These are the general values of the API. You need to fill the key and the value in the respective field.
In the set parameter field, you will add the key parameter of the API, and in the value – you can either hardcode a text or click on the selection box, and choose any attribute which you get from the triggering apps.
When you click on the selection box, you will get to see all the data received from the triggering app, and you can select any one or multiple items.
Use the plus sign “+” to continue adding the parameters.
This is the basic set up for firing an API. Further, there are some more fields which appear after selecting some particulars. They are optional and you can check the details below.
7. Payload type – If you select the action method or URL request type as POST and PUT then you need to select a payload type. This depends on the application how they are accepting the data. We are providing the option for JSON, XML, HTML, FormData, Encoded form, and plain text. So you need to select the payload depending upon the application’s API you are using.
8. Wrap request in array – If you are putting a payload type, then you need to provide if you want to wrap the request in an array or not. If you select “Yes” then the Set Parameters will be concluded in “[] parentheses”
If you select “No” then the Set Parameters will be concluded in “{} curly brackets”.
This completes all the information related to API action.
Now, let’s move forward to learn about the next option in the “Choose App” drop-down.
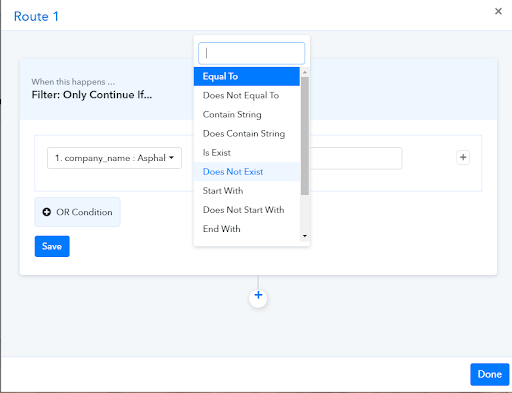
4. Filter
This is a simple option to create the “If/Else” condition in your workflow.
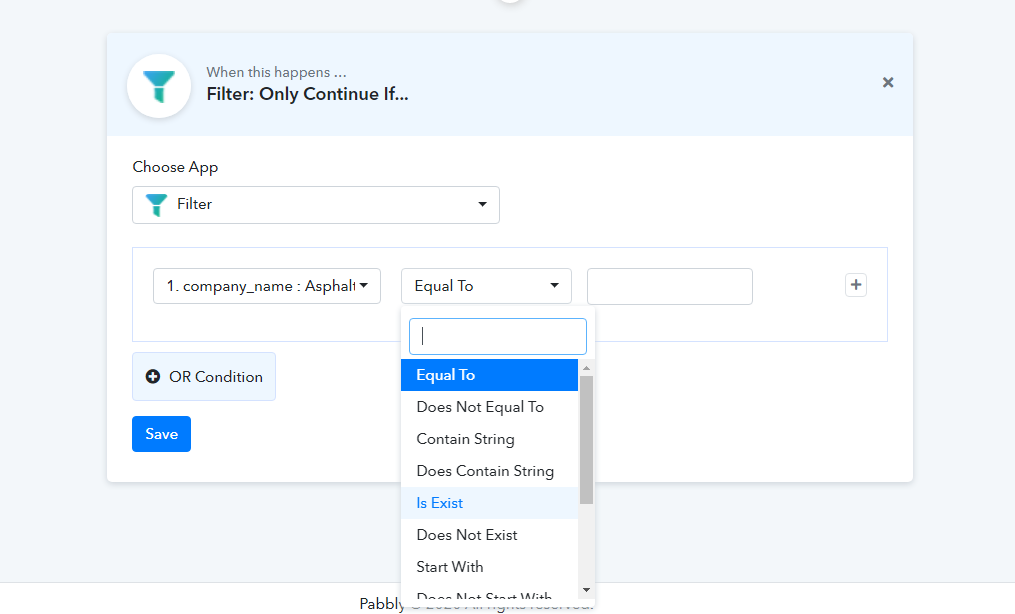
In the filter, you need to define two variables namely Condition and Comparison.
1. Condition – Here in the first drop-down field, you will find all the responses from the triggering apps. You can select anyone.
2. Comparison – Here you will choose how you compare the first field with the other. Like if you choose –
- Equals to – Then condition will be “If data in the first field is equal to the data in next field”.
- Does not equal to – Then condition will be “If data in the first field is not equal to the data in next field”.
- Contains String – Then condition will be “If data in the first field contain a particular string of the next field”.
- Does not contain string – Then condition will be “If data in the first field does not contain a particular string of the next field”.
- Is Exist – Then the condition will be “The data in the first field must exist in the workflow.
- Does not exist – Then the condition will be “The data in the first field must not exist in the workflow.”
- Start with – Then the condition will be “The data in the first field starts with the data in the next field.”
- Does not start with – Then the condition will be “The data in the first field does not start with the data in the next field.”
- End with – Then the condition will be “The data in the first field ends with the data in the next field.”
- Does not end with – Then the condition will be “The data in the first field does not end with the data in the next field.”
- Less than – Then the condition will be “If data in the first field is less then the data in the next field.”
- Greater than – Then the condition will be “If data in the first field is greater then the data in the next field.”
3. Condition – Here you add the custom data with which you are comparing the data from the 1st field.
Note – If the added condition is satisfied in the filter then only the workflow will move forward.
4. Or Condition – If you want to put a further condition for the filter then you can use this option.
So this is all the information related to Filter action. Let’s move forward to learn about the next option in the “Choose App” drop-down.
5. Router
This option can be used to provide a path to your workflow. You can direct your data to different streams based on the condition you add here.
You add the comparison same as you added the filter, but for multiple paths.
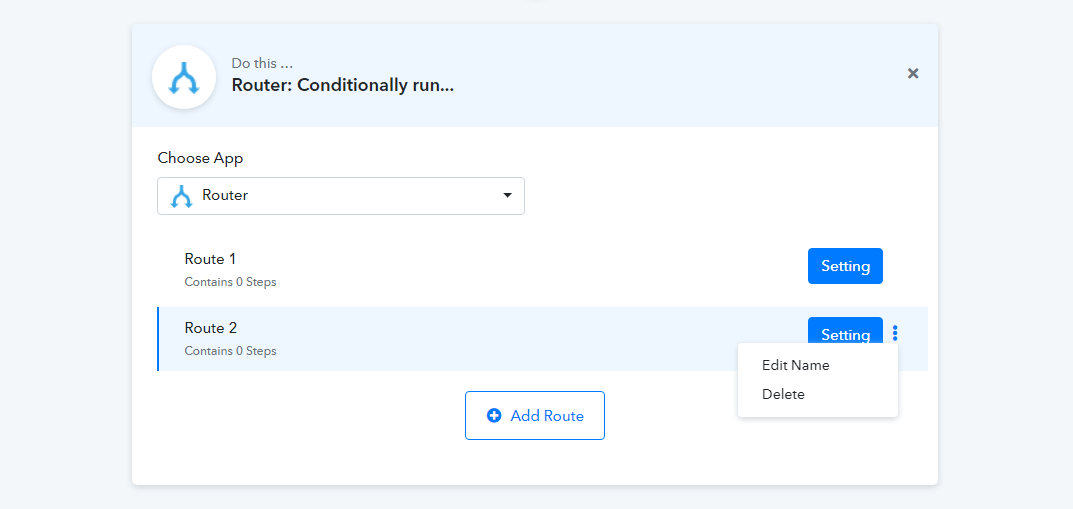
Let us understand this through a sample condition of the router. You can make flow like –
Route 1 – If the customer email contains the “GMAIL(@gmail.com)” domain then send the file A.
Route 2 – If the customer email contains “Custom domain (@abc.com)” then send the file B.
Use add route button to add more conditions according to your needs.
You can also remove or edit the name of the route from the 3 dots action button.
Click on Settings to make the condition accordingly.
This completes all the information related to Router action. Let’s move forward to learn about the next option in the “Choose App” drop-down.
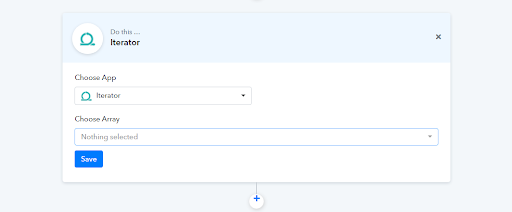
6. Iterator
This is used when you need to enumerate elements from the collection of your data.
You will need to choose the array to iterate the values.
If you add an iterator in the workflow then the selected array will be enumerated.
This completes all the basics related to Pabbly Connect’s working.
We hope this article proved helpful to you.
But still, if you have any questions feel free to contact our support team.
We’ll be happy to help you out.


