Ideal For: All the gym equipment manufacturers, fitness equipment shops, sports shops and other merchants can use this method to sell fitness equipments online.
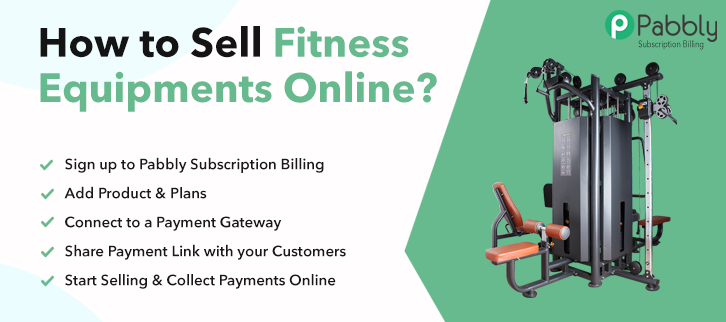
Why Choose this Method for Selling Over any Other Solution?
Unlike any other solution, this method allows you to:
- List and sell your fitness equipments for FREE. Absolutely no payment required.
- No commission deducted on sales.
- Collect payment through multiple payment modes from a single checkout page.
- Sell one time or recurring subscriptions of your fitness equipments.
- Sell and collect payment in any currency as per your requirement.
- Give discounts on your products by offering special coupon codes.
- Add sales commission agents to help you in selling your fitness equipments.
The fitness equipment industry is massive and growing. For instance, according to Allied Market Research Group in 2019, this market was valued at $11.5 billion. And with the CAGR of 3.5%, it is expected to grow over $15.2 billion by 2027. So many industry leaders are actively pursuing out of the box ideas to beat the competition. And increasingly many of them have resorted to starting fitness equipments business online.
Why would you like to sell fitness equipments online?
The answer is simple when you start selling fitness equipments online, you will be inundated with offers from around the world. This will help you to leverage the best prices for your equipments. Since you really don’t need a brick and mortar store now, you can avoid the red tape of government officials like licensing, utility connections, fire safety inspection, etc. Simply put, you can straight away start your business and start printing money.
Now, to build an e-store, there are a ton of software available online. But keeping affordability and necessary functionalities in mind, I would like to recommend Pabbly Subscription Billing. The reason is it can list unlimited products through its awesome checkout pages. Moreover, you can create unlimited plans and coupons to entice your customers. Other functionalities included are:
- Unlimited Revenues
- Customer Data Import/Export
- No Additional Transaction Fees
- Easy Plan Upgrade/Downgrade
- Comprehensive Sale and Analytics Data
- Tax Management
With these functionalities, you can beat your competition with ease. Now, that I have ignited interest in you, let’s create an awesome checkout page to start your fitness equipments business online.
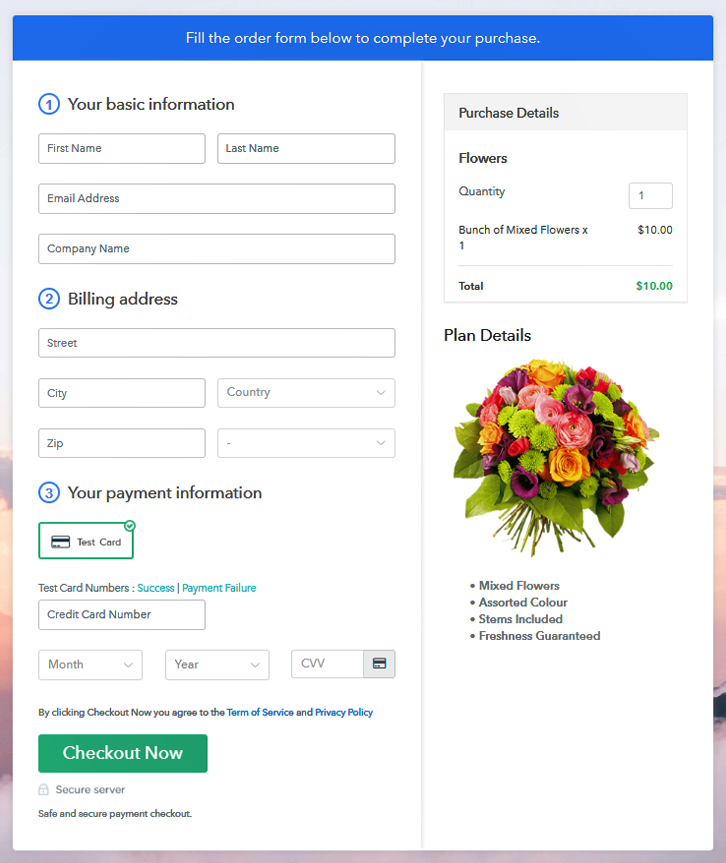
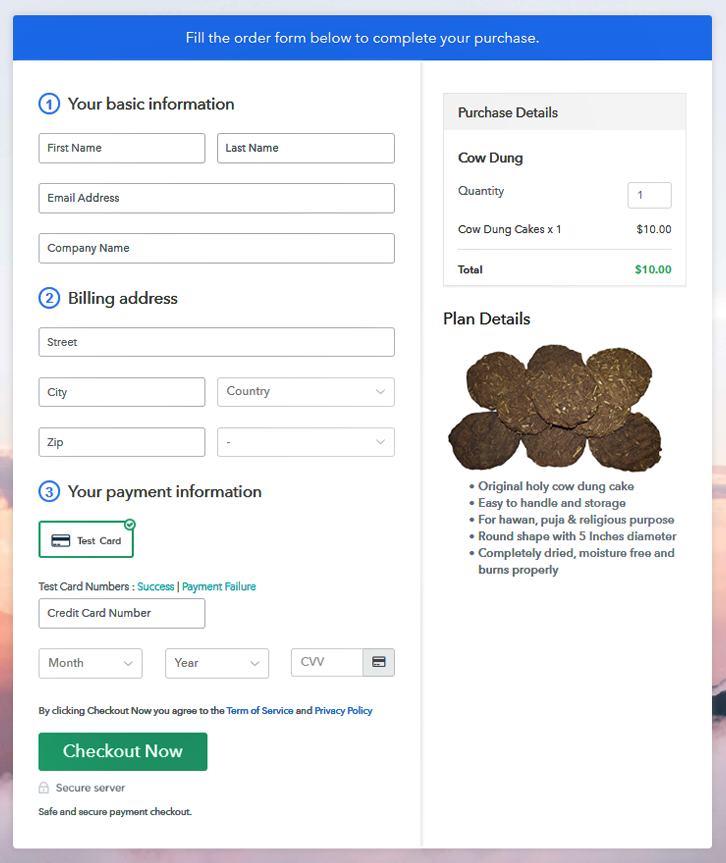
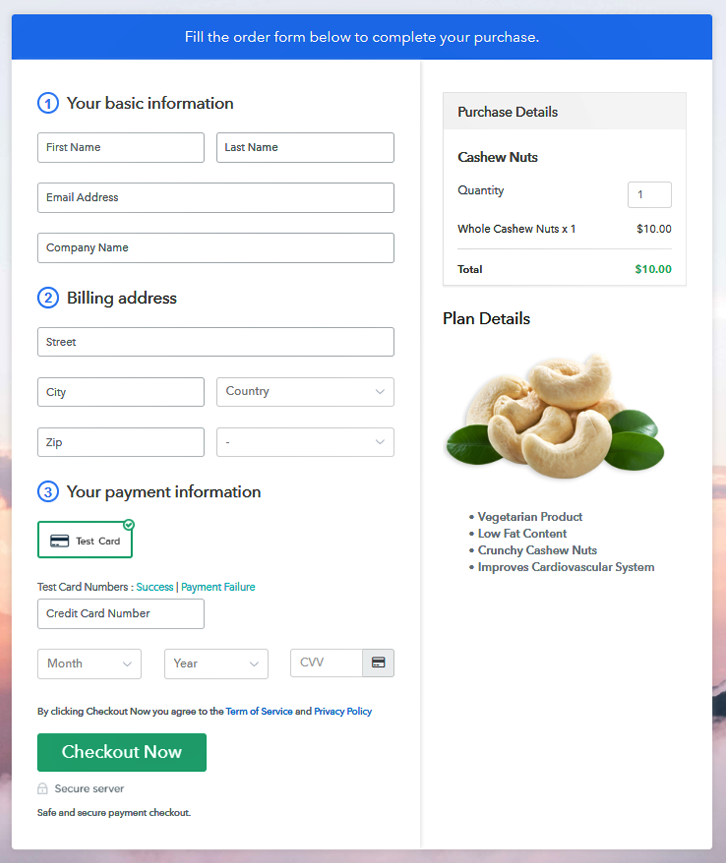
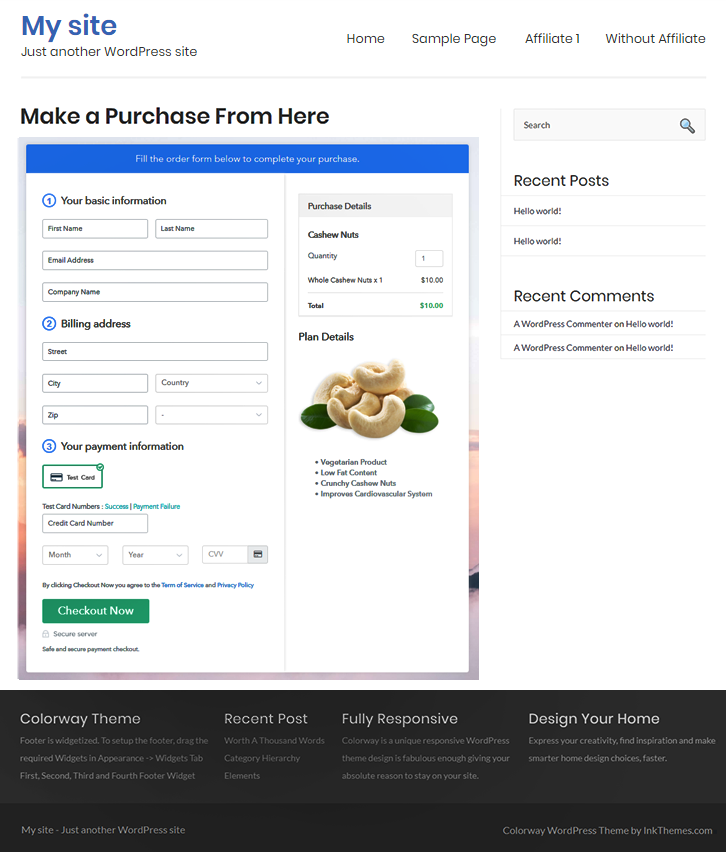
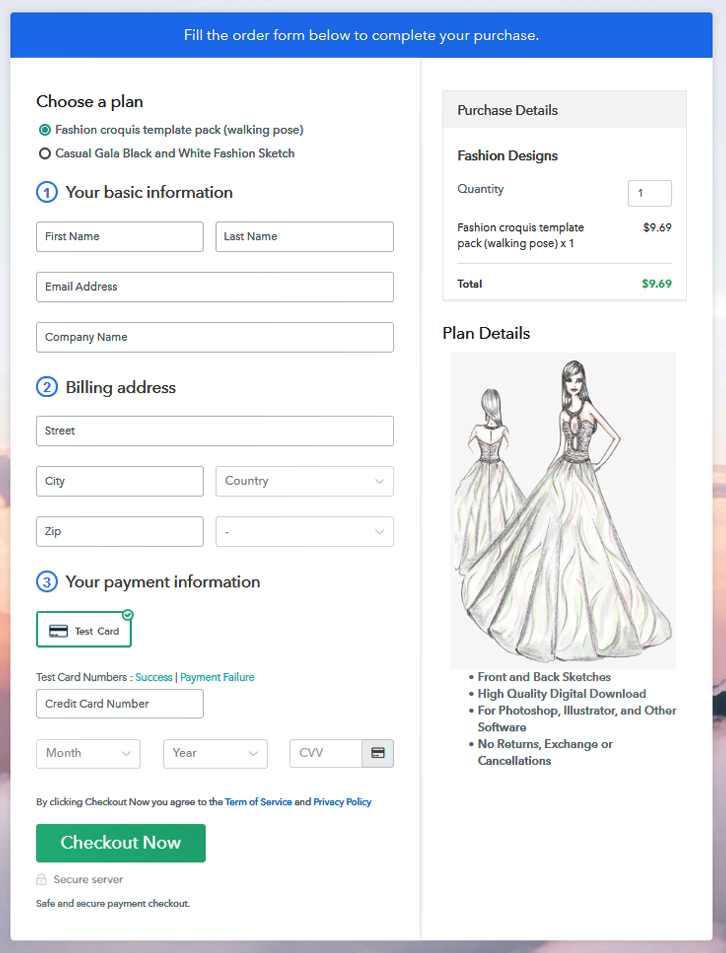
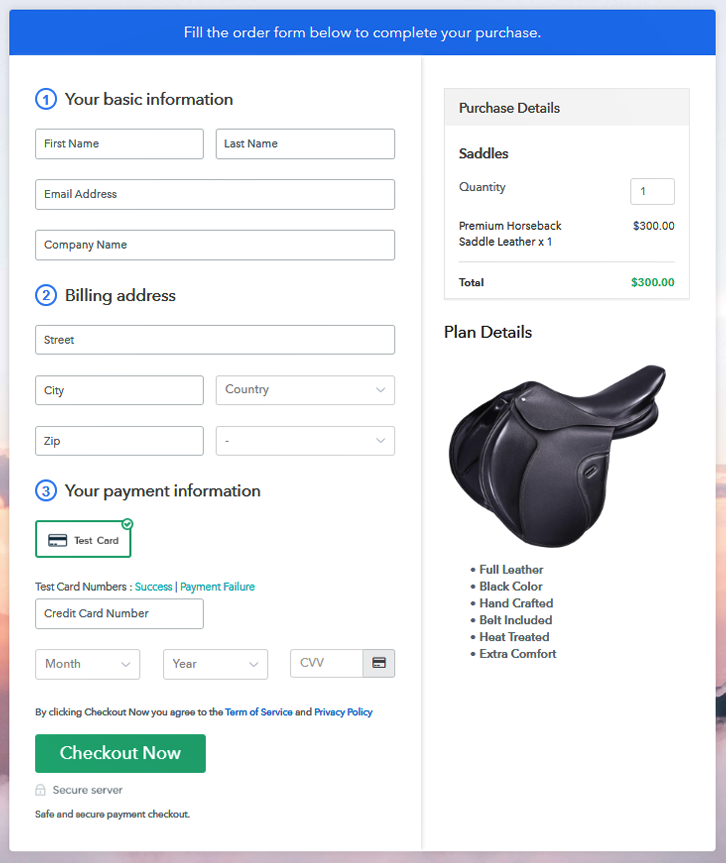
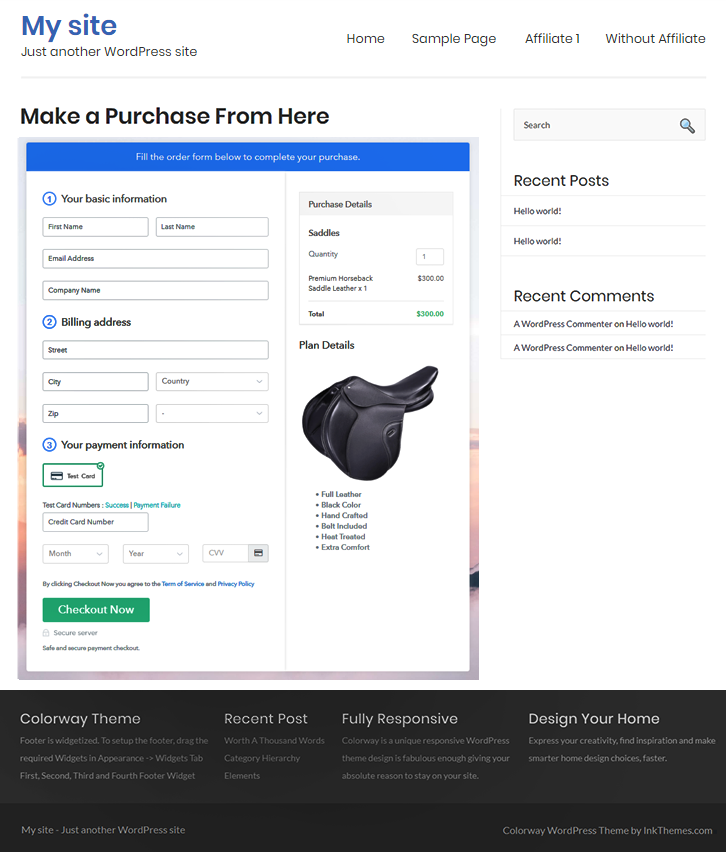
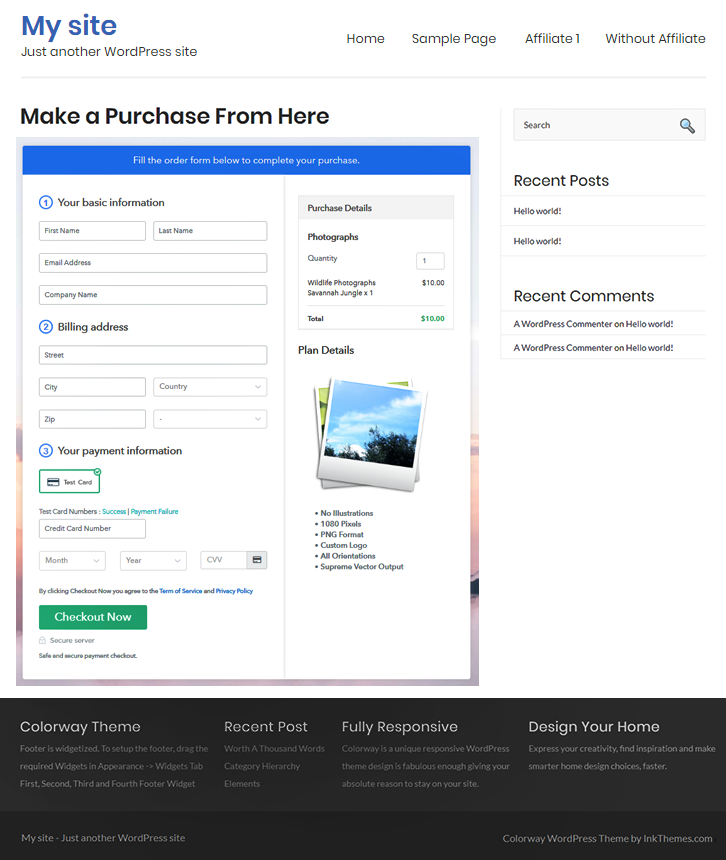
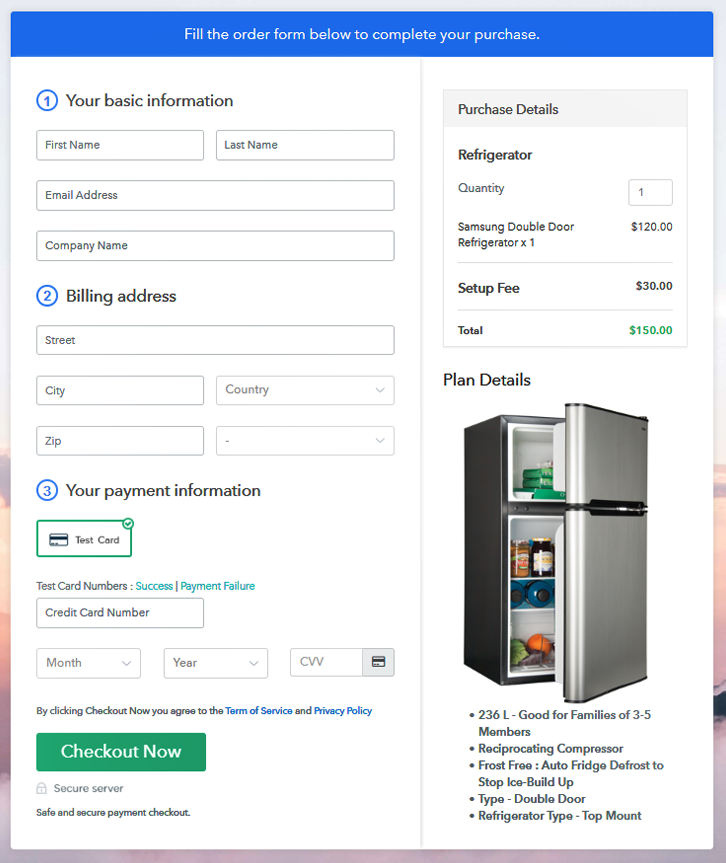
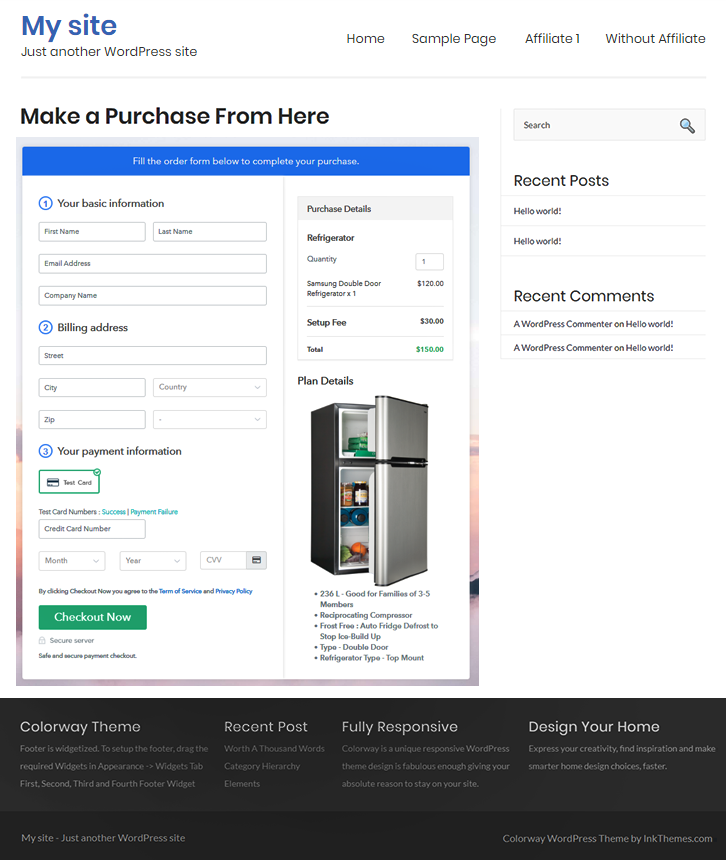
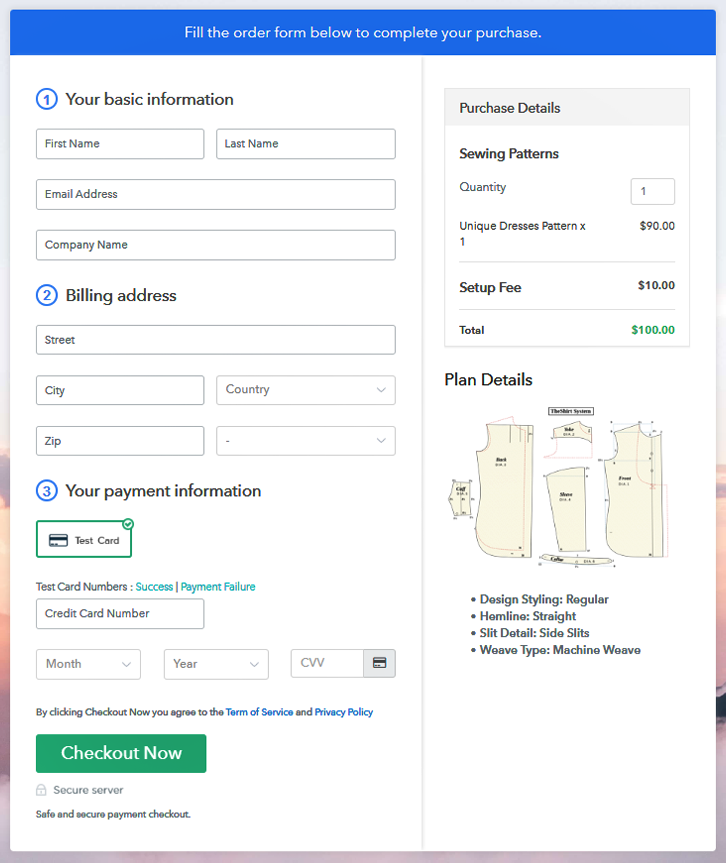
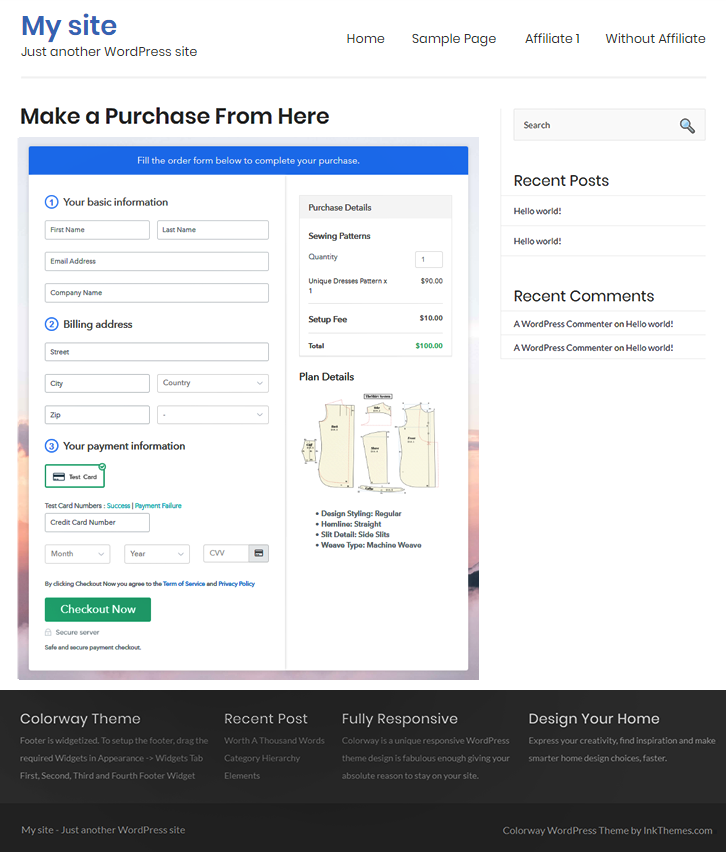
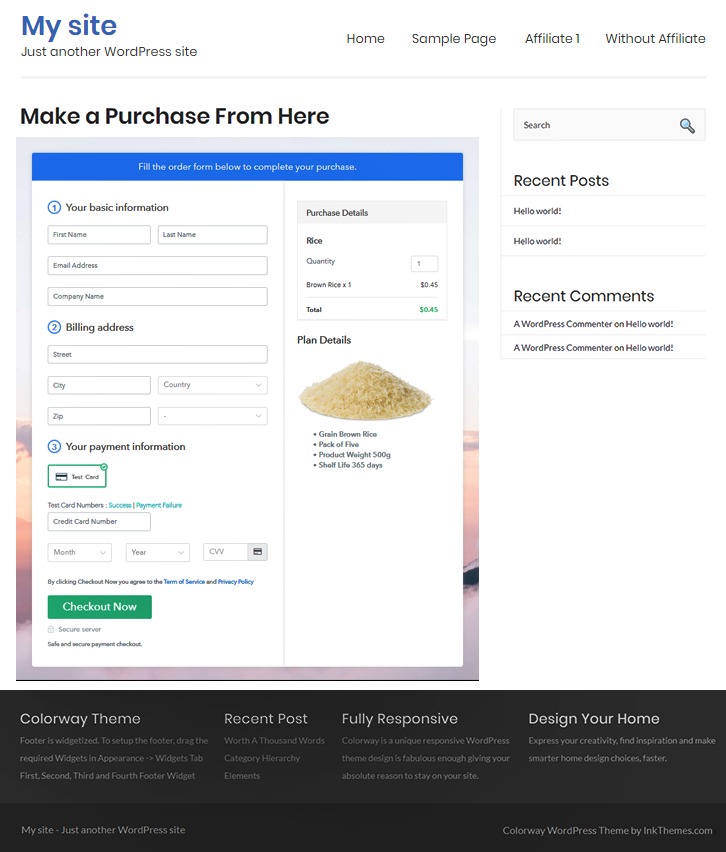
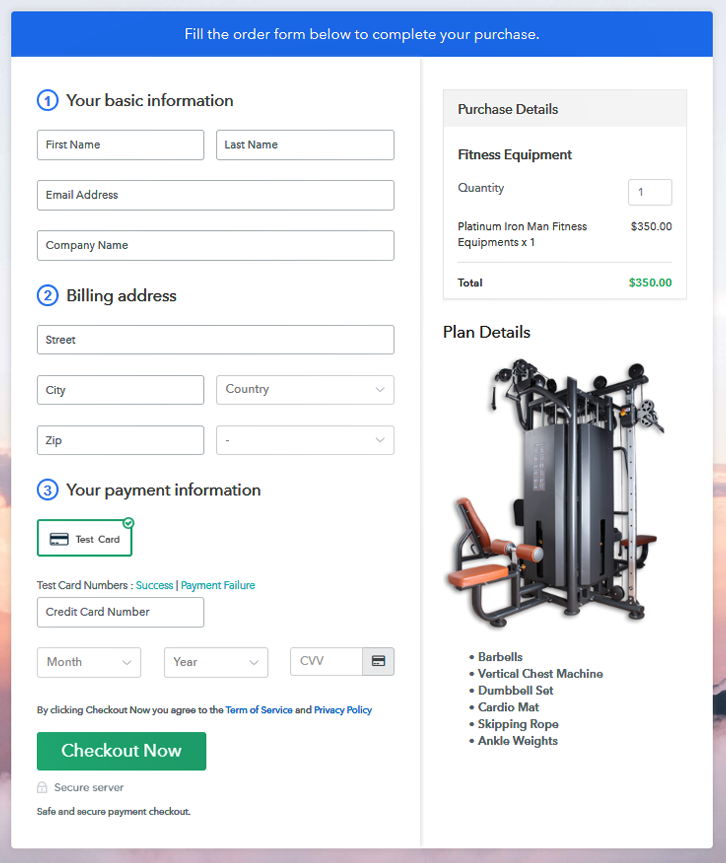
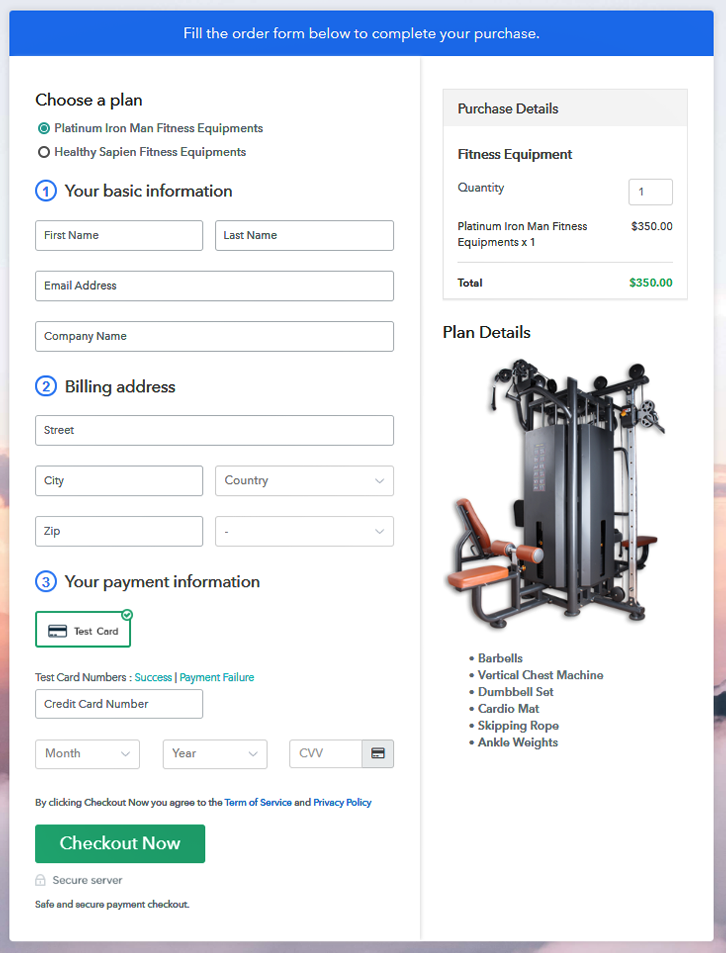
This is How your Checkout Page will Look Like After Creation
Step 1: Log in to Pabbly Subscription Billing

Search for Pabbly Subscription Billing and on landing on the website, click on “Sign up Free“. Here, you will have two choices like either sign in using your Gmail account or as fill in the required fields like name, email, etc and then click the “Sign Up” button.
Sign Up For Free!
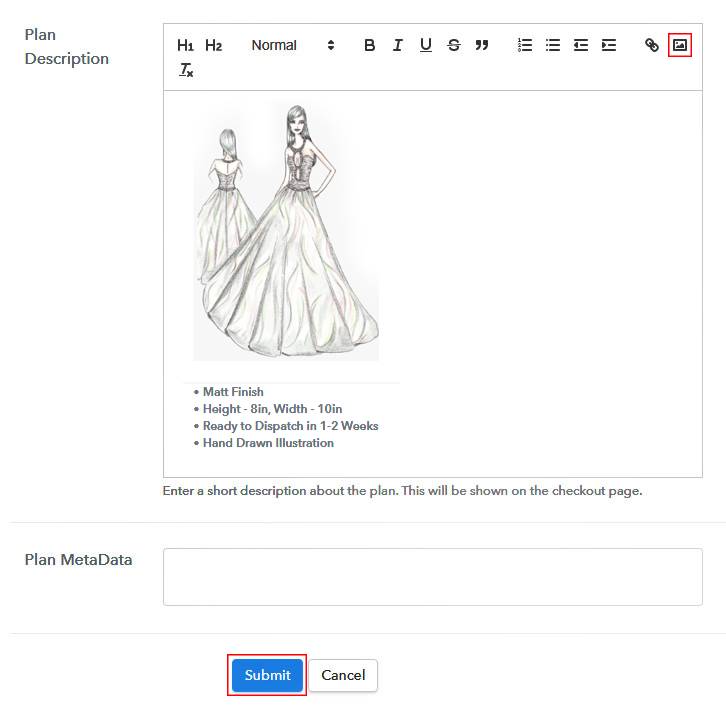
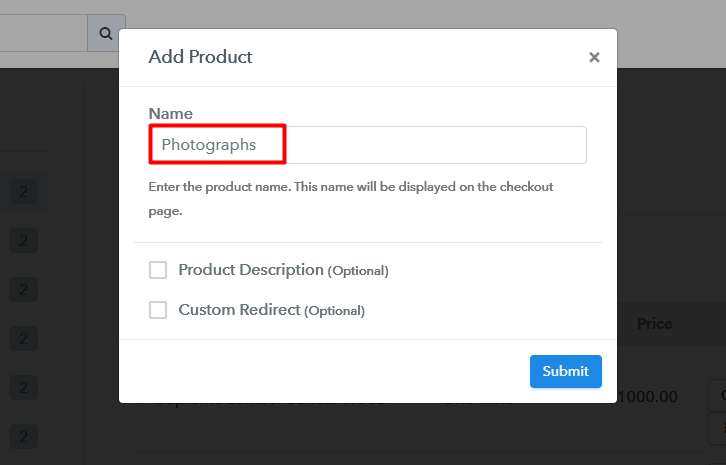
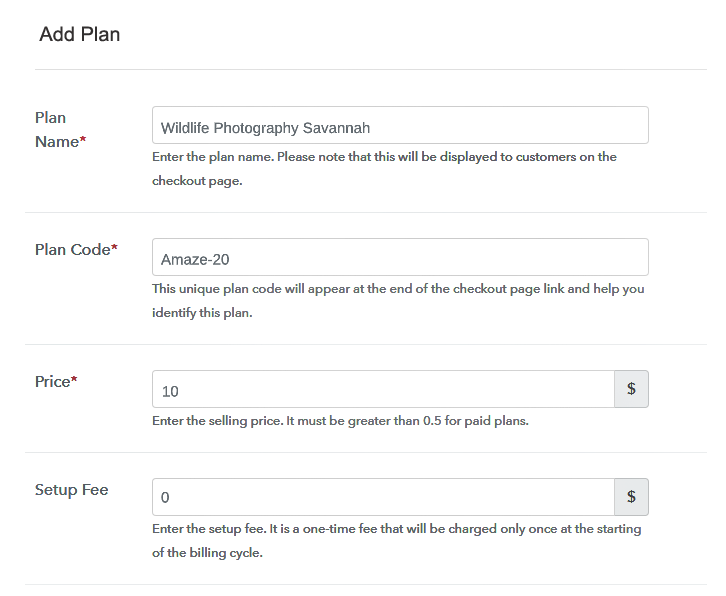
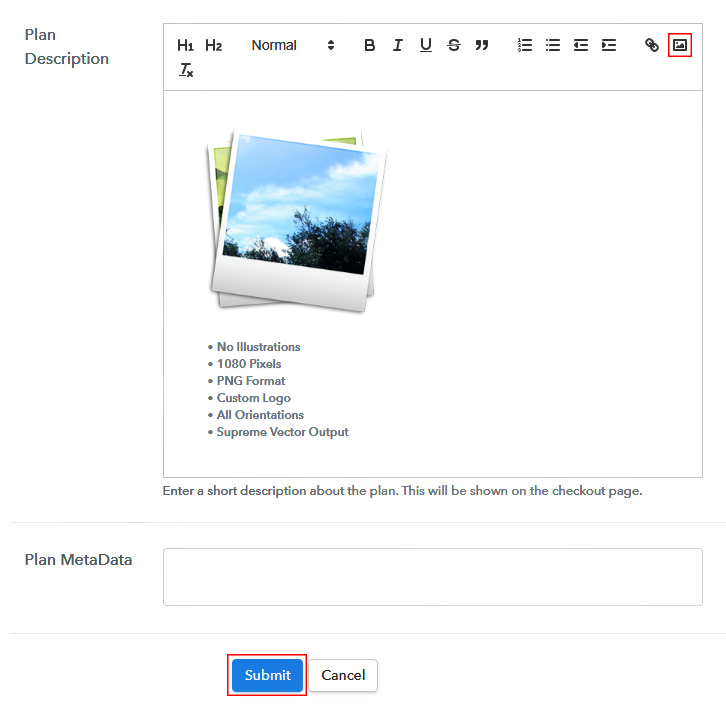
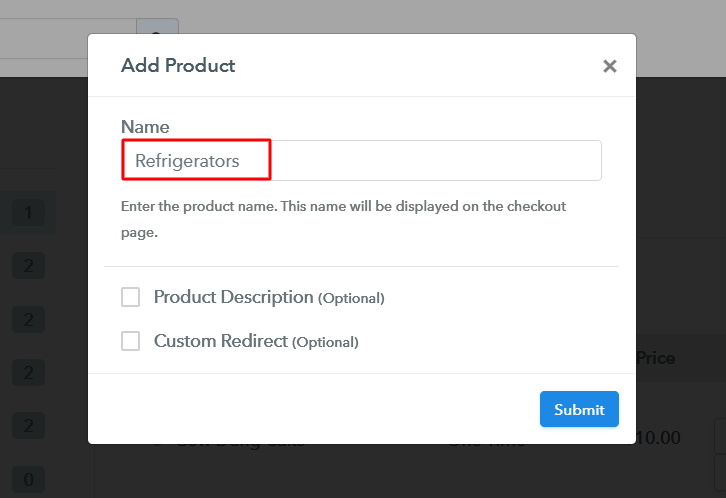
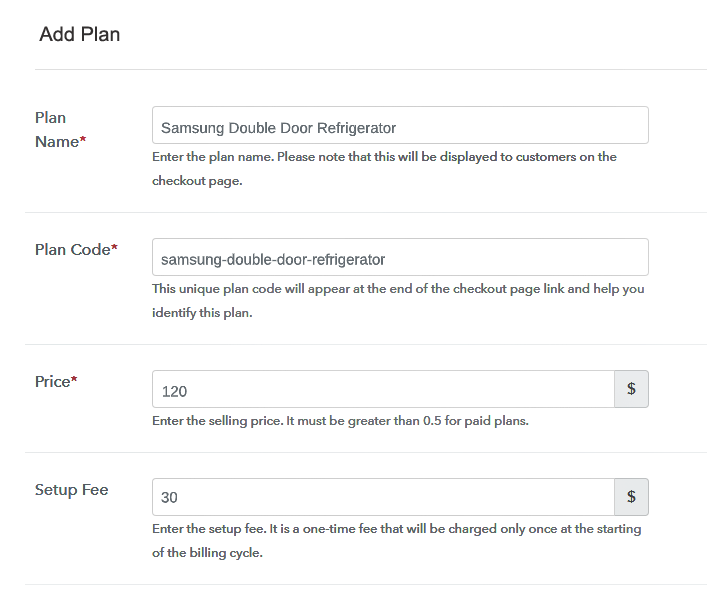
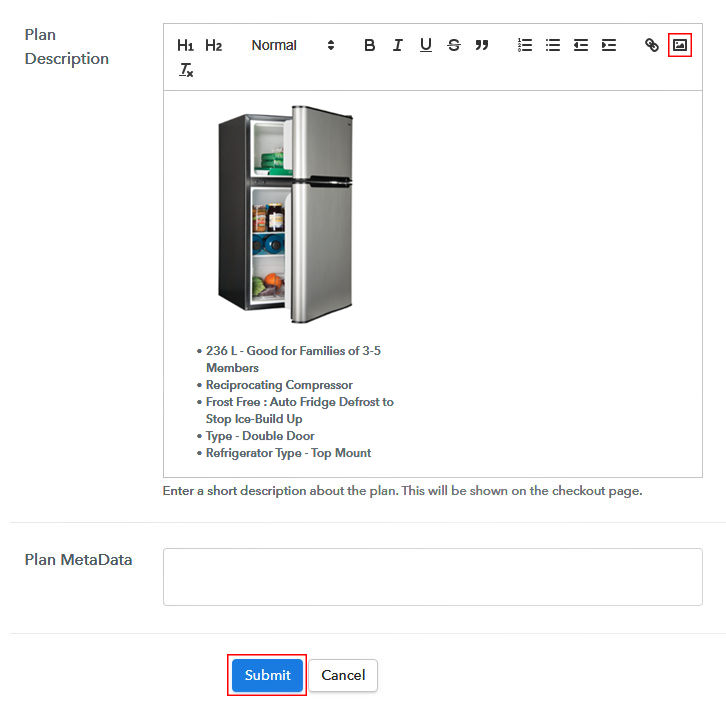
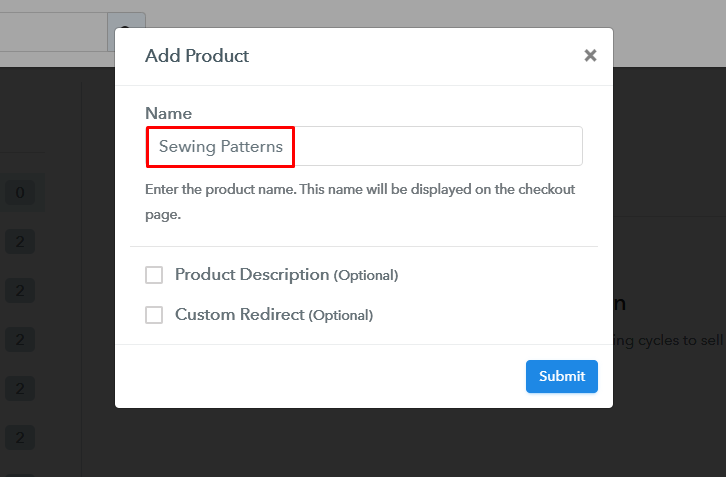
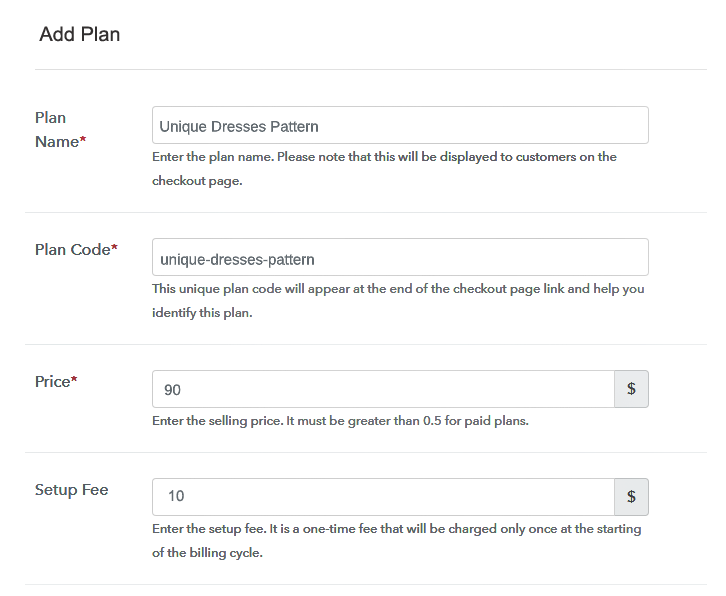
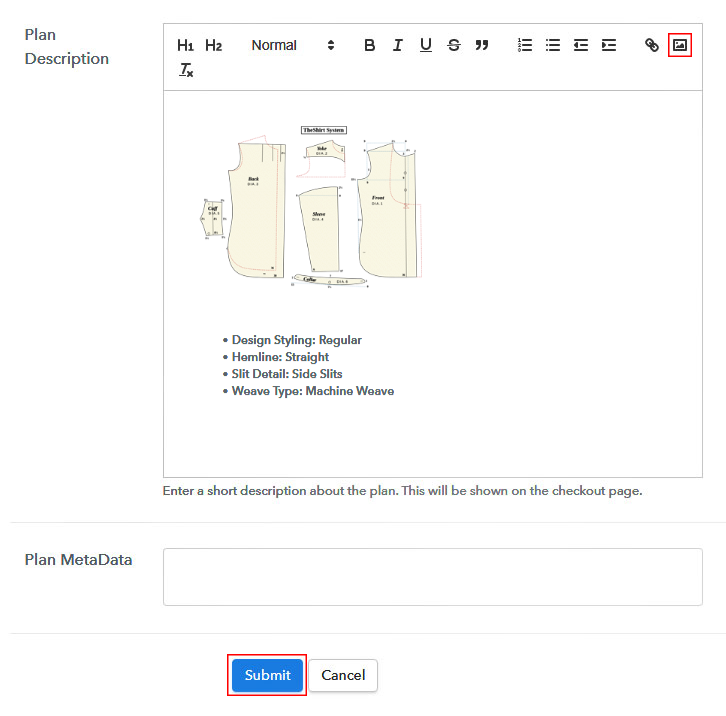
On entering the dashboard, you will find the section “Subscription Billing” and click on the “Access Now” button on it. On clicking the button, you will welcomed by a dialogue box, requesting you to fill the company details like name, currency, and phone number. Now, press the “Continue” button after filling in the details. So, as a merchant, your numero uno priority is to provide your customers with a safe and smooth payment experience. To ensure that Pabbly Subscription Billing comes with a dummy payment gateway, where you can pilot test payment experience of a customer in advance. You can do this by clicking on the “Enable Test Payment” option. Also, multiple payment gateways like Stripe, Razorpay, PayPal, Authorize.net, etc can be easily integrated using the guides given below. But since we have to set up the payment process, we will click on the “Enable Test Payment” option. So, if the payment gateway integration went well then let’s march ahead to add products. Beneath the “Enable Payments” you will find the segment “Add your product” click on it. This will generate a dialog box with a blue button “Add New Product”. Click it. This will generate a pop-up box and you have to add the required product title, in this case, it is the fitness equipments. Fill up the details and your product is created. Note: Here you can add all the products related to the similar category by creating plans for each of them. Now, we are going to create plans to start a fitness equipments business online It is time to add product pricing details like plan name, code, price, setup fees, etc. Also, you can opt for different billing models like one-time payment, recurring, based on cycles, etc. Now, upload some stunning images of your fitness equipments. Furthermore, add some information about fitness equipments like color, cushions, motor rpm etc in bullet points then press the “Submit” button. Moreover, using the same process, you can list more products. Follow up these steps to preview checkout page: Now, copy the embed plan link to insert the checkout page on your WordPress website. Now, when the link is copied, then paste it to the text area of the editor. After pasting the code, now hit the ‘Publish’ button. Your checkout page is embedded. Note: In case you want to sell multiple products via a single checkout page, you can create a multi-plan checkout page otherwise skip this step. Phew, it is finally over !! You managed to create an e-store with the help of Pabbly Subscription Billing through which you can sell fitness equipments online. Now with some experience, you will eventually exploit the full features of Pabbly Subscription Billing and then finally the online market. Although this process has benefited many traders like you, some of you might have doubts regarding the online markets and the steps mentioned above. So, drop your queries in the comment section below, we will respond to you as soon as possible.Step 2: Select Subscription Billing

Step 3: Account Setup

Step 4: Connect Payment Gateways To Sell Fitness Equipments Online

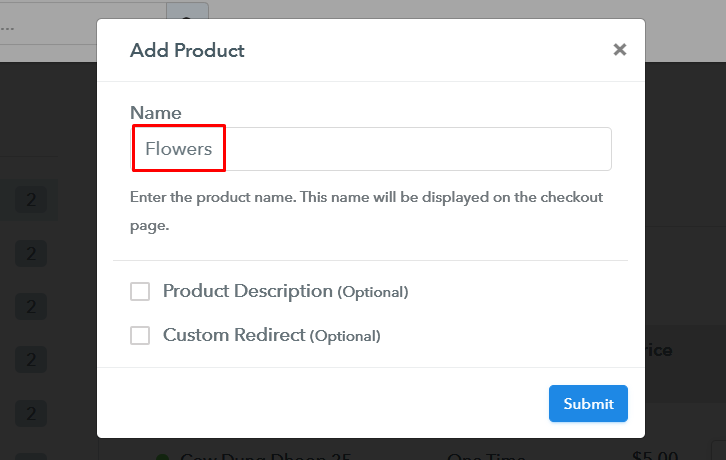
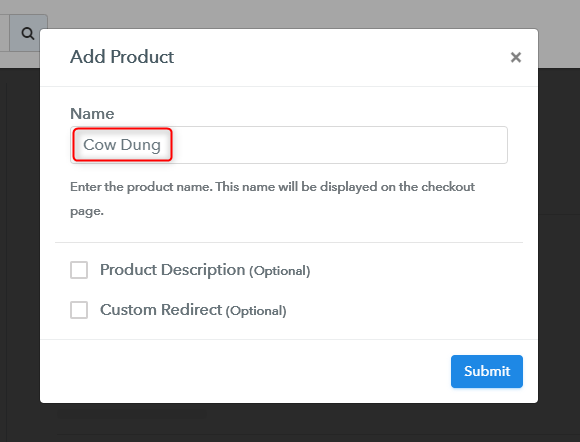
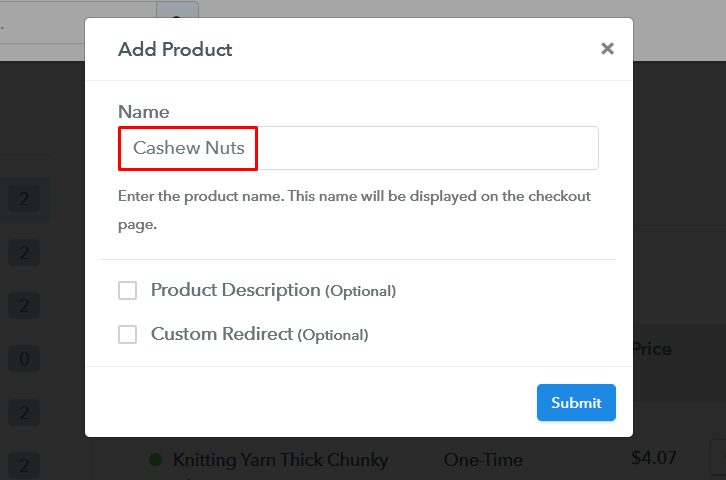
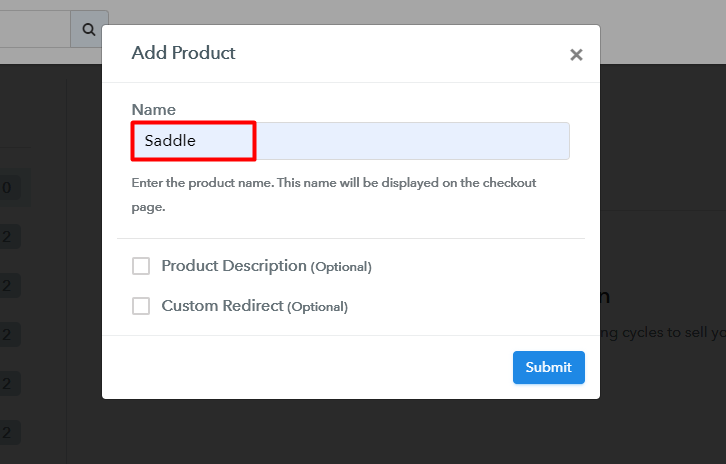
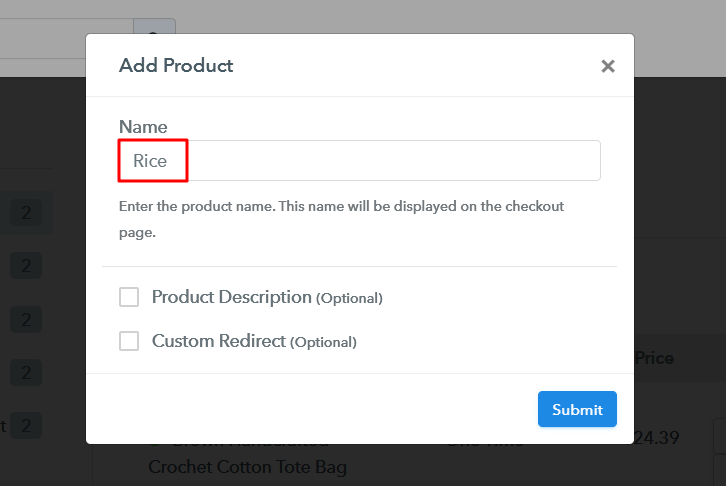
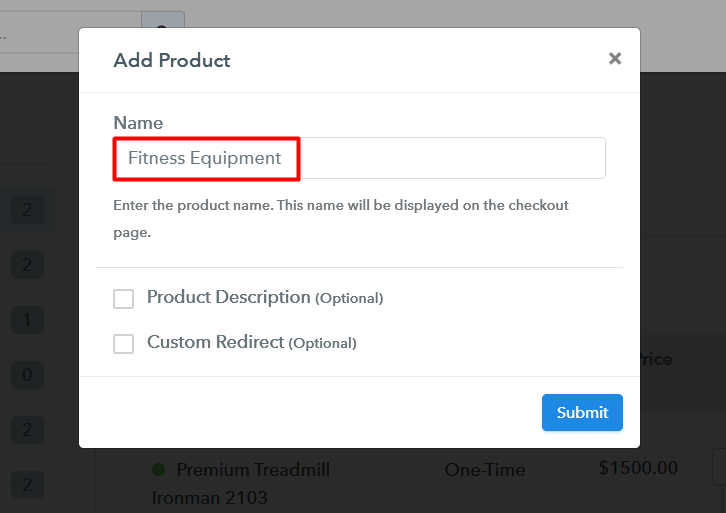
Step 5: Add Your Product

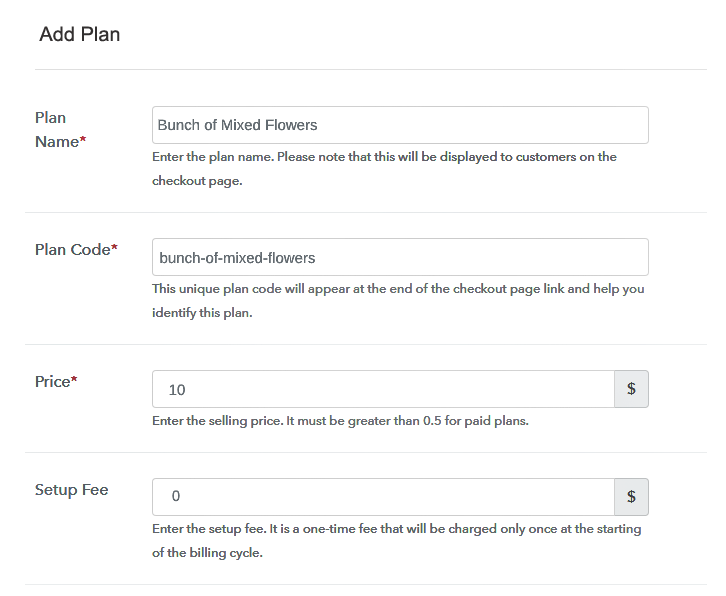
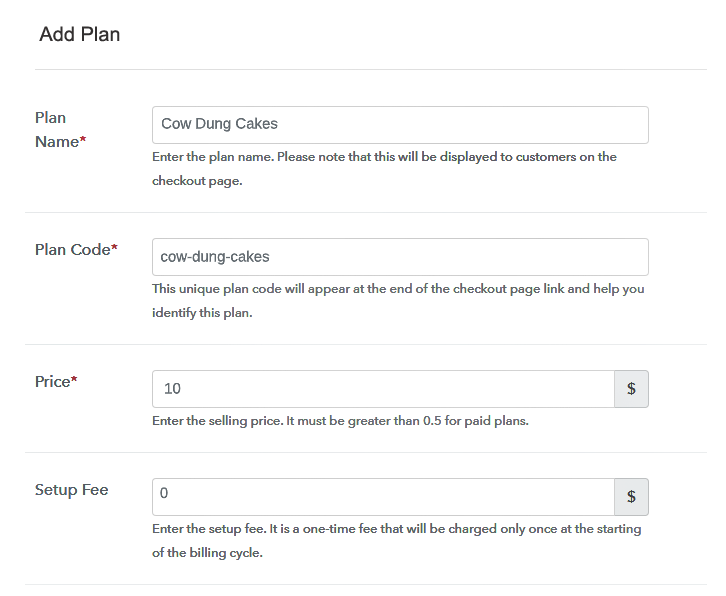
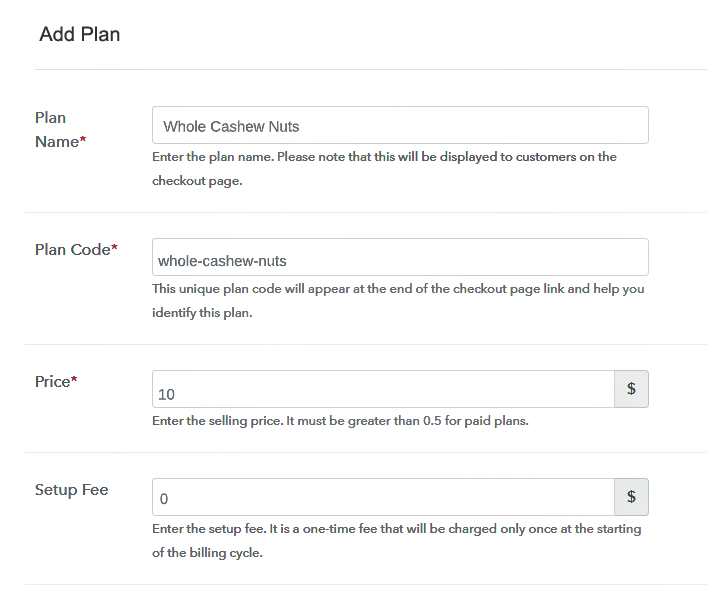
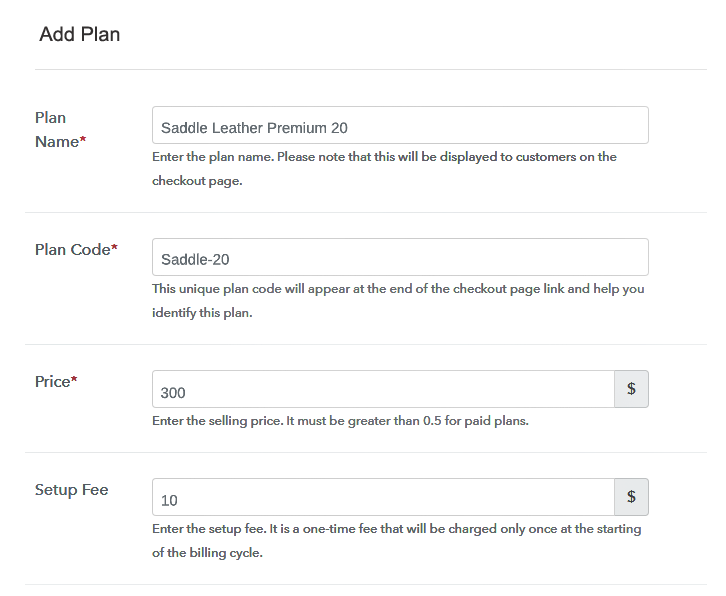
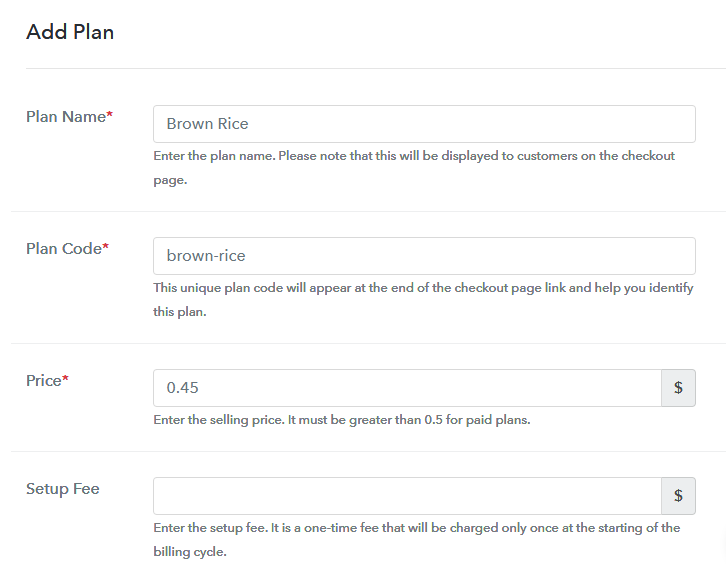
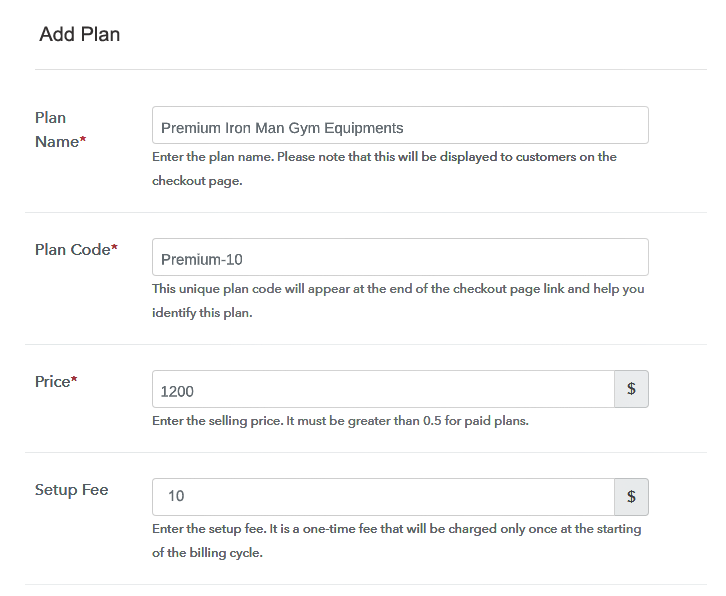
Step 6: Add Plans
(a) Select Add New Plan

(b) Specify the Plan & Pricing Details
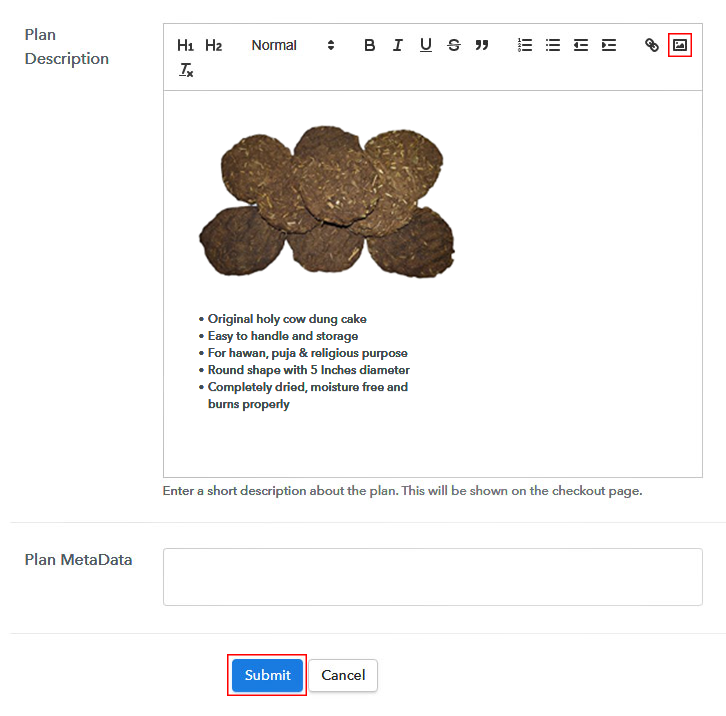
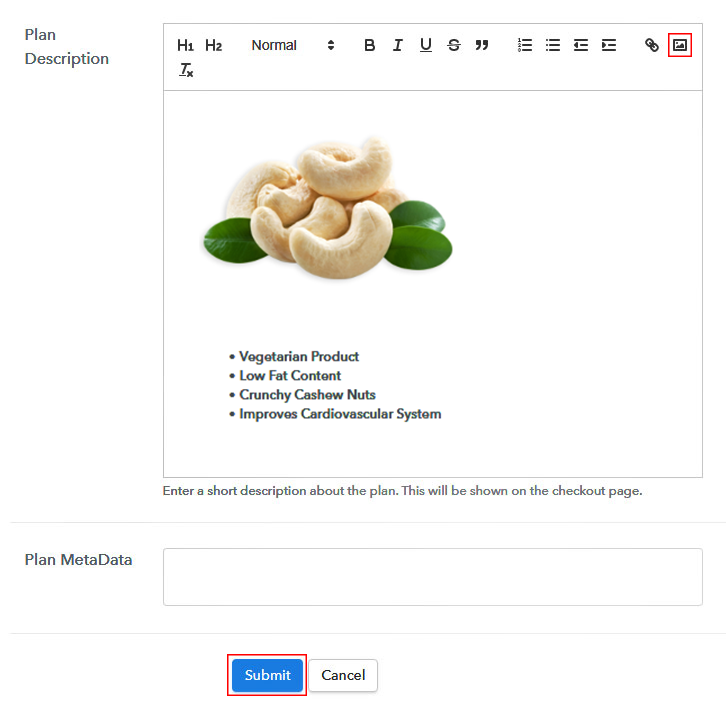
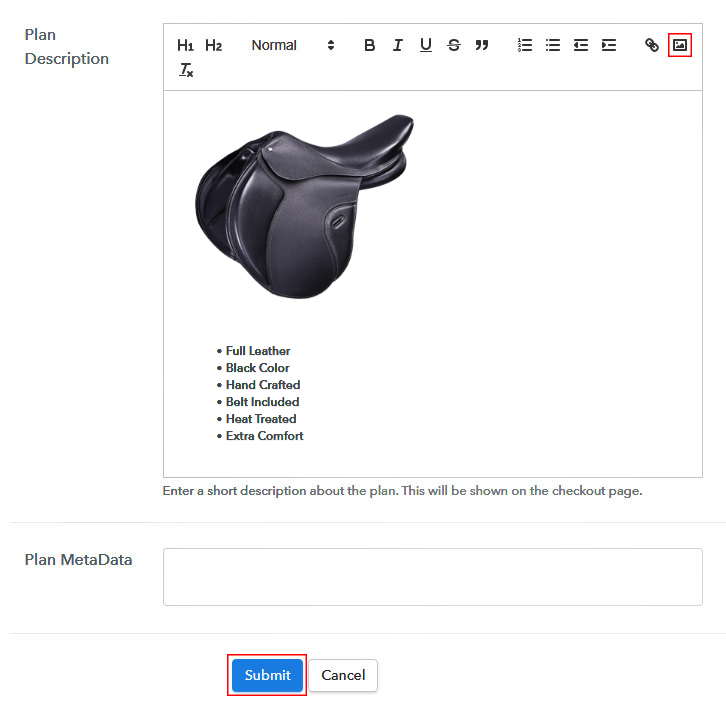
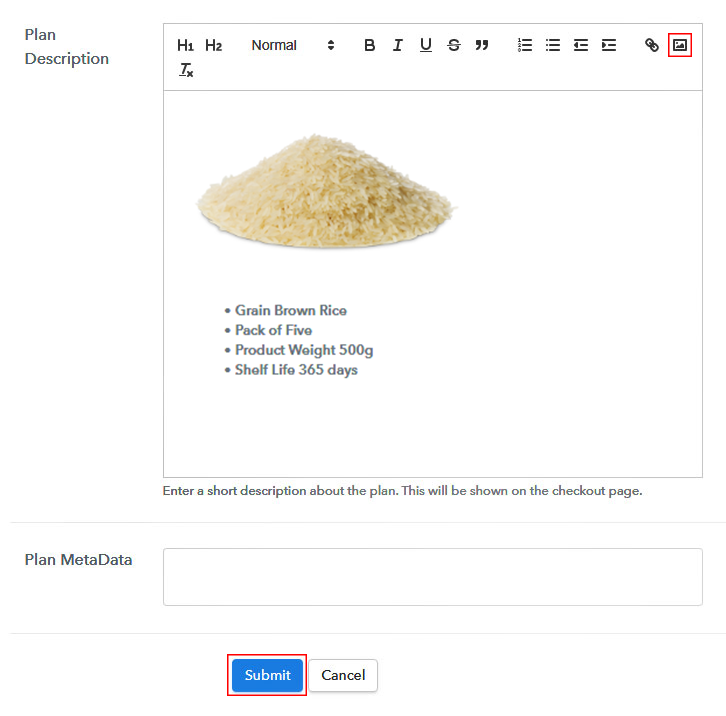
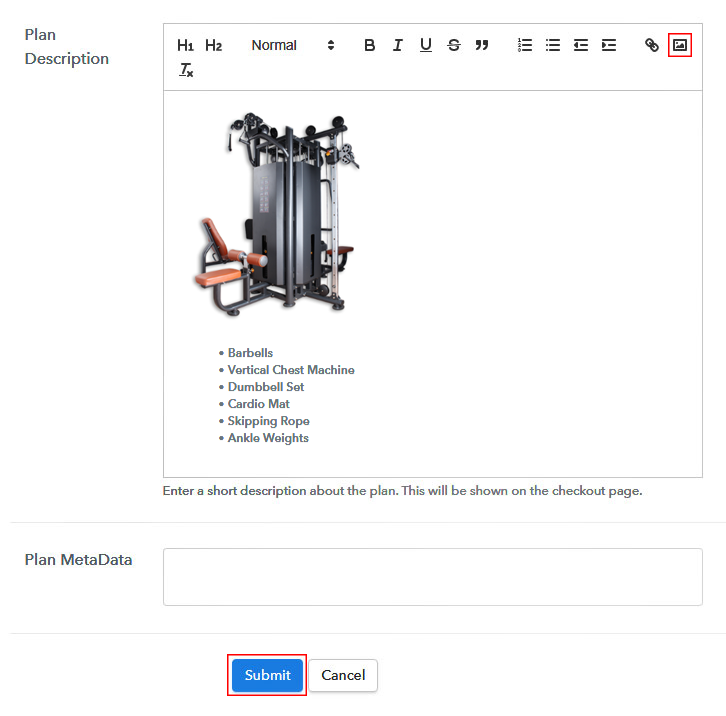
(c) Add Image & Description
Step 7: Share your Checkout Page

Step 8: Preview Checkout Page
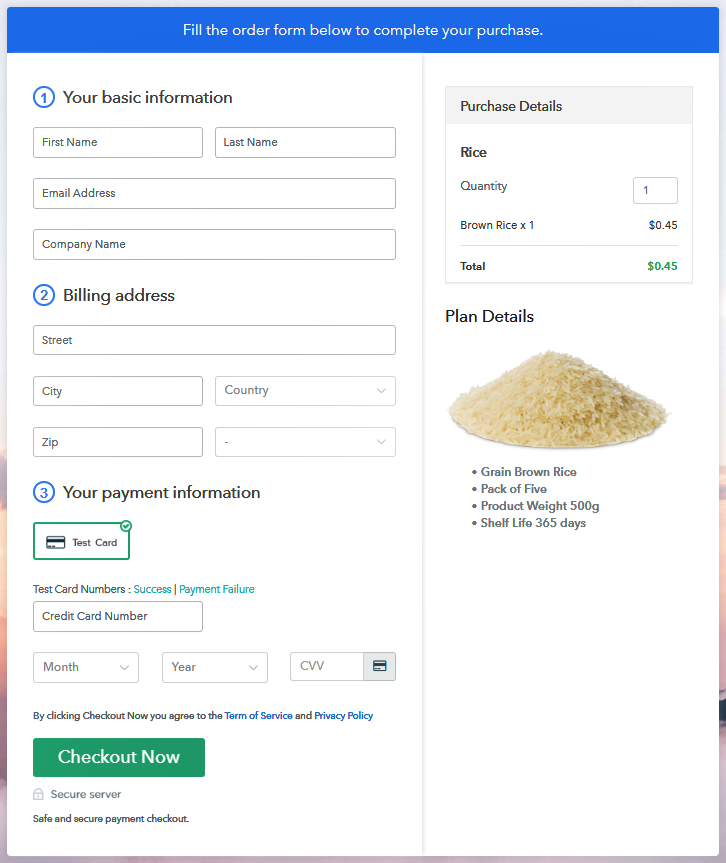
(a) Click on the View Button

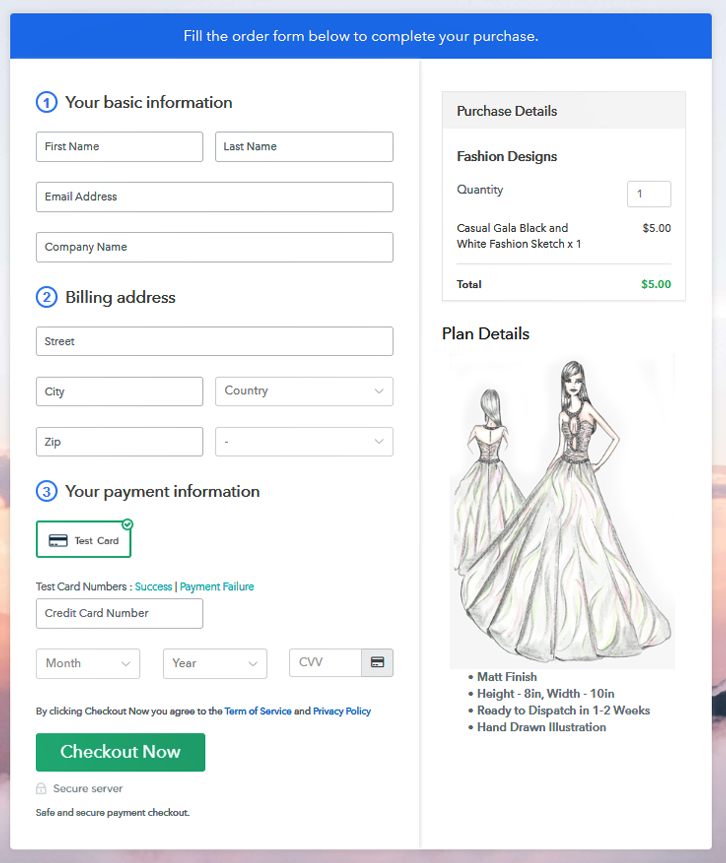
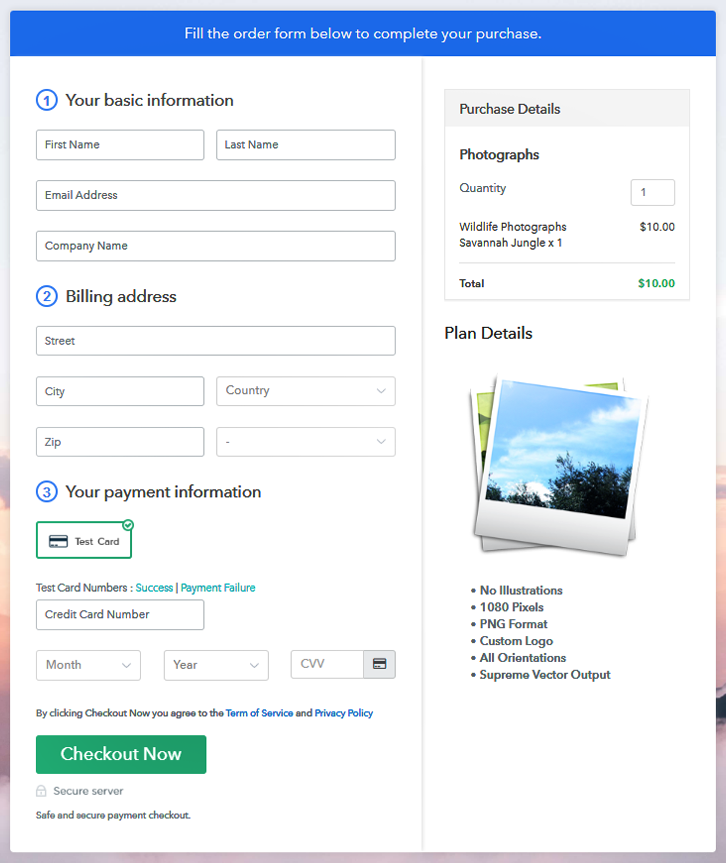
(b) Take a Look at the Checkout Page
Step 9: Embed Checkout Page in Site & Sell Fitness Equipments Online

(a) Edit the Page & Paste the Copied Link

(b) Save & Publish the Checkout Page

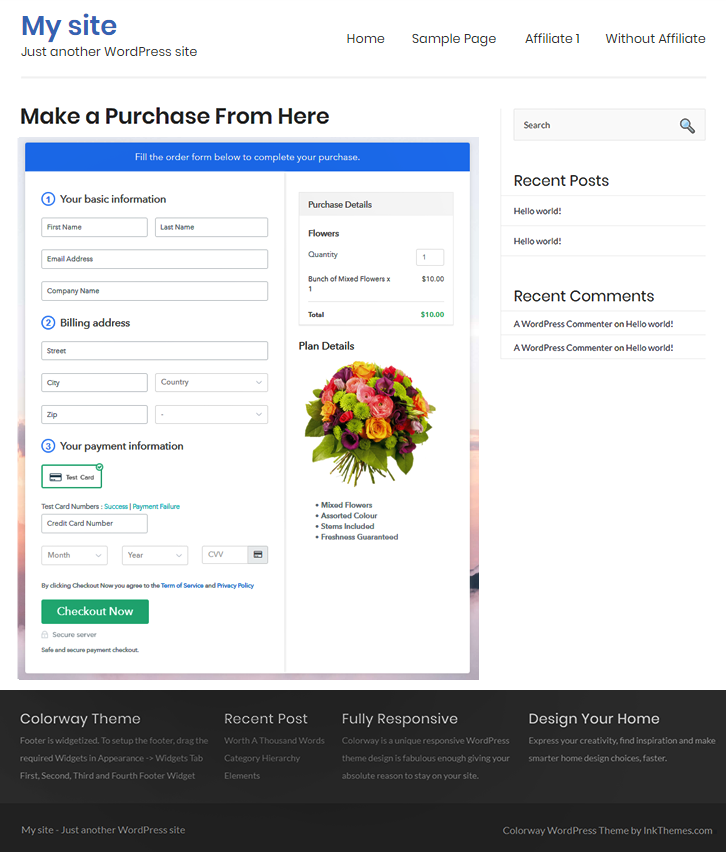
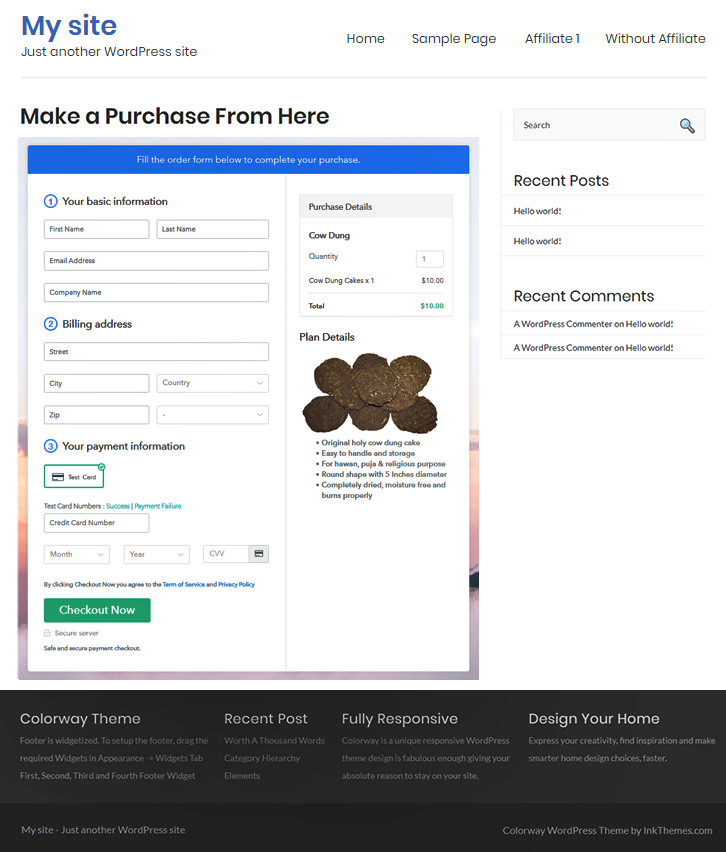
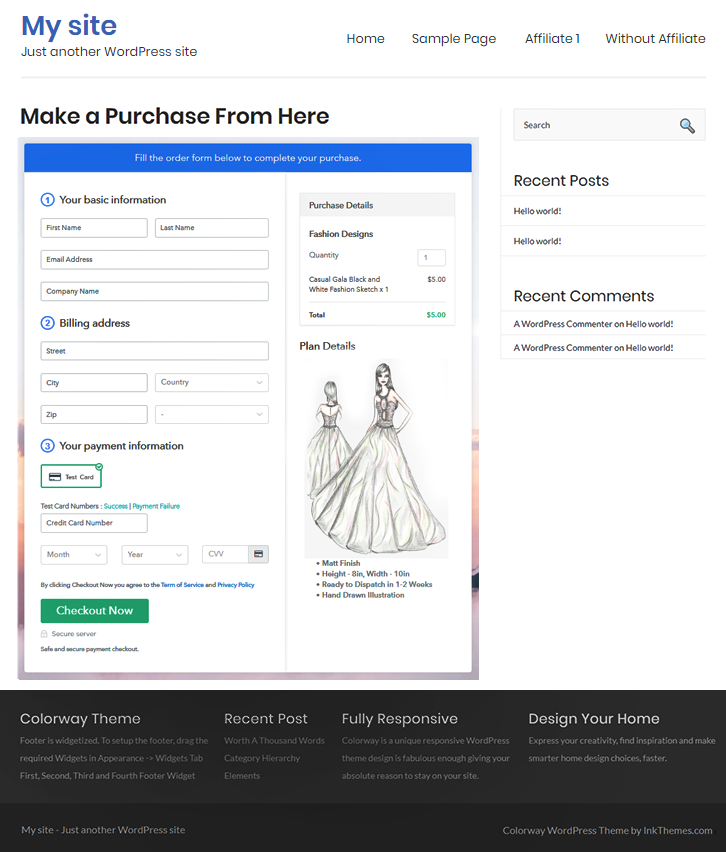
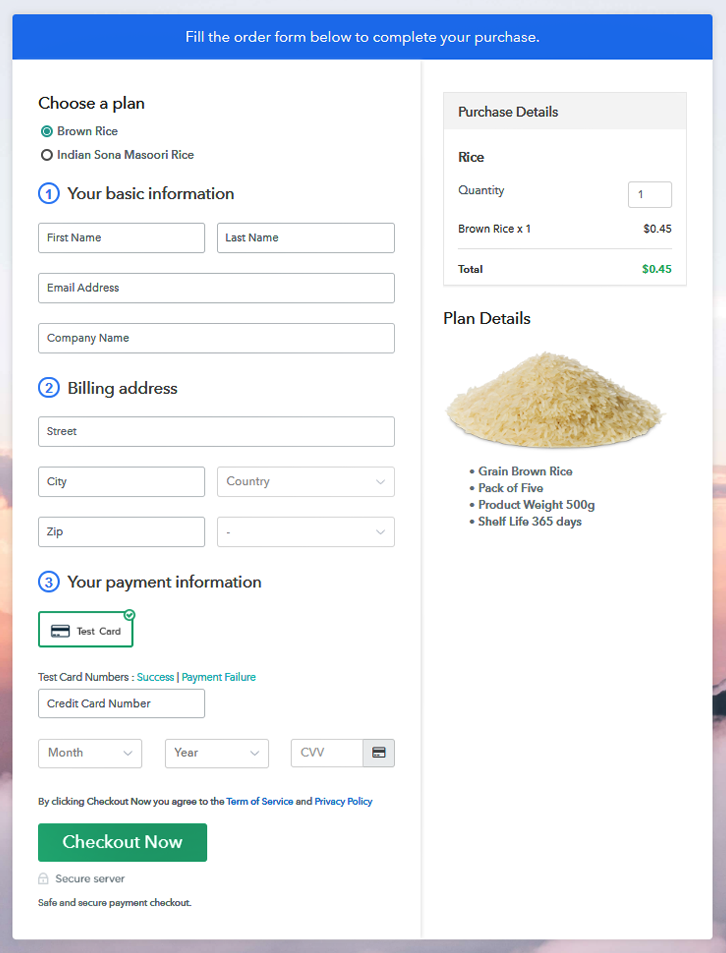
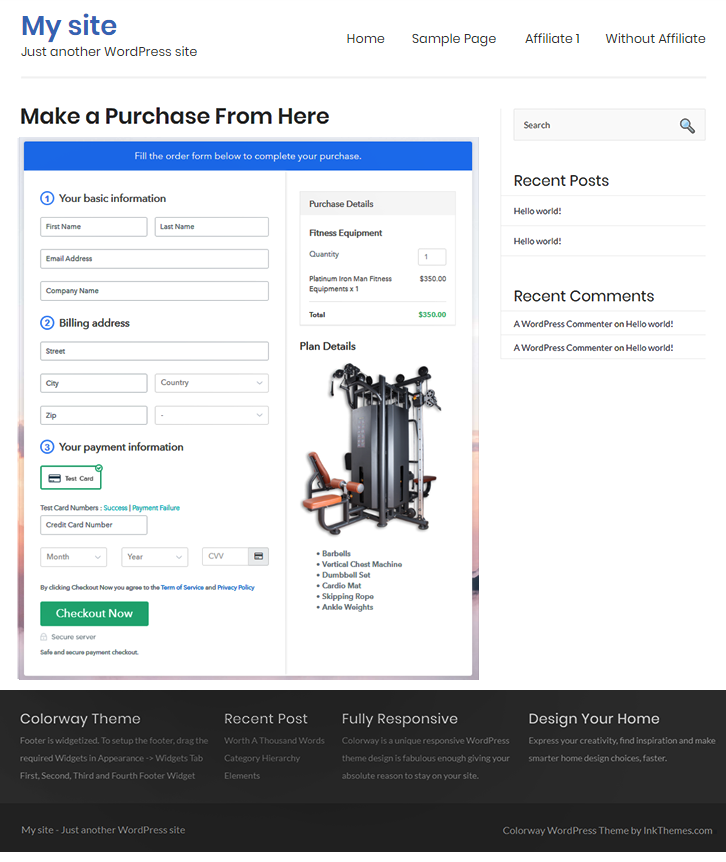
(c) Check out the Final Look of your Checkout Page on WordPress Site
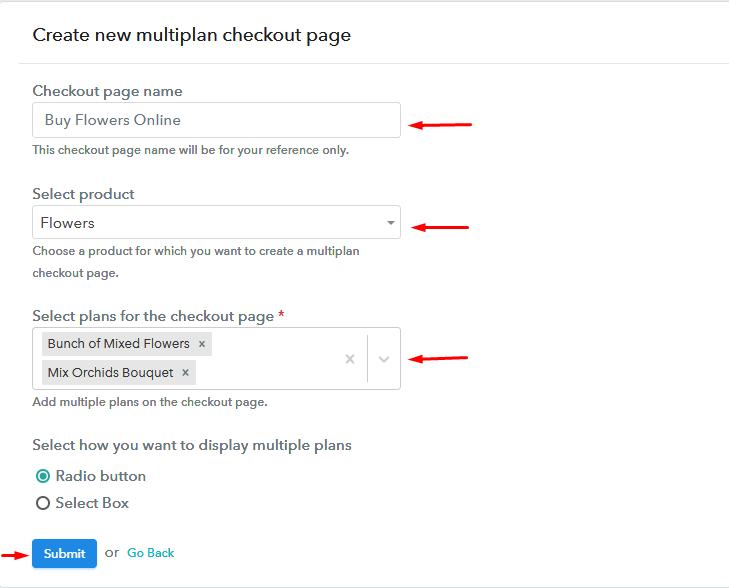
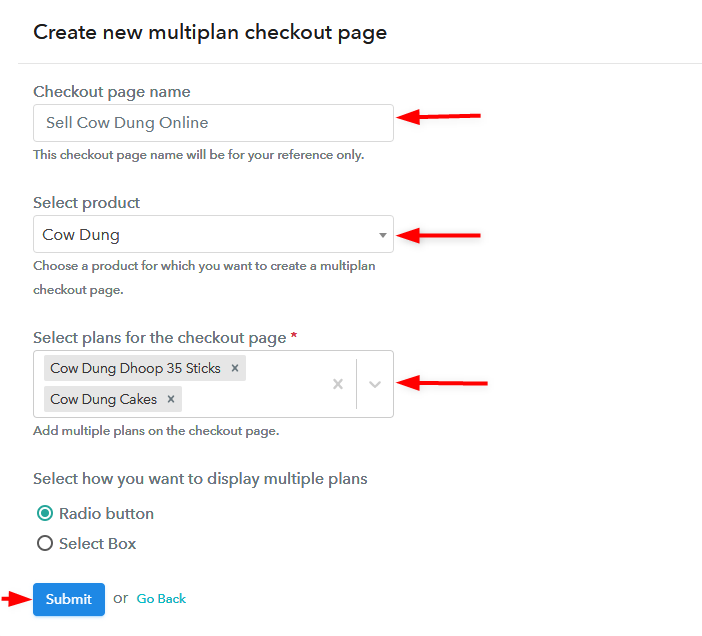
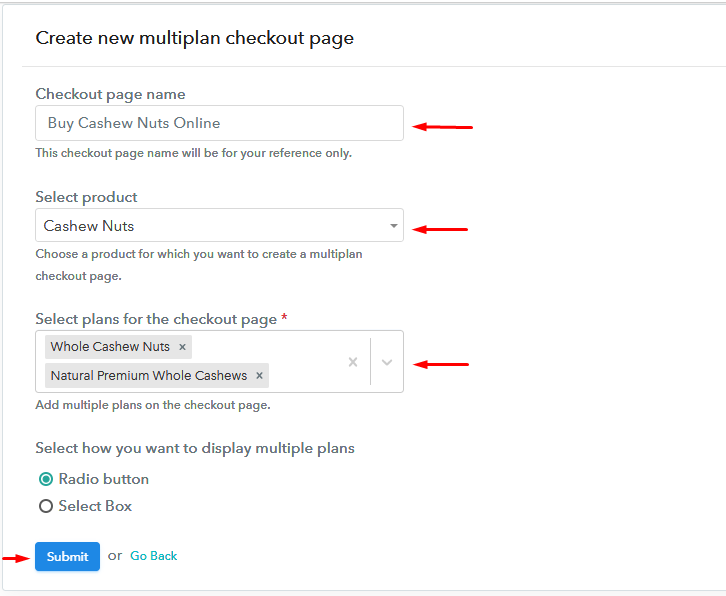
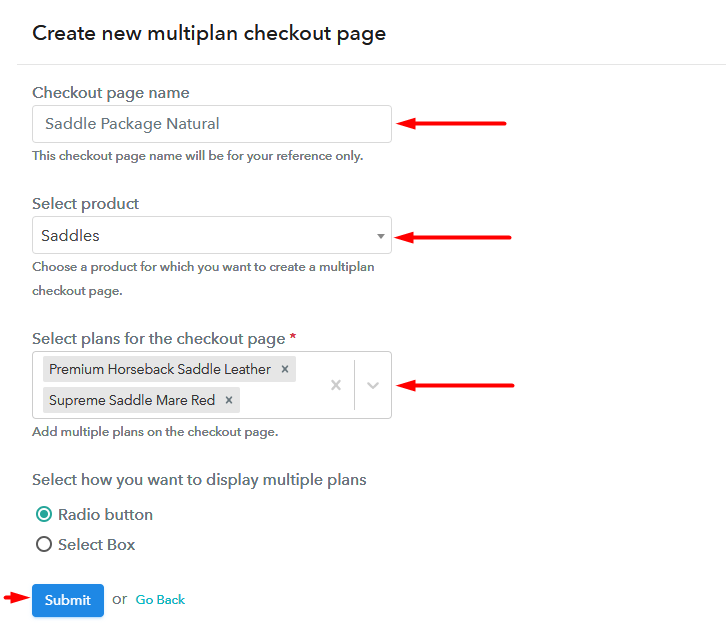
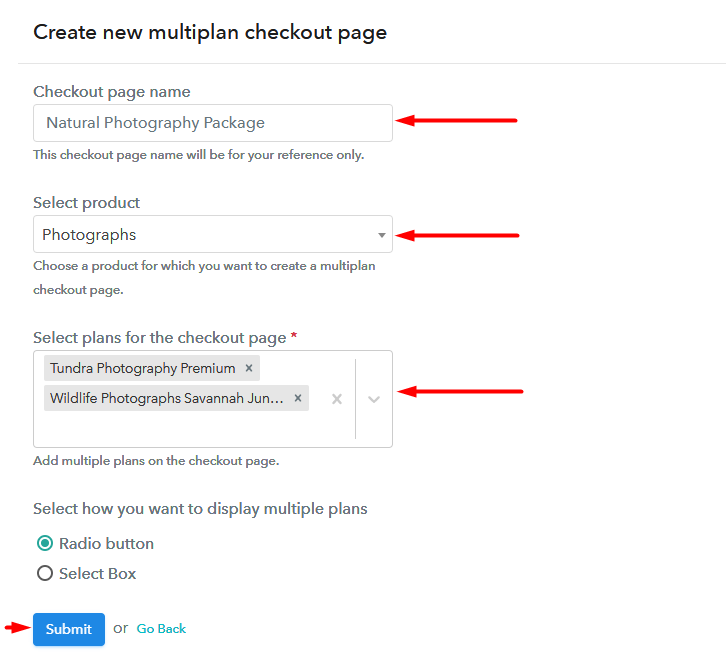
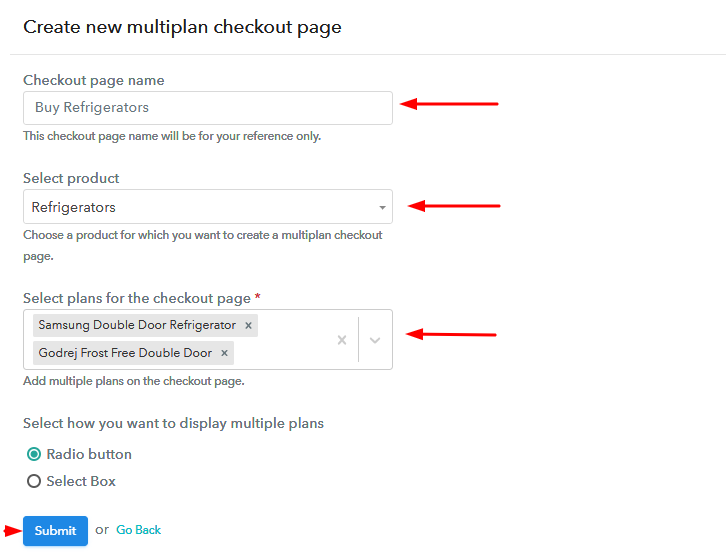
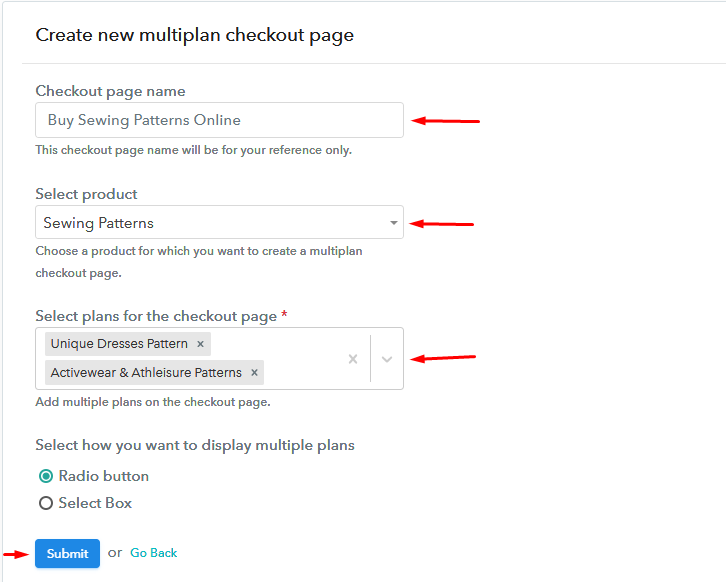
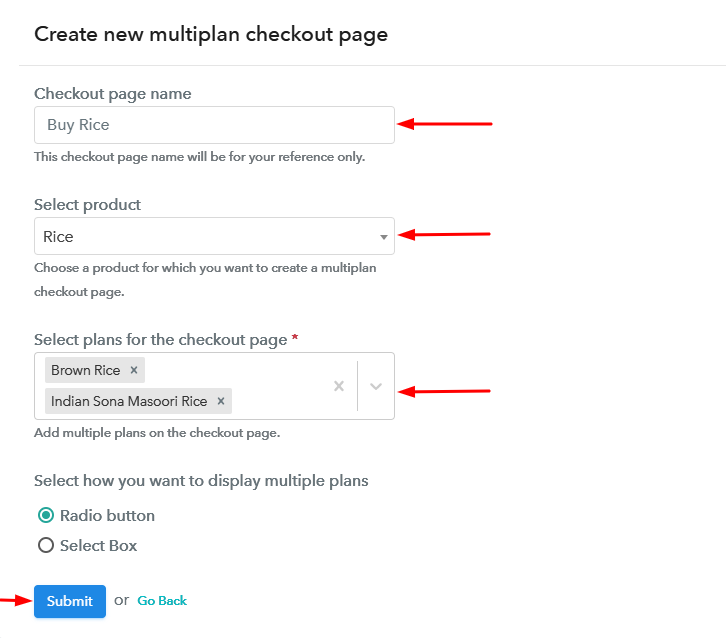
Step 10: Multiplan Checkout Page
(a) Click on Add Mutiplan Checkout

(b) Add Plans to Sell Fitness Equipments Online from Single Checkout Page

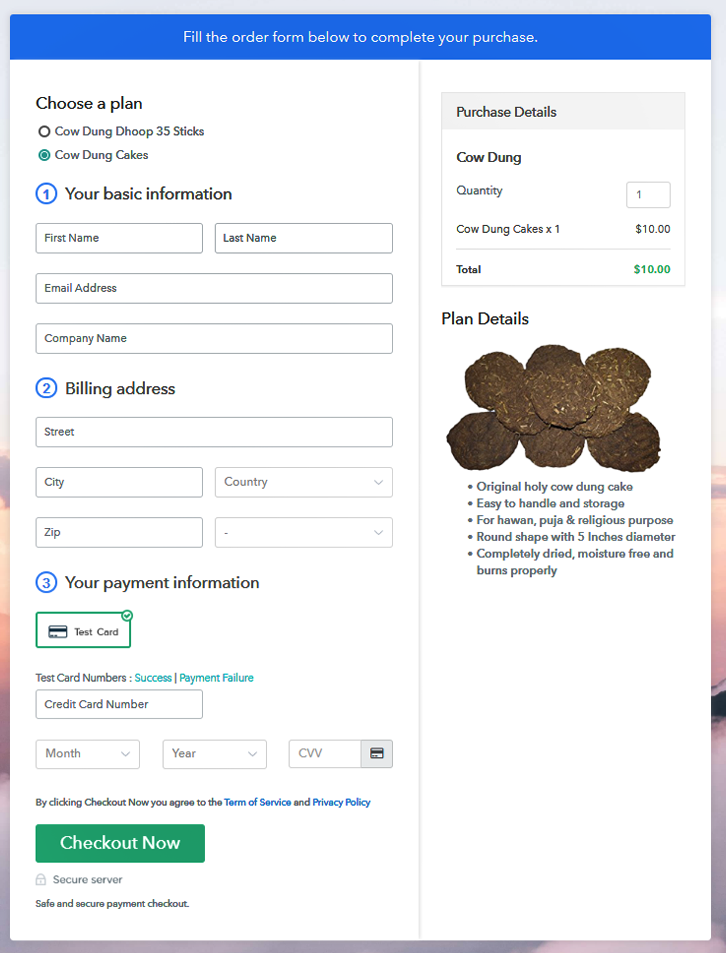
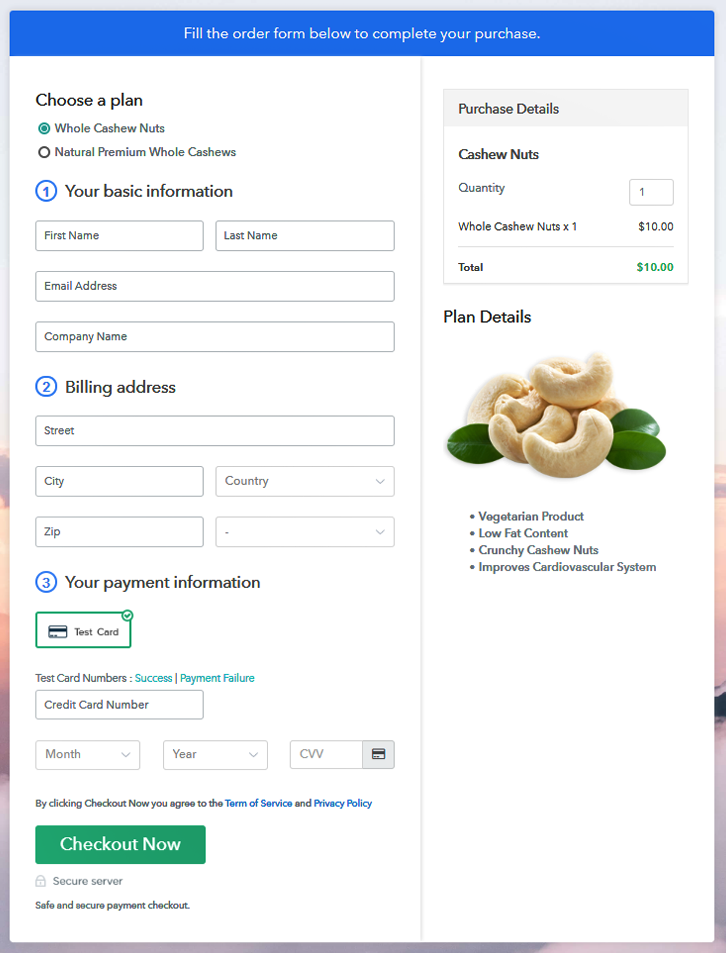
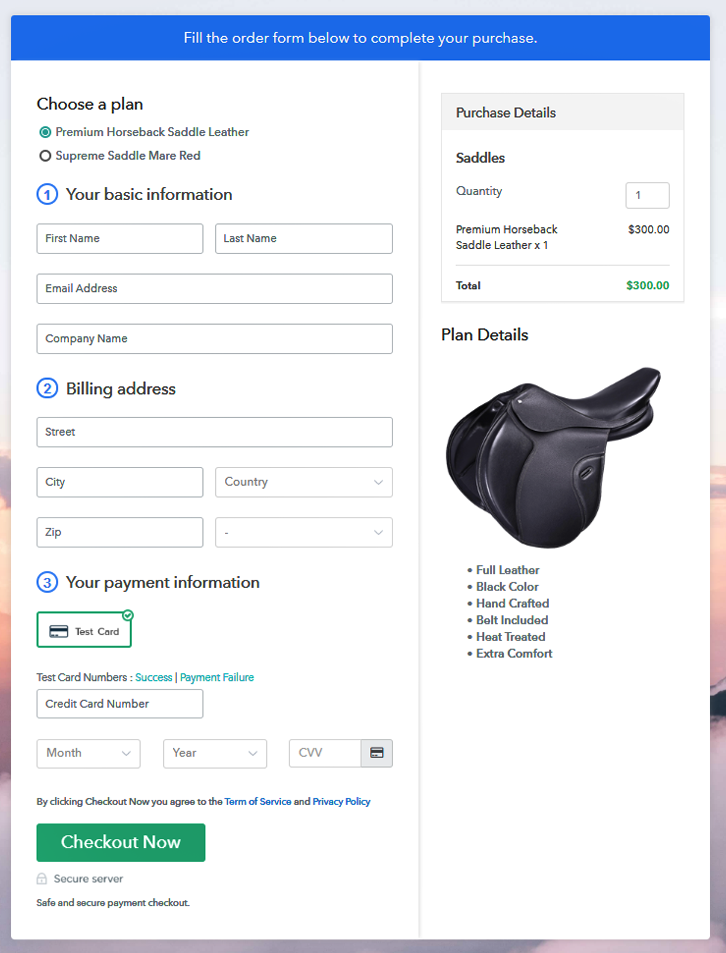
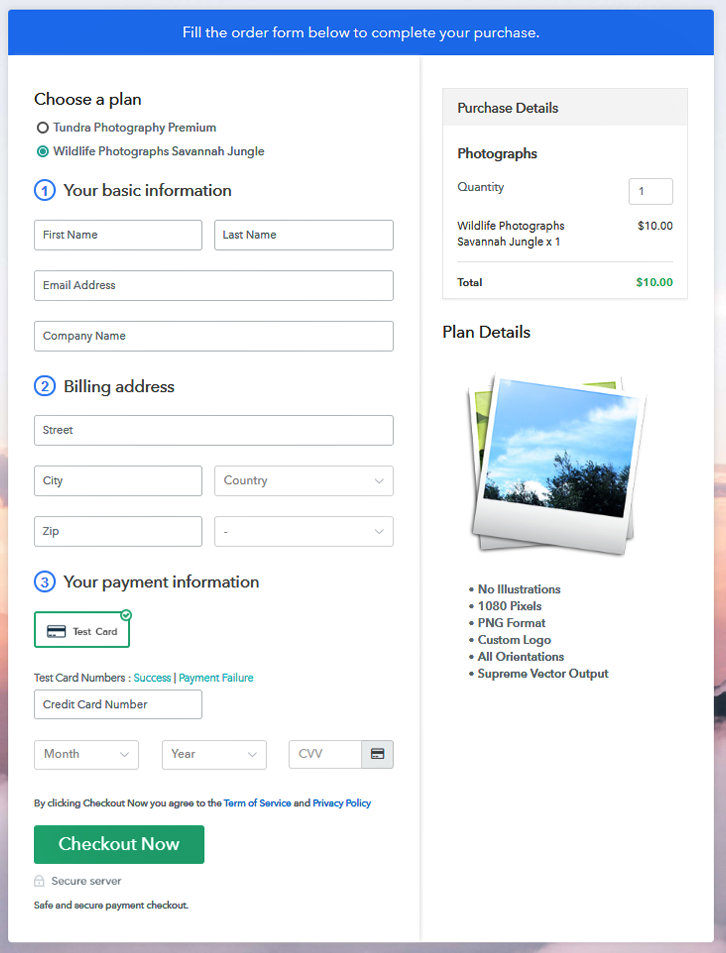
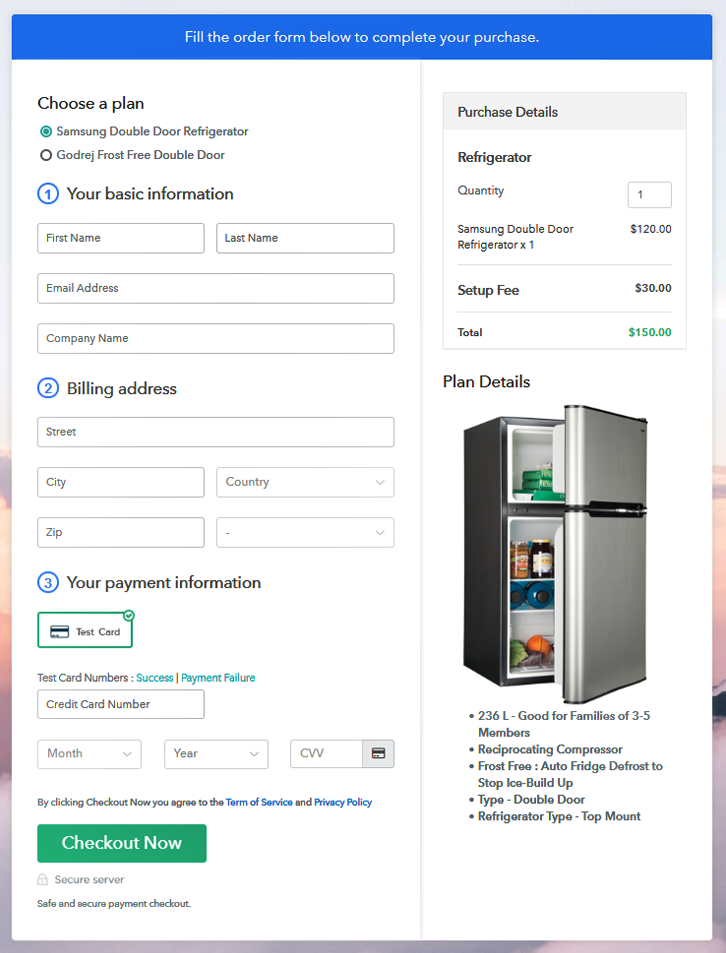
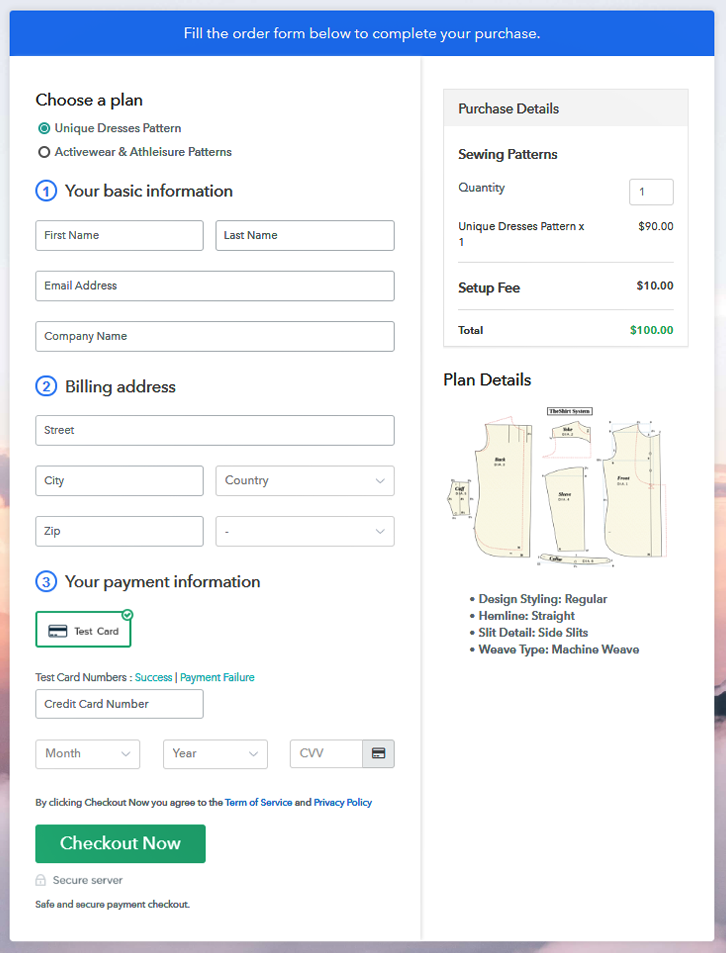
(c) Take a Look at the Checkout Page
Wrapping Up
You May Also Like To Read –