Ideal For: All the professional and amateur photographers, wildlife photography clubs, photography studios and other merchants can use this method to sell photographs online.
Why Choose this Method for Selling Over any Other Solution?
Unlike any other solution, this method allows you to:
- List and sell your photographs for FREE. Absolutely no payment required.
- No commission deducted on sales.
- Collect payment through multiple payment modes from a single checkout page.
- Sell one time or recurring subscriptions of your photographs.
- Sell and collect payment in any currency as per your requirement.
- Give discounts on your products by offering special coupon codes.
- Add sales commission agents to help you in selling your photographs.
The first photograph was taken in 1824 and ever since we have come a long way. Now with the advent of the internet, the new generation of photographers are increasingly starting to sell photographs online to get higher sales.
Why would you like to sell photographs online?
The benefits of selling photographs online are obviously manifold like higher product discovery, lower utility costs, 24×7 open shops, lower manual labor, etc. But, what is the best possible way to start selling photographs online?
Well, there are many platforms like Getty Images, Alamy, Twenty20 that can sell your photographs online but the problem is you will be charged a very high commission which will eat up your profits. Another disadvantage with these websites is that you cant promote your own brand image as your photographs will be drowned in the works of countless other photographers.
So, the next option, which is getting popular with new-age photographers is selling their works through their own dedicated websites. Now to create an e-store on a website, you have to build a checkout page. This can be done with Pabbly Subscription Billing. The advantage of using Pabbly Subscription Billing is
- Listing Unlimited Photos And Plans
- No Extra Transaction Costs
- Email Alerts On Purchase/ Transaction Failure
- Customizable Checkouts
- Importing/Exporting Customer Data
Now, with these features, your photography business will skyrocket and will have a definite edge over your peers. So, why wait let’s begin building the checkout pages to start selling photographs online.
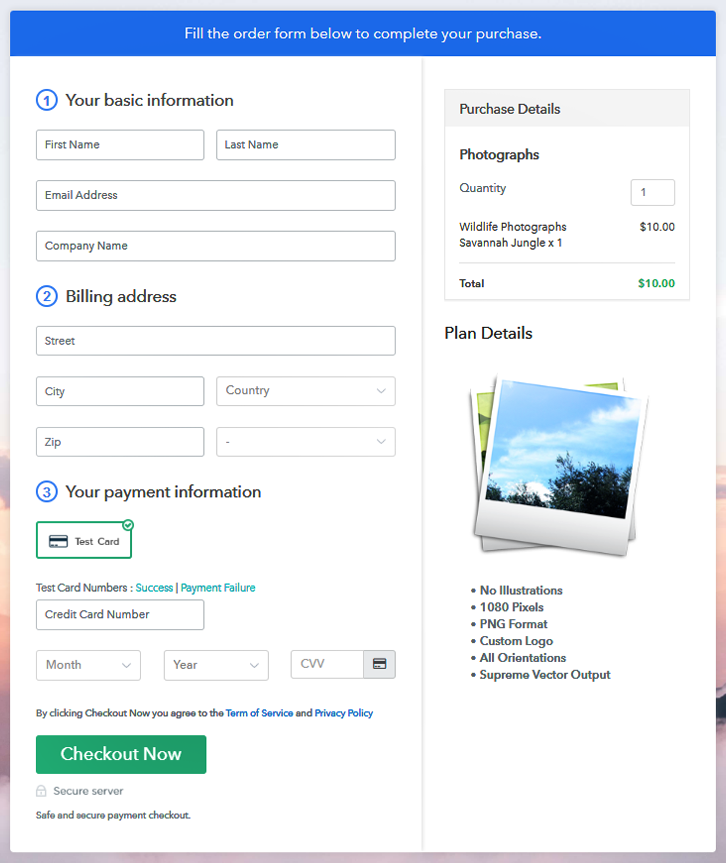
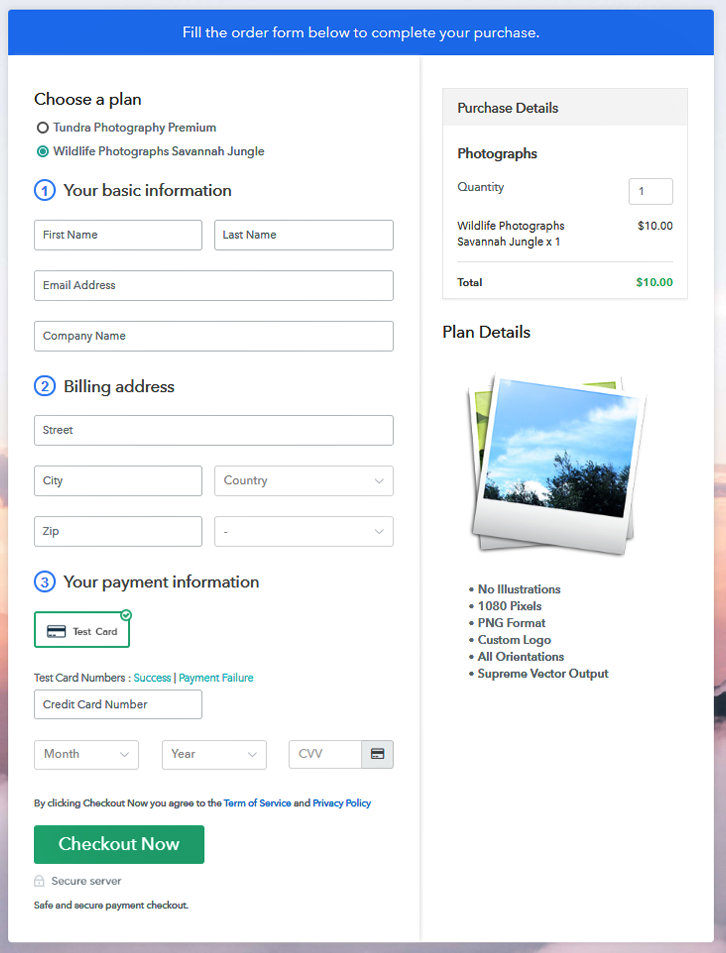
This is How your Checkout Page will Look Like After Creation
Step 1: Log in to Pabbly Subscription Billing

Fire up your search engine for Pabbly Subscription Billing and landing on the website, click on “Sign up Free“. You can obviously sign in using your Gmail account or fill the required blanks like name, email, etc and then click the “Sign Up” button.
Sign Up For Free!
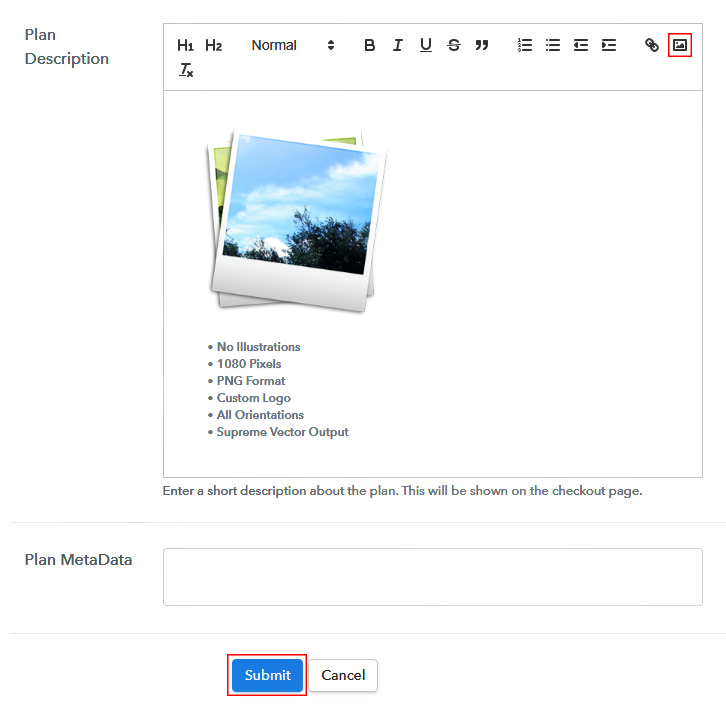
Now, you will enter the dashboard and here click on the “Access Now” button on the Subscription Billing option. A dialog box will open you, that will require you to fill the company details like name, currency, and phone number. After filing in the details press the “Continue” button to complete the process. An average customer has a low tolerance for any disruptions during payments and can leave the transactions midway. So as a merchant, you should avoid any kind of glitches and make the whole payment experience streamlined. That is why with Pabbly Subscription Billing, you can pilot test the whole payment experience of a customer using dummy payment gateways. You can do this by clicking on “Enable Test Payment” option Also, with Pabbly Subscription Billing, you can integrate with a ton of payment gateways like Stripe, Razorpay, PayPal, Authorize.net, etc. These payment gateways can be easily integrated using the help of the articles given below. But since we have to set up the payment process, we will click on the “Enable Test Payment” option. Hopefully, your payment integration went well, now let’s move on to add products. Below “Enable Payments” you will find the section “Add your product” click on it. This will generate a dialog box with a blue button “Add New Product”. Click it. This will summon a pop-up box and You have to add the required product title, in this case, it is photographs Fill up the details and your product is created. Note: Here you can add all the products related to the similar category by creating plans for each of them. Now, we are going to create plans to start a photography business online Here you will fill in details like plan name, code, price, setup fees, etc. You can choose from different billing models like one-time payment, recurring, based on cycles, etc. Now, upload the photographs using the image upload button. And add some useful description of your photographs like pixels, orientations and size in bullet points and press the “Submit” button. Also, using the same process, you can list more products Follow up these steps to preview checkout page: Now, copy the embed plan link to insert the checkout page on your WordPress website. Now, when the link is copied, then paste it to the text area of the editor. After pasting the code, now hit the ‘Publish’ button. Your checkout page is embedded. Note: In case you want to sell multiple products via a single checkout page, you can create a multi-plan checkout page otherwise skip this step. The amount of data processed in the last two years is 11 times more than the data processed in a decade. My point is the internet will play a huge role in everyone’s lives. And as a photographer, you don’t start photography business online, your business will slowly perish in the coming years. So, stop wasting time and open an online store through Pabbly Subscription Billing already. Furthermore, if you have any queries then please drop them in the comment section below. Thank youStep 2: Select Subscription Billing

Step 3: Account Setup

Step 4: Connect Payment Gateways To Sell Photographs Online

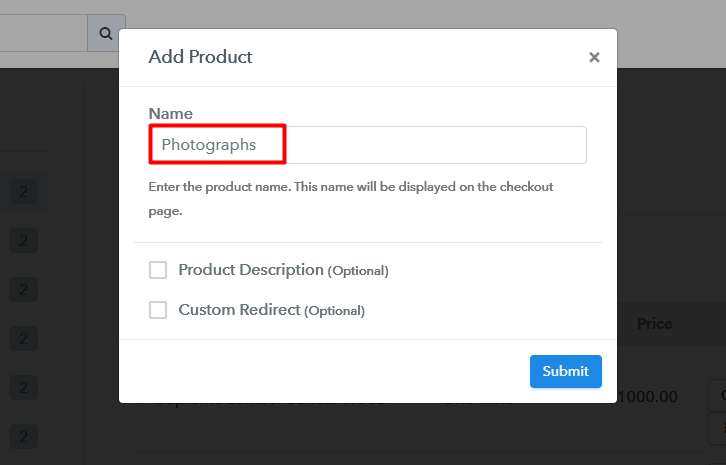
Step 5: Add Your Product

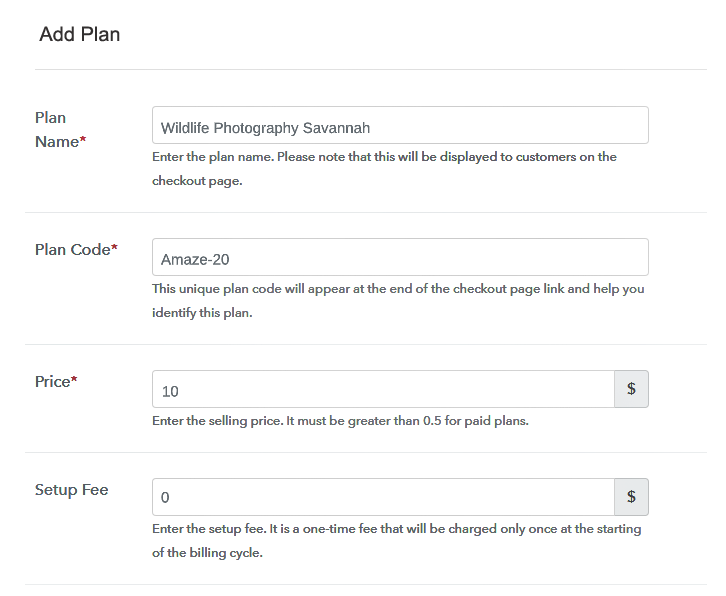
Step 6: Add Plans
(a) Select Add New Plan

(b) Specify the Plan & Pricing Details
(c) Add Image & Description
Step 7: Share your Checkout Page

Step 8: Preview Checkout Page
(a) Click on the View Button

(b) Take a Look at the Checkout Page
Step 9: Embed Checkout Page in Site & Sell Photographs Online

(a) Edit the Page & Paste the Copied Link

(b) Save & Publish the Checkout Page

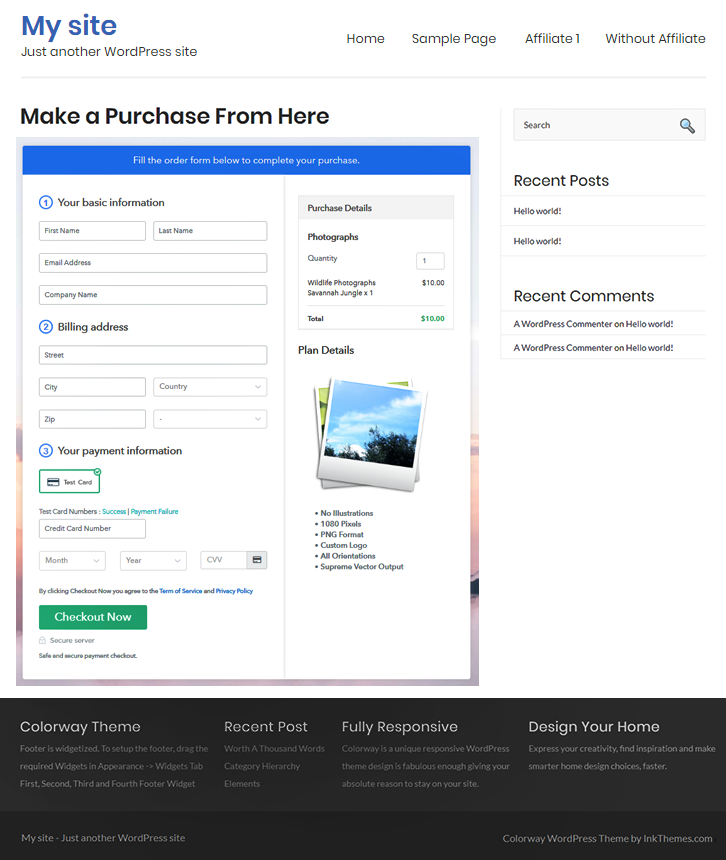
(c) Check out the Final Look of your Checkout Page on WordPress Site
Step 10: Multiplan Checkout Page
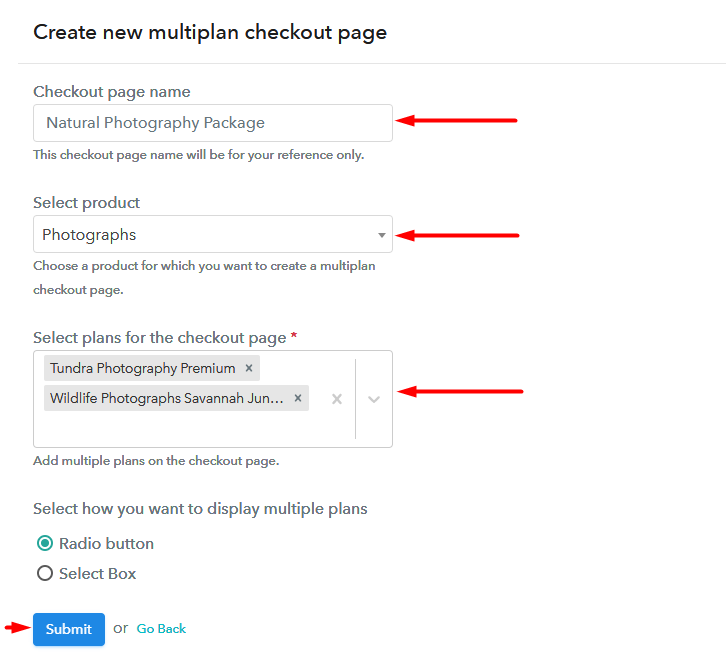
(a) Click on Add Mutiplan Checkout

(b) Add Plans to Sell Photographs Online from Single Checkout Page
(c) Take a Look at the Checkout Page
Wrapping Up
You May Also Like To Read –


