Ideal For: All the funko pop manufacturers, art galleries, comic con stores and other merchants can use this method to sell funko pops online.
Why Choose this Method for Selling Over any Other Solution?
Unlike any other solution, this method allows you to:
- List and sell funko pops for FREE. Absolutely no payment required.
- No commission deducted on sales.
- Collect payment through multiple payment modes from a single checkout page.
- Sell one time or recurring subscriptions of your funko pops.
- Sell and collect payment in any currency as per your requirement.
- Give discounts on your products by offering special coupon codes.
- Add sales commission agents to help you in selling your funko pops.
Funko pops are bobbleheads made of vinyl acrylics. With the rise of the entertainment industry, there has been an increase in demands from fans to make funko pops of their favorite characters. That is why according to Vox this industry is now a $686 million business from its humble origins in the 1980s. And that is why many artists are increasingly looking to sell funko pops online to get the best demands for their products.
Why would you like to sell funko pops online?
The advantages of selling funko pops online are numerous like you can discover the best prices possible for your products from a global audience, automated customer servicing, flexible working hours, lower rent, higher price discovery, etc.
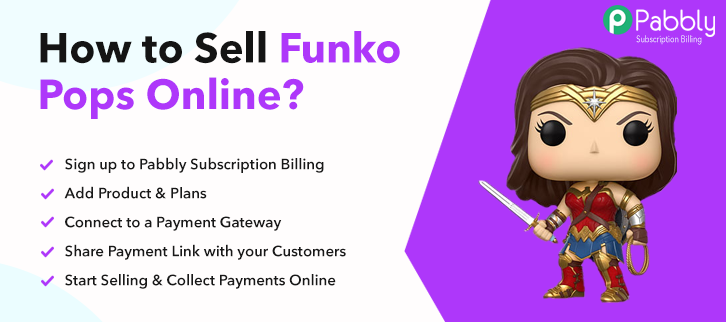
So, let’s start selling funko pops online already. But wait how will you set up funko pops business online? Well, it is actually pretty easy, you have to build an online store and there are plenty of software that can do it. One of the best e-store creators is Pabbly Subscription Billing, where you can list unlimited funko pops and collect payments in both online/offline mode through its amazing checkout pages. Some of the unique features are:
- Unlimited Product Placements
- Easy Tax Management
- Affiliate Modules
- Import/Export Customers Data
Now, you are taken by Pabbly Subscription Billing amazing features, lets us create an awesome checkout page with its help to sell funko pops online.
Note: Before you start selling funko pops online, you should have an appropriate license from the creators of these characters, or else you will be in serious trouble with the law.
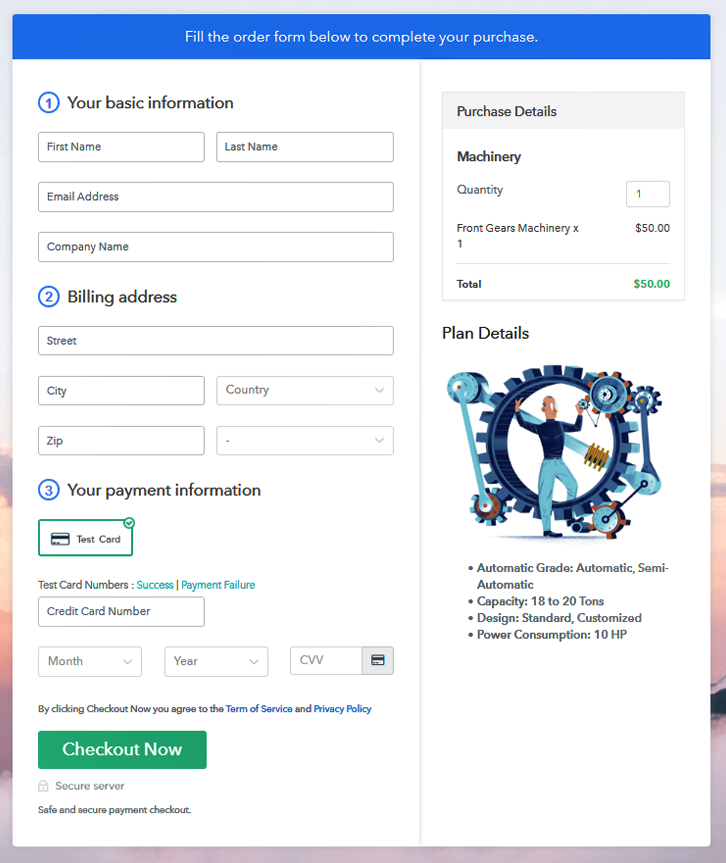
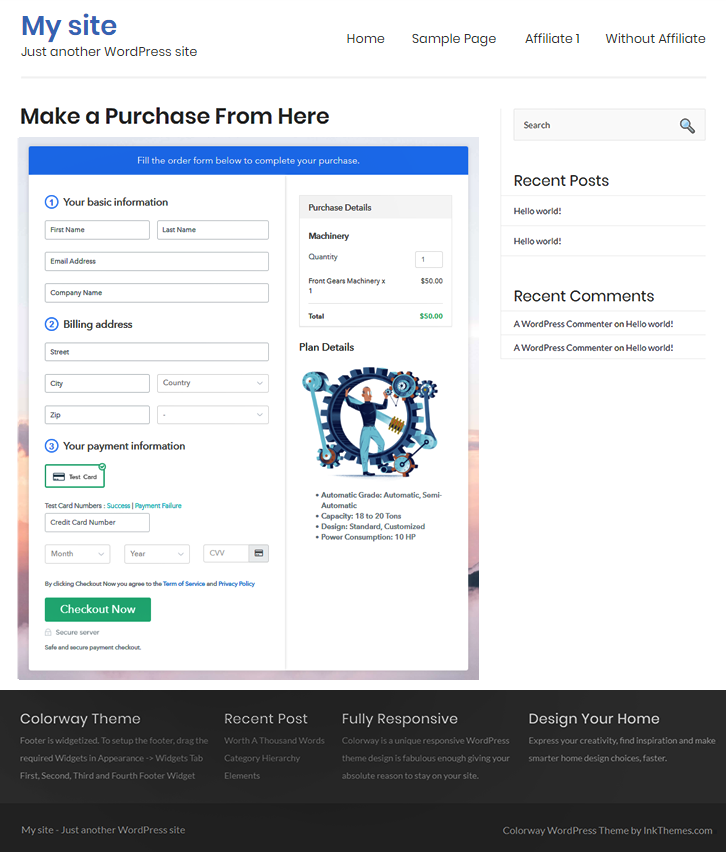
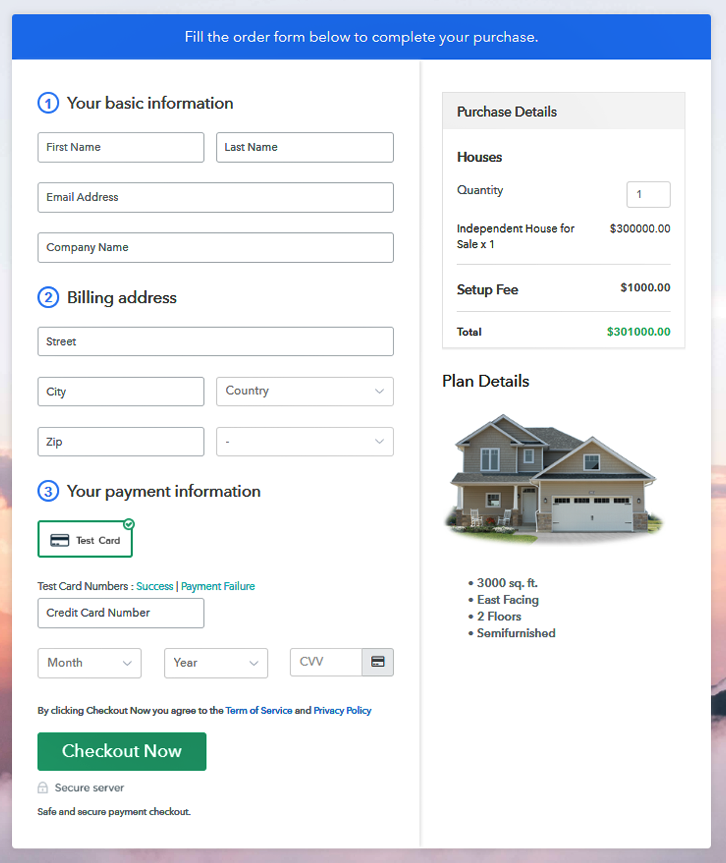
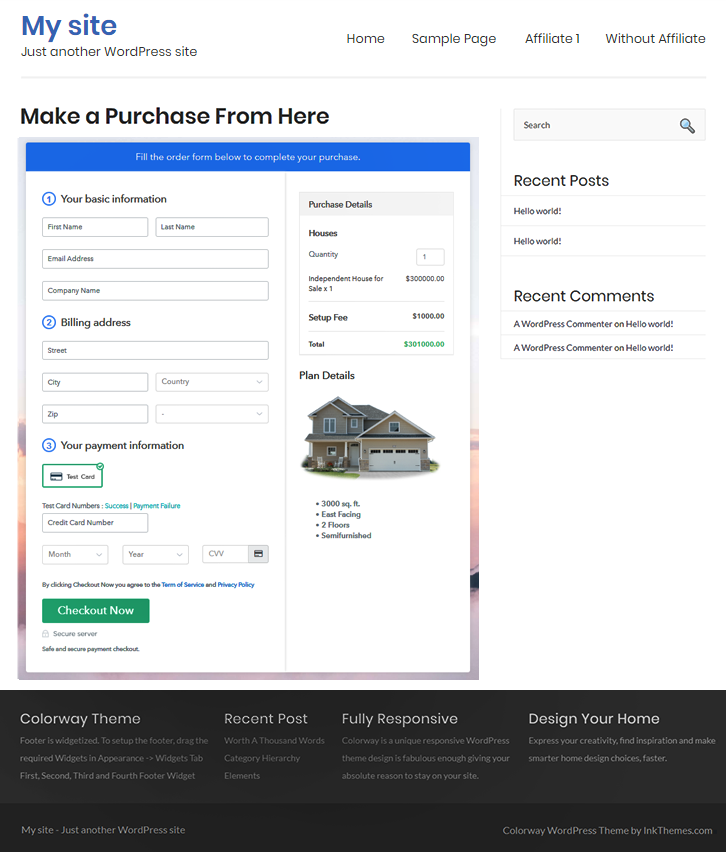
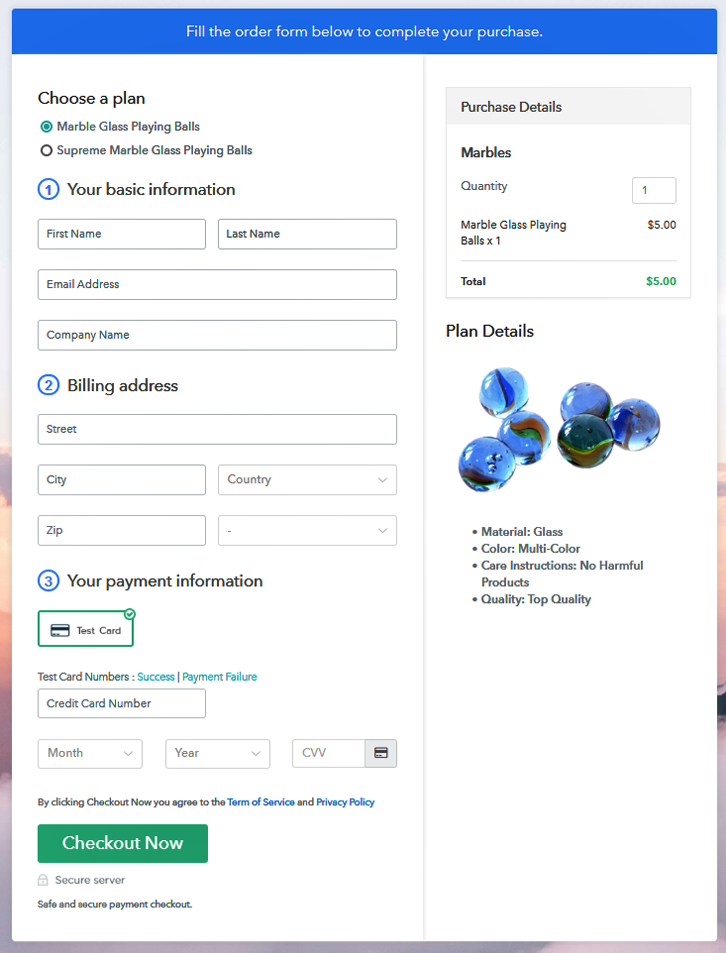
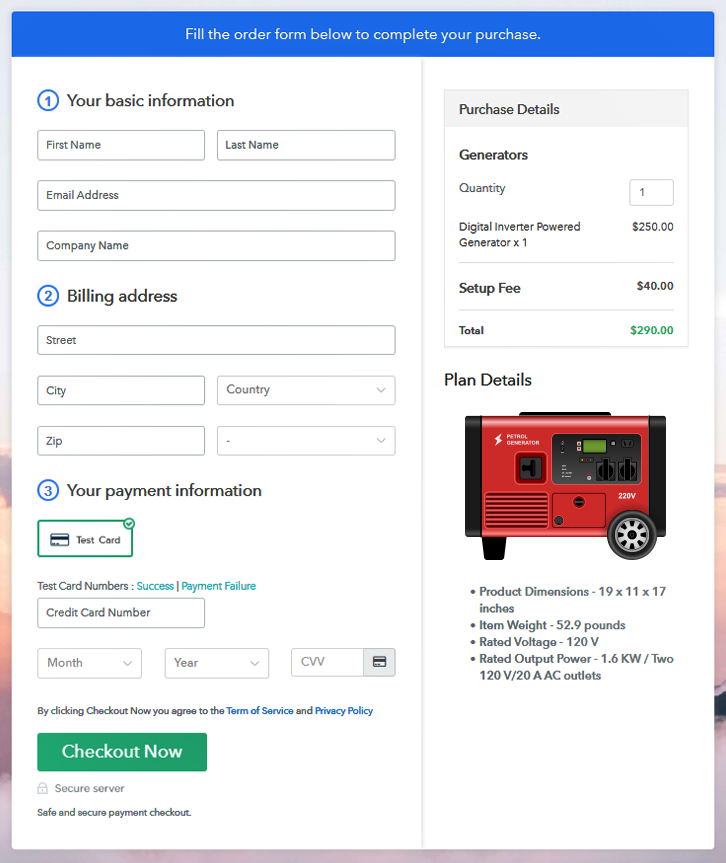
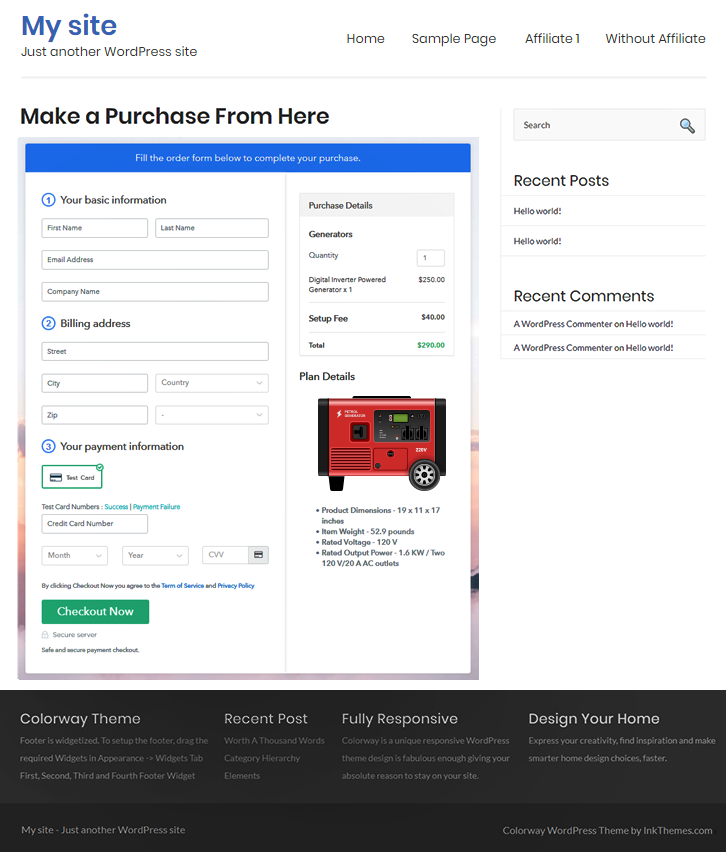
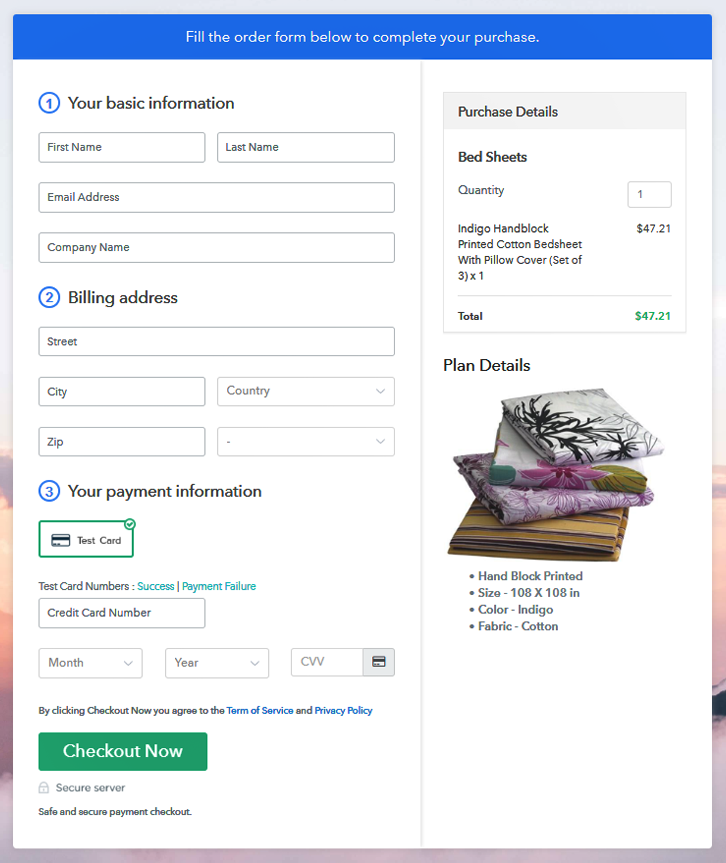
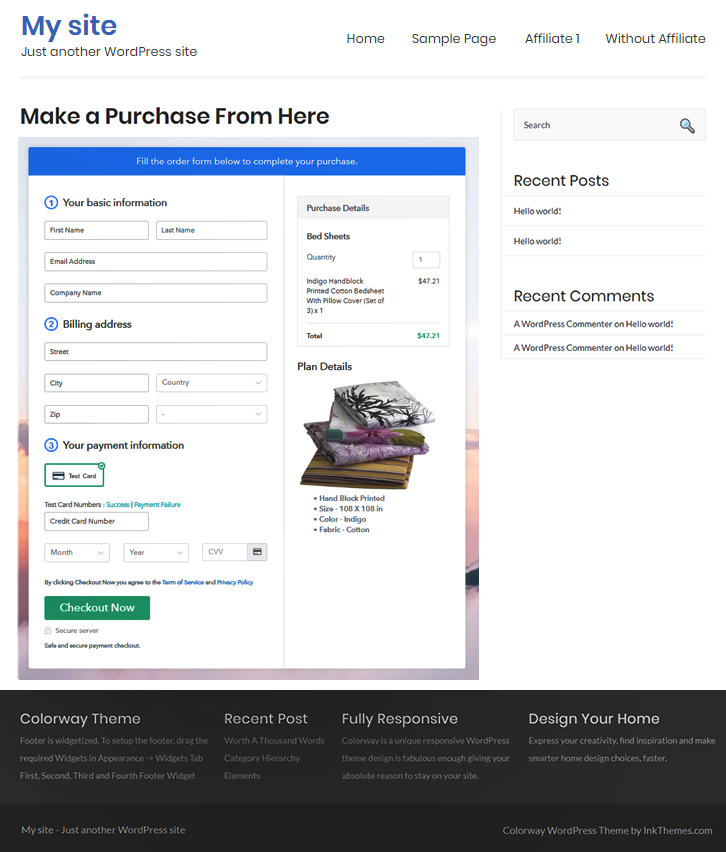
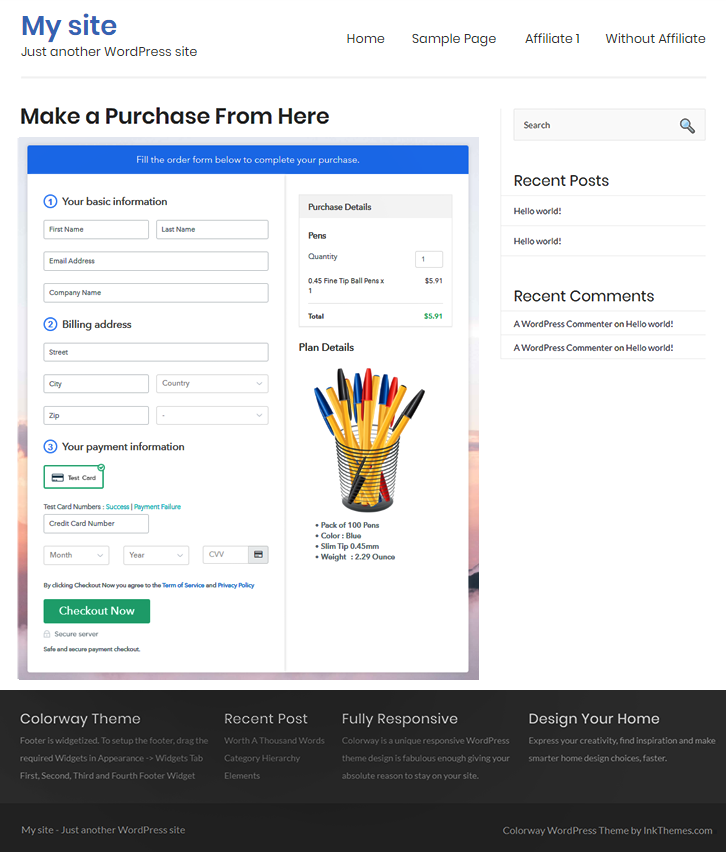
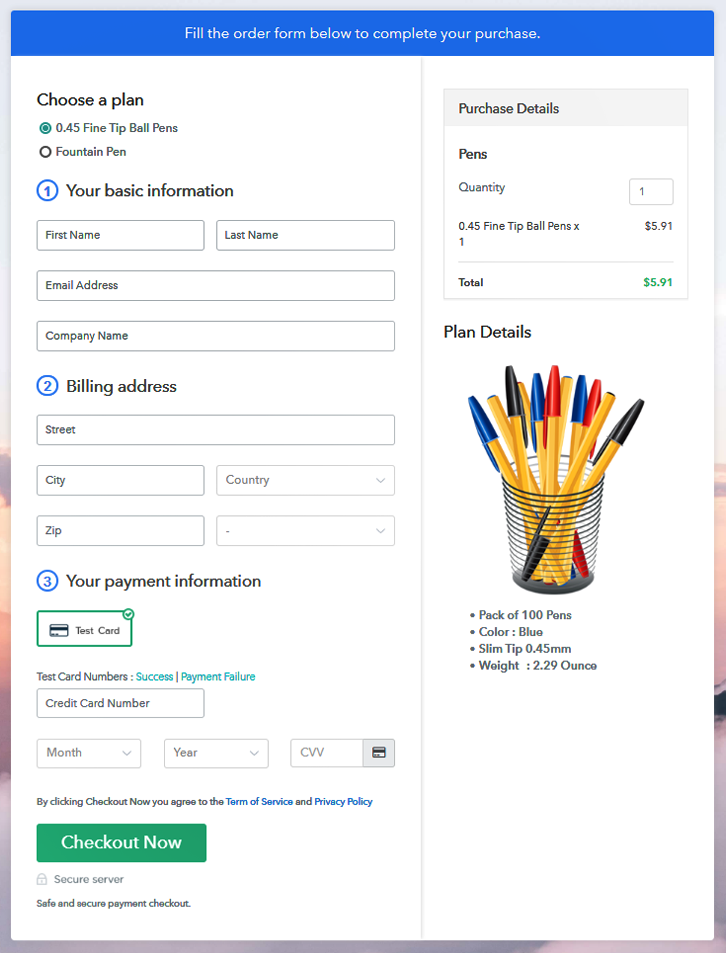
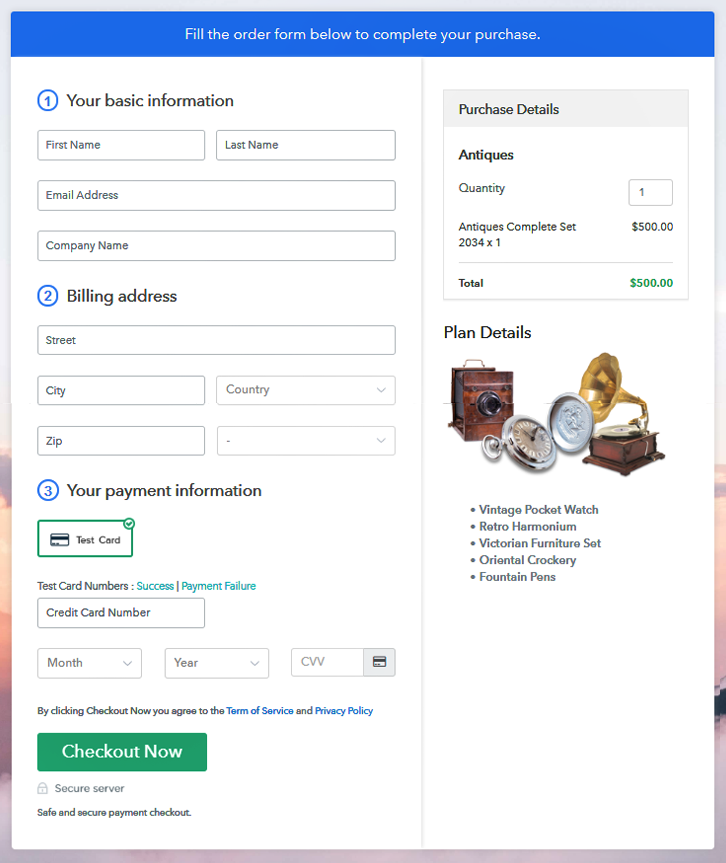
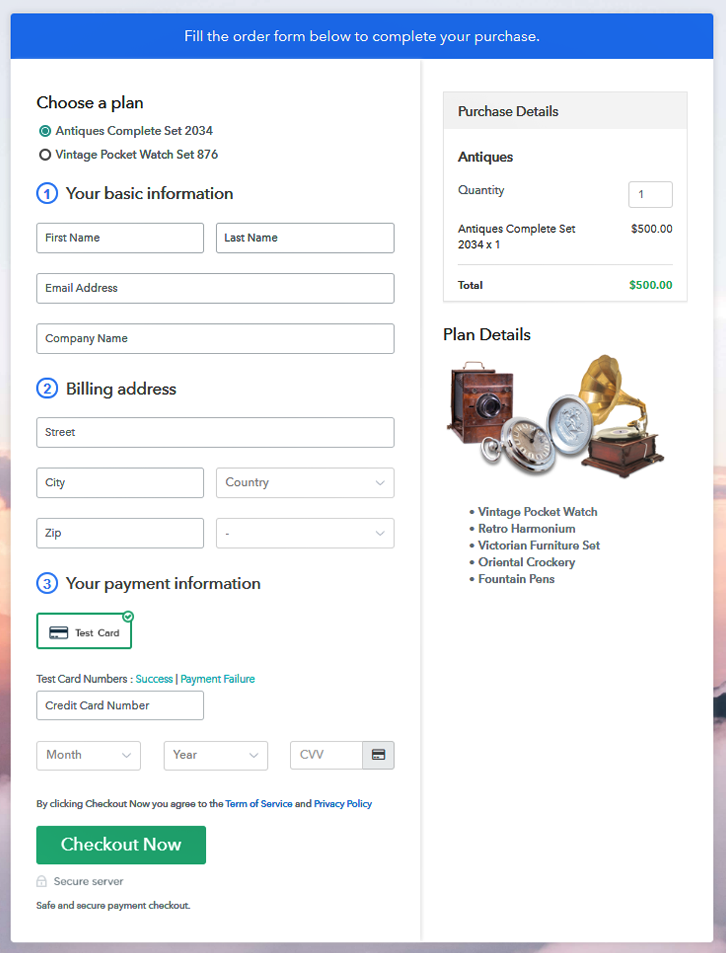
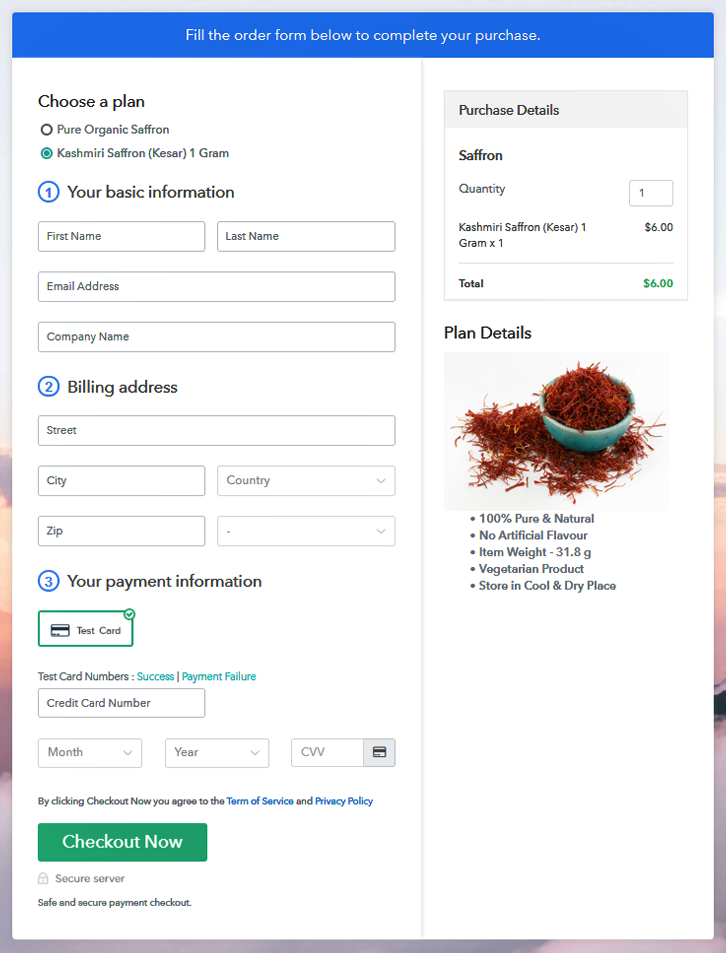
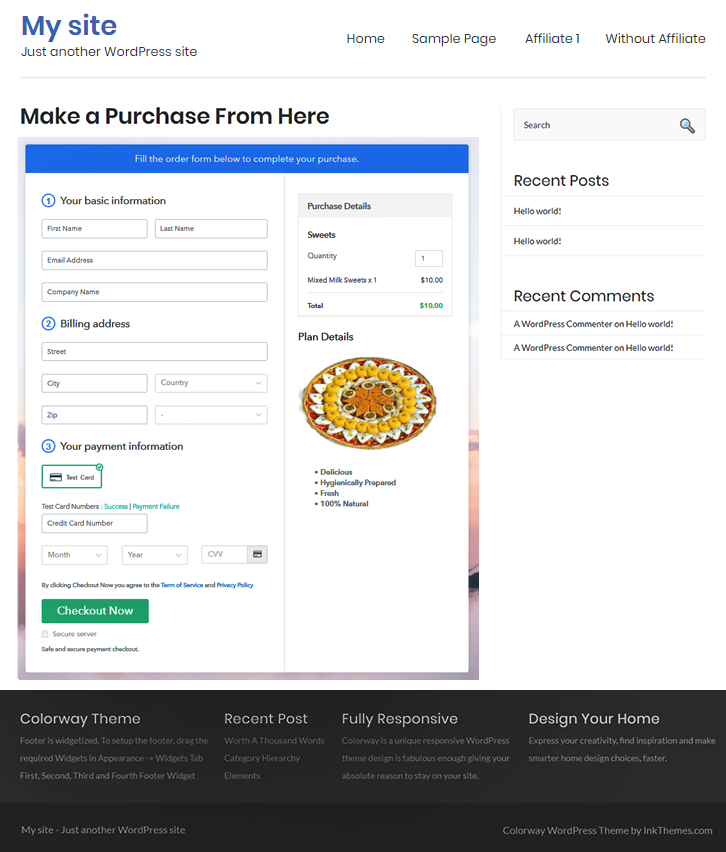
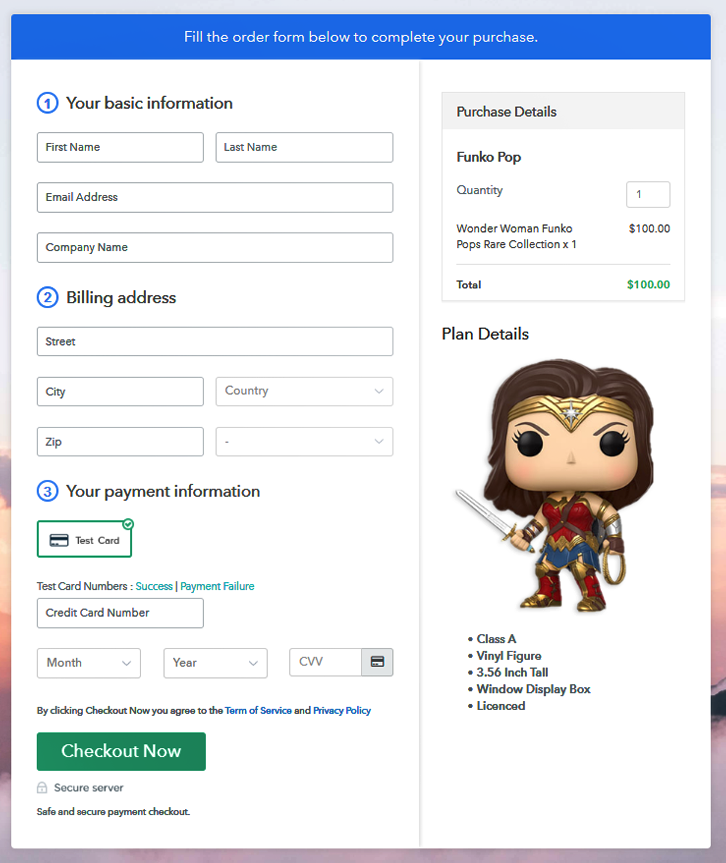
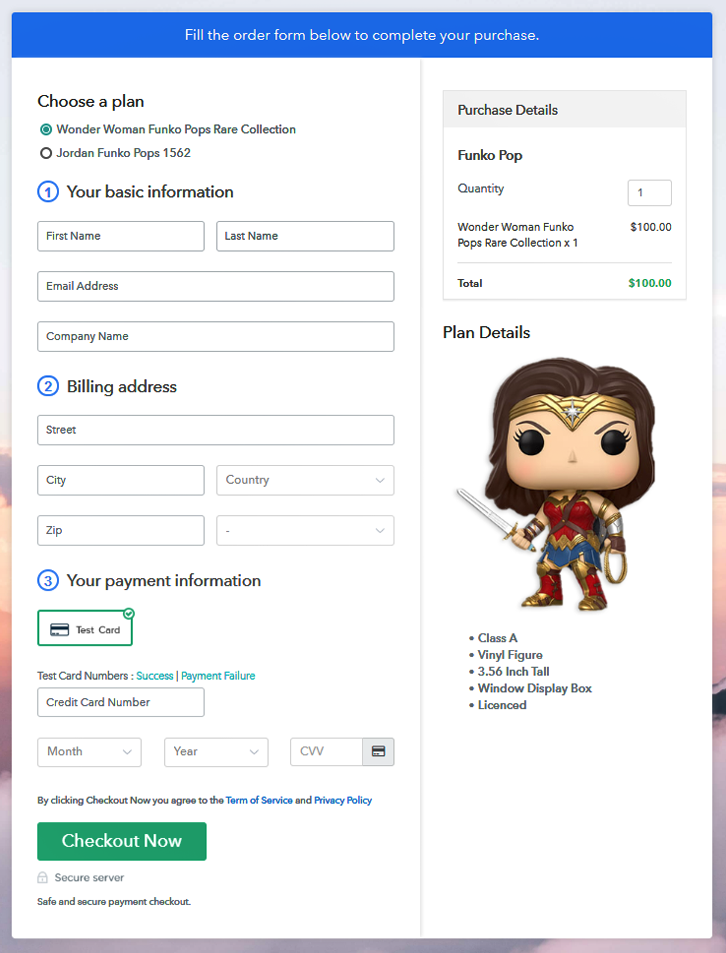
This is How your Checkout Page will Look Like After Creation
Step 1: Log in to Pabbly Subscription Billing

Look for Pabbly Subscription Billing in your browsers and on the website click on “Sign up Free“. Either sign in using your Gmail account or fill in the required fields like name, email, etc and then click the “Sign Up” button.
Sign Up For Free!
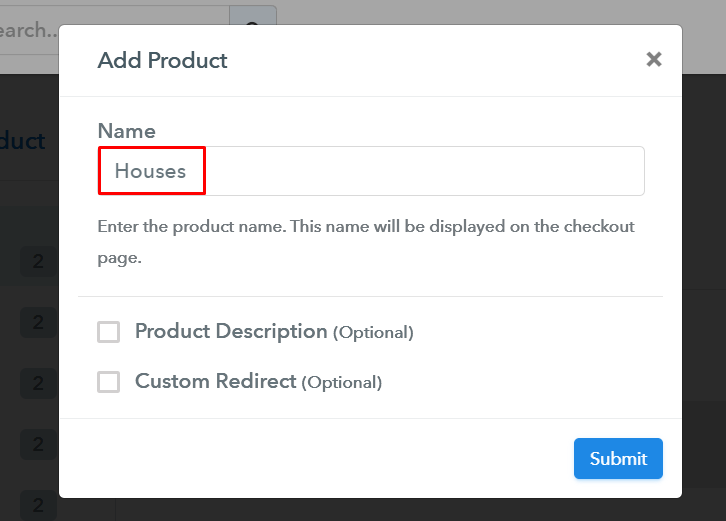
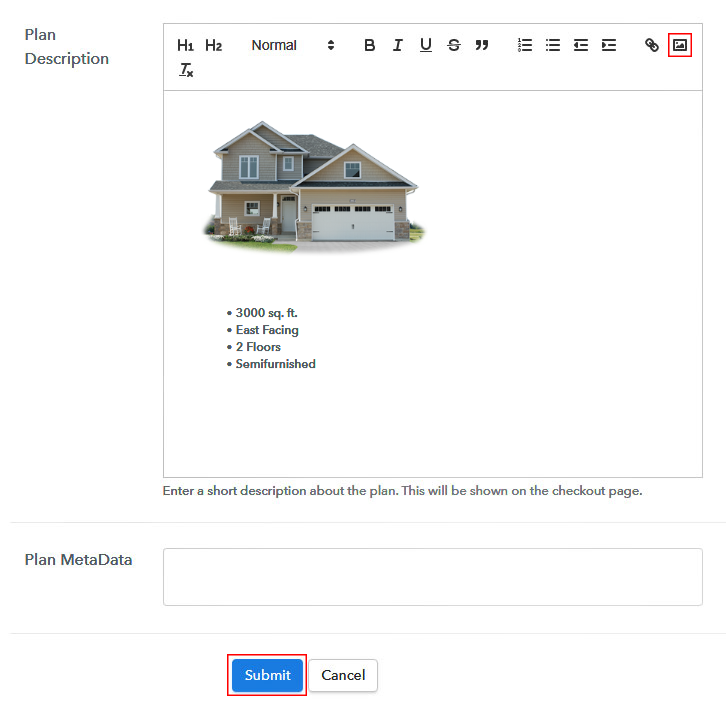
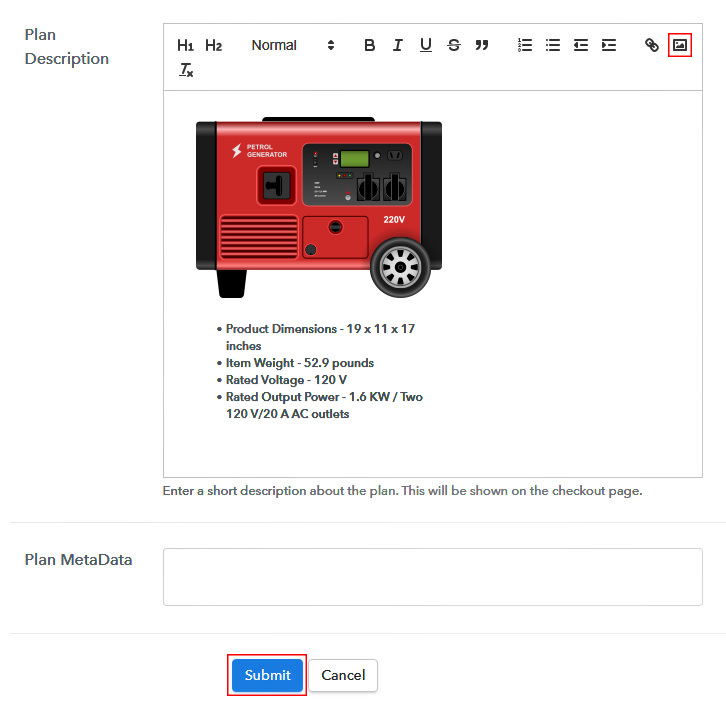
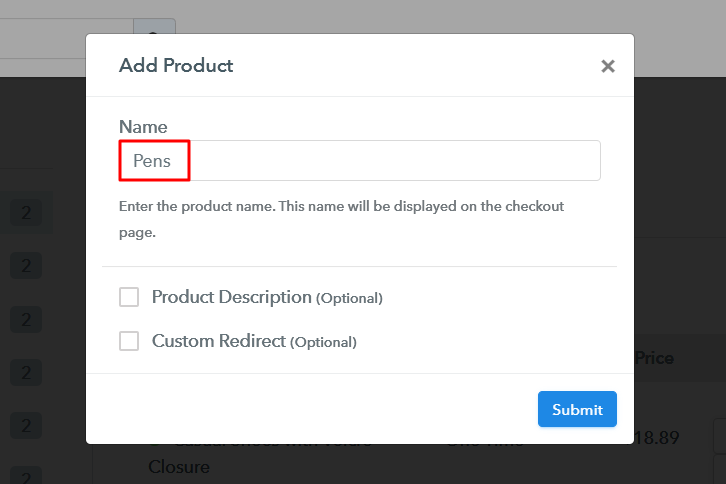
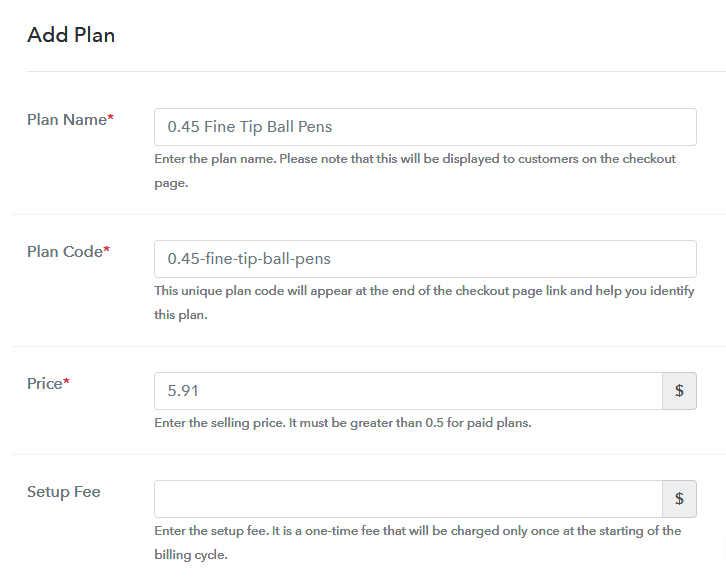
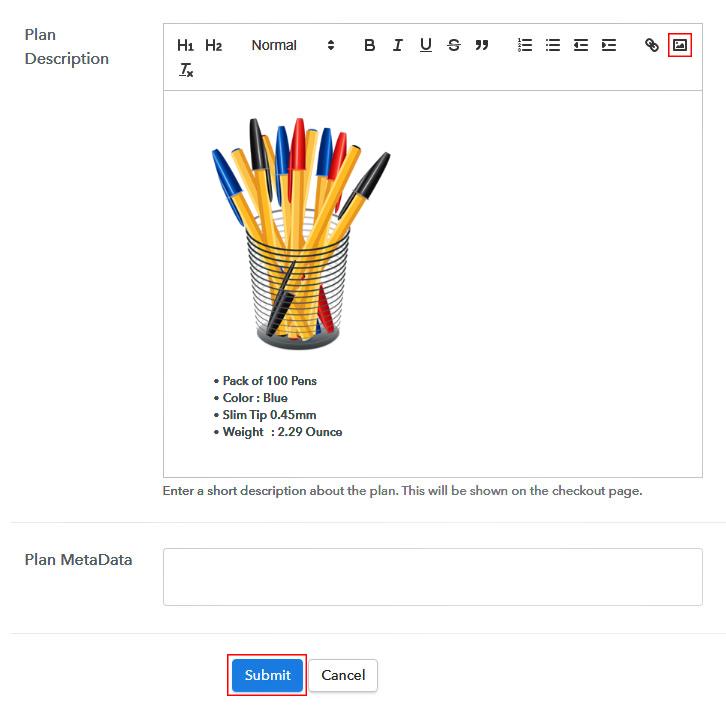
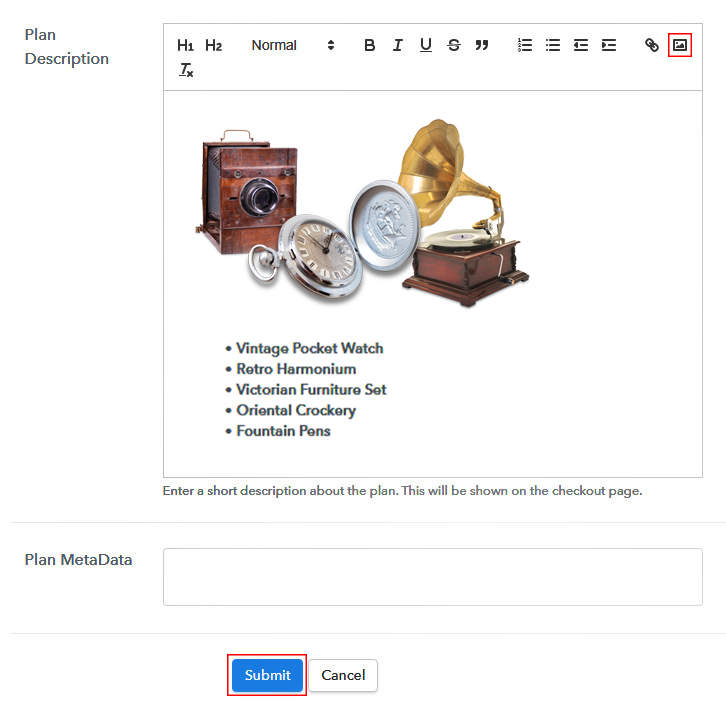
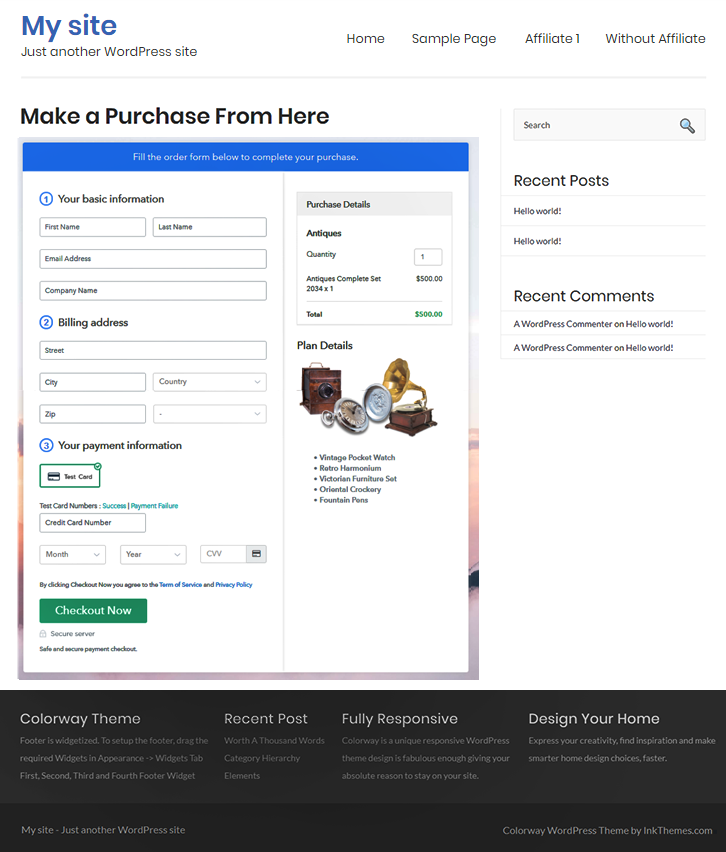
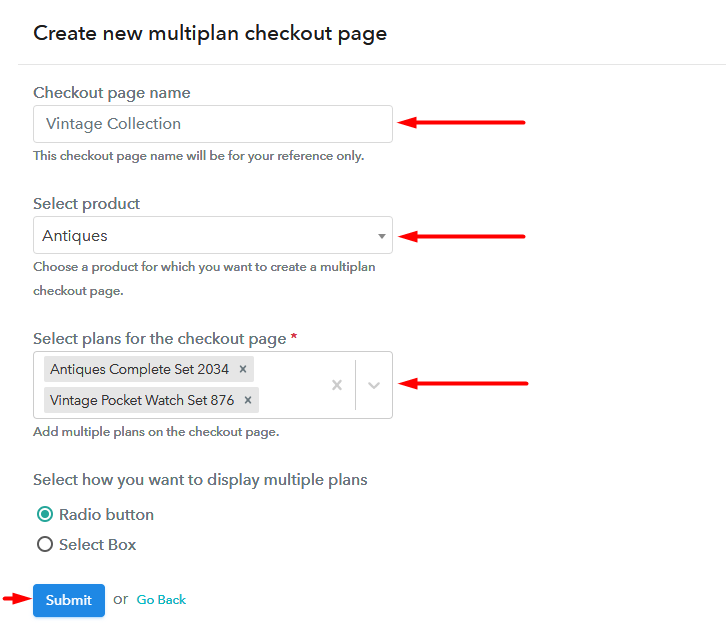
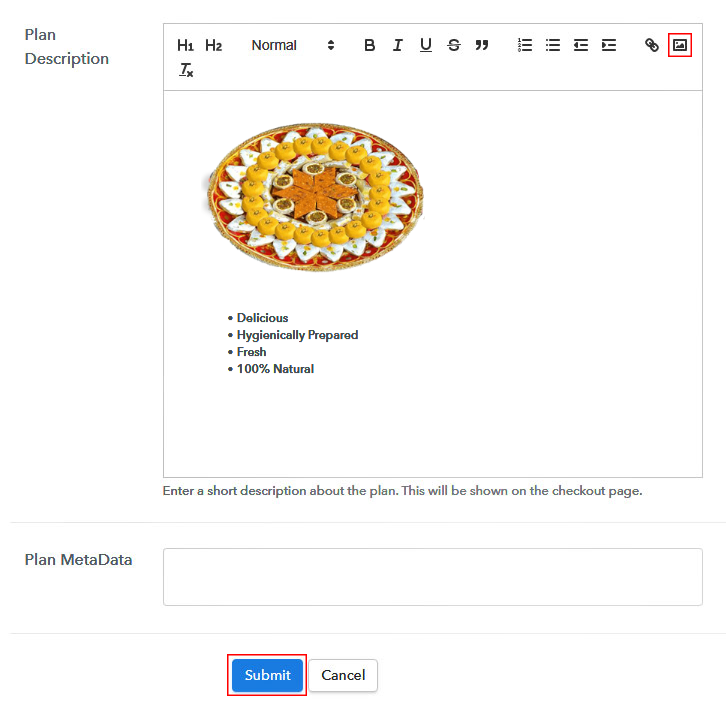
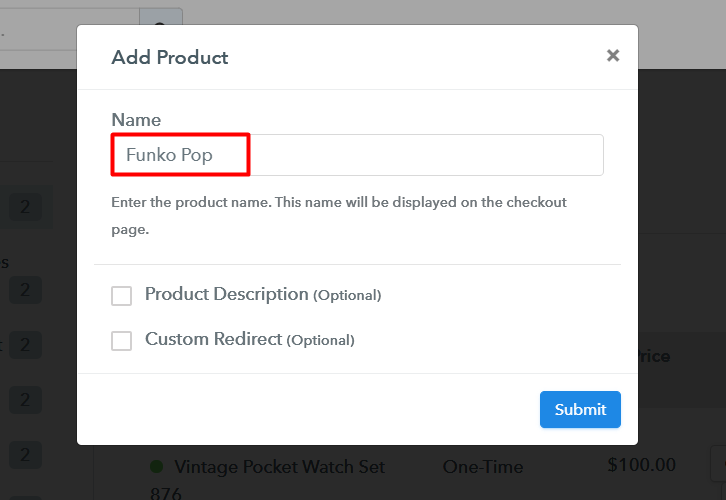
So you will enter the dashboard and will have to click on the “Access Now” button on the Subscription Billing option. This will automatically create a dialogue box that will require you to fill the company details like name, currency, and phone number. Now, press the “Continue” button after filling in the details. With Pabbly Subscription Billing there is a dummy payment gateway, where you stimulate the payment experience of a customer to remove the problems beforehand. You can do this by clicking on the “Enable Test Payment” option. Also, using Pabbly Subscription Billing, you can integrate with multiple payment gateways like Stripe, Razorpay, PayPal, Authorize.net, etc. For the integration of the payment gateways, you can avail the help of listed guides beneath this paragraph. But since we have to set up the payment process, we will click on the “Enable Test Payment” option. So, now we are going to add the products. Below the “Enable Payments,” you will find the section “Add your product” click on it. This will create a dialog box with a blue button “Add New Product”. Click it. This will generate a pop-up box and you have to add the required product title, in this case, it is the ‘funko pops’. Fill up the details and your product is created. Note: Here you can add all the products related to the similar category by creating plans for each of them. Now, we are going to create plans to start a funko pops business online Add details of the product related to prices like plan name, code, price, setup fees, etc. Also, you can choose for different billing models like one-time payment, recurring, based on cycles, etc. Yes, if you are not satisfied with the present billing models then you can change it at any time. Now, upload some amazing images of your funko pops. Moreover, add a description about the funko pops like height, weight, character, licensing number, etc in preferably bullet points then press the “Submit” button. Furthermore, using the same methods, you can list more products. Follow up these steps to preview checkout page: Now, copy the embed plan link to insert the checkout page on your WordPress website. Now, when the link is copied, then paste it to the text area of the editor. After pasting the code, now hit the ‘Publish’ button. Your checkout page is embedded. Note: In case you want to sell multiple products via a single checkout page, you can create a multi-plan checkout page otherwise skip this step. So, you learned an easy and cheap method to start funko pops business online with Pabbly Subscription Billing. Now, it might be a bit overwhelming for a any new users but eventually, you will ace this software and top the e-commerce game. Furthermore, if you have any doubts regarding these steps or e-commerce, write your queries in the comment section below. We will respond to you as early as possible.Step 2: Select Subscription Billing

Step 3: Account Setup

Step 4: Connect Payment Gateways To Sell Funko Pops Online

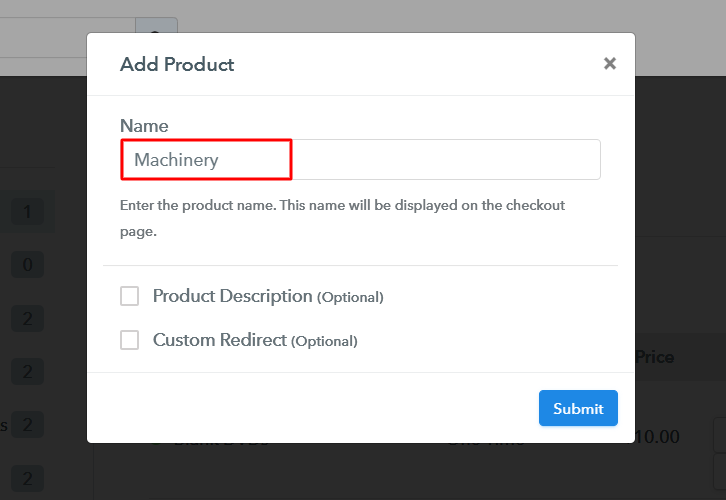
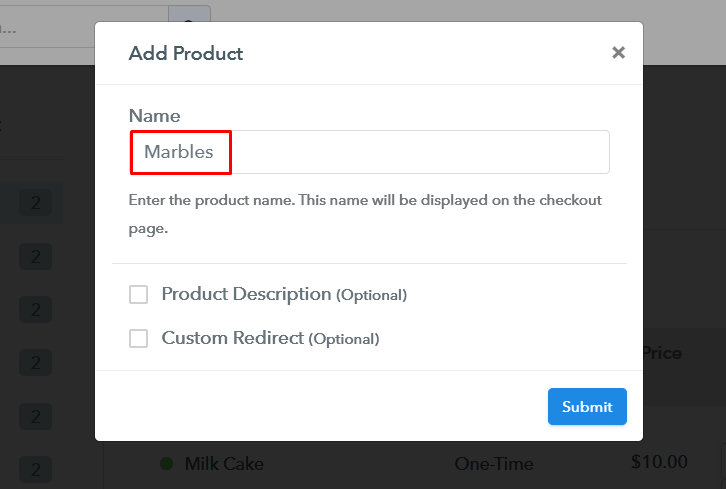
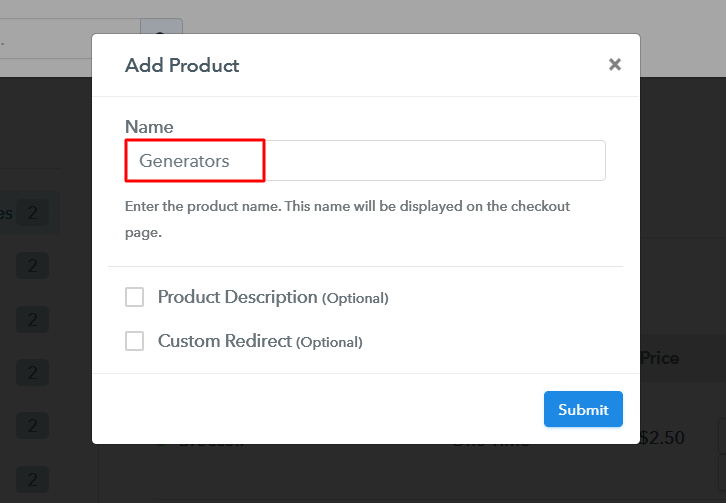
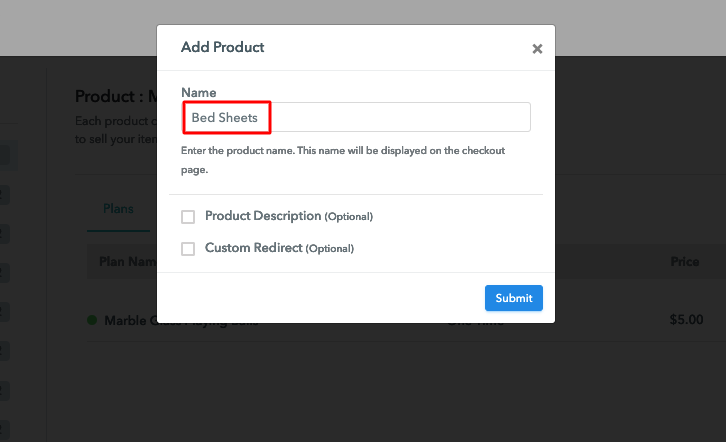
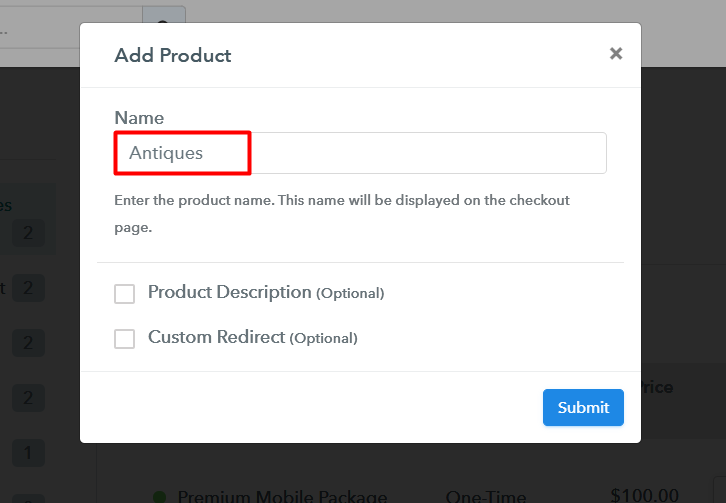
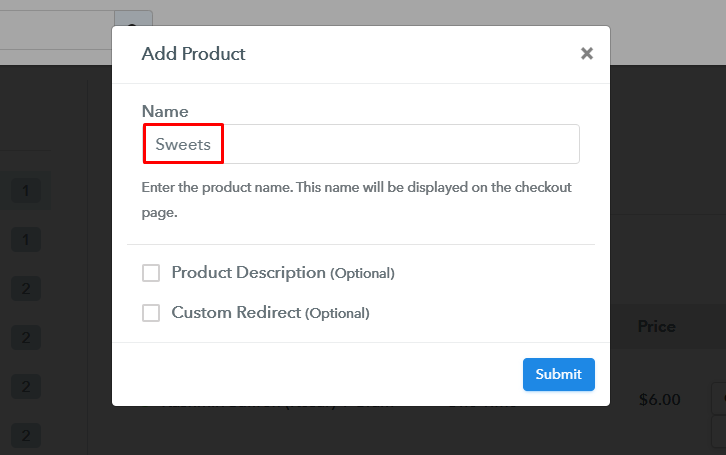
Step 5: Add Your Product

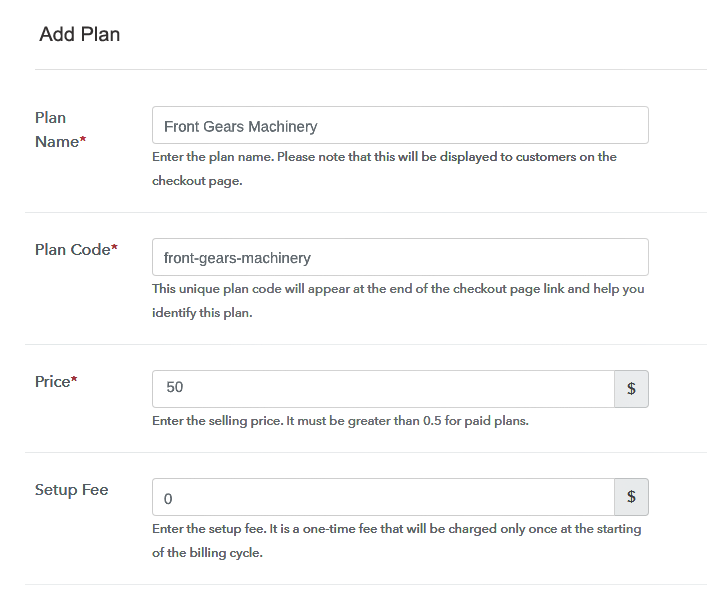
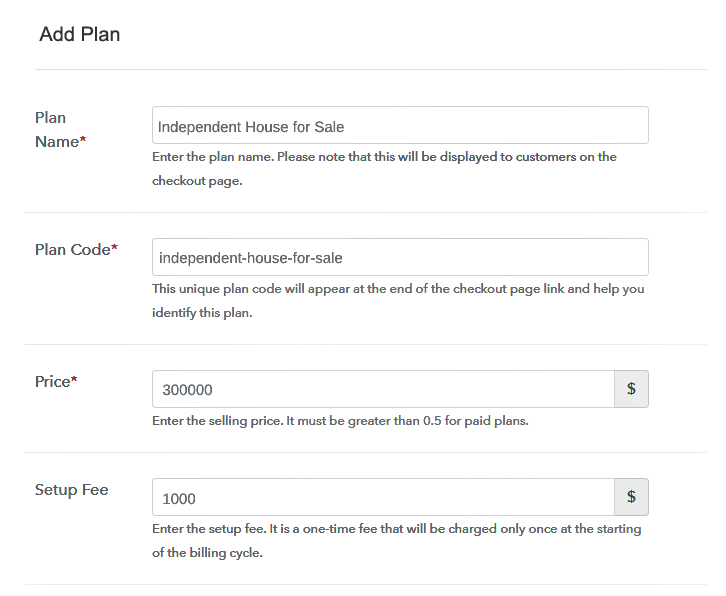
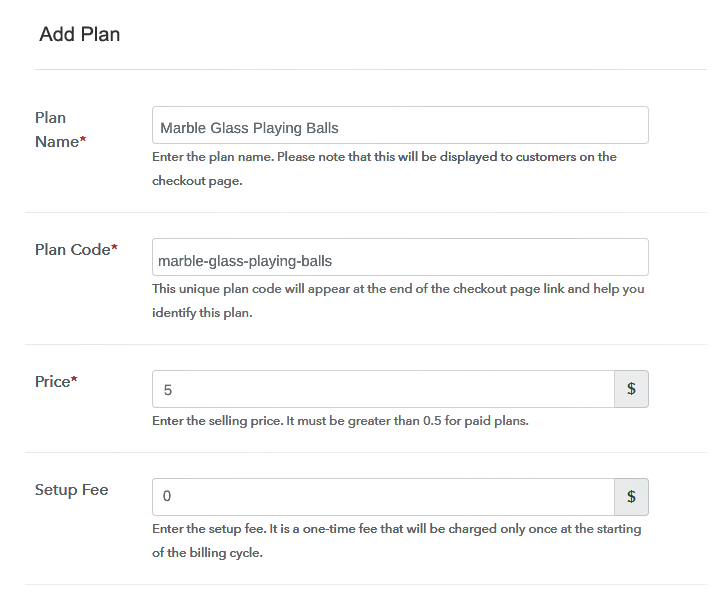
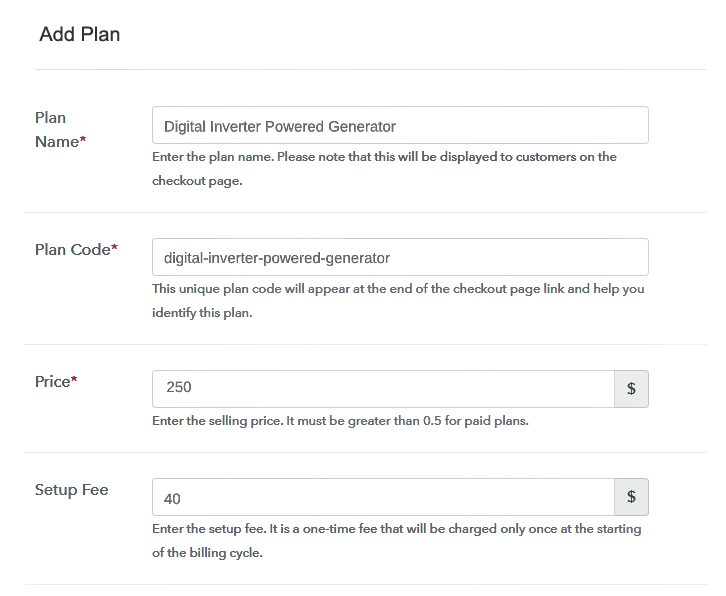
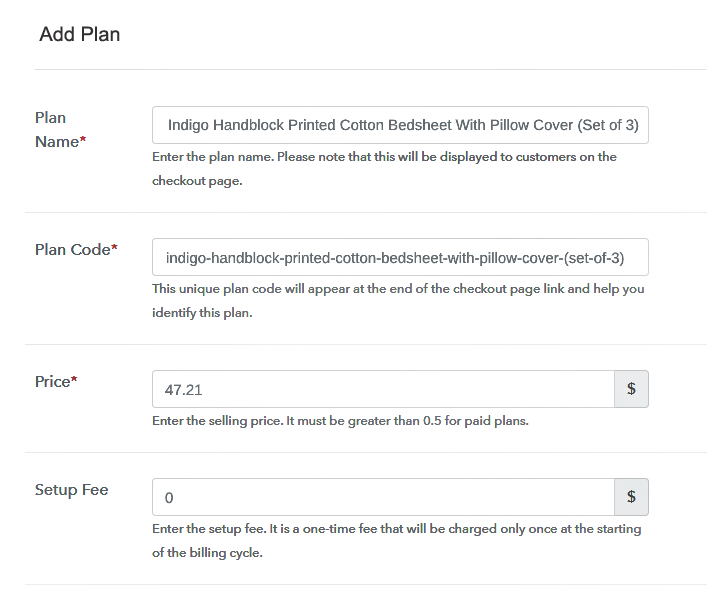
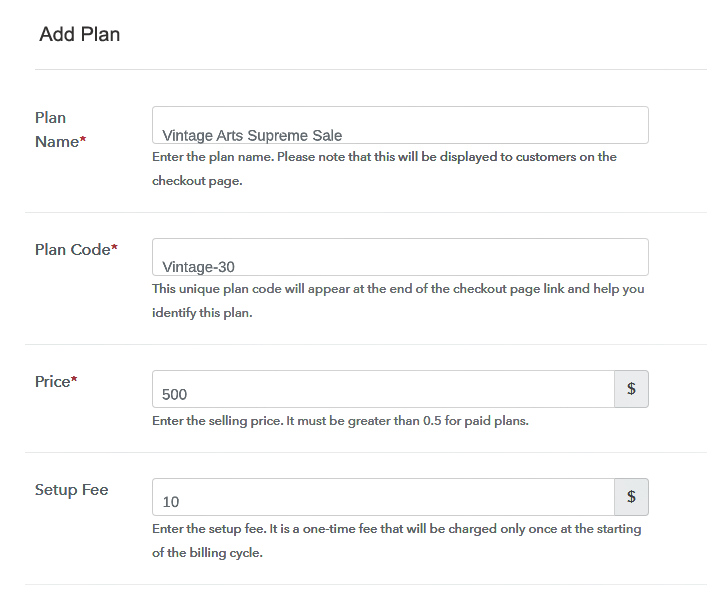
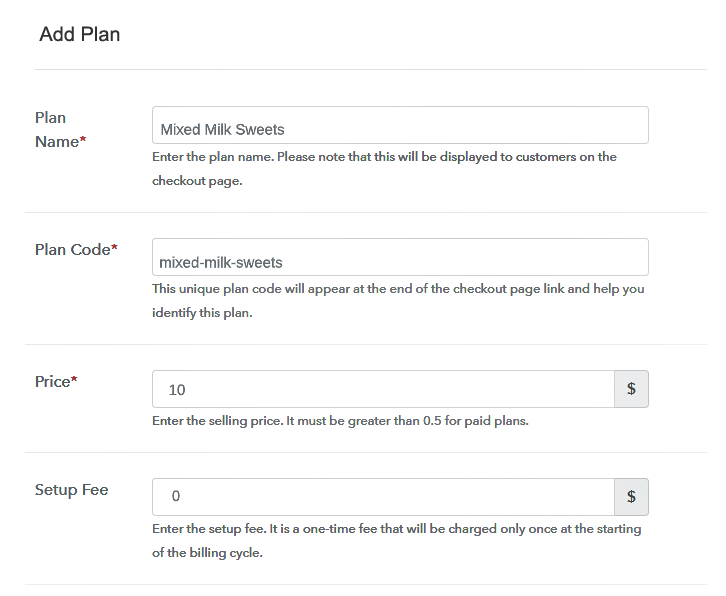
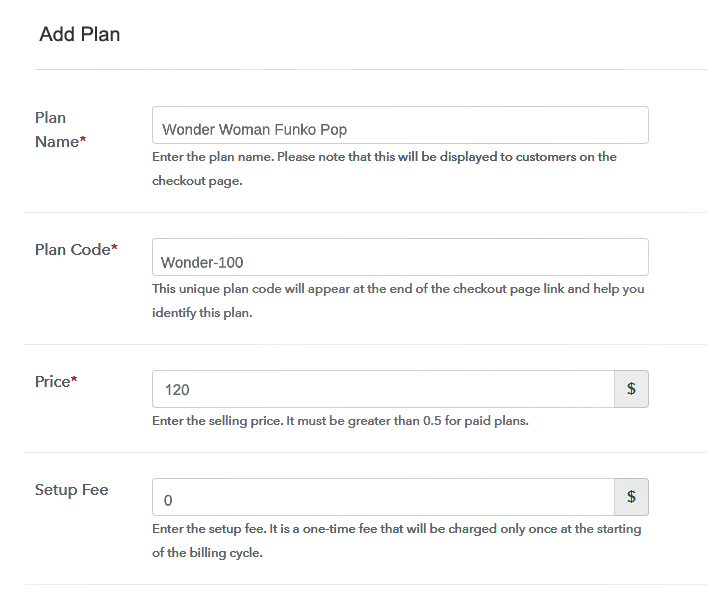
Step 6: Add Plans
(a) Select Add New Plan

(b) Specify the Plan & Pricing Details
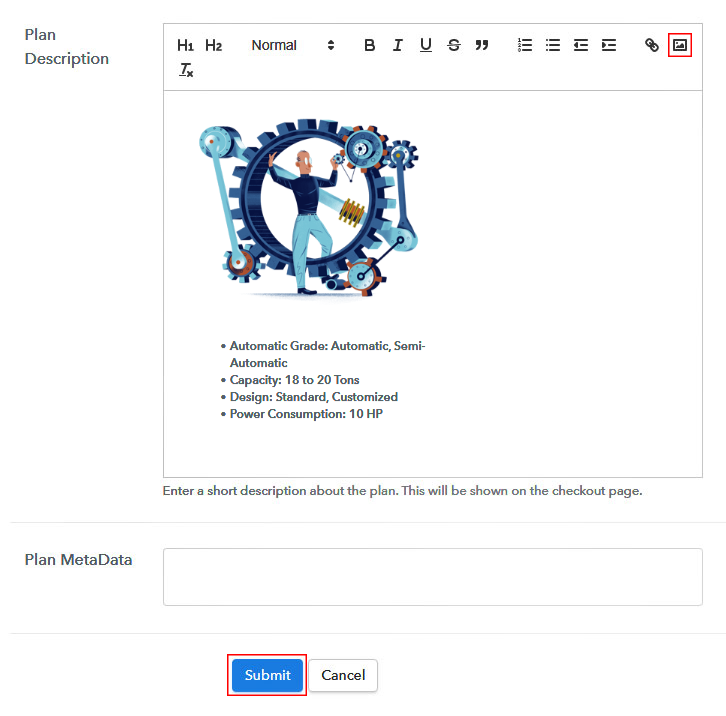
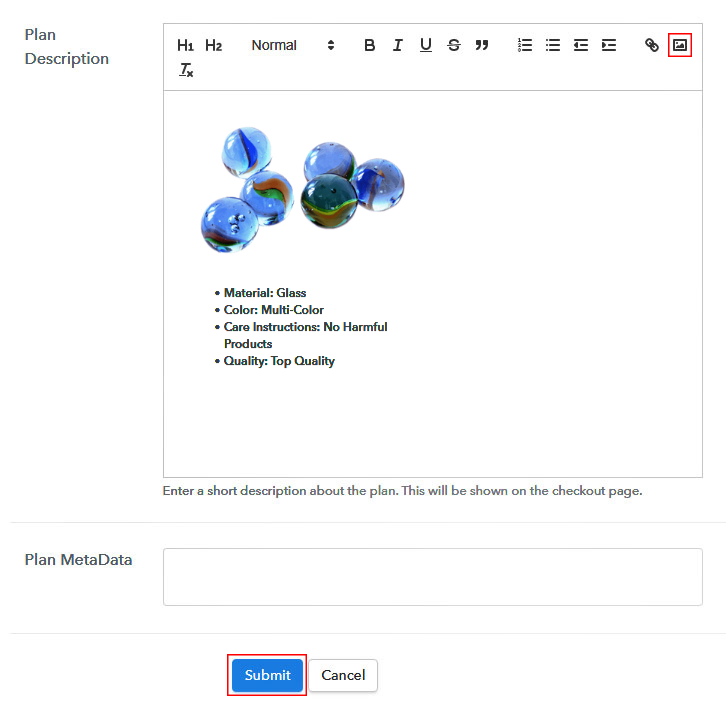
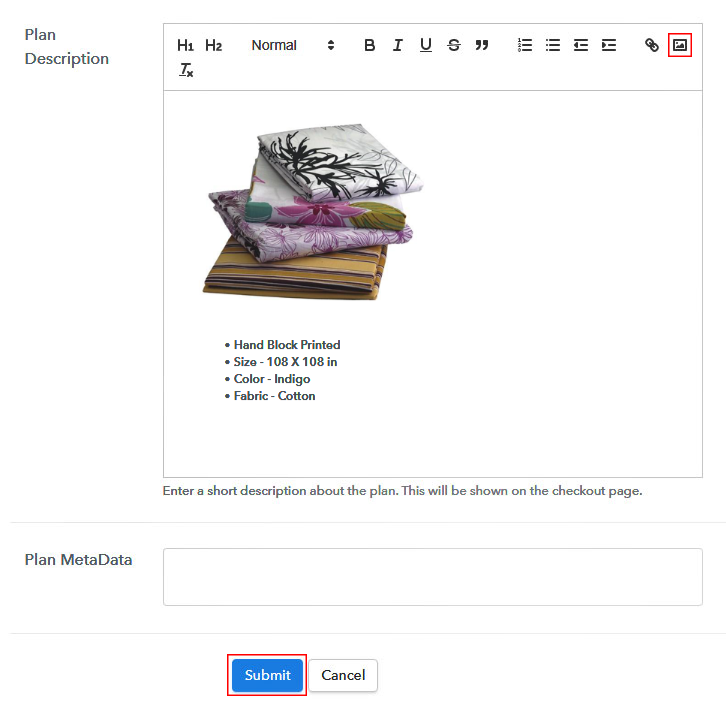
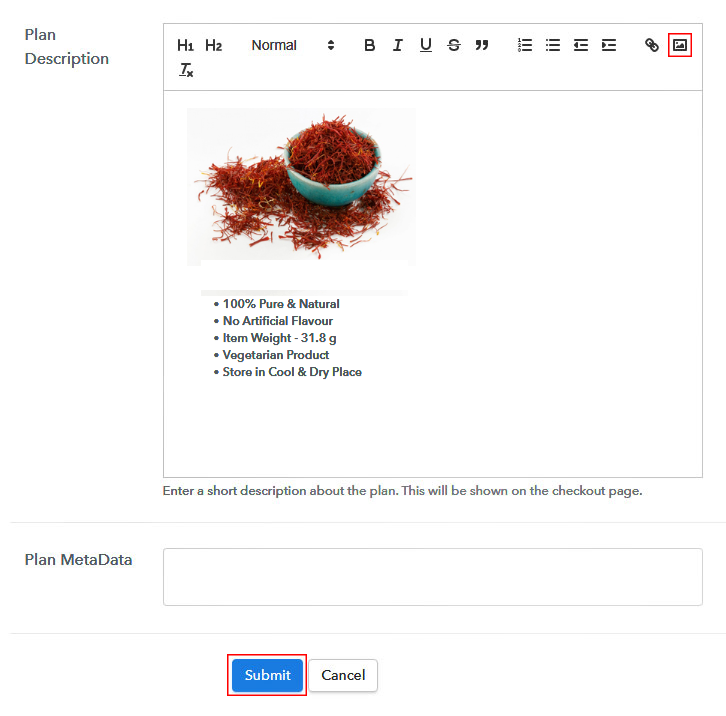
(c) Add Image & Description

Step 7: Share your Checkout Page

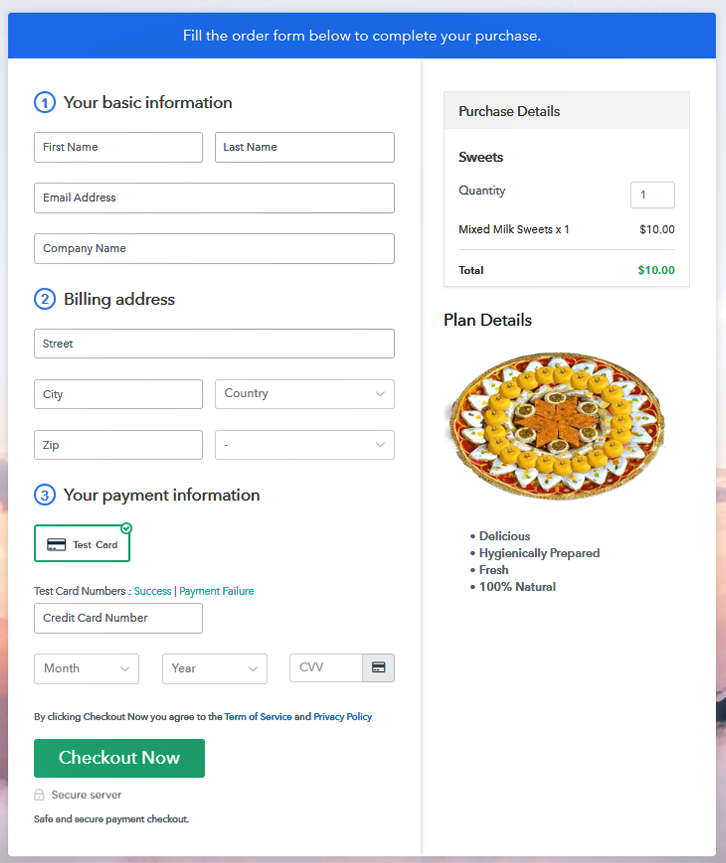
Step 8: Preview Checkout Page
(a) Click on the View Button

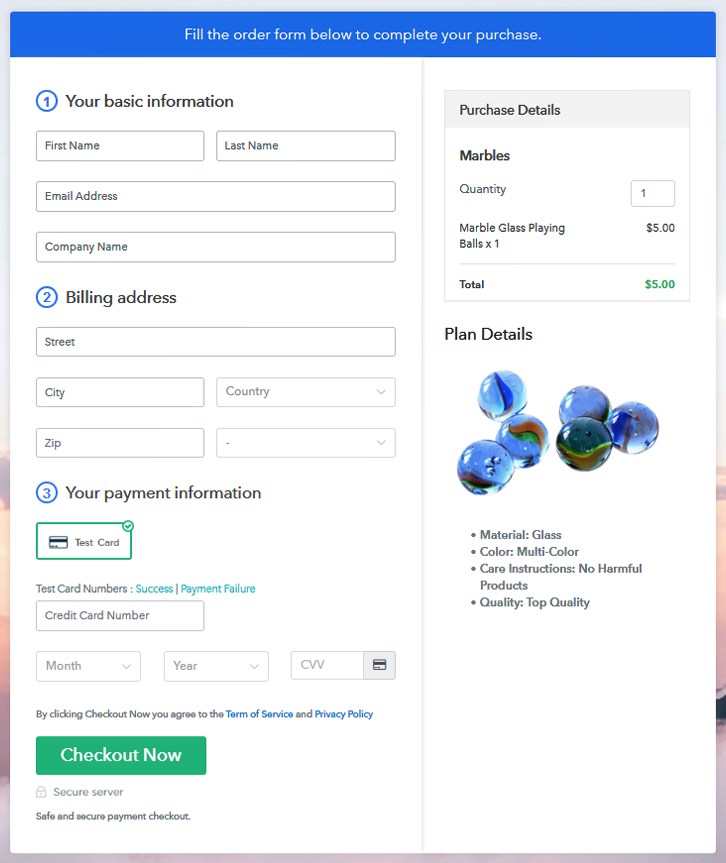
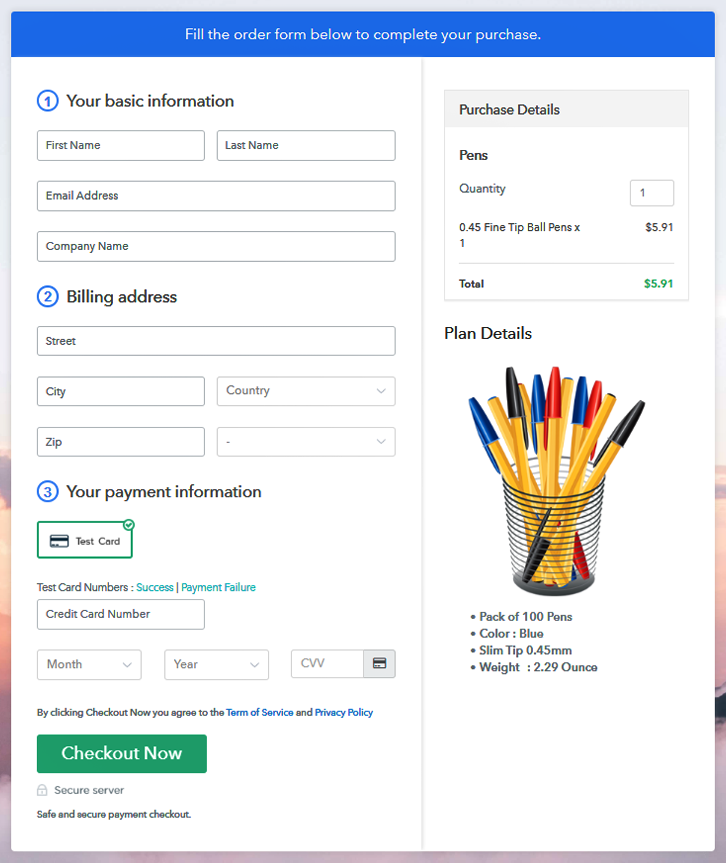
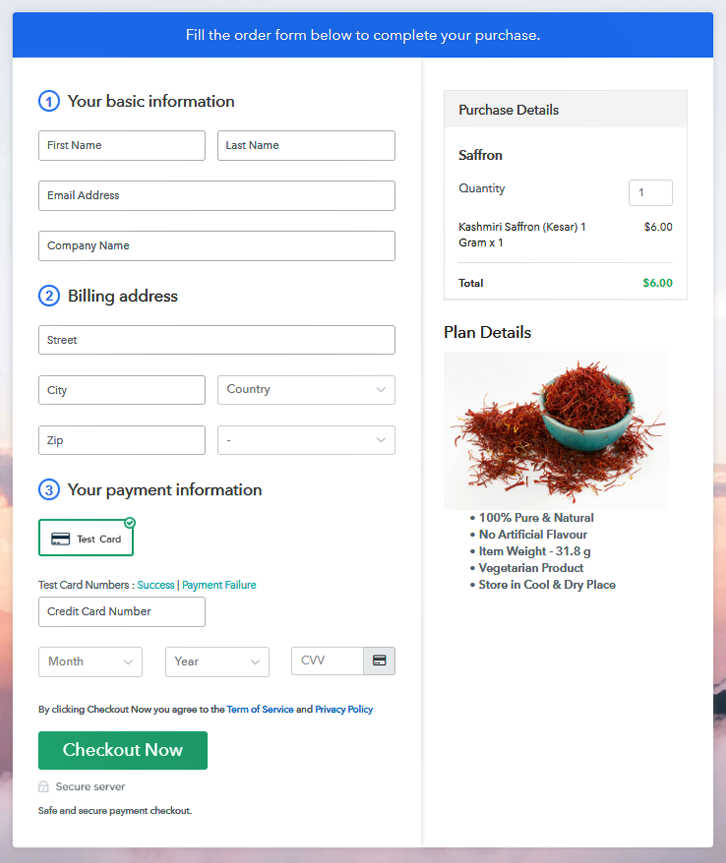
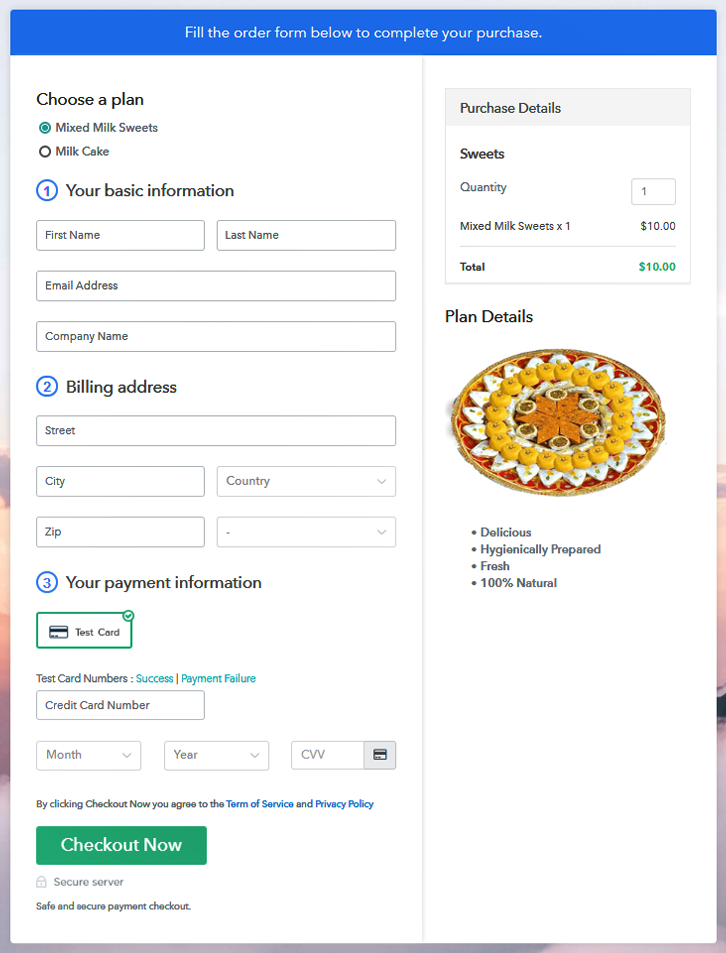
(b) Take a Look at the Checkout Page
Step 9: Embed Checkout Page in Site & Sell Funko Pops Online

(a) Edit the Page & Paste the Copied Link

(b) Save & Publish the Checkout Page

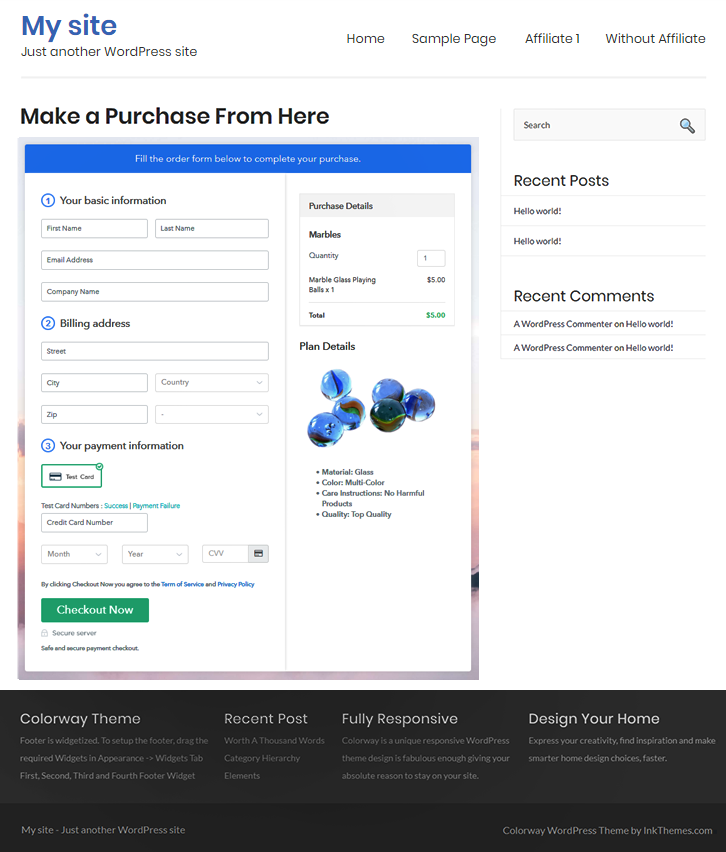
(c) Check out the Final Look of your Checkout Page on WordPress Site

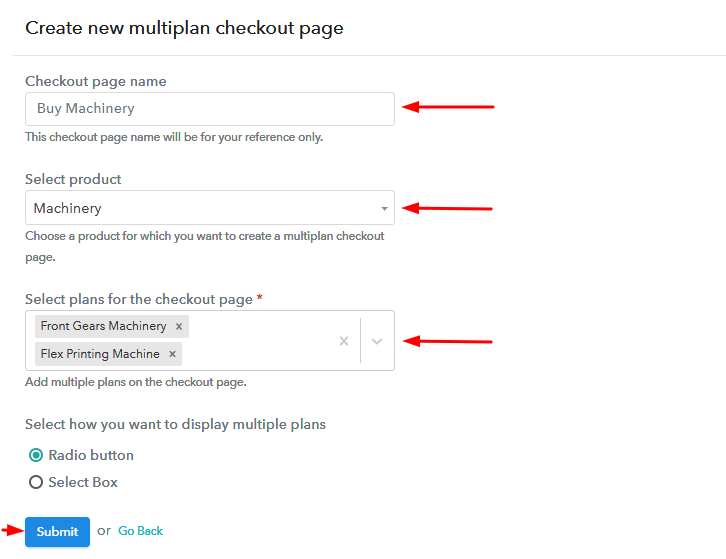
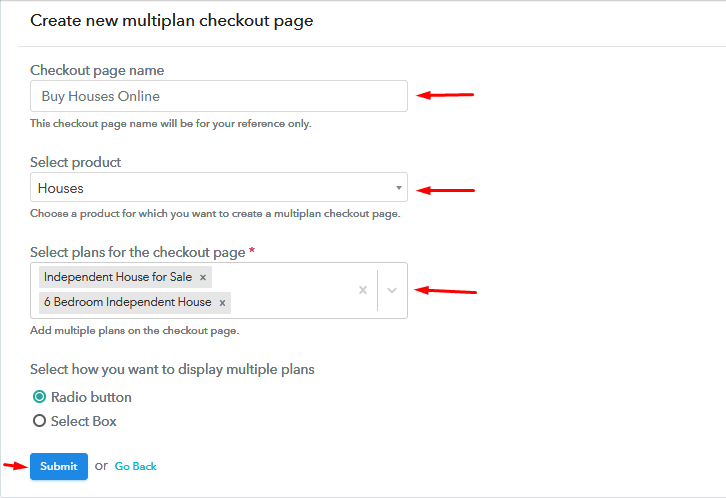
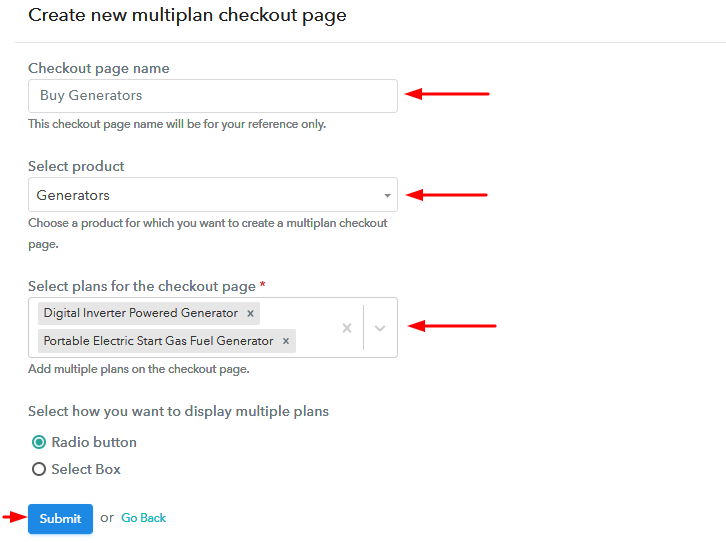
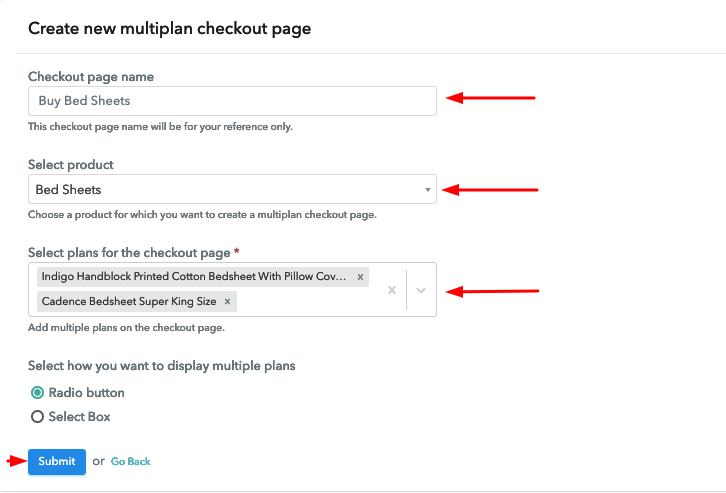
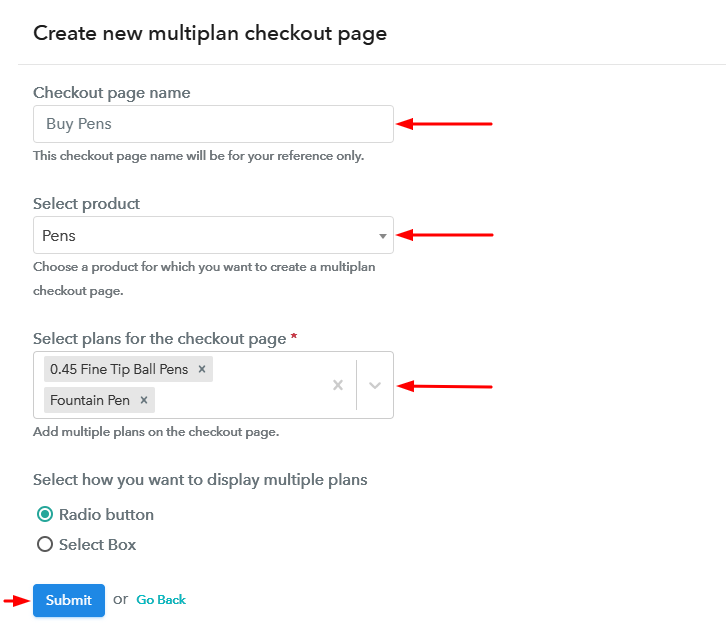
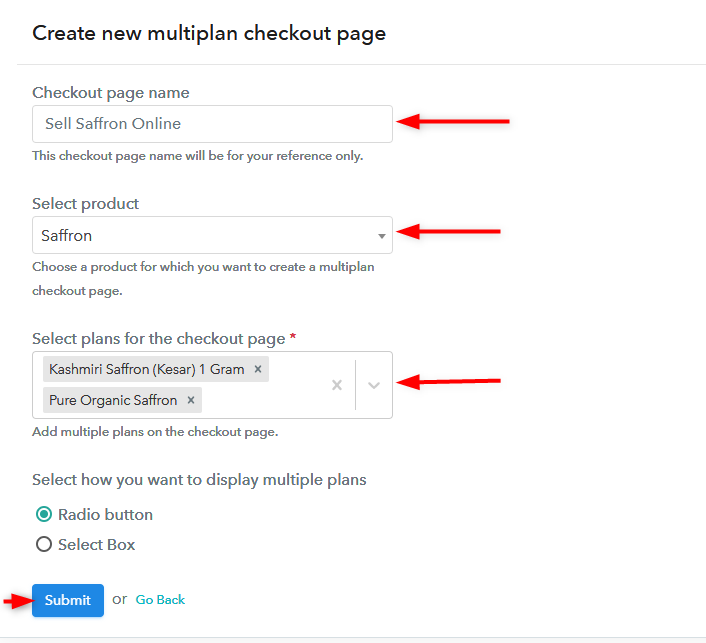
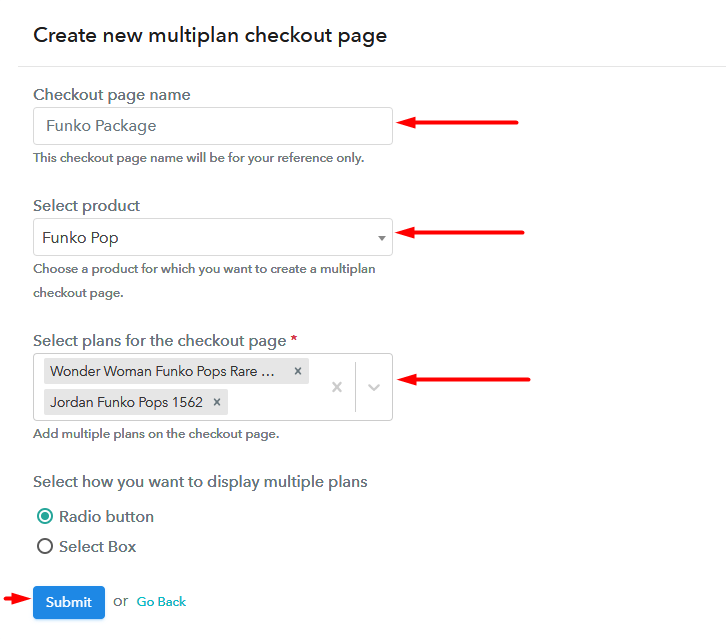
Step 10: Multiplan Checkout Page
(a) Click on Add Mutiplan Checkout

(b) Add Plans to Sell Multiple Funko Pops Online from Single Checkout Page
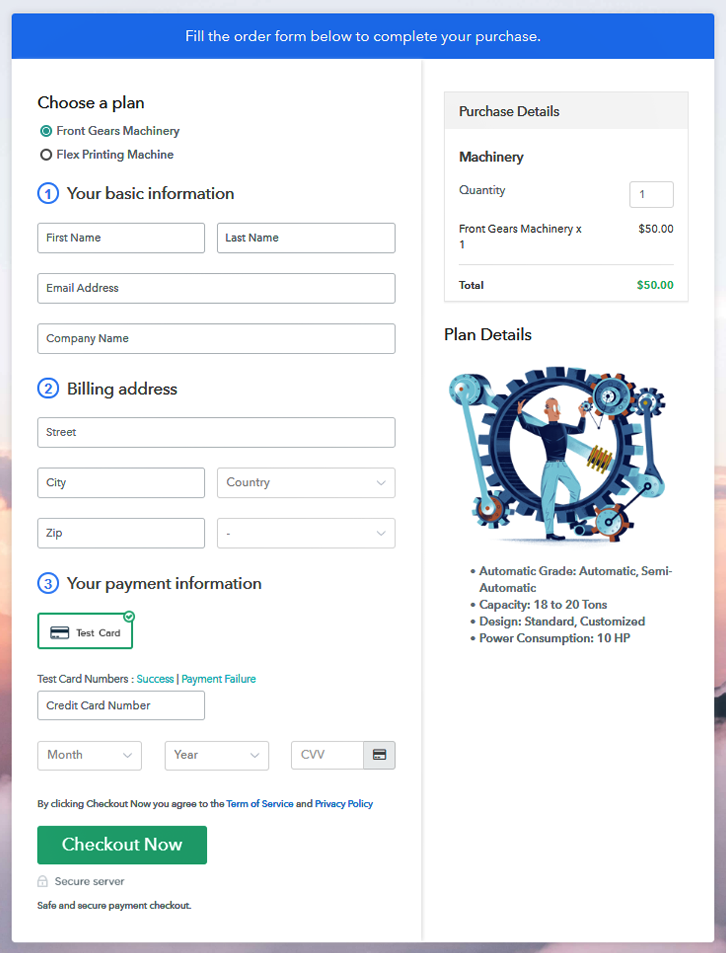
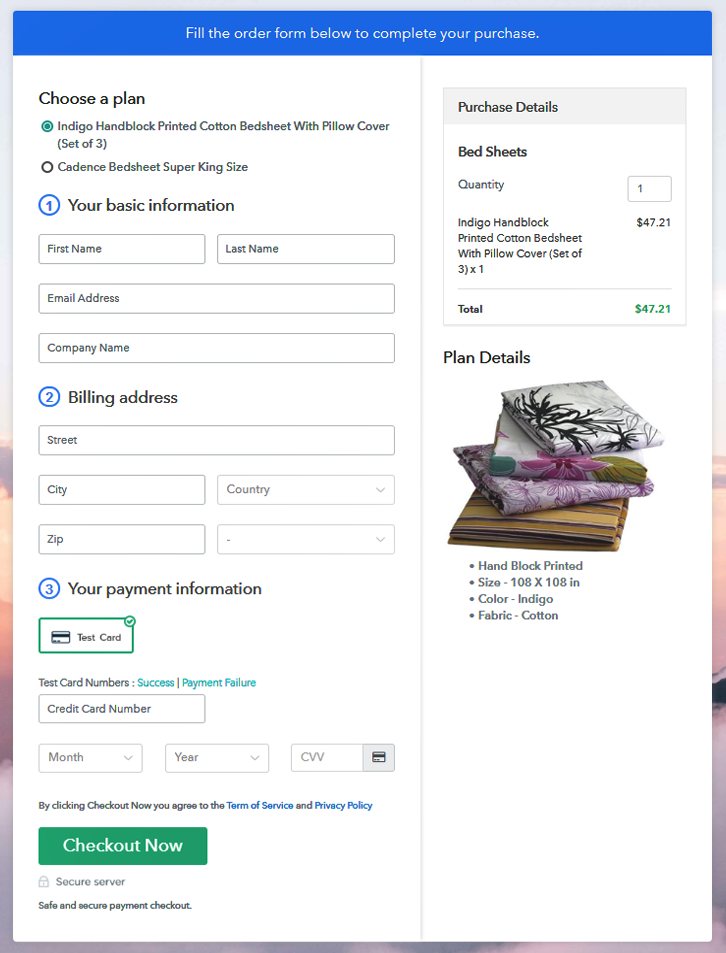
(c) Take a Look at the Checkout Page
Wrapping Up
You May Also Like To Read –