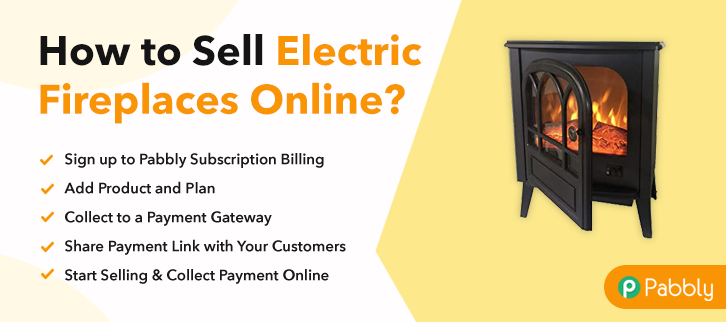
Ideal For: All the firework sellers, firework makers, retail firework selling business owners, and other firework selling merchants can use this method to take their fireworks selling business online.
Why Choose this Method for Selling Over any Other Solution?
Unlike any other solution, this method allows you to:
- List and sell your fireworks for FREE. Absolutely no payment required.
- No commission on sales.
- Collect payment through multiple payment modes from a single checkout page.
- Sell one time or recurring subscriptions of your fireworks.
- Sell and collect payment in any currency as per your requirement.
- Give discounts on your products by offering special coupon codes.
- Add sales commission agents to help you in selling fireworks online.
Sometimes it’s pretty hard to find fireworks off-season, and so the online firework selling platforms has become a lifesaver here. And if you are also looking forward to selling firework online then you must be looking for a faster way to get started.
Why would you like to sell fireworks online?
Well, it’s a great business as you can earn a lot in the high sales season. But, what more it could bring in online selling is secure payments, billing and the management of items.
Yet, here comes the role of online selling platforms that can help you with the trouble of collecting payments as well as invoicing. In this blog, we’ll discuss doing so with making checkout pages and by sharing these checkout pages we’ll be going to sell fireworks online.
Not only the payment collection and the management gets a lot easier, but you can even share as well as embed the checkout pages on social media and websites. It supports almost every platform such as Twitter, WhatsApp, SMS, Emails, Facebook etc for selling fireworks online.
Have a look at what more you’ll get by using this service.
- A place to keep the record for all the fireworks in stock
- Collect online & offline payments both
- Automated billing & invoicing through emails
- Showcase single & multiple fireworks on pages
- Collect safe & secure payments both online & offline
- Unlimited product & plan creation to sell as many fireworks as you want to sell
And much more…
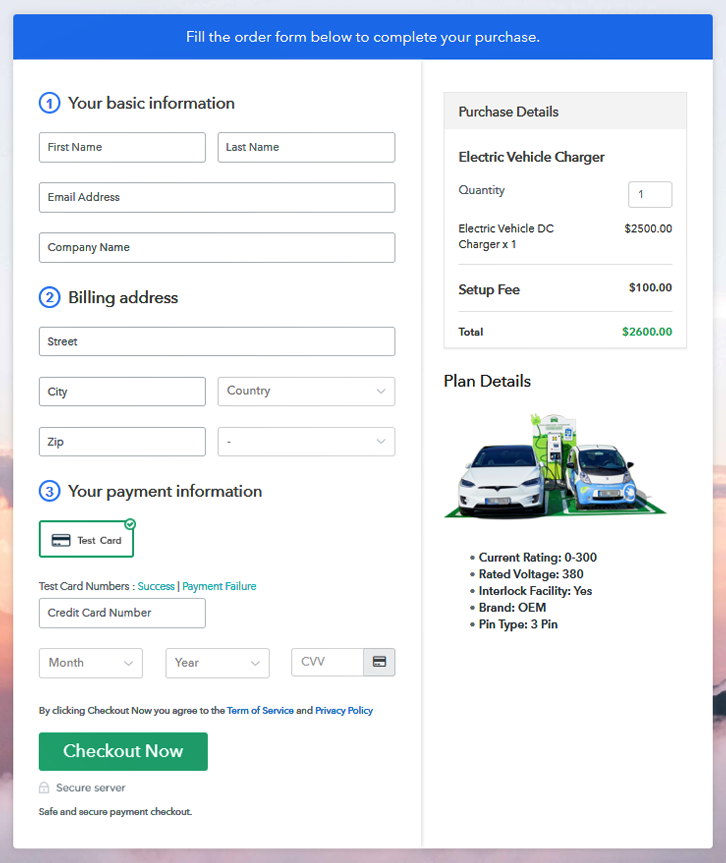
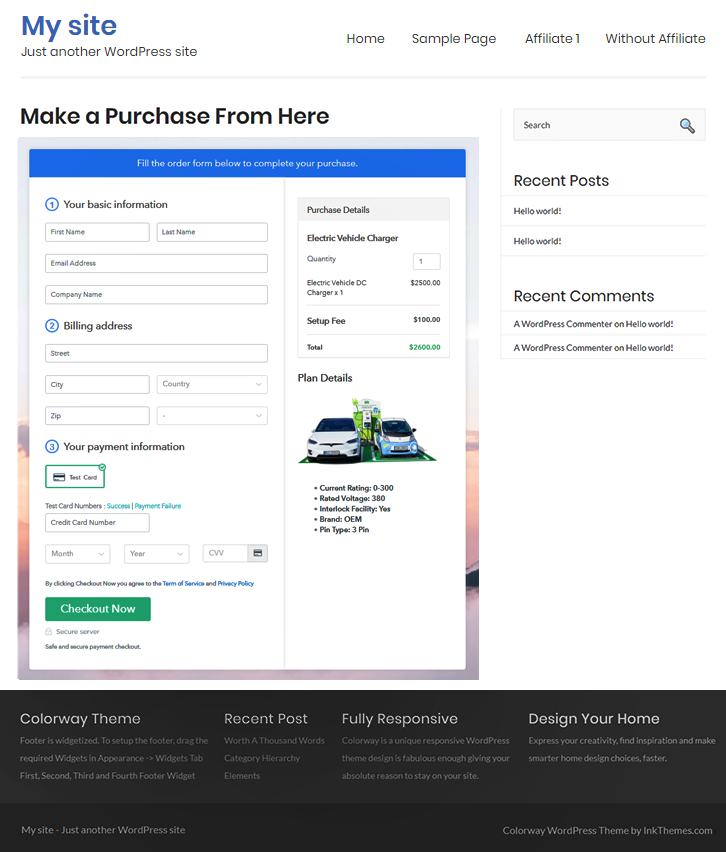
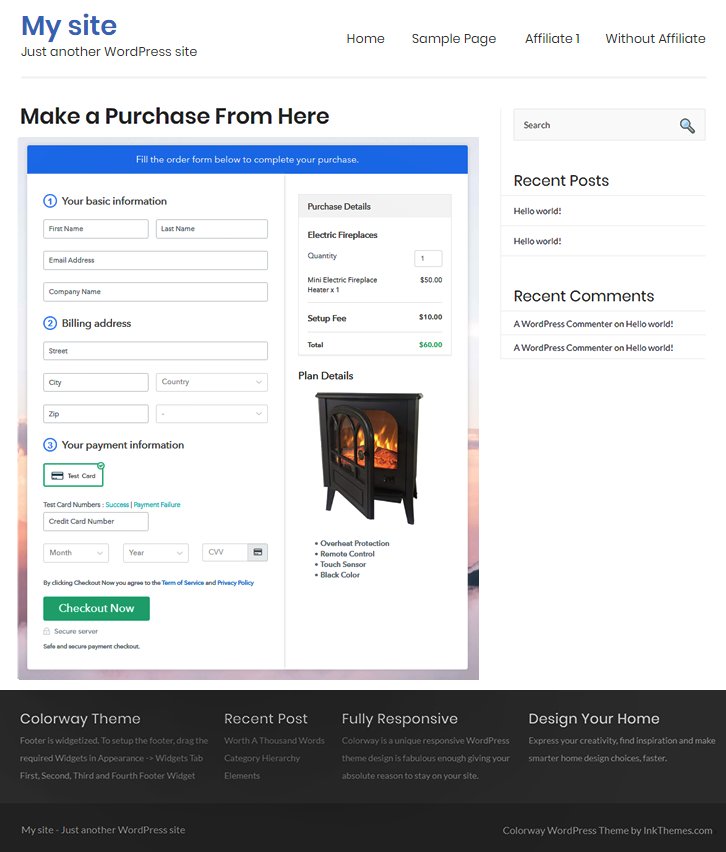
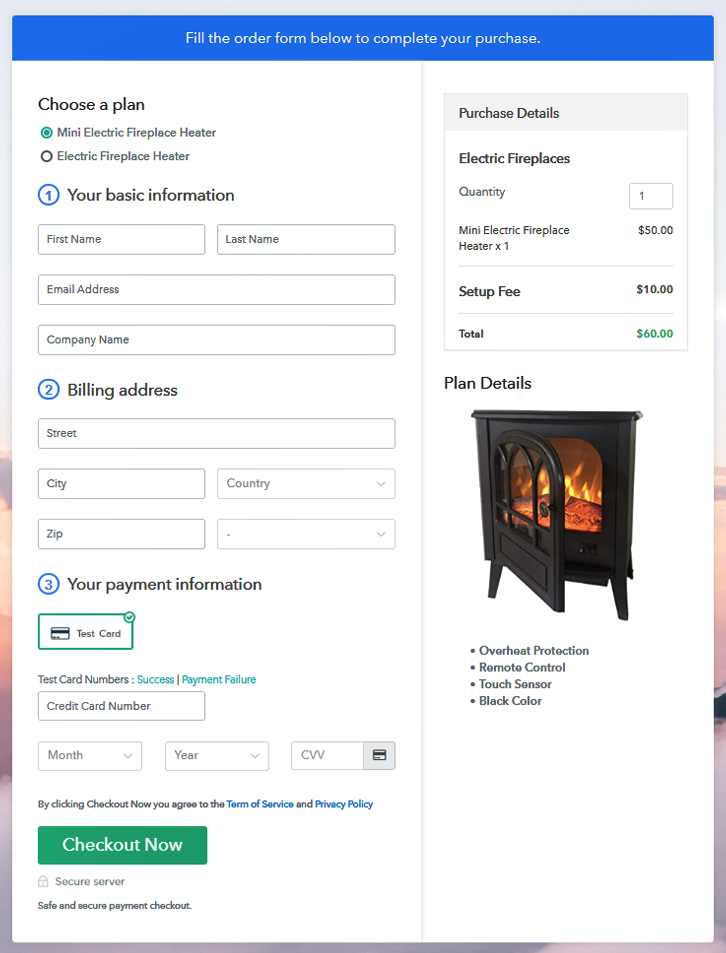
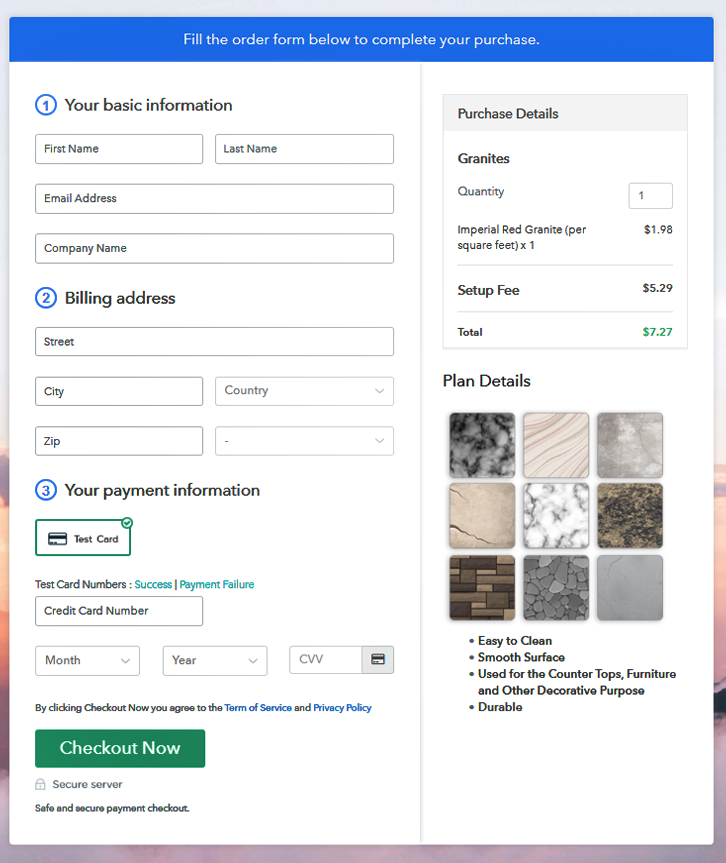
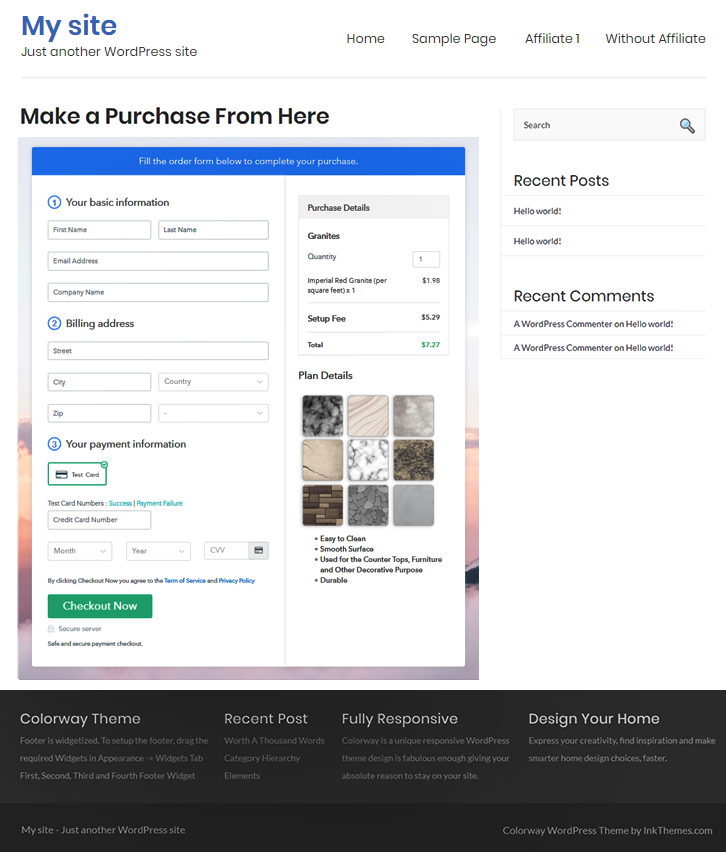
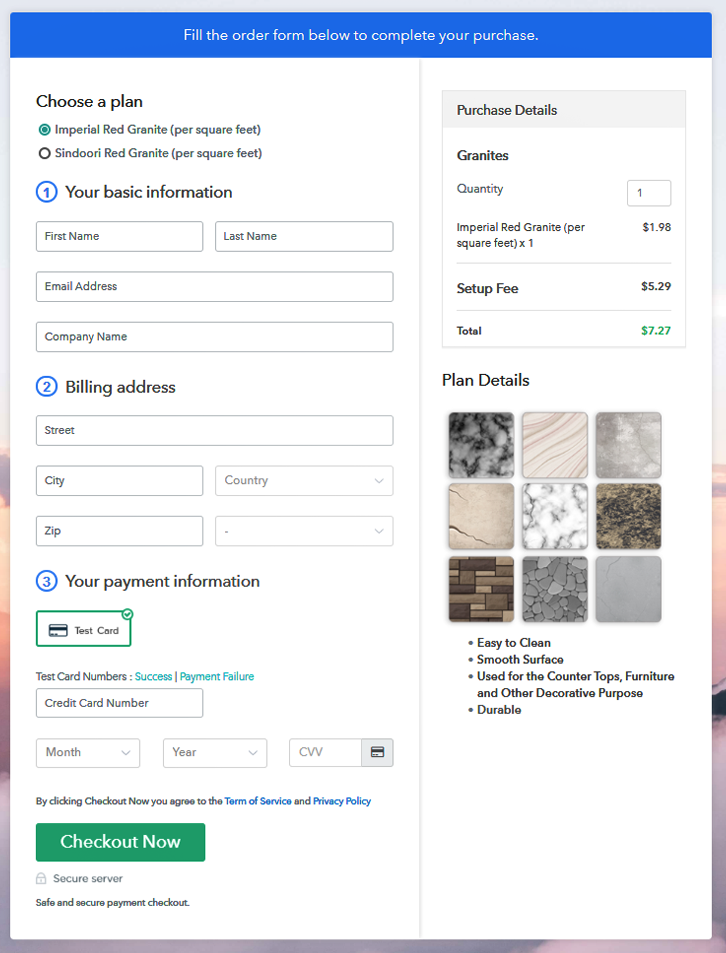
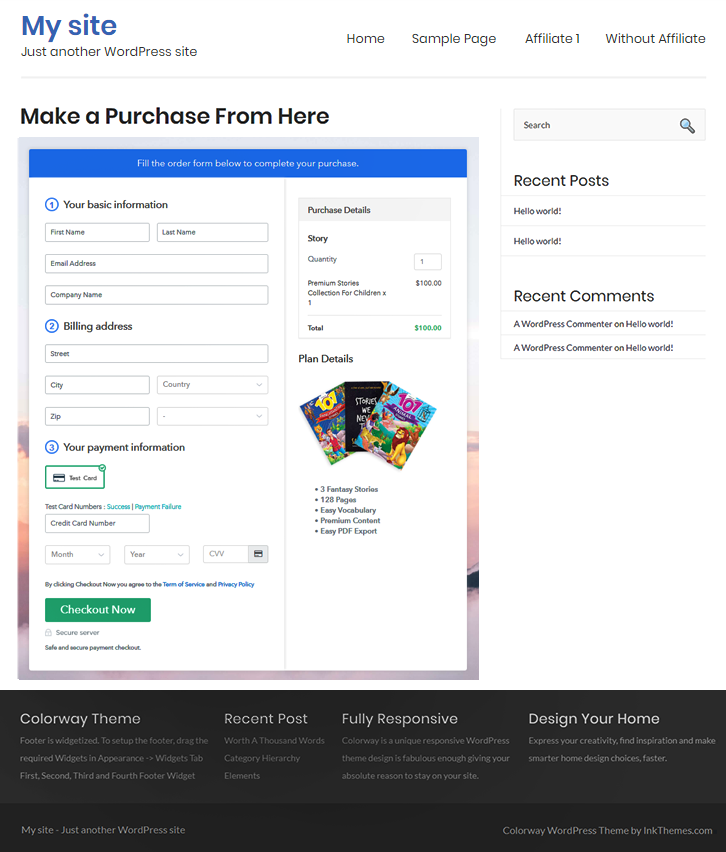
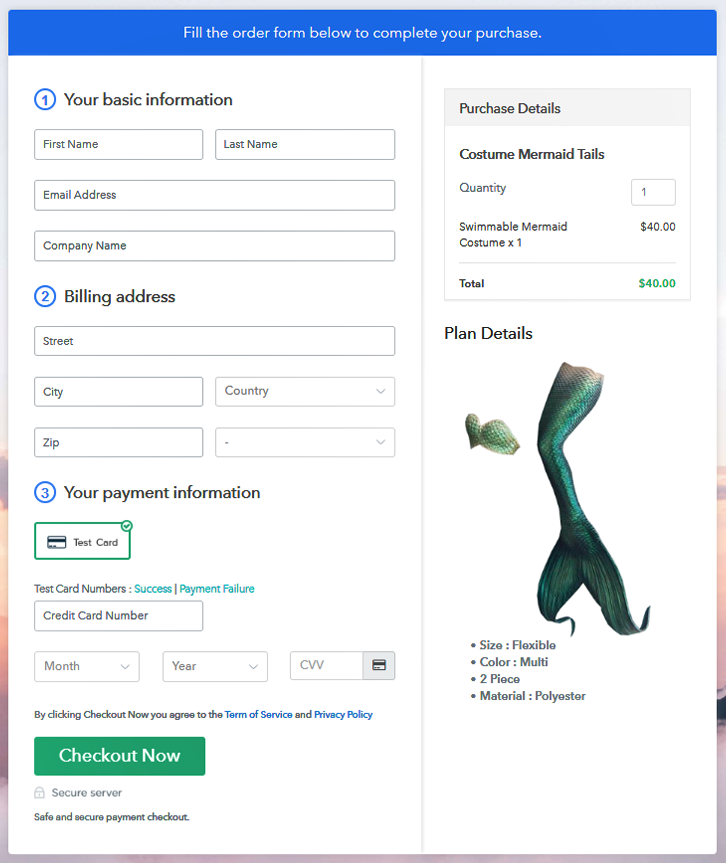
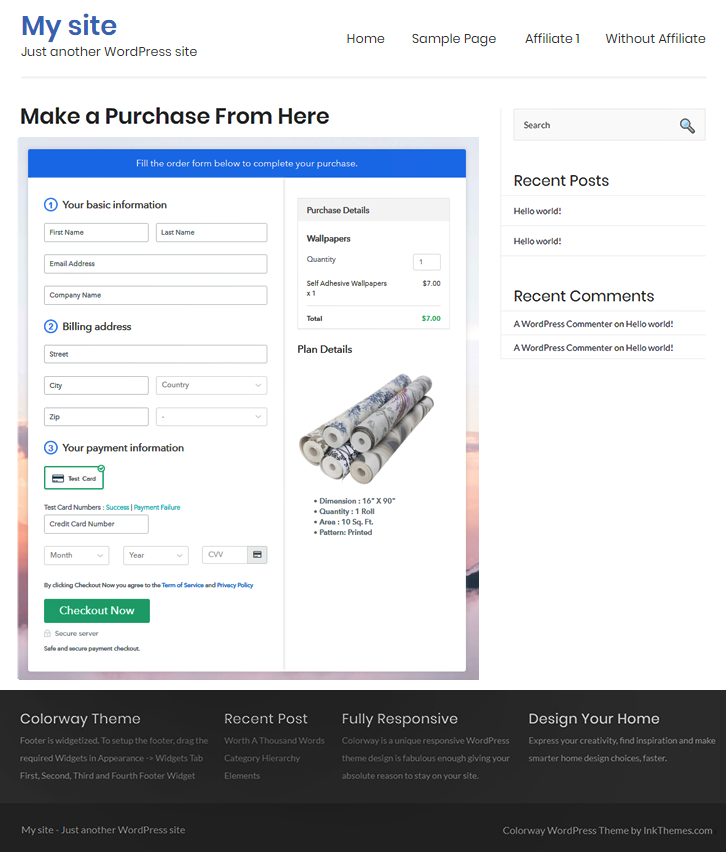
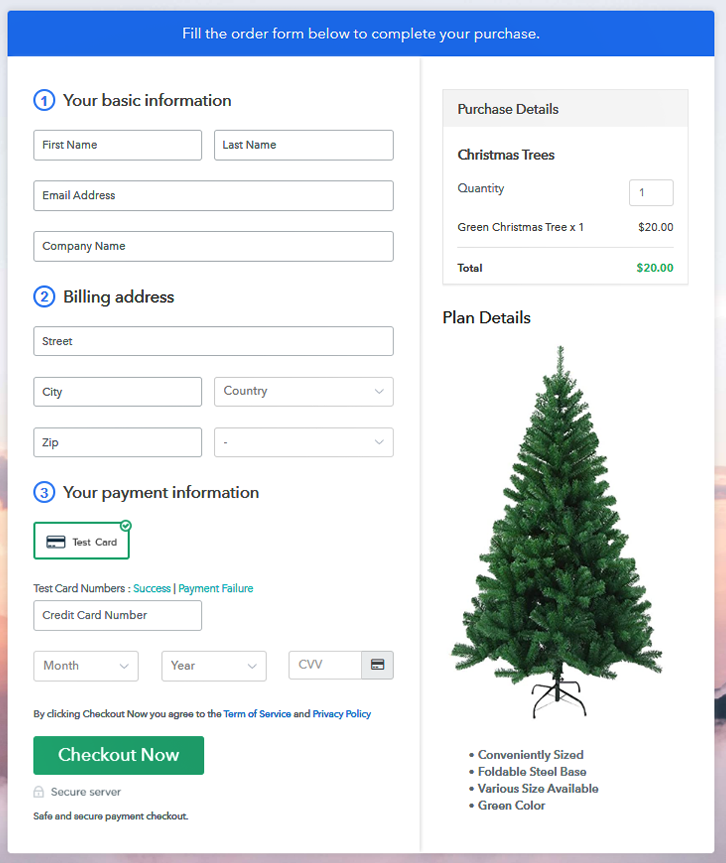
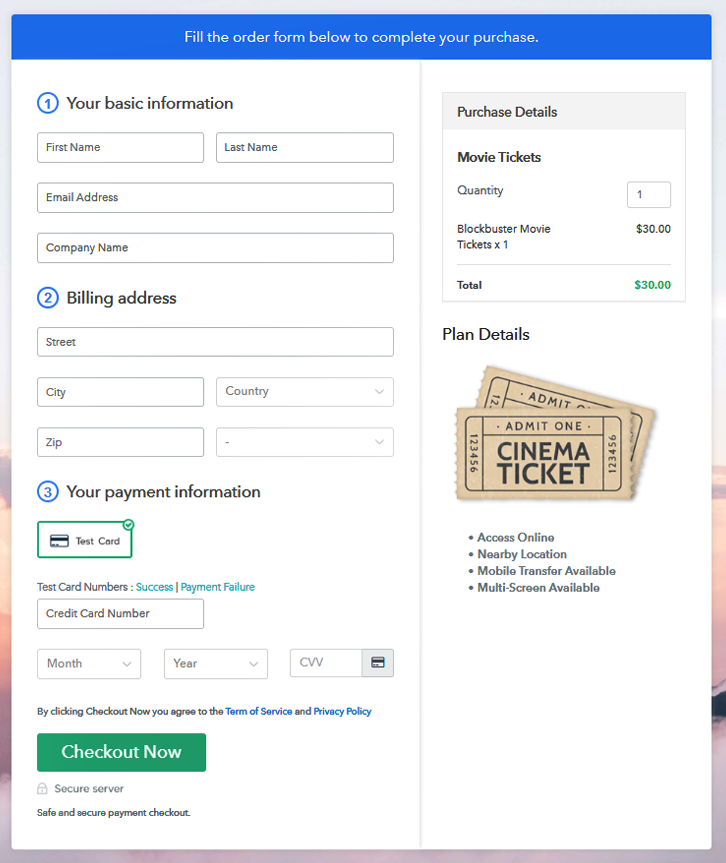
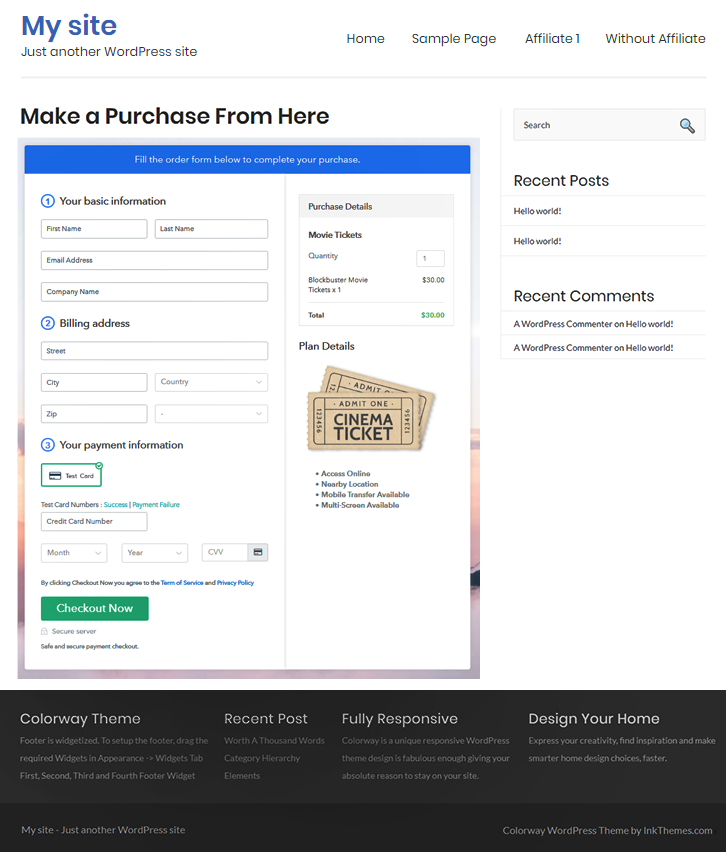
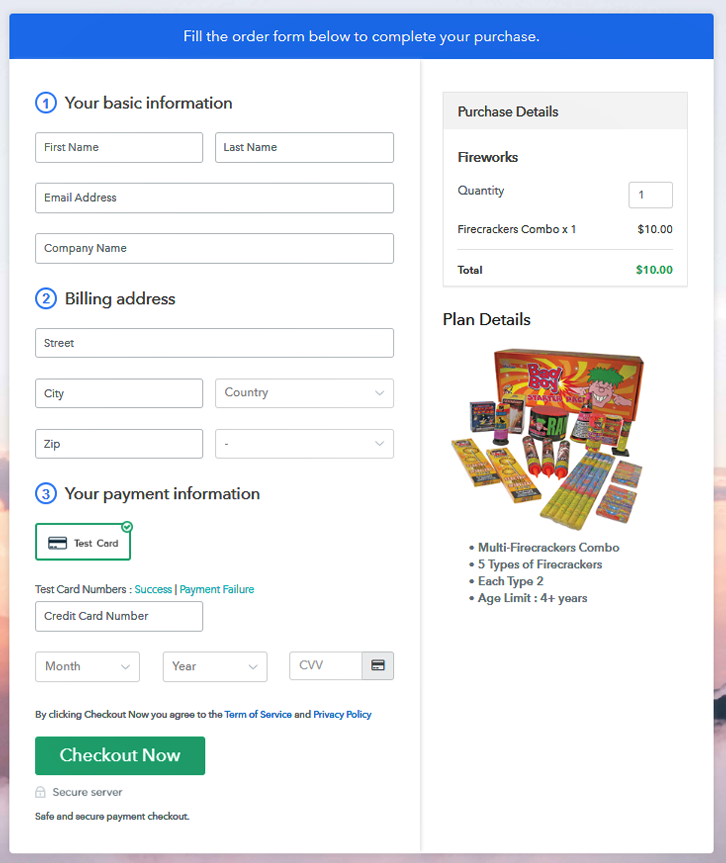
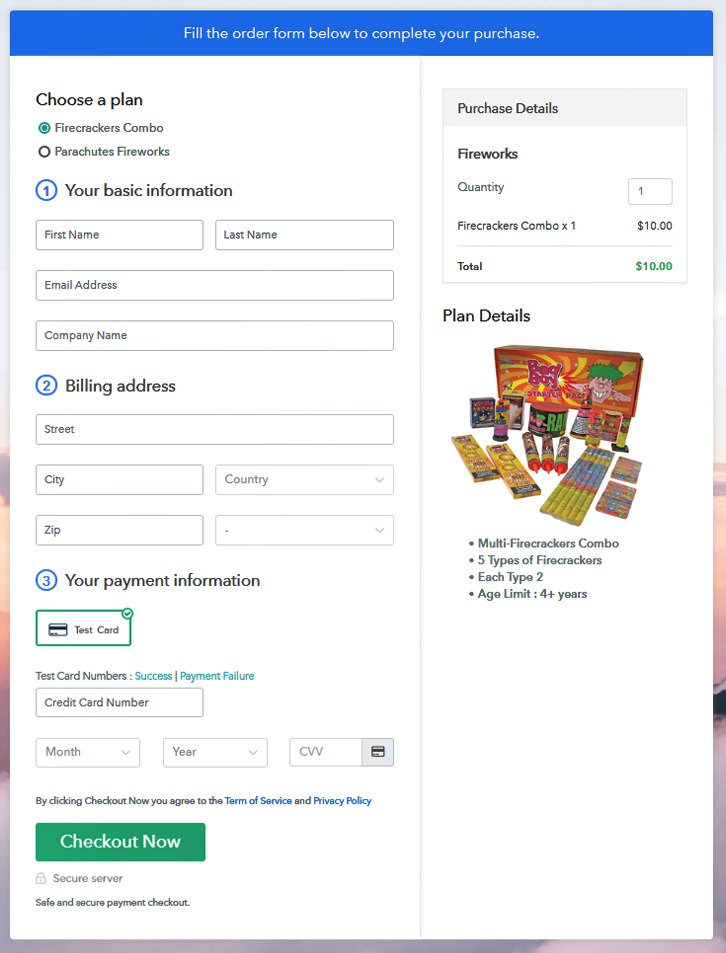
This is How your Checkout Page will Look Like After Creation
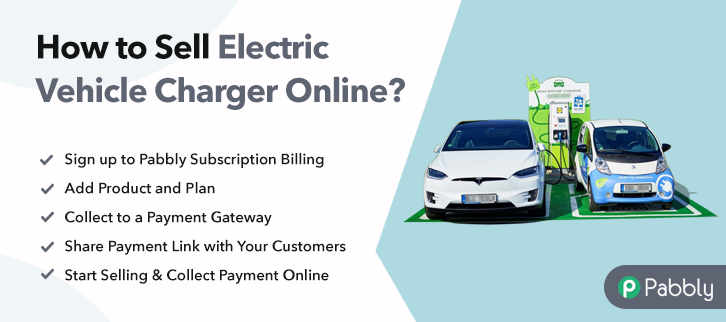
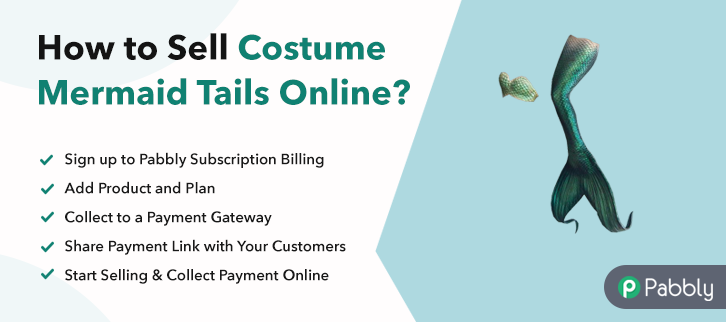
Step 1: Login to Pabbly Subscription Billing

You can start the procedure by visiting Pabbly Subscription Billing website. On the website click on the “Sign Up Free” button. On the sign-in/sign-up page, either mention name, email id and other details in the sign-up form and sign-in or directly sign-in using a Google existing account.
Step 2: Select Subscription Billing

Here, click on the “Access Now” button of the Subscription Billing application.
Step 3: Account Setup

In this pop-up window write down the company name, currency and phone number, and then click on the “Continue” button.
Step 4: Connect Payment Gateway to Sell Fireworks Online

Next step is integrating a payment gateway. Choose from the multiple gateway options and make use of the integration guides linked below. In this blog, for the basic understanding, I’m using the test payment method.
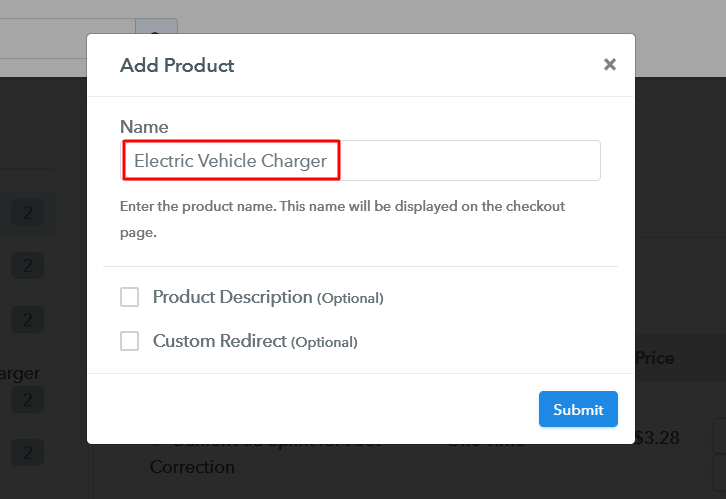
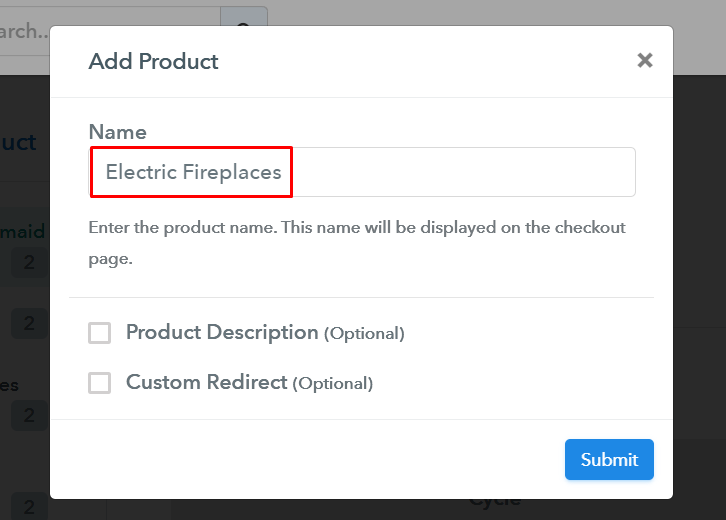
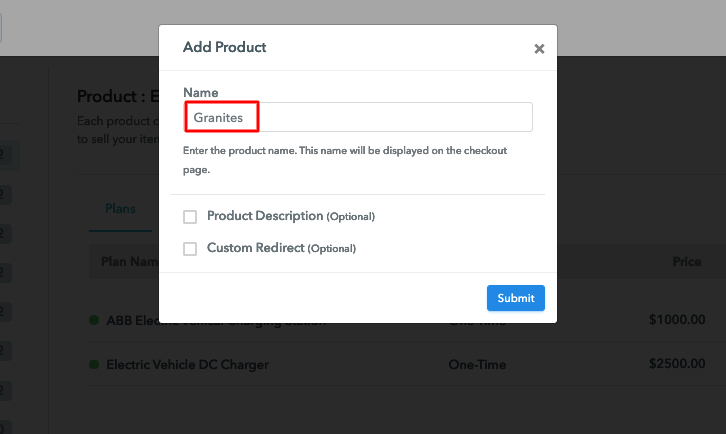
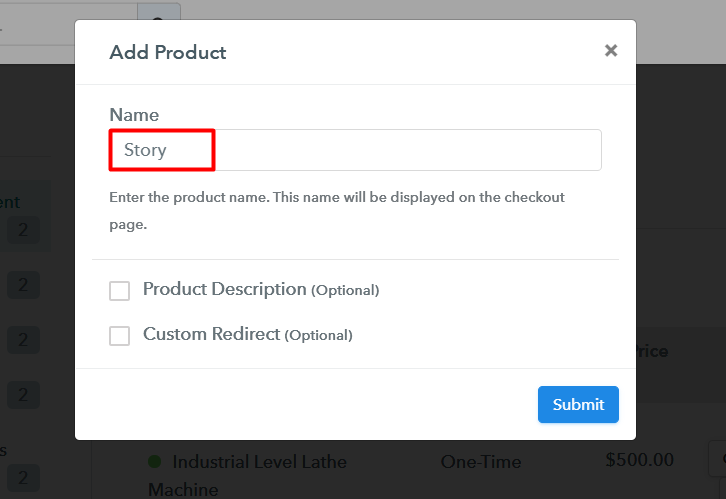
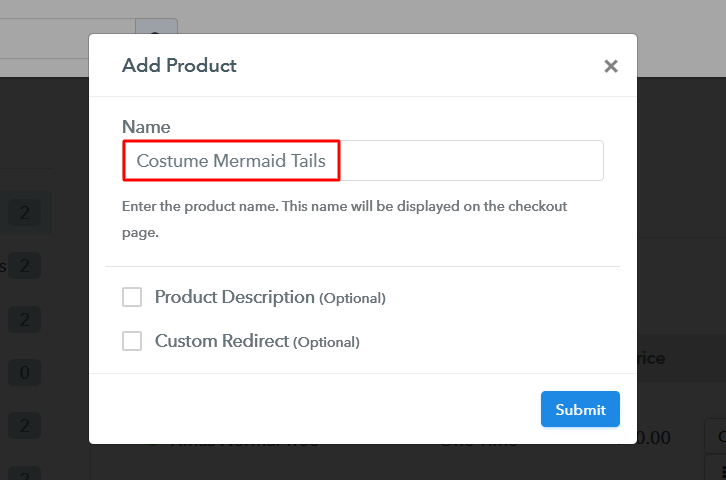
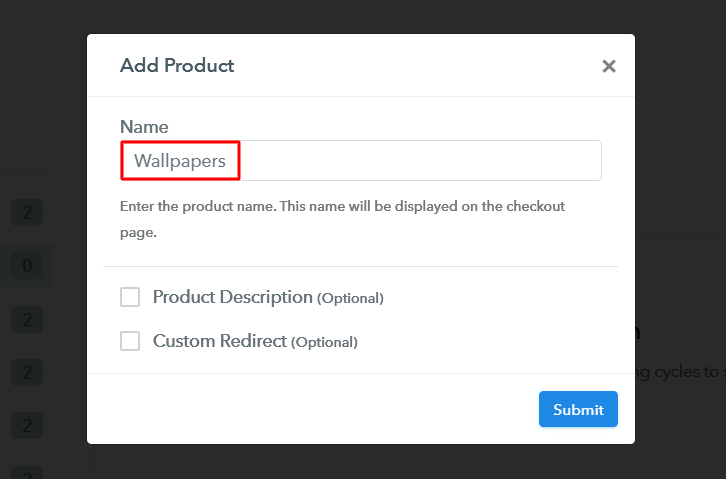
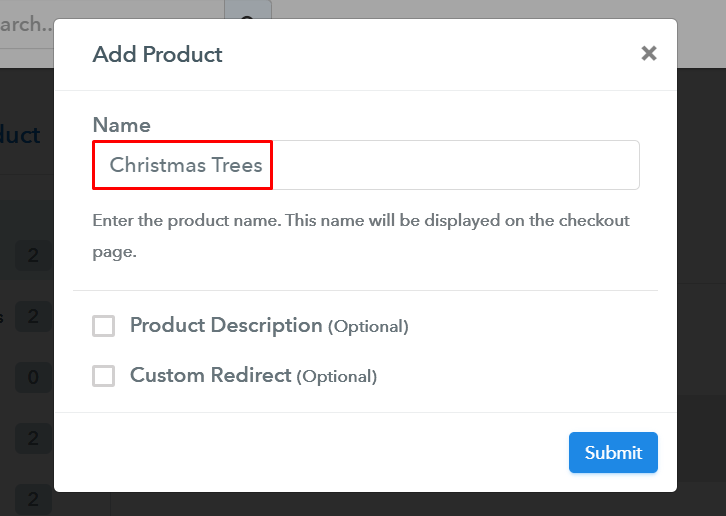
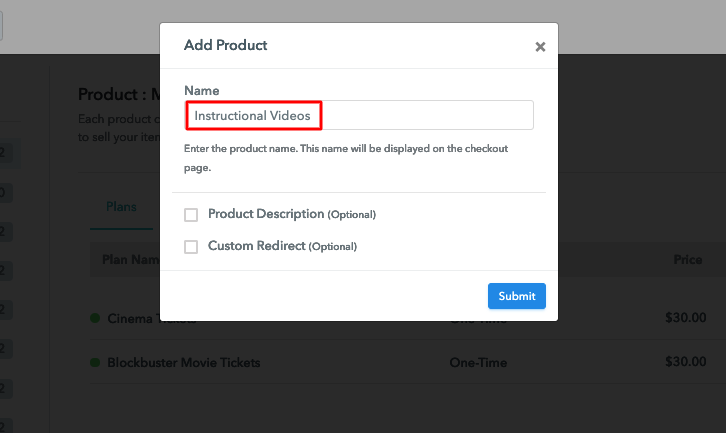
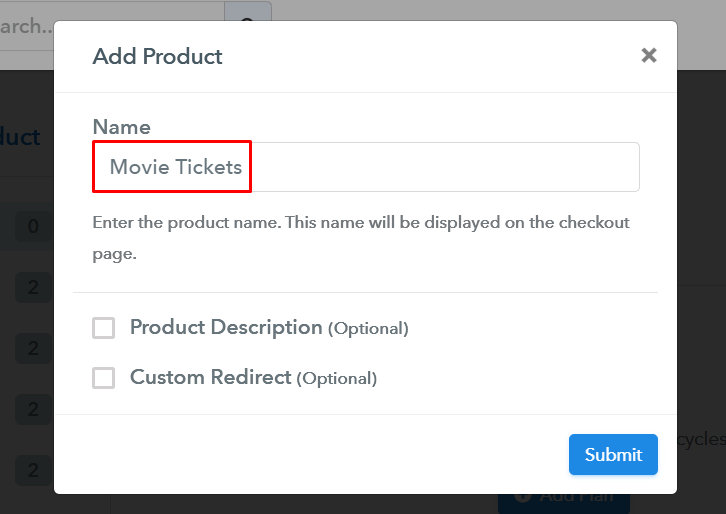
Step 5: Add Your Product

Now, the system settings are all done and we can create products. For this, click on the “Add New Product” button and specify a product name. The product name here is much like a category that is ascribed to a variety of items that you are going to sell further as plans.
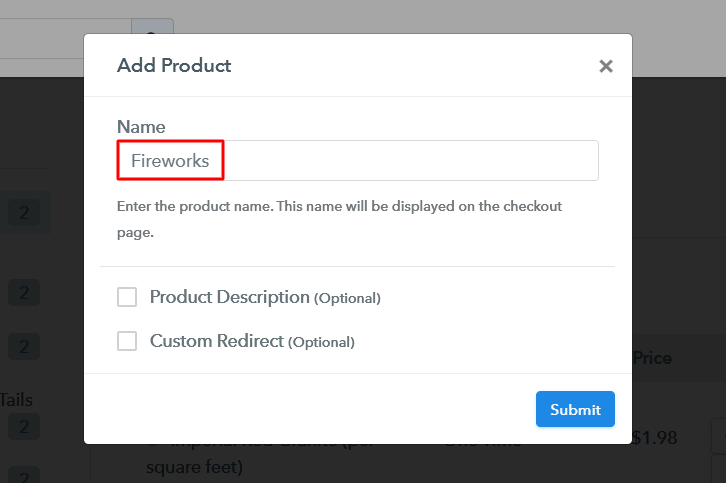
After mentioning all the mandatory details click on the “Submit” button & a product will be pushed in your product list instantly.
Note: Here you can add all the products related to the similar category by creating plans for each of them.
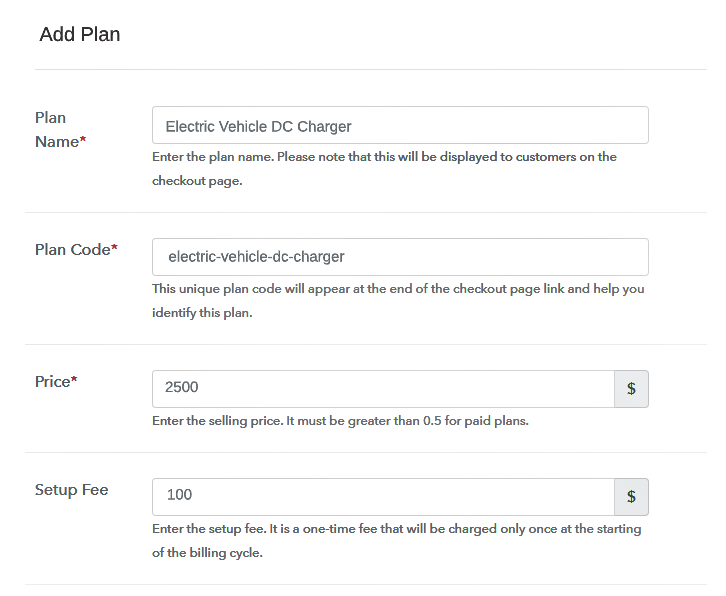
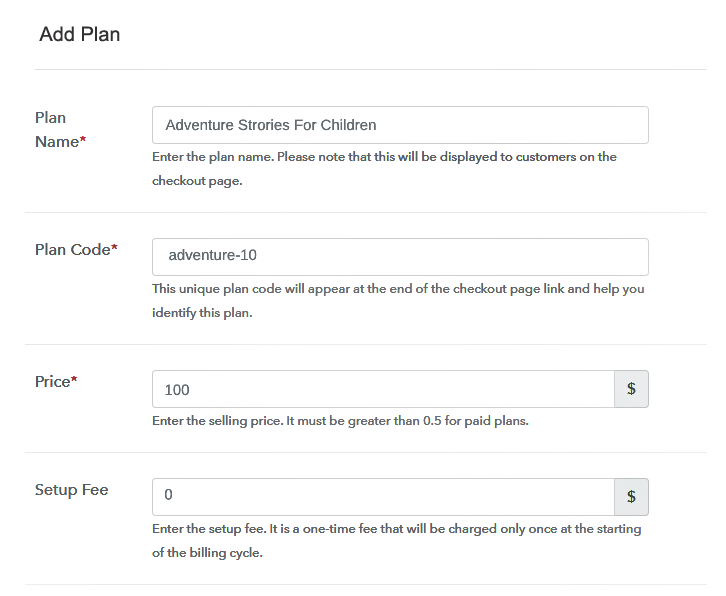
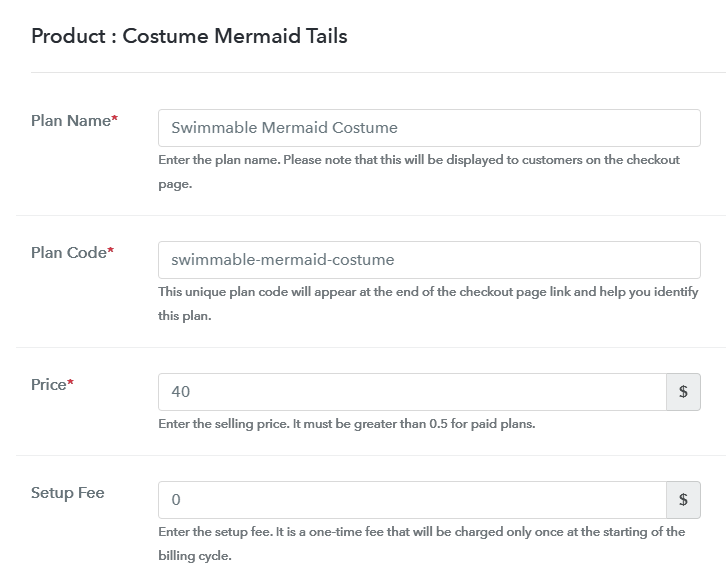
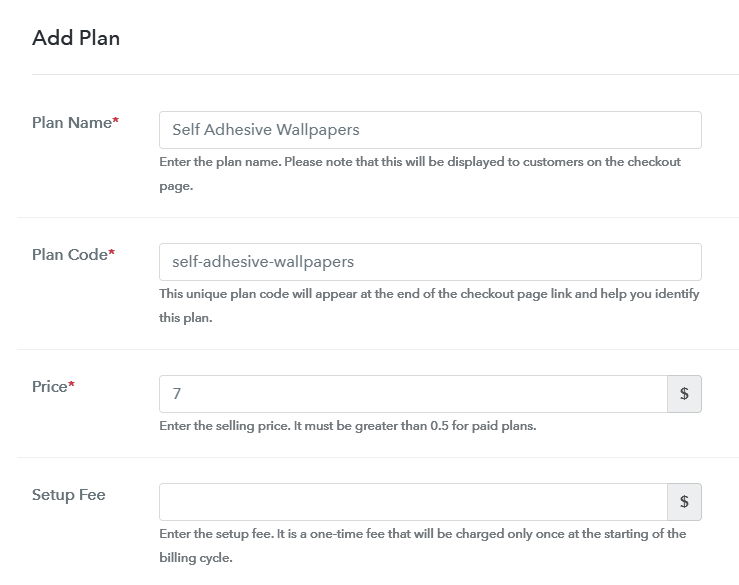
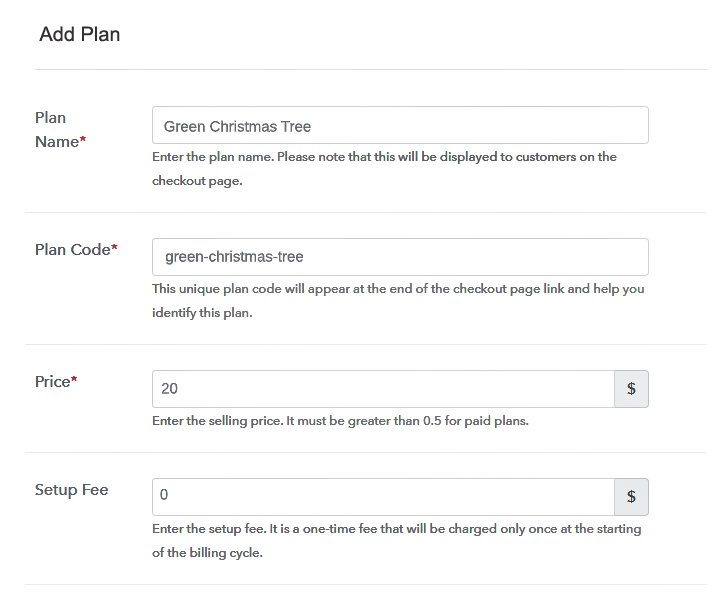
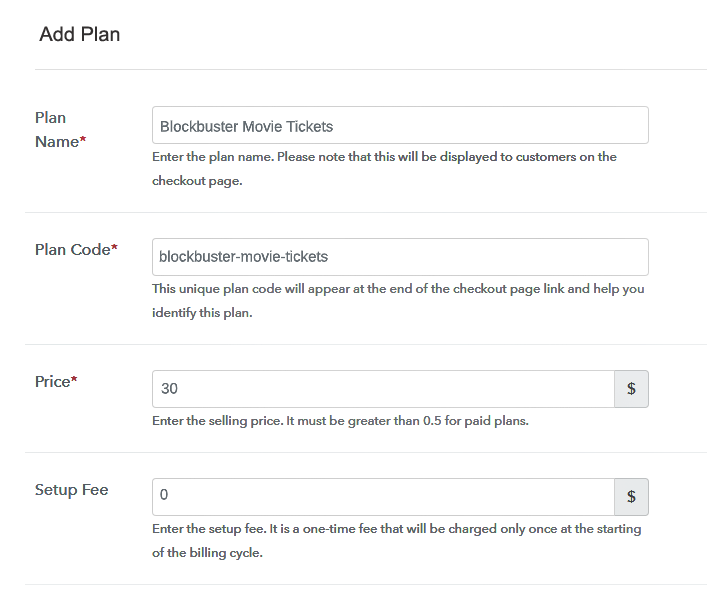
Step 6: Add Plans
You can now add plans subsequent to adding a product. Just hit the “Add New Plan” button and then stuff details in the plan page. The details that you mention in here will be shown on the checkout page for selling fireworks online.
(a) Select Add New Plan

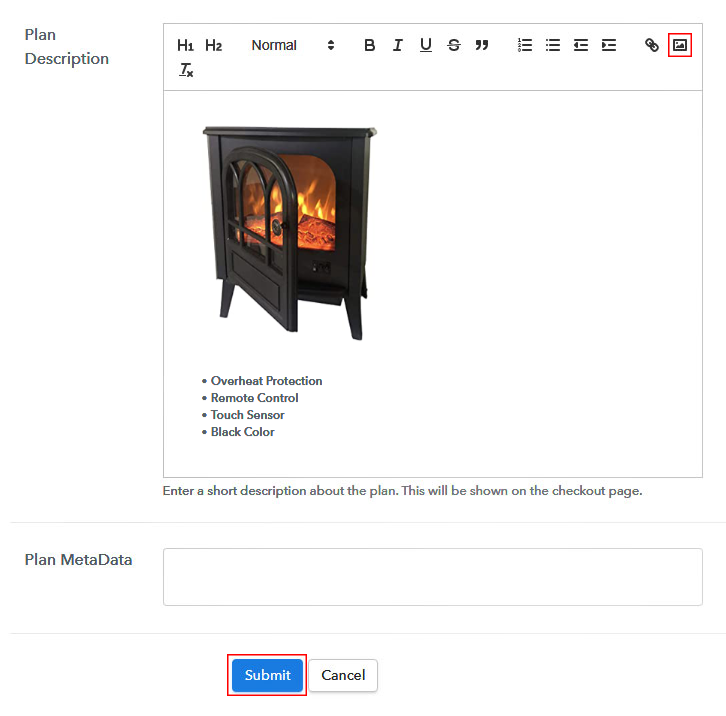
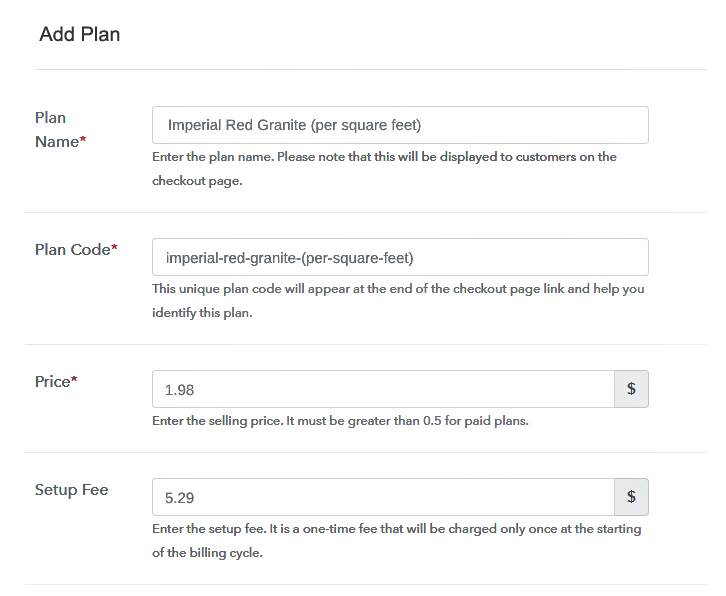
(b) Specify the Plan & Pricing Details
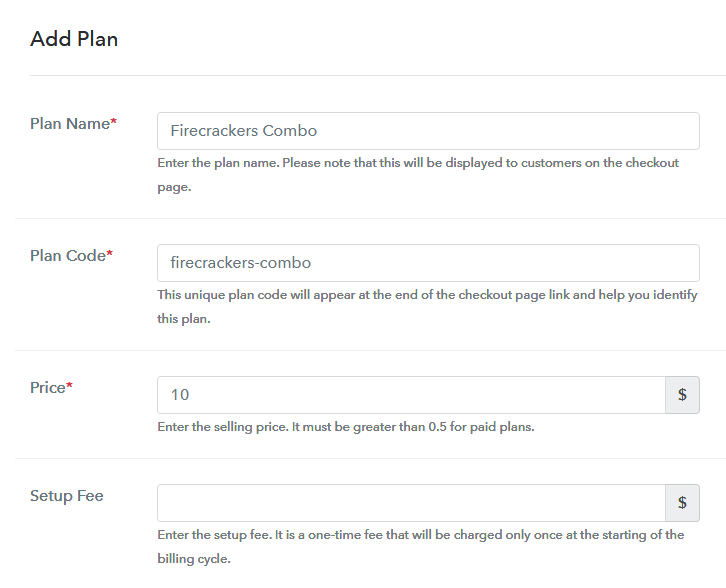
Mention the details to sell a firework item such as name, code, pricing etc.
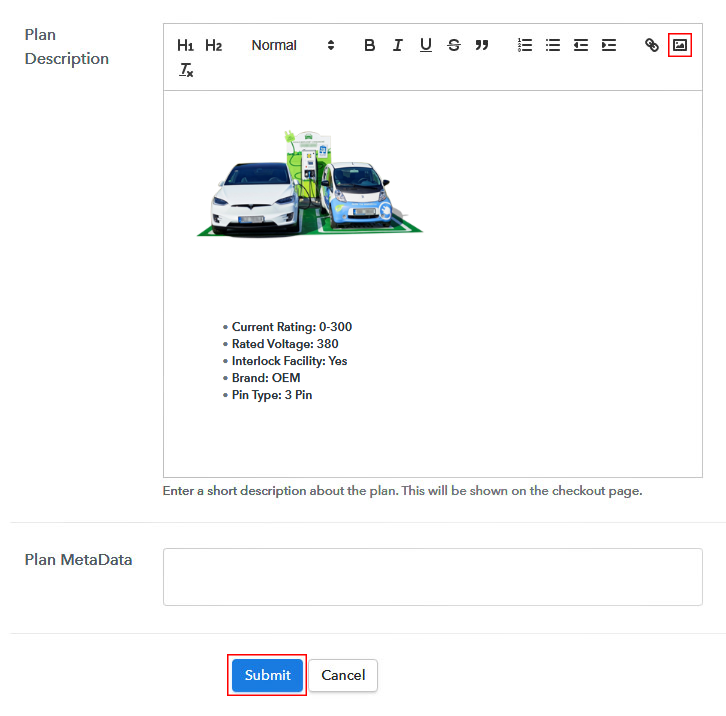
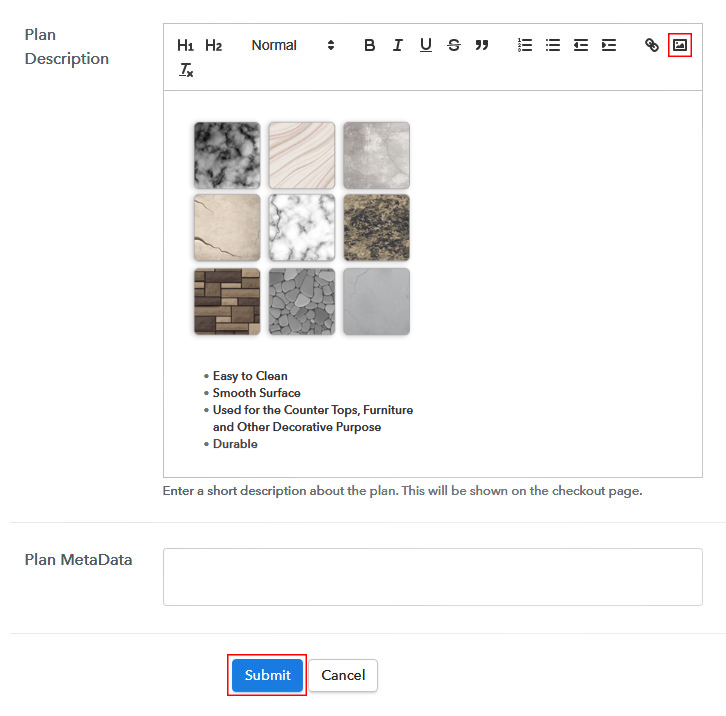
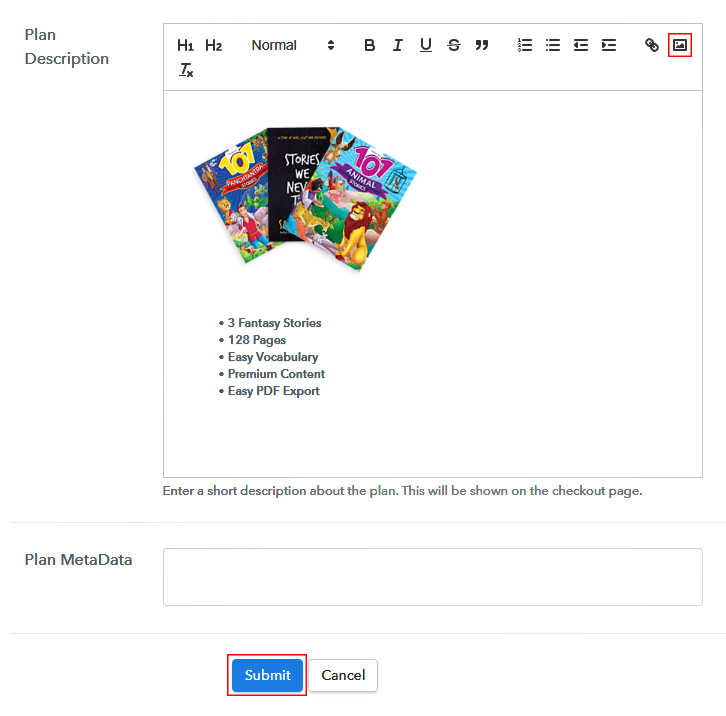
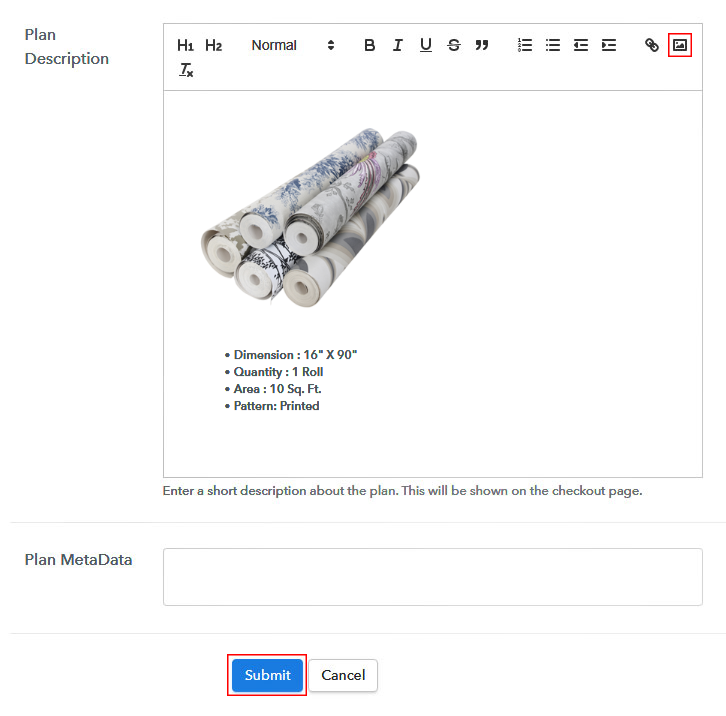
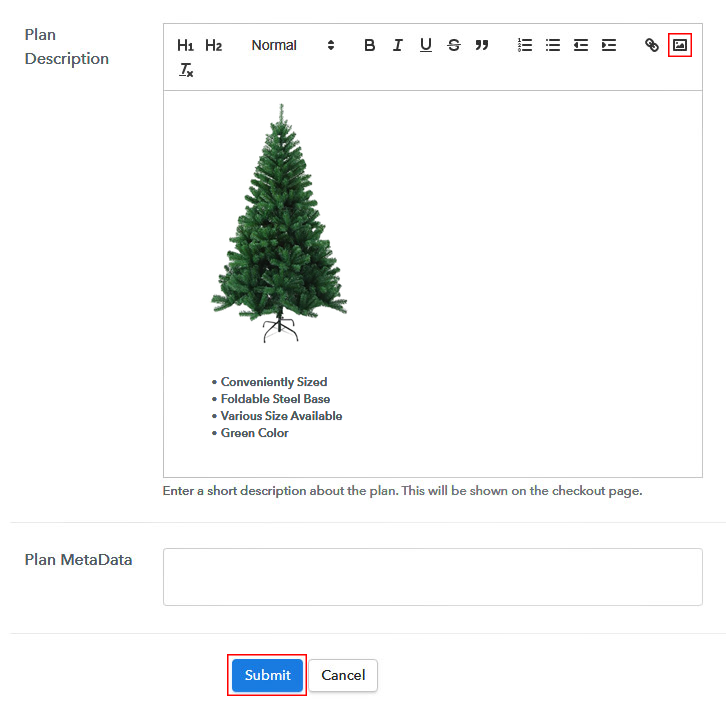
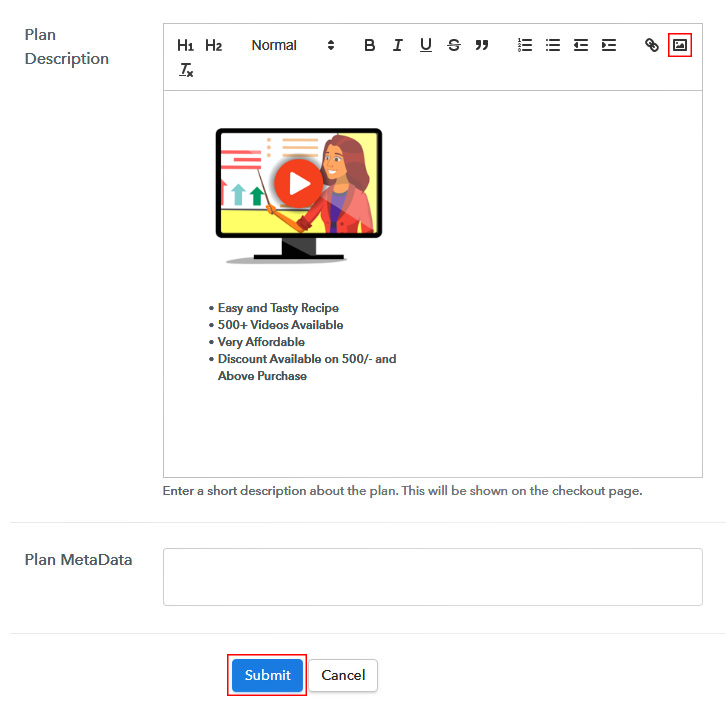
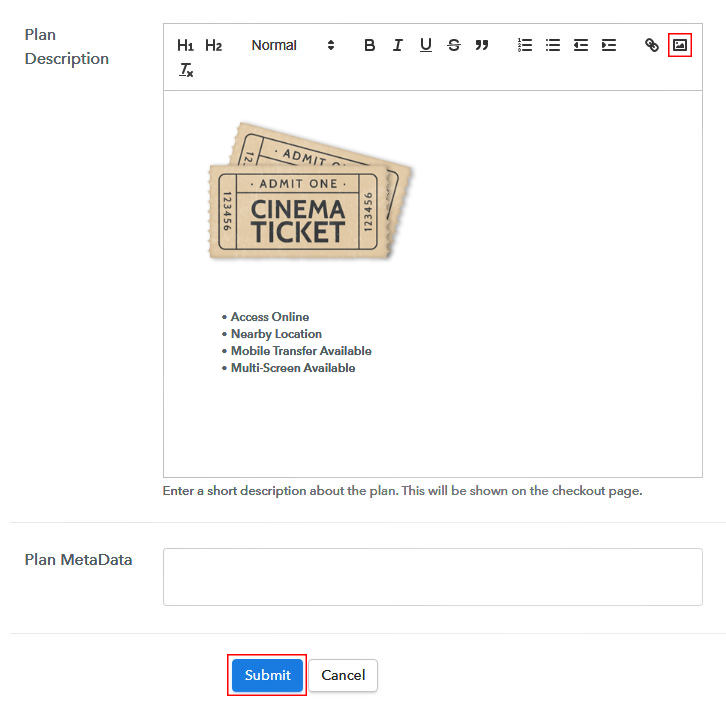
(c) Add Image & Description
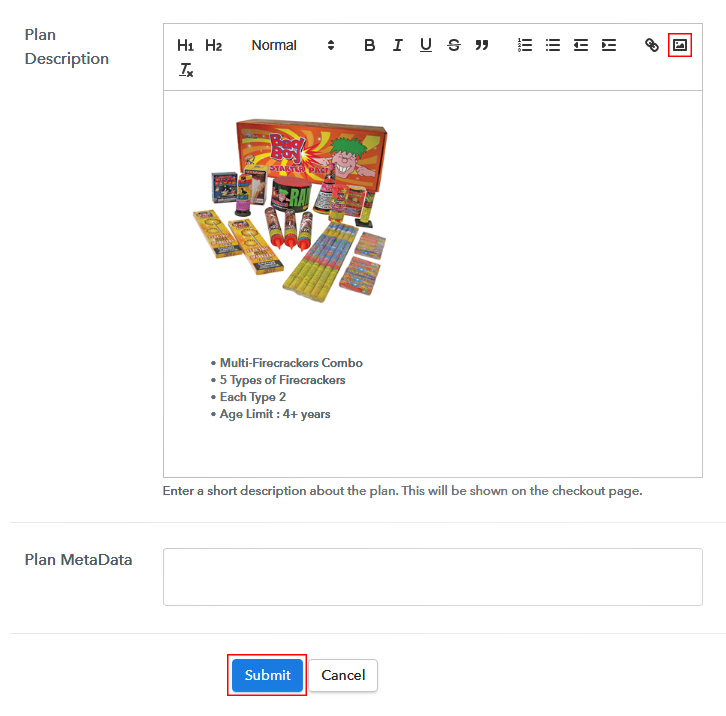
You can also show a firework’s image & write a description to display on the plan checkout page to sell fireworks online. For this insert an image and descriptive text in the “Add Description” field. You can also make use of lists, quotes, links, headings etc to write about the firework.
Click on the “Submit” button once you are done with writing the fireworks plan description. A firework item will get appended in the plan list for selling fireworks online.
Step 7: Share your Checkout Page

Further, you’ll see a window displaying a plan link, two icons & a plan code to share and sell fireworks online using different platforms.
- You can share the URL mention in the “Plan Link” window & directly onto various social media platforms, emails, WhatsApp, SMS etc to sell fireworks online.
- Also, you can link the URL to the buttons and texts of any website.
- There are two Facebook and Twitter icons also available to share the checkout page directly over these platforms.
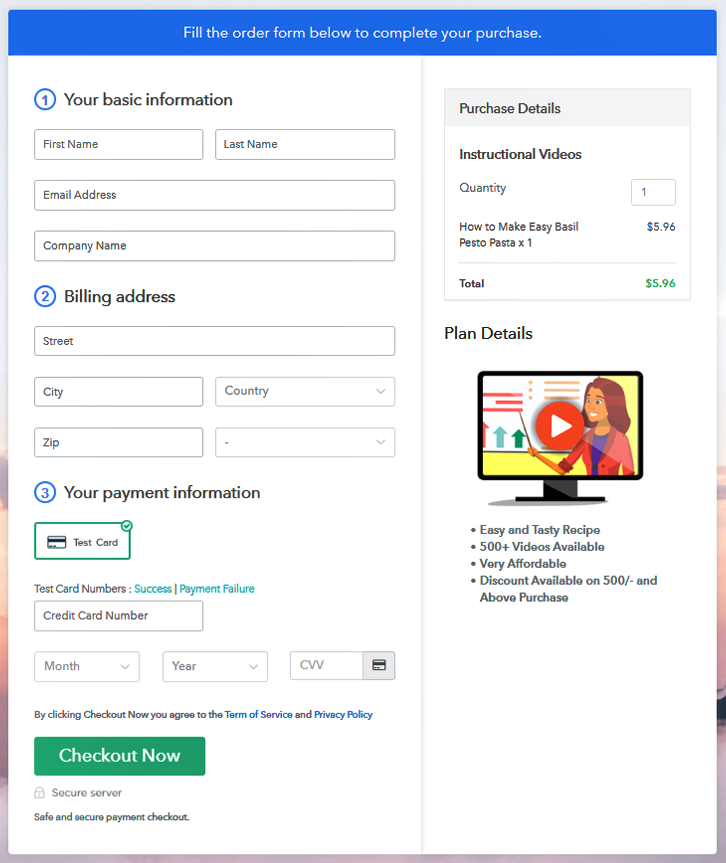
Step 8: Preview Checkout Page
Follow these steps to preview a checkout page:
(a) Click on the View Button

(b) Take a Look at the Checkout Page
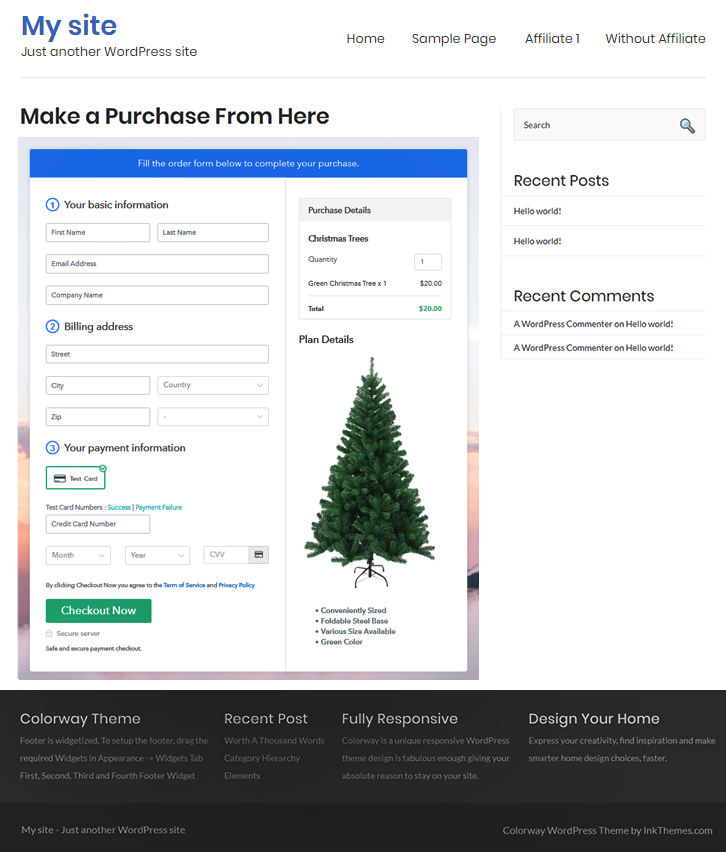
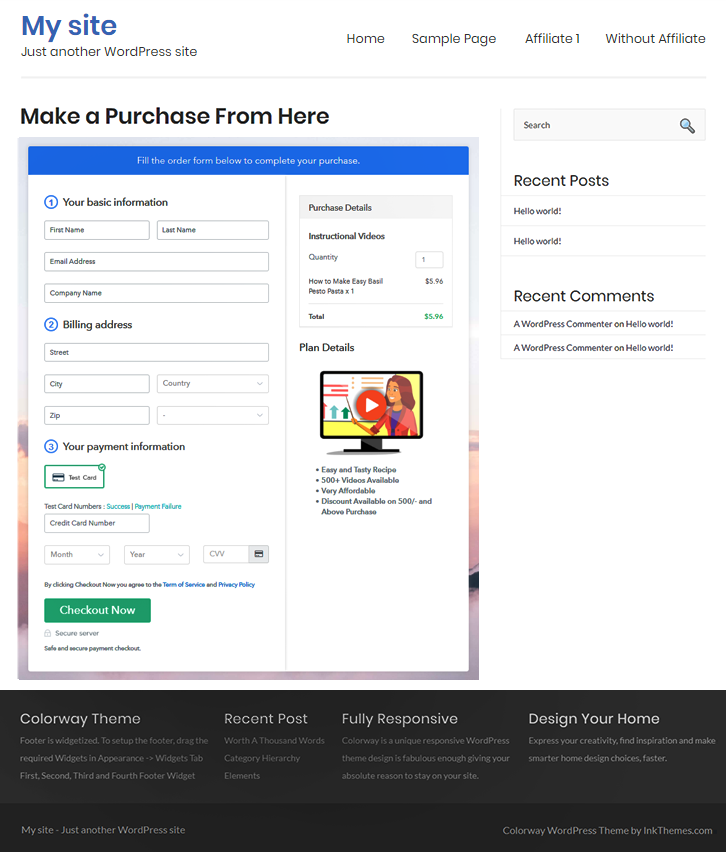
Step 9: Embed Checkout Page in Site & Sell Fireworks Online

Also, you can copy the code given for embedding checkout pages on WordPress.
(a) Edit the Page & Paste the Copied Link

And paste it in the text area of any post or page.
(b) Save & Publish the Checkout Page

After publishing the post or page the checkout page gets embedded on that particular website.
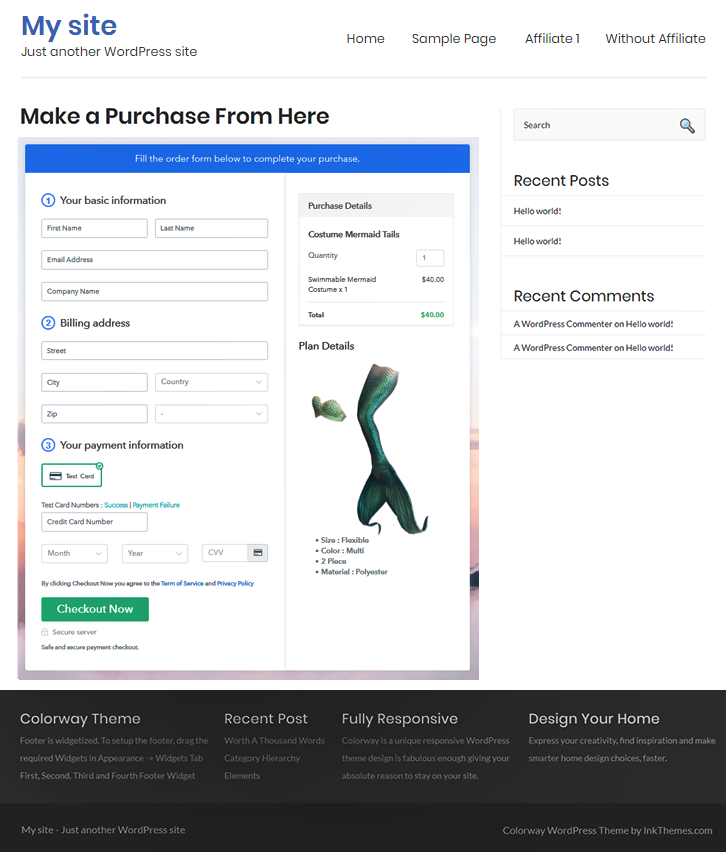
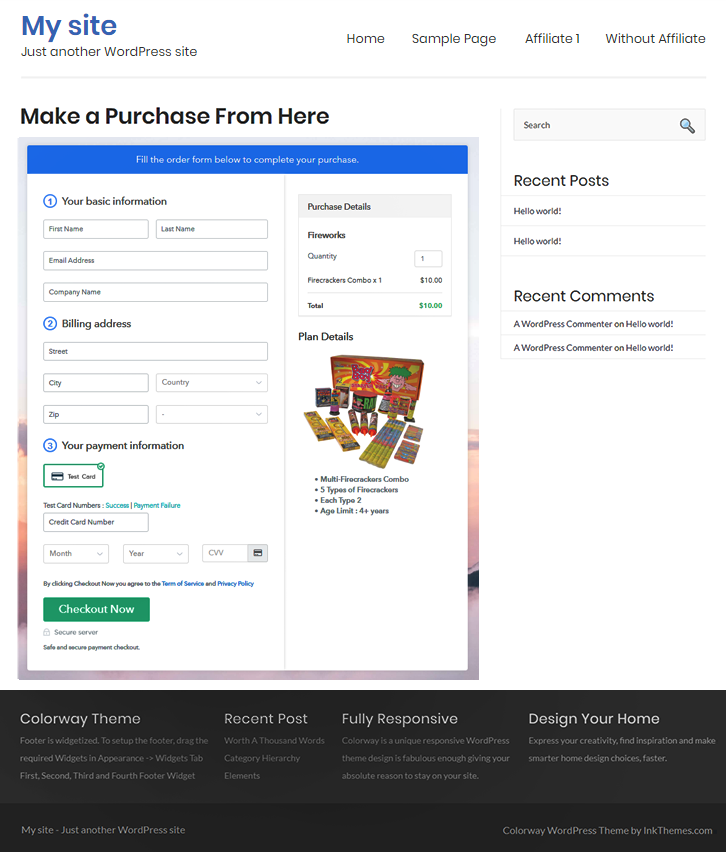
(c) Check out the Final Look of your Checkout Page on WordPress Site
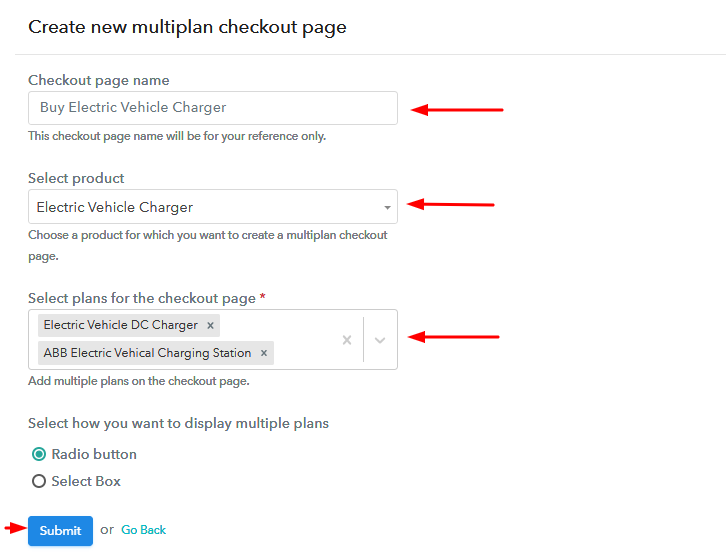
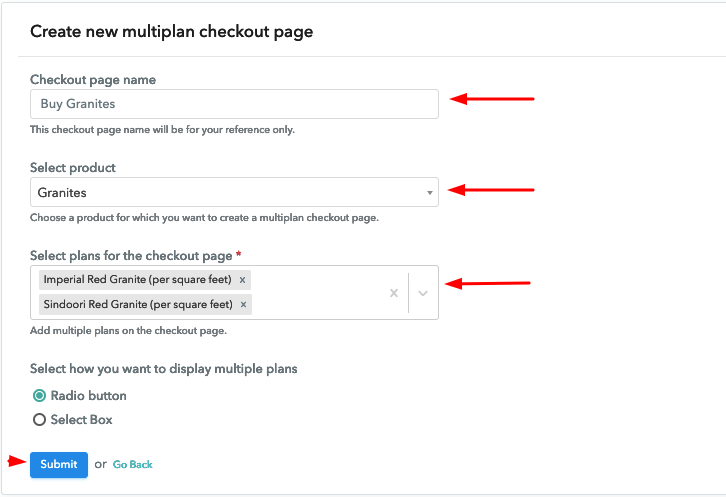
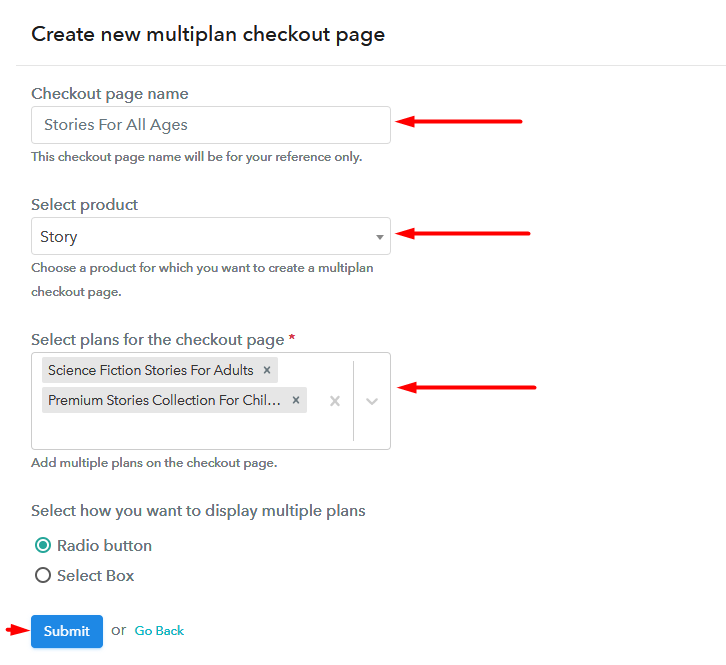
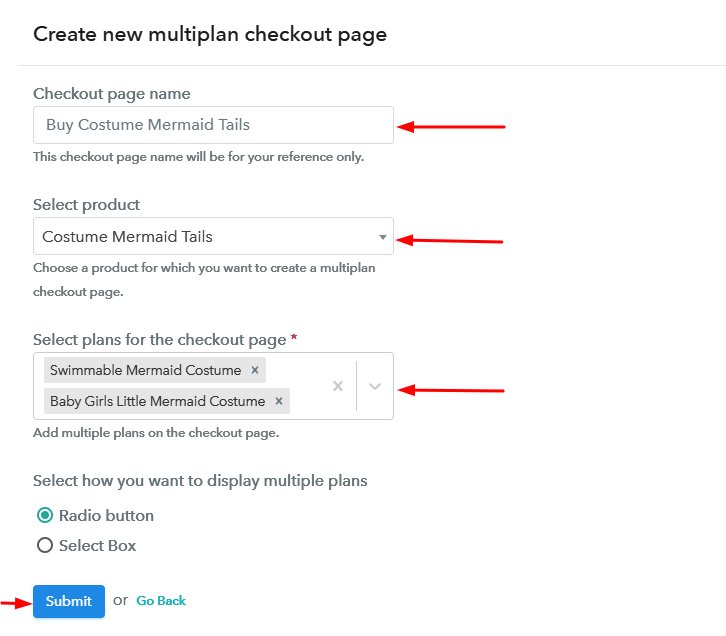
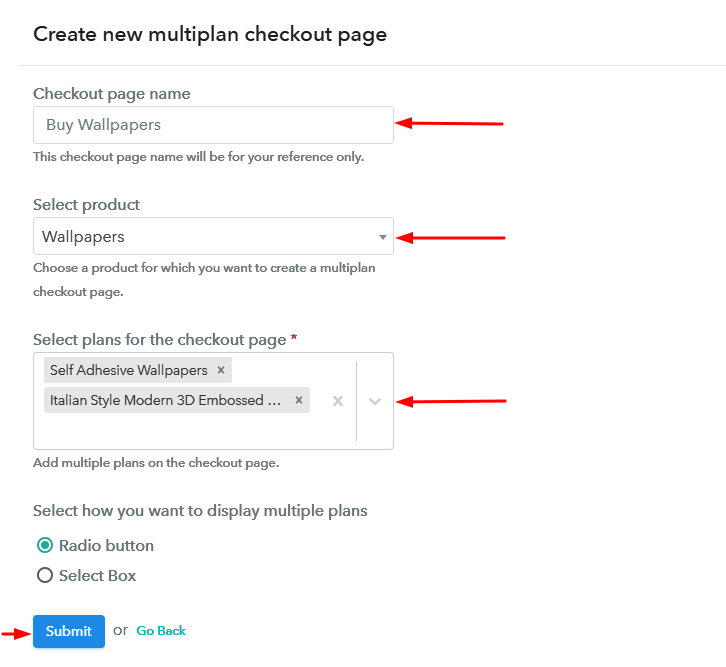
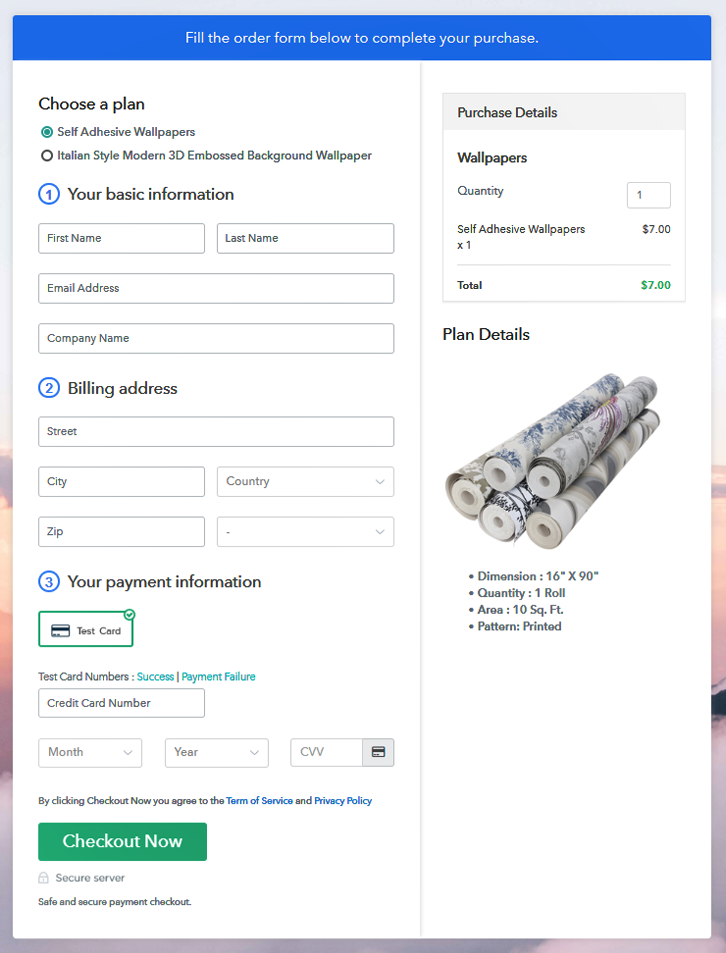
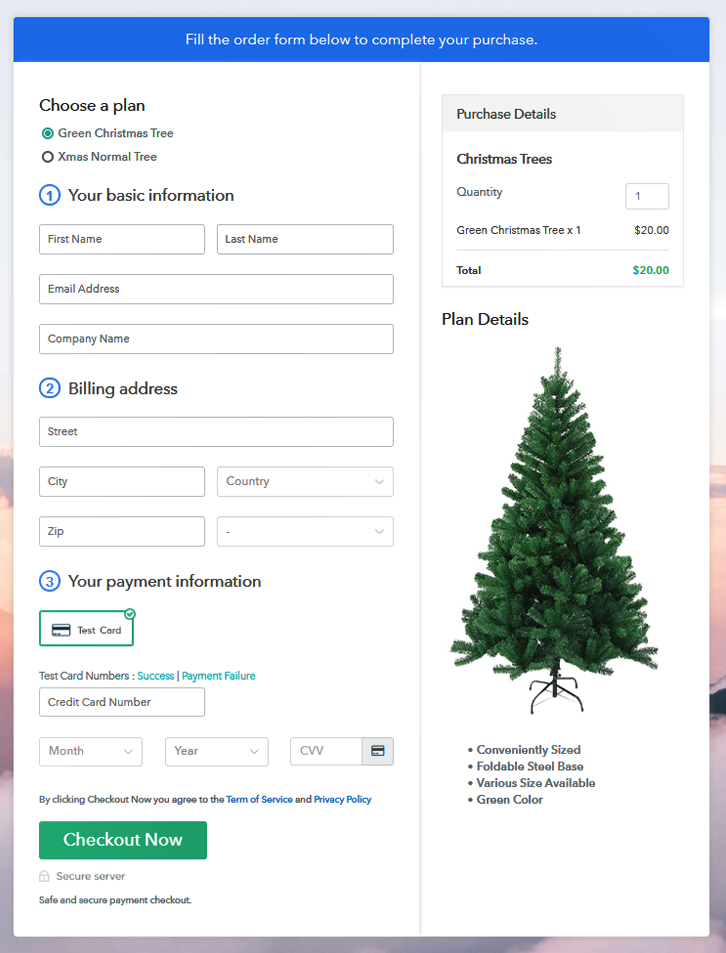
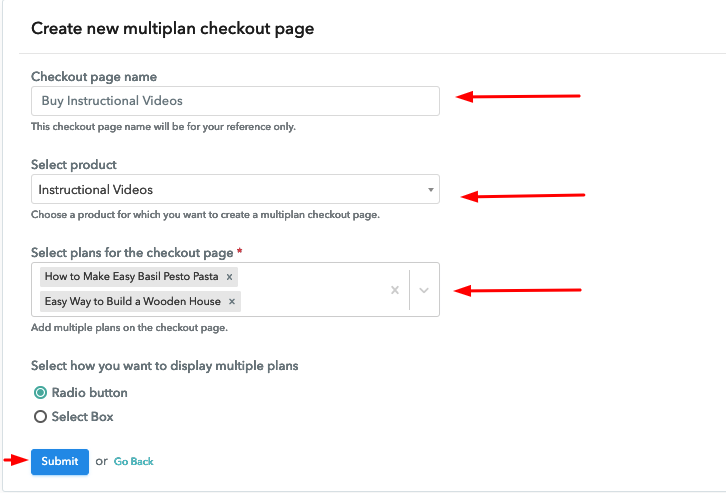
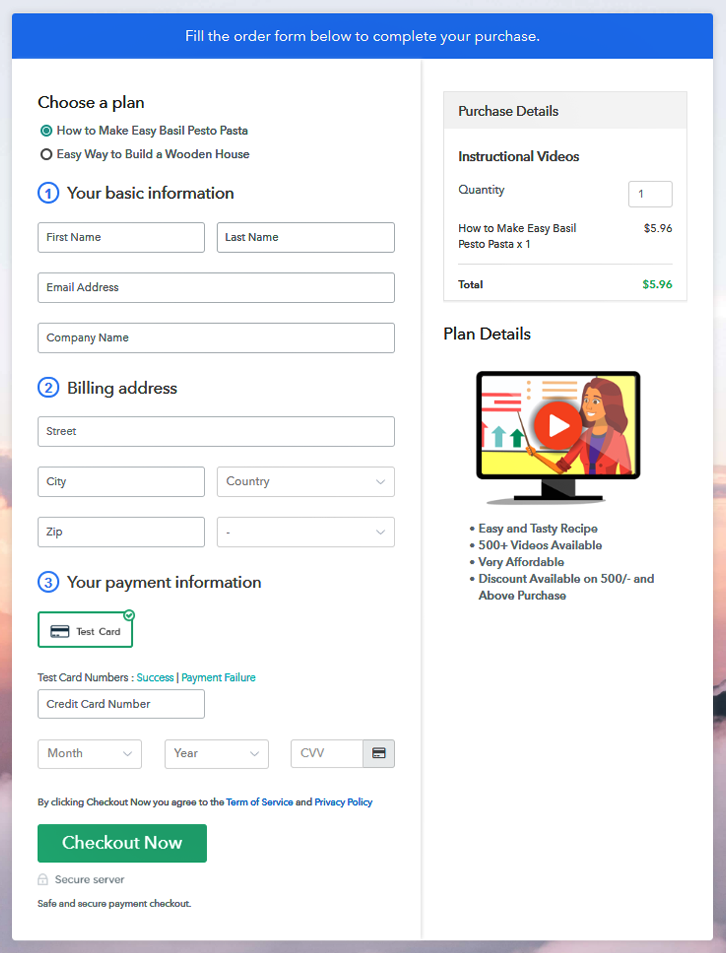
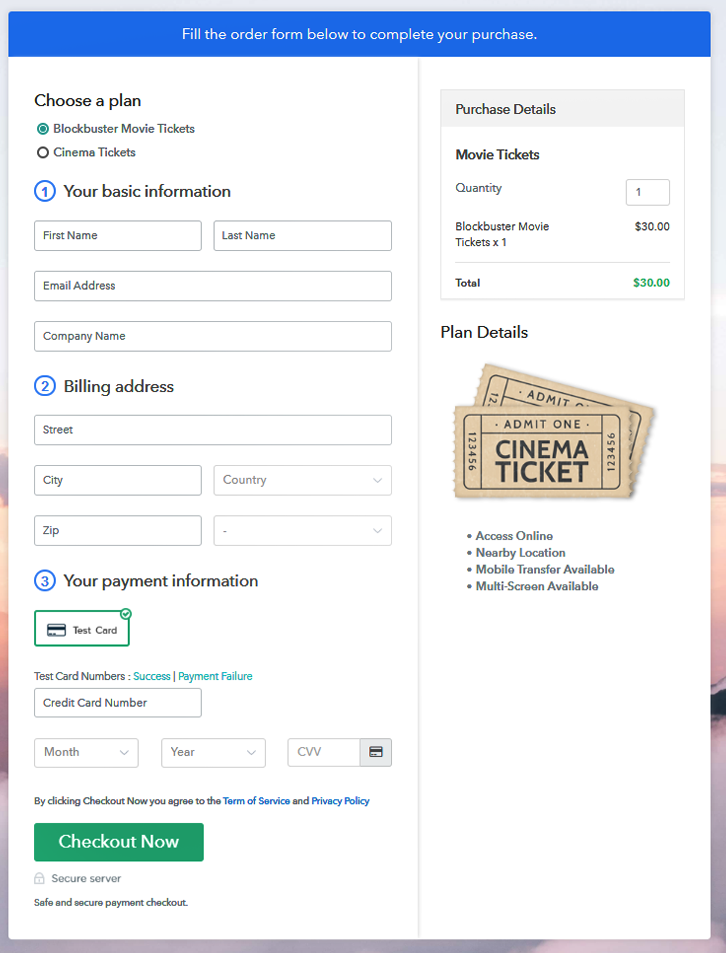
Step 10: Multiplan Checkout Page
Note: In case you want to sell multiple products via a single checkout page, you create a multi-plan checkout page otherwise skip this step.
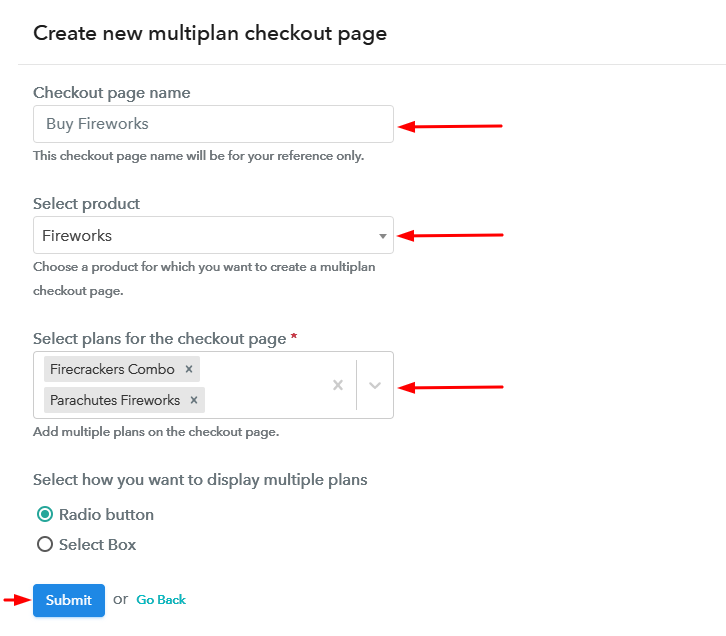
(a) Click on Add Mutiplan Checkout

(b) Add Plans to Sell Multiple Fireworks from Single Checkout Page
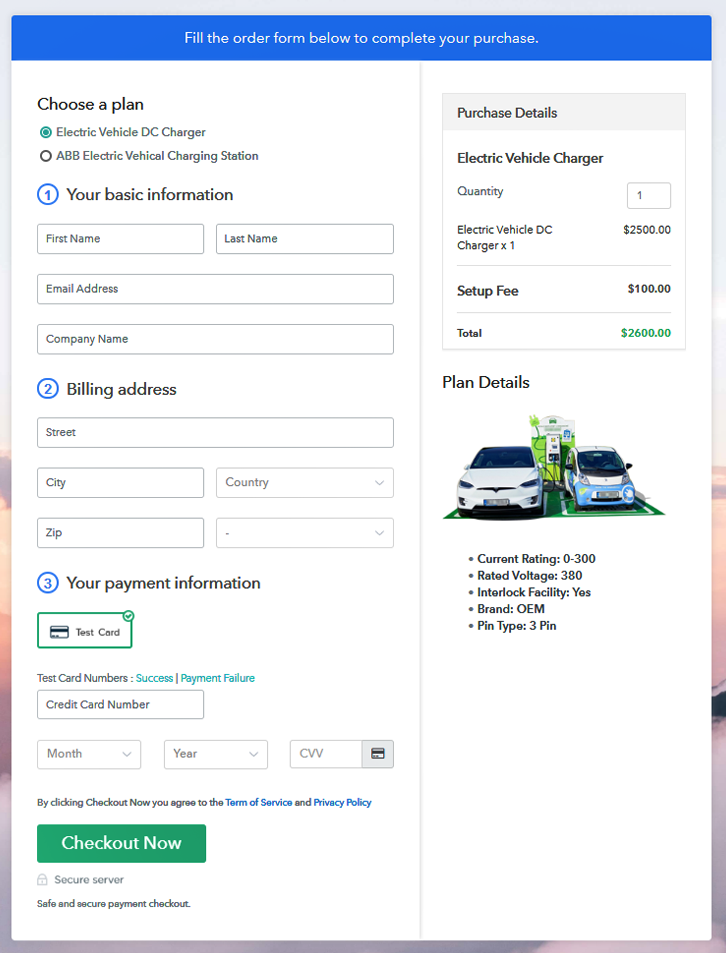
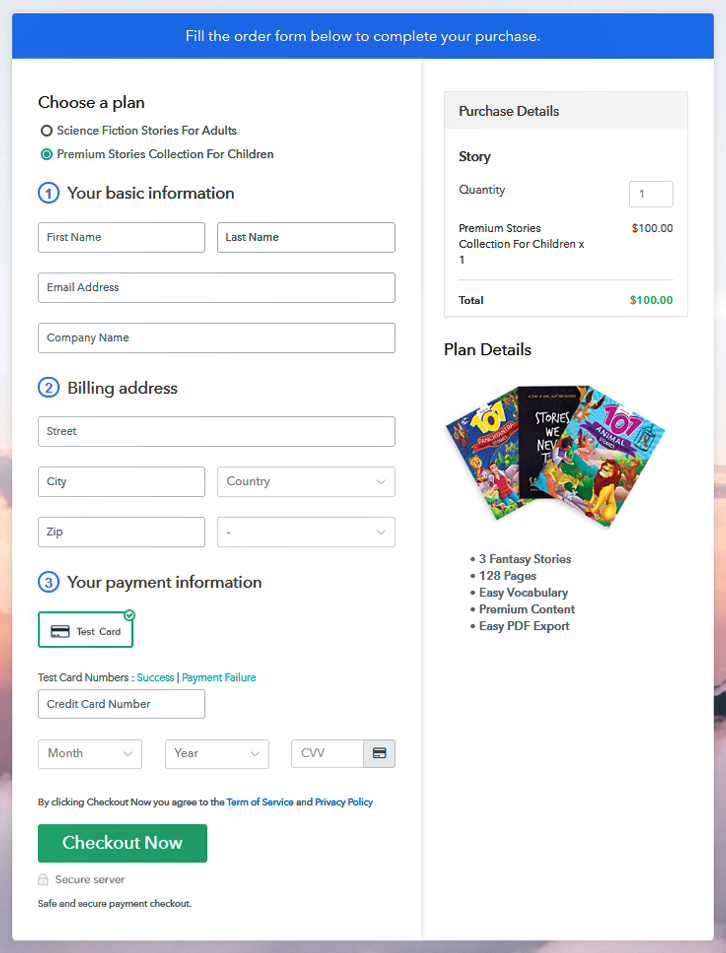
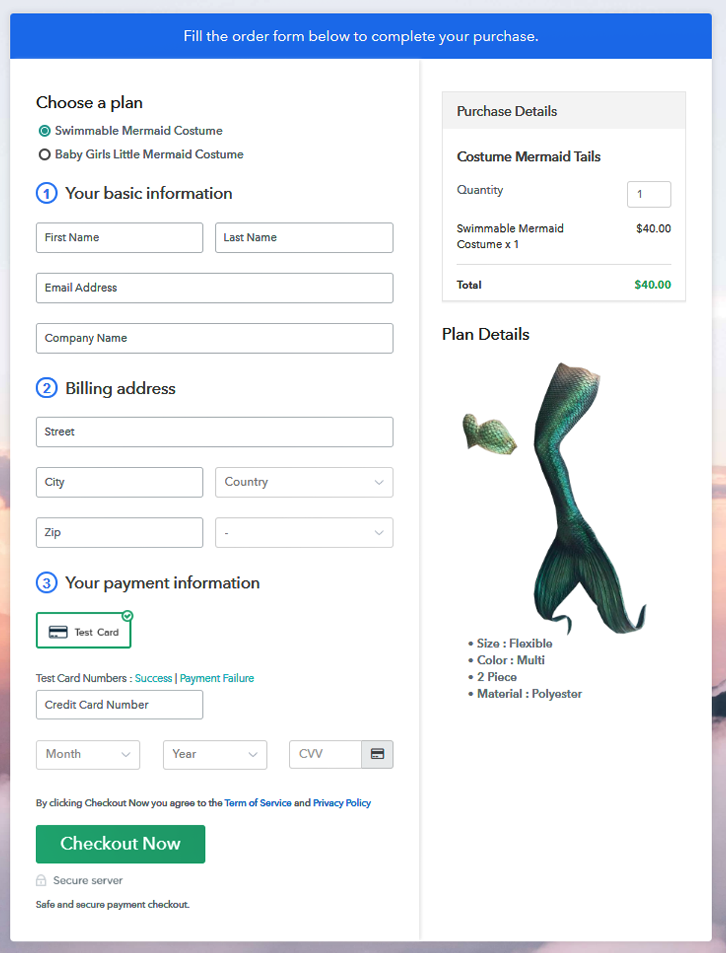
(c) Take a Look at the Checkout Page:
Wrapping Up
If you have searched for ways to start fireworks business online then you may have yet seen that this fastest procedure so far. Furthermore, payments are always concerns in online businesses and this service is providing very safe and reliable payment gateway options to choose from. Also, small as well as large business can use this method to sell fireworks online very easily.