Ideal For: All the accessory stores, fashion accessory stores, fashion accessory shops, clothing stores, clothing showrooms, and other sellers can use this method to take their caps and hats selling business online.

Why Choose this Method To Sell Caps and Hats Online?
Unlike any other solution, this method allows you to:
- List and sell your caps and hats for FREE. Absolutely no payment required.
- No need to pay commission on any of your sales.
- Multiple payment options like PayPal, Credit Card, etc to collect payment from a single place.
- Sell one time or recurring subscriptions of your caps and hats.
- Collect payments & sell products in any currency as per your requirement.
- Give discounts on your products by offering special coupon codes.
- Add sales commission agents to help you in selling caps and hats online.
Caps and hats are the basic accessories in today’s times. People can be spotted wearing them everywhere, so if you sell caps and hats and If you want to improve your sales then take your caps and hats selling business online to earn extra money.
You can easily start selling caps and hats online through checkout pages. Checkout pages are the webpages that help you to improve your sales and broaden the customer range. Simply you have to create checkout pages for your caps and hats and then share them on social media or your website so that people can purchase caps and hats directly through them. To create checkout pages you need only one service and that is Pabbly Subscription Billing, it is free and easy to use.
Other than checkout pages you can also access its other features like easy invoicing, integration with website and other apps, unlimited listings of products, easy payment collection, etc to build up your online business.
Now create checkout pages for your caps and hats and start selling them online.
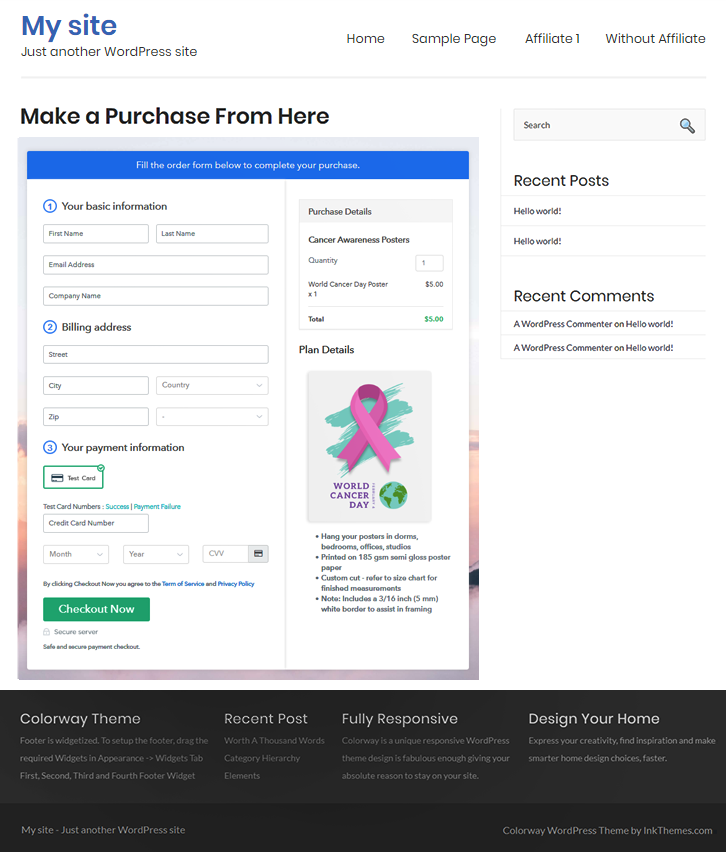
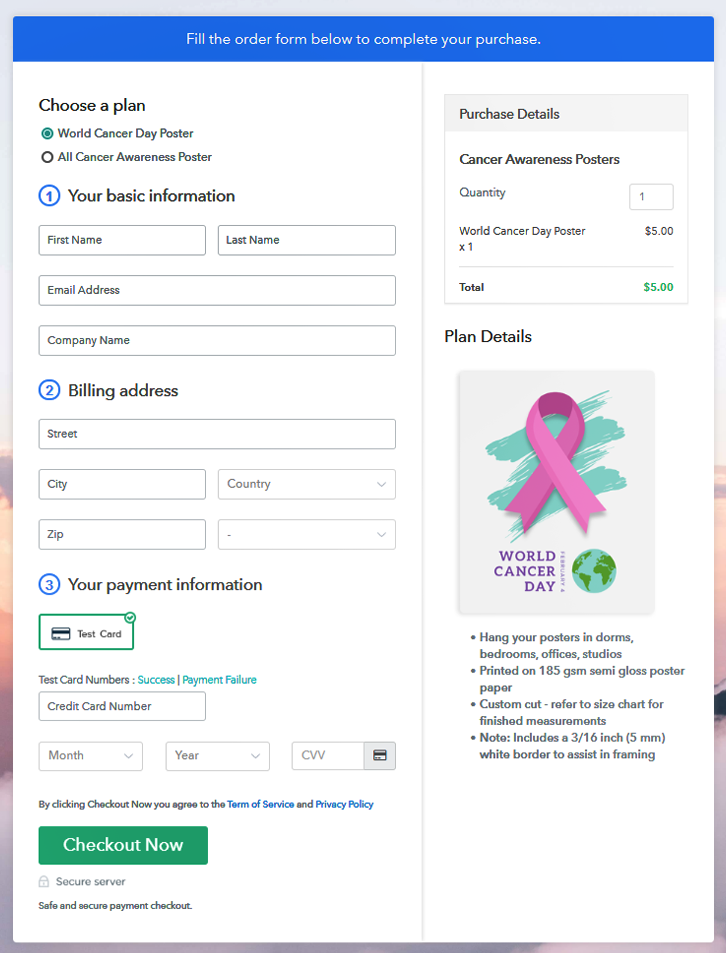
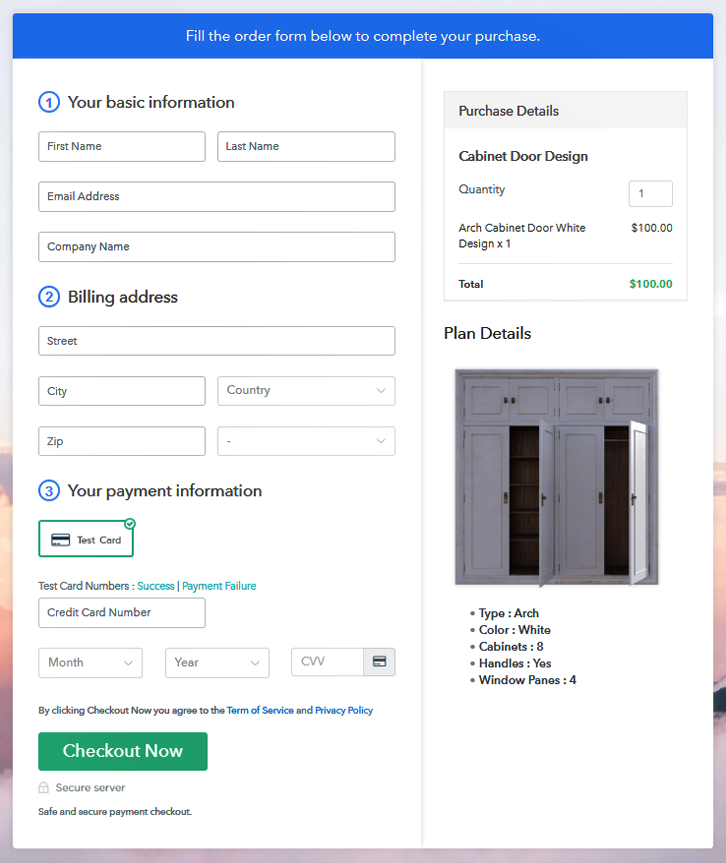
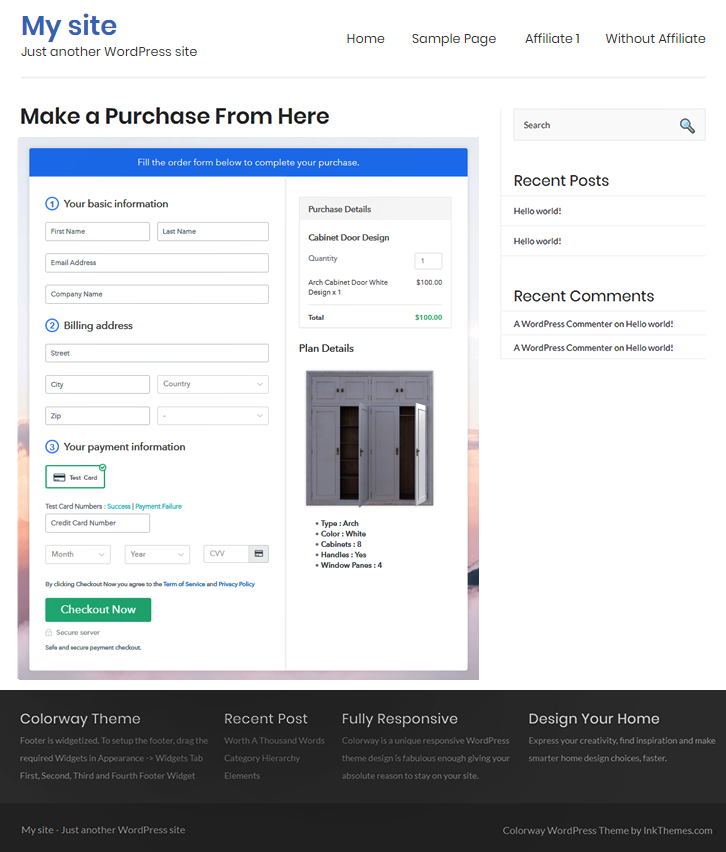
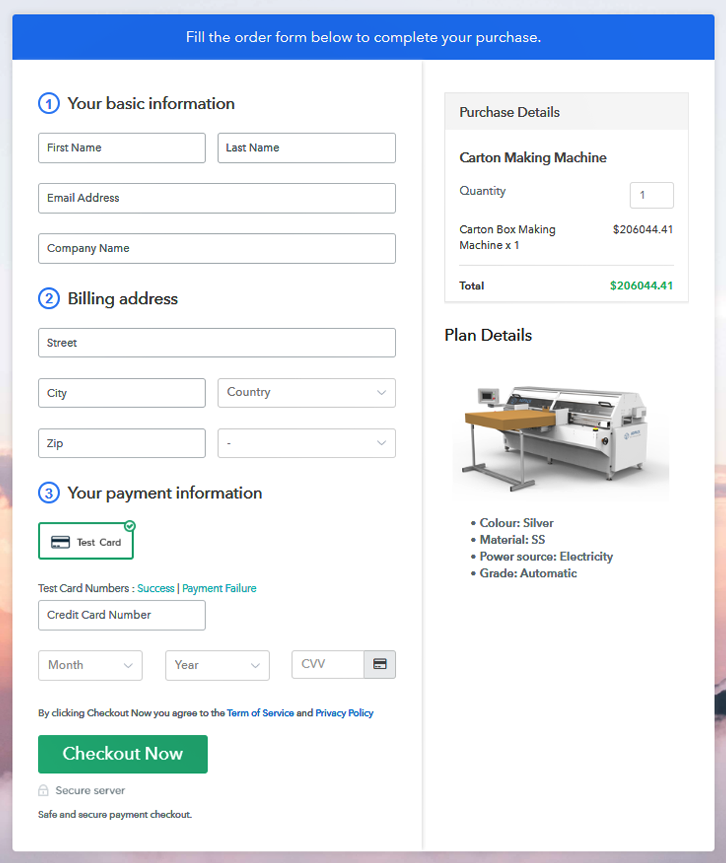
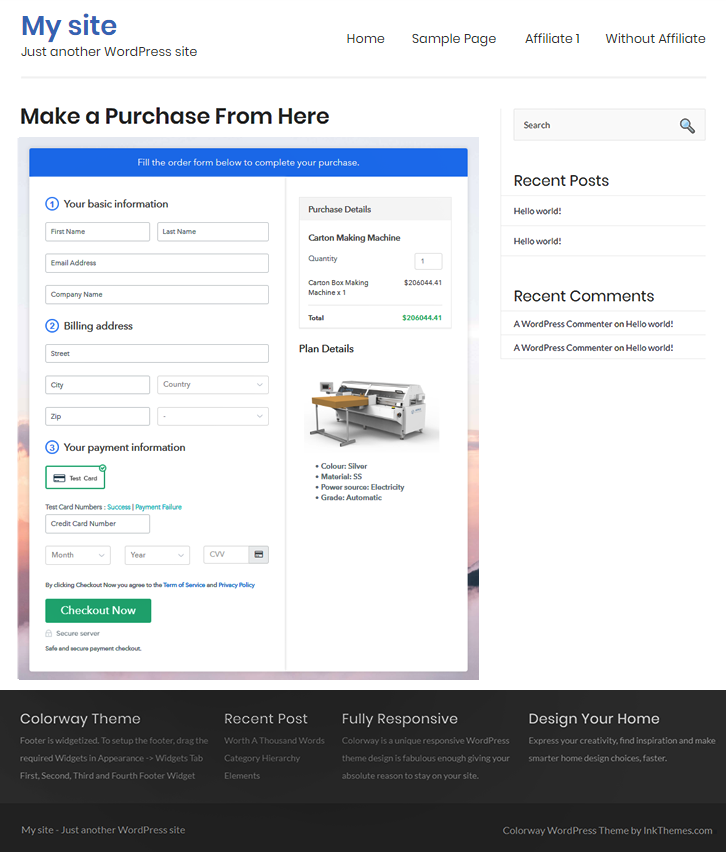
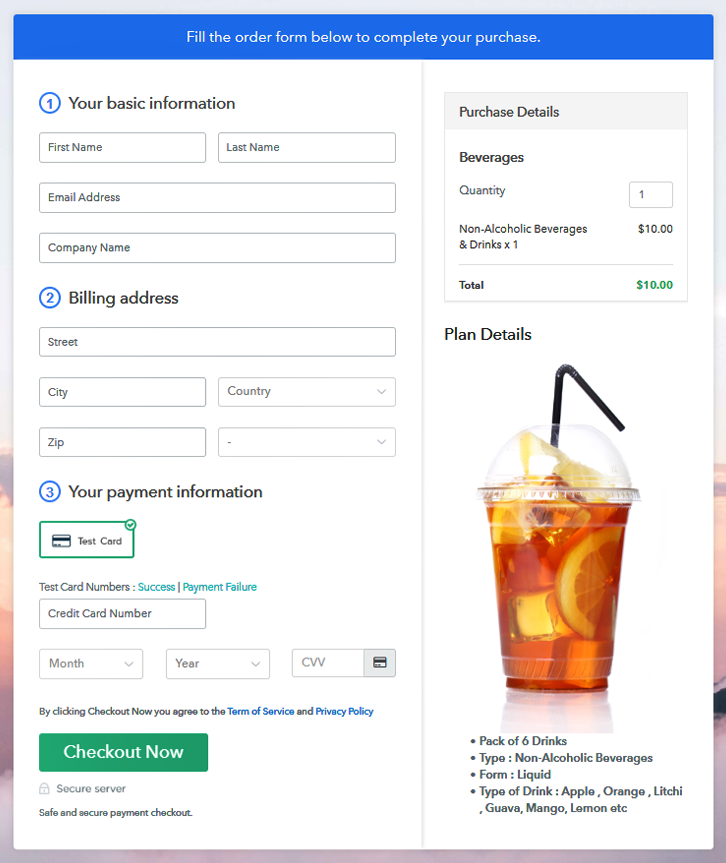
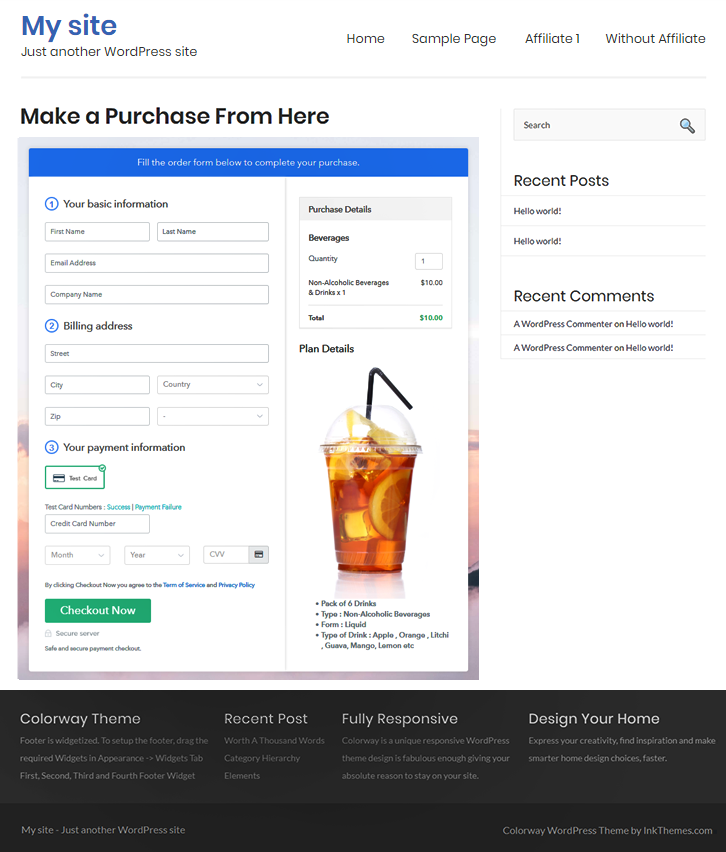
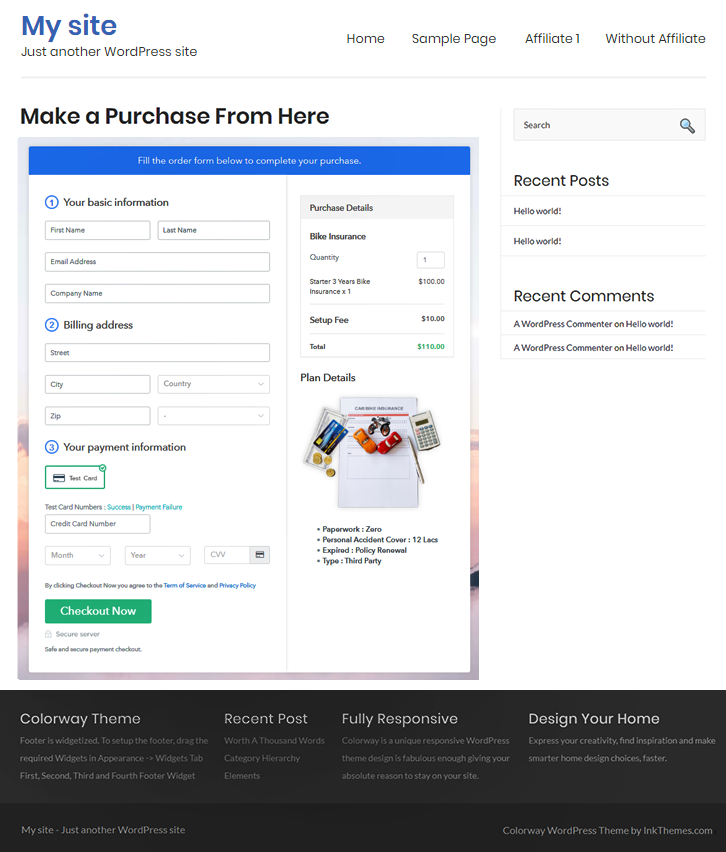
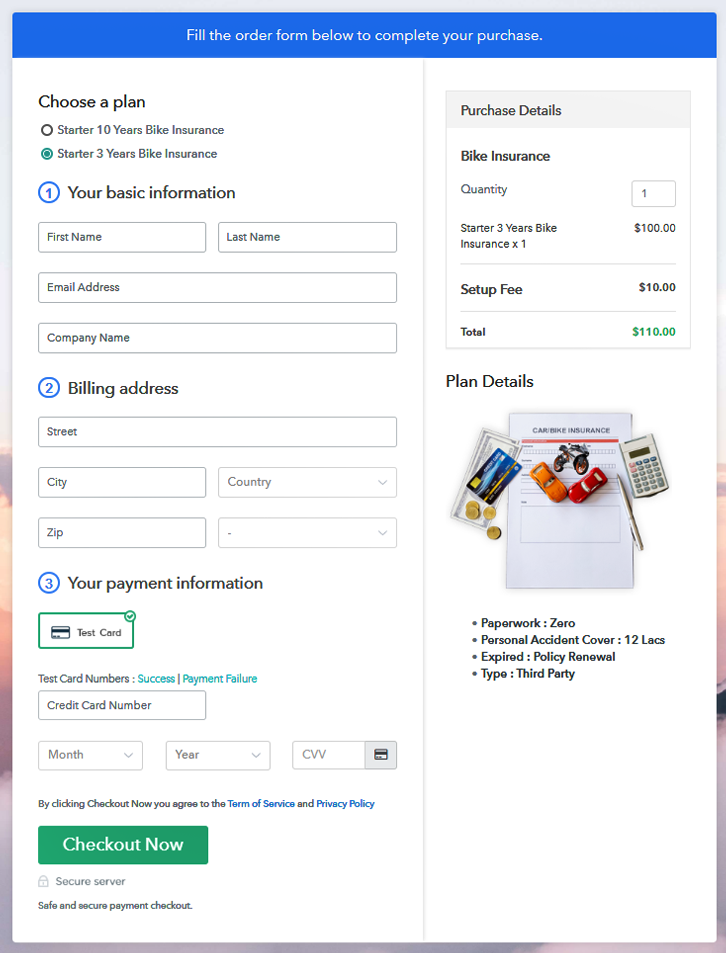
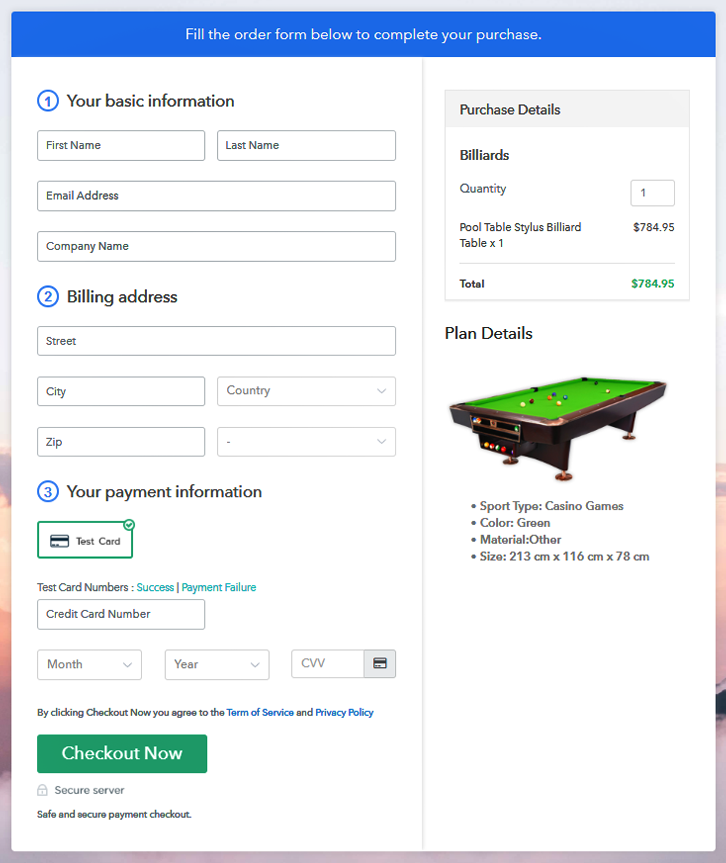
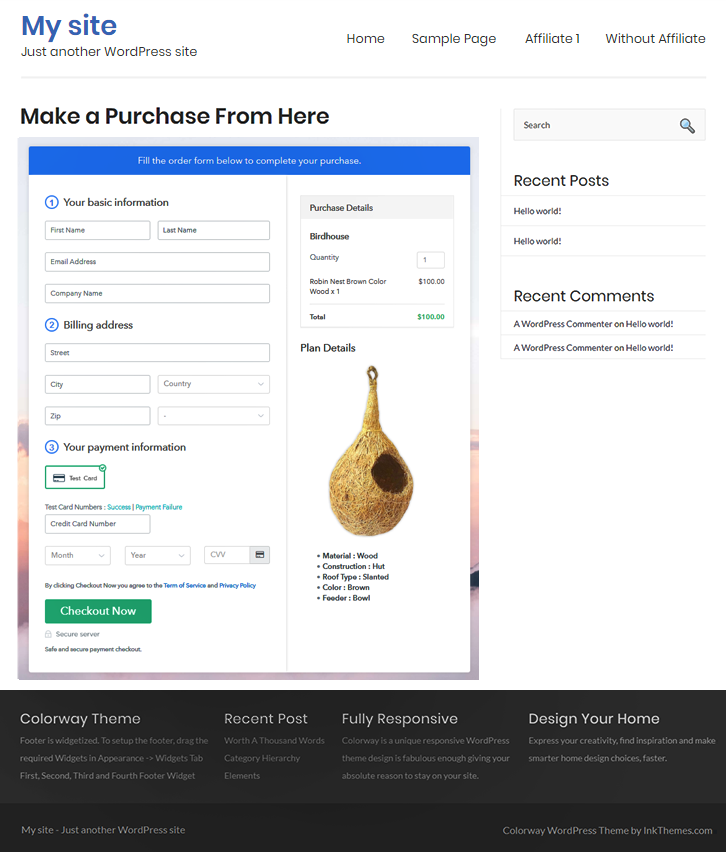
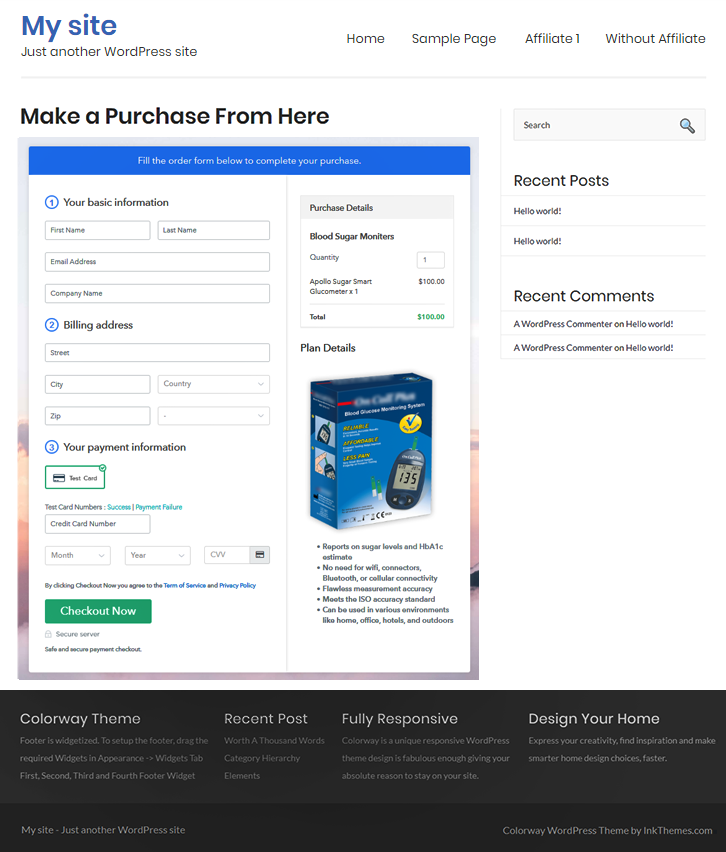
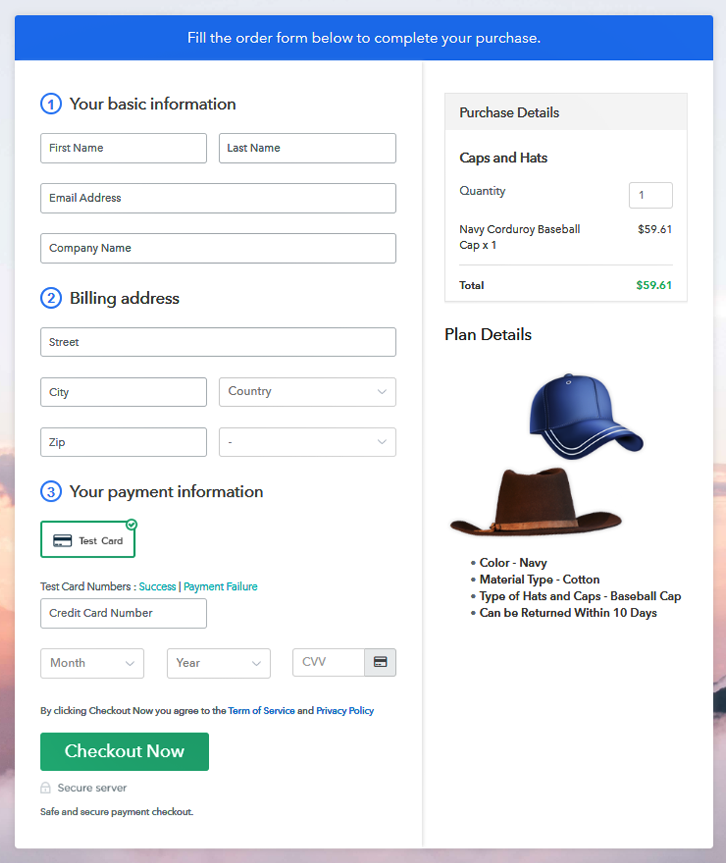
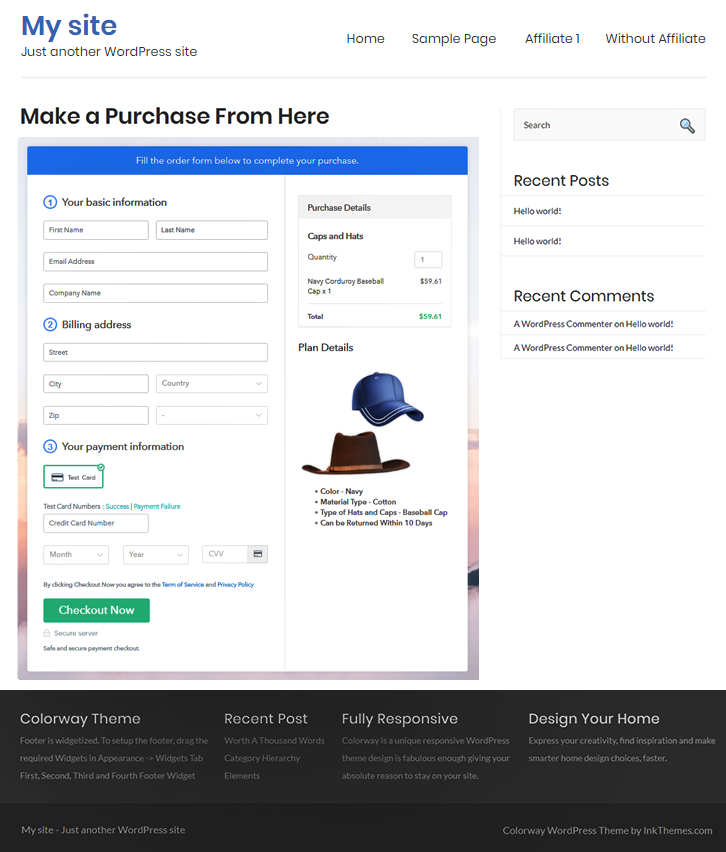
Final View of Checkout Page For Your Caps and Hats Selling Business
Step 1: Log in to Pabbly Subscription Billing

Begin with visiting Pabbly Subscription Billing website and then click on the “Signup Free” button. On clicking the button, the signup page will appear, here you can create your account automatically via Gmail or you can also enter your details manually.
Sign Up For Free!
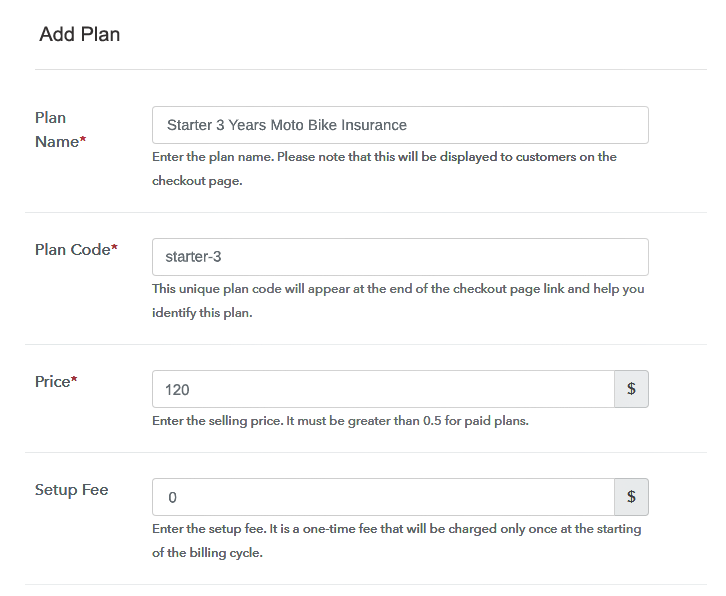
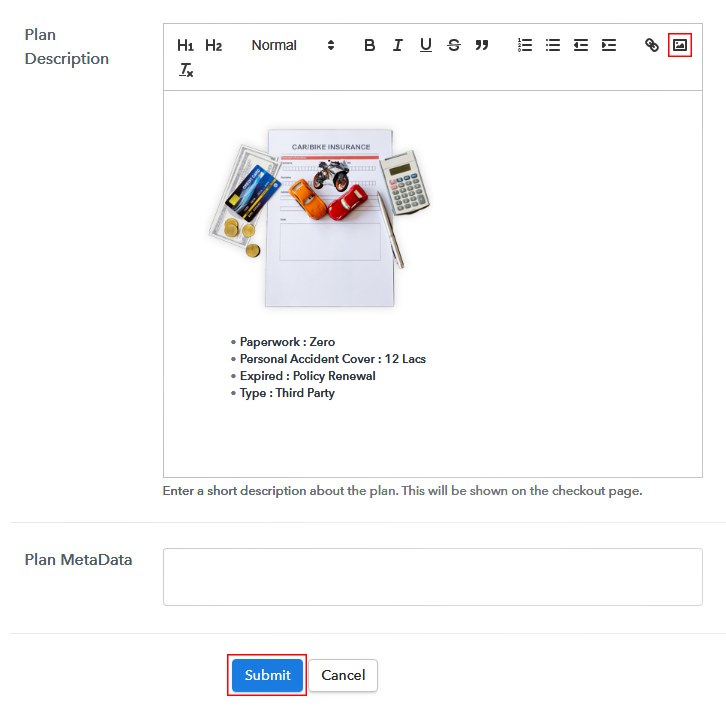
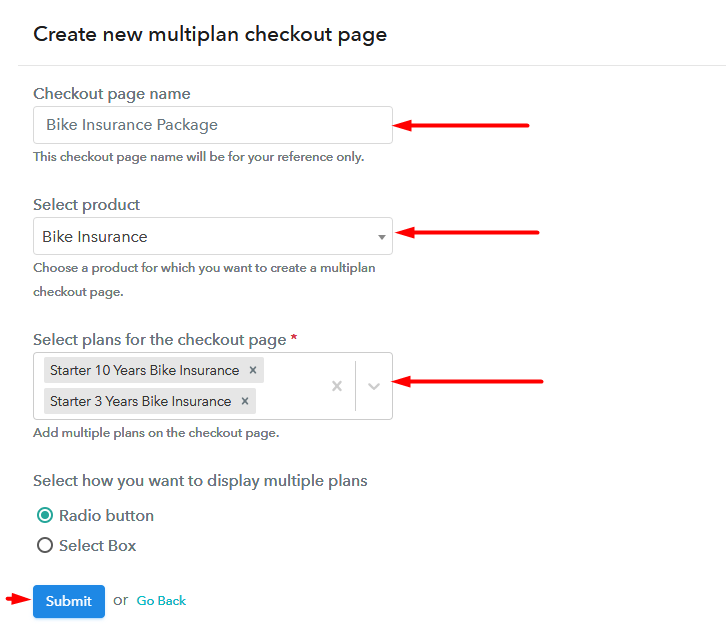
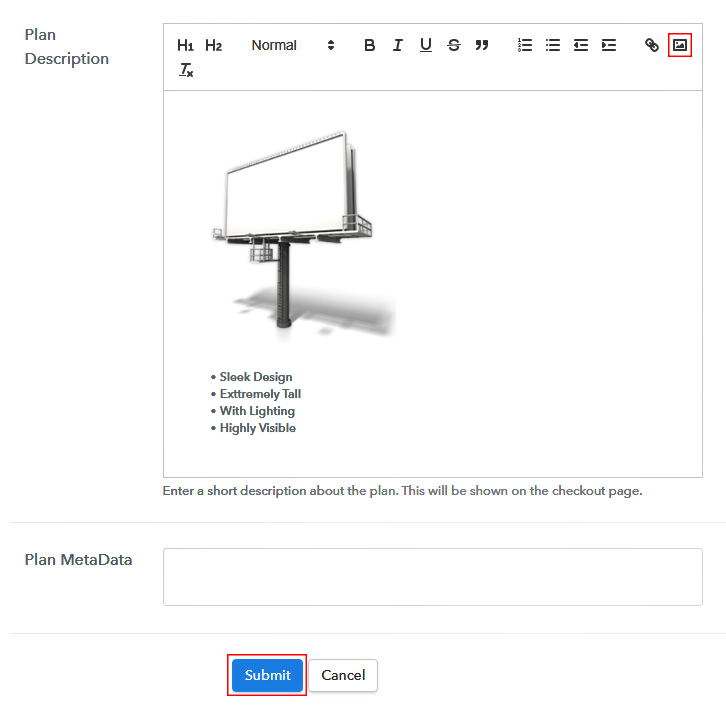
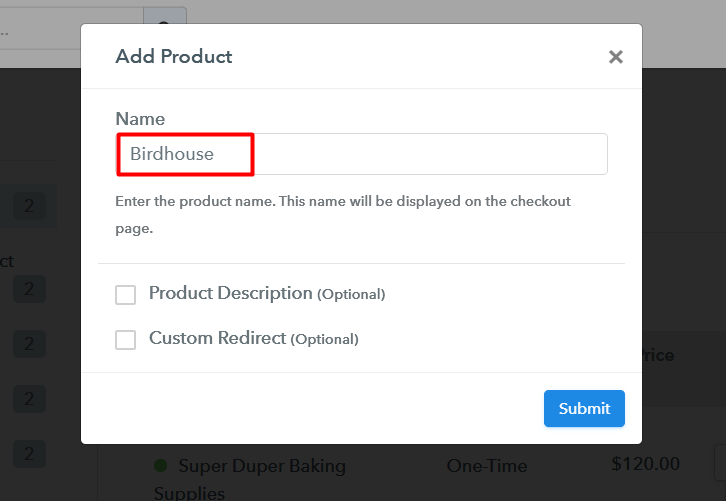
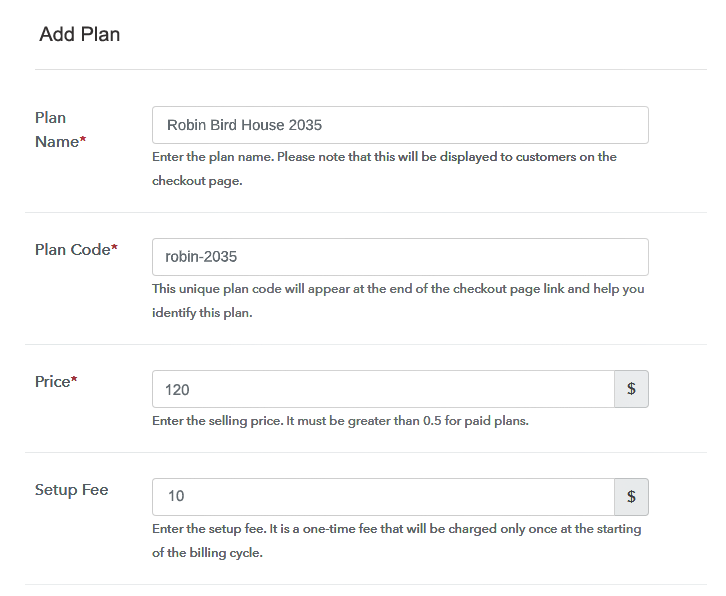
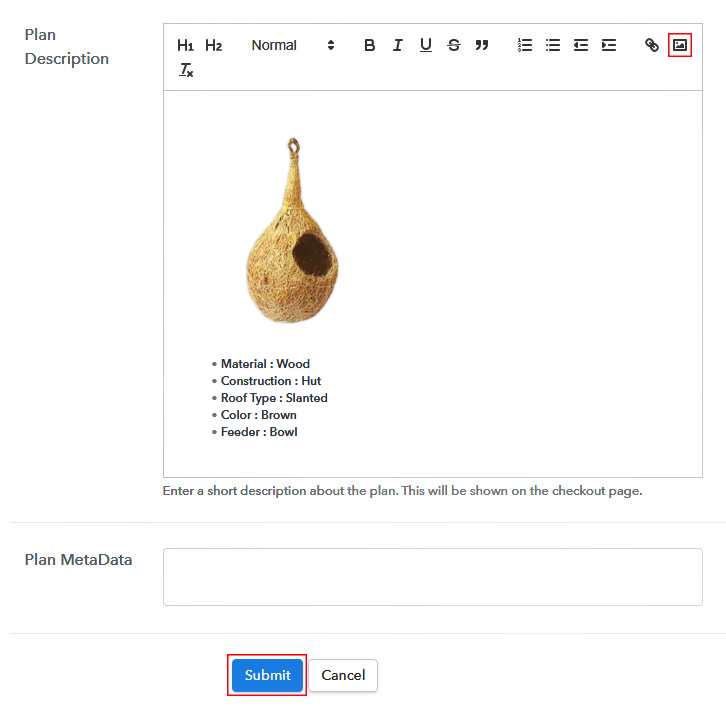
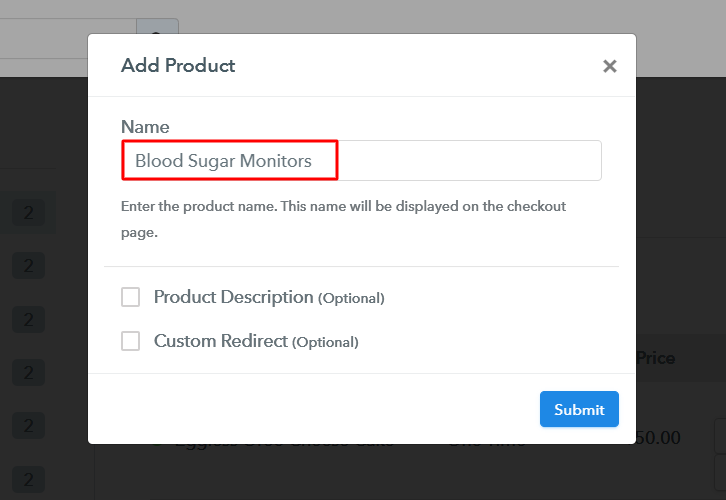
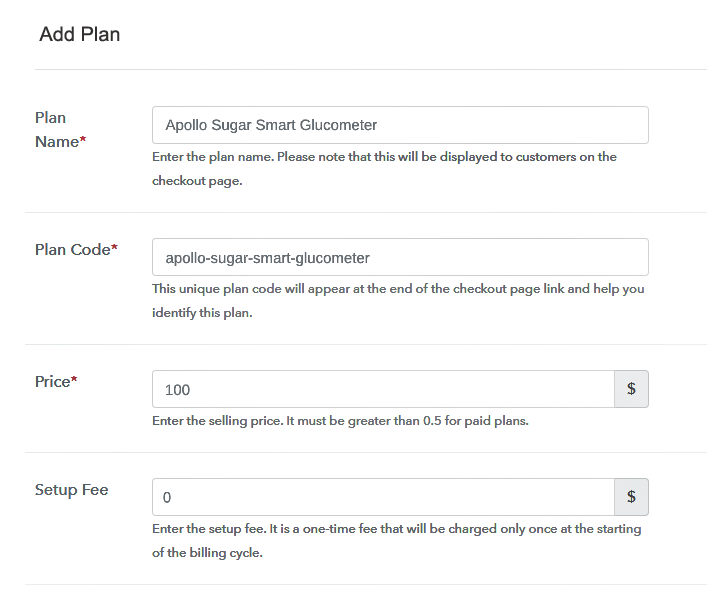
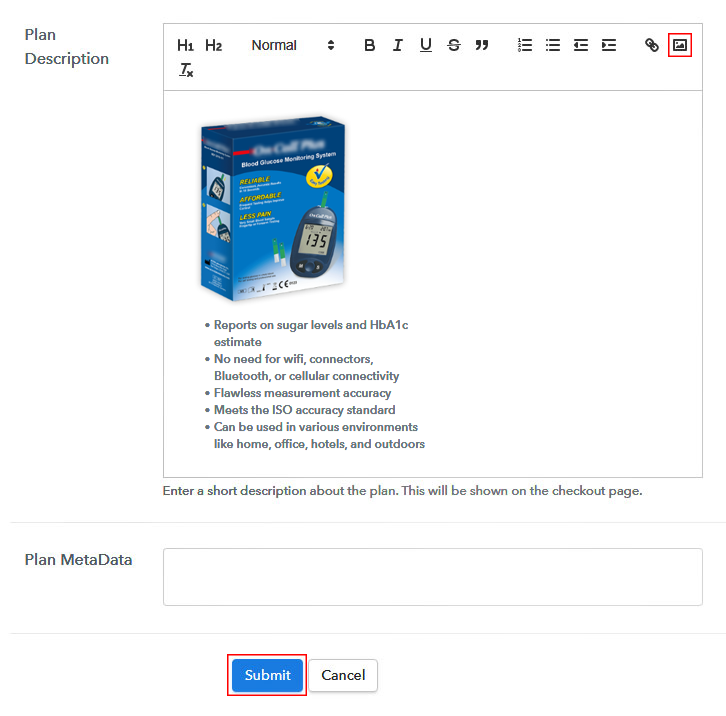
Once you are done with the signup process, now fill up your company details, like company name, currency, phone number in the given box. Pabbly Subscription Billing makes the payment collection process error-free by providing the “Test Payment” mode. Enable this mode and check for yourself how this process works. Later, you can connect with other payment gateways like Stripe, Razorpay, etc of your choice. The complete payment gateways integration guide is given below- In this step, you have to add your first product. You can add caps and hats from different categories like baseball caps, bowler hats, etc. Add all the other caps and hats in the same product section by creating different plans for them. Note: Here you can add all the products related to the similar category by creating plans for each of them. Let’s rollout plans for different kinds of caps and hats available in your store. On clicking the “Add New Plan” button, you will end up on the plan page, here you have to fill up details like product name, code, price, billing cycle, etc. Further, you can describe the caps and hats that you want to sell along with the images, links, etc, and then click on the submit button to add your product. You can also create more plans for all the caps and hats in a similar way. If you want to improve your caps and hats sales online then follow these given steps: Follow up the recommended steps to preview the checkout page: Simply copy the link and add the checkout page to sell caps and hats online at any preferable place on your WordPress site. Further, paste the plan link on a text editor of the WordPress dashboard. Next, click the “Publish” button, after making changes. Note: In case you want to sell multiple products via a single checkout page, you can create a multi-plan checkout page otherwise skip this step. Coming to the end, this is the easiest and free way to start your online business. With Pabbly Subscription Billing now you can sell unlimited caps and hats online, collect payment easily, share invoices automatically, etc. Now create checkout pages for your caps and hats and start selling them online. For further queries or suggestions please contact us.Step 2: Select Subscription Billing

Step 3: Account Setup

Step 4: Connect Payment Gateways & Start Caps and Hats Selling Business Online

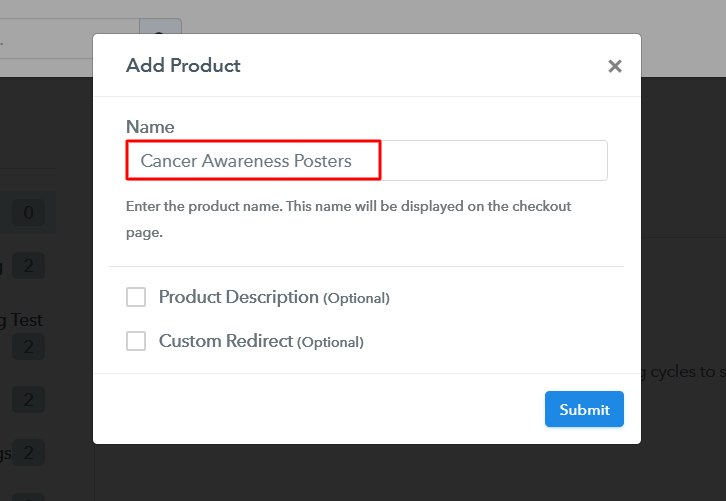
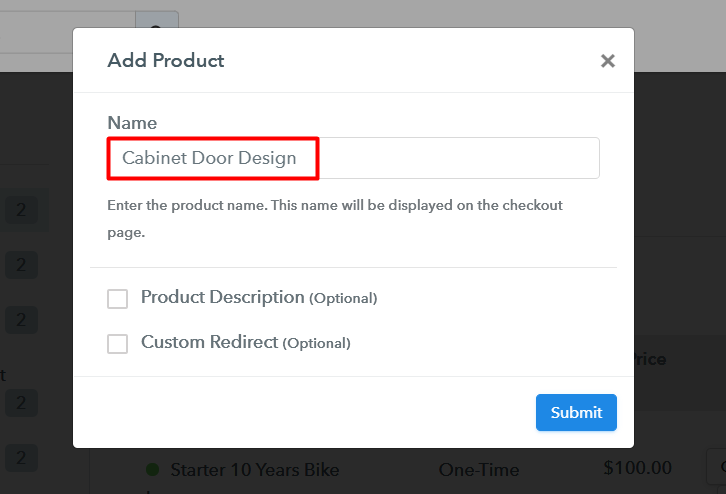
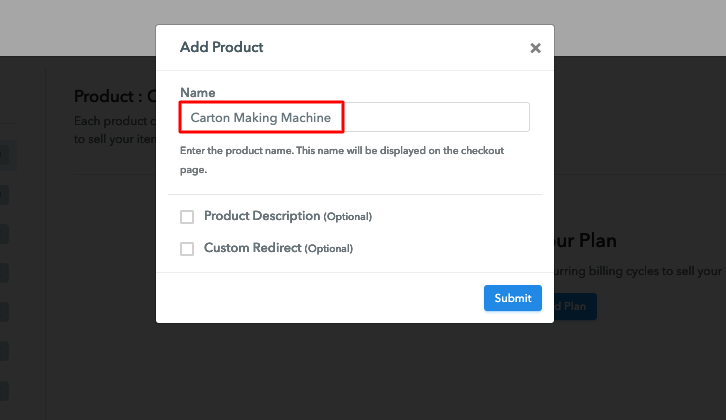
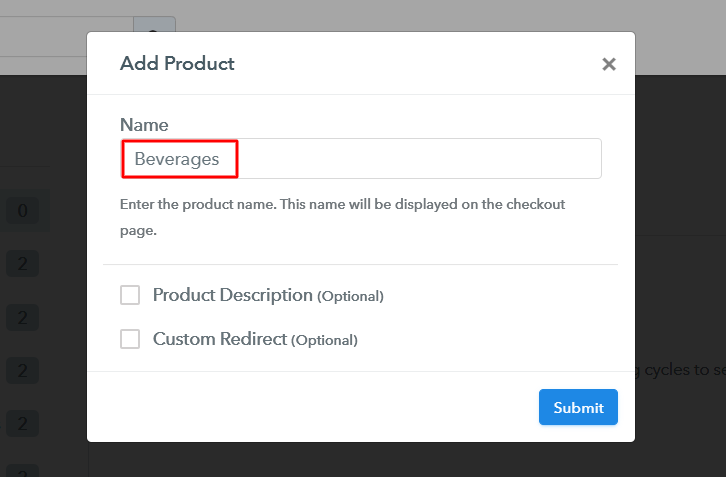
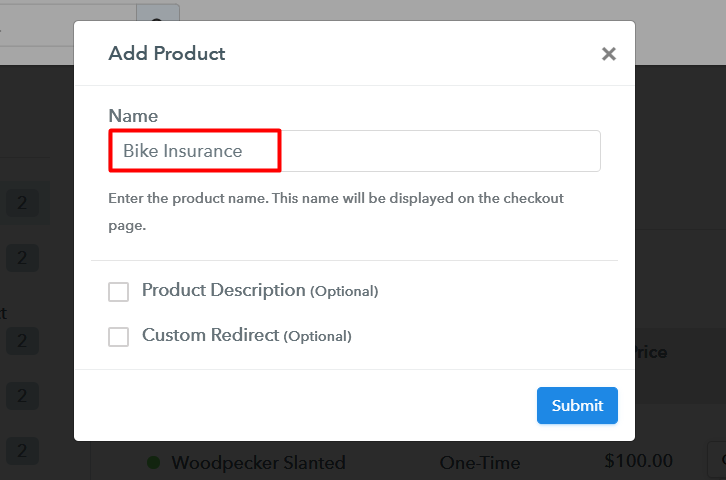
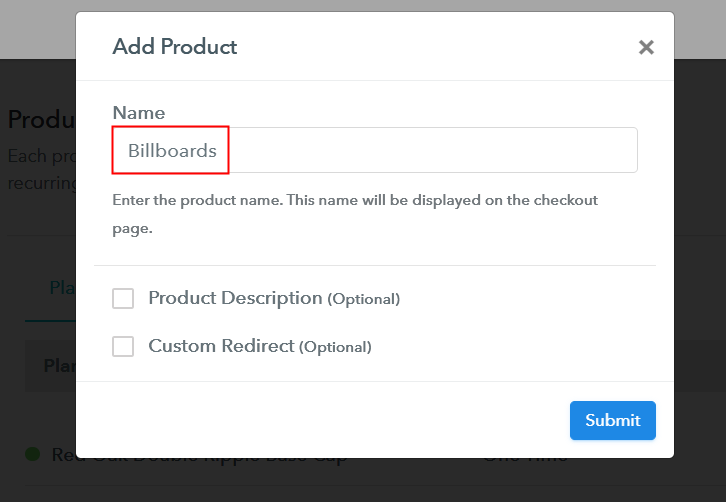
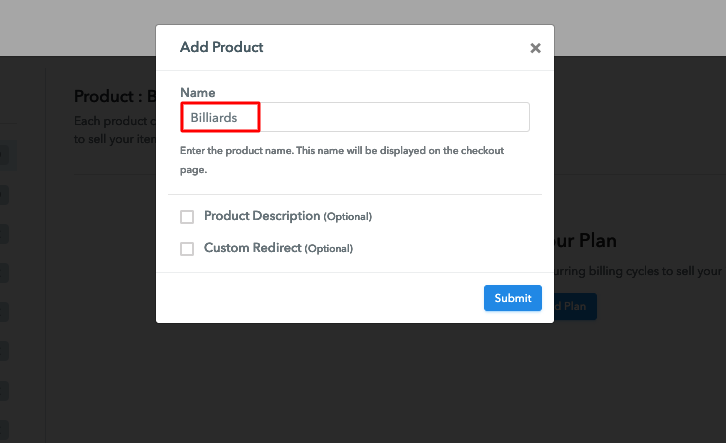
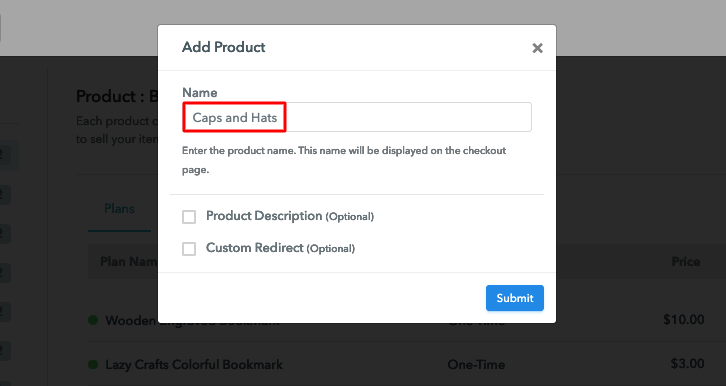
Step 5: Add Product For Your Caps and Hats

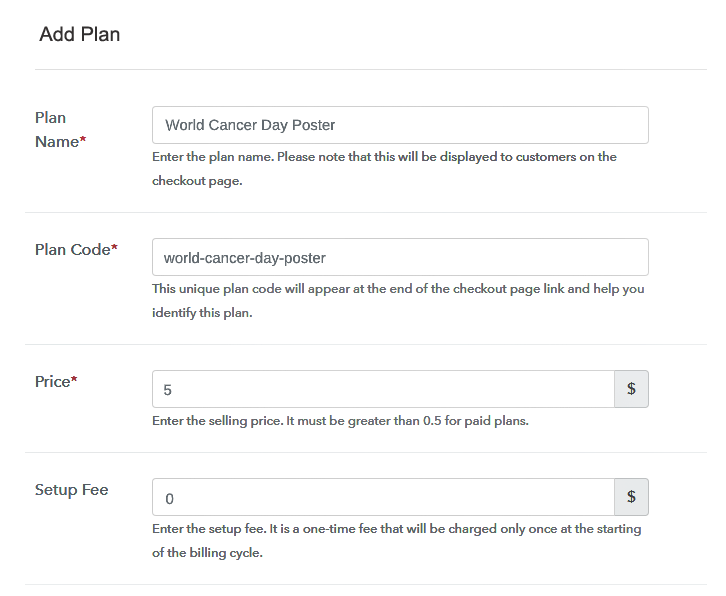
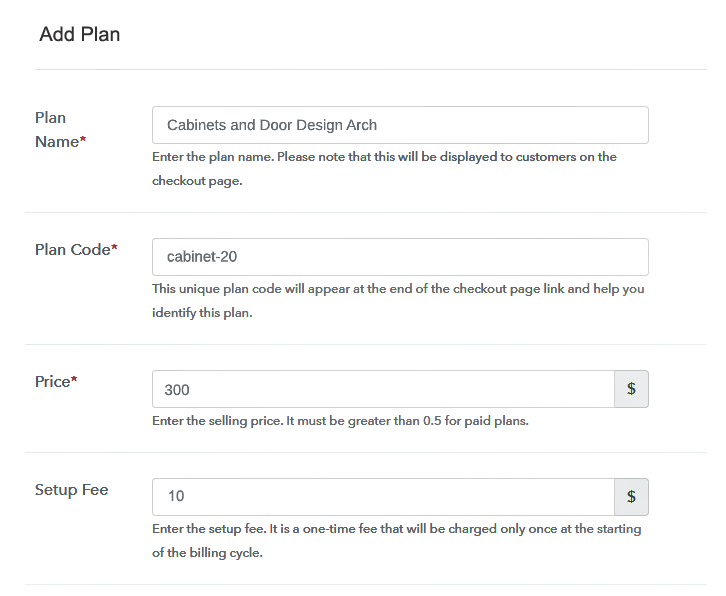
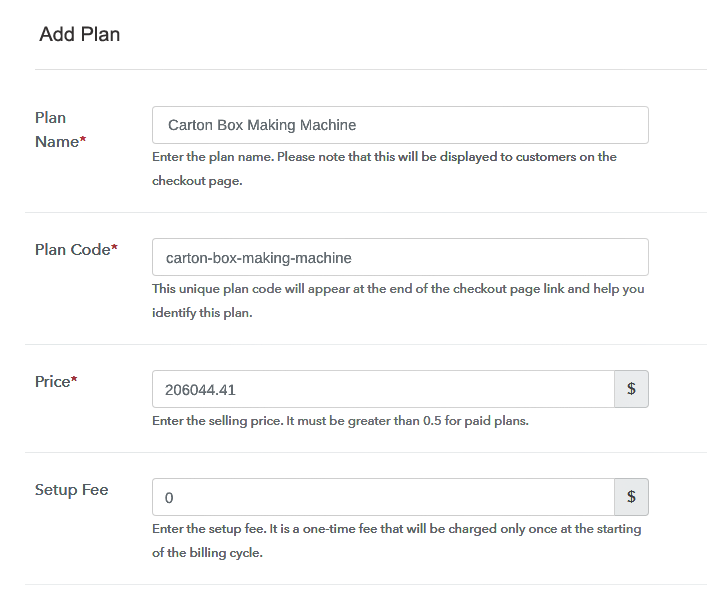
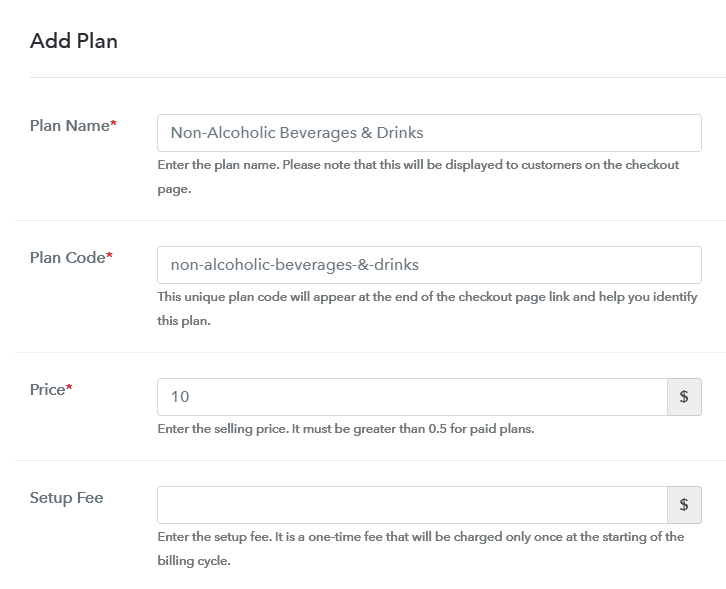
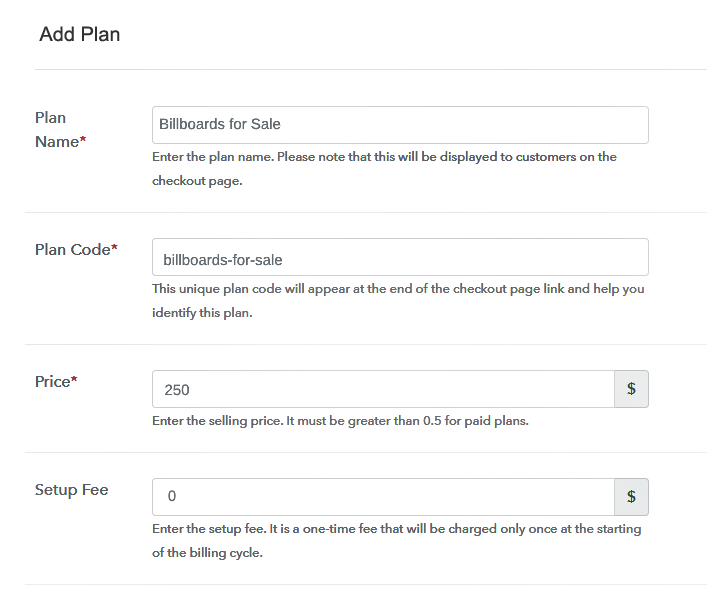
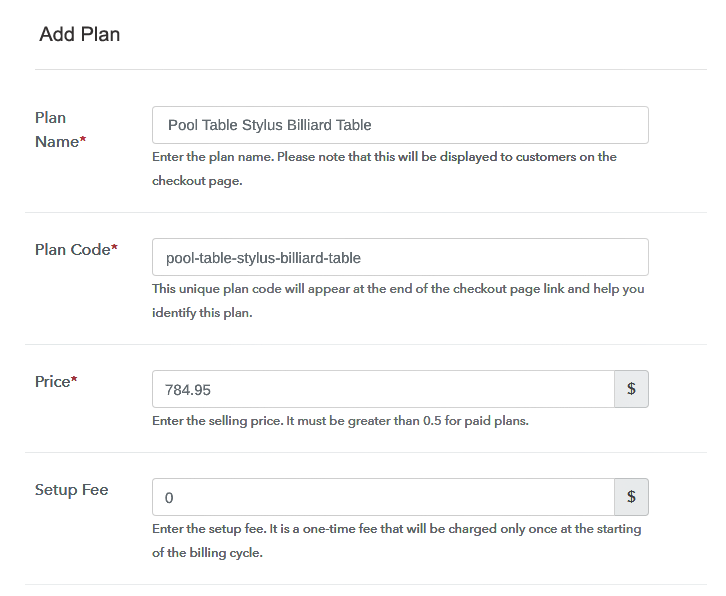
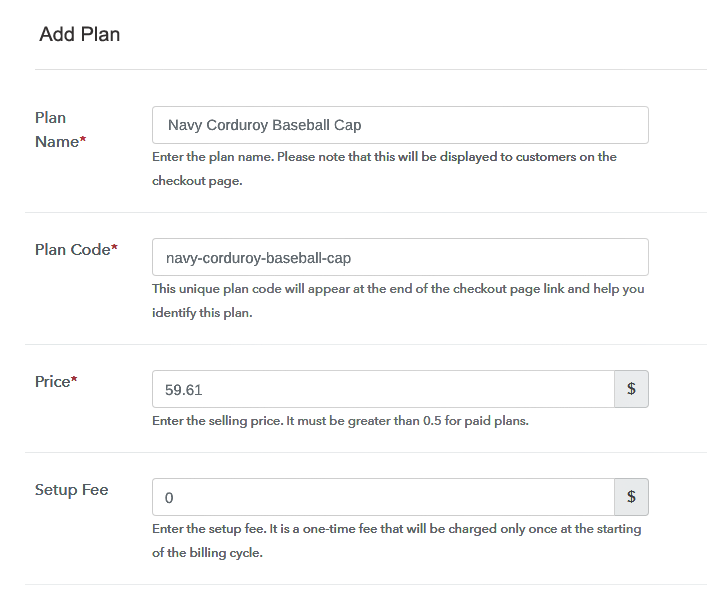
Step 6: Add Plans
(a) Select Add New Plan

(b) Specify the Plan & Pricing Details
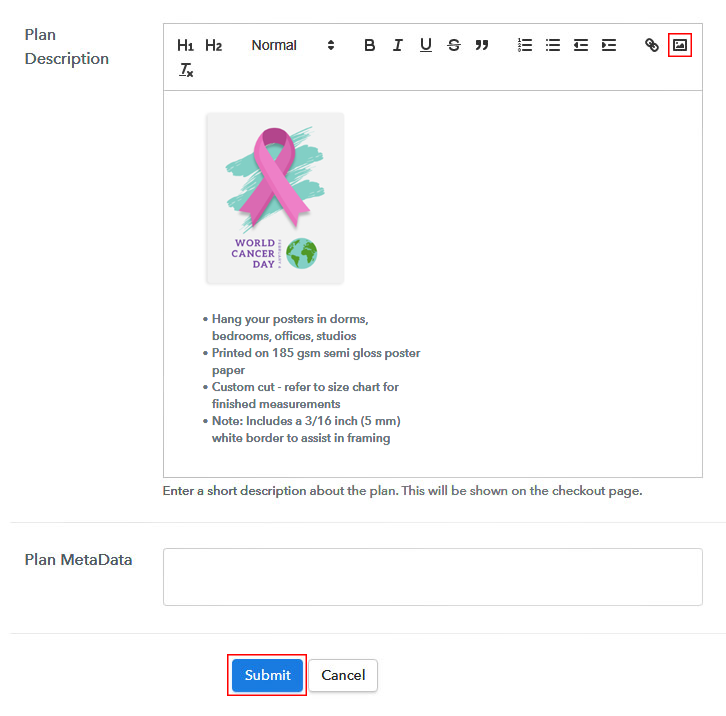
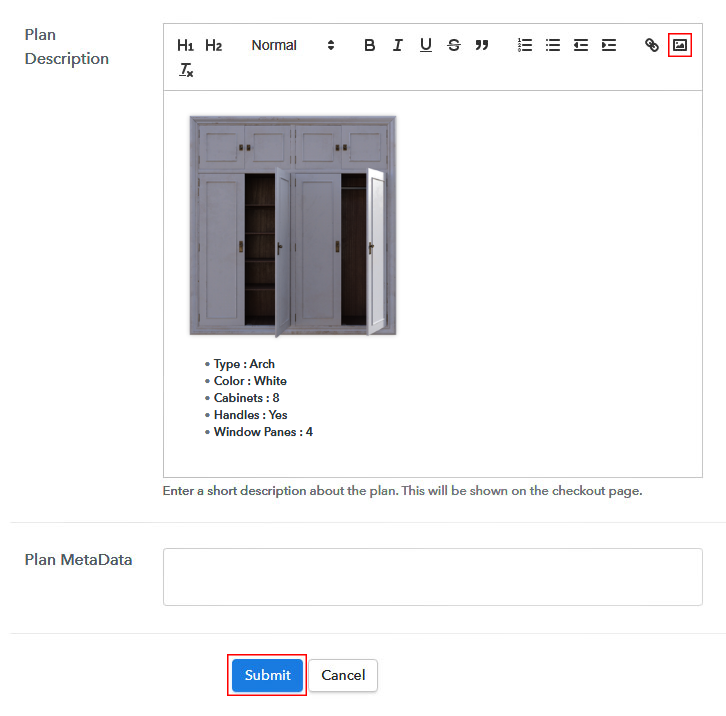
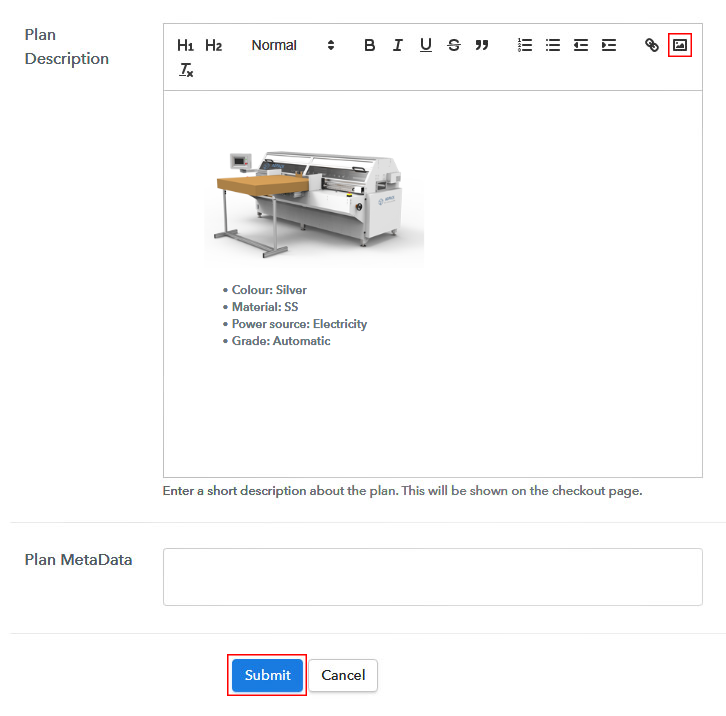
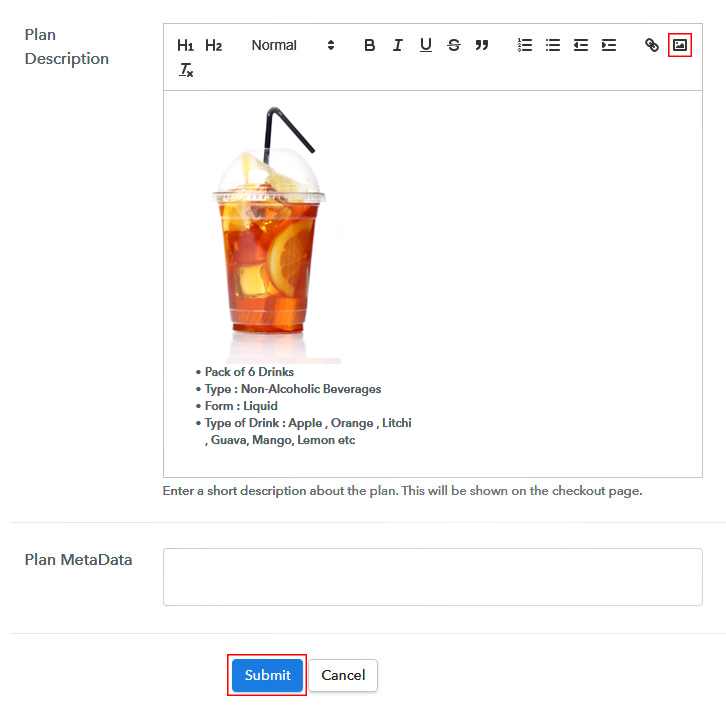
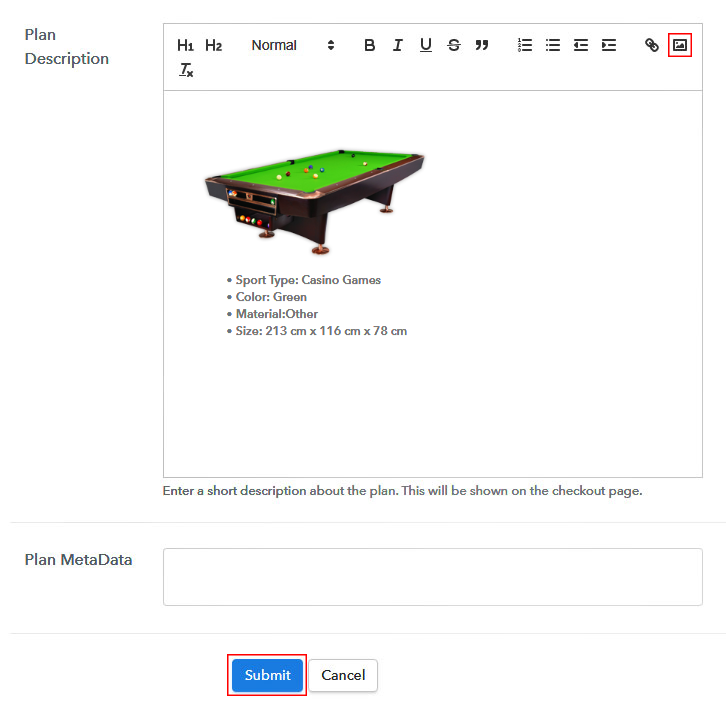
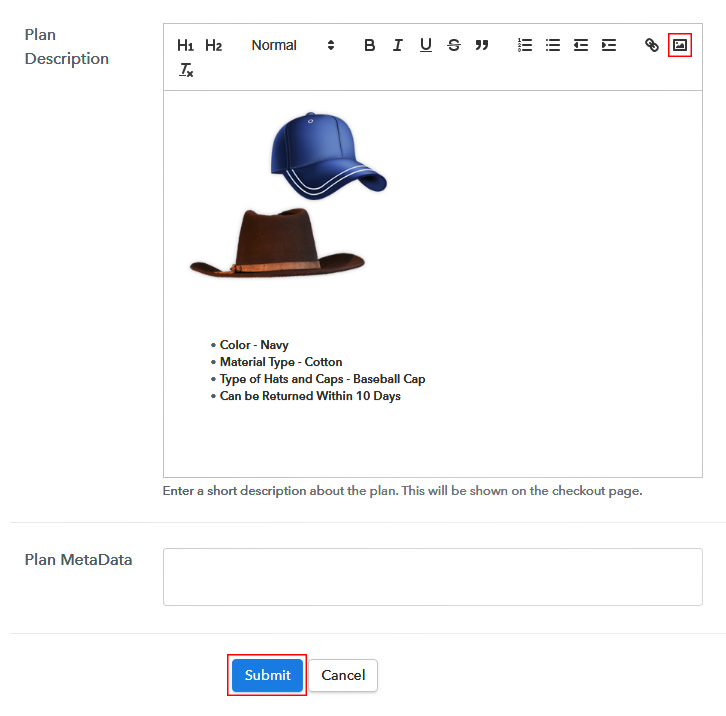
(c) Add Image & Description of Caps and Hats
Step 7: Share your Checkout Page

Step 8: Preview Checkout Page
(a) Click on the View Button

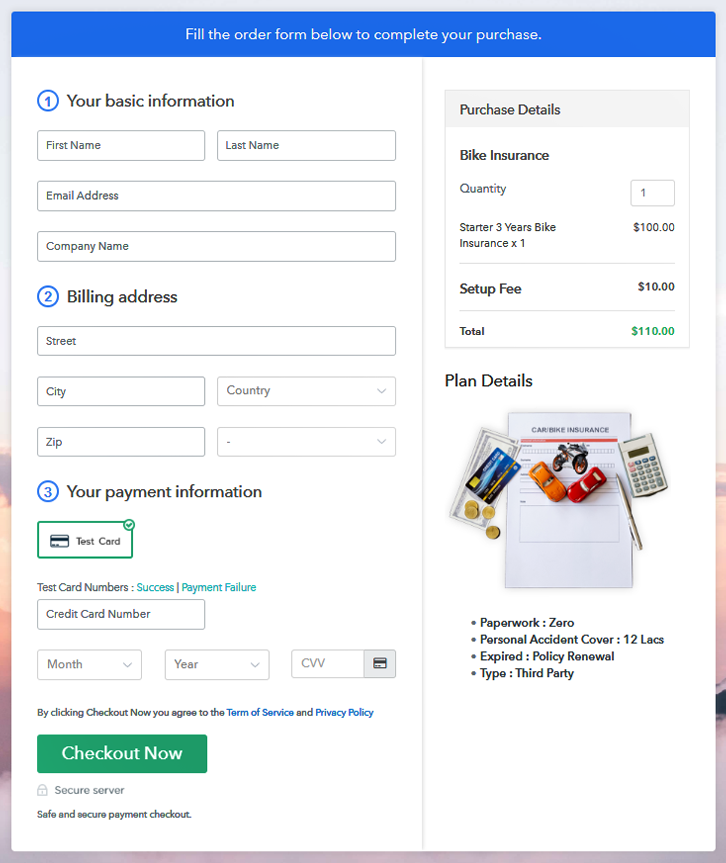
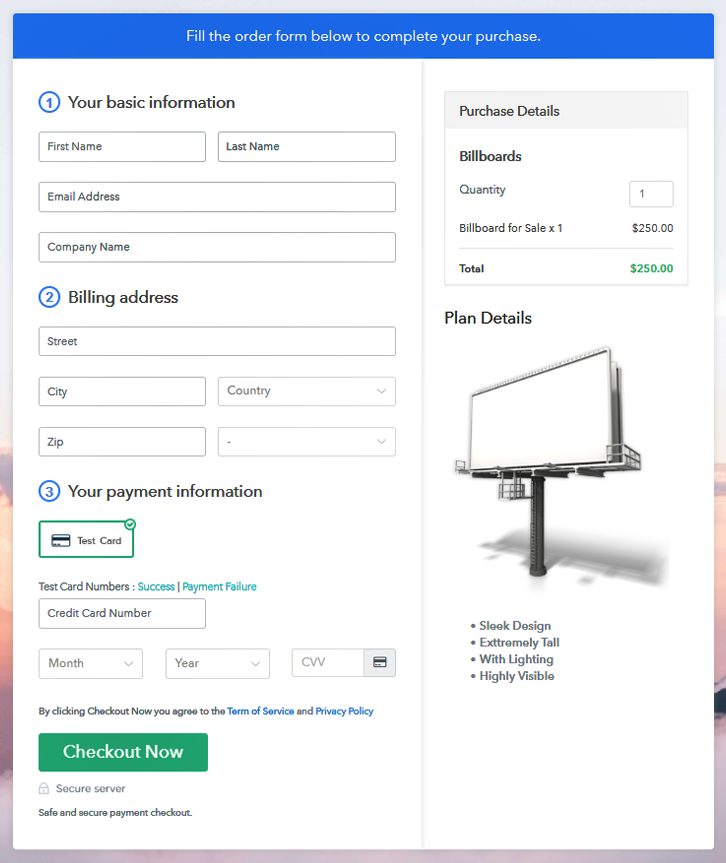
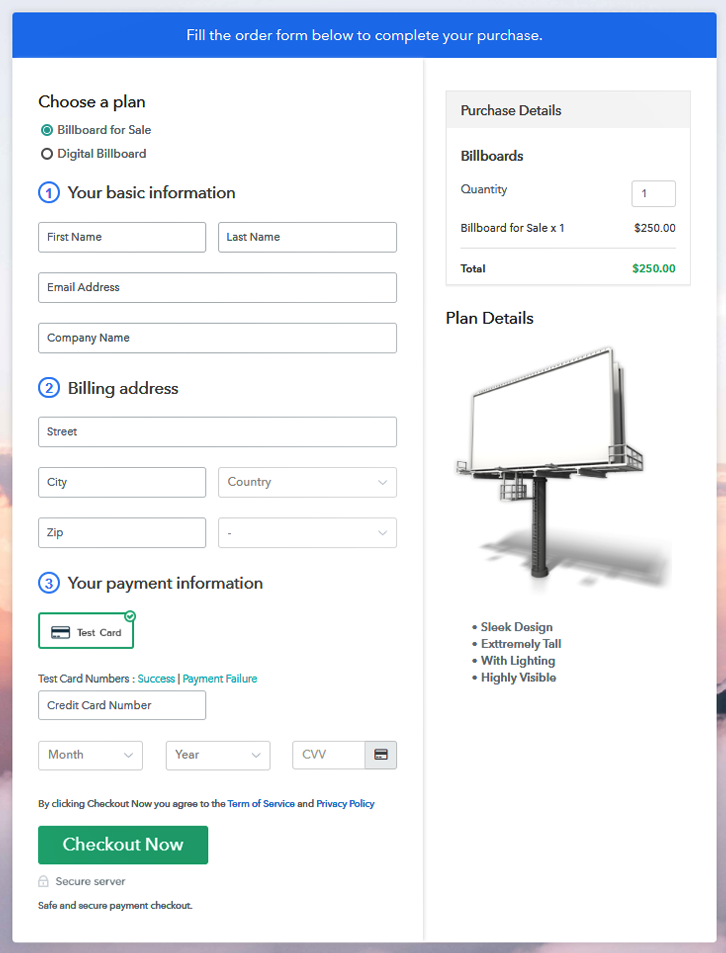
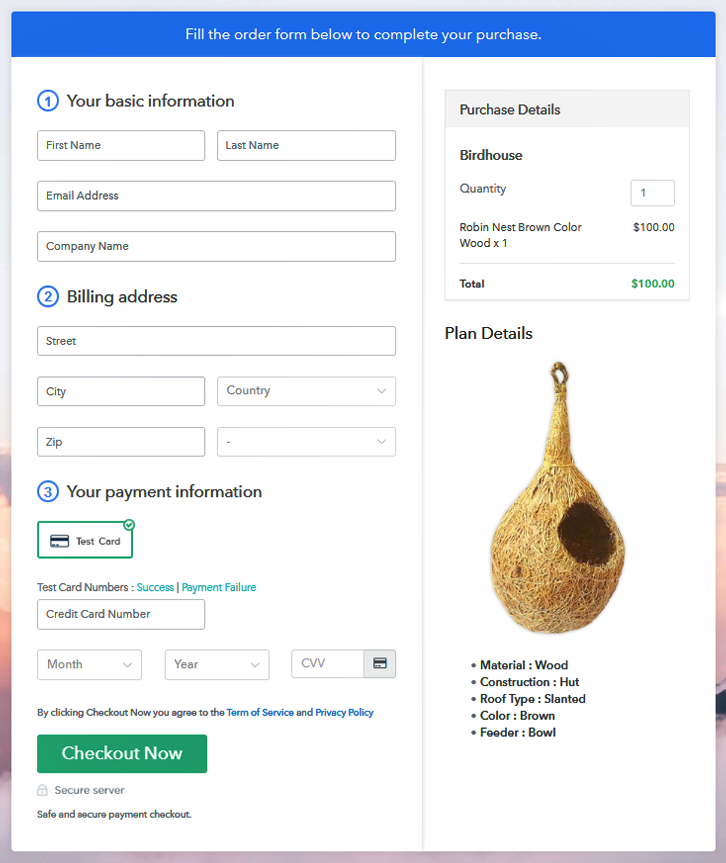
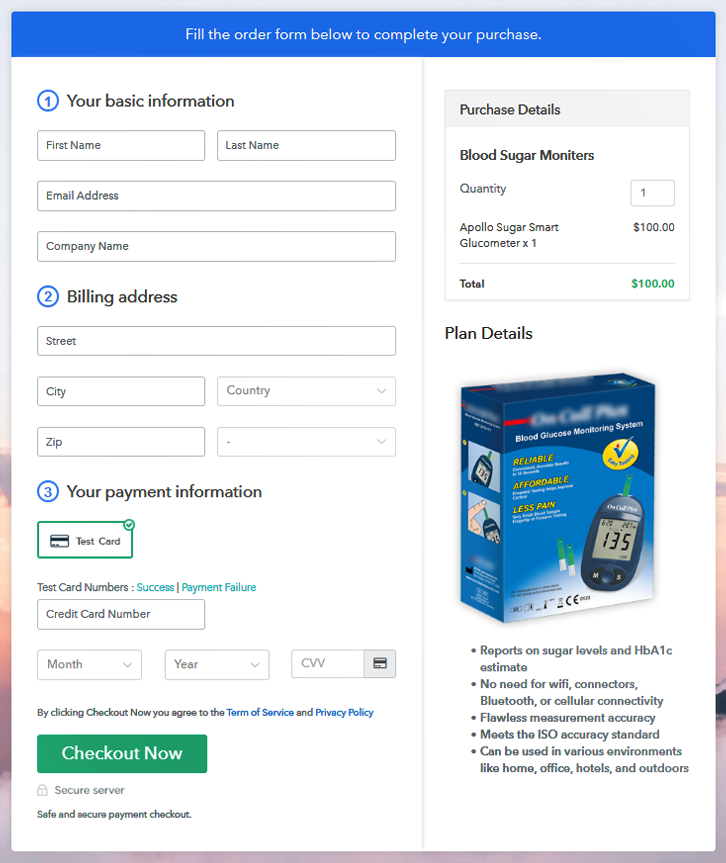
(b) Take a Look at the Checkout Page
Step 9: Embed Checkout Page in Site & Sell Caps And Hats Online

(a) Edit the Page & Paste the Copied Link

(b) Save & Publish the Checkout Page

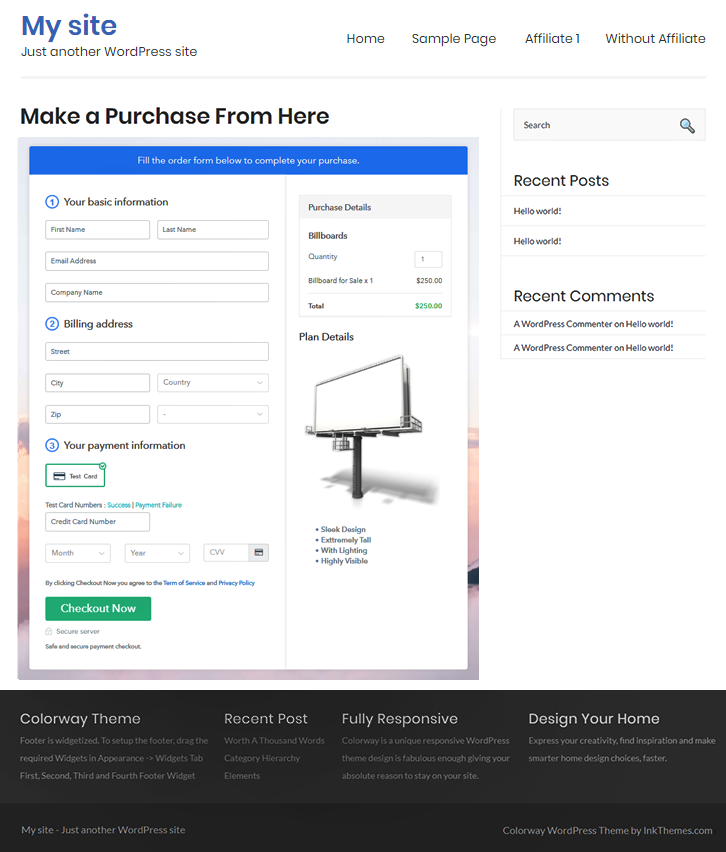
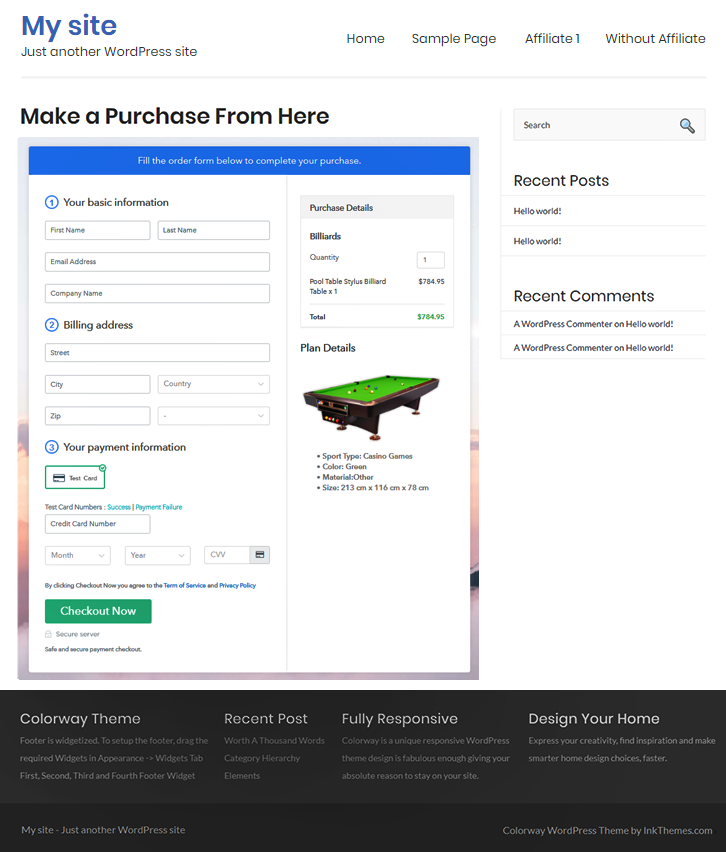
(c) Check out the Final Look of your Checkout Page on WordPress Site
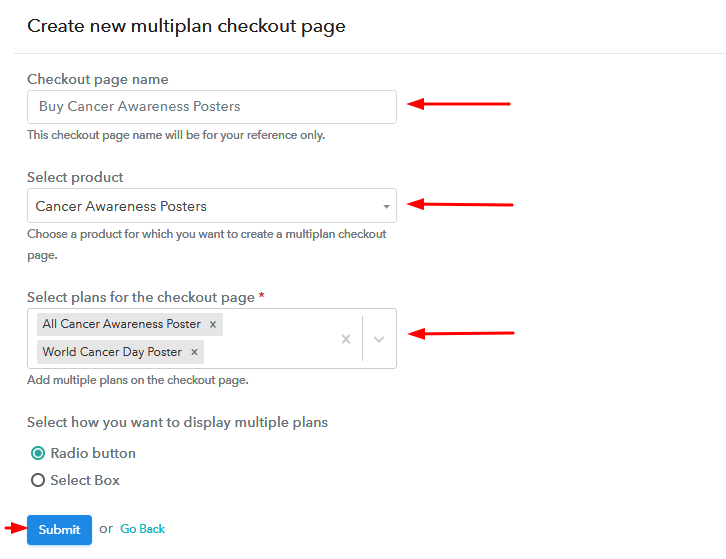
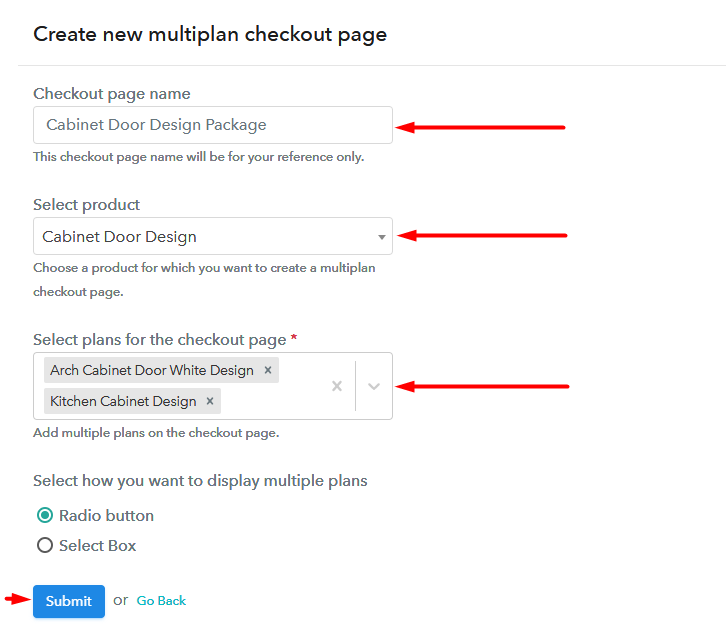
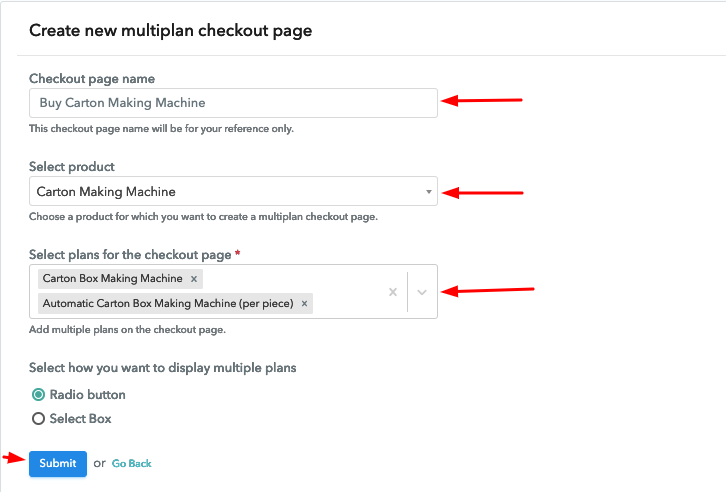
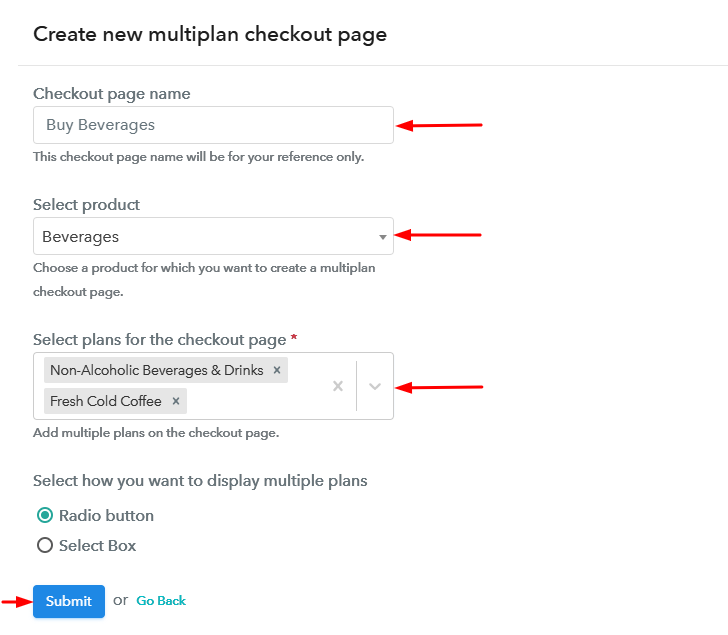
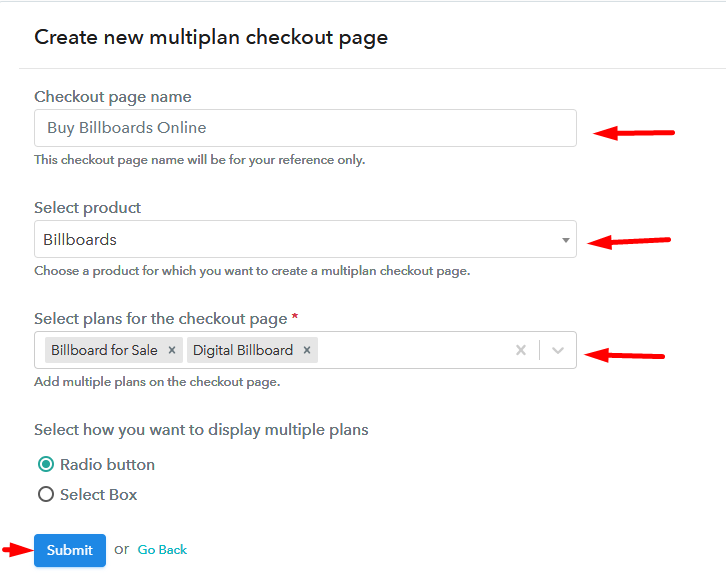
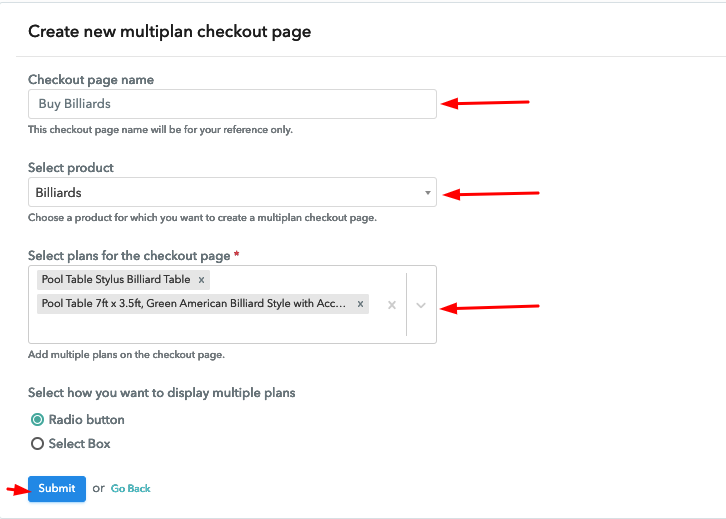
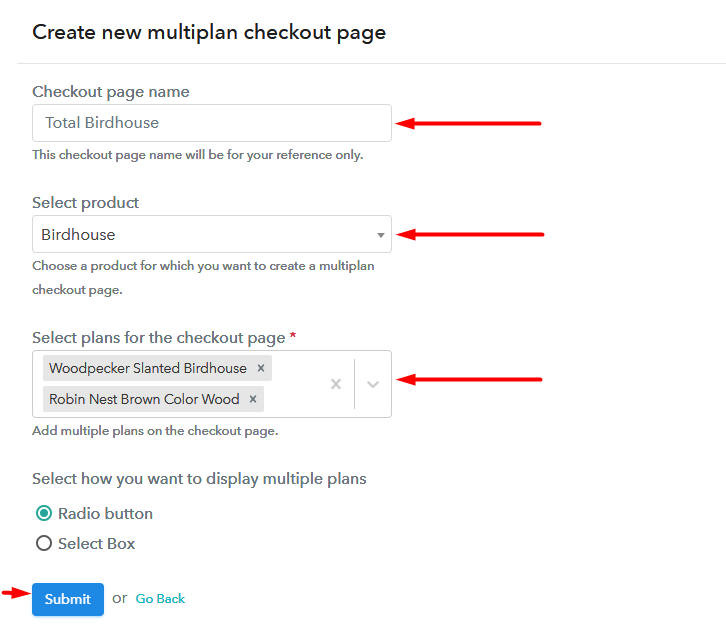
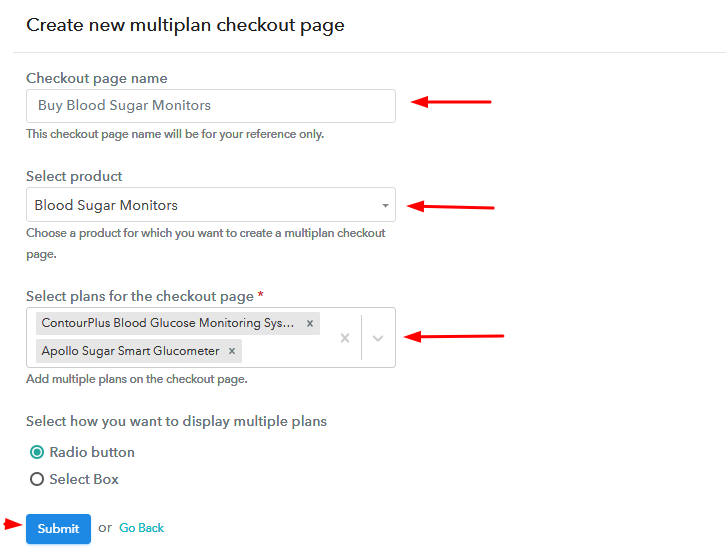
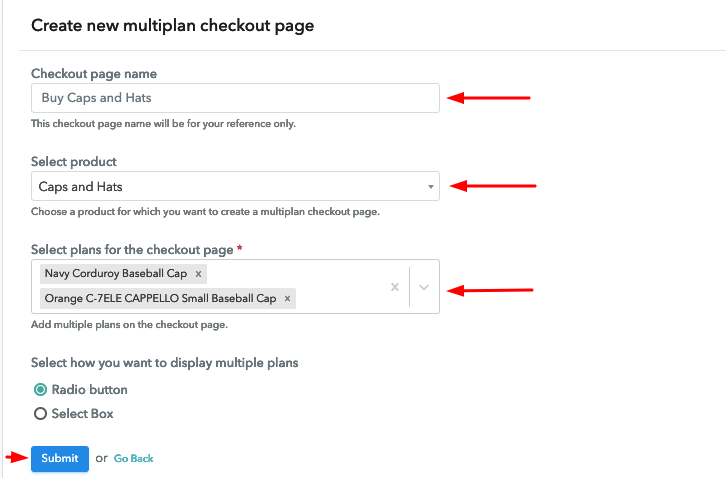
Step 10: Multiplan Checkout Page
(a) Click on Add Mutiplan Checkout

(b) Add Plans to Sell Multiple Caps and Hats from Single Checkout Page
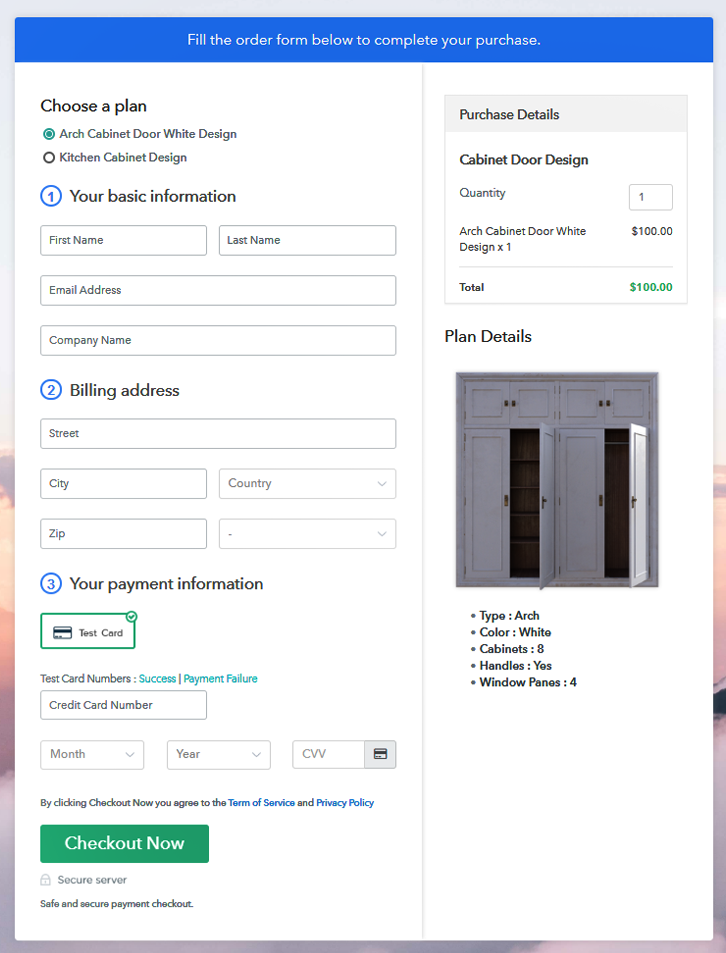
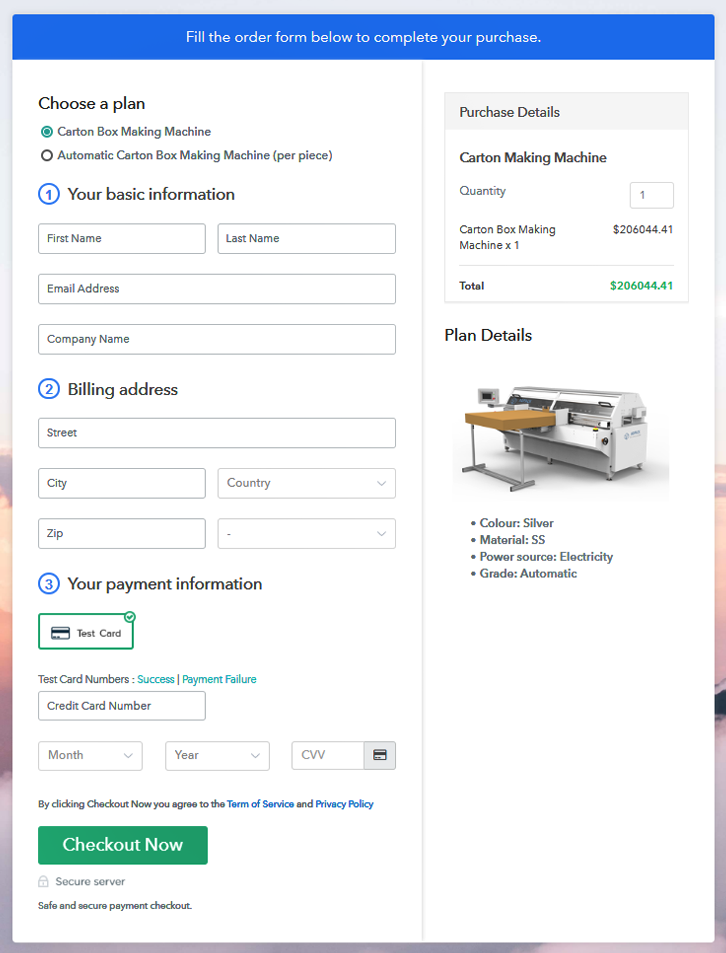
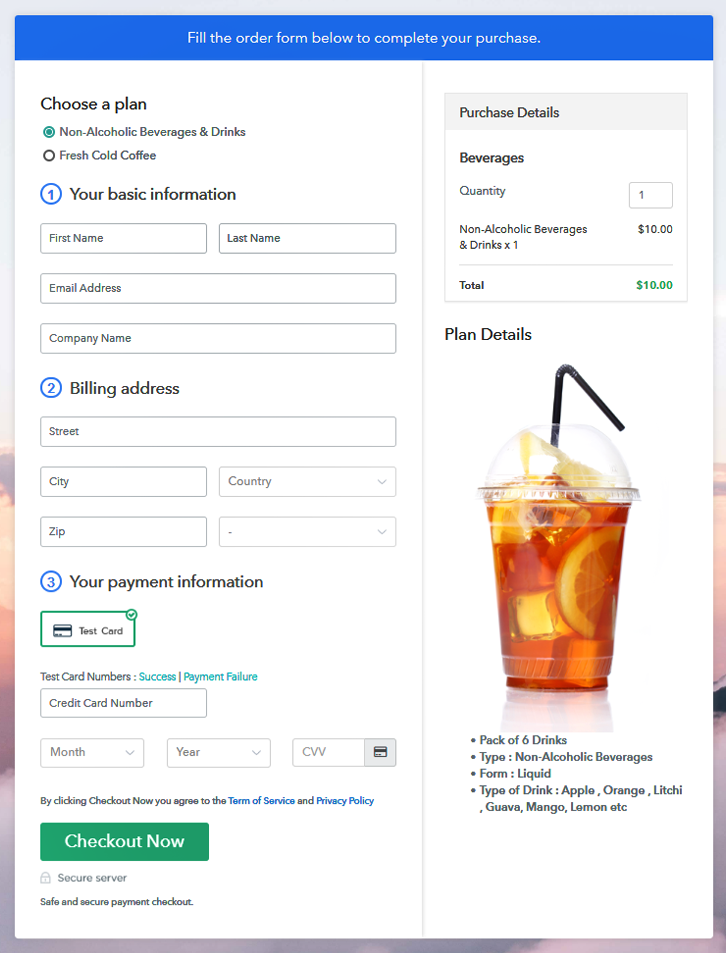
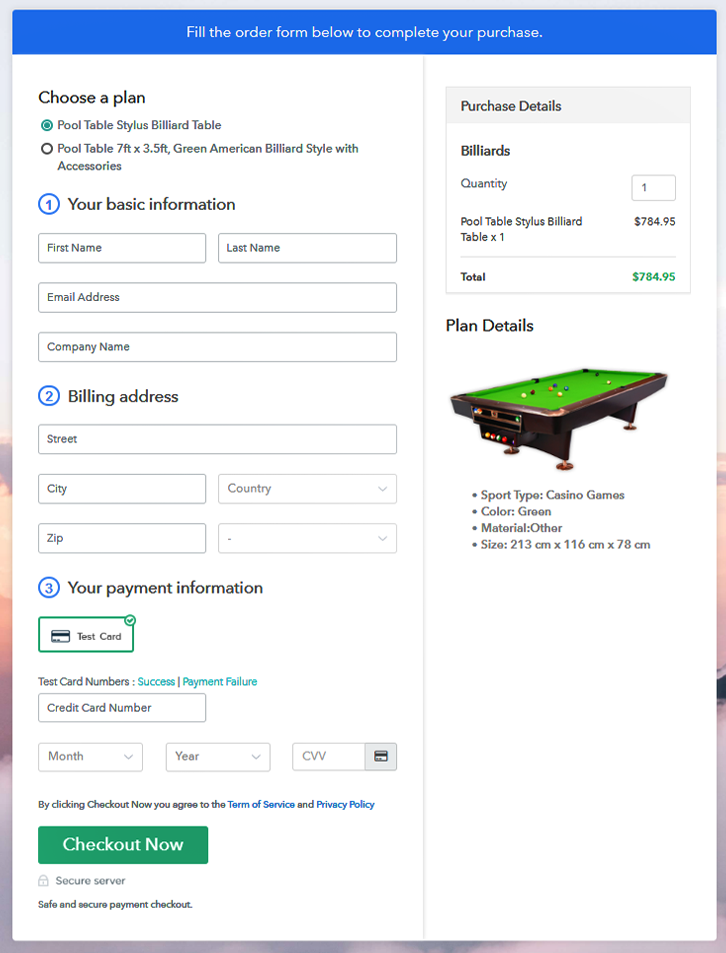
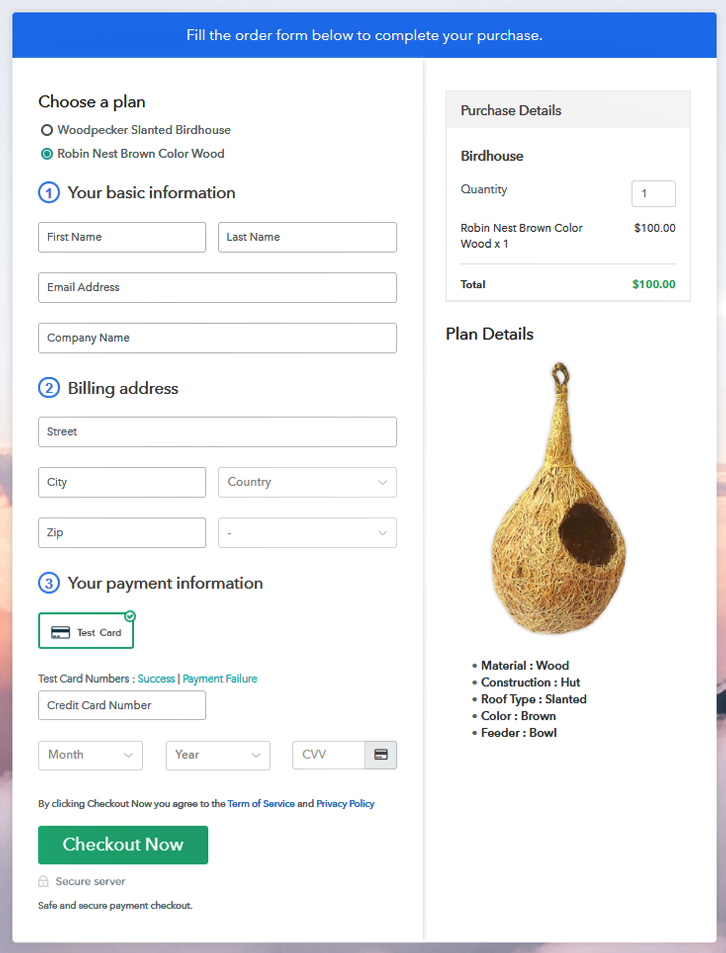
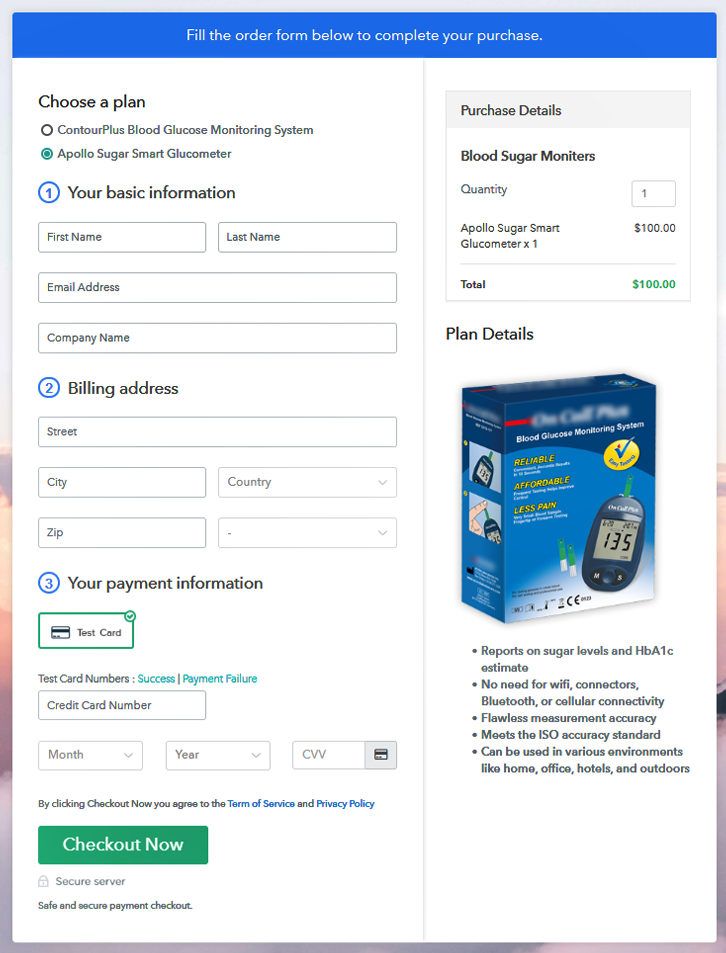
(c) Take a Look at the Checkout Page

Wrapping Up
You May Also Like To Read –