Ideal For: All the insurance agents, third party insurance sellers, insurance dealers, independent insurance sellers and other merchants can use this method to sell bike insurance online.
Why Choose this Method to Sell Bike Insurance Online?
Unlike any other solution, this method allows you to:
- List and sell your bike insurance for FREE. Absolutely no payment required.
- No need to pay commission on any of your sale.
- Multiple payment options like PayPal, Credit Card, etc to collect payment from a single place.
- Sell one time or recurring subscriptions of your bike insurance.
- Collect payments & sell products in any currency as per your requirement.
- Give discounts on your products by offering special coupon codes.
- Add sales commission agents to help you in selling bike insurance online.
The highest growth for motorbikes in 2022 was seen in Asia Pacific regions like China, India, Japan, and South Korea. Now as a newly established insurance company you want to sell your insurance products to all these regions as well as other countries. But that is only possible if you sell bike insurance online. However, you lack the skills to set up a e-commerce market for selling bike insurance online.
Well, don’t you worry, as in this article we will use an amazing Saas tool called Pabbly Subscription Billing which can sell bike insurance online easily. The other advantages of using this software are :
- Unlimited Product Listing
- Payment Collection in Offline/Online Modes
- Mesmerizing Checkout Pages
- Transparent Billing
- Multiple Payment Gateway Integration
- Analytics
- Multiple Billing Models
- Custom Domains
- Tax Management
- Automatic Alerts on Payment Completion/Failure
Now, we will straightaway dive into creating an awesome checkout page with Pabbly Subscription Billing to sell bike insurance online.
Note: Before selling bike insurance online, it is advisable to check the framework developed by the regulatory authorities of that region. Putting it succinctly, Pabbly Subscription Billing won’t take responsibility for any fraudulent activities.
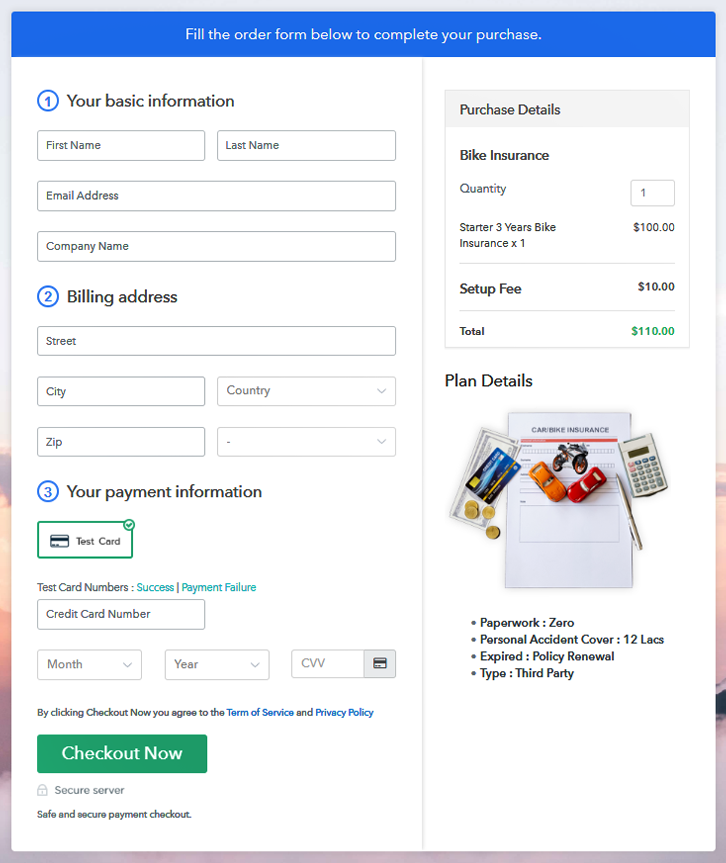
Final View of Checkout Page For Your Bike Insurance Selling Business
Step 1: Log in to Pabbly Subscription Billing

Lok in for the website Pabbly Subscription Billing in your browser. Now on the website click on the “Sign up Free“ button. You can either manually fill all the details or simply sign in using your Gmail account.
Sign Up For Free!
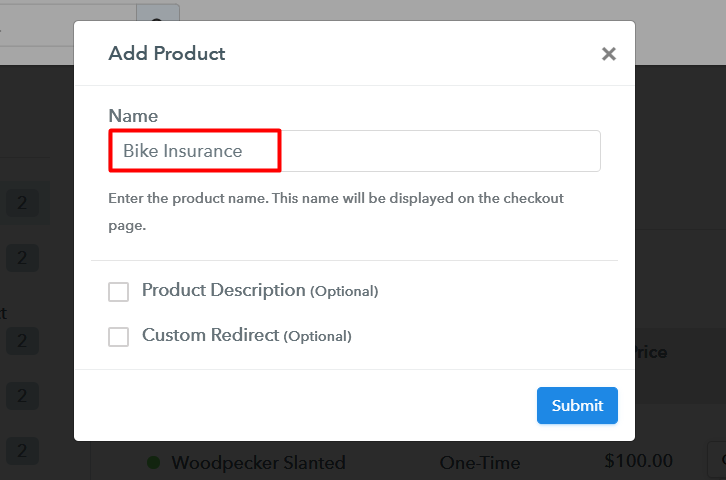
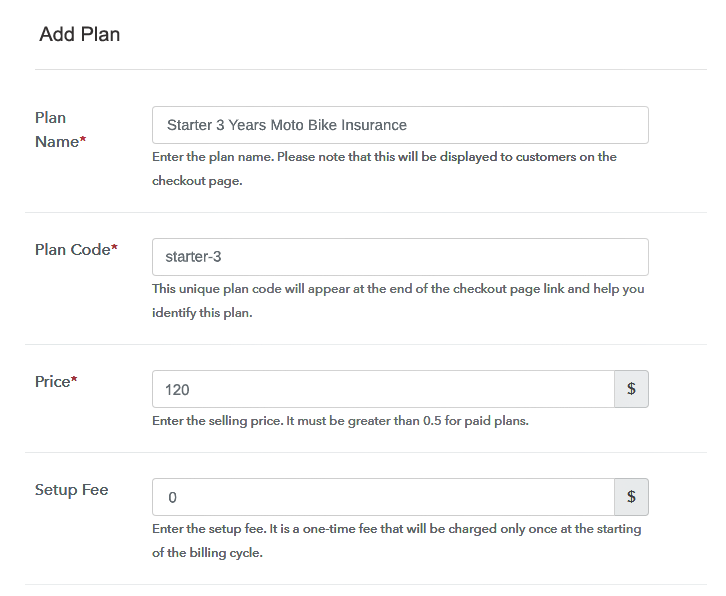
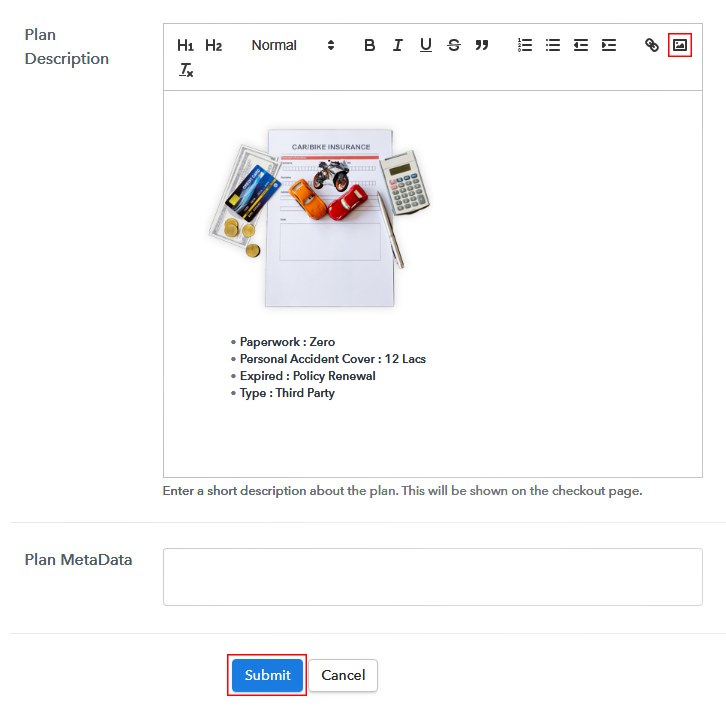
Click on the “Access Now” button of the software, a page will redirect with fields like company name, select currency, and phone number. Just fill out those details to continue creating a checkout page for bike insurance. To prevent glitches during transactions, Pabbly Subscription Billing provides a dummy payment gateway where you can pilot test the entire payment experience of the customer in advance. Furthermore, Pabbly Subscription Billing contains an integration guide for each of the payment gateways like Razorpay, PayPal, etc. You can access them from below this para. But I am going ahead to enable the test payment option to continue the process. Now if the payment gateway integration went well, so let’s begin to add the products. Below the “Enable Payments” segment there is the “Add your product” section click on it. This will generate a dialog box with a blue button “Add New Product”. Click on it. You have to add the required product title, in this case, it is the ‘bike insurance’. Fill out all the details like the name of the product and voila your product is created. Note: Here you can add all the products related to the similar category by creating plans for each of them. Let’s rollout plans for different kinds of bike insurance available in your store. Here, on the plan page, you have to fill in information like plan name, code, price, setup fees, etc. Also, while scrolling down you will find different billing models like one-time payment, recurring, based on cycles, etc. Now, choose the one that interests you the most. Furthermore, you can change it any time you want. Insert images of the insurance schemes here by clicking on the upload button. You can add unlimited images of your schemes. Furthermore, add some information on the insurance scheme in bullet points like tenure, date of expiry, premiums, type, etc. Later after filling out the description, press the submit button. Follow up the recommended steps to preview the checkout page: Just copy the link and add the checkout page to sell bike insurance online at any suitable place on your WordPress site. Further, paste the plan link of the bike insurance on a text editor of the WordPress dashboard. Next, click the “Publish” button, after making changes. Note: In case you want to sell multiple products via a single checkout page, you can create a multi-plan checkout page otherwise skip this step. Excellent, you created your first checkout page in Pabbly subscription Billing to sell bike insurance online. Furthermore, these were just little strides, as in due time you will finally tame this software to dominate the online market. Also, since you are new you may have some doubts regarding the step mentioned above. Just relax and drop your queries in the comment section below. We will reach out to you at the earliest. Thank You.Step 2: Select Subscription Billing

Step 3: Account Setup

Step 4: Connect Payment Gateways & Start Bike Insurance Selling Business Online

Step 5: Add Product For Your Bike Insurance

Step 6: Add Plans
(a) Select Add New Plan

(b) Specify the Plan & Pricing Details
(c) Add Image & Description of Bike Insurance
Step 7: Share your Checkout Page

Step 8: Preview Checkout Page
(a) Click on the View Button

(b) Take a Look at the Checkout Page

Step 9: Embed Checkout Page in Site & Sell Bike Insurance Online

(a) Edit the Page & Paste the Copied Link

(b) Save & Publish the Checkout Page

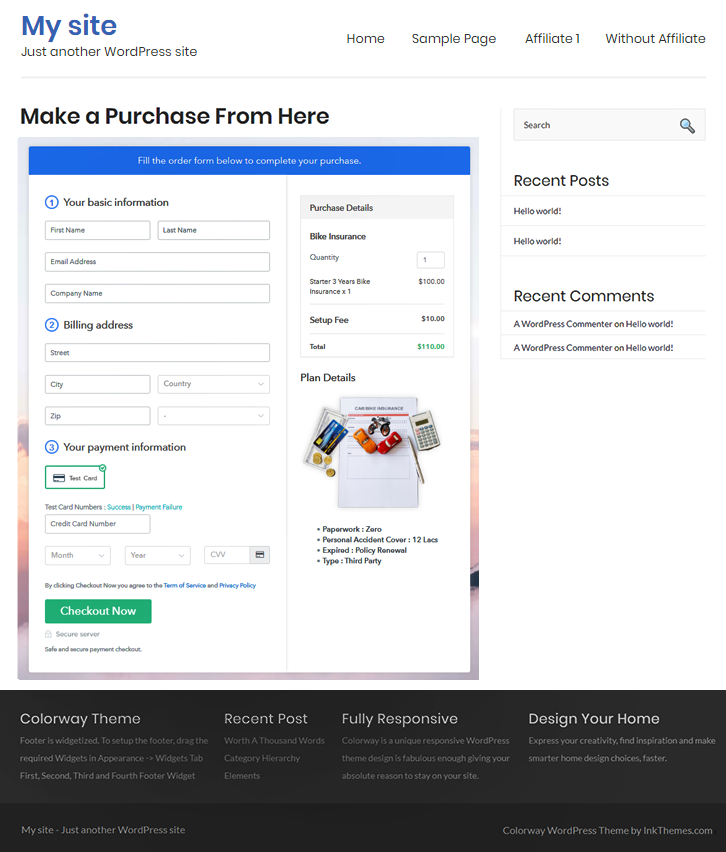
(c) Check out the Final Look of your Checkout Page on WordPress Site
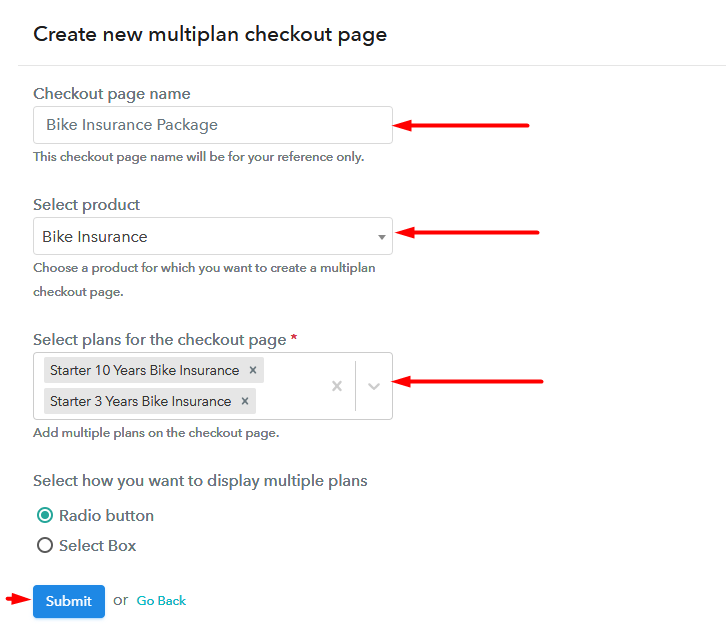
Step 10: Multiplan Checkout Page
(a) Click on Add Mutiplan Checkout

(b) Add Plans to Sell Multiple Bike Insurance from Single Checkout Page
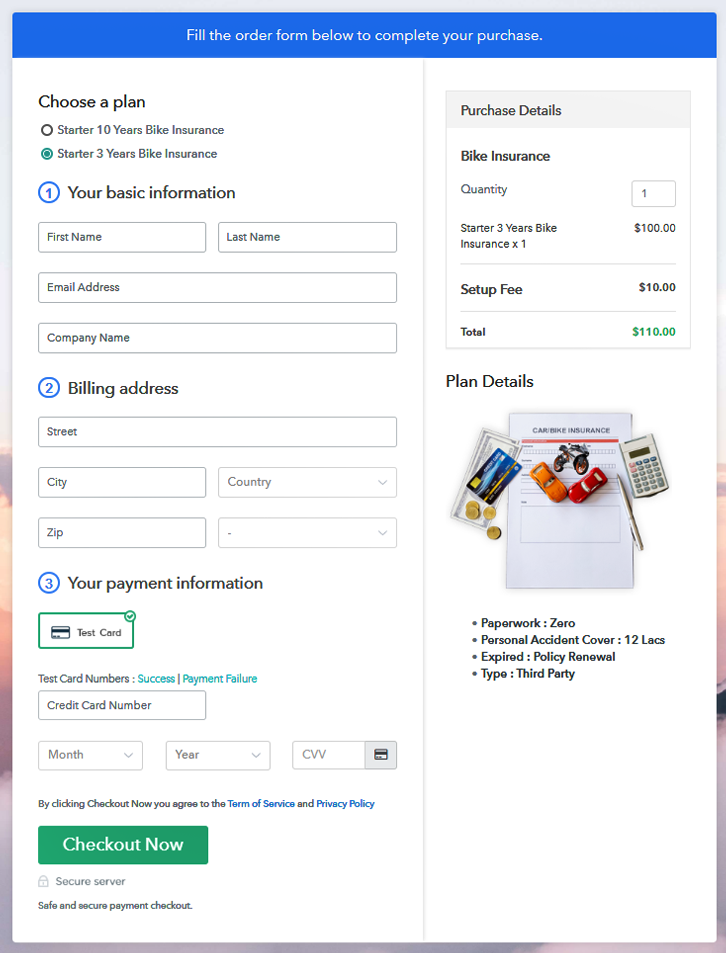
(c) Take a Look at the Checkout Page
Wrapping Up
You May Also Like To Read –


