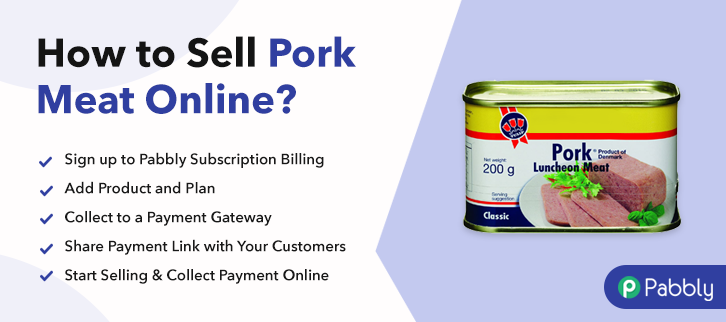
Ideal For: All the piano sellers, pawn shop owners, piano manufacturers, vinatge piano sellers, music instruments makers, and other merchants can use this method to sell pianos online.
Why Choose this Method to Sell Pianos Online?
Unlike any other solution, this method allows you to:
- List and sell your pianos for FREE. Absolutely no payment required.
- No need to pay commission on any of your sale.
- Multiple payment options like PayPal, Credit Card, etc to collect payment from a single place.
- Sell one time or recurring subscriptions of your pianos.
- Collect payments & sell products in any currency as per your requirement.
- Give discounts on your products by offering special coupon codes.
- Add sales commission agents to help you in selling pianos.
From the early 1900s to the 1980s the pianos were once considered the ‘heart of the home’. But now, due to weak global demands in 2019 barely 3,103 pianos were sold. However, the manufacturers are still very upbeat, as they are reinventing their business channels. They are working on new methods to sell pianos online to get better demand from a global audience.
There are many online tools available for selling pianos online. But many of them are either pricey or demand excessive pay cuts as commissions. The way out of this conundrum is using an affordable Saas tool called Pabbly Subscription Billing. This software allows you to build checkout pages to list an unlimited number of pianos to sell them online. Furthermore, there are no annoying transaction fees and the UIs are so easy, that it can be piloted even by a kid. Some other prime features are
- Versatile Checkout Pages
- Custom Domain for Professional Outlook
- Auto Card Reattempt
- Multi Billing Models
- Custom Logo
- Tracking Revenue Sources
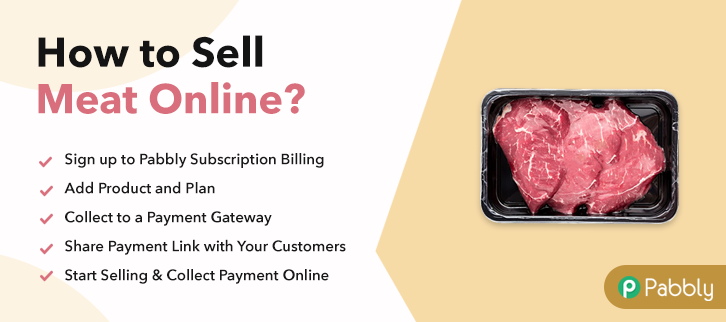
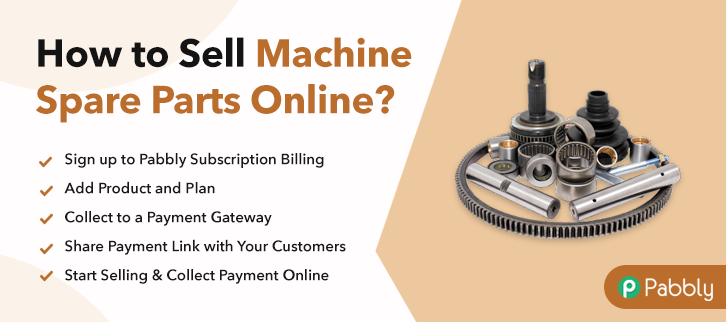
Now, without wasting time, let us build our first checkout page to start selling pianos online.
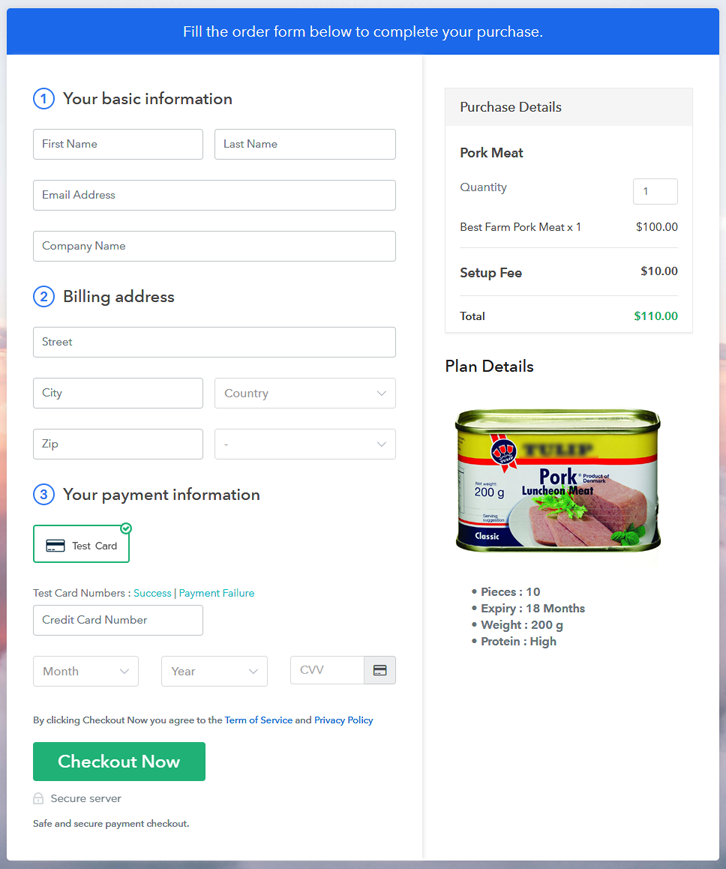
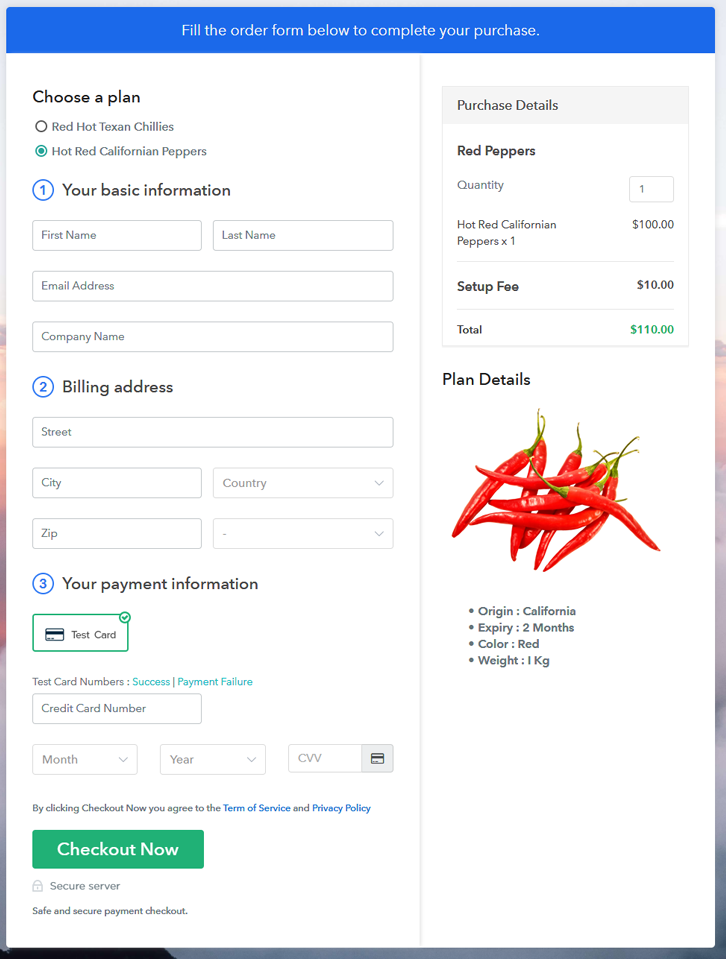
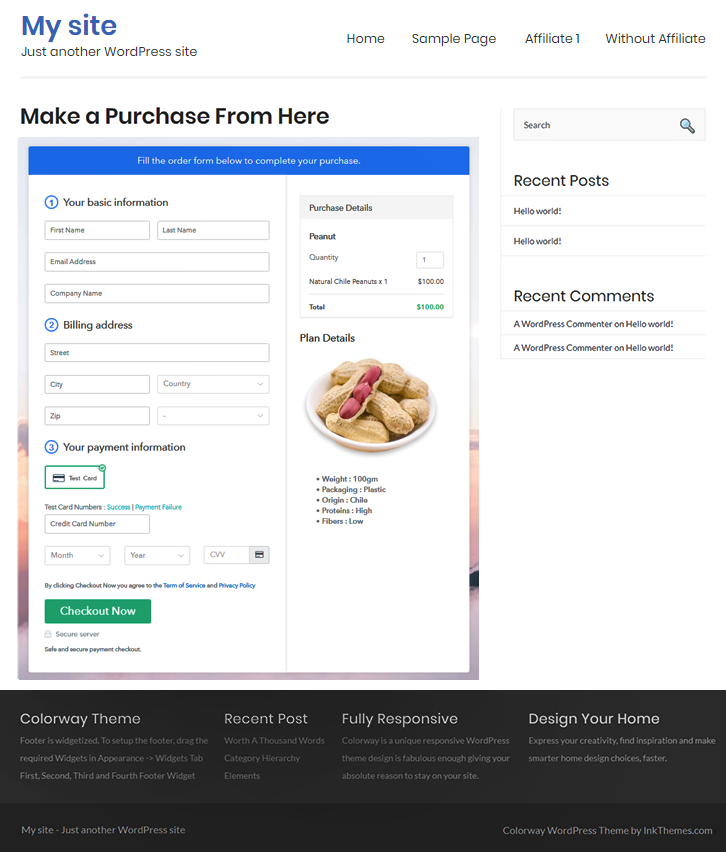
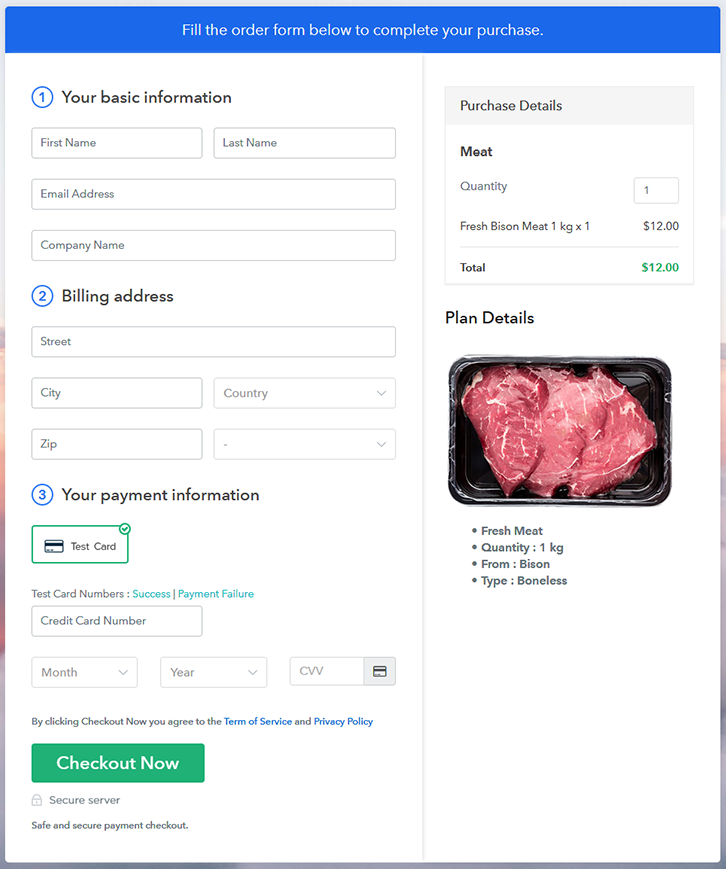
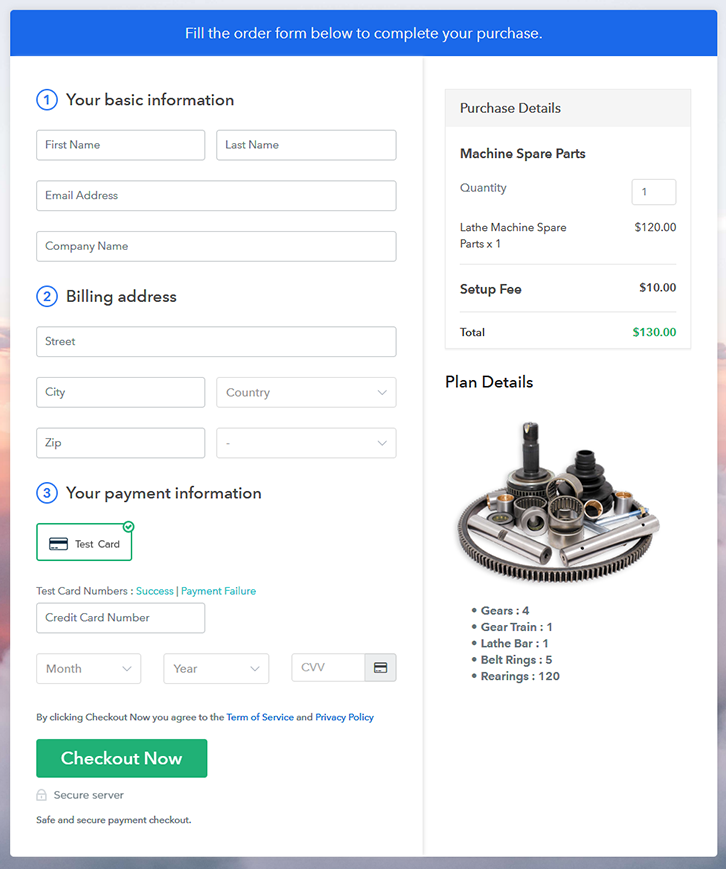
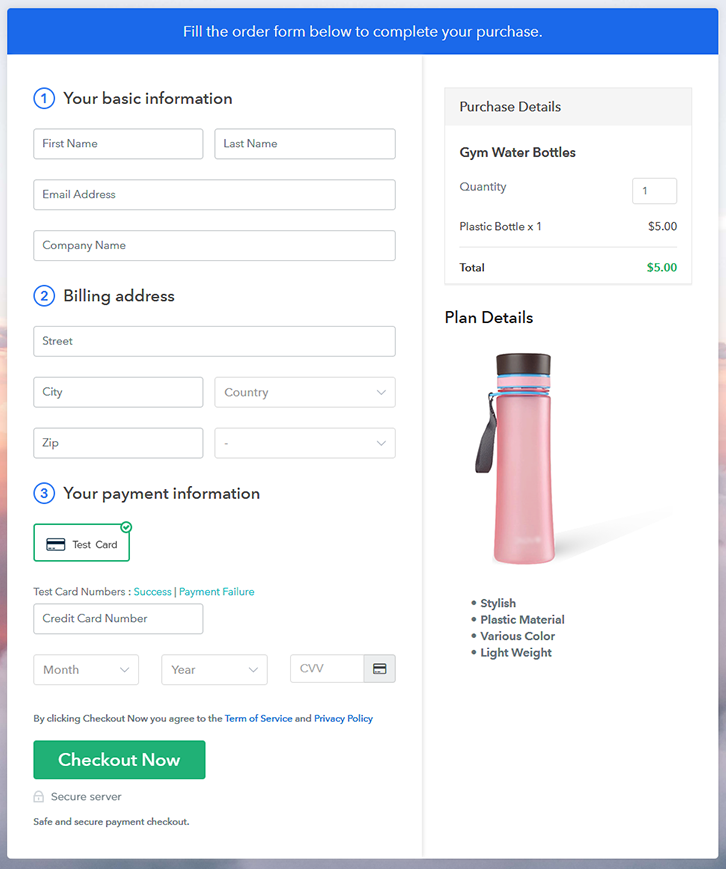
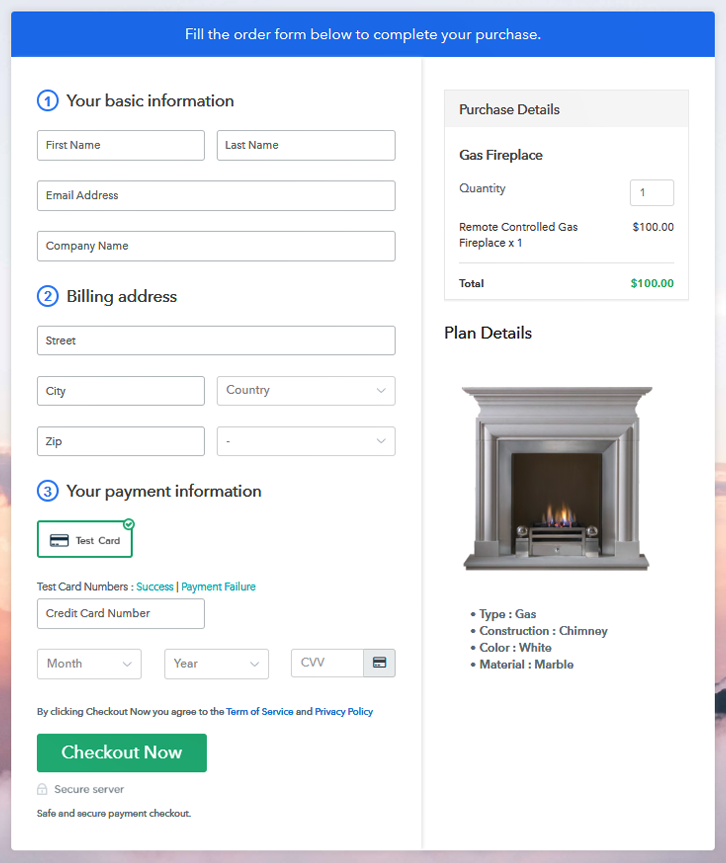
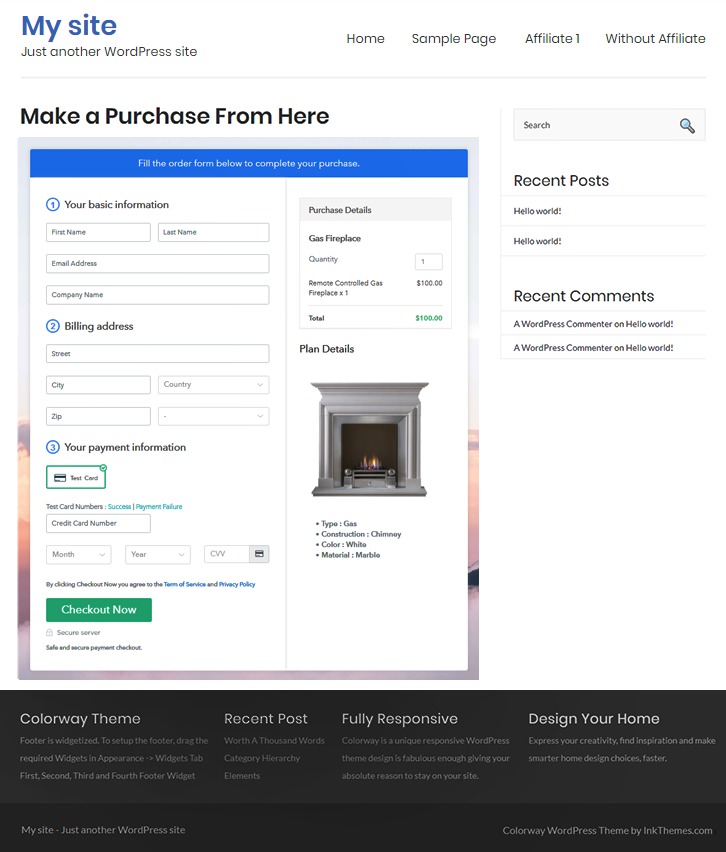
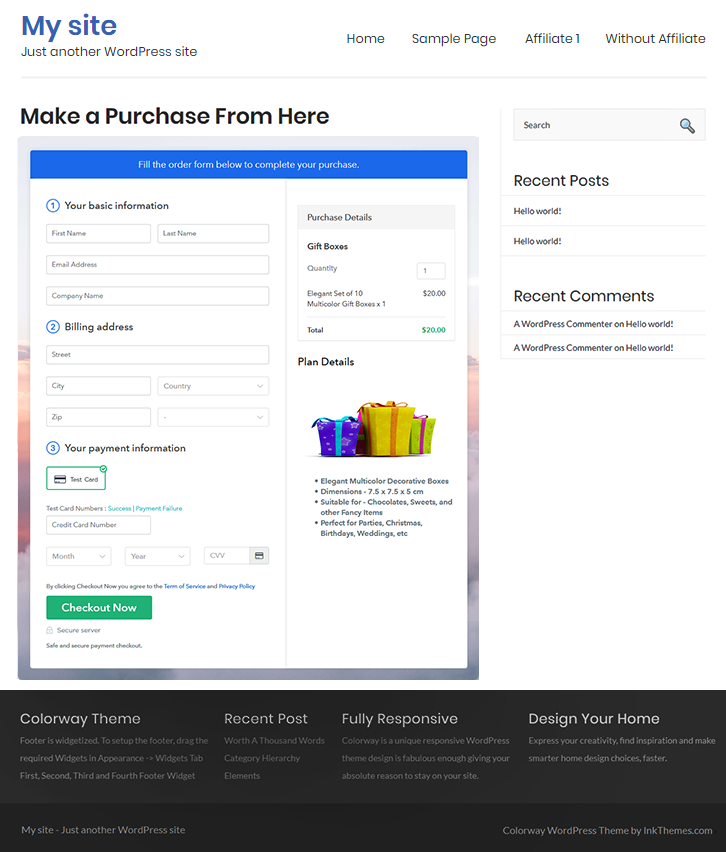
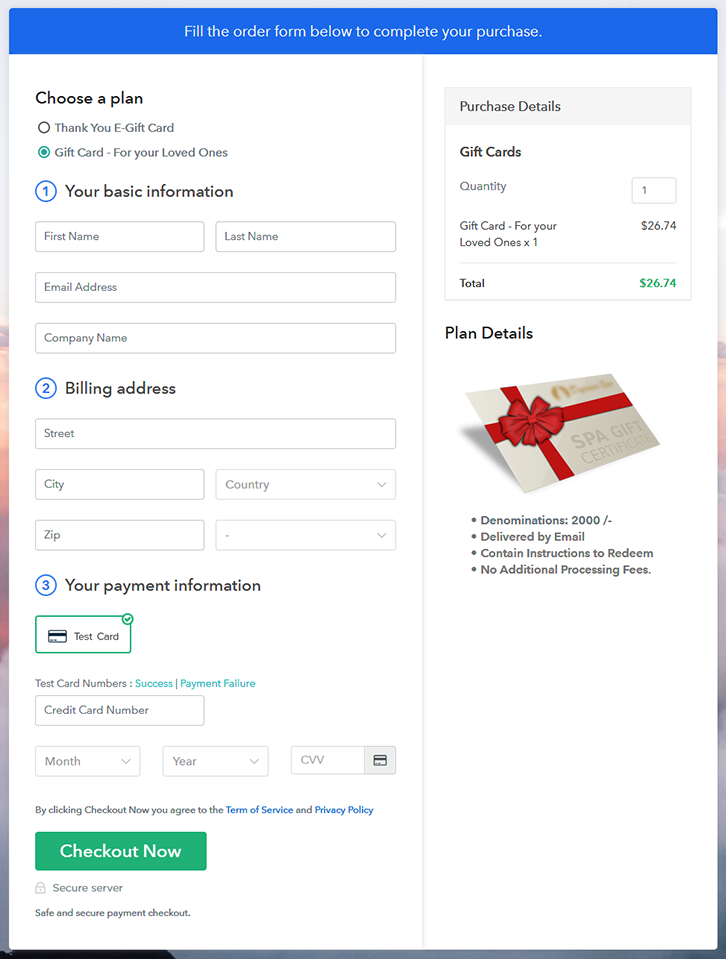
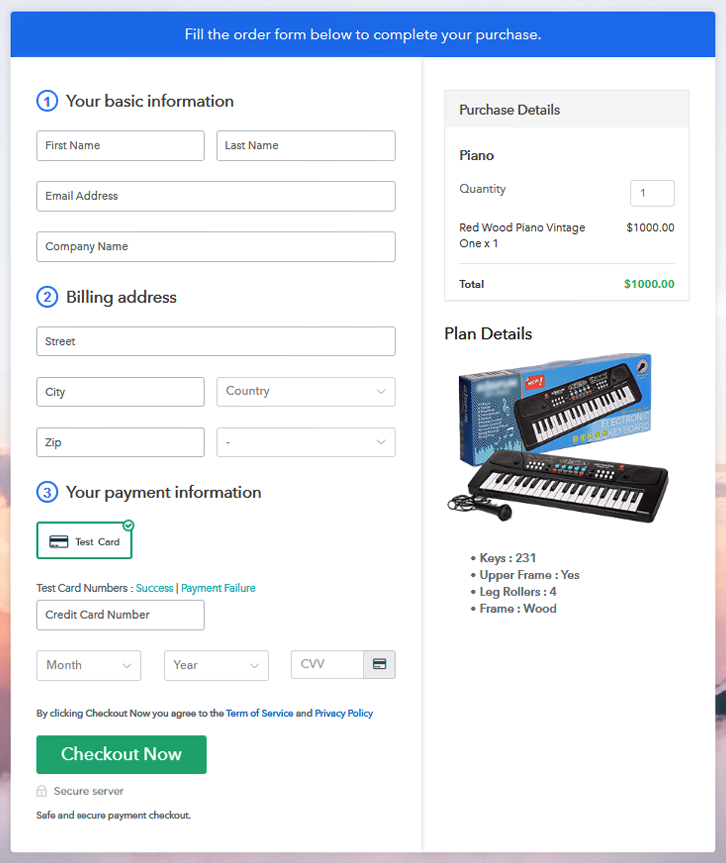
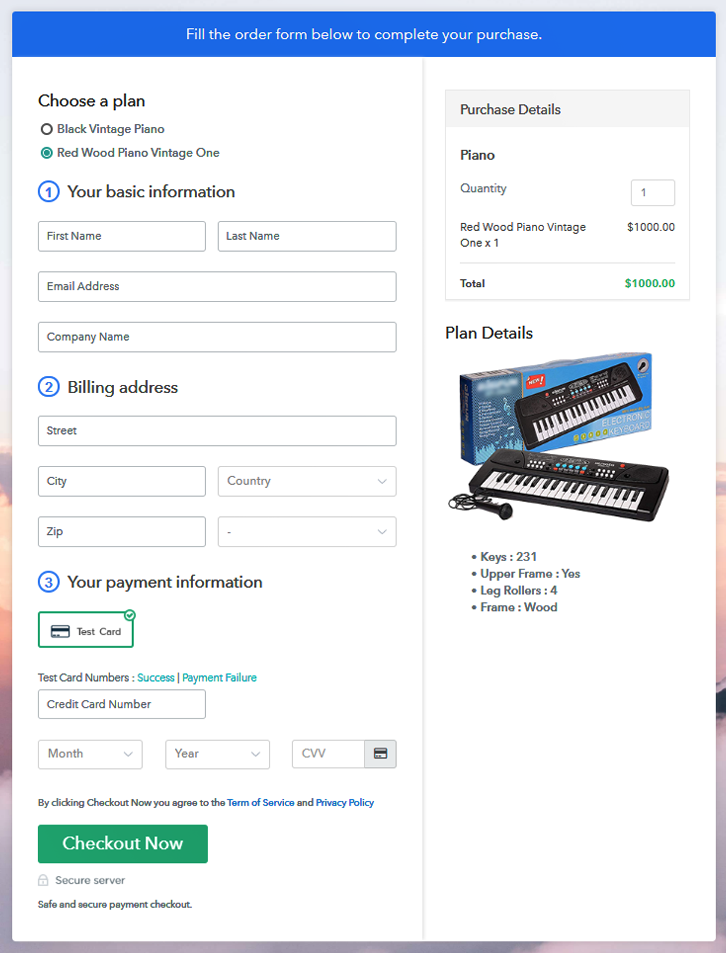
Final View of Checkout Page for your Pianos Selling Business
Step 1: Log in to Pabbly Subscription Billing

Check for Pabbly Subscription Billing in your browser. Now, click on the “Sign up Free“ button. Either fill all the information or simply sign in using your Gmail account.
Sign Up For Free!
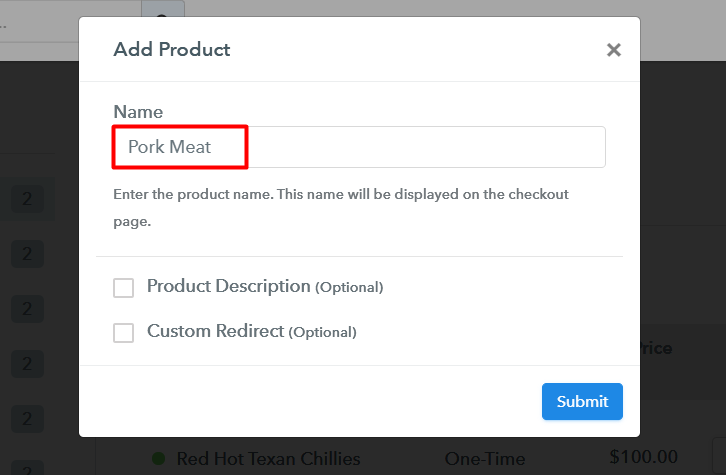
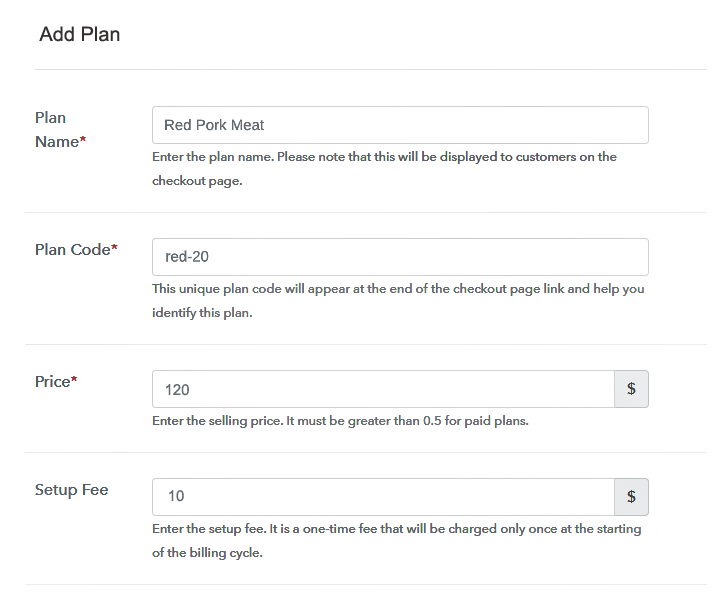
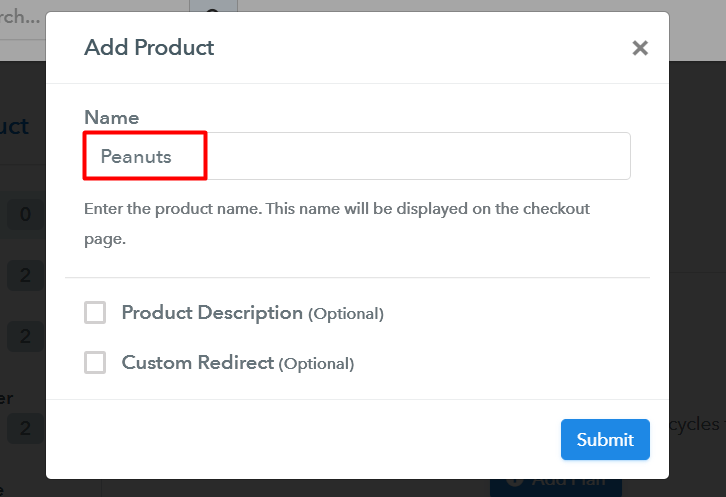
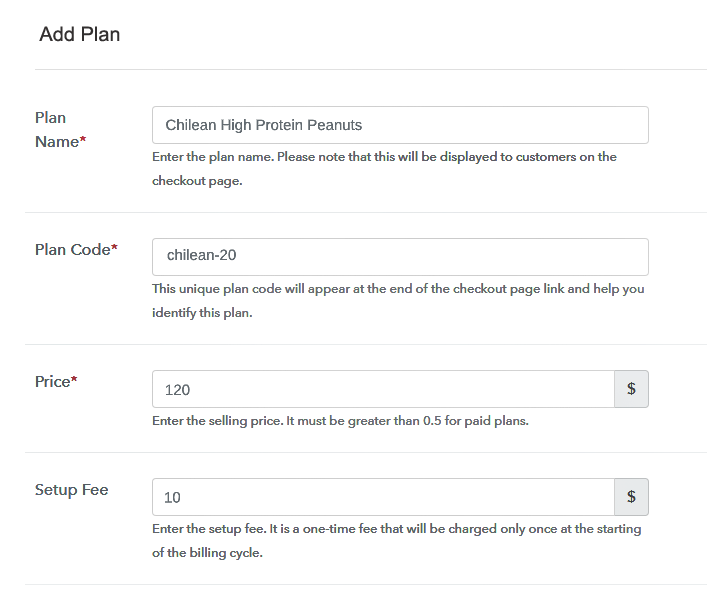
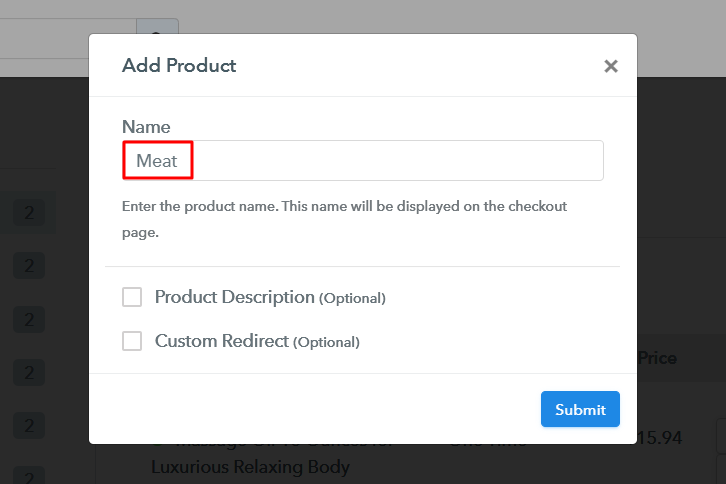
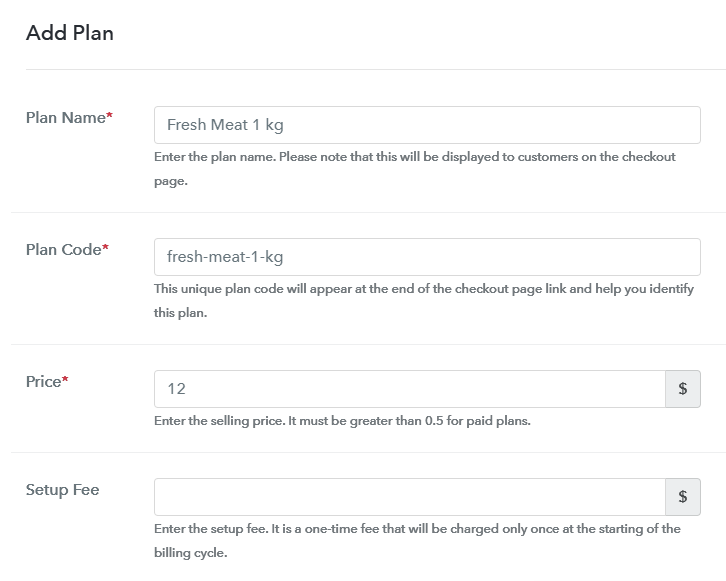
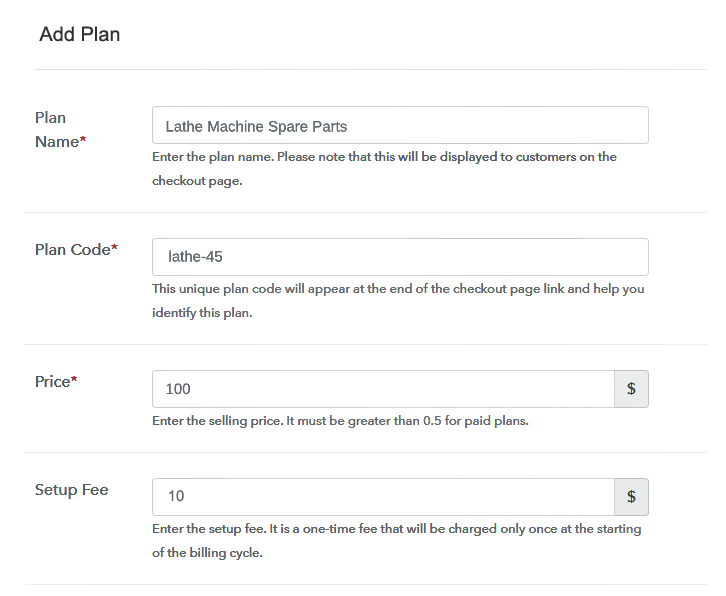
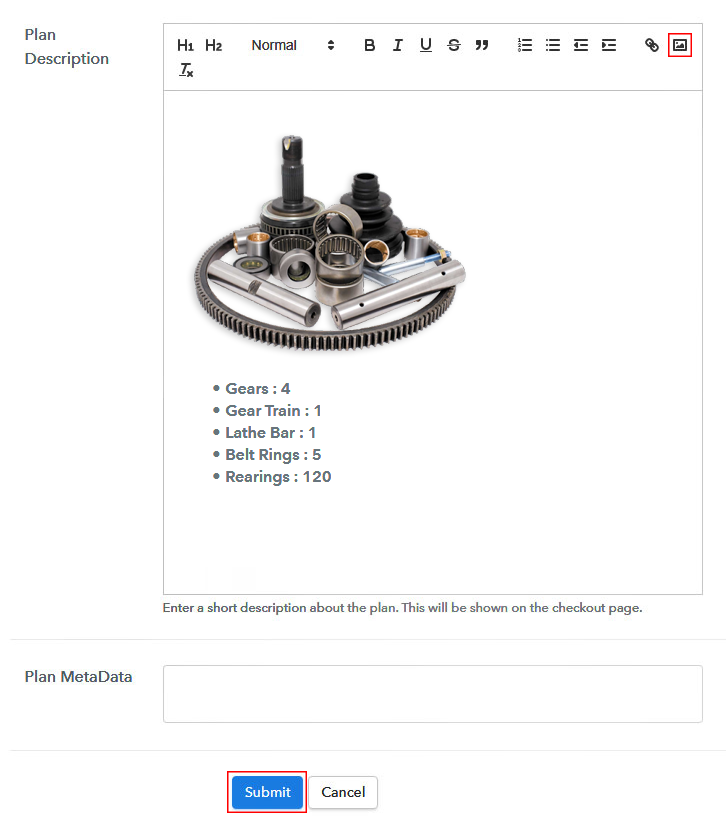
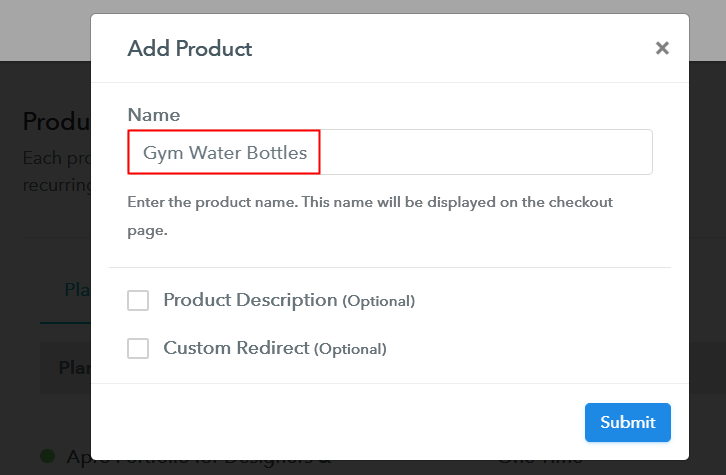
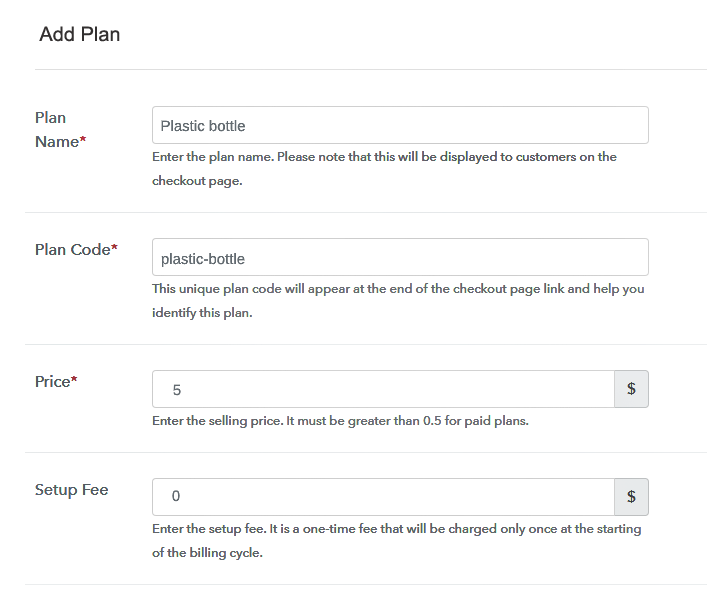
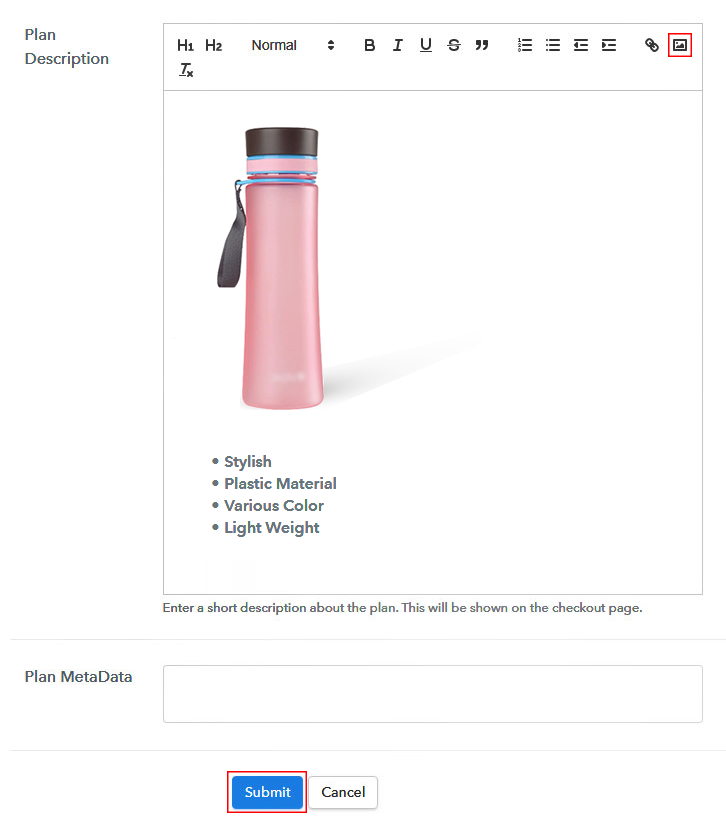
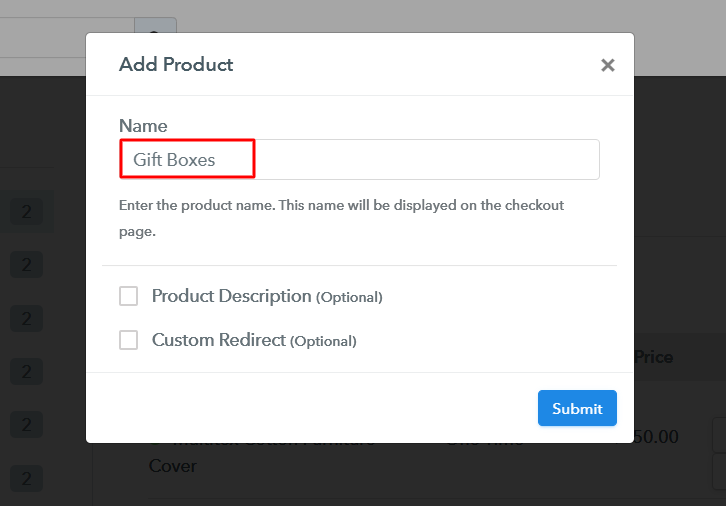
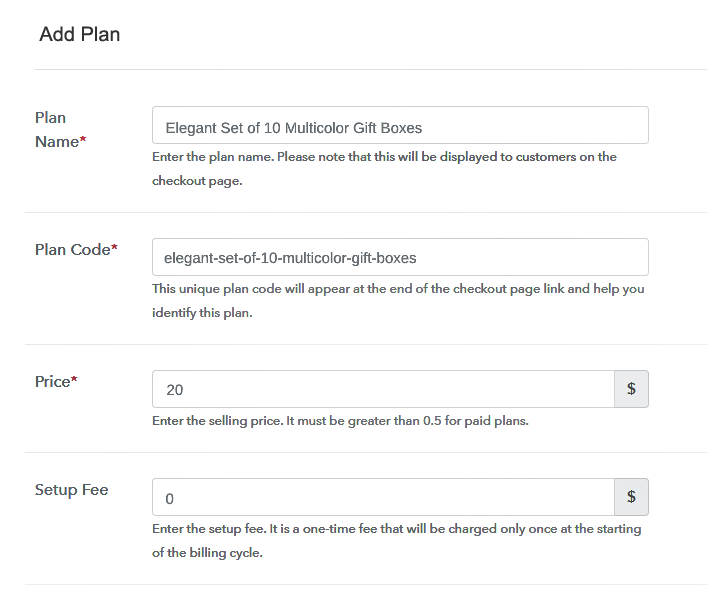
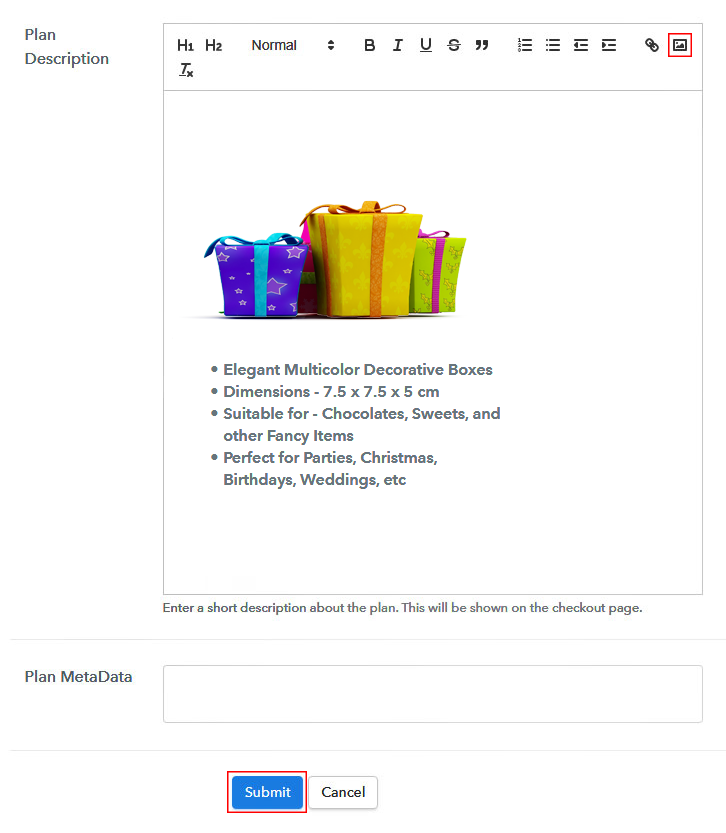
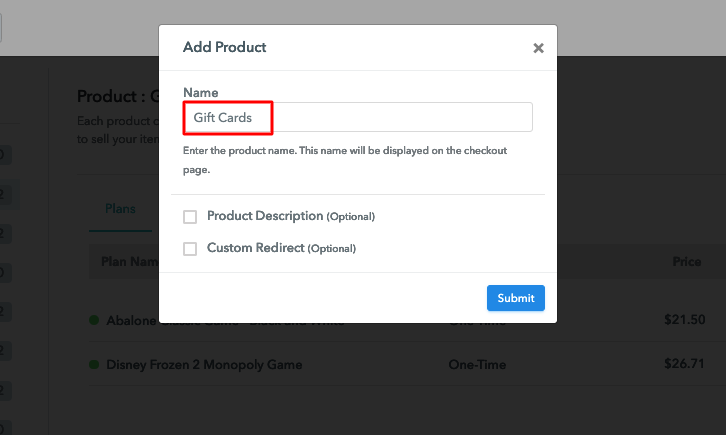
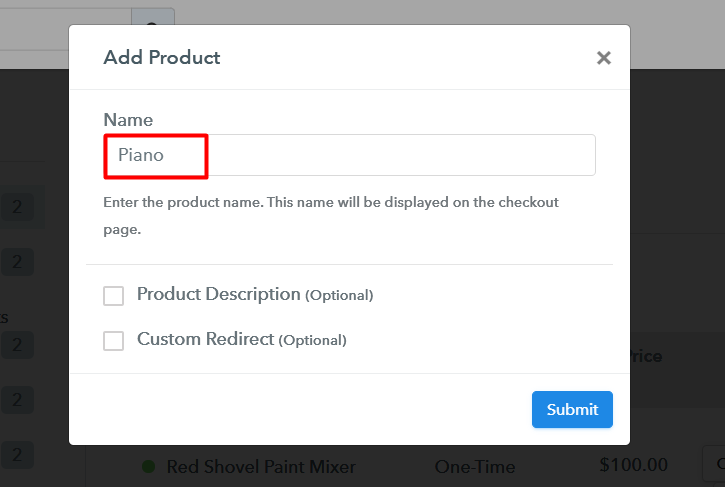
Once you’re done click on the “Access Now” button of Pabbly Subscription Billing, a page will pop-up with details like company name, currency, and contact number. Next, you need to fill those details to go on. Let’s start to add the products. Also, beneath the “Enable Payments” segment there is the “Add your product” section click on it. Furthermore, this will generate a dialog box with a blue button “Add New Product”. Click on it. Also, you have to add the required product title, in this case, it is ‘pianos’. Fill out all the details like the name of the product and voila your product is created. Note: Here you can add all the products related to the similar category by creating plans for each of them. Now let’s create plans for different kinds of pianos available in your store. In the plan page, here you have to fill in details like plan name, code, price, setup fees. Now scroll down, and in the section below you can see the choice to change the billing models like one-time payment, recurring, etc. Furthermore, choose your preferred revenue model accordingly and after some time you can even change it according to your discretions. Also, let’s take some amazing pics of your pianos and upload it by clicking the image button. Moreover, now under the image place some good information about your pianos like the date, strings, buttons etc, and then press the “Submit” button. Furthermore, later, by using the same process, you can list more products. There are three methods by which you can build brand awareness of your pianos in social media sites Follow up the recommended steps to preview the checkout page: Moreover, just copy the link and add the checkout page to sell pianos at any suitable place on your WordPress site. Further, paste the plan link of the pianos on a text editor of the WordPress dashboard. Next, click the “Publish” button, after making changes. Note: In case you want to sell multiple products via a single checkout page, you can create a multi-plan checkout page otherwise skip this step. Do remember the world is heading towards a total internet-based economy. Your first checkout page to sell pianos online is the proof that you made the cut. So congratulation!! Furthermore, you should know that are a ton of features available in Pabbly Subscription Billing that I haven’t mention due to constraints of time. But due explore and experiment with them. Moreover, for now, if you have any queries please let me know in the comment section below. We will reply at the earliest.Step 2: Select Subscription Billing

Step 3: Account Setup

Step 4: Connect Payment Gateways & Start Pianos Selling Business Online
 Pabbly Subscription Billing provides for pilot testing the whole payment experience of a customer using dummy payment gateways. You can do this by clicking on the “Enable Test Payment” option. These payment gateways can be easily integrated using the help of the articles given below.
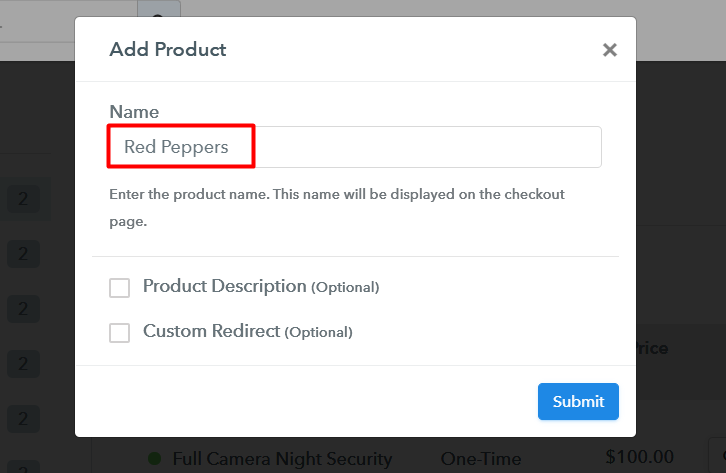
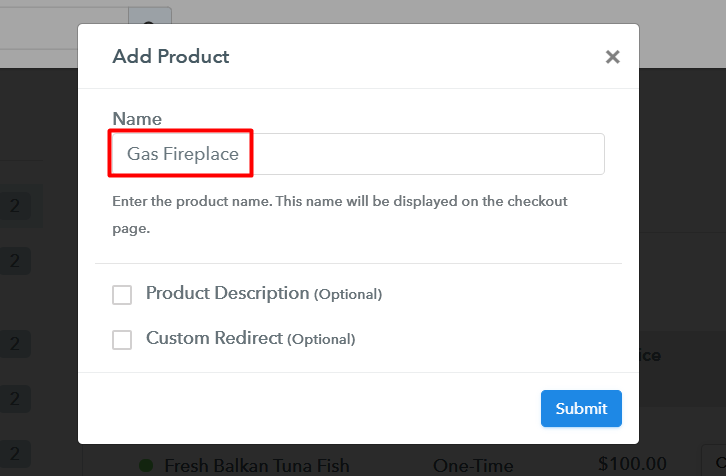
Step 5: Add Product for your Pianos

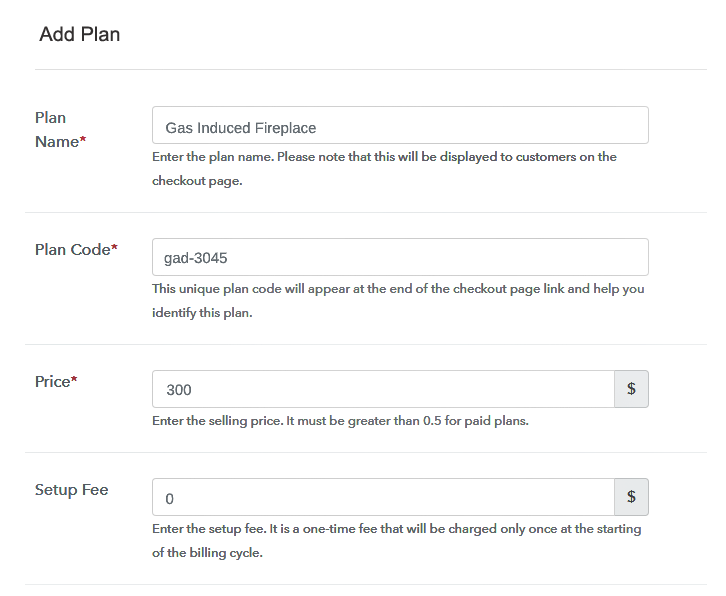
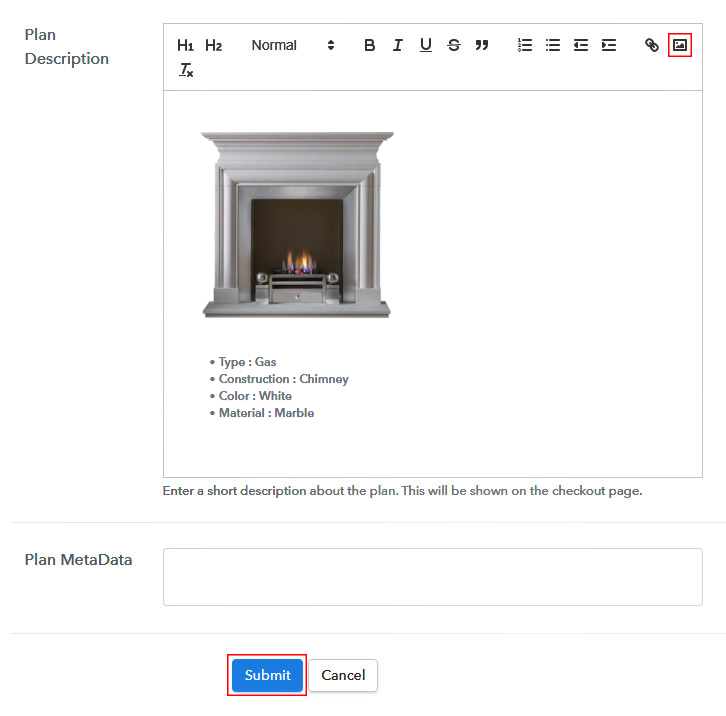
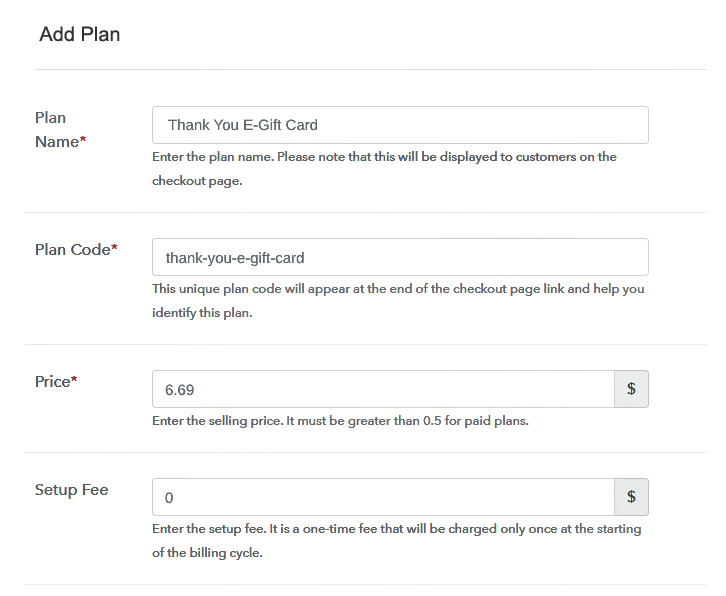
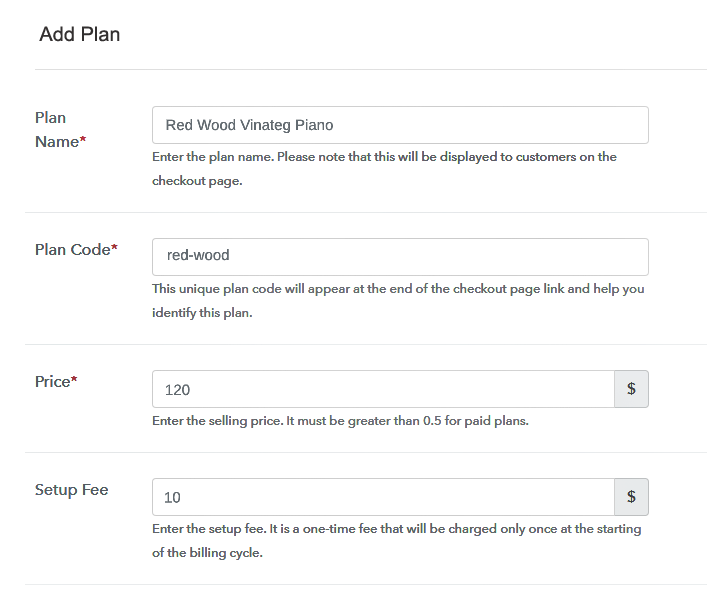
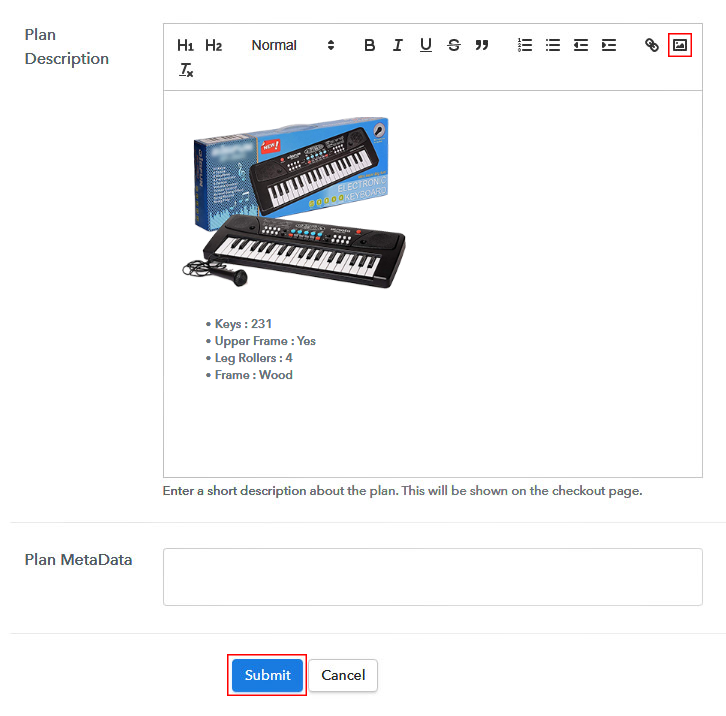
Step 6: Add Plans
(a) Select Add New Plan

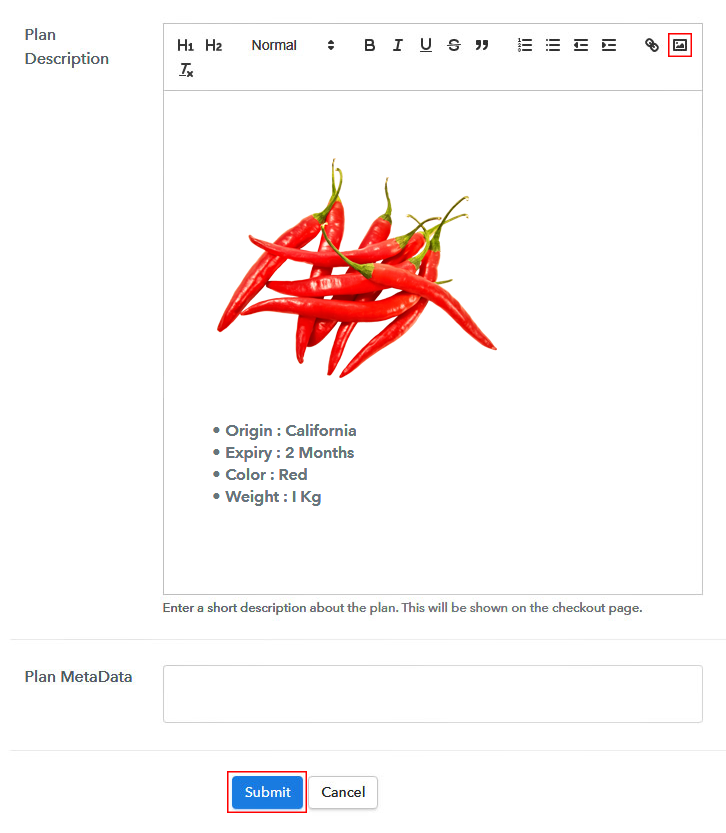
(b) Specify the Plan & Pricing Details
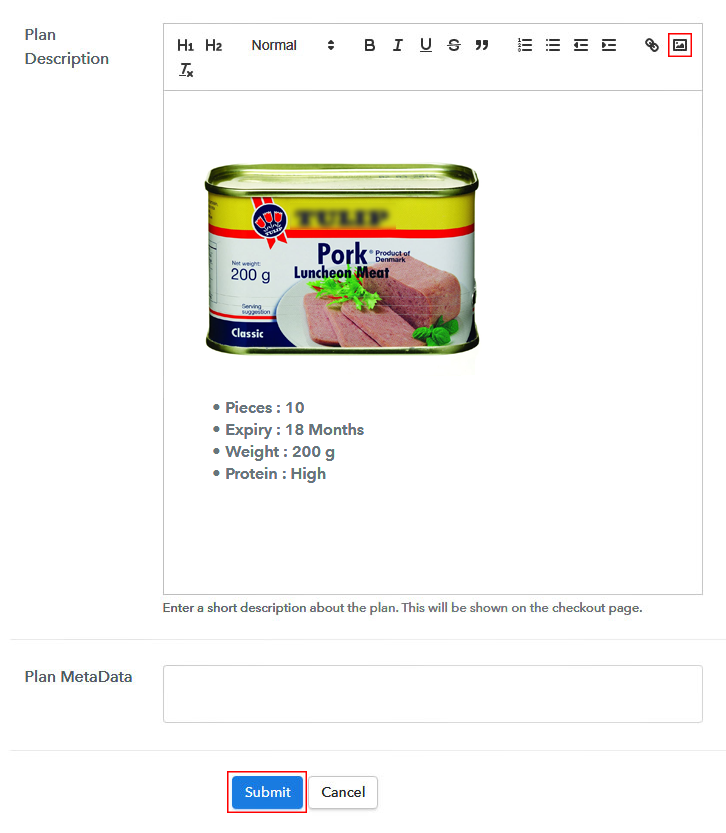
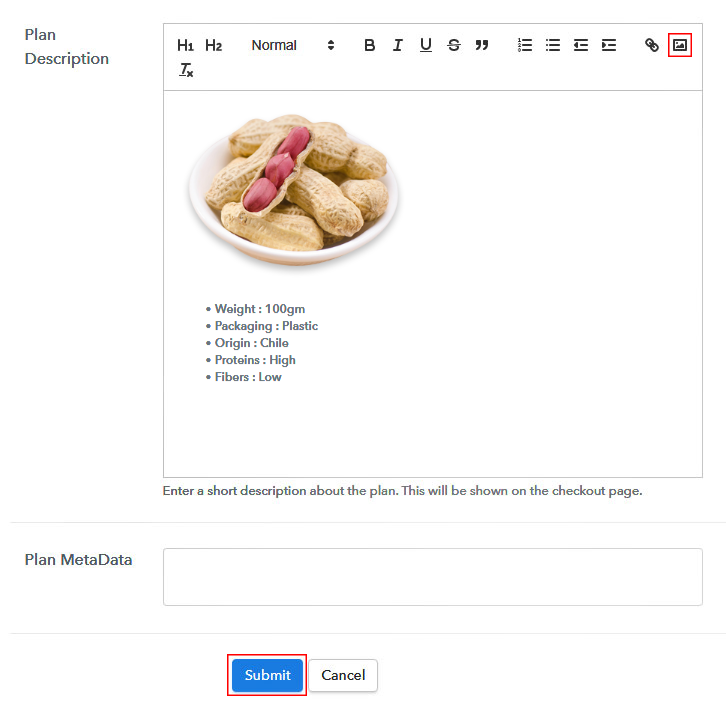
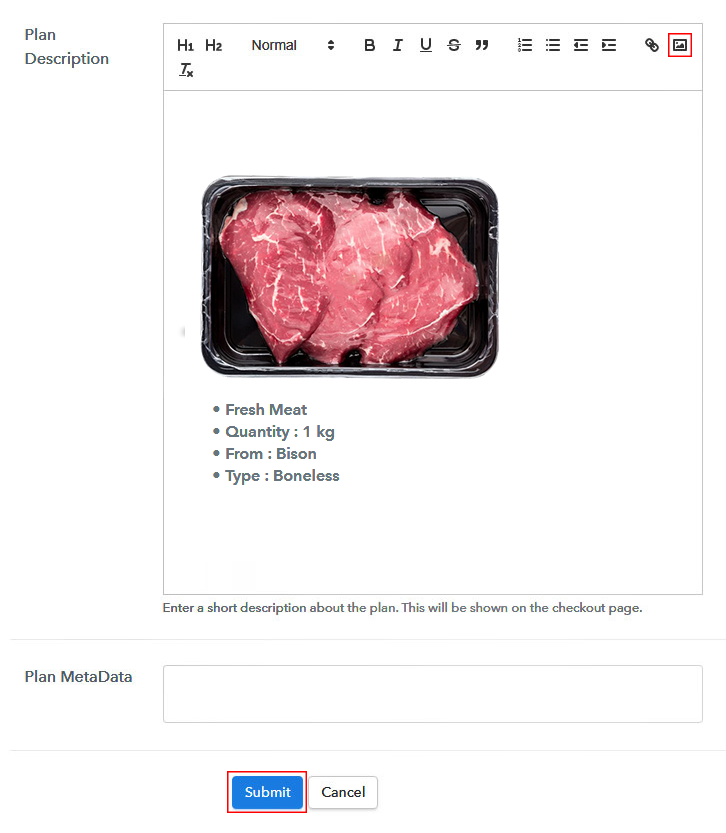
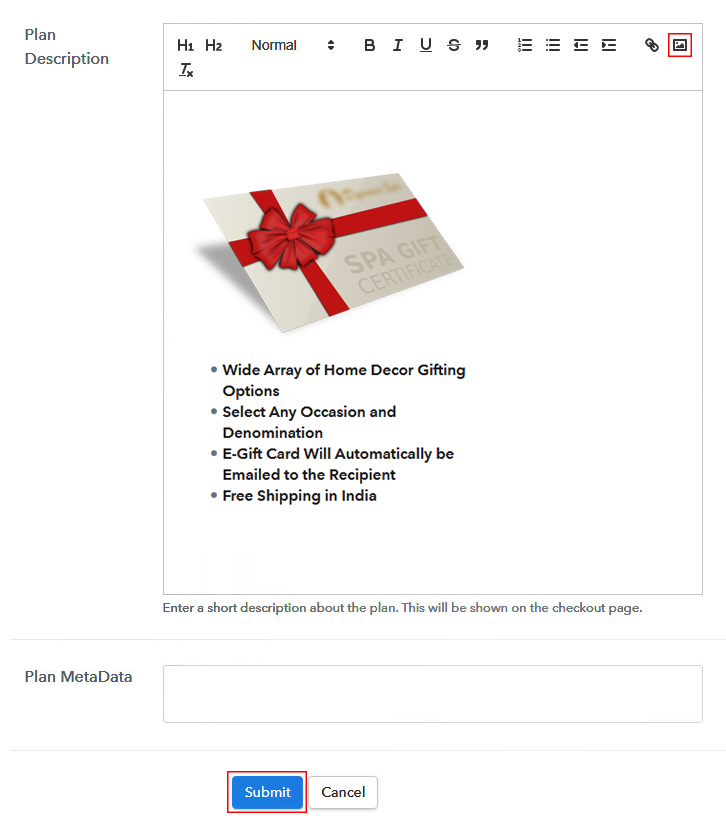
(c) Add Image & Description of Pianos
Step 7: Share your Checkout Page

Step 8: Preview Checkout Page
(a) Click on the View Button

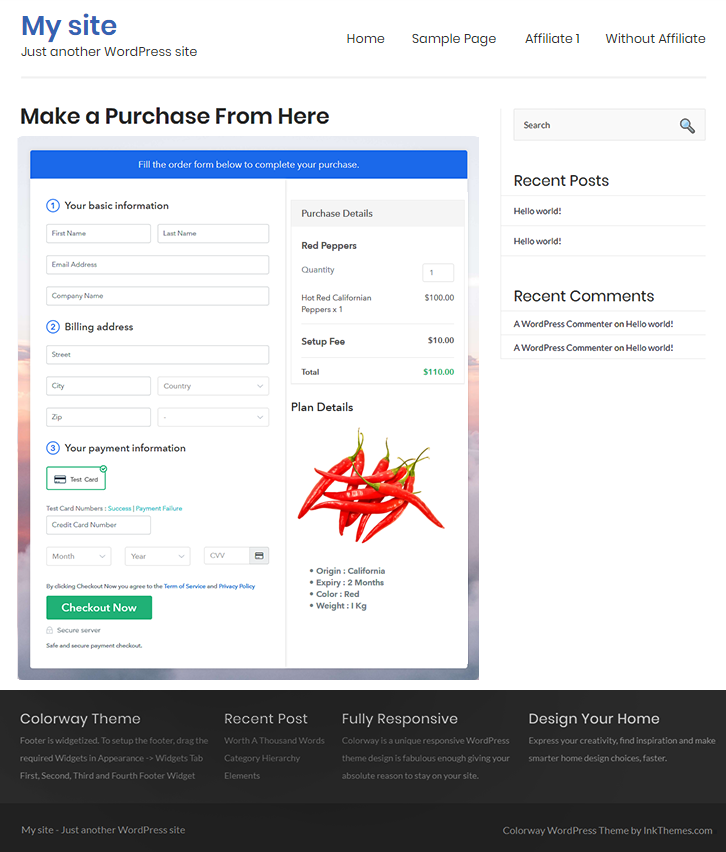
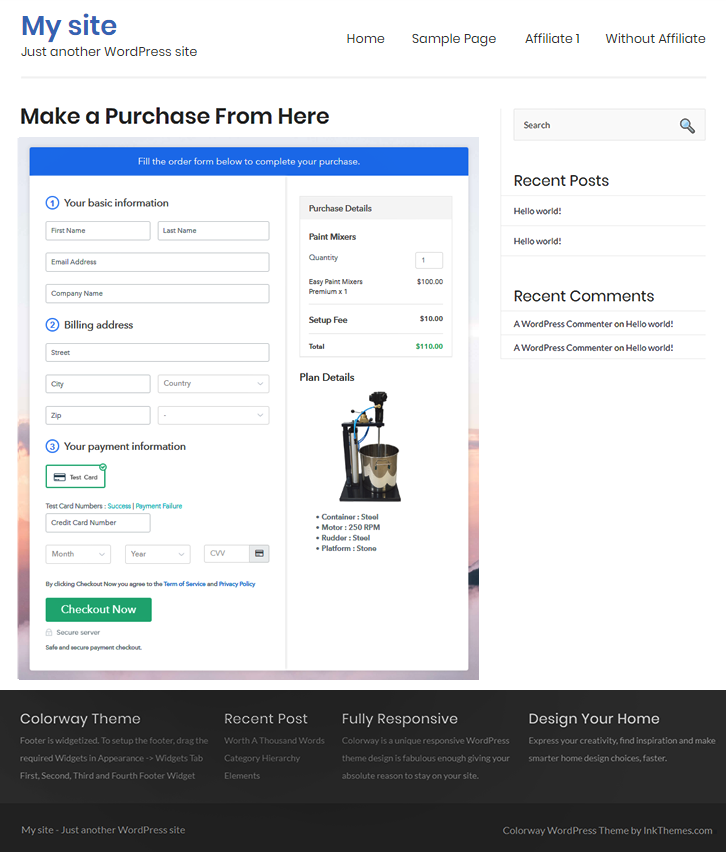
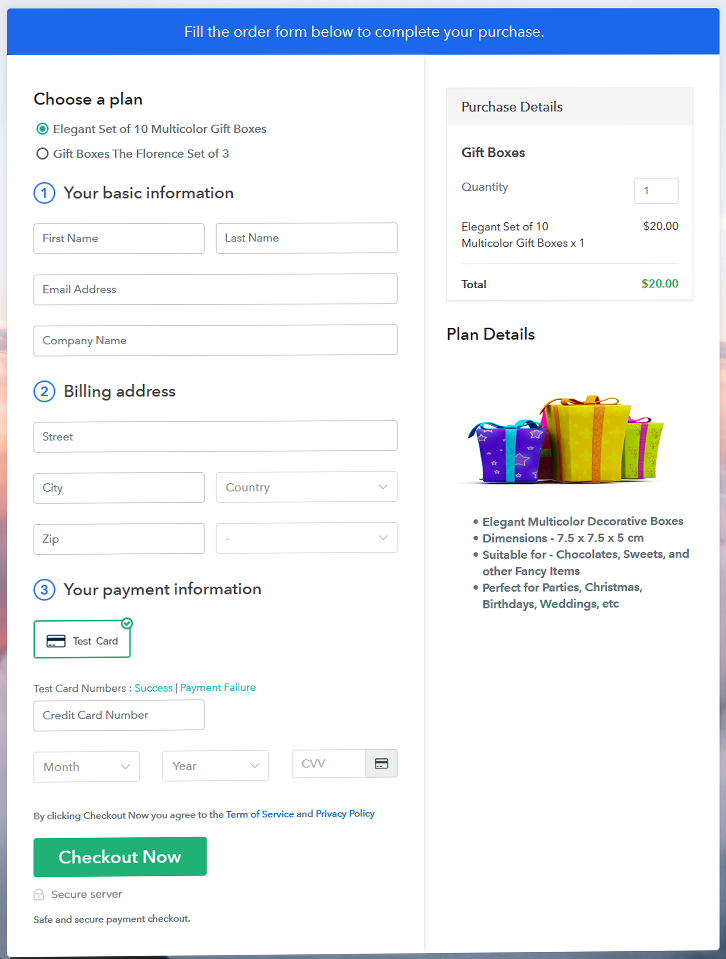
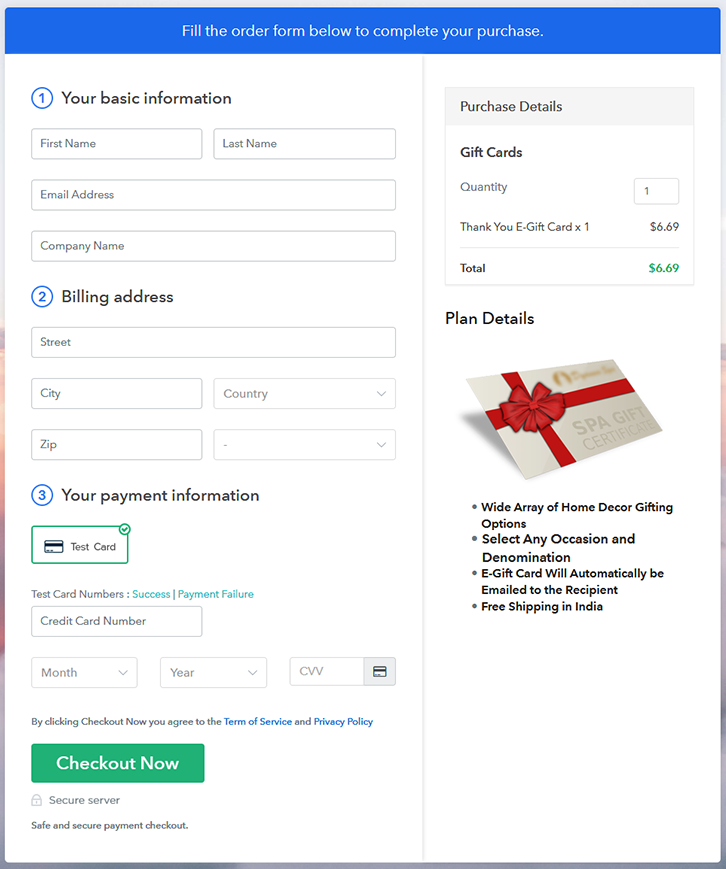
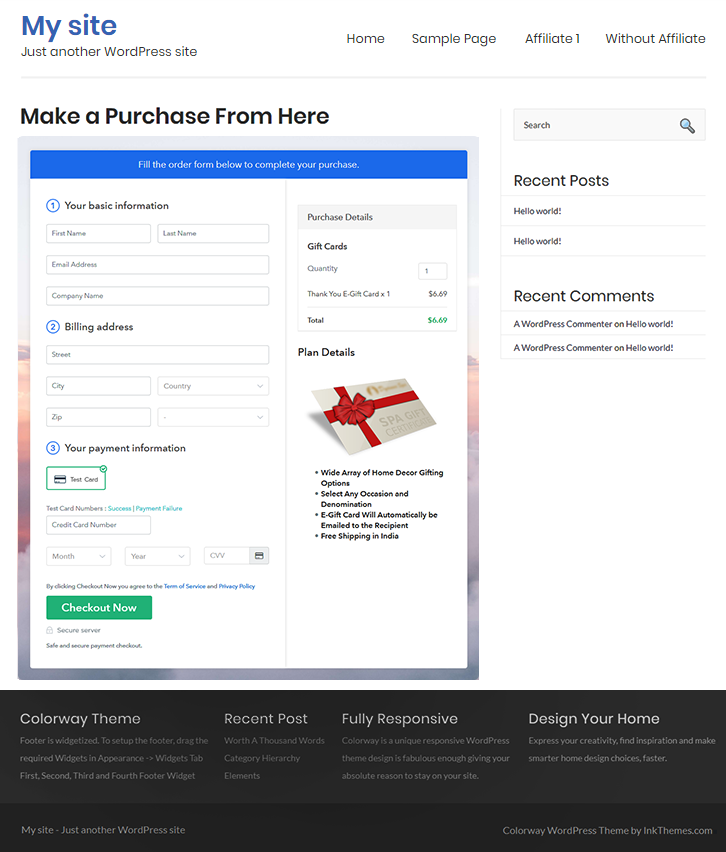
(b) Take a Look at the Checkout Page

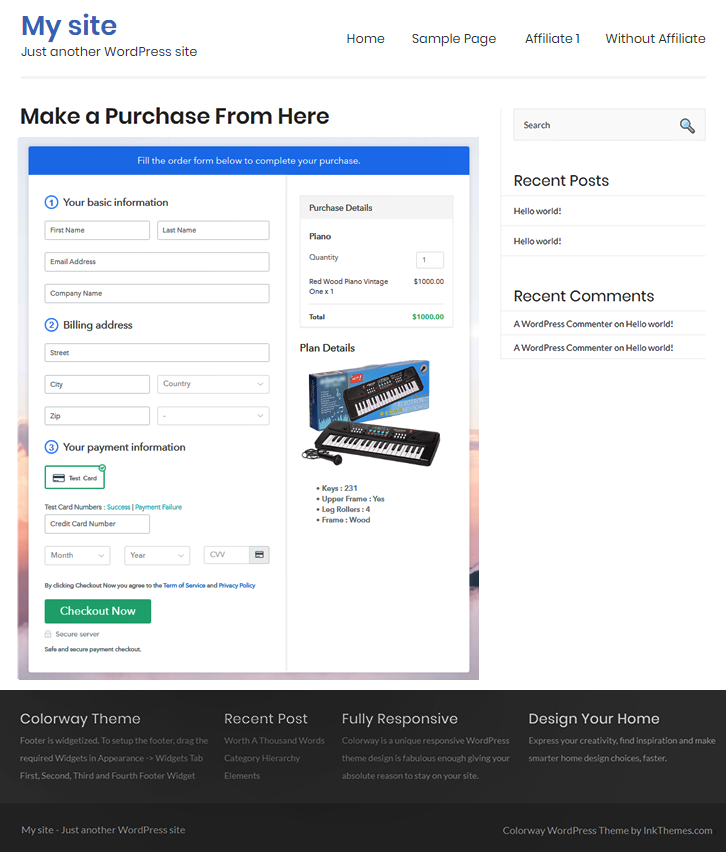
Step 9: Embed Checkout Page in Site & Sell Online

(a) Edit the Page & Paste the Copied Link

(b) Save & Publish the Checkout Page

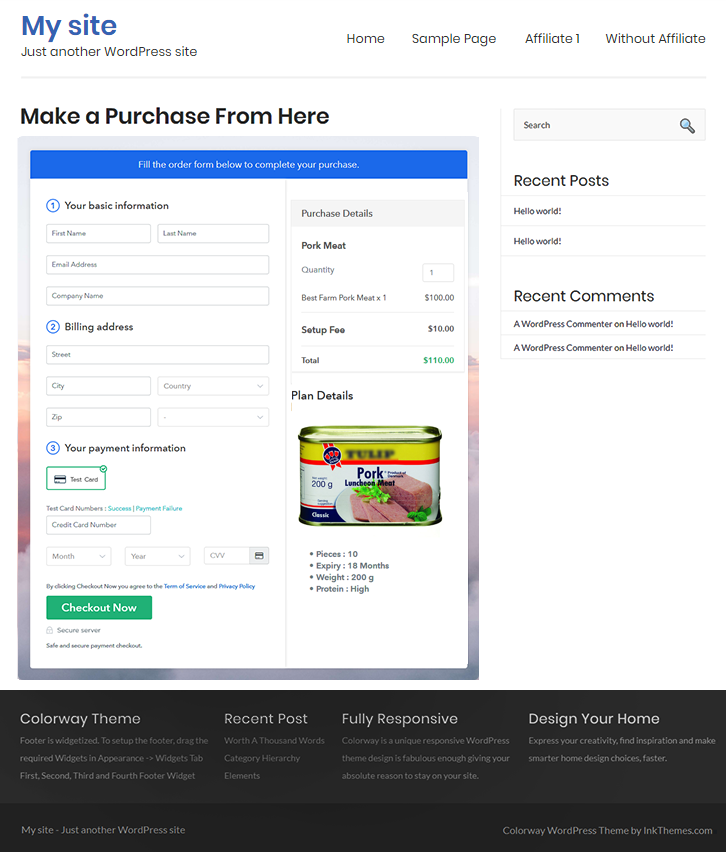
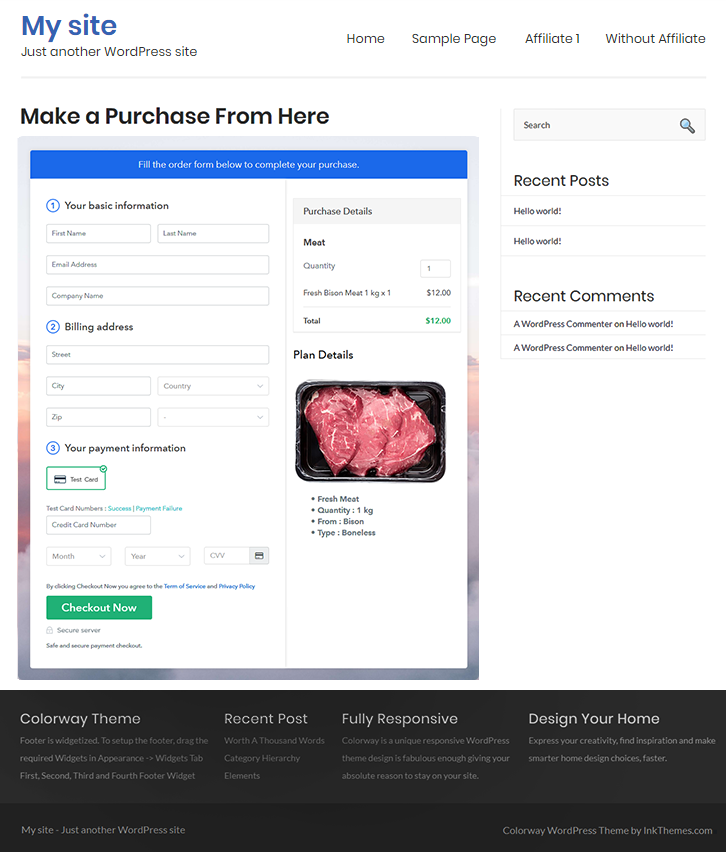
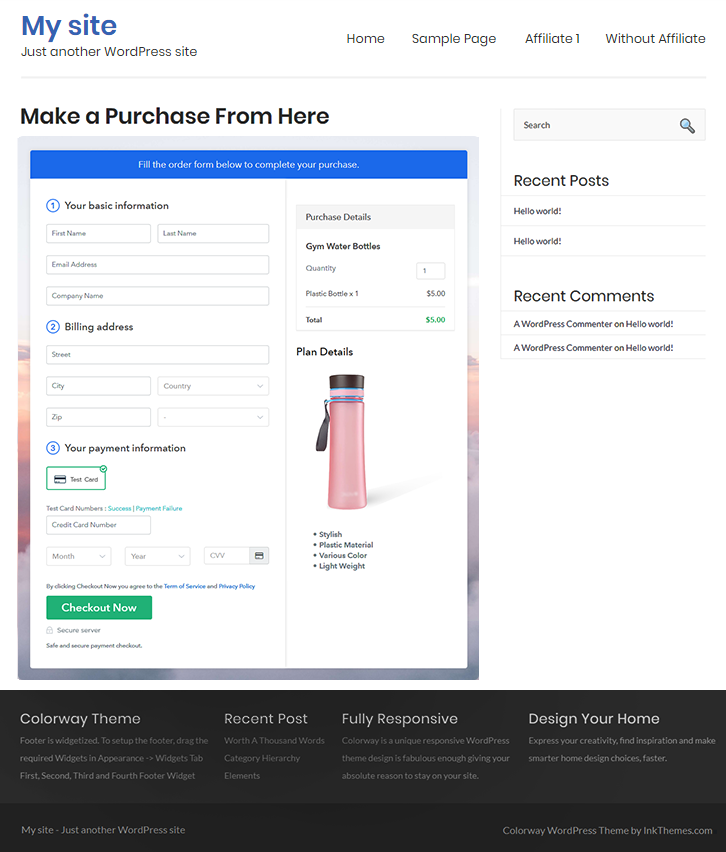
(c) Check out the Final Look of your Checkout Page on WordPress Site
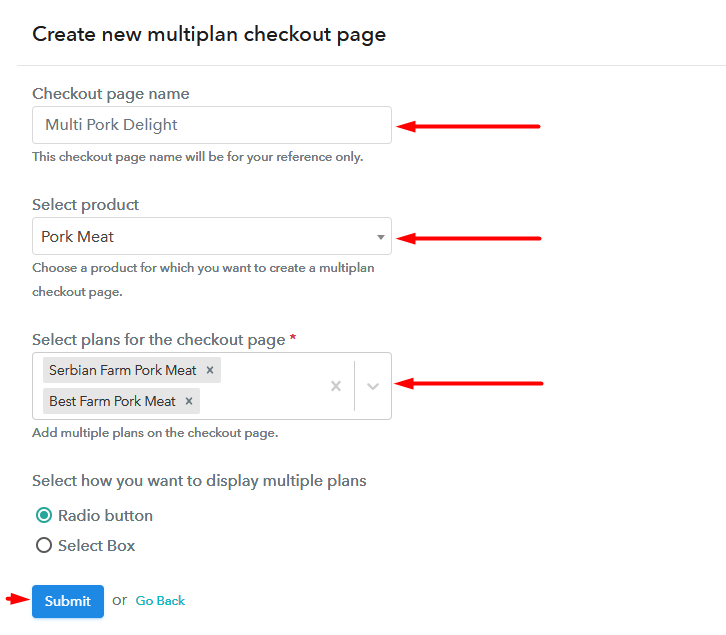
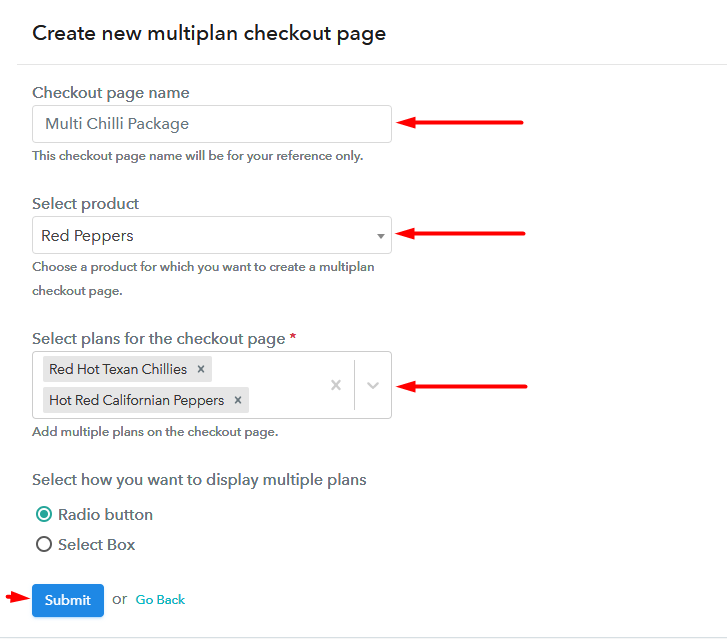
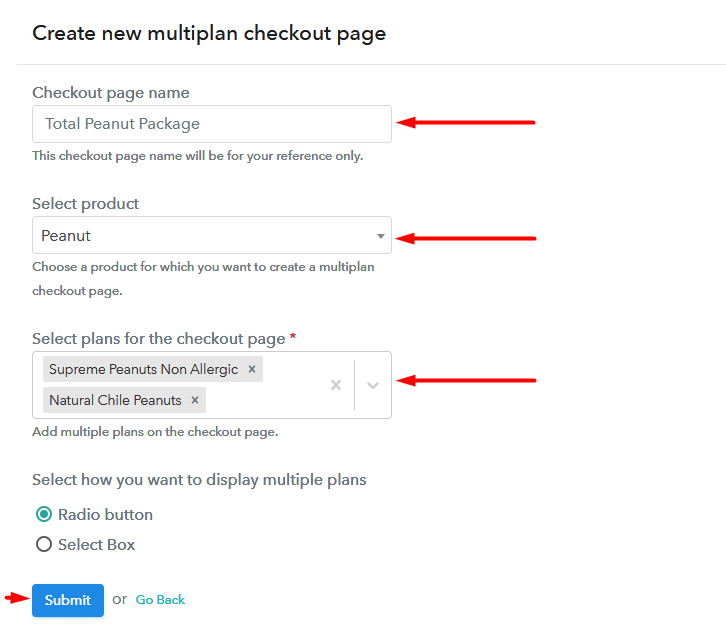
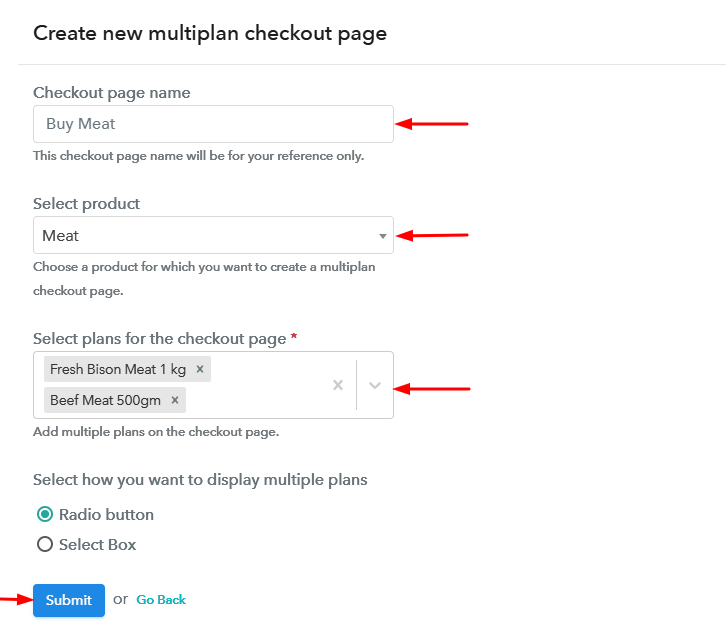
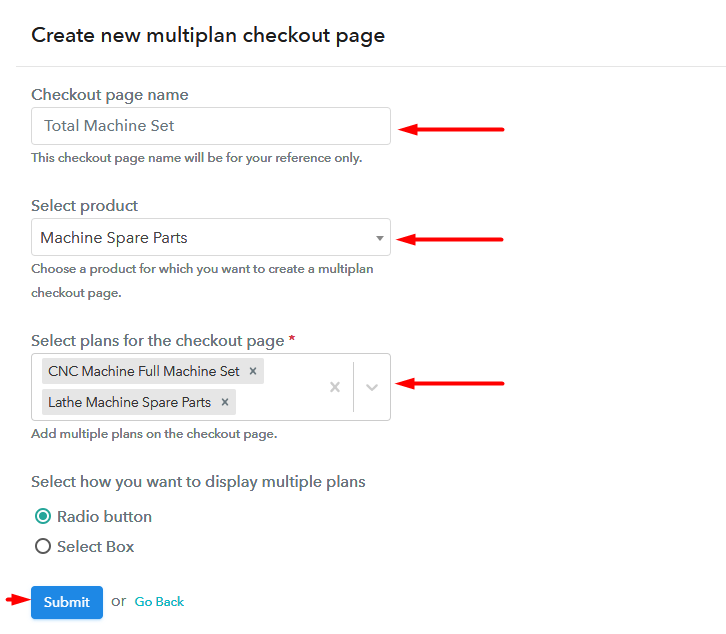
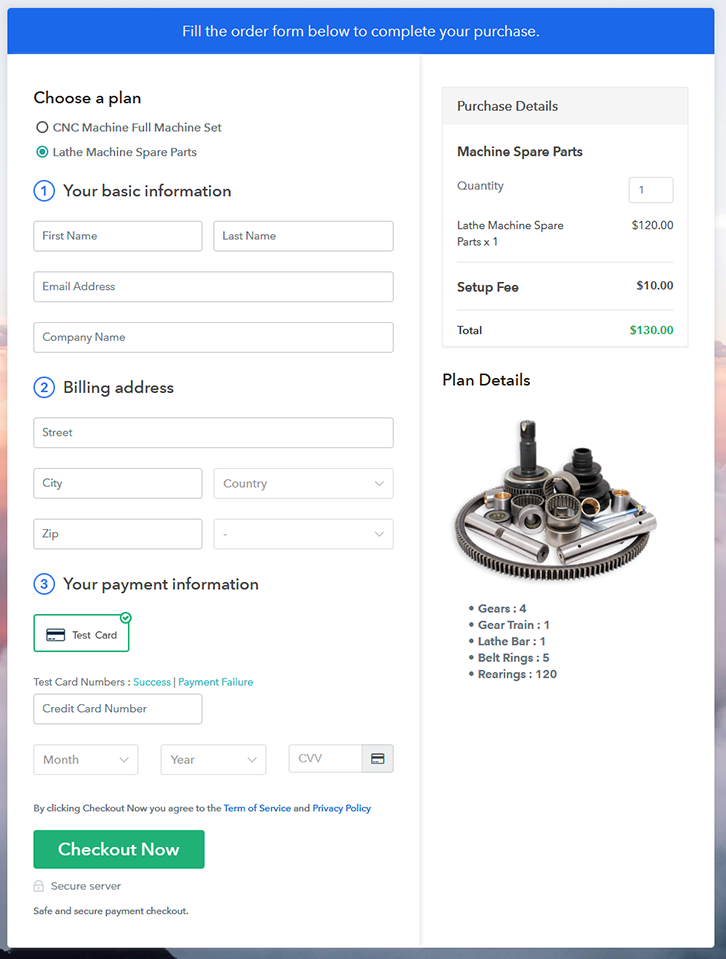
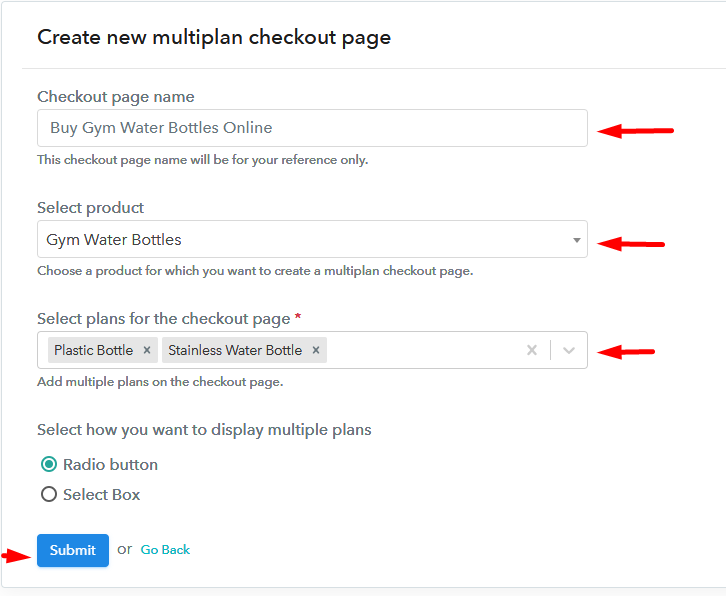
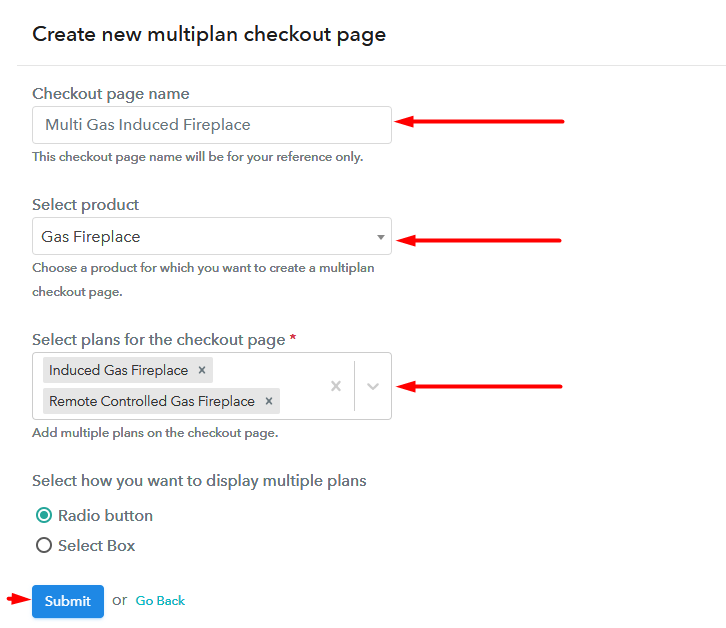
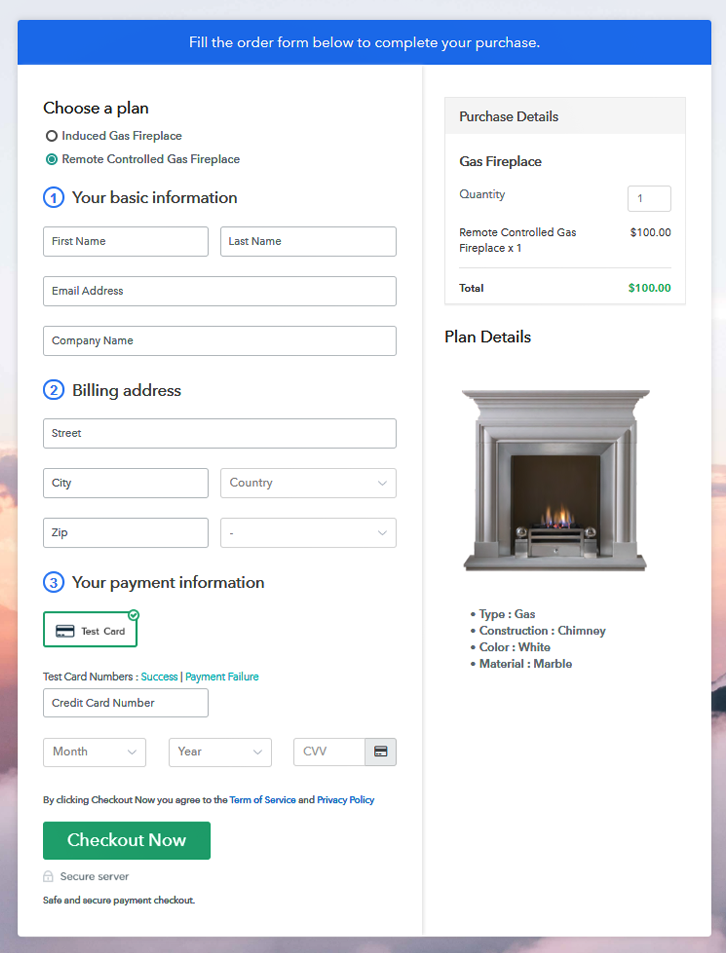
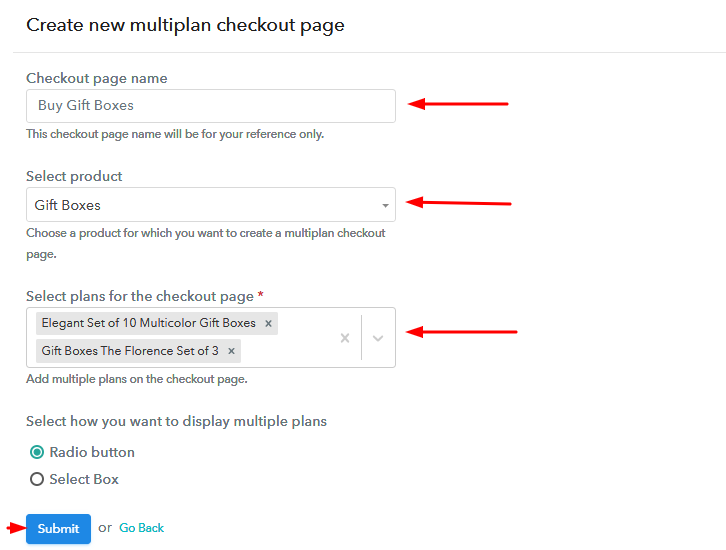
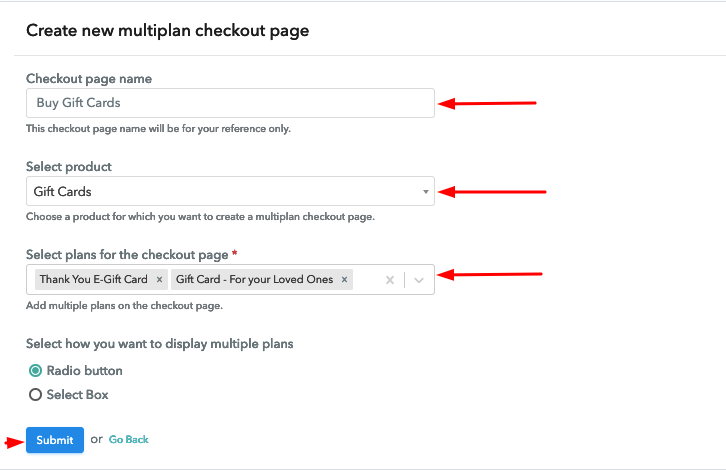
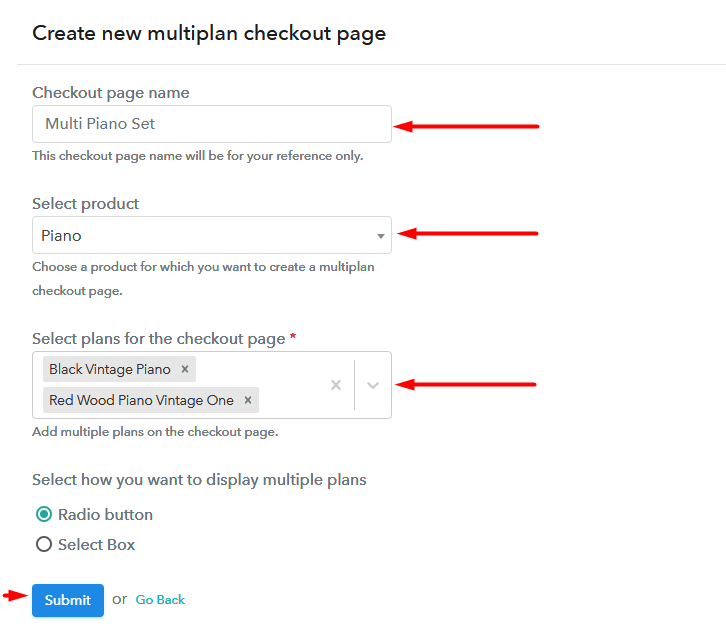
Step 10: Multiplan Checkout Page
(a) Click on Add Mutiplan Checkout

(b) Add Plans to Sell Multiple Pianos from Single Checkout Page
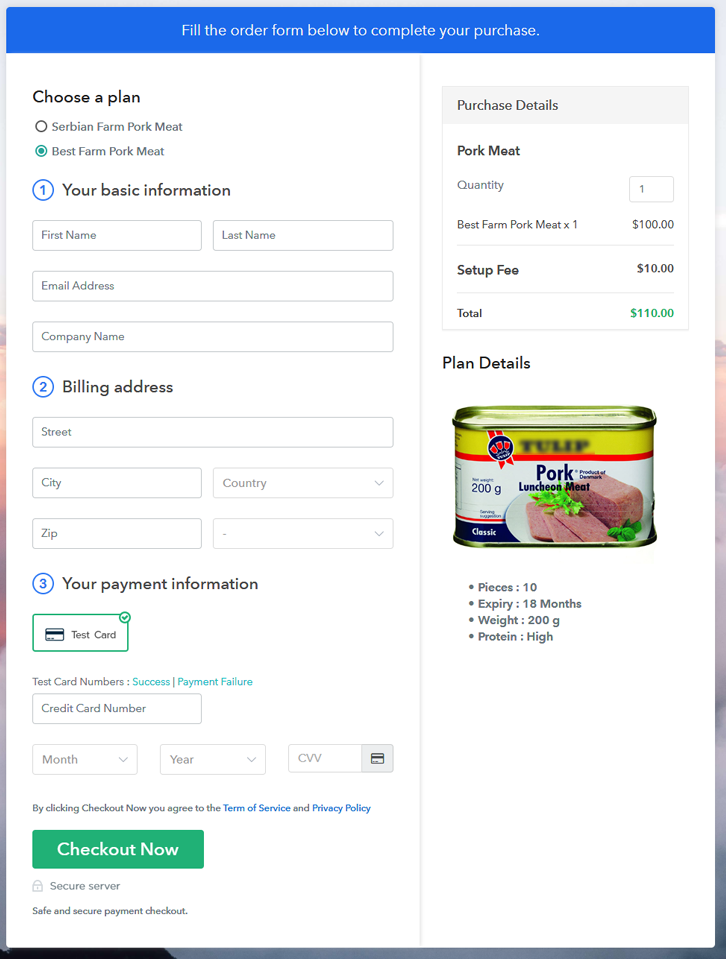
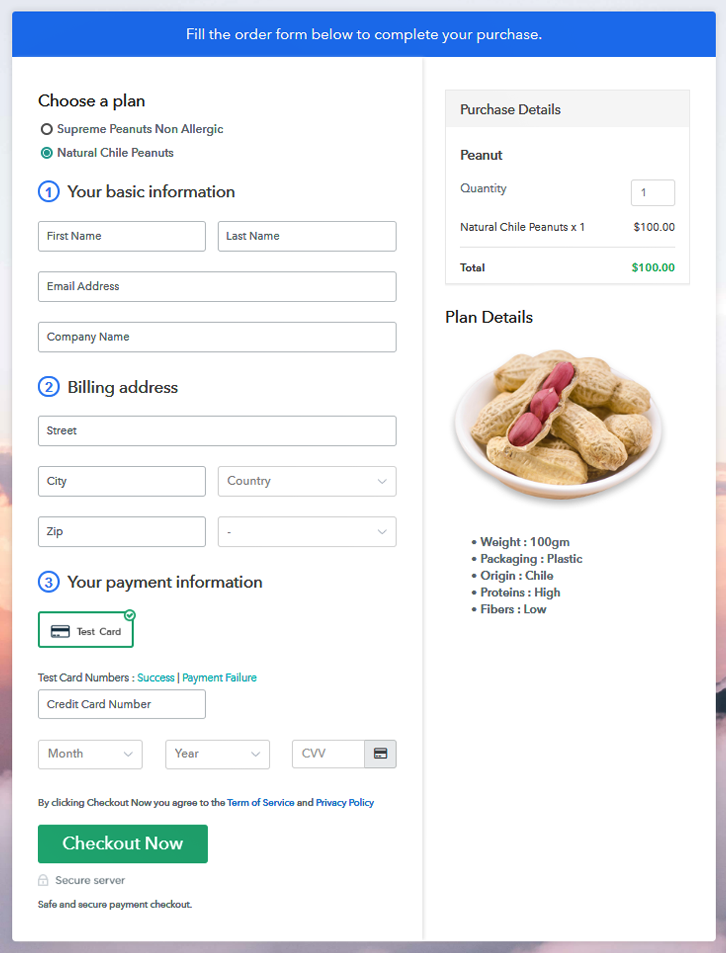
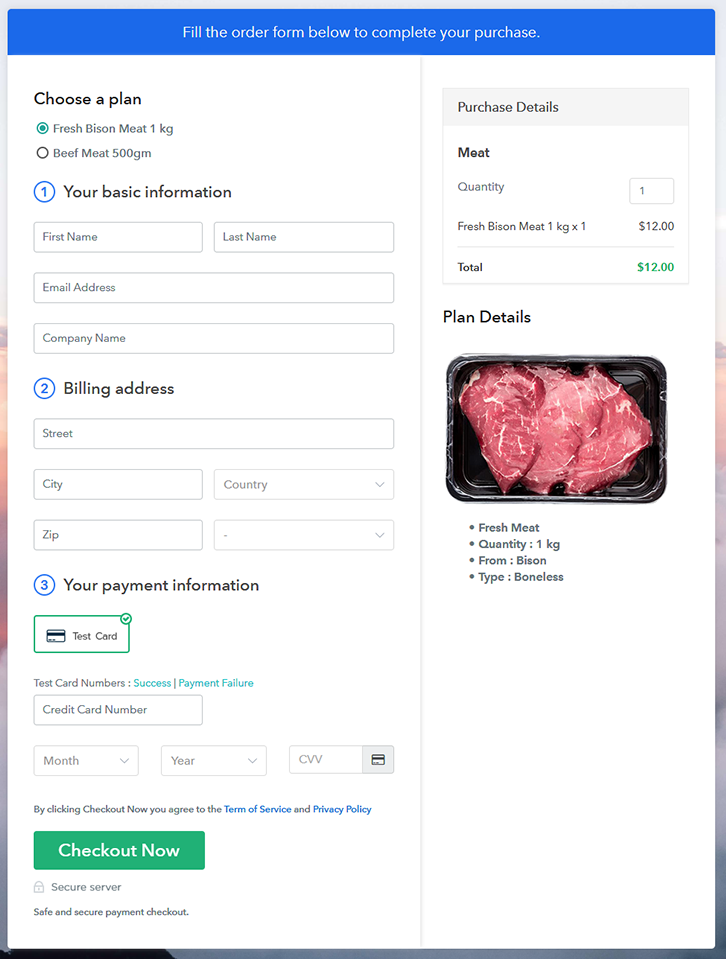
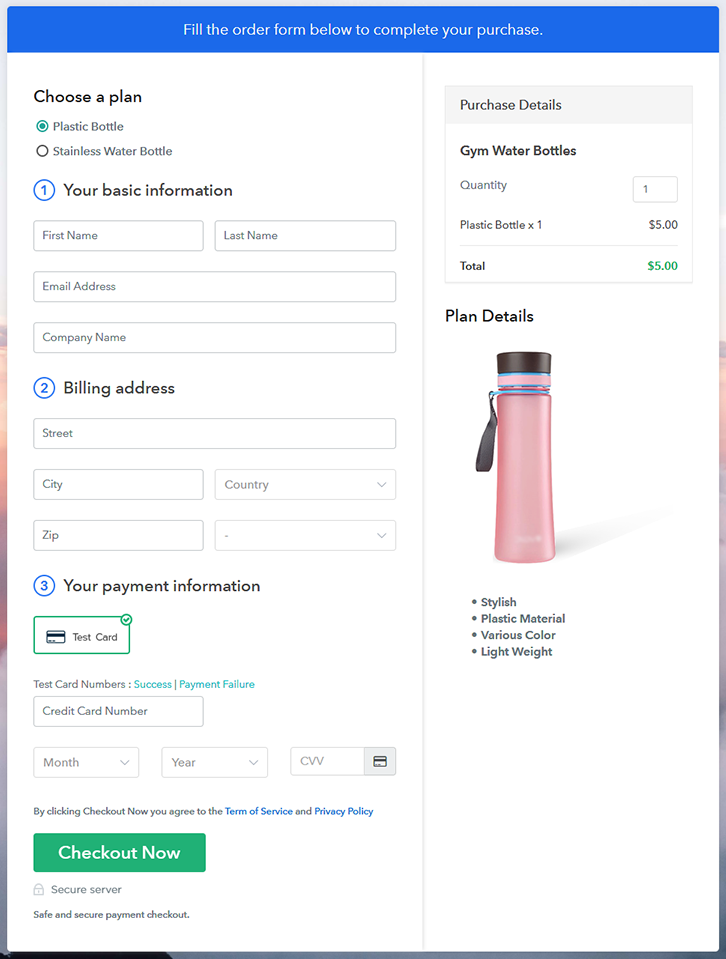
(c) Take a Look at the Checkout Page
Wrapping Up
You May Also Like To Read –