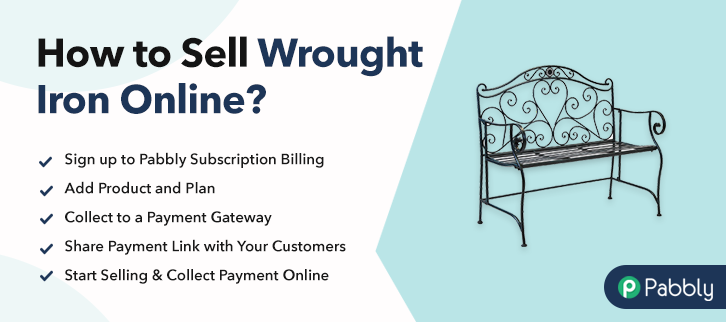
Ideal For: All the pawn shop owner, wrestling memorabilia creators, memorabilia delears, and other merchants can use this method to sell wrestling memorabilia online.

Why Choose this Method to Sell Wrestling Memorabilia Online?
Unlike any other solution, this method allows you to:
- List and sell your wrestling memorabilia for FREE. Absolutely no payment required.
- No need to pay commission on any of your sale.
- Multiple payment options like PayPal, Credit Card, etc to collect payment from a single place.
- Sell one time or recurring subscriptions of your wrestling memorabilia.
- Collect payments & sell products in any currency as per your requirement.
- Give discounts on your products by offering special coupon codes.
- Add sales commission agents to help you in selling wrestling memorabilia.
Even 20 years after its inception WWE continues to the most popular form of sports entertainment. Some of the memorabilia like Hulk Hogans WWF 1995 championship belt was sold over a million dollars. Similarly, other pieces like Kane’s mask, Undertaker’s dead man hat has fetched quite a sum over the years. Nowadays due to the advent of the internet, increasingly many pawn store owners have started selling wrestling memorabilia online to get higher prices and businesses from around the world.
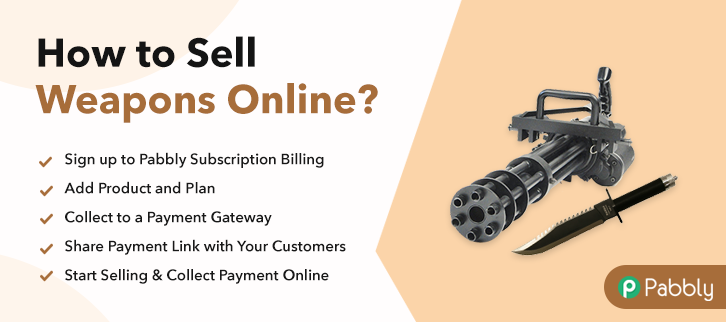
Now, in this article, I would like to suggest an incredible software called Pabbly Subscription Billing. The reason is, through this Saas tool, you can create incredible checkout pages to sell wrestling memorabilia online. Other advantages are
- Unlimited Revenue Generation
- Revenue Tracking
- Multiple Billing Models
- Dedicated Buttons For Marketing
- Auto Email Alerts
- Custom Domain
Note: There were many lawsuits concerning the authenticity of such merchandises, hence one should have proper paperwork before selling wrestling memorabilia online.
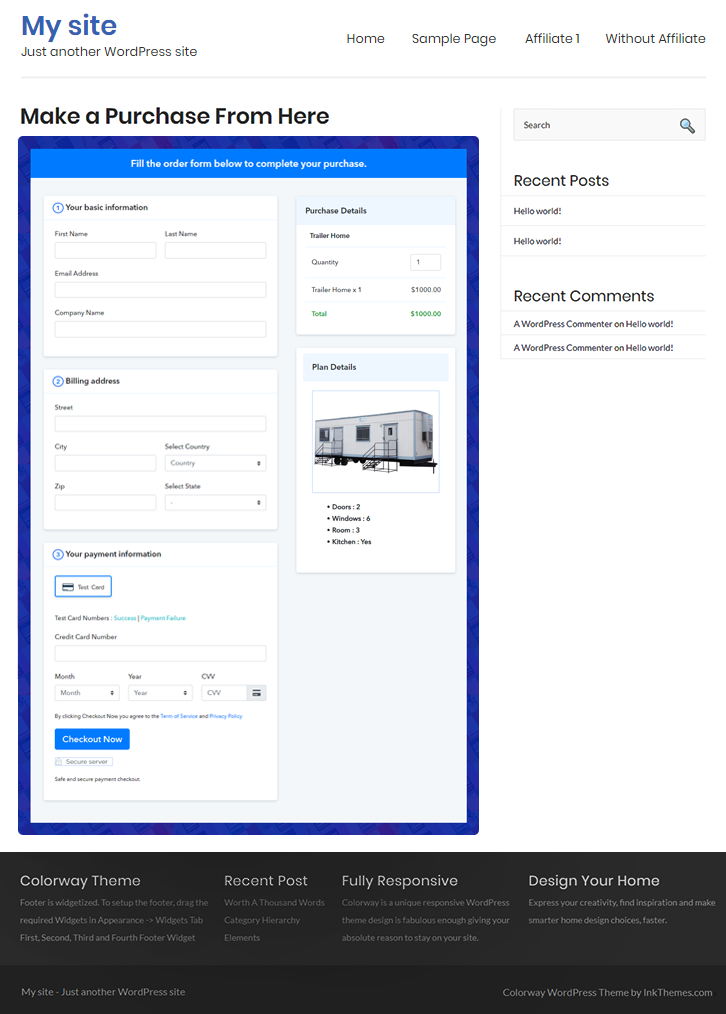
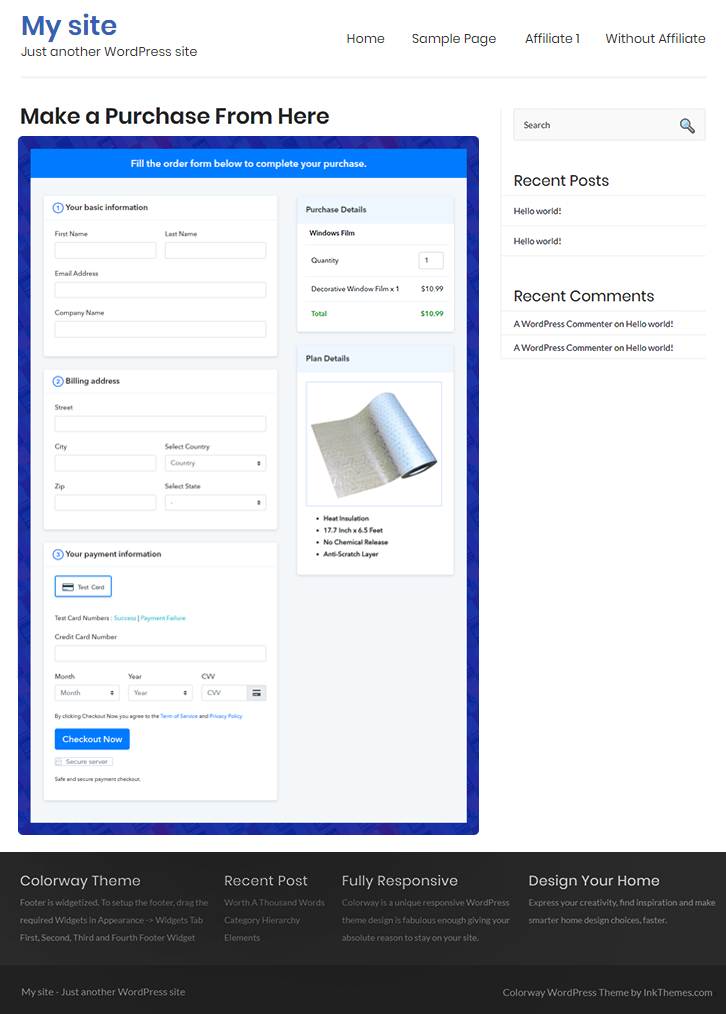
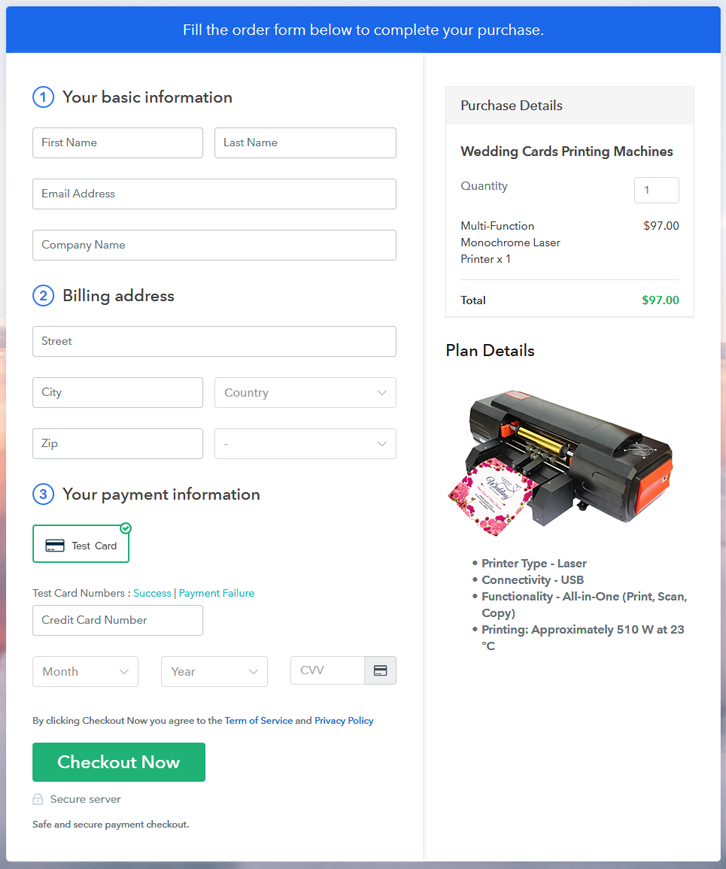
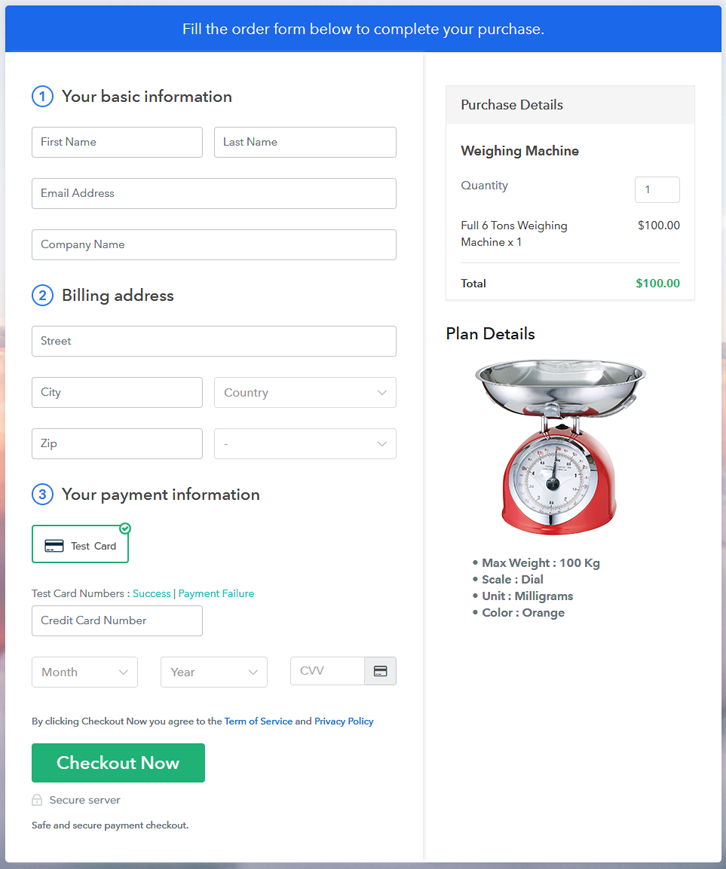
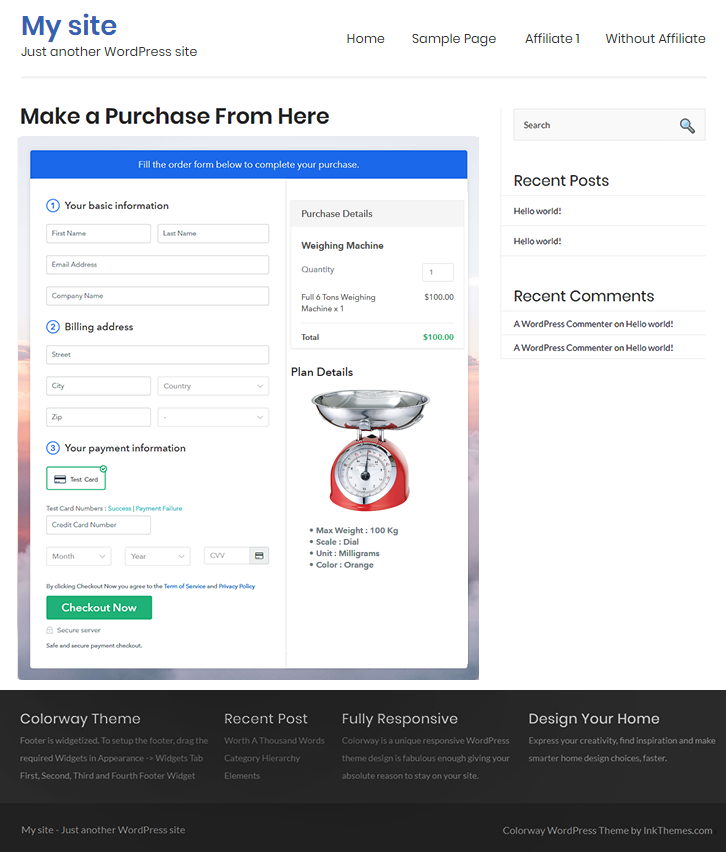
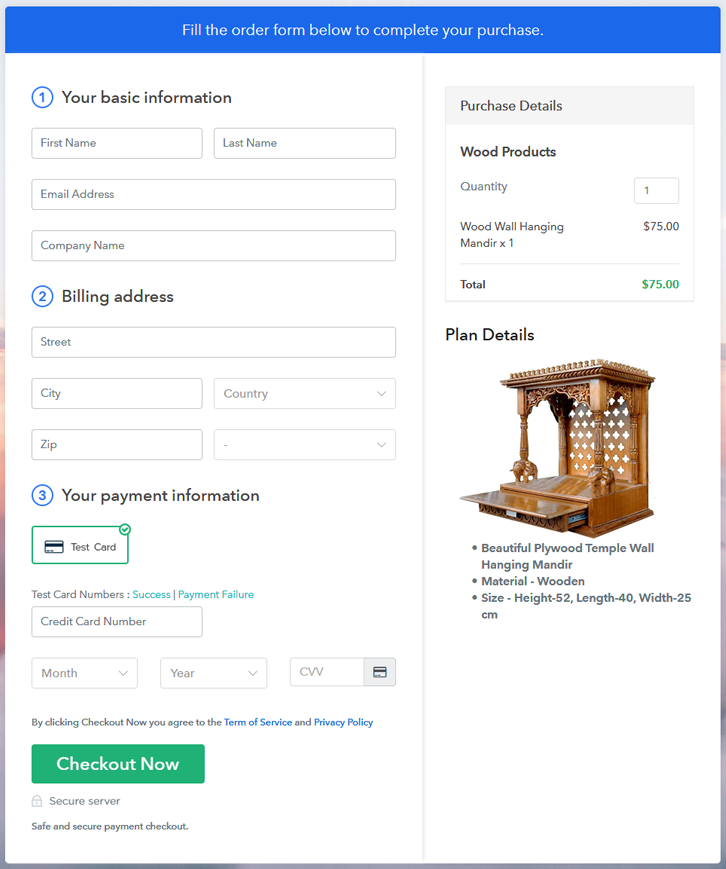
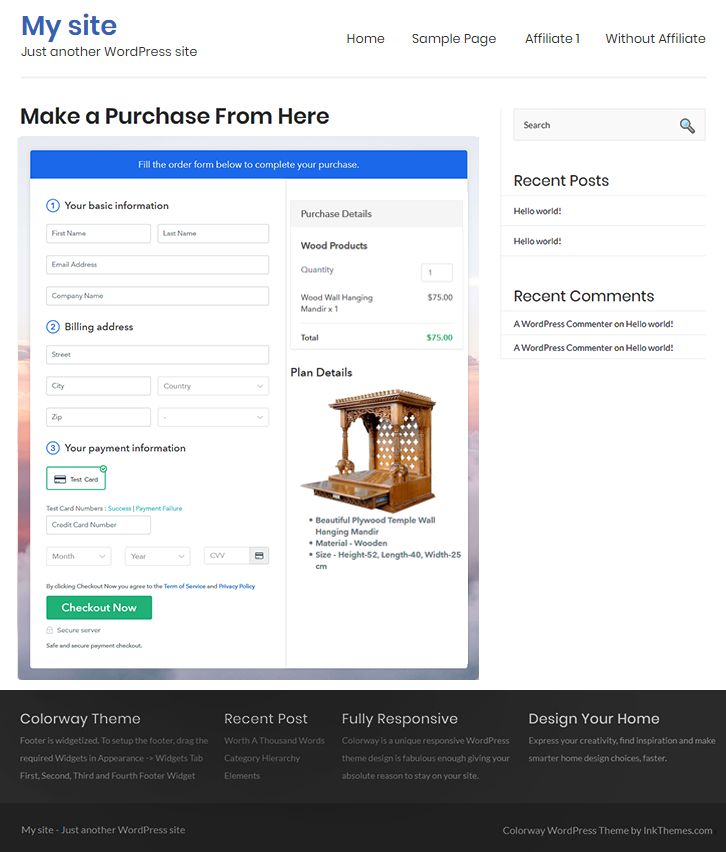
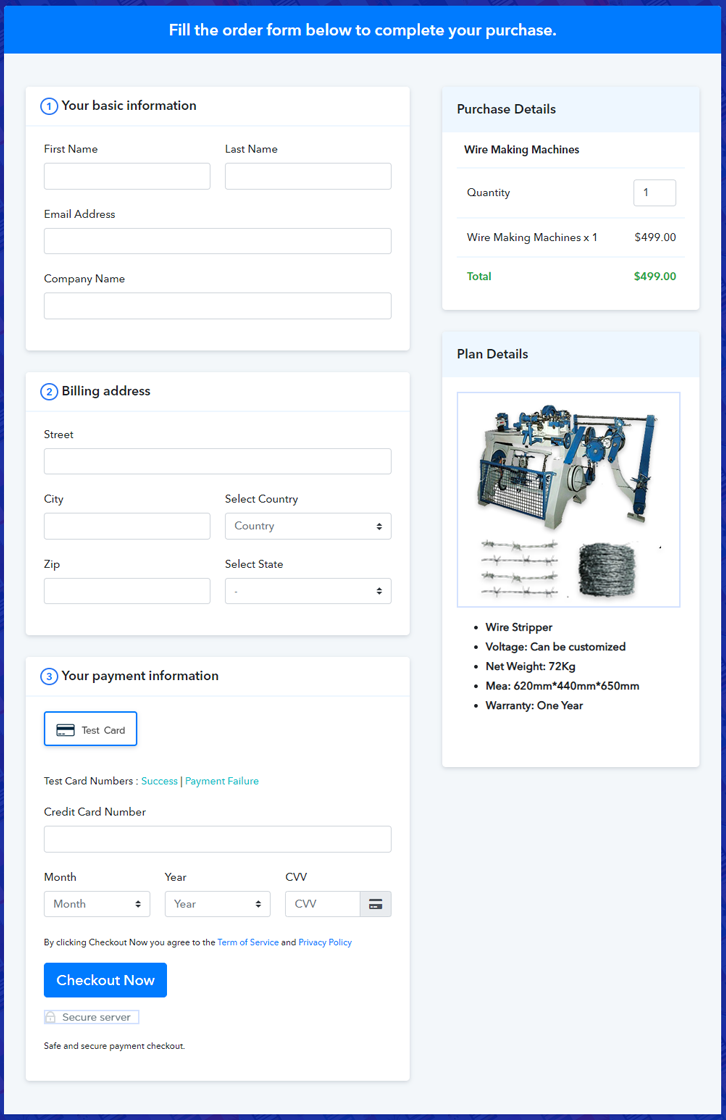
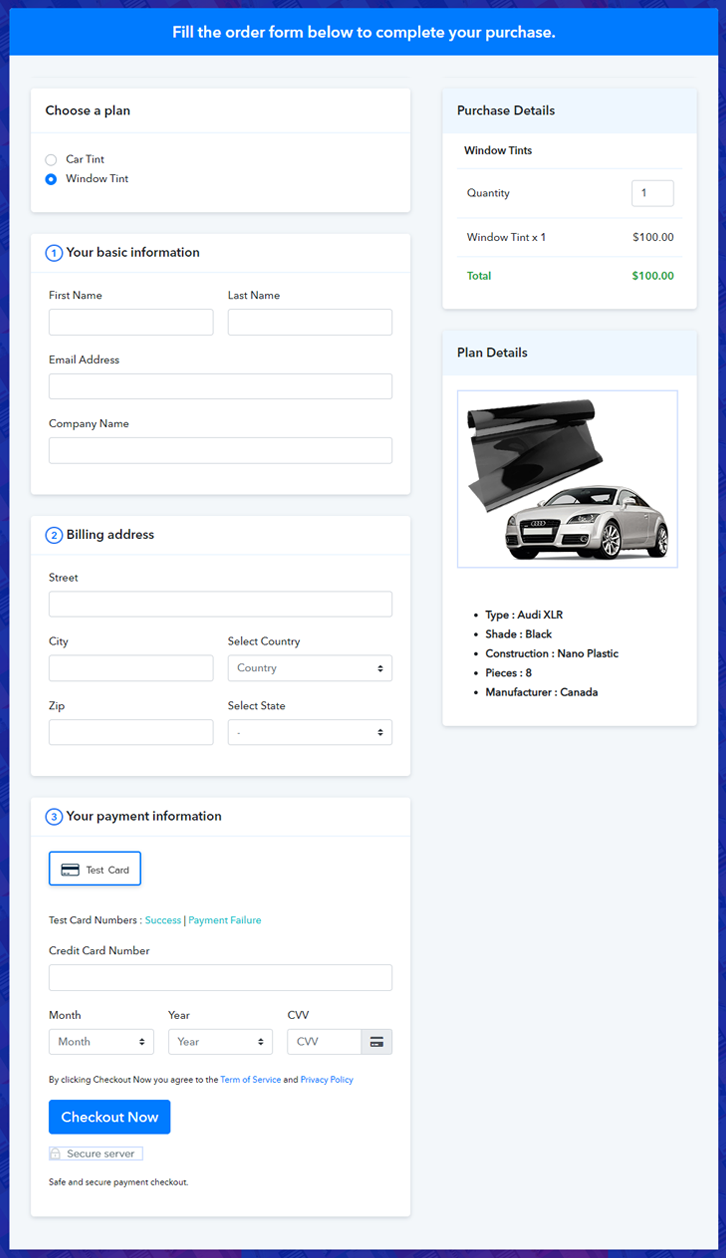
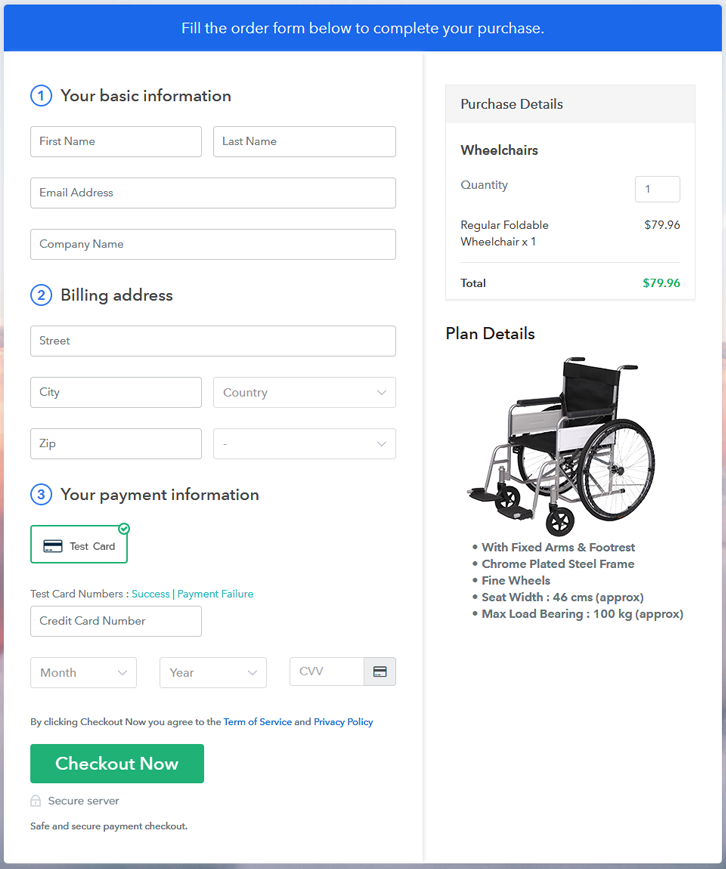
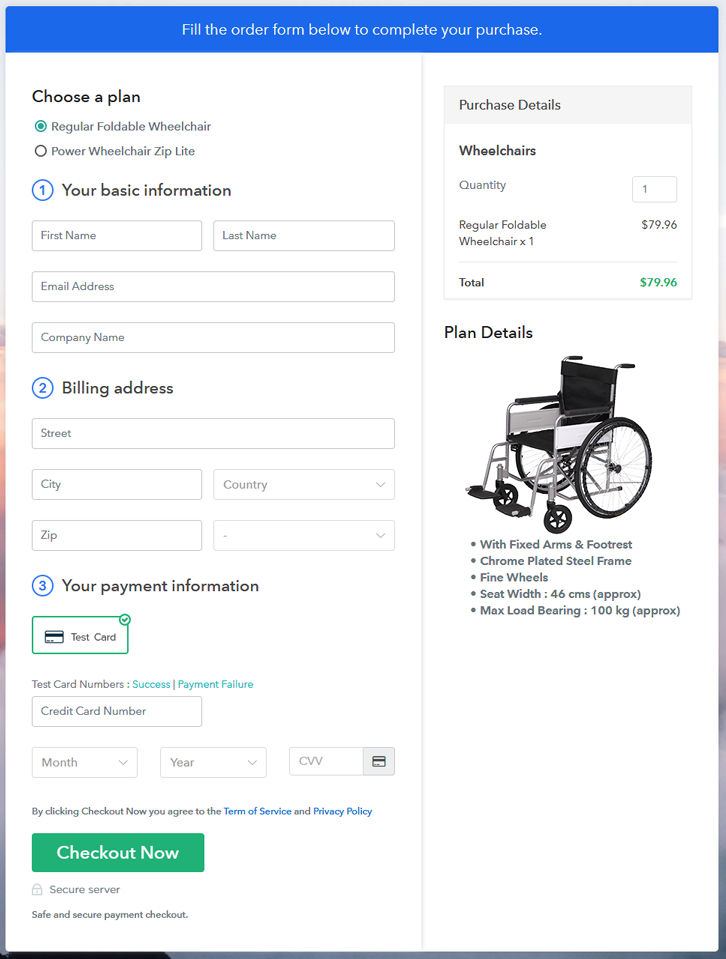
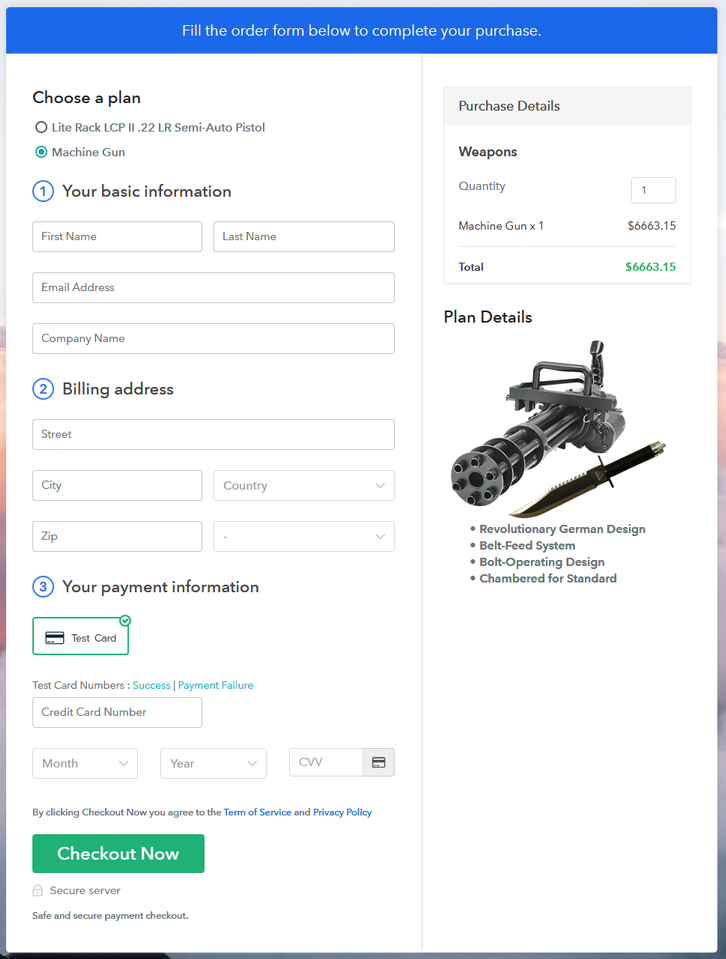
Final View of Checkout Page for your Wrestling Memorabilia Selling Business

Step 1: Log in to Pabbly Subscription Billing

Look in for Pabbly Subscription Billing in your browser. Now, click on the “Sign up Free“ button. Either fill all the information or simply sign in using your Gmail account.
Sign Up For Free!
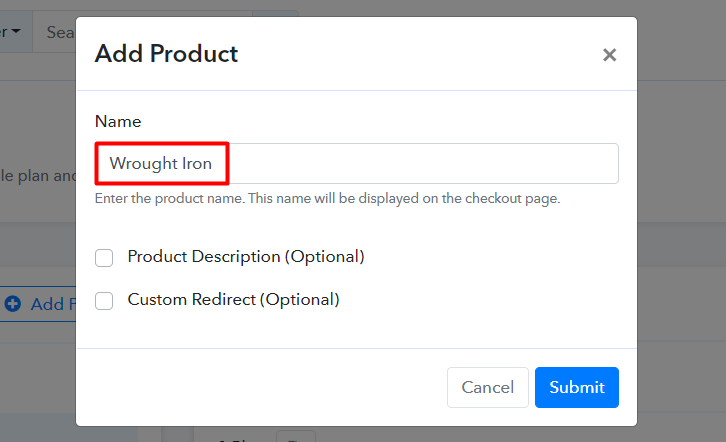
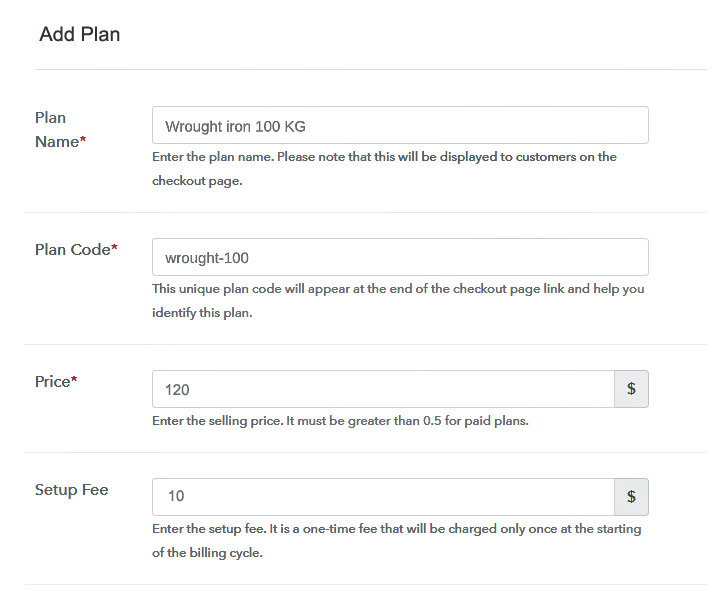
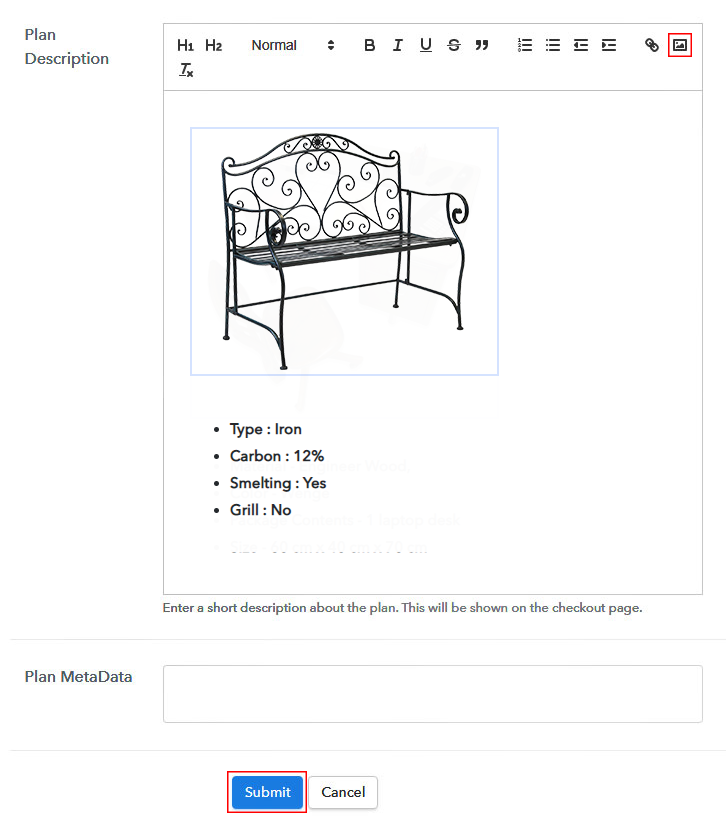
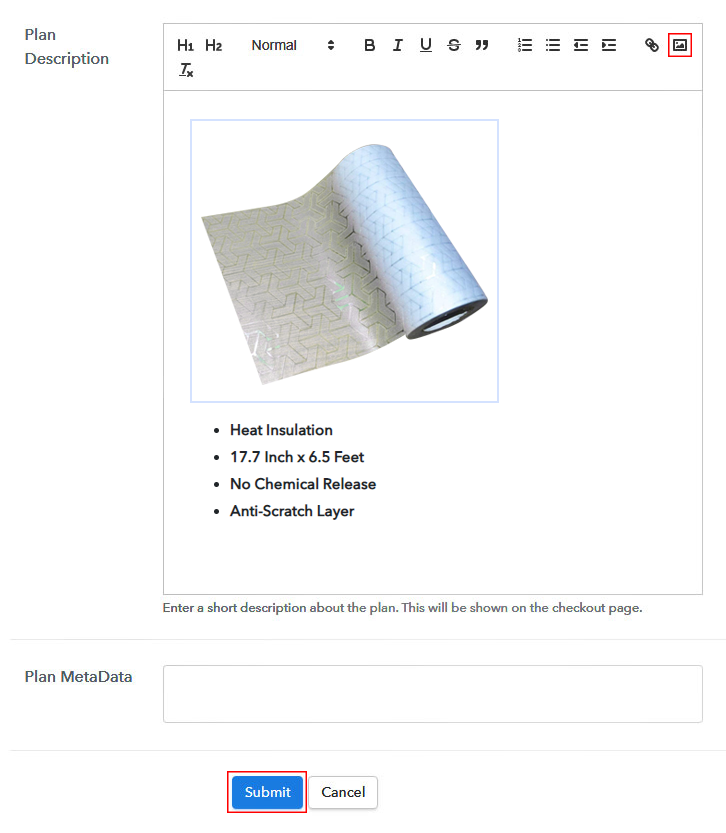
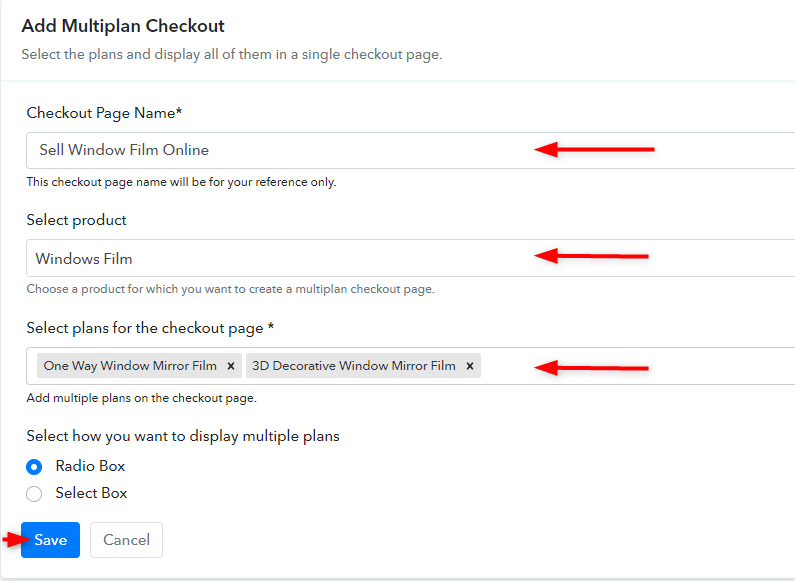
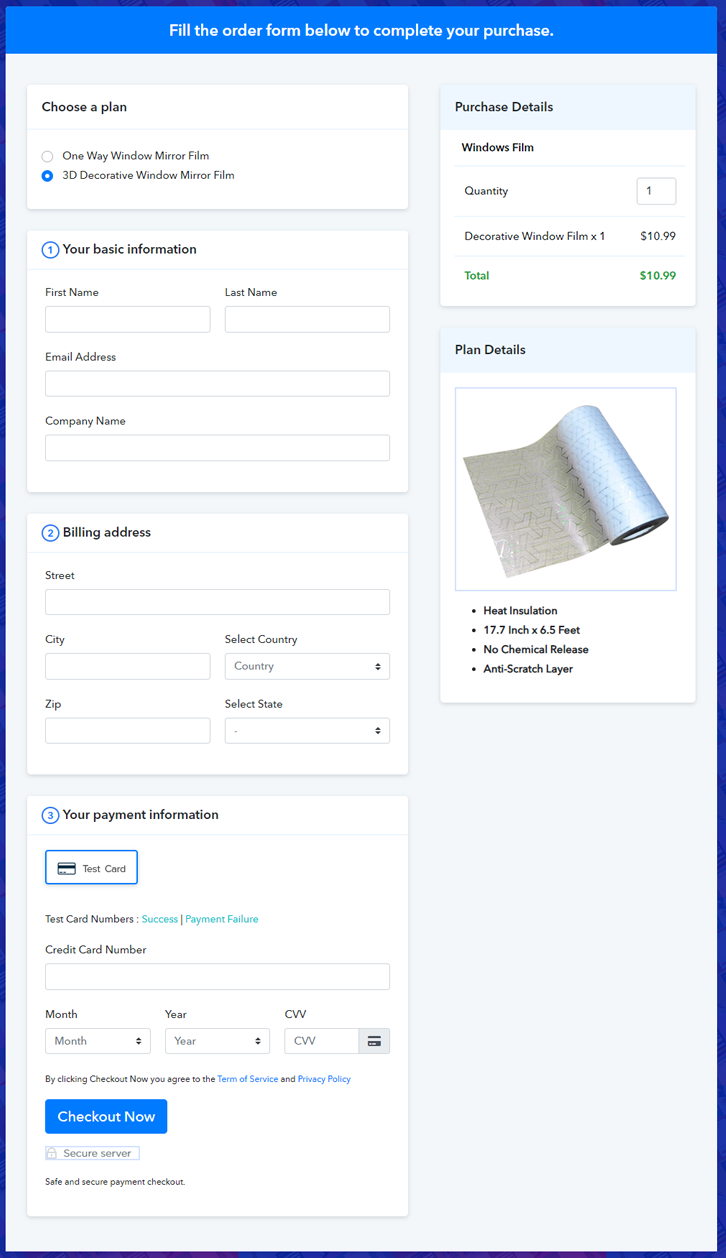
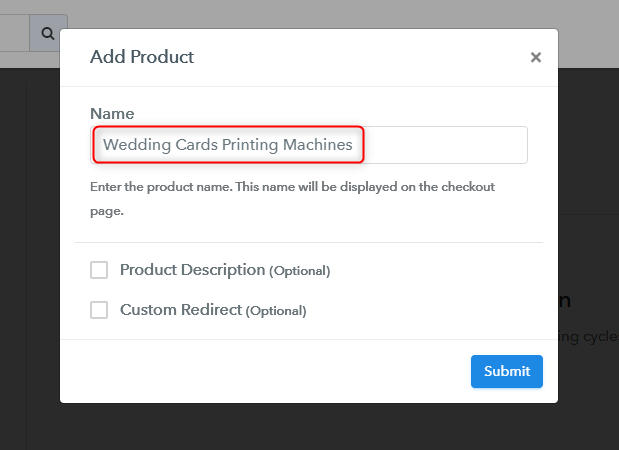
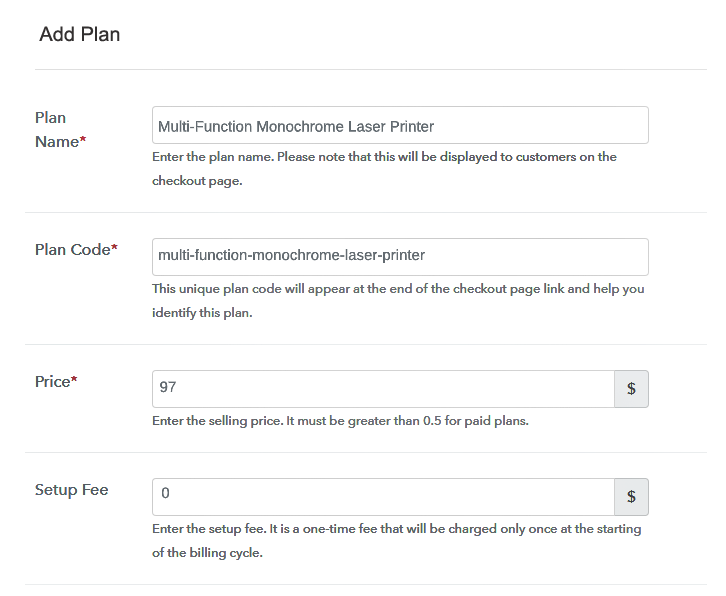
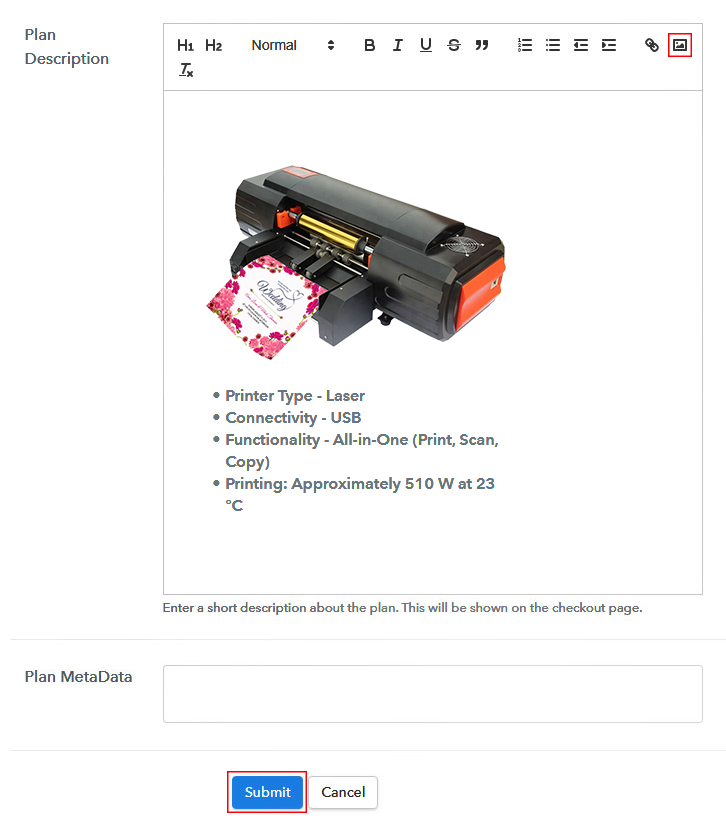
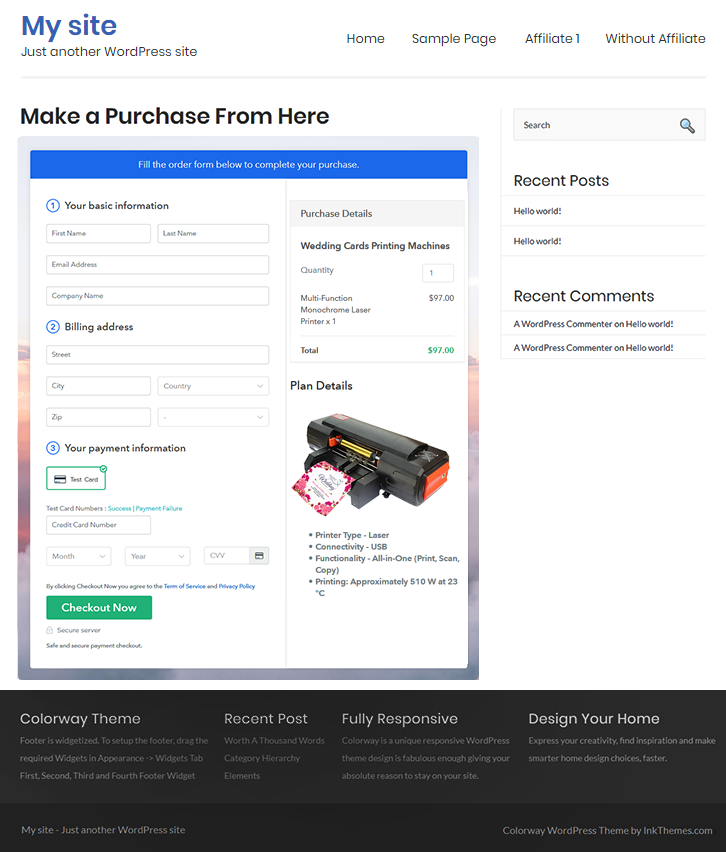
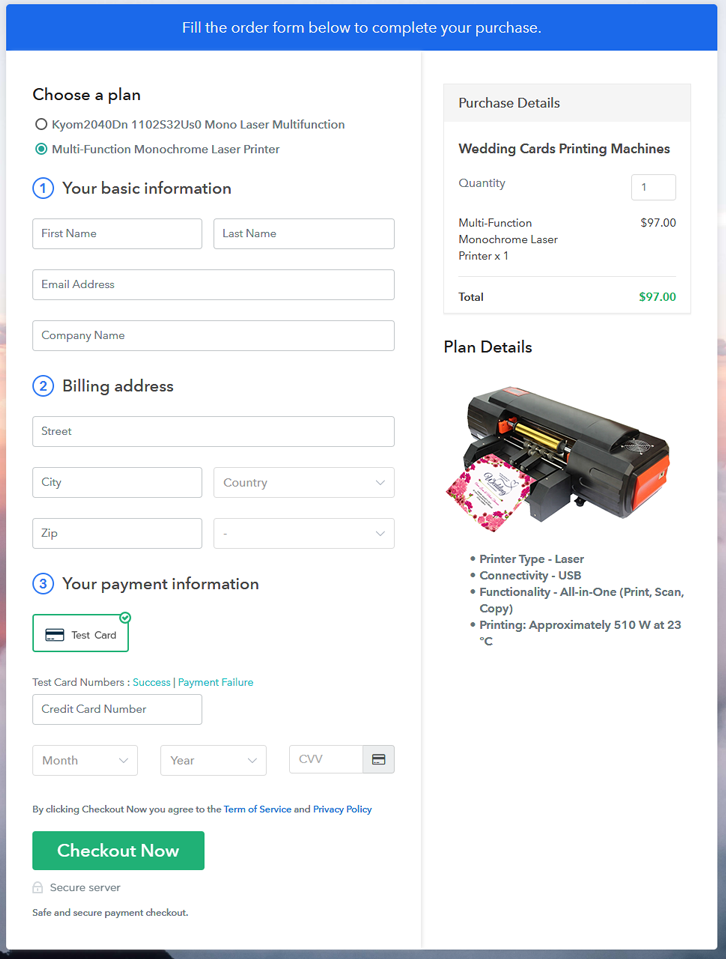
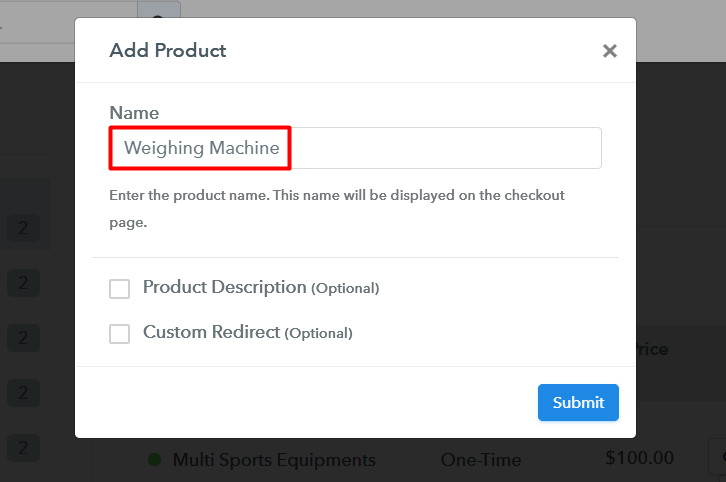
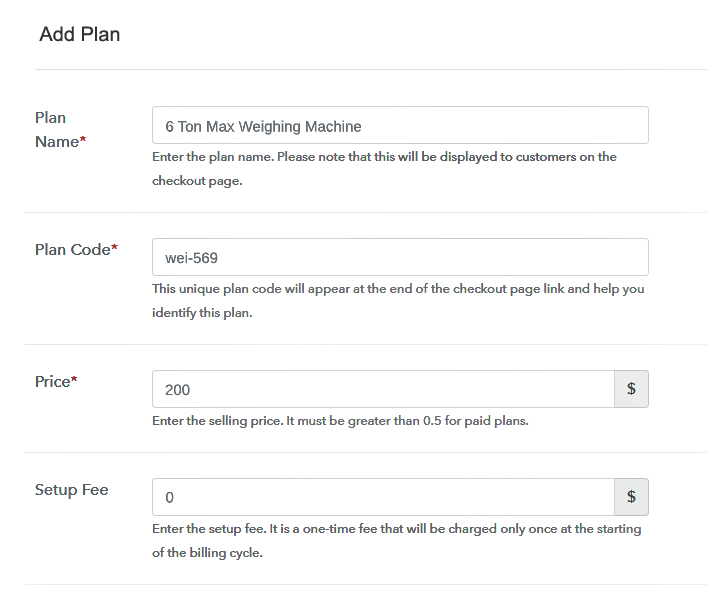
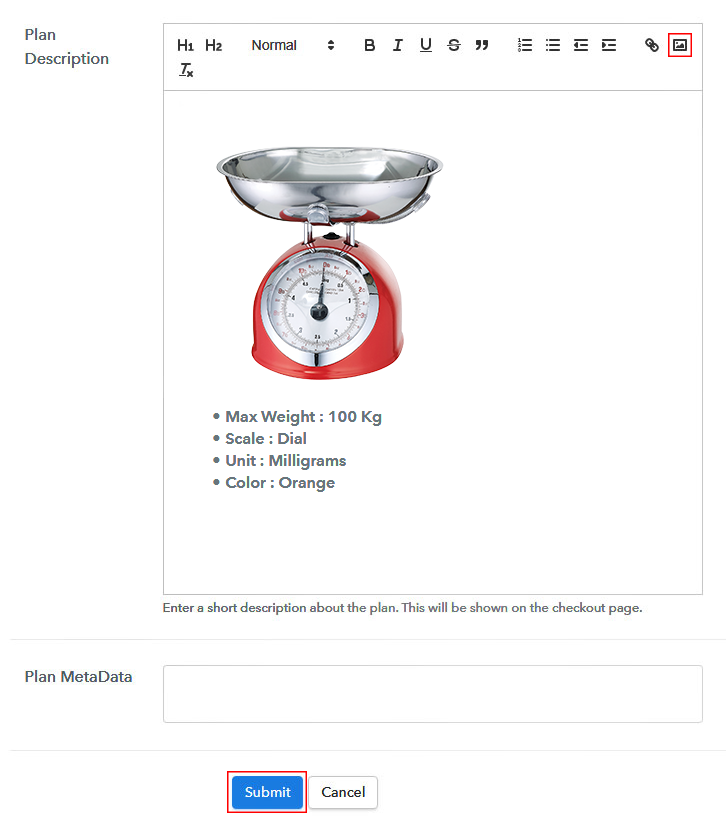
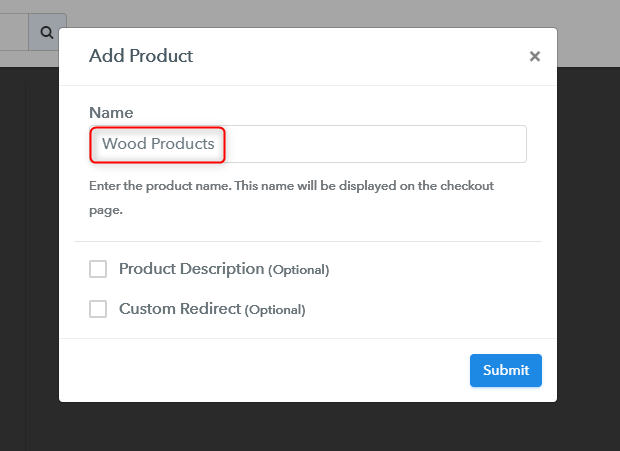
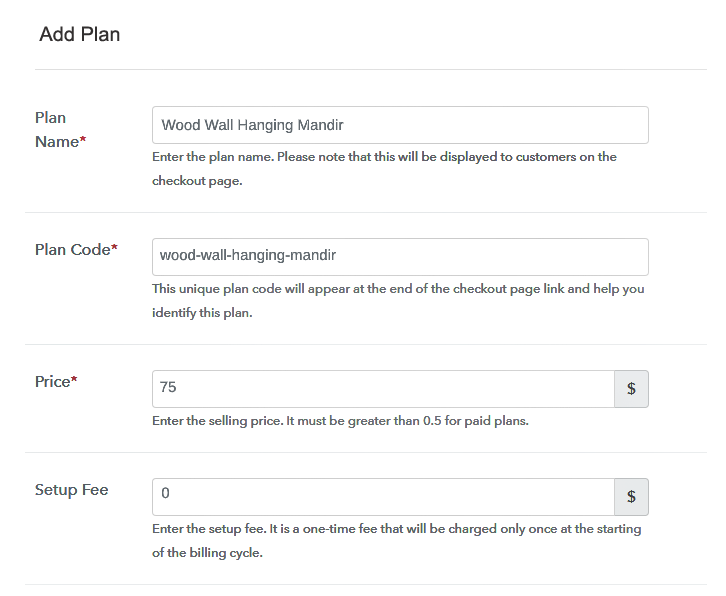
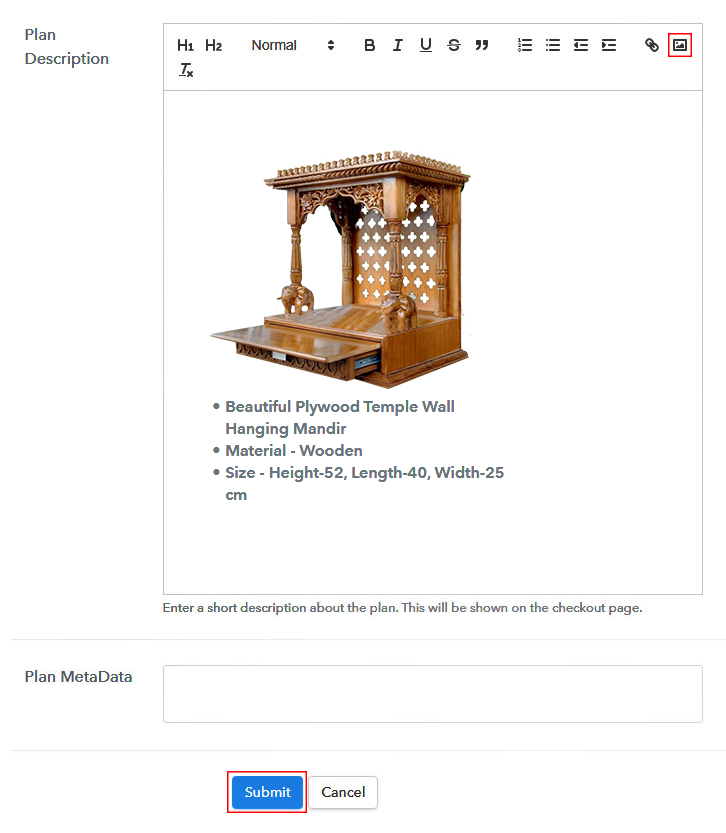
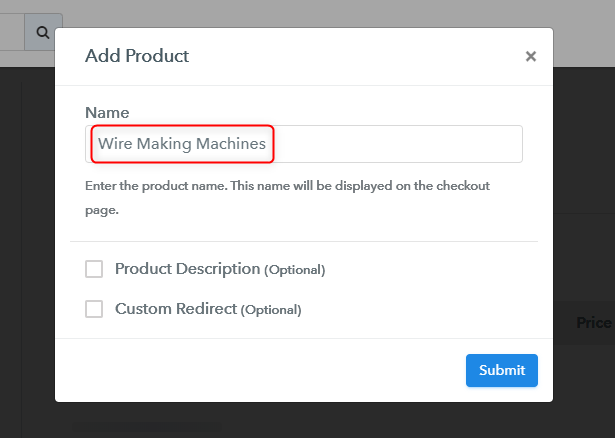
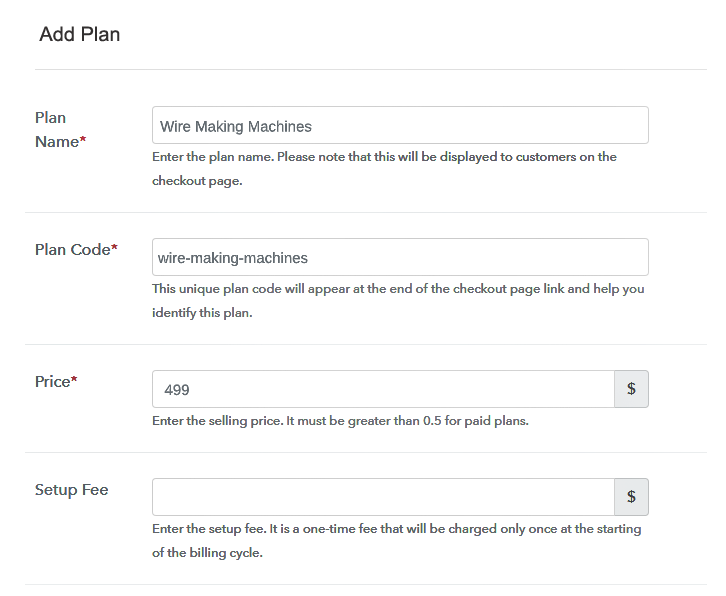
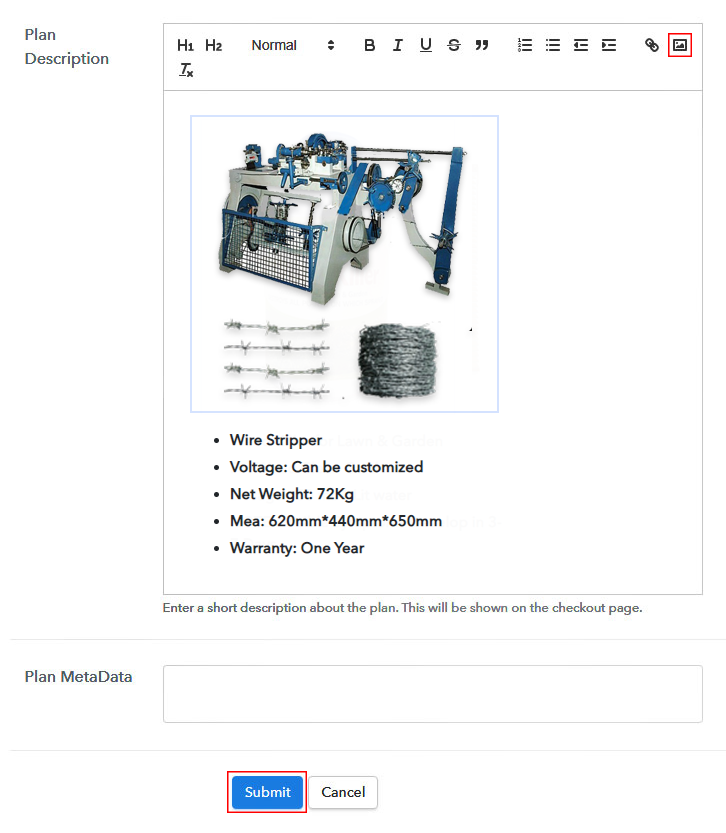
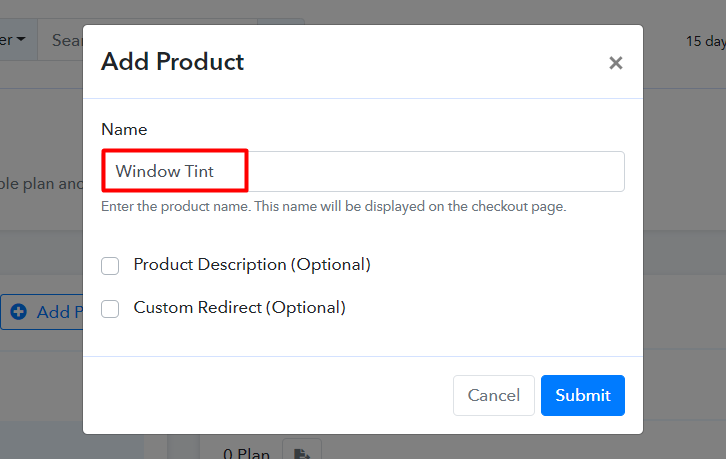
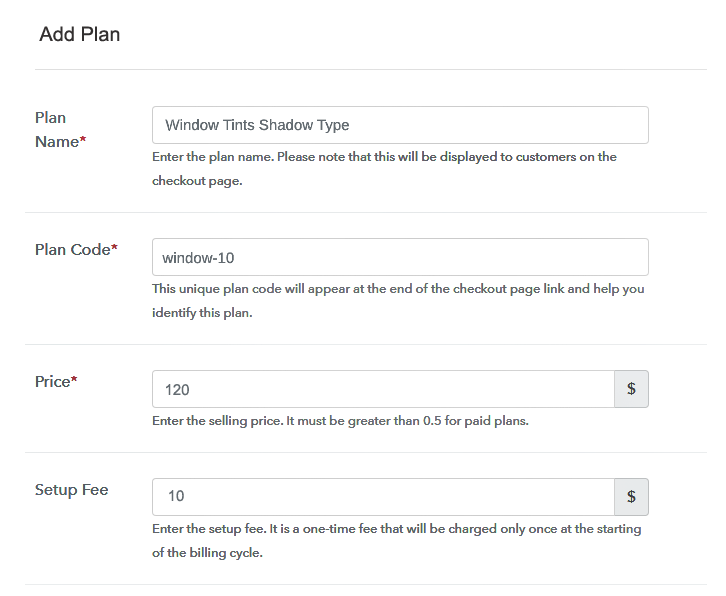
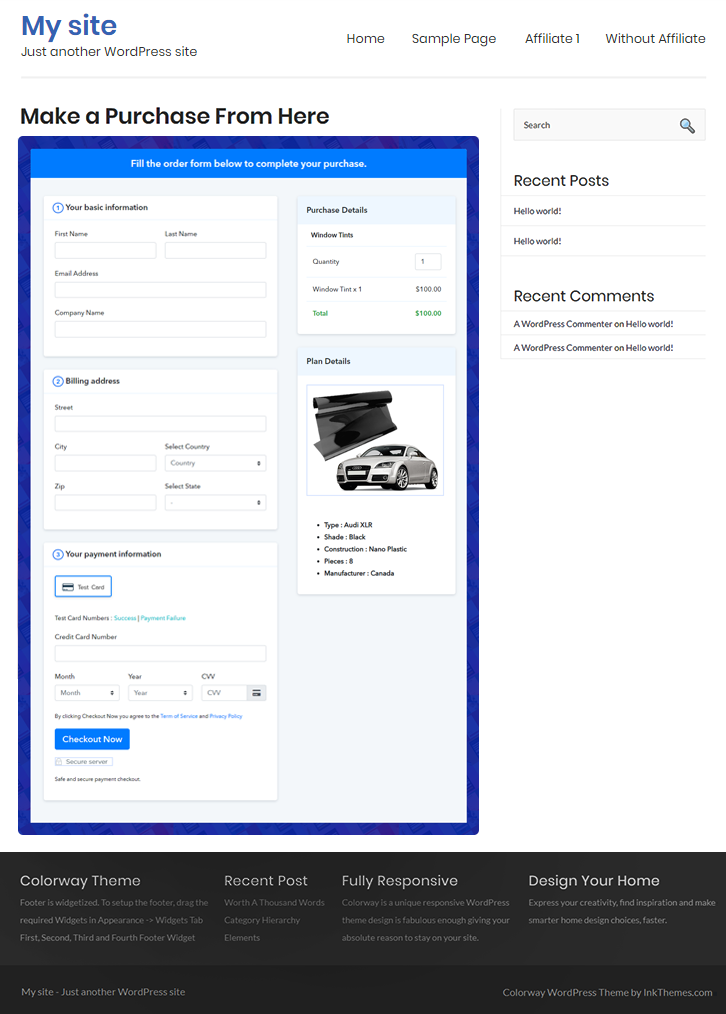
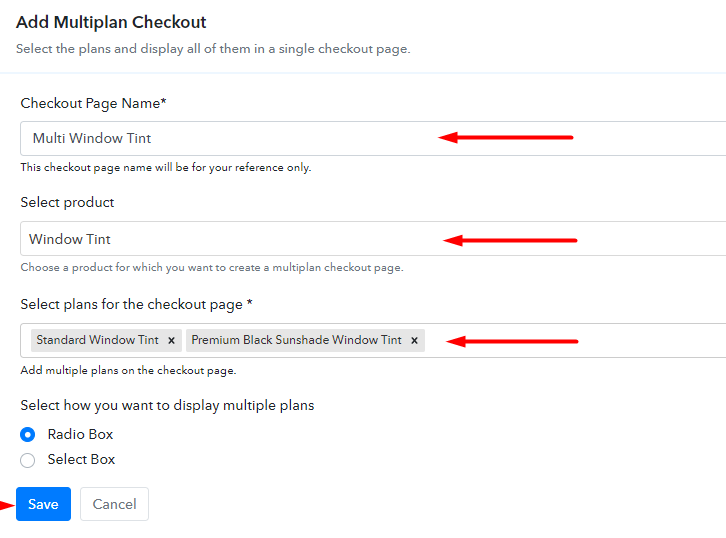
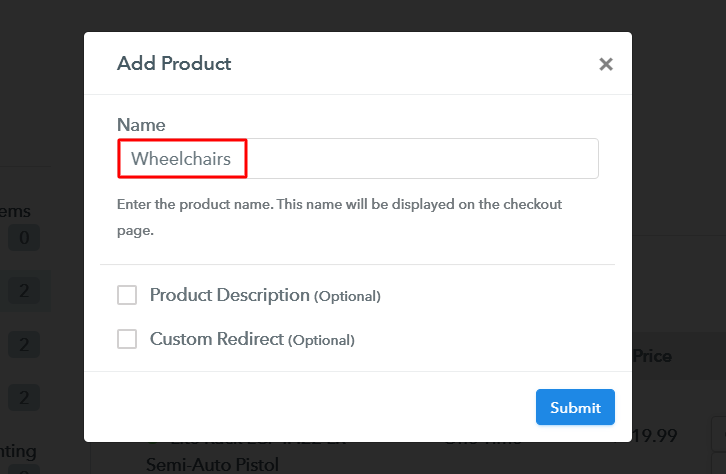
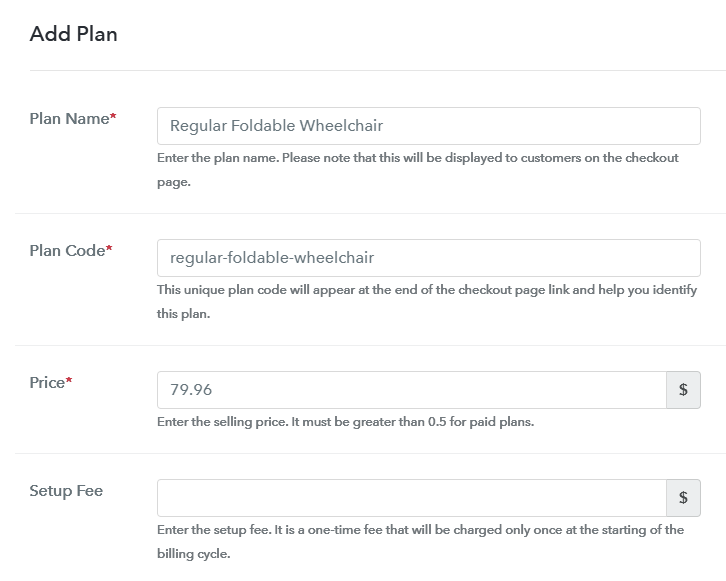
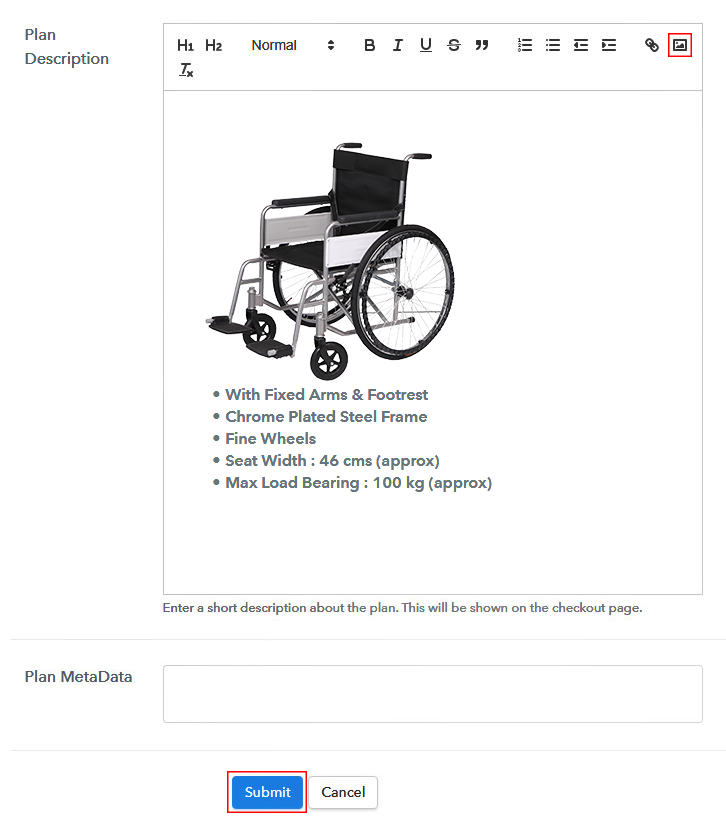
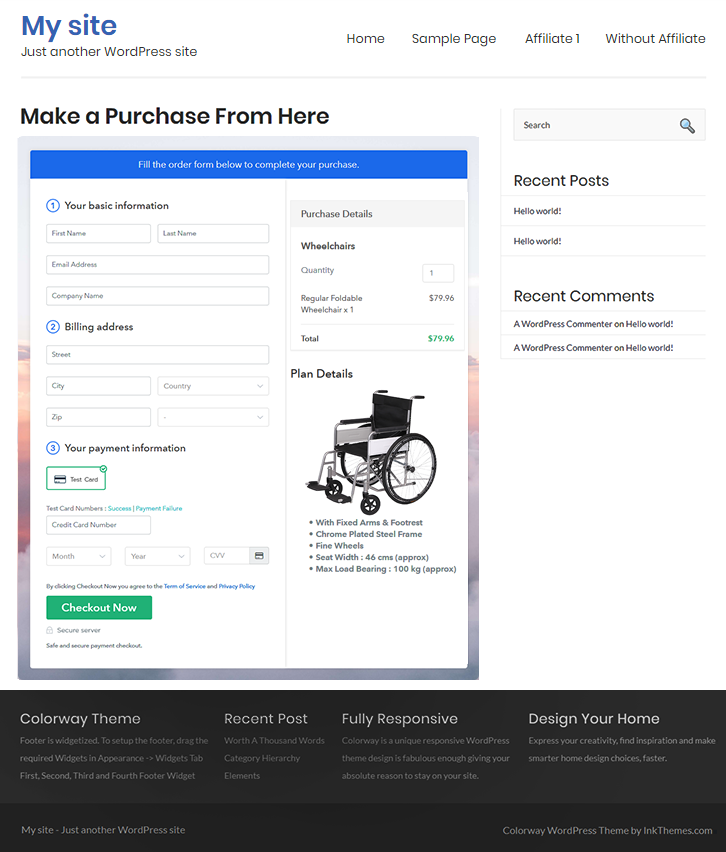
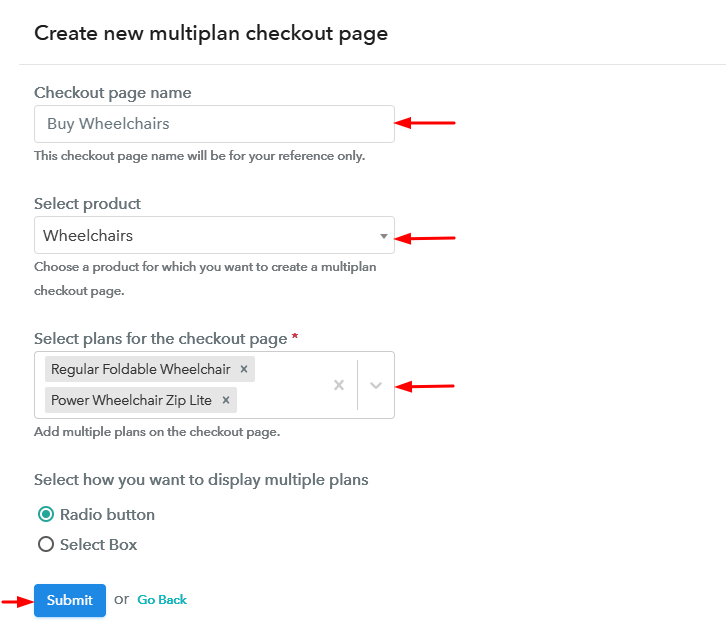
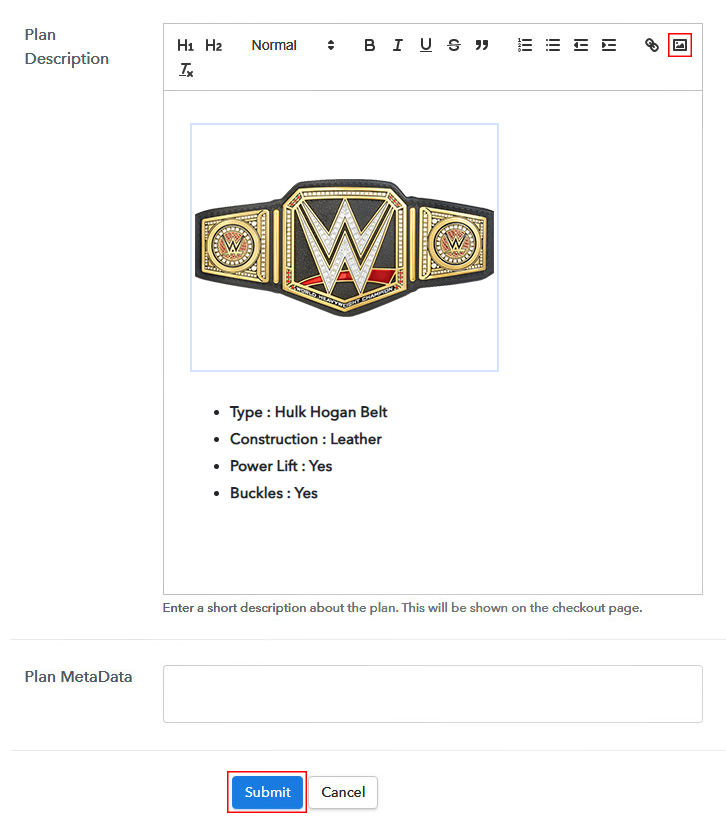
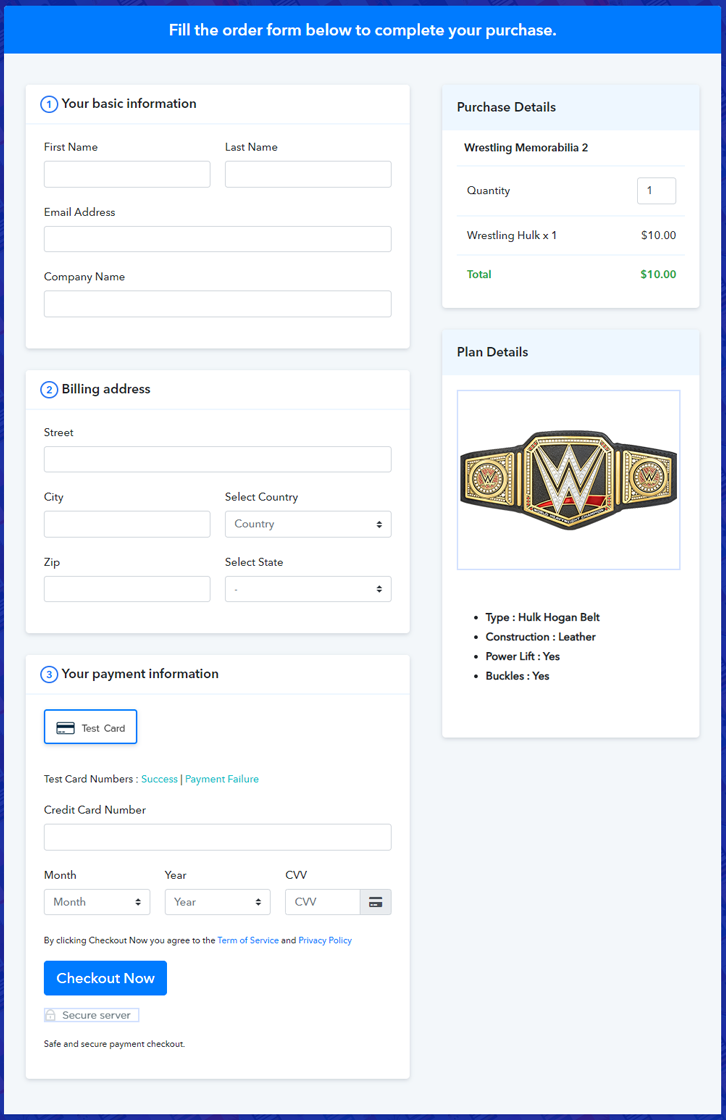
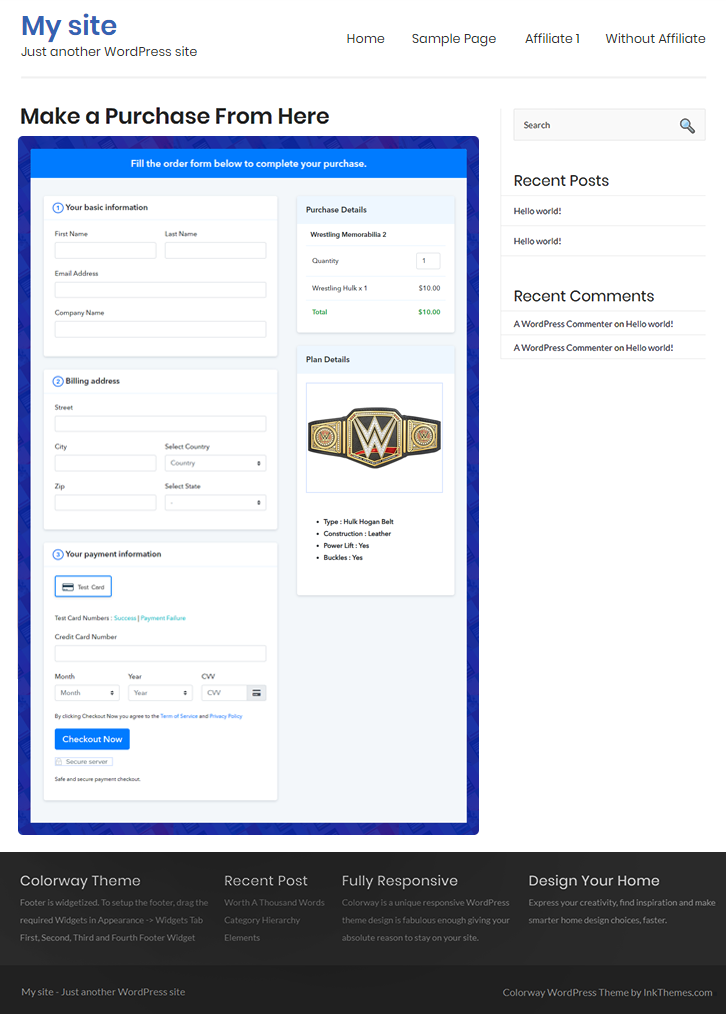
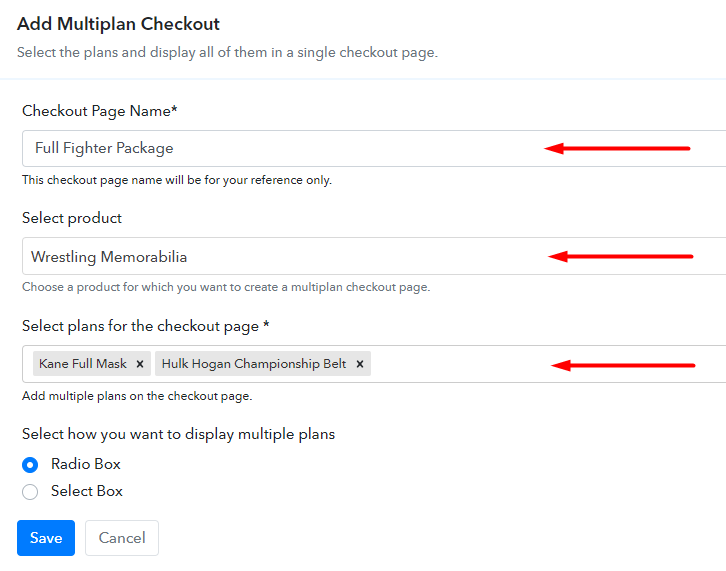
Once you’re done click on the “Access Now” button of Pabbly Subscription Billing, a page will pop-up with details like company name, currency, and contact number. Next, you need to fill those details to go on. The next step is to understand the payment process using a “Test Payment Gateway”. By pressing this button, you will be having the same payment experience that a customer will have. This will allow you to sort out the glitches and make the transactions seamless. Also, this software allows integrations with payment gateways such as PayPal, Stripe, etc. Furthermore, there are manuals listed below to help you out. Now we will add products and here beneath the “Enable Payments” segment there is the “Add your product” section click on it. Also, this will generate a dialog box with a blue button “Add New Product”. Click on it. Now, here you will add the title which is ‘wrestling memorabilia’ Fill out all the details like the name of the product and voila your product is created. Note: Here you can add all the products related to the similar category by creating plans for each of them. Now let’s create plans for different kinds of wrestling memorabilia available in your store. In the plan page, here you have to fill in details like plan name, code, price, setup fees. Moreover, choose your preferred revenue model accordingly and after some time you can even change it according to your choice. Now, give small info about wrestling memorabilia in bullet points, add images and links too. Then, on hitting the submit button, your product will be successfully added. Also, you can create multiple plans and can add all the memorabilia you want to sell online. Here are some ways, by which you can share the checkout pages through Pabbly Subscription Billing. Follow up the recommended steps to preview the checkout page: Furthermore, just copy the link and add the checkout page to sell wrestling memorabilia at any suitable place on your WordPress site. Further, paste the plan link of the wrestling memorabilia on a text editor of the WordPress dashboard. Next, click the “Publish” button, after making changes. Note: In case you want to sell multiple products via a single checkout page, you can create a multi-plan checkout page otherwise skip this step. By 2035 it estimated that nearly 50% of the population will buy stuff directly from the internet. And this checkout page to sell wrestling memorabilia is your first baby step to that future. Do remember there are a ton of features that I haven’t mentioned here, but you got to explore them. Thank You !!Step 2: Select Subscription Billing

Step 3: Account Setup

Step 4: Connect Payment Gateways & Start Wrestling Memorabilia Selling Business Online

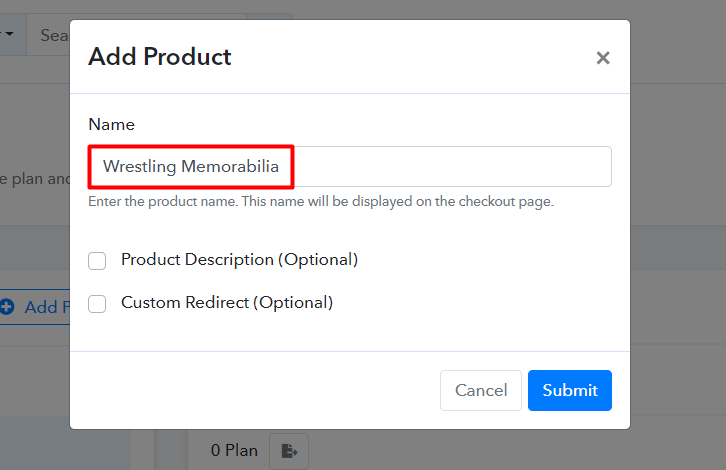
Step 5: Add Product for your Wrestling Memorabilia

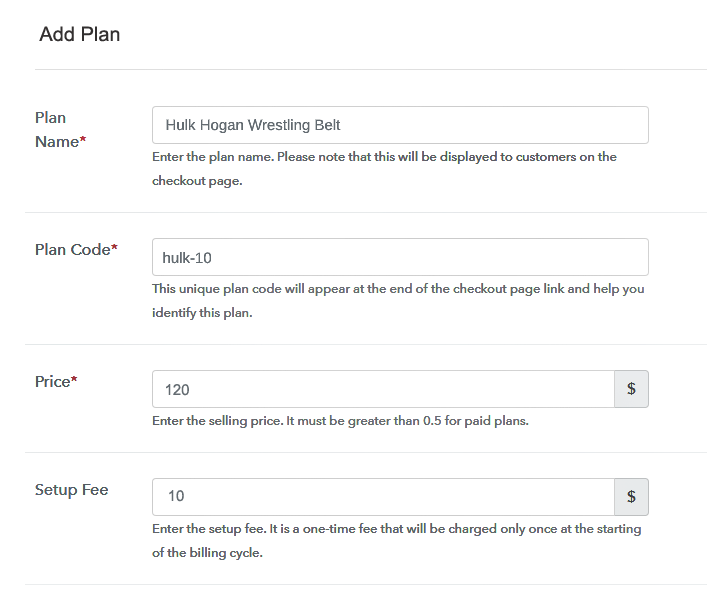
Step 6: Add Plans
(a) Select Add New Plan

(b) Specify the Plan & Pricing Details
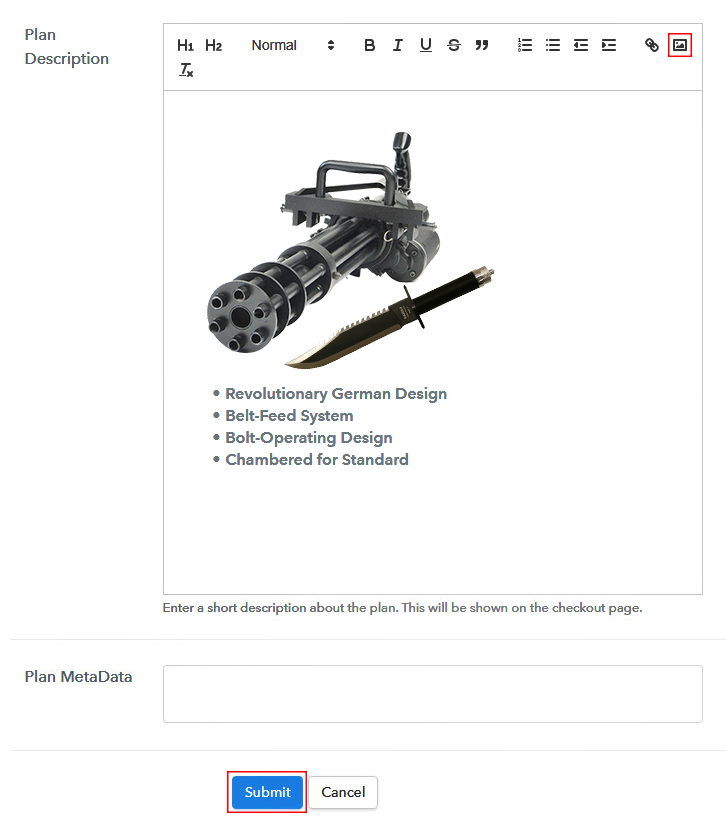
(c) Add Image & Description of Wrestling Memorabilia
Step 7: Share your Checkout Page

Step 8: Preview Checkout Page
(a) Click on the View Button

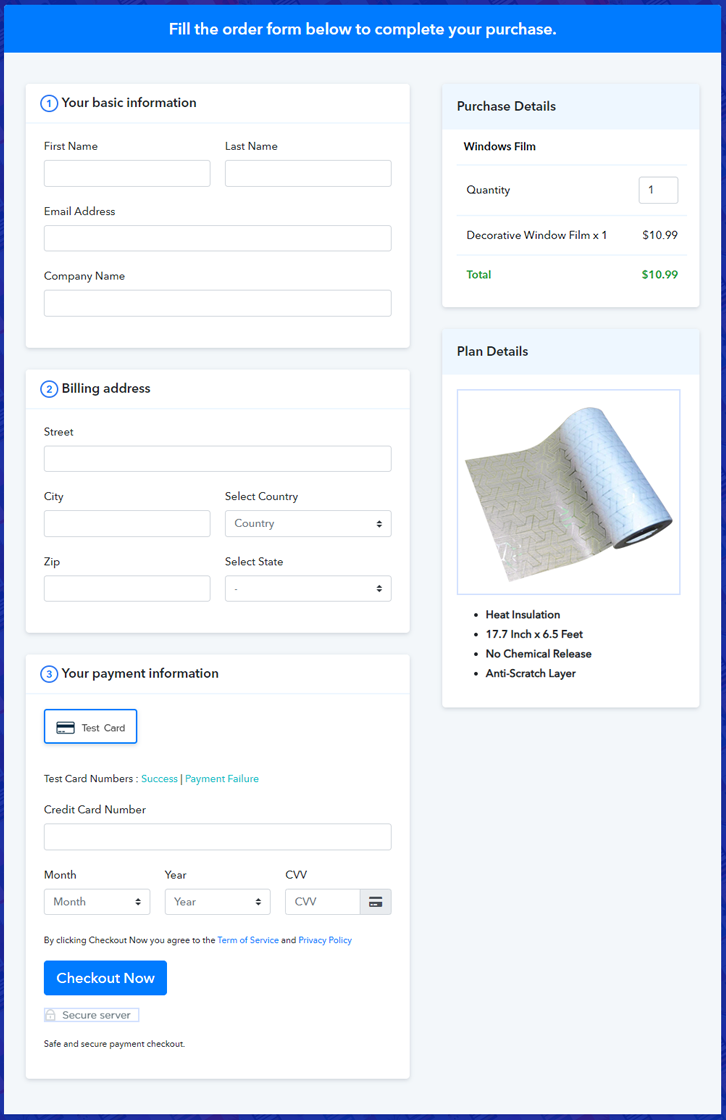
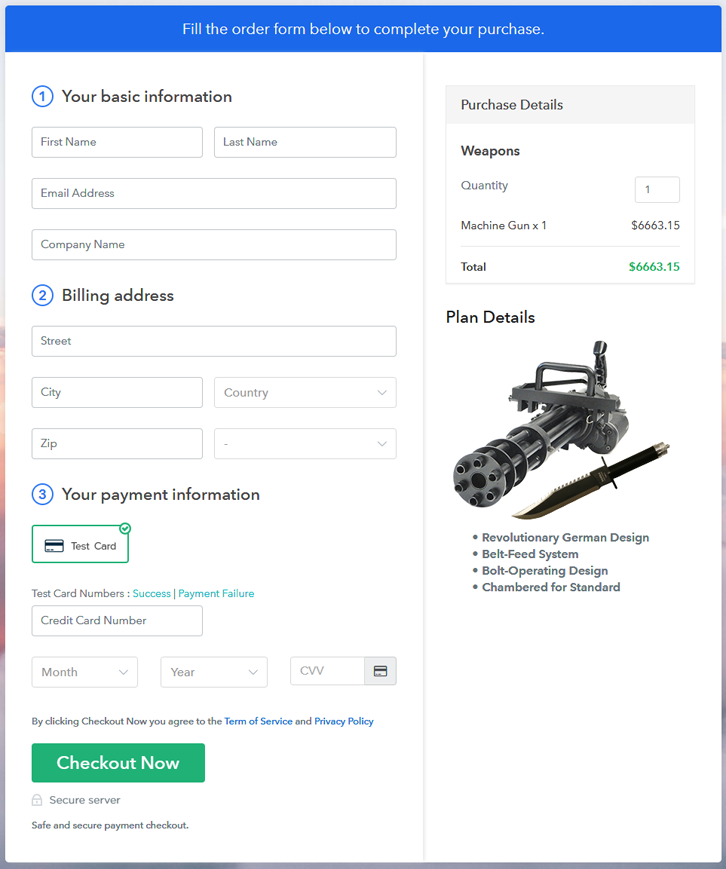
(b) Take a Look at the Checkout Page
Step 9: Embed Checkout Page in Site & Sell Online

(a) Edit the Page & Paste the Copied Link

(b) Save & Publish the Checkout Page

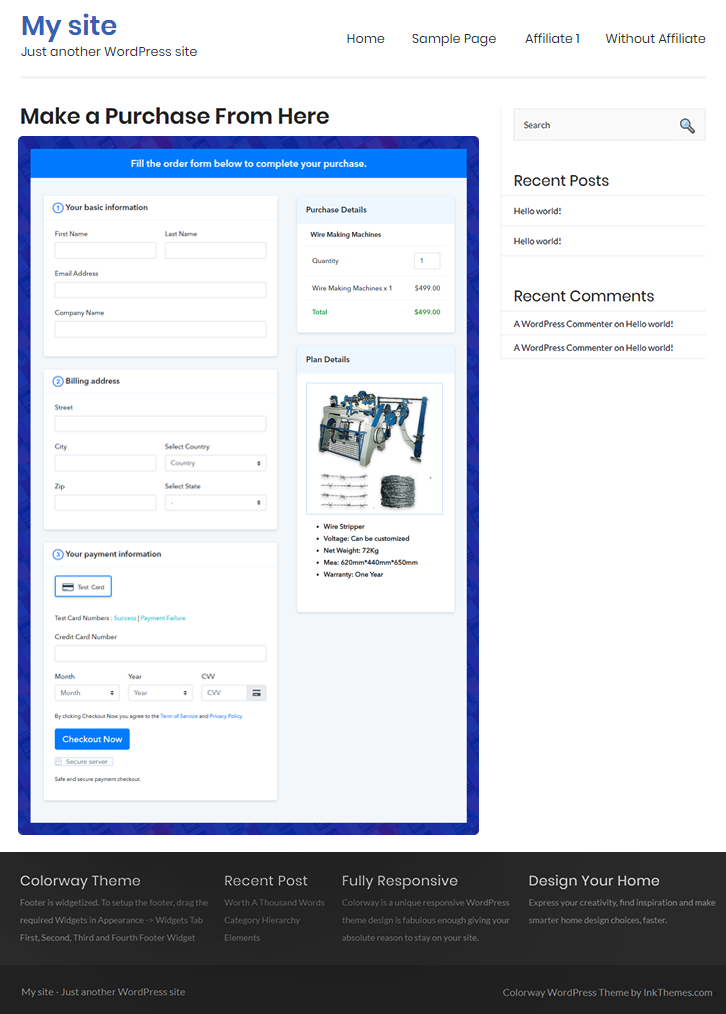
(c) Check out the Final Look of your Checkout Page on WordPress Site
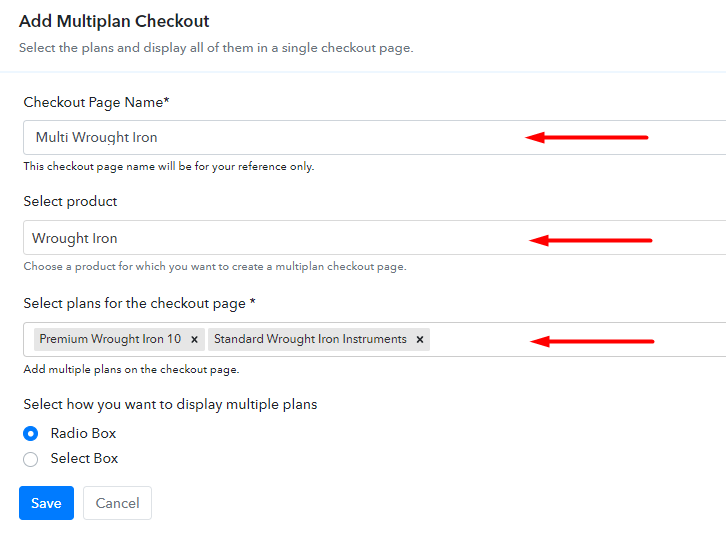
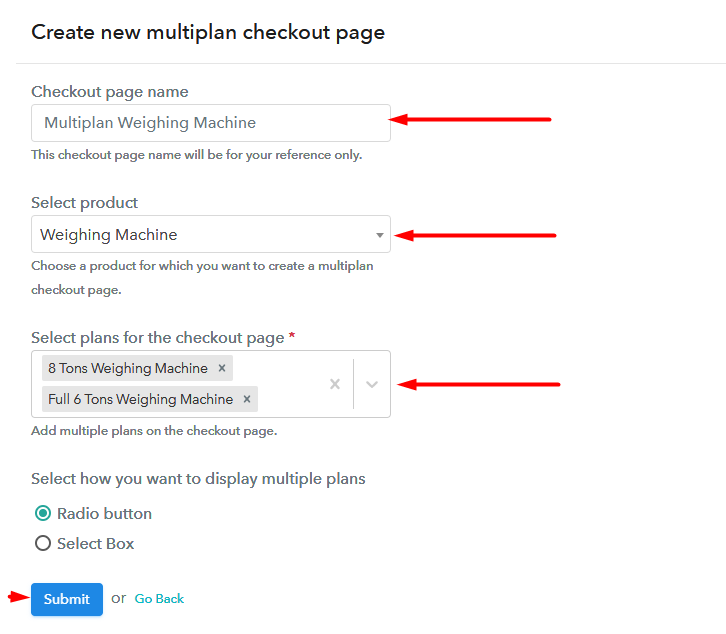
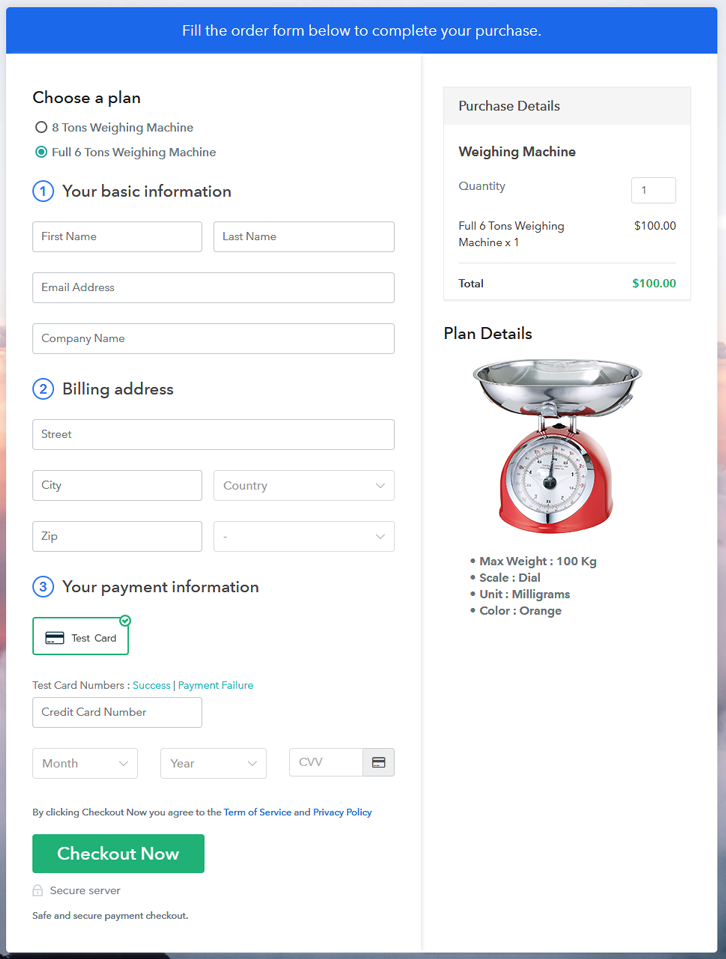
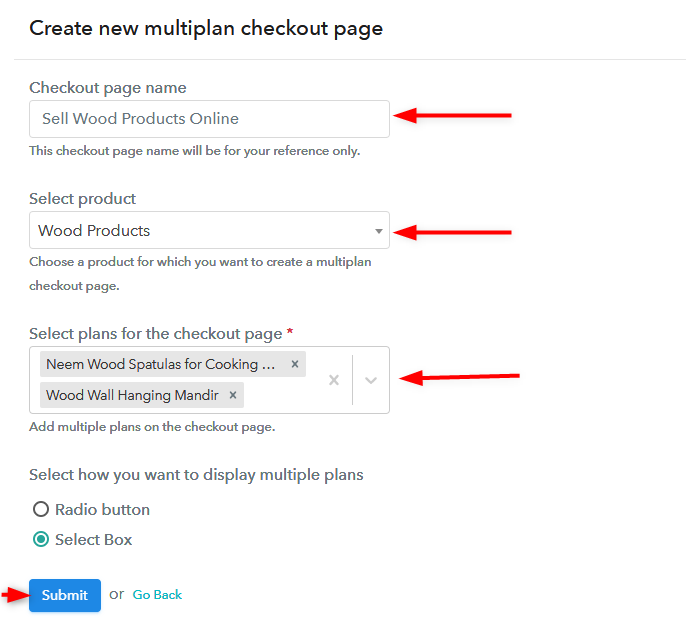
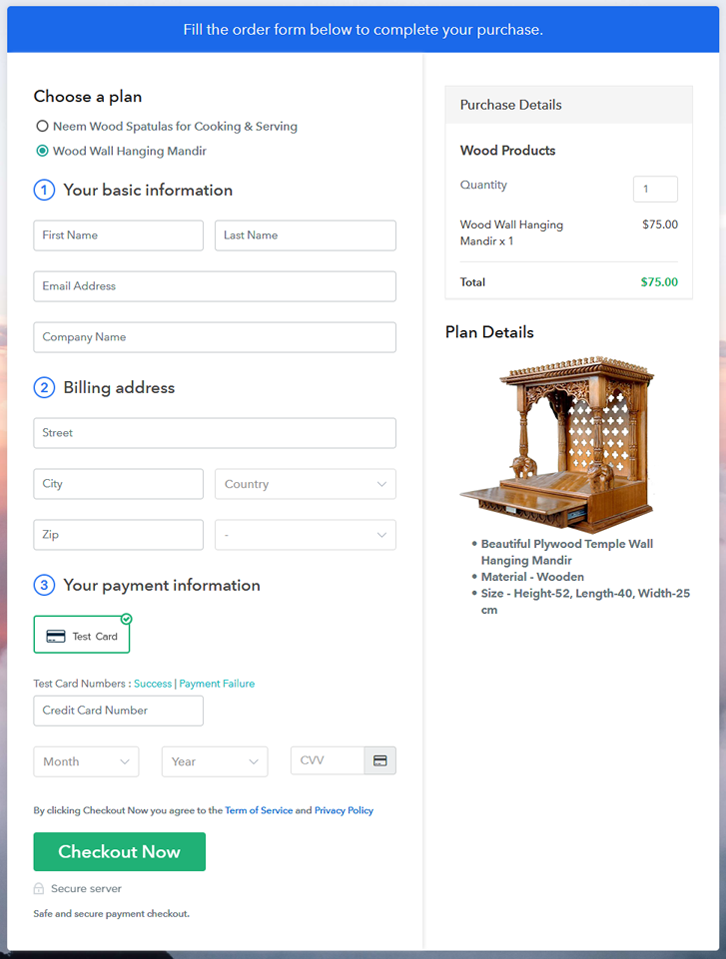
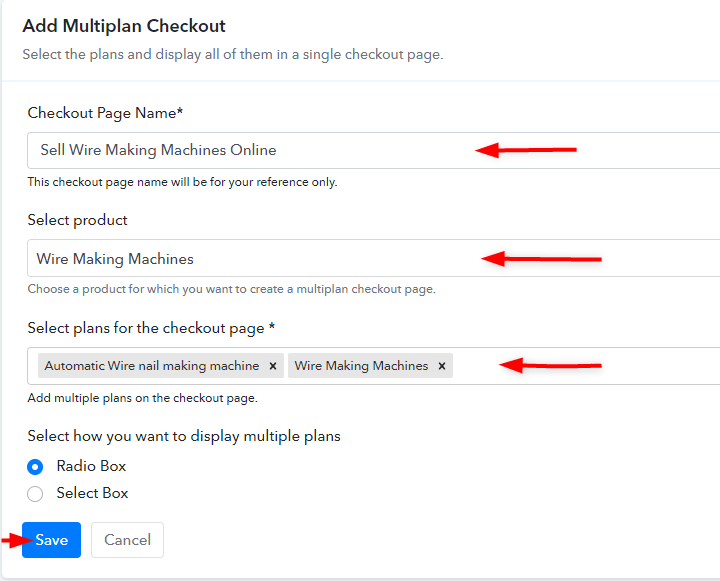
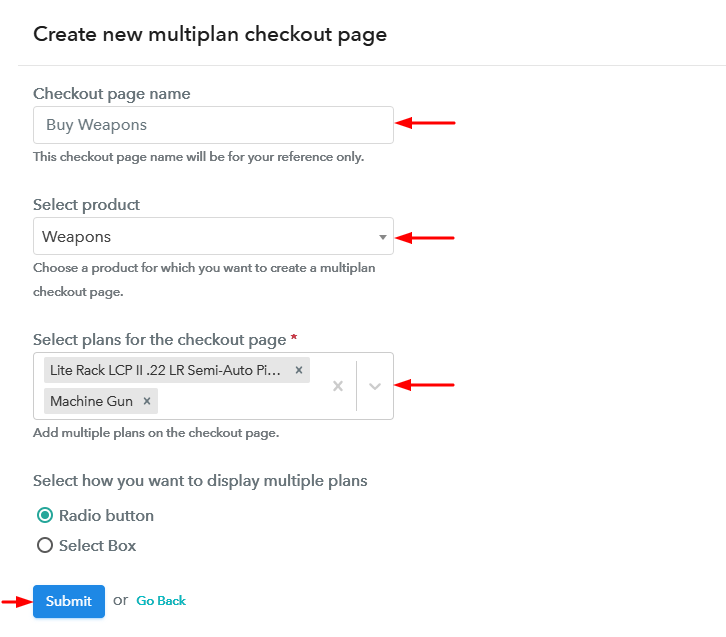
Step 10: Multiplan Checkout Page
(a) Click on Add Mutiplan Checkout

(b) Add Plans to Sell Multiple Wrestling Memorabilia from Single Checkout Page
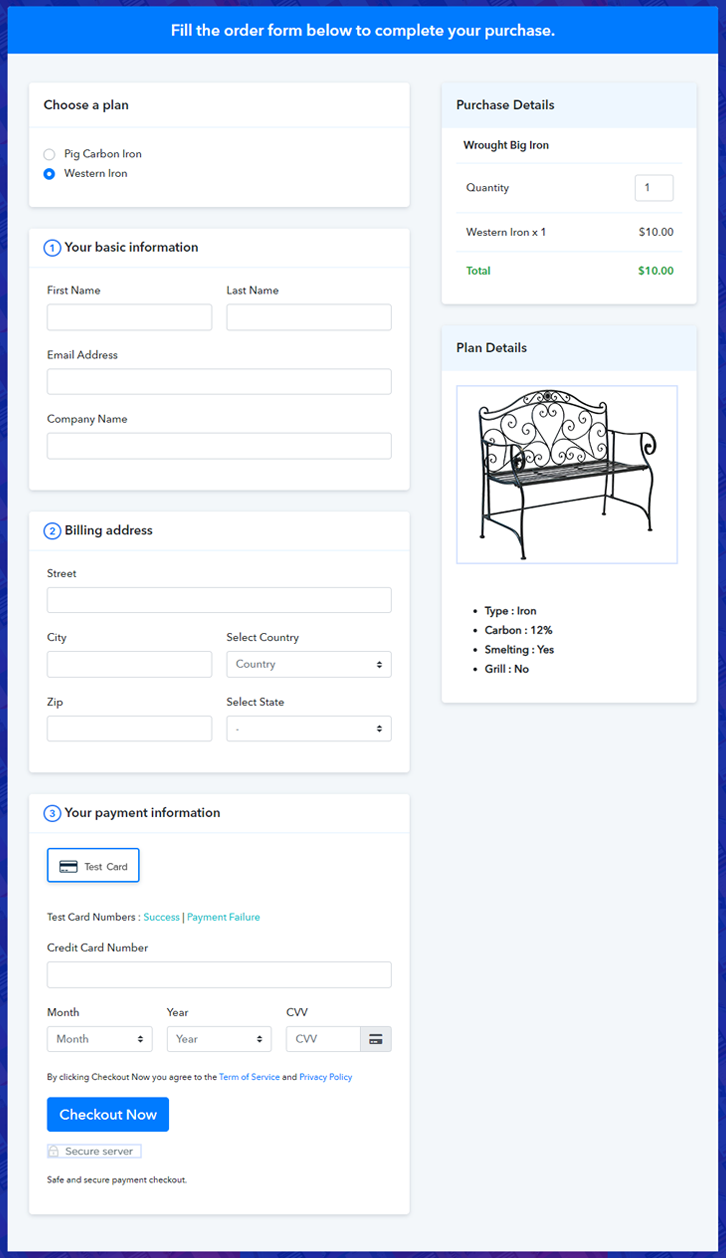
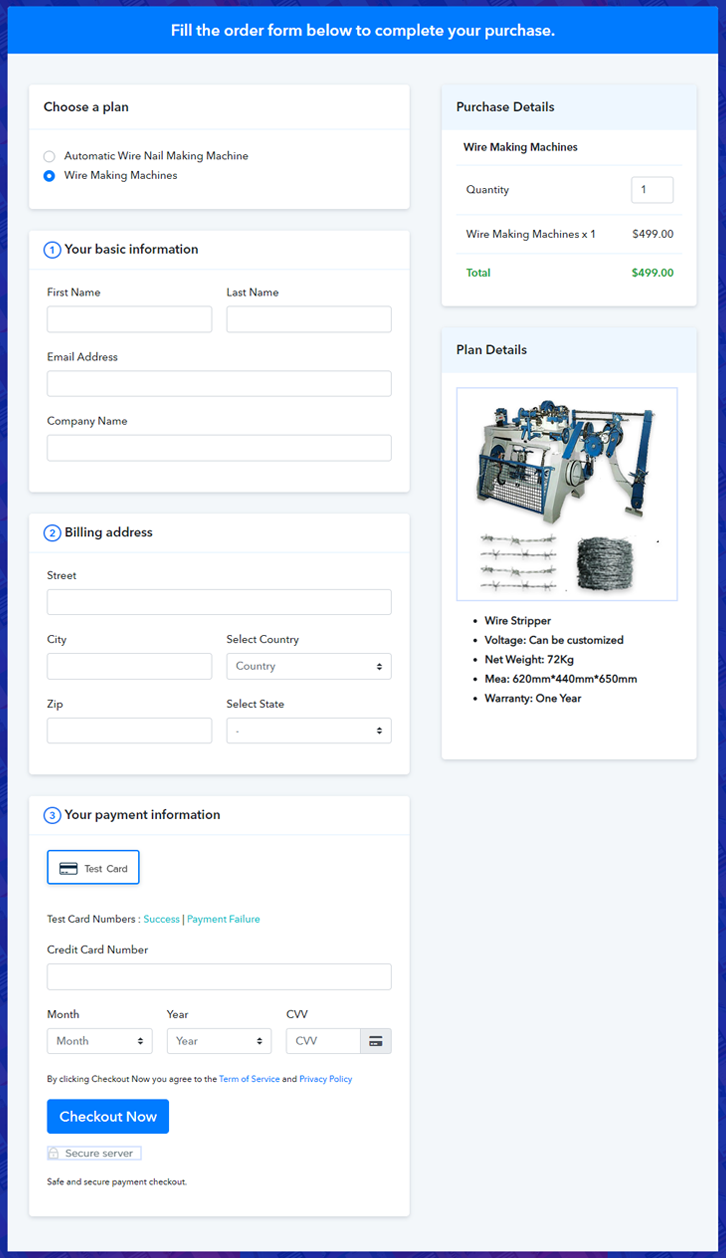
(c) Take a Look at the Checkout Page

Wrapping Up
You May Also Like To Read –