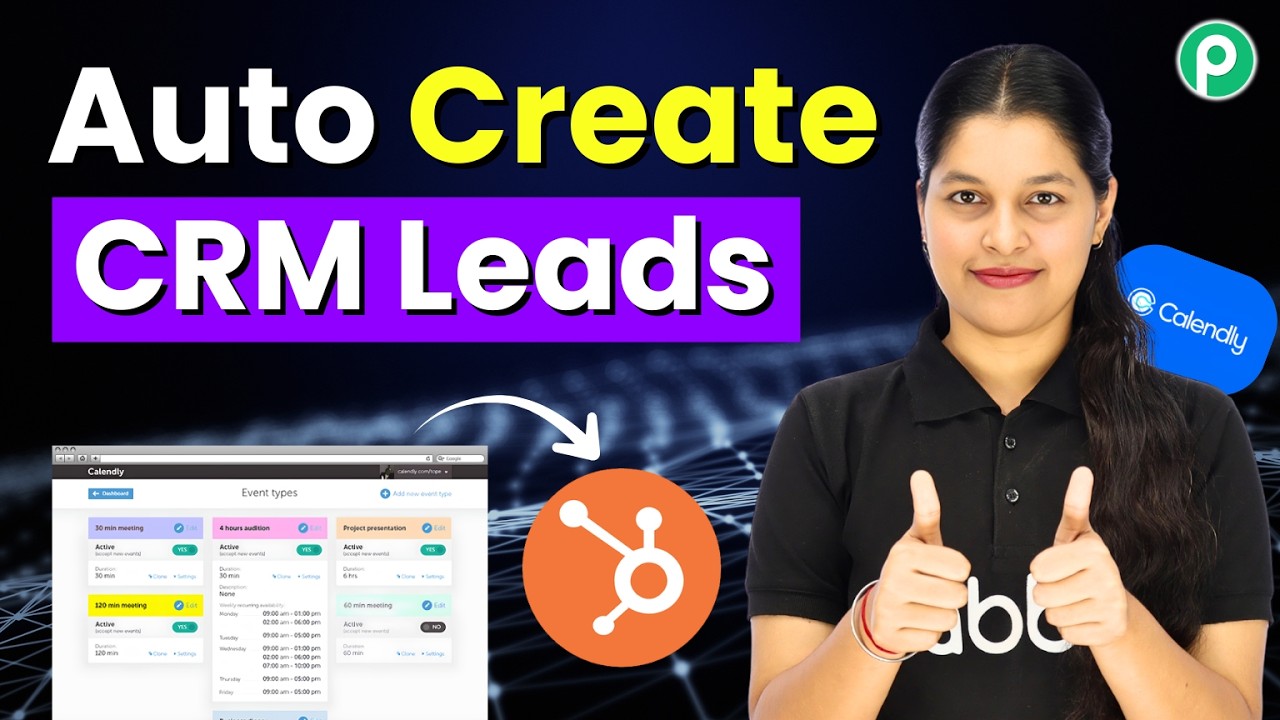
Automatically Create CRM Leads from New Appointments

Watch Step By Step Video Tutorial Below


1. Accessing Pabbly Connect for Integration

To start integrating Calendly with HubSpot, first, access Pabbly Connect by visiting pabbly.com/connect. Once there, you will find options to sign in or sign up for a free account. Signing up gives you 100 free tasks monthly, allowing you to explore the platform.

If you are an existing user, simply click on the sign-in button. Once logged in, you will be directed to the dashboard of Pabbly Connect, where you can create your integration workflow.


2. Creating a New Workflow in Pabbly Connect

To create a new workflow, click on the “Create Workflow” button on the dashboard of Pabbly Connect. This action will guide you to the quick builder, a feature that simplifies the integration process.

  • Select the option to create a workflow using the quick builder.
  • Input the prompt: “Integrate Calendly and HubSpot CRM”.
  • Choose Calendly as the trigger application and select “Invitee Created” as the trigger event.

Next, set HubSpot as the action application and select “Create a Contact” as the action event. This configuration allows Pabbly Connect to automate the lead creation process in HubSpot whenever a new event is scheduled in Calendly.


3. Connecting Calendly and HubSpot in Pabbly Connect

After setting up the workflow, you need to connect the applications. Click on the “Connect” button next to Calendly in Pabbly Connect. This will prompt you to log in to your Calendly account if you haven’t done so already.

Once logged in, select the organization and user associated with your Calendly account. After making these selections, click on “Save and Send Test Request”. This action will initiate a test to check if the connection is successful.

  • Ensure you receive a webhook response indicating a successful connection.
  • If the status shows “Waiting for Webhook Response”, proceed to create a new event in Calendly.

Creating a new event will send the data to Pabbly Connect, allowing you to verify that the integration is functioning correctly.


4. Mapping Data from Calendly to HubSpot

Once you have confirmed the webhook response, you can proceed to map the data from Calendly to HubSpot. Select HubSpot as your action application in Pabbly Connect and click on the “Connect” button to establish the connection.

After connecting, you will see fields for entering the contact details. Instead of manually entering these details, use the mapping feature of Pabbly Connect. This feature allows you to dynamically insert data from the previous step.

  • Map the email address, first name, last name, and phone number from the Calendly response.
  • Click on “Save and Send Test Request” to finalize the mapping.

Upon successful mapping, you will receive a positive response indicating that a contact has been created in HubSpot, demonstrating the effectiveness of Pabbly Connect in automating your lead management process.


5. Verifying Integration Success in HubSpot

To verify that the integration was successful, navigate to your HubSpot CRM and refresh the contacts page. You should see the new lead created based on the event scheduled in Calendly.

This seamless process illustrates how Pabbly Connect enables you to automate lead generation without manual input. Each time an event is booked in Calendly, the lead will automatically be added to HubSpot, enhancing your workflow efficiency.

By using Pabbly Connect, you can easily manage your contacts and improve your business operations. This integration not only saves time but also ensures that no leads are missed.


Conclusion

In conclusion, using Pabbly Connect to integrate Calendly with HubSpot automates the lead management process effectively. This integration allows for seamless data transfer, enhancing your business efficiency.
Turn Any RSS Feed into Instant Notifications

Watch Step By Step Video Tutorial Below


1. Accessing Pabbly Connect for Automation

To start automating your Slack notifications using Pabbly Connect, first, access the platform. If you are an existing user, simply log in to your account. New users can visit pabbl.com/connect to sign up for a free trial, which offers 100 tasks per month.

Once you sign up, you can explore the features of Pabbly Connect and consider upgrading to a paid subscription later. Make sure to utilize the available discount coupon code for your subscription, which is exclusively available for viewers of the accompanying video.


2. Setting Up Your Workflow in Pabbly Connect

After logging into Pabbly Connect, navigate to the workflow builder. This interface is where you will create your automation. To initiate, click on the “Add Trigger” button. For the trigger application, select “RSS by Pabbly” and choose the event “New Item in Feed”.

  • Click on “Connect” to link your RSS feed.
  • Enter the feed URL from your chosen news publisher, such as The Hindu.
  • Set the filter type to default and click “Save and Send Test Request”.

After testing, you will receive the latest news title, link, and publication date. This information will be used to send notifications to your Slack channel using Pabbly Connect.


3. Configuring Slack Action in Pabbly Connect

Next, you need to set up the action in Slack. Click on “Add New Action Step” and search for “Slack”. Select the event “Send Channel Message” and click on “Connect”. If you already have a connection established, select it; otherwise, create a new connection.

To connect Slack, enter the token type as either user or bot. You can find instructions by clicking on the “Learn More” hyperlink in the setup. Make sure your Slack account is logged in to grant necessary permissions to Pabbly Connect.


4. Mapping Data for Slack Notifications

In this step, you will set up the message template for your Slack notifications. Choose the channel where you want to send updates, such as “new updates”. For the message, you can create a template that includes the news title, description, and link.

To ensure your messages are dynamic, map the fields from the previous step:

  • Map the news title, description, and link from the RSS feed.
  • Add static text such as “New Update:” before the dynamic fields.

Once your message is complete, click on “Save and Send Test Request”. Check your Slack channel to confirm that the message was successfully sent. This shows how Pabbly Connect automates notifications seamlessly.


5. Finalizing and Testing Your Integration with Pabbly Connect

After setting up the Slack action, it’s important to finalize your integration. Ensure that the trigger time is set appropriately; you can configure it to check for new updates every 60 minutes.

Test your entire workflow by sending a test notification to ensure everything is functioning correctly. You should see the updates appear in your Slack channel as intended. With Pabbly Connect, you can also automate notifications to other platforms like Google Chat, Discord, or WhatsApp.


Conclusion

In this tutorial, we demonstrated how to automate Slack notifications using Pabbly Connect and RSS feeds. By following the outlined steps, you can ensure instant updates are sent to your Slack channel, enhancing your communication and efficiency.

This Automation Syncs Website Leads to Zoho CRM 🚀

Watch Step By Step Video Tutorial Below


1. Accessing Pabbly Connect for Integration

To start using Pabbly Connect, visit the official website and sign up for a free account. This platform allows for seamless integration between different applications, such as Zoho CRM and your website forms.

Once logged in, you will receive 100 free tasks each month, enabling you to create automations without any coding skills. This is a great way to explore the features of Pabbly Connect before committing to a paid plan.


2. Setting Up the Trigger in Pabbly Connect

In this section, we will set up the trigger using Pabbly Connect. To do this, select the “Gravity Forms New Response” trigger, which will capture submissions from your website form.

  • Open your Gravity Forms account and install the Webhook add-on.
  • Create a new webhook and paste the URL provided by Pabbly Connect.
  • Set the method to POST and format to JSON.

After saving these settings, return to Pabbly Connect and click the “Recapture” button to test the connection. This will ensure that your form submissions are correctly captured by the platform.


3. Creating the Action Step to Sync Data

Now that the trigger is set, we will create the action step to sync the captured data into Zoho CRM using Pabbly Connect. Click on the “Add New Connection” option and select Zoho CRM.

Enter your Zoho CRM domain and grant the necessary permissions. This process is secure, ensuring your data remains safe while integrating with Pabbly Connect.

  • Map the fields from your Gravity Forms submission to the corresponding fields in Zoho CRM.
  • Ensure the first name, last name, email, and phone number are correctly mapped.
  • Click “Save and Send Test Request” to ensure everything is working correctly.

Once you receive a positive response, check your Zoho CRM contacts page to verify that the new lead has been added successfully.


4. Finalizing the Integration with Pabbly Connect

The final step is to ensure that your integration is complete. Whenever a new form submission occurs on your website, Pabbly Connect will automatically add the lead as a contact in Zoho CRM.

This automation saves you time and effort, allowing your team to focus on engaging with leads rather than data entry. You can easily monitor and manage these leads through your Zoho CRM dashboard.

  • Test the entire workflow by submitting a new lead through your website form.
  • Refresh your Zoho CRM contacts page to see the new entry.

This seamless integration demonstrates the power of Pabbly Connect in automating your business processes.


5. Conclusion: Automate Your Lead Management with Pabbly Connect

In conclusion, integrating Pabbly Connect with Zoho CRM allows for effortless lead management. By following the steps outlined in this tutorial, you can automate the addition of new leads directly from your website forms into your CRM.

This setup not only improves efficiency but also ensures that your team can focus on nurturing leads instead of manual data entry. Start leveraging Pabbly Connect today for a more streamlined workflow.

Share New Pinterest Pins on Discord Automatically

Watch Step By Step Video Tutorial Below


1. Accessing Pabbly Connect for Automation

To start automating your Pinterest pins, you need to access Pabbly Connect. Begin by navigating to the Pabbly Connect website by typing in the URL: pabbly.com/connect.

Once you land on the homepage, you will see two options: “Sign In” and “Sign Up Free”. If you are a new user, click on “Sign Up Free” to create an account. Existing users can simply log in.


2. Setting Up Your Workflow in Pabbly Connect

After logging into Pabbly Connect, you will be directed to the workflow page. Here, you can start creating your automation workflow. The first step is to add a trigger.

To set the trigger for your workflow, follow these steps:

  • Click on “Add Trigger”.
  • Select Pinterest as your trigger application.
  • Choose “New Pin” as the trigger event.

Once you have selected your trigger application, click on the “Connect” button to establish a connection to your Pinterest account.


3. Creating a New Pin in Pinterest

Now that your trigger is set, it’s time to create a new pin in Pinterest. This action will initiate the workflow in Pabbly Connect.

To create a new pin, follow these steps:

  • Go to your Pinterest account and click on “Create Pin”.
  • Upload an image and provide a title and description.
  • Click on the “Publish” button to finalize your pin.

After publishing, return to Pabbly Connect and click on “Save and Send Test Request” to fetch the newly created pin details.


4. Notifying Discord About the New Pin

With the new pin created, the next step is to notify your Discord channel. This is where Pabbly Connect makes the integration seamless.

To set up the notification, follow these steps:

  • Select Discord as your action application.
  • Choose “Send Channel Message” as the action event.
  • Enter the Webhook URL from your Discord channel.

After entering the Webhook URL, map the title and description fields from the Pinterest response to make them dynamic. Finally, click on “Save and Send Test Request” to send the notification.


5. Conclusion

By following these steps, you can effectively automate your Pinterest pins using Pabbly Connect. This integration allows you to notify your Discord community about new pins effortlessly. Start using Pabbly Connect today to streamline your automation tasks.

How Gyms Re-Engage Lost Members on WhatsApp (Step-by-Step)

Watch Step By Step Video Tutorial Below


1. Accessing Pabbly Connect for WhatsApp Integration

To start integrating WhatsApp with Pabbly Connect, first, you need to access the platform. Pabbly Connect is essential for automating your communication with past gym members. If you’re a new user, visit the Pabbly website to sign up and create an account.

After signing in, navigate to the Pabbly Connect dashboard. Here, you can manage your integrations and set up workflows. Make sure to have your WhatsApp number ready, as this will be needed for sending messages through Pabbly Connect.


2. Creating a WhatsApp Broadcast Campaign with Pabbly Connect

Once you’re on the Pabbly Connect dashboard, the next step is to create a broadcast campaign for WhatsApp. This feature allows you to send bulk messages to your old gym members effortlessly. Start by clicking on the “Broadcast” feature on the left-hand side of the dashboard.

  • Select the “Add Broadcast” button.
  • Choose “Broadcast Campaign” as the type.
  • Name your broadcast, e.g., “Gym Comeback Offer”.

After naming your broadcast, select the contact list you want to target. This list should contain the phone numbers of your previous members, which you can upload in CSV format through Pabbly Connect.


3. Uploading Contacts to Pabbly Connect

To upload your gym members’ contacts, navigate to the “Contacts” feature in Pabbly Connect. Here, you can add contacts either manually or in bulk through a CSV file. This step is crucial for ensuring that your broadcast reaches the right audience.

Make sure your CSV file is formatted correctly, containing columns for first name, last name, and phone number. The file size should not exceed 50 MB, and you can upload up to 200,000 contacts at once. Once your CSV file is ready, drag and drop it into the designated area in Pabbly Connect.


4. Personalizing Your Broadcast Messages

After uploading your contacts, it’s time to personalize your messages. Pabbly Connect allows you to create dynamic messages by including variables such as the member’s name. This personalization can significantly increase engagement rates.

In the message body, use the dollar symbol followed by the variable name to automatically insert the user’s name. For example, if you write “Hello, $name!”, Pabbly Connect will replace $name with the actual name of each recipient when sending the message.


5. Scheduling Your WhatsApp Broadcast

Once your message is set up, you can schedule your broadcast using Pabbly Connect. Decide whether you want to send it immediately or at a later date. For instance, you can choose to send the message on a specific date and time, ensuring your past members receive it at the right moment.

To schedule, select the desired date and time, then click on the “Add Broadcast” button. This feature allows you to manage your communication effectively without needing to send messages manually.


Conclusion

Integrating WhatsApp with Pabbly Connect allows you to efficiently reconnect with past gym members through personalized broadcast messages. By following the steps outlined, you can automate your outreach and enhance member engagement effectively.

Post New YouTube Videos to Discord Channels Automatically

Watch Step By Step Video Tutorial Below


1. Setting Up Pabbly Connect for YouTube and Discord Integration

To automate posting new YouTube videos to Discord, start by accessing Pabbly Connect. Go to the Pabbly Connect website and log in or sign up for a free account. Once logged in, navigate to the workflow page where you can create your automation.

After reaching the workflow page, you will find options to add a trigger. In this case, the trigger will be YouTube. This setup will allow you to receive notifications every time a new video is uploaded to your YouTube channel. Click on ‘Add New Connection’ to link your YouTube account.


2. Selecting YouTube as the Trigger Application

Once you have set up Pabbly Connect, the next step is to select YouTube as your trigger application. Choose the event as ‘New Video in Channel with Video URL’. This event will ensure that every time you upload a video, it will trigger the next action in your workflow.

  • Select the YouTube app from the list.
  • Choose the event ‘New Video in Channel with Video URL’.
  • Click on ‘Add New Connection’ to connect your YouTube account.

After connecting your YouTube account, you will need to allow Pabbly Connect to access your data. This is crucial for fetching the latest video uploads. Once connected, proceed to the next step where you can set the trigger time for checking new videos.


3. Setting Trigger Time for YouTube Polling

In this section, you will configure the polling interval for YouTube in Pabbly Connect. This is important as it determines how often Pabbly Connect checks for new videos. Right-click on the trigger and select ‘Set Trigger Time’ to adjust this setting.

  • Choose a polling frequency, for example, every 10 minutes.
  • Save the settings to ensure your trigger is active.

With this configuration, Pabbly Connect will automatically check for new videos every 10 minutes, ensuring your Discord channel is updated promptly without manual intervention.


4. Connecting Discord to Send Notifications

Now that you have set up the YouTube trigger, the next step is to connect Discord to send notifications. In Pabbly Connect, add Discord as your action application. Select ‘Send Channel Message (Markdown)’ as your action event.

To connect Discord, you will need a webhook URL. Go to your Discord server, navigate to the channel where you want to send notifications, and create a webhook. Copy this URL and paste it into Pabbly Connect. This will allow Pabbly Connect to send messages directly to your chosen Discord channel.


5. Finalizing the Automation in Pabbly Connect

After connecting Discord, you will need to set up the message that will be sent. In Pabbly Connect, you can customize the message to include the title and URL of the YouTube video that was just uploaded. Use the mapping feature to insert dynamic content from the YouTube trigger.

Once you have set up the message, click on ‘Save and Send Test Request’ to test your automation. If everything is configured correctly, you should receive a notification in your Discord channel stating that a new video has been uploaded, along with the video title and URL.

This setup allows you to automatically notify your audience on Discord whenever you upload a new video, saving you time and effort while increasing your video’s reach.


Conclusion

By following this tutorial, you can effortlessly automate the process of posting new YouTube videos to Discord channels using Pabbly Connect. This integration not only saves time but also enhances audience engagement by keeping them updated on your latest content.

Automatically Capture Leads from Your Website Forms

Watch Step By Step Video Tutorial Below


1. Accessing Pabbly Connect for Lead Capture

To start capturing leads automatically from your website forms, you need to access Pabbly Connect. Simply open a new tab and type ‘pabbly.com/connect’ in your browser’s address bar. This will take you to the Pabbly Connect landing page.

Once on the page, if you are a new user, click on the ‘Sign Up for Free’ button. This will allow you to create an account and access 100 free tasks each month. Existing users should click on the ‘Sign In’ button to access their dashboard.


2. Creating a Workflow in Pabbly Connect

After logging into Pabbly Connect, the next step is to create a workflow. Click on the ‘Create Workflow’ button on your dashboard. This is where you will set up the integration between your website forms and Zoho CRM.

  • Choose a name for your workflow, such as “Connect Typeform with Zoho CRM”.
  • Select the trigger application, which in this case is Typeform.
  • Choose the action application, which is Zoho CRM.

Once you have selected the applications, click on the ‘Approve and Create’ button. This will set up your workflow, allowing you to build the necessary connections.


3. Connecting Typeform to Pabbly Connect

The next step involves connecting Typeform to Pabbly Connect. Click on ‘Add New Connection’ and select ‘Connect with Typeform’. This will prompt you to log in to your Typeform account if you haven’t done so already.

Once logged in, you will need to select the specific form you want to connect. For example, if you have created a lead generation form, choose that form from the list. After selecting the form, click on the ‘Save and Send Test Request’ button to ensure the connection works properly.


4. Connecting Zoho CRM to Pabbly Connect

Now, it’s time to connect Zoho CRM with Pabbly Connect. Click on ‘Add New Connection’ again and select ‘Connect with Zoho CRM’. You will be prompted to enter your Zoho CRM domain, which is typically the part of your URL after “https://” and before “/crm”.

  • Enter your domain and click ‘Paste’.
  • Authorize the connection by logging into your Zoho CRM account.
  • Choose the module name as “Leads” for creating new leads.

After completing these steps, you will be able to map the fields from Typeform to Zoho CRM, ensuring that each lead’s details are automatically transferred.


5. Mapping Fields for Automatic Lead Capture

Mapping fields is a crucial step in the integration process with Pabbly Connect. You will need to map the fields from your Typeform submission to the corresponding fields in Zoho CRM. For instance, map the first name, last name, email, contact number, and city.

To do this, click on the field where you want to input data and use the mapping tool to select the corresponding field from the Typeform response. This ensures that every time a new lead is generated from your website form, the data will be updated automatically in Zoho CRM.

After mapping all the necessary fields, click on the ‘Save and Send Test Request’ button. This will create a new lead in your Zoho CRM account, confirming that the integration is successful.


Conclusion

Using Pabbly Connect, you can effortlessly automate lead capture from your website forms into Zoho CRM. This integration not only saves time but also ensures that all lead details are accurately recorded without manual effort.

How Do I Launch Products Without Hiring a Social Media Manager?

Watch Step By Step Video Tutorial Below


1. Introduction to Automating Product Launch with Pabbly Connect

Launching a product can be overwhelming, especially when it comes to managing social media posts. With Pabbly Connect, you can automate the entire process, saving time and effort.

This tutorial will guide you through integrating Google Sheets with social media platforms using Pabbly Connect. By the end, you will be able to post updates automatically whenever you add new product details.


2. Setting Up Pabbly Connect for Automation

To get started, first, you need to access Pabbly Connect. If you are a new user, visit the Pabbly Connect website and sign up for a free account. Existing users can log in directly to the workflow builder.

  • Go to Pabbly Connect’s website.
  • Sign up or log in to your account.
  • Access the workflow builder.

Once logged in, you can create a new workflow. This workflow will be the core of your automation, allowing you to connect Google Sheets and social media platforms seamlessly using Pabbly Connect.


3. Creating the Workflow in Pabbly Connect

To create your automation, click on the “Add Trigger” button in Pabbly Connect. Select Google Sheets as the trigger application and choose the event as “New or Updated Spreadsheet Row”. This will initiate the workflow whenever a new product detail is added.

Next, connect your Google Sheets account by copying the webhook URL provided by Pabbly Connect into your Google Sheets add-on. Make sure to install the Pabbly Connect Webhooks add-on if you haven’t already. After installation, refresh your spreadsheet and navigate to the Pabbly Connect Webhooks option.

  • Paste the webhook URL in the setup.
  • Specify the trigger column (e.g., column E).
  • Click on “Submit” to finalize the setup.

Your Google Sheets is now connected to Pabbly Connect, ready to send data whenever a new product detail is entered.


4. Generating Content Using AI and Pabbly Connect

After setting up your Google Sheets, the next step is to generate content for your social media posts. For this, you will use an AI tool like Gemini. In your workflow, add a new action step and select Gemini as your application.

You’ll need to connect Gemini to Pabbly Connect by providing the API key. This key can be generated from your Google AI Studio. Once connected, map the product details from your Google Sheets to the content fields in Gemini.

  • Select “Generate Content” as the event.
  • Map the product name, description, and features to the AI prompt.
  • Click “Save and Send Test Request” to generate the content.

This process allows you to create dynamic content tailored to each product launch, leveraging the capabilities of Pabbly Connect and AI.


5. Posting Automatically on Social Media

Once you have generated the content, the final step is to post it on your chosen social media platforms. In your workflow, add another action step and select Facebook as the application. Choose the event “Create Page Photo Post” to publish your content.

Connect your Facebook account to Pabbly Connect and select the appropriate page for posting. Map the generated content and image URL from your previous steps to the respective fields in Facebook.

  • Choose the Facebook page for posting.
  • Map the image URL and caption generated by Gemini.
  • Click “Save and Send Test Request” to publish the post.

Your post will now appear on your Facebook page, showcasing your new product. This automation can also be extended to other platforms like Instagram and LinkedIn, all facilitated through Pabbly Connect.


Conclusion

By following this tutorial, you can automate your product launch process using Pabbly Connect, Google Sheets, and various social media platforms. This integration streamlines your workflow, allowing you to focus on your product rather than manual posting.

With the power of automation at your fingertips, you can efficiently manage your social media presence, ensuring timely updates and engaging content for your audience.

Turn Industry News into LinkedIn Posts Automatically Using AI

Watch Step By Step Video Tutorial Below


1. Accessing Pabbly Connect for Automation

To start automating LinkedIn posts using Pabbly Connect, first, you need to access the platform. Open your browser and type in pabyt.com to visit the Pabbly website. If you are an existing user, simply click on “Sign In” in the top right corner. New users can click on “Sign Up for Free” to create an account and get access to 100 free tasks monthly.

Once logged in, you will see the dashboard displaying all Pabbly applications. Click on Pabbly Connect to access the integration dashboard. Here, you can manage your workflows and folders. If you want to organize your workflows, you can create a new folder by clicking the plus icon. Now, let’s create a new workflow for automating LinkedIn posts.


2. Creating a New Workflow in Pabbly Connect

In this section, we will create a new workflow in Pabbly Connect to automate posting industry news on LinkedIn. Click on the “Create Workflow” button and name your workflow “Turn Industry News into LinkedIn Post Automatically Using AI.” Select the folder you wish to save this workflow in and click on “Create” to proceed.

  • Click on “Create Workflow”.
  • Name your workflow appropriately.
  • Select a folder to organize your workflow.

Once your workflow is created, you will need to set a trigger application. This trigger will start the automation process whenever a new item is received from the RSS feed. In this case, we will select “RSS by Pabbly” as our trigger application.


3. Setting the Trigger Application in Pabbly Connect

Now that we have our workflow set up, let’s configure the trigger application using Pabbly Connect. Choose “RSS by Pabbly” and select the trigger event as “New Item in Feed.” You will need to enter the feed URL from which you want to capture news. For this tutorial, we will use the Times of India RSS feed URL for business news.

After entering the feed URL, select the filter type as default and click on “Save and Send Test Request”. This will allow Pabbly Connect to fetch the latest news from the RSS feed. You should see a response displaying the latest news item, including the title and link.

  • Select “RSS by Pabbly” as your trigger application.
  • Enter the feed URL from Times of India.
  • Click “Save and Send Test Request” to fetch the latest news.

This setup allows Pabbly Connect to check for new items in the feed every 10 minutes, ensuring timely updates for your LinkedIn posts.


4. Integrating OpenAI with Pabbly Connect

Next, we will add an action step to our workflow by integrating OpenAI with Pabbly Connect. Click on “Add New Action Step” and search for OpenAI. Select the action event as “Chat GPT” and click on connect. If you have an existing connection, you can save it, or create a new one by entering your API token.

To obtain the API token, you can create a new secret key in your OpenAI account. Once you have the token, paste it into Pabbly Connect. After connecting, choose the AI model and enter your prompt to generate a LinkedIn post. Make sure to map the title and link of the news from the RSS feed to keep the content dynamic.

  • Add OpenAI as an action step in your workflow.
  • Enter your API token to connect.
  • Map the title and link from the RSS feed in your prompt.

Once everything is set, hit “Save and Send Test Request” to generate the LinkedIn post content. You should receive a positive response with the post details, ready for sharing on LinkedIn.


5. Posting the Generated Content to LinkedIn

Finally, we will post the generated content to LinkedIn using Pabbly Connect. Click on “Add New Action Step” again and search for LinkedIn. Choose the action event as “Share Simple Text” and connect your LinkedIn account. Enter your credentials if prompted to create a new connection.

In the action setup, map the content generated by OpenAI as the post content. Make sure to set the visibility to public before saving and sending the test request. Once completed, you should see the confirmation that the post has been successfully shared on LinkedIn.

  • Add LinkedIn as the final action step in your workflow.
  • Map the content from OpenAI as your LinkedIn post.
  • Set visibility to public and save the request.

With this setup, Pabbly Connect automates the entire process, turning industry news into LinkedIn posts without any manual effort.


Conclusion

This tutorial demonstrated how to automate LinkedIn posts using Pabbly Connect by integrating RSS feeds and OpenAI. By following these steps, you can effortlessly share industry news on LinkedIn, enhancing your online presence.

Create a Business Support WhatsApp AI Assistant with Pabbly Chatflow

Watch Step By Step Video Tutorial Below


1. Accessing Pabbly Connect for Integration

To start integrating Let, API, and Pabi, the first step is to access Pabbly Connect. Navigate to the Pabbly Connect homepage by entering the URL in your browser. Once there, you will see options to either sign in or sign up.

If you are a new user, click on the “Sign Up Free” option. Existing users can simply sign in. After logging in, you will be greeted by the dashboard where you can create your integration workflows.


2. Setting Up the AI Assistant with Pabbly Connect

Creating an AI assistant using Pabbly Connect is straightforward. Begin by selecting the option to create a new workflow. Choose the instruction type as “AI Agent” to set up your assistant.

  • Select the temperature setting for your AI assistant, where 0 is focused and 1 is creative.
  • Enter your OpenAI API key, which can be obtained from the OpenAI API key page.
  • Configure your AI assistant settings, including header and footer messages.

After entering these details, click the “Connect” button to save your settings. This process integrates your AI assistant with Pabbly Connect, allowing it to respond to user queries effectively.


3. Configuring Knowledge Base in Pabbly Connect

Next, you need to manage the knowledge base for your AI assistant through Pabbly Connect. This knowledge base acts as the brain for your assistant, providing it with necessary information to respond to customer queries.

To configure the knowledge base:

  • Upload your business knowledge files by clicking on the “Add New File” option.
  • Select the uploaded files to insert them into your AI assistant.

Once the knowledge base is set up, you can customize your assistant’s interface, including header names and initial messages. This customization allows your AI assistant to align with your brand while responding to queries through Pabbly Connect.


4. Enabling AI Assistant for Customer Queries

After configuring your AI assistant, the next step is to enable it for customer interactions using Pabbly Connect. Go to the settings section and select “Inbox Settings” to enable the assistant for all contacts or specific chats.

Follow these steps to enable the assistant:

  • Scroll to the option for enabling the assistant and toggle it on.
  • Choose the contact list for which you want to enable the assistant.

Once enabled, your AI assistant will automatically respond to customer messages, providing instant support without the need for manual interaction. This feature enhances customer satisfaction and streamlines support processes through Pabbly Connect.


5. Embedding Your AI Assistant on Your Website

To maximize the reach of your AI assistant, you can embed it on your website using Pabbly Connect. After creating and enabling the assistant, find the “Embed” option to get the script code.

Follow these steps to embed your assistant:

  • Copy the provided script code.
  • Paste this code into the HTML of your website.

This integration allows your AI assistant to operate directly on your website, providing seamless support to visitors. By utilizing Pabbly Connect, you can enhance customer engagement and streamline your support operations.


Conclusion

In this tutorial, we explored how to integrate Let, API, and Pabi using Pabbly Connect. By following these steps, you can create an AI assistant that automates customer support, improving efficiency and customer satisfaction.