Write Daily Video Scripts Automatically with AI

Watch Step By Step Video Tutorial Below


1. Accessing Pabbly Connect for Automation

To start integrating applications like Gemini and Google Docs, you need to access Pabbly Connect. Open your browser and navigate to pabbly.com/connect. This is where you can sign up or log in to your existing account.

If you’re new, click on ‘sign up for free’ to receive 100 free tasks each month. Existing users can simply sign in. Once logged in, select the option to access Pabbly Connect and navigate to the dashboard to begin creating workflows.


2. Creating a New Workflow in Pabbly Connect

After accessing Pabbly Connect, you will need to create a new workflow. Click on ‘Create from Scratch’ to start building your automation. This workflow will connect your AI tool, Gemini, with Google Docs.

  • Select the ‘Schedule’ trigger to set when the workflow should run.
  • Choose your desired days for the automation to trigger.
  • Set the time for execution, such as 10:00 AM.

Once configured, click ‘Save’ to finalize your trigger settings. You will see a confirmation message indicating that the trigger has been successfully set up in Pabbly Connect.


3. Generating Video Scripts Using Gemini

Next, you will configure Pabbly Connect to generate video scripts using Gemini. This involves connecting to your AI tool and setting up the necessary API key. Click on ‘Build New Connection’ and follow the prompts to enter your API key.

Once connected, provide a relevant prompt for Gemini to generate the video script. Make sure to select the appropriate model and method for content generation. Click ‘Save and Send Test Request’ to ensure everything is working correctly.


4. Creating a Google Doc for the Video Script

After generating the video script, the next step is to create a new document in Google Docs. In Pabbly Connect, click on ‘Build New Connection’ to link your Google account.

  • Select your Google account and grant access to Pabbly Connect.
  • Specify the document name, such as ‘Video Script for [Date]’.
  • Use the Date Time Formatter to automatically add the current date.

After creating the document, you will receive a confirmation indicating that the new Google Doc has been successfully created.


5. Adding the Generated Script to Google Docs

The final step is to insert the generated video script into the newly created Google Doc. In Pabbly Connect, select the previously connected Google Docs account to add the script.

Map the document ID received from the previous steps and insert the generated script text. Click ‘Save and Send Test Request’ to finalize this action. A successful response will confirm that the video script has been added to your Google Doc.


Conclusion

In this tutorial, we explored how to automate video script creation using Pabbly Connect, Gemini, and Google Docs. By following these steps, you can streamline your content creation process effectively.
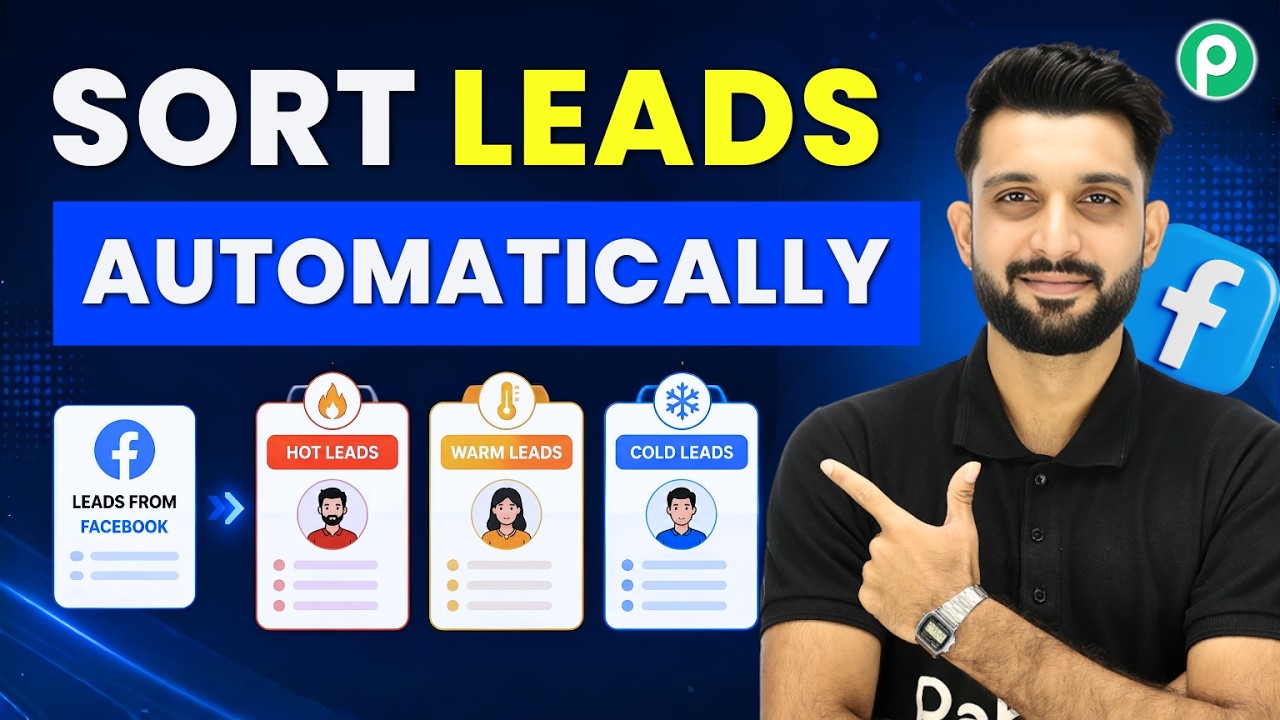
Automatically Separate Hot, Warm & Cold Leads Using Pabbly Connect

Watch Step By Step Video Tutorial Below


1. Accessing Pabbly Connect for Lead Management

To start categorizing leads as hot, warm, or cold, you first need to access Pabbly Connect. Go to the Pabbly website and sign up for an account if you are a new user, or log in if you already have an account.

Once logged in, navigate to the dashboard, where you can create a new workflow. This is where you will set up the automation to connect your lead sources with Zo CRM through Pabbly Connect.


2. Setting Up the Workflow in Pabbly Connect

In this section, you will create a workflow that triggers when a new lead is generated from Facebook. Use the quick workflow builder in Pabbly Connect to set up this automation.

  • Click on “Create Workflow”.
  • Enter a name for your workflow, such as “Connect Facebook Leads to Zo CRM”.
  • Choose “Facebook Lead Ads” as the trigger app and select “New Lead” as the trigger event.

After setting the trigger, connect your Facebook account to Pabbly Connect. You will need to authorize the connection, allowing Pabbly Connect to access your Facebook leads.


3. Configuring Zo CRM Integration

Next, you will set up the action in Zo CRM where the leads will be sent. Choose “Zo CRM” as the action app and select “Create Lead” as the action event. This is crucial for categorizing your leads based on their status.

Map the fields from your Facebook lead to the respective fields in Zo CRM. Ensure that you include:

  • Lead Name
  • Email Address
  • Contact Number

Once the fields are mapped, you can set conditions to categorize leads as hot, warm, or cold based on their responses in the lead form. This is where Pabbly Connect plays a vital role in automating the process.


4. Categorizing Leads Using Pabbly Connect

Now that your workflow is set up, it’s time to categorize the leads based on their urgency. Create filters in Pabbly Connect to determine if a lead is hot, warm, or cold.

For example, if a lead indicates they want to purchase within three months, they should be categorized as a hot lead. Use the router feature in Pabbly Connect to create multiple paths based on these conditions:

  • If the purchase time is within 3 months, tag as Hot Lead.
  • If the purchase time is within 6 months, tag as Warm Lead.
  • If the lead is just exploring, tag as Cold Lead.

By implementing these filters, Pabbly Connect ensures that your sales team can prioritize leads effectively, improving conversion rates.


5. Testing the Integration

After setting up the workflow and categorization, it’s essential to test the integration. Submit a test lead through your Facebook lead ad and monitor how it flows into Zo CRM.

Check if the lead is categorized correctly based on your conditions. If everything works as expected, you will see the lead appear in Zo CRM with the correct status. This testing phase is crucial to ensure Pabbly Connect is functioning correctly.

Make sure to refresh your Zo CRM account after submitting the test lead to see the updates. This will confirm that Pabbly Connect is successfully integrating your leads and categorizing them as intended.


Conclusion

In this tutorial, we explored how to automatically separate hot, warm, and cold leads using Pabbly Connect with Zo CRM and Facebook integration. By utilizing Pabbly Connect, you can streamline your lead management process, ensuring timely follow-ups and improved customer conversion.

Every New Lead Added to Google Sheets Automatically

Watch Step By Step Video Tutorial Below


1. Accessing Pabbly Connect for Integration

To automate the process of adding new leads to Google Sheets, you need to access Pabbly Connect. Start by navigating to the Pabbly Connect dashboard by entering its URL in your browser. Once on the homepage, you will see options to either sign in or sign up for free.

If you’re a new user, click on the “Sign Up Free” button to create an account. Pabbly Connect offers 100 free tasks per month, allowing you to explore its features without any cost. Existing users can simply log in to their accounts.


2. Creating a New Workflow in Pabbly Connect

After logging into Pabbly Connect, you’ll need to create a new workflow. Click the “Create Workflow” button on your dashboard. This will allow you to set up the automation between Typeform and Google Sheets.

  • Select “Quick Builder” for an easy setup.
  • Enter the prompt: “Integrate Typeform with Google Sheets”.
  • Choose Typeform as the trigger app and select “New Entry”.
  • Select Google Sheets as the action app and choose “Add New Row”.

Once you’ve set this up, click on “Approve” to finalize your workflow settings. This integration will allow every new lead captured in Typeform to be automatically added to your Google Sheets.


3. Connecting Typeform to Pabbly Connect

In this step, you will connect your Typeform account to Pabbly Connect. Click on the “Add New Connection” button to establish the link between the two applications. You will be prompted to log in to your Typeform account and grant the necessary permissions.

Once connected, select the specific form you want to use for capturing leads. For this tutorial, we will use the “Lead Generation Form”. Make sure to set the response format to “Simple” and then click on “Save and Send Test Request”.

At this point, Pabbly Connect will be waiting for a webhook response from your Typeform. You can test this by submitting a new entry in your Typeform to ensure the connection is successful.


4. Mapping Data from Typeform to Google Sheets

Now that you have successfully connected Typeform, it’s time to map the data to Google Sheets using Pabbly Connect. After receiving the webhook response, you will need to connect to Google Sheets by selecting the “Add New Connection” option again.

  • Log in to your Google account and authorize access.
  • Select your spreadsheet titled “Typeform Lead Records”.
  • Map the fields from Typeform to corresponding columns in Google Sheets.

This mapping process allows you to dynamically insert data from Typeform into Google Sheets without manual entry for each new lead. After mapping, click on “Save and Send Test Request” to verify that the data is being saved correctly.


5. Verifying the Integration and Conclusion

After completing the mapping process, it’s crucial to verify that the integration works seamlessly. Go back to your Google Sheet and check if the new lead details have been added automatically. You should see all the information you entered in Typeform reflected in your Google Sheet.

This entire process showcases how Pabbly Connect automates the addition of new leads to Google Sheets. No coding or technical skills are required, making it accessible for everyone.

Now you can automate your lead management process effortlessly. Start using Pabbly Connect today to enhance your business efficiency!


In this tutorial, we demonstrated how to use Pabbly Connect to automatically add new leads to Google Sheets. With simple steps and no coding required, you can streamline your lead management process effectively.

Meet Pabbly Email Marketing: The Best Email Marketing Tool 🤯

Watch Step By Step Video Tutorial Below


1. Accessing Pabbly Email Marketing

Pabbly Email Marketing is the best email marketing tool to help you manage your email campaigns effectively. To get started, log into your Pabbly Email Marketing account. Once logged in, you will be greeted by a user-friendly dashboard.

This dashboard allows you to manage subscribers, track campaigns, and analyze performance. Here, you can add new businesses and view existing ones, including details about your subscriber count and campaign statistics.


2. Creating Email Campaigns with Pabbly Email Marketing

Creating email campaigns is simple with Pabbly Email Marketing. Navigate to the “Email Campaigns” section on the dashboard. Here, you can see all your campaigns, including drafts and sent emails.

  • Click on “Create Campaign” to start a new email.
  • Choose a template or start from scratch.
  • Add your subject line and content.

Once your campaign is set up, you can manage and track its performance directly from this section. Pabbly Email Marketing provides a comprehensive overview of campaign status, allowing you to see what works best for your audience.


3. Managing Subscribers in Pabbly Email Marketing

Effective subscriber management is crucial for successful email marketing. In Pabbly Email Marketing, go to the “Subscribers” section to view and manage your subscriber lists. Here, you can create new lists and segment your audience based on various criteria.

  • Create custom fields to capture additional subscriber information.
  • Utilize tags to categorize your subscribers for targeted campaigns.
  • Monitor subscriber activity to understand engagement levels.

Pabbly Email Marketing makes it easy to see subscriber engagement and adjust your strategies accordingly. This ensures that your campaigns are reaching the right audience effectively.


4. Analyzing Campaign Performance with Pabbly Email Marketing

Analytics is a key feature of Pabbly Email Marketing that allows you to assess the performance of your campaigns. In the “Analytics” section, you can view detailed reports on sent emails, open rates, and click-through rates.

Utilize this data to refine your email marketing strategies. You can see which campaigns performed well and which need improvement, helping you make informed decisions for future campaigns.

With Pabbly Email Marketing, you can track metrics such as:

  • Total emails sent
  • Open rates
  • Click rates

This comprehensive analysis allows you to enhance your email marketing efforts, ensuring better engagement and higher conversion rates.


5. Setting Up Automated Workflows in Pabbly Email Marketing

Automation is a powerful feature of Pabbly Email Marketing that helps streamline your email marketing efforts. In the “Workflows” section, you can create automated email sequences based on subscriber behavior.

To set up a workflow, follow these steps:

  • Select “Create Workflow” and choose your trigger event.
  • Define the actions that should follow the trigger.
  • Test your workflow to ensure it functions as intended.

Pabbly Email Marketing’s automated workflows save you time and allow for personalized communication with your subscribers, enhancing their experience and engagement with your brand.


Conclusion

Pabbly Email Marketing is the best email marketing tool for managing campaigns and subscribers effectively. By utilizing its features, you can create targeted campaigns, analyze performance, and automate workflows to enhance your marketing strategy.

Convert More Leads with Instant Landing Page to Salesflare CRM Sync

Watch Step By Step Video Tutorial Below


1. Accessing Pabbly Connect to Start Your Integration

To begin your integration, access Pabbly Connect by visiting pabbly.com. Here, you can sign up for a free account or log in if you’re an existing user. This platform is essential for automating your workflows between applications.

Once logged in, navigate to the Pabbly Connect dashboard. This is where you can create and manage your workflows. Click on ‘Create Workflow’ to start setting up your integration. You can name your workflow something like “Lead Capture from Website Form to Salesflare” to keep it organized.


2. Setting Up the Trigger for Your Workflow

In this section, you will set up the trigger that initiates your workflow. The trigger in Pabbly Connect is an event that starts the automation process. For this integration, select “Webhook by Pabbly” as your trigger application.

  • Choose “Catch Webhook” as the trigger event.
  • Click on ‘Connect’ to establish the connection.
  • Copy the provided Webhook URL.

Next, you will need to add this Webhook URL to your website form’s code. This allows Pabbly Connect to capture lead data whenever a form submission occurs. Save the changes in your form code to complete this step.


3. Testing the Trigger with a Form Submission

After setting up the Webhook, it’s time to test whether the connection works. Go back to your website form and perform a test submission with dummy data. This step is crucial to ensure that Pabbly Connect is receiving the data correctly.

After submitting the form, return to the Pabbly Connect dashboard and refresh the page. You should see the captured data displayed, confirming that the Webhook integration is functioning as intended. This feedback loop is vital for verifying that your automation setup is correct.


4. Adding Action Steps to Create a Contact in Salesflare

Now that your trigger is successfully set up, the next step is to add an action to create a contact in Salesflare. In Pabbly Connect, click on “Add New Action Step” and select “Salesflare” as the action application.

  • Choose “Create a Contact” as the action event.
  • Connect your Salesflare account by entering your API key.
  • Map the fields from the Webhook response to the Salesflare contact fields.

By mapping the fields, you ensure that the data from your form submission is accurately transferred to Salesflare. This automation saves time and reduces the risk of errors in manual data entry.


5. Finalizing Your Integration and Testing

With the action step configured, it’s time to finalize your integration. Review all mappings to ensure accuracy. Once confirmed, click “Save and Send Test Request” to check if the contact is created successfully in Salesflare.

After the test request, check your Salesflare account to see if the new contact appears. This step verifies that your integration works seamlessly, allowing you to automatically add leads captured from your website form.

By using Pabbly Connect, you can create multiple automations like this, enhancing your workflow efficiency. If you have any questions, feel free to reach out for support.


Conclusion

In this tutorial, we demonstrated how to integrate your website form with Salesflare using Pabbly Connect. This automation allows you to capture leads efficiently, enhancing your business workflow.

How Do I Reply to Customers 24/7 Without Hiring More Support Agents?

Watch Step By Step Video Tutorial Below


1. Introduction to Pabbly Connect for Customer Support

Pabbly Connect is an essential platform for automating customer interactions. In this tutorial, we will explore how to use Pabbly Connect to create a WhatsApp AI bot that can respond to customer queries 24/7. This integration allows businesses to efficiently manage customer inquiries without the need for hiring additional support agents.

By utilizing Pabbly Connect, you can streamline your customer support process significantly. The automation not only saves time but also enhances customer satisfaction as responses are instant and accurate.


2. Setting Up Pabbly Chatflow for WhatsApp Integration

To begin, access your Pabbly account and navigate to the Pabbly Chatflow dashboard. Here, you can create a WhatsApp AI assistant that will handle customer queries automatically. Start by signing up for Pabbly Chatflow if you haven’t already, and utilize the free credits provided for testing.

  • Log into Pabbly Chatflow and create your AI assistant.
  • Select the AI instructions and customize them based on your business needs.
  • Make sure to configure the AI model settings appropriately.

Once the setup is complete, your assistant will be ready to respond to inquiries. This process showcases how Pabbly Connect enables seamless integration with WhatsApp, allowing your AI assistant to function effectively.


3. Configuring AI Instructions in Pabbly Connect

After creating your assistant, the next step is to configure the AI instructions. This is crucial as it defines how the AI will respond to various customer queries. In this section, you will select the instruction type and customize the responses.

For optimal performance, adjust the AI temperature settings to balance between focused and creative replies. A temperature setting of 0.5 is recommended for general inquiries. Ensure to select OpenAI as your AI provider and input your API key for connectivity.

  • Access the AI configuration settings in Pabbly Chatflow.
  • Set the temperature and select the AI model (e.g., GPT-3.5).
  • Paste your OpenAI API key to enable the assistant.

By following these steps, you ensure that your AI assistant is well-equipped to handle customer queries effectively. This highlights the role of Pabbly Connect in integrating AI functionalities into your customer service framework.


4. Establishing a Knowledge Base for Your AI Assistant

A crucial aspect of your AI assistant is the knowledge base. This is where you provide the necessary information about your business, including products, services, and policies. Properly training your AI assistant will lead to better responses to customer inquiries.

To create a knowledge base, upload relevant documents through the Pabbly Chatflow interface. This will allow the AI to access the necessary information when responding to queries. Make sure to verify the successful upload of the knowledge base.

  • Upload your knowledge base using the ‘Add File’ button in Pabbly Chatflow.
  • Ensure that the vector ID appears to confirm a successful upload.
  • Train your AI with specific data about your business.

This comprehensive setup ensures that your AI assistant is well-informed and capable of providing accurate responses, showcasing how Pabbly Connect facilitates the development of a robust customer support system.


5. Activating AI Auto Replies on WhatsApp

The final step is to enable AI auto replies on WhatsApp. Navigate to the inbox settings within Pabbly Chatflow and toggle the option for enabling AI auto replies. This feature allows your assistant to respond to customers automatically, enhancing the efficiency of your support system.

Select the contact list you want to assign the assistant to and save your settings. This ensures that all inquiries from selected contacts will be handled by your AI assistant without manual intervention.

  • Go to the inbox settings in Pabbly Chatflow.
  • Toggle the ‘Enable AI Auto Replies’ option.
  • Select the assistant from the dropdown and save the rule.

With these settings activated, your AI assistant is now fully operational and ready to assist customers around the clock, highlighting the power of Pabbly Connect in automating customer service tasks.


Conclusion

In conclusion, using Pabbly Connect allows businesses to automate customer responses on WhatsApp effectively. This tutorial has guided you through the steps to create an AI assistant that can handle inquiries 24/7 without hiring additional support agents. By implementing these strategies, you can enhance customer satisfaction and streamline your support process.

Automatically Follow Up with MagicBricks Leads

Watch Step By Step Video Tutorial Below


1. Accessing Pabbly Connect for Integration

To begin automating WhatsApp messages for your real estate leads, you need to access Pabbly Connect. Open a new tab in your browser and type in pabb.com/connect. Press Enter to go to the Pabbly Connect landing page.

If you are a new user, click on the “Sign Up for Free” button to create an account. This allows you to access 100 free tasks every month for automation. Existing users should click on the “Sign In” button to enter their accounts.


2. Creating a Workflow in Pabbly Connect

Once you are logged into Pabbly Connect, you will be directed to the dashboard. Here, you can create a new workflow by clicking on the “Create Workflow” button. This allows you to set up the integration needed for sending WhatsApp messages.

  • Select the “Magic Bricks” application as your trigger.
  • Choose the event that will trigger the message, such as a new lead entry.
  • Configure the necessary fields for the trigger.

After setting up the trigger, proceed to add the action step where you will connect to WhatsApp using Pabbly Connect. This allows you to automate the message sending process based on the new lead data captured from Magic Bricks.


3. Connecting WhatsApp Using Pabbly Connect

Next, you will connect WhatsApp to your workflow in Pabbly Connect. For this, you need to add a new connection to WhatsApp. Click on the “Add New Connection” button and follow the prompts to link your WhatsApp account.

You will need your WhatsApp API token, which can be obtained from your Pabbly Chatflow account. Navigate to your Chatflow settings, select API and Webhooks, and copy the API token provided there.

  • Paste the API token into the designated field in Pabbly Connect.
  • Map the phone number field from the Magic Bricks lead data to the WhatsApp message recipient.
  • Select the message template you wish to send to the lead.

By connecting WhatsApp through Pabbly Connect, you ensure that messages are sent automatically as soon as a new lead is captured, streamlining your follow-up process.


4. Sending Messages to Leads via WhatsApp

After setting up the connection, you can automate sending WhatsApp messages to your leads. With Pabbly Connect, you can create a message template that includes dynamic variables, such as the lead’s name.

Once your message template is ready, configure the body parameters to include these variables. This ensures that each lead receives a personalized message, enhancing engagement.

  • Test the message sending by clicking “Save and Send Test Request”.
  • Check the WhatsApp account to confirm receipt of the message.
  • Repeat the process for additional follow-up messages.

This feature allows you to maintain communication with your leads effectively, ensuring that they receive timely reminders for property visits or any other necessary follow-ups.


5. Setting Up Follow-Up Reminders in Pabbly Connect

To further enhance your lead management, you can set up follow-up reminders using Pabbly Connect. After sending the initial message, add a delay step to wait for a specified time before sending another reminder.

Choose the delay duration based on your follow-up strategy. For example, you can set a delay of 1 day before sending the next reminder message. This can be done by selecting the “Add Delay” option in Pabbly Connect.

  • Select the duration for the delay (e.g., 1 day).
  • Add another action to send the follow-up message after the delay.
  • Map the necessary fields again for the follow-up message.

This automation ensures that your leads are consistently engaged, increasing the likelihood of conversion and improving overall customer satisfaction.


Conclusion

Using Pabbly Connect to automate WhatsApp messages for your real estate leads is a powerful way to enhance your follow-up strategy. By streamlining the process, you can ensure timely communication and increase engagement with potential clients.

Automate Sales on WhatsApp with AI

Watch Step By Step Video Tutorial Below


1. Accessing Pabbly Connect for Integration

To begin integrating WhatsApp with Pabbly Connect, first access the Pabbly Connect platform. Navigate to the Pabbly website and sign up for a free account or log in if you are an existing user. This step is crucial as Pabbly Connect serves as the central hub for all integrations.

Once logged in, you will be directed to the Pabbly Connect dashboard. From here, you can manage your integrations and workflows. Make sure to explore the features of Pabbly Connect to understand how it can streamline your business operations.


2. Creating a WhatsApp AI Chatbot Using Pabbly Connect

Next, you will create a WhatsApp AI chatbot to respond to customer queries. In the Pabbly Connect dashboard, locate the option for creating a new assistant. Click on the ‘Add’ button and provide a name for your assistant. This assistant will utilize the capabilities of Pabbly Connect to automate responses effectively.

  • Select the instruction type from the dropdown menu.
  • Choose a predefined example like ‘Sales Agent’.
  • Configure AI settings such as temperature and model selection.

After setting up the assistant, click on the ‘Save’ button to finalize the creation. This process demonstrates how Pabbly Connect enables businesses to automate interactions on WhatsApp seamlessly.


3. Configuring Assistant Settings in Pabbly Connect

In this section, you will configure the assistant’s settings. Access the assistant settings to customize the header and footer messages that will be displayed during conversations. This is essential for branding and customer engagement.

  • Add a header message of up to 60 characters.
  • Specify stop keywords that will halt the assistant’s responses.
  • Set fallback messages for API failures.

These configurations enhance the user experience and ensure that your WhatsApp AI chatbot is effective. Utilizing Pabbly Connect in this manner allows for tailored communication with your customers.


4. Assigning the Assistant to WhatsApp Chats Using Pabbly Connect

Once your assistant is configured, the next step is to assign it to your WhatsApp chats. Navigate to the inbox settings in Pabbly Connect. Here you can enable auto-reply features for your WhatsApp contacts.

  • Select the contact list from the dropdown.
  • Assign the assistant you created to this list.
  • Click on the ‘Save’ button to apply the changes.

This assignment ensures that your WhatsApp AI chatbot can respond to customer inquiries automatically, showcasing the power of Pabbly Connect in enhancing customer service.


5. Finalizing and Activating Your WhatsApp Assistant

Finally, to activate your WhatsApp assistant, ensure that all settings are correctly configured. Click on the activation button to enable the assistant for your WhatsApp chats. This step is crucial for making your AI chatbot operational.

By following these steps, you can effectively automate your sales process on WhatsApp using Pabbly Connect. This integration not only saves time but also improves customer satisfaction by providing instant responses to inquiries.


Conclusion

Integrating WhatsApp with Pabbly Connect enables businesses to automate customer interactions efficiently. By following the outlined steps, you can create a responsive WhatsApp AI chatbot that enhances your sales process and improves customer engagement.

Organize Google Ads Leads Automatically in Airtable

Watch Step By Step Video Tutorial Below


1. Accessing Pabbly Connect for Integration

To start integrating Google Ads with Airtable, the first step is to access Pabbly Connect. Simply visit the Pabbly website by typing pabby.com in your browser. Once there, you can either sign in if you are an existing user or sign up for free to get started.

After signing in, you will be directed to the Pabbly dashboard where you can find all your applications. Select Pabbly Connect to begin creating your workflow. This platform will enable you to automate the lead capturing process seamlessly.


2. Creating a New Workflow in Pabbly Connect

Once you are in Pabbly Connect, click on the “Create Workflow” button to initiate a new project. You should name your workflow something like “Organize Google Ads Leads Automatically in Airtable”. Select the appropriate folder for your workflow and click on “Create”.

After creating the workflow, you will see a prompt to set up a trigger application. This is crucial as it determines when your automation will start. In this case, you will select Google Ads as your trigger application and choose the event “New Lead Form Entry”.


3. Connecting Google Ads to Pabbly Connect

To connect Google Ads with Pabbly Connect, you will need a webhook URL that acts as a bridge between the two platforms. Once you select Google Ads as your trigger, a webhook URL will be generated. Copy this URL and head over to your Google Ads account.

  • Open your Google Ads account and navigate to your lead form.
  • Locate the lead delivery section where you can input the webhook URL.
  • Paste the copied webhook URL and send a test lead to verify the connection.

After sending the test data, return to Pabbly Connect to check if the webhook response has been received. This confirms that the integration setup is functioning correctly.


4. Adding Action Steps to Capture Leads in Airtable

With the Google Ads integration confirmed, it’s time to add an action step in Pabbly Connect. Click on “Add New Action Step” and search for Airtable. Select the action event “Create Record” and click on “Connect”.

If you don’t have an existing connection, create a new one by granting access to your Airtable account. Once connected, you will need to select the base where you want to store your Google Ads leads. Make sure to refresh the base list to see your available options.


5. Mapping Lead Details from Google Ads to Airtable

In this step, you will map the lead details from Google Ads to Airtable using Pabbly Connect. This is crucial for ensuring that each new lead is captured correctly in your database. You will see fields for first name, last name, email, phone, and city from the Google Ads lead form.

  • Map the first name from Google Ads to the corresponding field in Airtable.
  • Continue mapping last name, email, phone, and city accordingly.
  • Hit “Save” and send a test request to ensure all details are captured accurately.

After refreshing your Airtable database, you should see the new lead details added successfully. This confirms that your integration between Google Ads and Airtable via Pabbly Connect is working as intended.


Conclusion

This tutorial has shown you how to effectively integrate Google Ads with Airtable using Pabbly Connect. By following these steps, you can automate your lead capturing process and ensure that every new lead is tracked efficiently.

Bulk WhatsApp Campaigns for Real Estate Leads

Watch Step By Step Video Tutorial Below


1. Accessing Pabbly Connect for WhatsApp Integration

To start integrating WhatsApp with Google Sheets, first, you need to access Pabbly Connect. Open your browser and search for Pabbly.com. This will take you to the Pabbly homepage.

If you are a new user, click on “Sign Up for Free” to create an account. Existing users can simply sign in. Once logged in, navigate to the Pabbly Connect dashboard to begin the integration process.


2. Setting Up WhatsApp Broadcast with Pabbly Connect

Once you are in the Pabbly Connect dashboard, you can set up a WhatsApp broadcast. To do this, select “Pabbly Chatflow” from the applications listed. Here, you can see options to connect your WhatsApp number.

  • Click on “Access Now” to go to the Chatflow dashboard.
  • If you haven’t connected your WhatsApp number yet, follow the provided tutorial to do so.
  • Once connected, you can start creating your broadcast campaign.

With your WhatsApp account connected, you can now access the broadcast feature. This allows you to send messages to multiple contacts at once, significantly saving time.


3. Creating a Message Template for WhatsApp

Before sending a broadcast, you need to create a message template in Pabbly Connect. Navigate to the templates section and create a new template for your WhatsApp message. This template should include dynamic variables for personalization.

For example, you might create a template named “New Property Launch” that includes placeholders for names or property details. Once your template is ready, ensure it is approved by Meta before using it.


4. Scheduling Your WhatsApp Broadcast Campaign

After creating your message template, you can schedule your WhatsApp broadcast campaign. In the broadcast section, click the “Add” button to create a new broadcast campaign.

  • Select the type of broadcast campaign.
  • Give your broadcast a name, such as “New Property Launch”.
  • Choose the contact list from Google Sheets for sending messages.

After selecting your contacts, you can choose to send the message immediately or schedule it for a later date and time. This flexibility allows you to reach your audience at the right moment.


5. Testing and Launching Your WhatsApp Broadcast

Before launching your broadcast, it’s essential to test it. You can send a test message to your WhatsApp number to ensure everything is functioning correctly. Click on the “Send Test Message” button and check your WhatsApp for the received message.

If the test is successful, you can proceed to schedule or send your broadcast. Monitor the broadcast stats to track delivery rates and engagement. This will help you refine future campaigns using Pabbly Connect.


Conclusion

Integrating WhatsApp with Google Sheets using Pabbly Connect streamlines your communication process. By following these steps, you can efficiently manage your broadcasts and keep your leads informed about new properties. This integration not only saves time but also enhances your marketing efforts significantly.