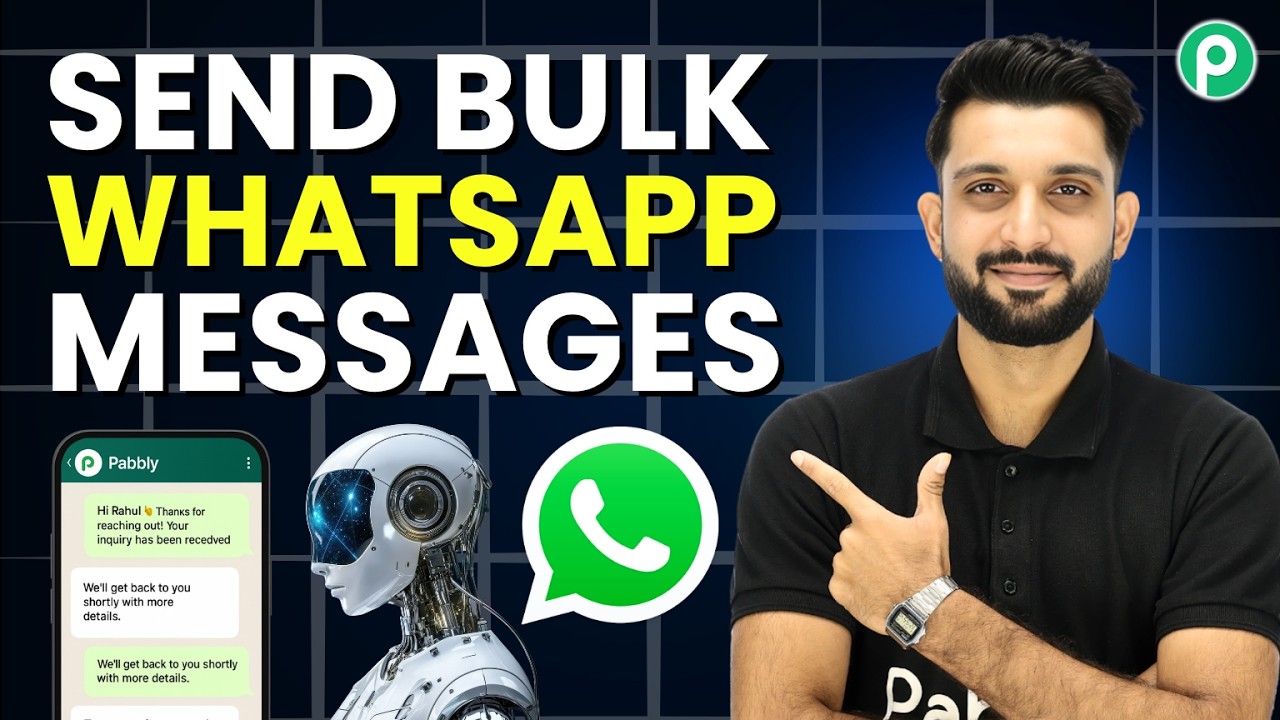
How to Send Bulk WhatsApp Messages Using Broadcasts

Watch Step By Step Video Tutorial Below


1. Setting Up Pabbly Connect for Integration

To start integrating applications, first, you need to set up Pabbly Connect. This application allows you to automate workflows by connecting various apps seamlessly. Begin by creating an account on the Pabbly Connect platform.

Once you’re logged in, navigate to the dashboard. Here, you’ll find options to create new workflows. Click on the ‘Create Workflow’ button to get started with your integration tasks.


2. Choosing Trigger Applications in Pabbly Connect

In this section, you will select the trigger application for your workflow. The trigger app is the one that initiates the automation process. Click on ‘Choose App’ and select your desired application.

  • Select the application from the dropdown list.
  • Choose the specific trigger event that will start the workflow.
  • Click on ‘Save & Continue’ to proceed.

After saving, you’ll need to connect your account. Follow the prompts to authorize Pabbly Connect to access your application data.


3. Setting Up Action Applications in Pabbly Connect

Next, you will set up the action application that will respond to the trigger. This is where the results of the workflow will be executed. Again, click on ‘Choose App’ and select the action application you want to integrate.

After selecting the action application, choose the specific action event. This could be creating a new record, sending an email, or any other action that the application supports. Click on ‘Save & Continue’ to finalize your choices.

  • Select the action event from the dropdown menu.
  • Map the necessary fields from the trigger application to the action application.
  • Test the action to ensure it works as intended.

This step is crucial as it ensures that the data flows correctly between the applications.


4. Testing and Activating Your Pabbly Connect Workflow

Once you have set up both the trigger and action applications, it’s time to test your workflow. Click on the ‘Test Workflow’ button to initiate a test. This will help you verify that everything is functioning correctly.

If the test is successful, you can activate your workflow. Click on the ‘Turn On’ button to make your automation live. You can always go back and edit the workflow if needed.

Testing is essential; ensure that you check every possible scenario to confirm that the integration works flawlessly. This will save you time and effort in the long run.


5. Monitoring and Managing Your Pabbly Connect Integrations

After activating your workflow, it’s important to monitor its performance. Pabbly Connect provides analytics to help you track the success of your integrations. You can view logs and see how many times your workflow has been triggered.

To manage your integrations effectively, return to the dashboard. Here, you can edit, pause, or delete workflows as needed. Regularly check your integrations to ensure they are functioning as expected.

By staying proactive, you can ensure that your automated processes continue to run smoothly and efficiently.


In conclusion, using Pabbly Connect to integrate applications can significantly enhance your workflow efficiency. By following the detailed steps outlined, you can automate processes between your favorite applications seamlessly.
Add New Google Contacts to Salesforce Without Manual Entry ⚡

Watch Step By Step Video Tutorial Below


1. Accessing Pabbly Connect for Integration

To start integrating Google Contacts with Salesforce CRM, first access Pabbly Connect. Visit the Pabbly Connect homepage by typing its URL, which is pabby.com/connect.

Once on the Pabbly Connect homepage, you will see options to sign in or sign up for a free account. New users can click on the “Sign Up Free” button, which allows you to explore Pabbly Connect with 100 free tasks every month.


2. Setting Up the Trigger in Pabbly Connect

In this section, we will set up the trigger to initiate the workflow. The trigger application will be Google Contacts, which will activate whenever a new contact is added.

  • Select Google Contacts as the trigger application.
  • Choose the event as “New or Updated Contact”.
  • Connect your Google account to Pabbly Connect.

After selecting the trigger event, click on the “Connect” button. You can either use an existing connection or create a new one by clicking on “Add New Connection”. Sign in to your Google account and allow access to complete the connection process.


3. Fetching Contact Data from Google Contacts

After setting up the trigger, the next step is to fetch the contact data from Google Contacts. This is essential for transferring that data to Salesforce CRM.

Before fetching the contact, create a new contact in your Google Contacts with the following details:

Now, click on “Save and Send Test Request” in Pabbly Connect. You should see the data fetched successfully, which includes the name, email, and phone number of the new lead.


4. Adding the Contact to Salesforce CRM

With the contact data fetched, the next step is to add this information to Salesforce CRM using Pabbly Connect. Here, Salesforce will serve as the action application.

Select Salesforce as the action application and choose the event as “Create Contact”. Click on the “Connect” button to establish the connection with Salesforce. Allow access to complete this step.

Once connected, map the fields from the Google Contacts data to Salesforce. For instance, map the first name, last name, email, and phone number fields. This mapping ensures that the data flows correctly into Salesforce CRM without manual entry.


5. Setting the Trigger Time for Automation

Finally, to ensure that Pabbly Connect regularly checks for new contacts, you need to set the trigger time. Google Contacts operates on a polling-based trigger.

Right-click on the trigger setup in Pabbly Connect and select “Set Trigger Time”. You can configure it to check for new contacts every 10 minutes. This setting allows seamless automation of adding new Google contacts to Salesforce CRM.

Now, with this automation in place, you can efficiently manage your contacts without manual updates, saving time and effort.


Conclusion

This tutorial demonstrated how to integrate Google Contacts with Salesforce CRM using Pabbly Connect. By following these steps, you can automate the process of adding contacts seamlessly, enhancing your productivity and efficiency.

Automatically Send WhatsApp Messages to HubSpot Contacts

Watch Step By Step Video Tutorial Below


1. Accessing Pabbly Connect for Integration

To start automating WhatsApp messages for new HubSpot CRM contacts, you first need to access Pabbly Connect. Visit the Pabbly Connect website at www.pabbly.com/connect and sign up for a free account. This allows you to test the integration with 100 free tasks every month.

Once logged in, you can explore the features of Pabbly Connect. This platform enables you to seamlessly connect HubSpot CRM with WhatsApp Cloud API, allowing for automated messaging without any coding skills. Here’s how to get started:

  • Visit the Pabbly Connect website.
  • Sign up for a free account.
  • Log in to access the dashboard.

With your account ready, you can now proceed to set up the integration workflow.


2. Setting Up the Trigger in Pabbly Connect

The next step involves setting up the trigger for your automation. In Pabbly Connect, select the trigger event as “New Contact Created” in HubSpot CRM. This means that every time a new contact is added, the automation will be triggered.

To connect HubSpot CRM, click on the “Add New Connection” button. You will be prompted to log into your HubSpot account and grant necessary permissions. Once connected, click on “Save and Send Test Request” to ensure the connection is established correctly.

  • Select “HubSpot CRM” as the trigger application.
  • Choose “New Contact Created” as the event.
  • Log in to HubSpot and authorize Pabbly Connect.

This setup ensures that every new contact in HubSpot will trigger an automated WhatsApp message, streamlining your communication process.


3. Sending WhatsApp Messages via Pabbly Connect

After setting up the trigger, the next step is to configure the action to send messages via WhatsApp. In Pabbly Connect, select WhatsApp Cloud API as the action application. You will need to add a new connection by providing the necessary API credentials.

Enter the required details such as your WhatsApp Business Account ID, phone number ID, and token. These credentials are essential for Pabbly Connect to authenticate and send messages through WhatsApp. Once you’ve entered the information, click on the “Save” button to establish the connection.

  • Select “WhatsApp Cloud API” as the action application.
  • Provide your WhatsApp Business Account ID and token.
  • Click “Save” to connect.

This allows Pabbly Connect to send messages directly to your new contacts on WhatsApp, enhancing your customer engagement.


4. Mapping Data for Personalized Messages

To ensure that the WhatsApp messages are personalized, you need to map the data from the HubSpot trigger to the WhatsApp message fields. In Pabbly Connect, select the phone number and name fields from the HubSpot response to dynamically insert this information into your WhatsApp messages.

For example, you can craft a message like “Hi, {name}. Welcome to our service!”. By mapping the name field, each new contact will receive a personalized greeting as soon as they are added to HubSpot. After setting up the message, click on “Save and Send Test Request” to test the automation.

  • Map the phone number and name fields from HubSpot.
  • Craft a personalized message for new contacts.
  • Test the automation to ensure messages are sent correctly.

This personalization increases the effectiveness of your communication, making new contacts feel valued and welcomed.


5. Conclusion

In this tutorial, we discussed how to automate WhatsApp messages for new contacts created in HubSpot CRM using Pabbly Connect. By following the steps outlined, you can set up an effective communication workflow that enhances customer engagement.

With Pabbly Connect, integrating HubSpot CRM with WhatsApp has never been easier. This automation not only saves time but also helps convert leads into paying customers efficiently.

Start using Pabbly Connect today to streamline your business processes and improve customer interactions.

Send Typeform Responses to Telegram Automatically

Watch Step By Step Video Tutorial Below


1. Accessing Pabbly Connect for Integration

To send Typeform responses to Telegram automatically, you must first access Pabbly Connect. Start by opening your web browser and navigating to pabbly.com/connect. If you’re a new user, click on the “Sign Up for Free” option in the top right corner.

Once registered, you’ll receive 100 free tasks each month to explore the features of Pabbly Connect. If you decide to continue using it, consider purchasing a subscription plan for additional features.


2. Creating a Workflow in Pabbly Connect

After logging into Pabbly Connect, navigate to the workflow builder. This is where you will set up the automation process. Click on the “Add Trigger” button to start creating your workflow.

For the trigger application, search for and select Typeform. Choose the event as “New Entry” and click on connect. If you haven’t created a connection yet, select “Add New Connection” and follow the prompts to connect your Typeform account.


3. Setting Up Typeform with Pabbly Connect

Once connected, you’ll need to select the specific Typeform you want to use. Choose your registration form from the dropdown list. Set the response format to “Advanced” and click on “Save and Send Test Request” to capture the webhook response.

To test this, open your Typeform link in a new tab and submit a sample entry. After submitting, return to Pabbly Connect, where you should see the captured response from Typeform. This confirms that the integration is working correctly.


4. Connecting Telegram to Pabbly Connect

Next, you will set up the action step to notify your team on Telegram. Click on “Add New Action Step” and search for “Telegram Bot”. Select the event as “Send Text Message” and click on connect. If you haven’t created a connection with Telegram yet, select “Add New Connection”.

To obtain the API token, open your Telegram account and search for “Bot Father”. Start the chat and create a new bot by following the prompts. Once created, copy the API token and paste it into Pabbly Connect. After saving, you will need the chat ID for notifications.


5. Finalizing the Automation Process

To get the chat ID, add the bot to the Telegram group where you want notifications. Make sure to promote the bot to admin. Once added, you can find the chat ID in the group settings.

In Pabbly Connect, map the necessary fields such as name, email, phone number, and course details into your message template. This dynamic mapping ensures that each new response updates automatically in the Telegram message.

Finally, click on “Save and Send Test Request”. You should receive a confirmation that the message was sent successfully. Now, every time a new registration is submitted, your team will be notified instantly on Telegram.


Conclusion

In this tutorial, we explored how to automate sending Typeform responses to Telegram using Pabbly Connect. This integration allows for seamless notifications, enhancing team communication effectively.

Send Personalized Emails Automatically with Google Sheets

Watch Step By Step Video Tutorial Below


1. Accessing Pabbly Connect for Email Automation

To automate personalized emails using Google Sheets, first, access Pabbly Connect by visiting pabbly.com/connect. This platform allows seamless integration between various applications, making automation easy.

Once on the Pabbly Connect homepage, you will see options to sign in or sign up. If you are new, click on “Sign Up Free” to create an account. Existing users can log in directly. Pabbly Connect offers 100 free tasks monthly for new users, allowing you to explore its features.


2. Setting Up the Workflow in Pabbly Connect

After logging in, navigate to the workflow section of Pabbly Connect. Here, you will create an automation that triggers an email whenever a new entry is added to Google Sheets. Start by selecting Google Sheets as your trigger application.

  • Choose “New or Updated Spreadsheet Row” as the event.
  • Copy the provided webhook URL for integration.
  • Paste this URL into the Google Sheets add-on.

This setup allows Pabbly Connect to capture data from Google Sheets automatically. After configuring the trigger, send a test entry to ensure everything is working correctly.


3. Configuring Google Sheets for Pabbly Connect

To integrate Google Sheets with Pabbly Connect, open your Google Sheet and navigate to the Extensions menu. From there, select Add-ons and then Get Add-ons to install the Pabbly Connect Webhook.

Once installed, go back to Extensions, select Pabbly Connect Webhooks, and choose “Initial Setup.” Here, paste the webhook URL you copied earlier and specify the trigger column (the last column of your data, typically E). Click submit to finalize this setup.


4. Sending Personalized Emails via Gmail

With the Google Sheets integration complete, the next step is to configure the action application, Gmail, in Pabbly Connect. Choose “Send Email” as the event to initiate email sending.

  • Sign in to your Google account to authorize Pabbly Connect.
  • Map the recipient’s email address from the Google Sheets data.
  • Customize the email subject and content using dynamic fields.

By utilizing the mapping feature in Pabbly Connect, you can ensure that each email is personalized with the user’s name and product of interest, making your outreach more effective.


5. Testing and Verifying the Automation

After setting up the email sending process, it’s crucial to test the automation. Use the “Save and Send Test Request” option in Pabbly Connect to verify that the email is sent correctly to the recipient.

Check your Gmail account to confirm that the email appears as intended, with the correct subject and personalized content. This step ensures your automation is functioning properly, allowing you to send personalized emails without manual effort.


Conclusion

This tutorial demonstrated how to automate personalized email sending using Google Sheets and Pabbly Connect. By following these steps, you can streamline your email outreach efficiently. Start using Pabbly Connect today to enhance your automation capabilities!

Automatically Send YouTube Video Notifications to Slack

Watch Step By Step Video Tutorial Below


1. Accessing Pabbly Connect for Integration

To start integrating YouTube with Slack, you first need to access Pabbly Connect. Go to the Pabbly website by typing pabbly.com in your browser. Once there, sign in to your Pabbly account. If you are new, you can sign up for free and receive 100 free tasks monthly.

After signing in, navigate to the Pabbly Connect dashboard. Here, you can view all your workflows. To create a new workflow, click on the ‘Create from Scratch’ button. Name your workflow, such as “Automatically Send YouTube Video Notifications to Slack” and select a folder for better organization.


2. Setting Up the Trigger in Pabbly Connect

In this step, we will set up the trigger for the workflow using Pabbly Connect. The trigger will activate whenever a new video is uploaded to your YouTube channel. Select YouTube as the trigger application and choose the event “New Video in Channel”.

  • Select “New Video in Channel” as the trigger event.
  • Connect your YouTube account by signing in with Google.
  • Test the connection by clicking “Save and Send Test Request”.

After setting up the trigger, you will wait for a webhook response from YouTube. This confirms that the integration is ready to capture new video uploads. Make sure to check your YouTube channel for the latest video to ensure the integration works correctly.


3. Configuring the Action to Send Notifications on Slack

Once the trigger is set, the next step is to configure the action using Pabbly Connect. The action will send a notification to your Slack channel whenever a new video is uploaded. Select Slack as the action application and choose the action event “Send Channel Message”.

Connect your Slack account by entering the required token type. You can use either user or bot token based on your requirements. After connecting, select the channel where you want to send the notification. For example, use a channel named “YouTube Videos”.

  • Enter the message content, such as “Hello team, we have uploaded a new video on YouTube!”.
  • Map the video title and URL dynamically to ensure accurate updates.
  • Test the action by clicking “Save and Send Test Request”.

After testing, you should see the message appear in your selected Slack channel, confirming that the integration is successful.


4. Finalizing the Integration in Pabbly Connect

In the final step, you will finalize the integration using Pabbly Connect. Make sure all settings are correct, including the trigger and action configurations. You can adjust the polling time for the trigger to check for new videos at your preferred interval.

Once everything is set, save your workflow. This ensures that your team will receive notifications on Slack every time a new video is uploaded to your YouTube channel. You can monitor the workflow’s performance by checking the dashboard in Pabbly Connect.


Conclusion

In this tutorial, we demonstrated how to integrate YouTube with Slack using Pabbly Connect. By following these steps, you can automate video notifications for your team, enhancing communication and efficiency.

Automatically Send Facebook Posts to Telegram

Watch Step By Step Video Tutorial Below


1. Setting Up Pabbly Connect for Facebook and Telegram Integration

To begin, access Pabbly Connect by visiting pabblval.com/connect. This platform is essential for automating tasks between Facebook and Telegram. If you are a new user, sign up for a free account to get started with 100 tasks every month.

Once logged in, navigate to the dashboard and click on the “Create Workflow” button. This will open the workflow builder where you can set up the integration between Facebook and Telegram.


2. Creating a Facebook Trigger in Pabbly Connect

In your workflow builder, click on the “Add Trigger” button. Search for “Facebook Pages” and select it as the application. Choose the event as “New Post” and click on “Connect” to link your Facebook account with Pabbly Connect.

  • Select “Add a New Connection” if you haven’t connected before.
  • Make sure your Facebook account is logged in to proceed.
  • Choose the specific Facebook page you want to automate.

After setting up the connection, click “Save and Send Test Request” to capture the response from your Facebook page.


3. Setting Up the Telegram Action in Pabbly Connect

Next, add a new action step by clicking on the “Add Action Step” button. Search for “Telegram Bot” and select it. Choose the event “Send Text Message” and click on “Connect” to establish a connection with Pabbly Connect.

If you haven’t connected Telegram before, choose “Add a New Connection”. You will need to obtain an API token from the BotFather on Telegram. To do this, search for “BotFather” in Telegram and create a new bot by following the prompts.

  • Start a conversation with BotFather and create a new bot using the /newbot command.
  • Copy the API token provided and paste it into Pabbly Connect.
  • Remember to add the bot as an admin in the Telegram group where you want to send messages.

Once connected, proceed to enter the chat ID of the group where messages will be sent.


4. Finalizing the Integration Between Facebook and Telegram

Now, map the message content you want to send to Telegram. Use the mapping feature in Pabbly Connect to dynamically insert the Facebook post details. You can include the post message and link.

To get the post link, you may need to add another action step to retrieve the post details from Facebook. Select “Get Page Post Details” as the event and map the post ID from the previous step.

  • Ensure the Facebook page ID is the same as the one used previously.
  • Click on “Save and Send Test Request” to confirm the details are correct.
  • Verify that the message is sent successfully to Telegram.

After confirming the integration, your setup is complete. Now, every time you post on Facebook, the message will automatically be sent to your Telegram group.


5. Testing the Automation Setup with Pabbly Connect

To test your automation, simply create a new post on your selected Facebook page. Within moments, you should see the message appear in your Telegram group, confirming that Pabbly Connect is functioning correctly.

This integration not only saves time but also enhances engagement across platforms. You can further customize your automation for other social media platforms using Pabbly Connect.

With the automation in place, you won’t need to manually share posts anymore. Just focus on creating engaging content for your audience.


Conclusion

This tutorial illustrates how to automatically send Facebook posts to Telegram using Pabbly Connect. By following these steps, you can streamline your social media management and enhance audience engagement effortlessly.

Convert Facebook Leads into Gym Memberships

Watch Step By Step Video Tutorial Below


1. Accessing Pabbly Connect for Integration

To begin converting Facebook leads into gym memberships, you first need to access Pabbly Connect. Open your browser and navigate to the Pabbly website. If you are a new user, click on the “Sign Up Free” button to create an account. Existing users can click on “Sign In” to access their dashboard.

Once logged in, you will see the Pabbly Connect dashboard, which displays your task limits and usage. This is where you will create a new workflow to automate the process of converting leads. Click on “Create Workflow” to start building your automation.


2. Creating a Workflow to Capture Facebook Leads

In this step, you will create a workflow in Pabbly Connect that captures leads from Facebook. Use the quick workflow builder to type in a name for your workflow, such as “Connect Facebook Leads to WhatsApp.” This will set the stage for integrating the applications.

  • Type in the workflow name.
  • Select the trigger application as Facebook Leads.
  • Choose the action application as WhatsApp.

After naming your workflow, proceed to configure the connection with Facebook Leads. This involves selecting the specific lead generation form you wish to use and ensuring that Pabbly Connect captures the responses automatically.


3. Connecting Facebook Leads to Pabbly Connect

Now, you will connect your Facebook account to Pabbly Connect. Click on “Add Connection” and choose Facebook Leads. You will be prompted to log into your Facebook account if not already done. Once logged in, you will need to select the specific Facebook page associated with your gym.

  • Choose your Facebook page from the list.
  • Select the lead generation form you created.
  • Click “Save and Send Test Request” to check the connection.

Once the connection is established, you can test the integration by generating a test lead. This will ensure that Pabbly Connect captures the lead details correctly from Facebook.


4. Sending WhatsApp Messages to Leads

After successfully capturing leads, the next step is to send a WhatsApp message using Pabbly Connect. For this, you will need to connect your WhatsApp account to Pabbly Chatflow. Click on “Add New Connection” and enter your API token to establish the connection.

  • Access your Pabbly Chatflow account settings to get the API token.
  • Paste the token into the connection setup in Pabbly Connect.
  • Map the lead details to the WhatsApp message template.

Using the mapped data, you can customize your WhatsApp messages to include the lead’s name and other relevant information, making your outreach more personal and effective.


5. Converting Leads into Gym Memberships

Finally, with the automated workflow set up in Pabbly Connect, you can convert Facebook leads into gym memberships seamlessly. As leads come in, they will receive a personalized WhatsApp message about your gym’s offers and membership options.

This automation not only saves time but also increases the likelihood of converting leads into paying customers. By following this process, you can effectively manage your leads and enhance your gym’s membership sales.


Conclusion

In summary, using Pabbly Connect to convert Facebook leads into gym memberships is a powerful strategy. By automating the process with WhatsApp messaging, you can engage leads effectively and boost your membership sales. Start leveraging Pabbly Connect today to streamline your lead conversion process.

How Do I Follow Up With Every Lead Without Forgetting Anyone?

Watch Step By Step Video Tutorial Below


1. Accessing Pabbly Connect for Lead Follow-Up

To start automating your lead follow-ups, first access Pabbly Connect by visiting pabbly.com. Sign in to your account using the “Sign In” option if you are an existing user, or click on “Sign Up for Free” to create a new account.

After logging in, navigate to the Pabbly Connect dashboard. Here, you can create a new workflow for lead automation. Click on “Create from Scratch” and name your workflow, for example, “Lead Follow-Up Automation.” Choose a folder for organization and click “Create” to proceed.


2. Setting Up the Trigger with Facebook Lead Ads

The next step is to set up the trigger in your workflow. For this, select Facebook Lead Ads as your trigger application in Pabbly Connect. This trigger will activate whenever a new lead is received.

  • Choose “New Lead Instant” as the trigger event.
  • Connect your Facebook account by clicking on “Add New Connection” and following the prompts.
  • Select your Facebook page and lead gen form.

Once connected, test your setup by submitting a test lead. This will ensure that your workflow captures the lead data correctly.


3. Sending Email Notifications via Gmail

After setting up the trigger, the next action is to send an email notification to the new lead using Gmail through Pabbly Connect. Select Gmail as your action application.

  • Choose “Send Email” as the action event.
  • Connect your Google account and grant necessary permissions.
  • Fill in the email details, including sender name, recipient email, and email content.

Make sure to personalize the email by mapping fields from the Facebook Lead Ads data, such as the lead’s name and email address. This ensures that every lead receives a tailored message.


4. Adding a Delay Before Sending WhatsApp Messages

To enhance your follow-up process, you can add a delay before sending a WhatsApp message. In Pabbly Connect, add a new action step and select “Delay by Pabbly” as your action application.

  • Choose “Add Time Delay” as the action event.
  • Specify the delay duration, such as 1 day.

This delay allows you to wait before sending the follow-up WhatsApp message, ensuring that the lead has time to respond to the initial email.


5. Sending Follow-Up Messages via WhatsApp

Finally, to send a follow-up message, select Pabbly Chatbot as your action application in Pabbly Connect. Choose “Send Text Message” as the action event.

  • Connect your Pabbly Chatbot account and retrieve the API key.
  • Map the WhatsApp number and compose your follow-up message.

Ensure the message is personalized, referencing the lead’s name and previous inquiry. Once everything is set, execute the workflow to test the entire process.


Conclusion

This tutorial has shown you how to automate lead follow-ups using Pabbly Connect to integrate WhatsApp and Gmail. By following these steps, you can ensure no lead is forgotten, enhancing your communication efficiency.

Save Facebook Lead Ads Responses to Notion Instantly

Watch Step By Step Video Tutorial Below


1. Setting Up Pabbly Connect for Facebook Lead Ads

To start integrating Facebook Lead Ads with Notion, the first step is to access Pabbly Connect. This platform allows you to automate workflows between various applications seamlessly. Begin by logging into your Pabbly Connect account and navigating to the workflow page.

Once on the workflow page, click on the “Add Workflow” button. Here, you will set up a trigger that initiates the integration. For this example, select Facebook Lead Ads as your trigger application. This will be the first step in your automation process.


2. Selecting Trigger Event in Pabbly Connect

In this section, you will select the specific event that will trigger your workflow. Choose the “New Lead Instant” option from the event dropdown menu. This ensures that every time a new lead is generated through your Facebook Lead Ads, the workflow will be activated.

  • Select “Facebook Lead Ads” as your application.
  • Choose “New Lead Instant” as your event.
  • Click the “Connect” button to establish a connection.

After clicking the connect button, you will be prompted to log into your Facebook account. Once logged in, grant Pabbly Connect access to your Facebook Lead Ads. This step is crucial for the integration to function correctly.


3. Testing the Connection in Pabbly Connect

Now that you have set up the trigger, the next step is to test the connection. Click on the “Save and Send Test Request” button. This action will prepare Pabbly Connect to receive data from Facebook Lead Ads.

After saving, navigate to the Meta for Developers page to test your lead form. Use the Lead Ads Debug Tool to simulate a lead submission. Fill in the required fields such as first name, last name, email, phone number, and company name, then click “Continue” to submit the form.

  • Open the Meta for Developers page.
  • Select the Lead Ads Debug Tool.
  • Fill in the lead form and submit it.

After submitting the form, return to Pabbly Connect. You should see a response indicating that the lead details have been successfully captured. This confirms that your trigger setup is working correctly.


4. Adding Notion Integration in Pabbly Connect

With the Facebook Lead Ads integration working, the next step is to connect Notion. In Pabbly Connect, search for Notion and select it as your action application. Choose the “Create Database Item” event for this integration.

After selecting Notion, click the “Connect” button to establish a connection. You will need to allow Pabbly Connect access to your Notion account. Once connected, select the specific database where you want to store the lead information.

  • Choose the database you created for Facebook leads.
  • Map the fields for company name, phone number, email, and customer name.
  • Click “Save and Send Test Request” to finalize the setup.

After mapping the fields, you will receive a confirmation that the database item has been created successfully. This means that every new lead from Facebook Lead Ads will now be automatically added to your Notion database through Pabbly Connect.


5. Conclusion: Automate Your Lead Management with Pabbly Connect

By following these steps, you have successfully integrated Facebook Lead Ads with Notion using Pabbly Connect. This automation allows you to manage your leads efficiently without manual entry. Now, every time a lead fills out your Facebook form, their details will be automatically added to your Notion database.

With Pabbly Connect, you can streamline your workflow and focus on more important tasks, enhancing your productivity. Start automating your lead management today and experience the benefits of seamless integration.