I Automated My Shopify Store in 10 Minutes 🚀

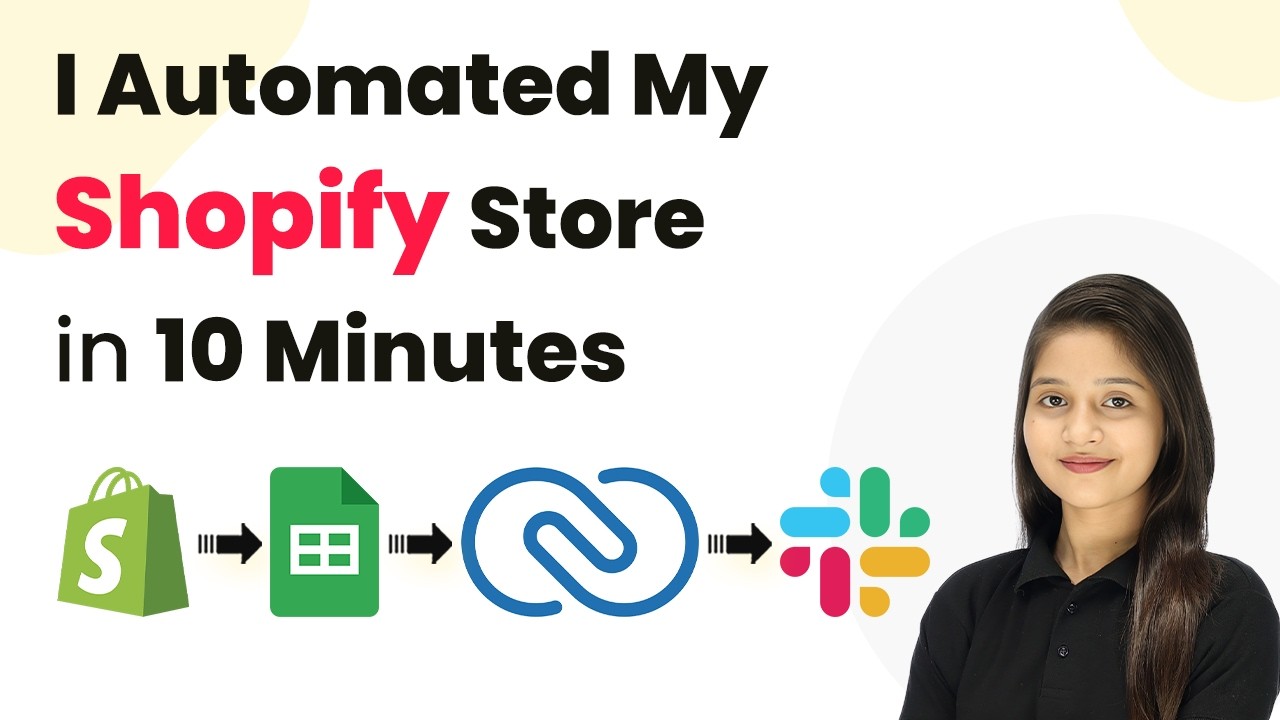
Learn how to automate your Shopify store using Pabbly Connect in just 10 minutes. Follow this detailed tutorial to integrate Shopify with Google Sheets, Zoho CRM, and Slack.

Watch Step By Step Video Tutorial Below


1. Accessing Pabbly Connect for Automation

To automate your Shopify store, the first step is to access Pabbly Connect. Open a new tab and search for Pabbly.com/connect. This will direct you to the official Pabbly Connect page.

On this page, you will see options to either sign in or sign up for free. If you are new, click on the ‘Sign Up Free’ button to create an account and receive 100 free tasks every month. For existing users, simply click on ‘Sign In’ to access your dashboard.


2. Creating a New Workflow in Pabbly Connect

Once signed in, navigate to the Pabbly Connect dashboard. Here, click on the ‘Create Workflow’ button to start a new automation process. Name your workflow something descriptive, such as ‘I Automated My Shopify Store in 10 Minutes’. using Pabbly Connect

  • Select the ‘New Beta’ option for the workflow type.
  • Choose a folder for your workflow, for example, ‘Leaf Connect’.
  • Click the ‘Create’ button to initiate your workflow.

Your workflow will be created successfully, and you can now set up the trigger for your automation.


3. Setting Up the Trigger with Shopify

In this step, you will set up the trigger for your workflow. Click on the trigger application and select ‘Shopify’ since you want the automation to start when a new order is placed.

For the app event, choose ‘New Order’. Click on the ‘Connect’ button to obtain a webhook URL. Copy this URL as you will need it to connect Pabbly Connect with your Shopify account.

  • Go to your Shopify account and click on ‘Settings’.
  • Select ‘Notifications’ and then click on ‘Create Webhook’.
  • Choose the event ‘Order Creation’ and format as JSON.

Paste the copied webhook URL into the designated field and save the webhook. This allows Shopify to communicate with Pabbly Connect.


4. Adding Google Sheets to Store Customer Details

Next, you will add Google Sheets as an action step to store customer details. Select Google Sheets as your application and choose the app event ‘Add New Row’. using Pabbly Connect

Click on the ‘Connect’ button and then choose to add a new connection. Sign in with your Google account and grant permissions to Pabbly Connect. Select the spreadsheet titled ‘Shopify Order Details’ where you want to store the order information.

Map the fields from Shopify to Google Sheets, such as Name, Email Address, Order ID, and Item Purchased. Use the mapping feature to ensure data dynamically updates with each new order.

After mapping the necessary fields, click on the ‘Save and Send Test Request’ button to confirm that the integration is working correctly.


5. Integrating Zoho CRM for Customer Management

The final step is to integrate Zoho CRM, allowing you to manage customer contacts efficiently. Select Zoho CRM as your next application and choose the app event ‘Create Contact’.

Click on the ‘Connect’ button and create a new connection by entering your Zoho domain. After granting permission, map the relevant fields such as First Name, Last Name, and Email Address from the Shopify order data.

Ensure all required fields are mapped correctly to create new contacts in Zoho CRM. Click on ‘Save and Send Test Request’ to verify the integration.

Once the test is successful, you will see new contacts created in your Zoho CRM account, confirming that the integration with Pabbly Connect is complete.


Conclusion

In this tutorial, you learned how to automate your Shopify store using Pabbly Connect, integrating it with Google Sheets and Zoho CRM. This powerful workflow allows you to manage orders and customer information efficiently, saving you time and effort.

Ensure you check out Pabbly Connect to create business automation workflows and reduce manual tasks. Pabbly Connect currently offer integration with 2,000+ applications.

By following these steps, you can easily replicate this automation for your own business, enhancing productivity and customer management.

WhatsApp AI Chatbot for Coaching Institutes | Automate Student Exam Queries

Learn how to automate student exam queries using Pabbly Chatflow and WhatsApp AI Chatbot. Step-by-step guide for coaching institutes. Learn step-by-step how to create, test, and optimize chatbots that enhance customer experience while reducing support workload.

Watch Step By Step Video Tutorial Below


1. Accessing Pabbly Chatflow for WhatsApp Integration

To automate student exam queries, the first step is accessing Pabbly Chatflow. You can do this by visiting the official Pabbly Chatflow website at www.Pabbly.com/chatflow. Once on the page, sign in to your existing account or create a new one for free, which provides you with 100 free tasks monthly.

After signing in, navigate to the Pabbly Chatflow dashboard. Here, you can view your credits and add your WhatsApp number. To connect your WhatsApp, click on the ‘Add WhatsApp Number’ button and select the preferred method to connect. For detailed instructions, refer to the help section within the app.


2. Creating an AI Assistant in Pabbly Chatflow

The next step involves creating an AI assistant using Pabbly Chatflow. On the left sidebar, click on the ‘AI Assistant’ option. Here, you can view existing assistants or create a new one. Click on ‘Create AI Assistant’ and name it appropriately, such as ‘Chatbot for Coaching Institutes’.

  • Select the instruction type for the AI agent.
  • Set the temperature for responses (0 for focused, 1 for creative).
  • Enter your OpenAI API key to enable the assistant.

After setting these configurations, save your assistant settings. This AI assistant will now be capable of responding to student queries automatically using the knowledge base you provide.


3. Uploading Knowledge Source in Pabbly Chatflow

With your AI assistant created, the next step is to upload the knowledge source. This is crucial as it defines how your assistant will respond to queries. In Pabbly Chatflow, navigate to the knowledge source section and select the option to upload a file.

Prepare a detailed document in a format such as TXT or PDF containing all relevant information about your coaching institute, including:

  • Course offerings and details
  • Admission process and contact information
  • Demo class scheduling and fees

Once uploaded, this knowledge base will enable your AI assistant to provide accurate and relevant responses to student inquiries.


4. Assigning AI Assistant to Chats in Pabbly Chatflow

After setting up your AI assistant and knowledge source, you need to assign the assistant to specific chats. In Pabbly Chatflow, go to the ‘Inbox’ section. Here, you can select the chat to which you want to assign the AI assistant.

Toggle the button to select your AI assistant and save the settings. For broader applications, you can also assign the assistant to groups or all contacts by adjusting the settings in the ‘Inbox Settings’ section. This allows for efficient management of student queries across multiple channels.


5. Testing and Optimizing Your WhatsApp AI Chatbot

Once your AI assistant is assigned, it’s essential to test its functionality. Send various queries through WhatsApp to check if the Pabbly Chatflow assistant responds accurately. For instance, ask about study plans or admission procedures to see how well it handles the questions.

If the responses are not satisfactory, revisit the knowledge source and AI settings to optimize the answers. Ensure that all relevant information is included and that the AI’s response settings are appropriately configured to meet the needs of your students.


Conclusion

In summary, using Pabbly Chatflow to automate student exam queries through a WhatsApp AI chatbot can greatly enhance communication for coaching institutes. By following the outlined steps, you can create an efficient system that responds to student inquiries promptly and accurately. This not only saves time but also improves the overall student experience.

Ensure you check out Pabbly Connect to create business automation workflows and reduce manual tasks. Pabbly Connect currently offer integration with 2,000+ applications.

Auto-Post YouTube Videos to Facebook Instantly (Pabbly Connect Tutorial) 😱

Learn how to automate posting YouTube videos to Facebook using Pabbly Connect with this step-by-step tutorial. Boost your social media reach effortlessly! Follow this definitive guide to creating powerful automated workflows with straightforward, efficiency-focused solutions that save valuable time.

Watch Step By Step Video Tutorial Below


1. Accessing Pabbly Connect for Automation

To automate posting YouTube videos to Facebook, you first need to access Pabbly Connect. Open a new browser tab and navigate to Pabbly.com/connect. This platform allows you to integrate multiple applications effortlessly.

If you are new to Pabbly, click on the ‘Sign Up Free’ option to create an account. Existing users can simply sign in. Once logged in, you will be directed to the Pabbly Connect dashboard where you can create and manage your automation workflows.


2. Creating Your YouTube to Facebook Workflow

After signing in to Pabbly Connect, click on the ‘+ Create Workflow’ button. Name your workflow something like ‘Auto Post YouTube Video to Facebook Instantly’ and select the appropriate folder for organization.

  • Select the ‘New Beta’ workflow builder.
  • Choose YouTube as your trigger application.
  • Set the trigger event to ‘New Video in Channel’.

After setting up the trigger, click on the ‘Connect’ button to link your YouTube account. This connection will allow Pabbly Connect to monitor your YouTube channel for new uploads.


3. Configuring the YouTube Trigger in Pabbly Connect

Upon connecting your YouTube account, select your channel ID from the dropdown. This ensures that Pabbly Connect pulls data from the correct source. Choose the response format you prefer; ‘Simple’ is recommended for most users.

Click on the ‘Save and Send Test Request’ button. This action will check for the most recent video uploaded to your channel and provide the video URL. Ensure that you see a successful connection message indicating that your YouTube account is linked to Pabbly Connect.


4. Setting Up the Facebook Action to Post Videos

Next, you will set up the action application, which is Facebook. Click on the ‘+’ icon and search for Facebook Pages. Select the ‘Create Page Post’ event to configure how your YouTube videos will appear on Facebook. using Pabbly Connect

  • Connect your Facebook account by clicking ‘Connect with Facebook Pages’.
  • Choose the page where you want to post the video.
  • Enter a message to accompany the video post.

In the message box, you can map the video title and URL dynamically using the data received from the YouTube trigger. This mapping ensures that every time a new video is uploaded, the post will automatically include the latest video details.


5. Testing and Enabling Your Automation Workflow

After completing the setup, click on the ‘Save’ button to finalize your workflow. You can test the integration by refreshing your Facebook page to see if the new post appears with the correct video URL and message. using Pabbly Connect

Lastly, ensure to enable the toggle for your workflow. If this toggle is not activated, your automation will not function. With this setup, every time you upload a video to YouTube, Pabbly Connect will automatically create a post on your Facebook page without any manual intervention.


Conclusion

Using Pabbly Connect, you can effortlessly automate the process of posting YouTube videos to Facebook. This integration boosts your social media presence and saves you time by eliminating manual posting.

Ensure you check out Pabbly Connect to create business automation workflows and reduce manual tasks. Pabbly Connect currently offer integration with 2,000+ applications.

Send New Leads to Pipedrive Instantly

Learn how to use Pabbly Connect to send new leads to Pipedrive instantly. Follow this detailed tutorial for seamless integration. Develop expertise in application integration and learn how to design streamlined automation workflows using proven, simplified approaches.

Watch Step By Step Video Tutorial Below


1. Accessing Pabbly Connect for Lead Integration

To start sending new leads to Pipedrive instantly, you must access Pabbly Connect. If you’re a new user, visit pabbl.com/connect and click on the ‘Sign Up for Free’ button in the top right corner. This allows you to explore the platform with 100 free tasks each month.

Once you sign up, you can log into your Pabbly Connect account. For existing users, simply open your workflow builder. This is where you will create the automation that connects your lead sources to Pipedrive.


2. Creating Your Workflow in Pabbly Connect

In the workflow builder of Pabbly Connect, you will set up the trigger and action for your lead integration. Click on the ‘Add Trigger’ button to start. For this automation, search for ‘Facebook Lead Ads’ as your trigger application.

  • Select ‘New Lead Instant’ as the event.
  • Connect your Facebook account to Pabbly Connect.
  • Choose the appropriate Facebook page and lead form.

After connecting your Facebook Lead Ads account, ensure the response format is set to simple. Click on ‘Save and Send Test Request’ to proceed with capturing the lead data.


3. Testing Facebook Lead Ads with Pabbly Connect

Next, you need to test your Facebook Lead Ads integration. Open a new tab and search for the ‘Meta for Developers’ site. Navigate to the ‘Lead Ads Debug Tool’ under the resources section. Here, select the same page and form you chose in Pabbly Connect.

  • Preview the lead form and fill it out.
  • Submit the form to generate a test lead.

After submission, return to your Pabbly Connect workflow to see if the lead data has been captured. This step verifies that your Facebook Lead Ads are correctly integrated with Pabbly Connect.


4. Adding Pipedrive Action to Your Workflow

Now that your lead data is captured, it’s time to add Pipedrive as the action application in Pabbly Connect. Click on ‘Add New Action Step’ and search for ‘Pipedrive’. Select ‘Create a Person’ as the event.

If you have already connected Pipedrive to Pabbly Connect, select the existing connection. If not, click on ‘Add a New Connection’ and provide your Pipedrive API token, which you can find in your Pipedrive account settings.


5. Mapping Lead Details to Pipedrive

After establishing the connection, you’ll need to map the lead details from Facebook to Pipedrive. In the mapping section, select the fields for the lead name, phone number, and email. This is crucial as it ensures that the data flows correctly from Pabbly Connect to Pipedrive.

Map the phone number and email from the captured data. Set a label for the lead, like ‘Hot Lead’.

Finally, click on ‘Save and Send Test Request’ to create the new lead in Pipedrive. You should receive a confirmation that the lead has been successfully created, and you can verify this by checking your Pipedrive contacts.


Conclusion

In this tutorial, we explored how to use Pabbly Connect to send new leads to Pipedrive instantly. By following these steps, you can automate your lead management process efficiently, ensuring that every new lead is captured and added to your Pipedrive account seamlessly.

Ensure you check out Pabbly Connect to create business automation workflows and reduce manual tasks. Pabbly Connect currently offer integration with 2,000+ applications.

Automate WhatsApp Replies Using an AI Agent (Step-by-Step)

Learn how to automate WhatsApp replies using Pabbly Connect with our detailed step-by-step tutorial. Enhance your customer service with AI agents. Discover hidden automation capabilities within your existing tools. This guide shows you how to connect your essential applications and permanently eliminate redundant manual processes.

Watch Step By Step Video Tutorial Below


1. Accessing Pabbly Connect for WhatsApp Automation

To automate WhatsApp replies using Pabbly Connect, start by accessing the platform. Visit Pabbly.com and select the Pabbly Connect option. This powerful tool will help you integrate WhatsApp with your business processes seamlessly.

Once on the Pabbly Connect homepage, click on ‘Sign In’ if you are an existing user or ‘Sign Up Free’ to create a new account. Upon signing in, you will be directed to the dashboard where you can manage your integrations.


2. Creating Your AI Agent for WhatsApp

After accessing Pabbly Connect, it’s time to create your AI agent for WhatsApp. Click on the ‘Add’ button to initiate the setup process. You will be prompted to name your assistant and select the instruction type from the dropdown menu.

  • Choose ‘AI Agent’ as your instruction type.
  • Configure the temperature setting to determine how creative or focused the responses should be.
  • Select your AI model, such as OpenAI, to power your assistant.

After configuring these settings, click on ‘Save’ to create your AI agent. This agent will now be ready to respond to customer queries on WhatsApp.


3. Configuring AI Agent Settings in Pabbly Connect

With your AI agent created, the next step is to configure its settings using Pabbly Connect. Here, you can set various parameters such as header messages and footer messages. These messages will be displayed to users when they interact with your WhatsApp agent.

  • Add a header message that introduces the agent to users.
  • Define footer messages for additional information or disclaimers.
  • Specify stop keywords that will halt automated replies when triggered.

Once all settings are configured, click ‘Save’ to ensure your changes are applied. This configuration is crucial for providing a personalized experience to your customers.


4. Assigning Your AI Agent to WhatsApp Contacts

Now that your AI agent is configured, it’s time to assign it to your WhatsApp contacts using Pabbly Connect. Navigate to the settings section and find the ‘AI Auto Reply Settings’. Here, you will enable the auto-reply feature and select the contacts you want to assign your agent to.

Select the contact list you wish to assign your AI agent to. Click on the ‘Save’ button to finalize the assignment.

Your AI agent will now automatically respond to queries from the selected contacts, enhancing your customer service capabilities significantly.


5. Testing Your AI Agent’s Responses

After successfully assigning the AI agent, it’s essential to test its responses to ensure everything is functioning correctly through Pabbly Connect. Send a WhatsApp message to your business number and observe the automated reply.

For effective testing, try asking various questions that customers might typically inquire about. This will help you gauge the AI agent’s performance and refine its responses as necessary. If adjustments are needed, return to the Pabbly Connect dashboard and modify the agent’s settings accordingly.


Conclusion

By following this tutorial, you can effectively automate WhatsApp replies using Pabbly Connect and an AI agent. This integration enhances customer service efficiency and ensures timely responses to inquiries, ultimately benefiting your business.

Ensure you check out Pabbly Connect to create business automation workflows and reduce manual tasks. Pabbly Connect currently offer integration with 2,000+ applications.

Auto Generate Invoices and Notify Customers for New Orders

Learn how to automate invoice generation and customer notifications for new orders using Pabbly Connect in this detailed tutorial. Discover hidden automation capabilities within your existing tools. This guide shows you how to connect your essential applications and permanently eliminate redundant manual processes.

Watch Step By Step Video Tutorial Below


1. Accessing Pabbly Connect for Invoice Automation

To start automating invoice generation and customer notifications, first, access Pabbly Connect. Open a new tab and navigate to Pabbly.com/connect. This platform allows you to create automated workflows seamlessly.

If you are new to Pabbly Connect, click on the ‘Sign Up Free’ option. Existing users can sign in by clicking the ‘Sign In’ button. Once logged in, click on the ‘Access Now’ button to enter the Pabbly Connect dashboard.


2. Creating a New Workflow in Pabbly Connect

In the Pabbly Connect dashboard, you can create and manage your automation workflows. Click on the ‘+ Create Workflow’ button to initiate a new workflow for auto-generating invoices and notifying customers. using Pabbly Connect

  • Select the ‘New Beta’ workflow builder.
  • Name your workflow as ‘Auto Generate Invoices and Notify Customers for New Orders’.
  • Click the ‘Create’ button to save your workflow.

Now that your workflow is created, the next step is to set up the trigger, which is crucial for automation. This trigger will initiate the workflow when a new order is placed on Shopify.


3. Setting Up the Trigger with Shopify

For the trigger application, select Shopify. The event you want to trigger is ‘New Order’. Click on the ‘Connect’ button to establish a connection between Shopify and Pabbly Connect.

You will receive a webhook URL. Copy this URL, then go to your Shopify account. Navigate to Settings, then Notifications, and click on ‘Create Webhook’. Select ‘Order Creation’ as the event and paste the copied webhook URL. Choose JSON as the format and save the webhook.

  • Ensure the webhook API version is set to the latest.
  • Complete a test order to check if the integration is successful.

Once the order is processed, return to Pabbly Connect to confirm you have received the new order response, indicating a successful connection.


4. Generating Invoice Using Google Docs

After confirming the trigger, the next step is to generate invoices using Google Docs. Select Google Docs as your next application and choose ‘Create Document from Template’ as the app event. using Pabbly Connect

Click the ‘Connect’ button and choose to add a new connection. Sign in with your Google account. Select the template document for the invoice that you previously created in Google Docs. This document should contain placeholders for dynamic data.

Map the order ID to dynamically name the invoice. Choose the folder in Google Drive where the invoice will be stored.

After mapping all necessary fields, click on ‘Save and Send Test Request’. Verify that the invoice is created in your Google Docs account with the correct details.


5. Sending Invoice via Gmail

The final step in this automation process is to send the generated invoice to customers via Gmail. Select Gmail as your last application and choose ‘Send Email’ as the app event.

Connect your Gmail account to Pabbly Connect. In the email setup, map the recipient’s email address from the previous response. Customize the email subject and body with relevant information, including the attached invoice.

Set the email content type to HTML for better formatting. Attach the PDF link of the invoice generated from Google Drive.

Once all fields are mapped, click on ‘Save and Send Test Request’. Check your Gmail account for the email with the attached invoice to confirm the workflow is functioning correctly.


Conclusion

In this tutorial, we explored how to use Pabbly Connect to automate the generation of invoices and notify customers for new orders. By integrating Shopify, Google Docs, Google Drive, and Gmail, you can streamline your order processing and enhance customer experience.

Ensure you check out Pabbly Connect to create business automation workflows and reduce manual tasks. Pabbly Connect currently offer integration with 2,000+ applications.

With Pabbly Connect, automating these tasks not only saves time but also ensures that your customers receive timely and professional invoices. Start using Pabbly Connect today to revolutionize your order management process.

Send Order Status Updates to Customers on WhatsApp Automatically

Learn how to send order status updates to customers on WhatsApp automatically using Pabbly Connect. Follow this step-by-step tutorial for seamless integration. Build sophisticated automated workflows in less time than you think. This guide translates complex integrations into straightforward steps for immediate implementation.

Watch Step By Step Video Tutorial Below


1. Accessing Pabbly Connect for Automation

To send order status updates to customers on WhatsApp automatically, you need to access Pabbly Connect. Start by visiting the Pabbly Connect website and either sign in or sign up for a free account. New users can create an account to explore the features with 100 free tasks every month.

Once you are logged in, navigate to the Pabbly Connect dashboard. Here, you can create and manage all your automation workflows. Click on the ‘Create Workflow’ button to begin setting up your integration for sending order status updates.


2. Creating a Workflow in Pabbly Connect

After clicking the ‘Create Workflow’ button, you will be prompted to name your workflow. Enter a descriptive name, such as ‘Send Order Status Updates to Customers on WhatsApp Automatically’. This helps in identifying your workflow later.

  • Select the new beta version of the workflow builder.
  • Click on the ‘Create’ button to finalize your workflow setup.

This sets up your workflow environment within Pabbly Connect, ready for further configuration.


3. Setting Up the Trigger for WooCommerce

In this step, you will set up the trigger that initiates the workflow. Select WooCommerce as the trigger application and choose the event ‘New Order Created’. This means that every time a new order is placed in your WooCommerce store, it will trigger the workflow.

Click on the ‘Connect’ button to generate a webhook URL. Copy this URL as it will be used to connect your WooCommerce account to Pabbly Connect. Next, go to your WooCommerce dashboard, navigate to Settings, and then to Advanced where you will find the Webhooks option.

  • Click on ‘Add Webhook’ and name it as ‘WooCommerce Orders’.
  • Set the status to active and select the topic as ‘Order Created’.
  • Paste the copied webhook URL and save the changes.

This connection allows Pabbly Connect to receive order details automatically when a new order is created in WooCommerce.


4. Mapping Data from WooCommerce to WhatsApp

Once the WooCommerce account is connected, you can map the order data to be sent via WhatsApp. Click on the ‘Recapture Webhook Response’ button in Pabbly Connect to fetch the latest order details. Make a test order in your WooCommerce store to see the data.

After placing the test order, return to Pabbly Connect to see the captured response. This response includes customer details like first name, last name, contact number, and product information.

Map the user’s contact number to send messages directly to their WhatsApp. Include personalized messages using dynamic fields from the captured data.

This mapping is essential for sending personalized order updates to customers via WhatsApp.


5. Sending WhatsApp Messages Using Pabbly Connect

Now, set up the action application to send messages via WhatsApp using Pabbly Connect. Select Pabbly Chatflow as the action application and choose the event ‘Send Text Message’. Click on the ‘Connect’ button to create a new connection.

In the connection setup, you will need an API token from your Pabbly Chatflow account. Navigate to the settings in Pabbly Chatflow, click on API and Webhooks, and copy your API token. Paste this token back into Pabbly Connect to establish the connection.

Map the recipient’s mobile number to ensure the message goes to the right customer. Compose your message, including order details dynamically pulled from the previous response.

After saving the setup, your workflow will automatically send WhatsApp messages to customers when a new order is created in WooCommerce.


Conclusion

By following this tutorial, you can effectively use Pabbly Connect to send order status updates to customers on WhatsApp automatically. This integration enhances customer communication and streamlines order management, ensuring that customers are always informed about their purchases.

Ensure you check out Pabbly Connect to create business automation workflows and reduce manual tasks. Pabbly Connect currently offer integration with 2,000+ applications.

With the right setup, you can leverage the power of Pabbly Connect to automate your business processes and improve customer satisfaction.

24/7 Customer Support Using WhatsApp Chatbot

Learn how to set up a 24/7 customer support WhatsApp chatbot using Pabbly Connect for seamless integration and real-time assistance. Eliminate manual repetitive tasks from your workflow. Discover proven automation methods with intuitive steps designed for efficiency-minded professionals.

Watch Step By Step Video Tutorial Below


1. Setting Up Pabbly Connect for WhatsApp Integration

To start creating a 24/7 customer support WhatsApp chatbot, you need to access Pabbly Connect. First, navigate to the Pabbly Chartflow dashboard. If you are a new user, sign up at Pabbly.com/chartflow to receive free credits for exploring features.

Once logged in, ensure you have added your WhatsApp number. This is crucial as it enables the integration with the chatbot. If you need assistance, check the help video provided in the description. After adding your WhatsApp number, you are ready to create your AI chatbot.


2. Creating Your AI Assistant with Pabbly Connect

In this step, you’ll create your AI assistant using Pabbly Connect. From the left sidebar, select the ‘AI Assistant’ option, then click on the ‘Add AI Assistant’ button. Name your assistant, for example, ‘WhatsApp AI Chatbot’.

  • Enter AI instructions based on your business needs.
  • Set the temperature for responses, focusing on creativity.
  • Select the AI model (e.g., OpenAI 5.2).

After configuring these settings, click ‘Connect’ to save your AI assistant setup. This integration will allow your chatbot to respond to customer queries efficiently.


3. Uploading Your Knowledge Base to Pabbly Connect

To enhance the chatbot’s responses, upload a knowledge base using Pabbly Connect. Prepare a document detailing your products and services, then save it in a text format. After this, go back to your AI assistant settings and locate the ‘Knowledge Base’ section.

  • Click on the ‘Choose File’ button to upload your document.
  • Ensure the file is in TXT format for optimal performance.
  • Verify the upload with the vector ID displayed.

This knowledge base will provide the AI with the necessary information to answer customer inquiries accurately and promptly.


4. Customizing Your Chatbot Interface with Pabbly Connect

Next, customize the chatbot interface using Pabbly Connect. You can change the header and footer messages, add your brand name, and adjust the initial messages that greet users. This personalization helps maintain your brand identity.

To finalize the customization, enable the option to display the ‘Powered by Pabbly’ label, and set up a footer text with links to your privacy policy. Once you are satisfied with the design, save the changes to make your AI assistant live.


5. Deploying Your Chatbot for Customer Interaction

Finally, deploy your AI chatbot using Pabbly Connect. In the dashboard, find the ‘Embed It’ section to get the script required for integration. Copy this script and paste it into your website’s code. This action will enable the chatbot for customer interactions.

Once embedded, customers can click on the ‘Chat with Us’ button, which redirects them to WhatsApp, where the chatbot will initiate a conversation based on the initial message you set. Ensure you monitor the performance and make adjustments as necessary to improve customer satisfaction.


Conclusion

Using Pabbly Connect, you can create a robust 24/7 customer support WhatsApp chatbot that enhances customer engagement and satisfaction. By following these steps, you ensure that your business is equipped with a responsive AI assistant ready to assist customers at any time.

Ensure you check out Pabbly Connect to create business automation workflows and reduce manual tasks. Pabbly Connect currently offer integration with 2,000+ applications.

Create an Automatic Payment Reminder Sending Workflow

Learn how to set up an automatic payment reminder sending workflow using Pabbly Connect. Step-by-step guide to streamline your payment reminders. Explore systematic approaches to creating efficient automation solutions that convert technical concepts into practical, implementable instructions.

Watch Step By Step Video Tutorial Below


1. Accessing Pabbly Connect to Create Your Workflow

Pabbly Connect is the key platform for creating an automatic payment reminder sending workflow. To get started, open a new tab and go to Pabbly.com/connect. Here, you can sign in or sign up for a free account, which gives you 100 free tasks each month.

If you are a new user, click on the ‘Sign Up Free’ button. Existing users should click ‘Sign In’ to access their accounts. Once logged in, navigate to the Pabbly Connect dashboard by clicking the ‘Access Now’ button. This is where you will create your workflow.


2. Creating Your Workflow in Pabbly Connect

Inside the Pabbly Connect dashboard, click on the ‘Create Workflow’ button to begin. You can organize your workflows by creating folders on the left side. After clicking ‘Create Workflow’, choose your preferred workflow builder. using Pabbly Connect

  • Select a meaningful name for your workflow, such as ‘Clear Ledger Automatic Payment Reminder System’.
  • Choose the folder where you want to save your workflow.
  • Click on the ‘Create’ button to proceed.

After creating your workflow, you will be directed to a new page where you can start integrating applications. The first step is to set up your trigger application.


3. Setting Up the Trigger Application

For the trigger application, you will use the ‘Schedule by Pabbly’ feature to kickstart your workflow every day at a specific time. Click on the plus button to add your trigger application and select ‘Schedule by Pabbly’. using Pabbly Connect

For the event, choose ‘Schedule Workflow’ and click on the ‘Connect’ button. Set the frequency to ‘Every Day’ and select the time (9:00 AM) for your workflow to trigger. Save this step to confirm your scheduling.


4. Integrating Action Applications with Pabbly Connect

Next, you will set up your action application. Click on the plus button and select ‘Google Sheets’ as your next action application. Choose the event to get all rows from your Google Sheet and press the ‘Connect’ button. using Pabbly Connect

  • If this is your first time, select ‘Add New Connection’ and sign in to your Google account.
  • Select the spreadsheet and sheet from which you want to extract data.
  • Specify the range (A:J) to include all necessary rows.

Once you have configured these settings, click on ‘Save and Send Test Request’ to ensure your Google Sheets integration is working correctly.


5. Filtering Customers Using OpenAI in Pabbly Connect

To filter customers whose invoices are due today, add OpenAI as your next action application. Click on the plus button, select OpenAI, and choose ‘Chat GPT’ as the event. Connect using your OpenAI token. using Pabbly Connect

In the prompt field, input the criteria for filtering customers based on their due dates. Map the data from your Google Sheets action application to this prompt. Once set up, save and send a test request to ensure the filtering works correctly.

Finally, to send WhatsApp messages to the filtered customers, use the iterator feature in Pabbly Connect. This allows you to process each customer individually and send them a reminder message via Pabbly Chatflow.


Conclusion

By following this detailed tutorial, you can create an automatic payment reminder sending workflow using Pabbly Connect. This integration ensures timely reminders to your customers, streamlining your payment processes efficiently.

Ensure you check out Pabbly Connect to create business automation workflows and reduce manual tasks. Pabbly Connect currently offer integration with 2,000+ applications.

Send Instant Discord Notifications from Google Sheets (Business Automation)

Learn how to send instant Discord notifications from Google Sheets with Pabbly Connect. This step-by-step tutorial guides you through the integration process. Discover hidden automation capabilities within your existing tools. This guide shows you how to connect your essential applications and permanently eliminate redundant manual processes.

Watch Step By Step Video Tutorial Below


1. Setting Up Pabbly Connect for Integration

To send instant Discord notifications from Google Sheets, you need to set up Pabbly Connect. Begin by visiting the Pabbly website and signing in or signing up for a free account to access the features of Pabbly Connect.

After signing in, navigate to the Pabbly Connect dashboard. Here, you can create a new workflow by clicking on the ‘Create Workflow’ button. This is where you will set up the integration between Google Sheets and Discord.


2. Creating a Google Sheets Trigger in Pabbly Connect

Next, you need to create a trigger for Google Sheets in Pabbly Connect. Click on the plus icon to add a trigger application and search for ‘Google Sheets’. Select it as your trigger application.

  • Choose the trigger event as ‘New or Updated Row’.
  • Connect your Google Sheets account by following the prompts.
  • Select the specific spreadsheet and worksheet you want to monitor.

Once you have set up the trigger, you will receive a webhook URL. Copy this URL as you will need it to link Google Sheets with Pabbly Connect.


3. Configuring Google Sheets for Pabbly Connect

Now, go to your Google Sheets document and set up the Pabbly Connect integration. Click on ‘Extensions’ in the menu, then go to ‘Add-ons’ and select ‘Get Add-ons’. Search for ‘Pabbly Connect WBooks’ and install it. using Pabbly Connect

After installation, return to your sheet and refresh the page. Go back to ‘Extensions’, find ‘Pabbly Connect WBooks’, and click on ‘Initial Setup’. Here, paste the webhook URL you copied earlier and select the trigger column, which is usually the last column that will trigger the notification.


4. Setting Up Discord Action in Pabbly Connect

Now that Google Sheets is set up, it’s time to configure the action in Pabbly Connect for Discord. Click the plus icon to add another application and select ‘Discord’. Choose the action event as ‘Send Channel Message’.

  • Connect your Discord account by providing the necessary permissions.
  • Select the channel where you want to send notifications.
  • Map the message fields using data from Google Sheets.

Once you have mapped the fields, test the action to ensure that notifications are sent successfully to your Discord channel each time a new row is added to your Google Sheets.


5. Finalizing the Integration and Testing

After setting up both Google Sheets and Discord in Pabbly Connect, it’s essential to finalize the integration. Make sure all configurations are correct and save your workflow. You can enable the ‘Send on Event’ option to automate the process.

Finally, test your integration by adding a new row to your Google Sheets. Check your Discord channel to ensure that the notification appears as expected. If everything works correctly, you have successfully set up the automation!

Conclusion

This guide summarizes the key points and helps you understand the essential features and benefits of using this tool.

Ensure you check out Pabbly Connect to create business automation workflows and reduce manual tasks. Pabbly Connect currently offer integration with 2,000+ applications.


In this tutorial, you learned how to send instant Discord notifications from Google Sheets using Pabbly Connect. By following these steps, you can automate notifications for your sales team seamlessly.