Send Bulk WhatsApp Messages for Free (Without Getting Blocked)

Watch Step By Step Video Tutorial Below


1. Accessing Pabbly Connect for WhatsApp Integration

To begin using Pabbly Connect for WhatsApp integration, first navigate to the Pabbly website. Here, you can either sign in if you are an existing user or sign up for a free trial if you are new. This step is essential as it sets the foundation for automating your WhatsApp messaging process.

Once logged in, you will be directed to the Pabbly Connect dashboard. From here, you can access various applications and features that Pabbly Connect offers. Make sure to familiarize yourself with the layout, as it will help streamline your integration process.


2. Creating a WhatsApp Broadcast Using Pabbly Connect

To send bulk WhatsApp messages, you need to create a broadcast in Pabbly Connect. Begin by selecting the option to create a new broadcast. This is where you will choose your broadcast type and name it appropriately.

  • Select “Broadcast Campaign” as the broadcast type.
  • Name your broadcast, e.g., “New Offers Broadcast”.
  • Choose your contact list from the available options.

After naming your broadcast, you can refine your audience by excluding contacts you do not wish to send messages to. This feature is particularly useful for maintaining a targeted approach when sending bulk messages through Pabbly Connect.


3. Uploading Contacts to Pabbly Connect for Messaging

Before sending messages, you must upload your contacts to Pabbly Connect. You can do this by accessing the contact section within your account. Here, you can either add contacts manually or upload a CSV file of your contacts.

To upload a CSV file, ensure it contains all the necessary details. Once uploaded, select the option to add these contacts to your designated list. This process is straightforward and allows for quick integration of your contacts into Pabbly Connect.


4. Sending WhatsApp Messages through Pabbly Connect

With your contacts uploaded, it’s time to send your WhatsApp messages. In Pabbly Connect, select the option to send a message using a pre-approved template or a regular message. Templates allow for a more personalized touch, as you can include variables such as names.

  • Choose a template from the dropdown menu.
  • Customize the message by adding variables for personalization.
  • Test the message by sending it to your own number first.

After testing, you can schedule the broadcast or send it immediately. The scheduling feature in Pabbly Connect allows you to choose a specific date and time for your messages, ensuring they reach your audience at the optimal moment.


5. Tracking Broadcast Performance with Pabbly Connect

Once your messages are sent, Pabbly Connect provides detailed analytics on the broadcast performance. You can view metrics such as sent, delivered, and failed messages, which are crucial for assessing the effectiveness of your campaign.

By analyzing these metrics, you can refine your approach for future broadcasts. This data-driven insight is invaluable for optimizing your messaging strategy through Pabbly Connect, ensuring that your communications are both effective and efficient.


Conclusion

In this tutorial, we explored how to use Pabbly Connect to send bulk WhatsApp messages effectively. By following these steps, you can leverage automation to enhance your communication strategy, ensuring timely and personalized messages.
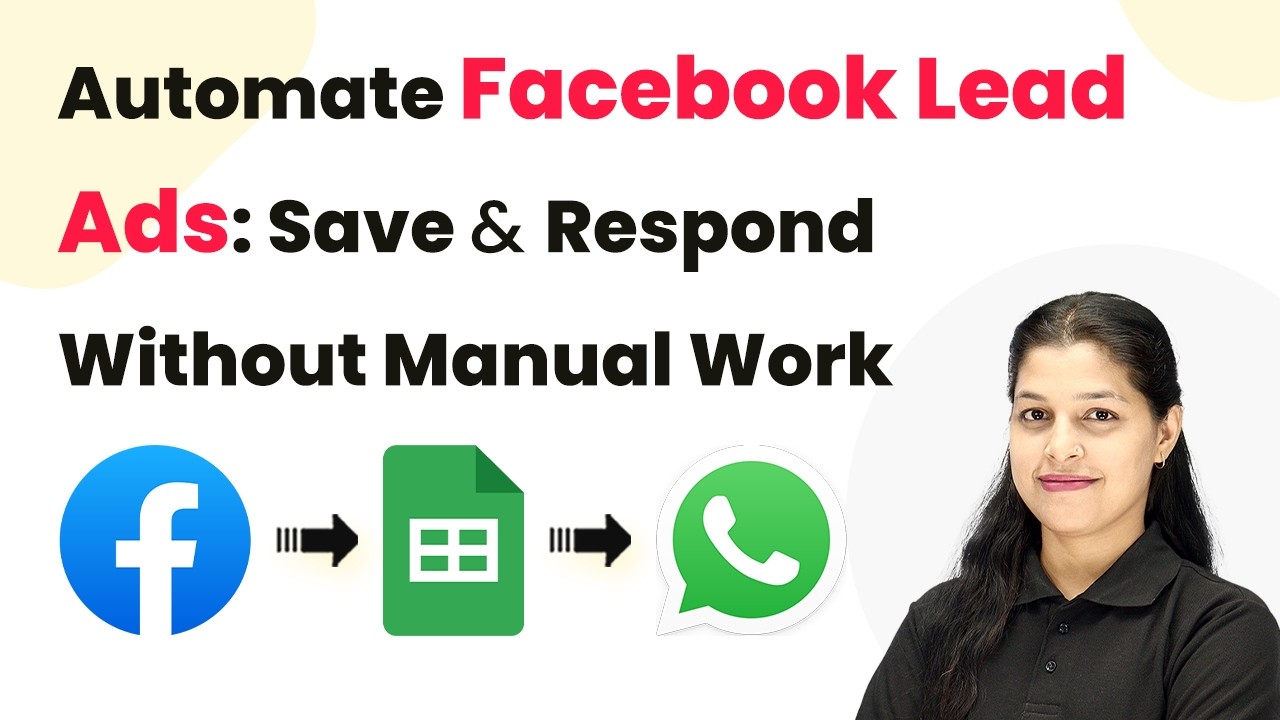

Automate Facebook Lead Ads: Save & Respond Without Manual Work

Watch Step By Step Video Tutorial Below


1. Accessing Pabbly Connect for Automation

To start automating your Facebook leads, access Pabbly Connect by visiting its official website. You can sign up for free, allowing you to explore its features and get 100 free tasks each month.

Once on the homepage, you will see options to ‘Sign In’ or ‘Sign Up Free’. After logging in, navigate to the workflow page where you can create your automation. This is where the magic happens with Pabbly Connect, enabling seamless integration between Facebook Leads, Google Sheets, and WhatsApp.


2. Setting Up Facebook Lead Ads as Trigger in Pabbly Connect

In this section, we will set up Facebook Lead Ads as the trigger for our automation using Pabbly Connect. This trigger will initiate the workflow whenever a new lead fills out the form.

Click on the ‘Add Trigger’ button and select ‘Facebook Lead Ads’ as the application. Choose the event as ‘New Lead Instant’. Then, click on the ‘Connect’ button to establish a connection with your Facebook account. Follow these steps:

  • Select your Facebook account.
  • Choose the Facebook page associated with your leads.
  • Select the form from which you want to capture leads.

After setting up the trigger, click ‘Save and Send Test Request’ to ensure the connection is working. This step confirms that Pabbly Connect is successfully capturing lead data from Facebook.


3. Adding Lead Data to Google Sheets via Pabbly Connect

Next, we will use Pabbly Connect to add the captured lead data to Google Sheets. This integration allows you to keep track of all your leads in a centralized location.

Choose ‘Google Sheets’ as the action application and select the event as ‘Add New Row’. Click ‘Connect’ and sign in with your Google account. Then, select the spreadsheet where you want to store the lead details. Follow these mapping steps:

  • Map the lead’s first name to the corresponding column in Google Sheets.
  • Map the last name, email, phone number, and city similarly.
  • Ensure all fields are mapped correctly for dynamic updates.

Click ‘Save and Send Test Request’ to verify the data is being added successfully to your Google Sheets. This confirms that Pabbly Connect is effectively handling the data flow.


4. Sending WhatsApp Messages Using Pabbly Connect

In this section, we will set up WhatsApp as another action in our automation using Pabbly Connect. This allows you to send instant messages to leads via WhatsApp.

Select ‘WhatsApp Cloud API’ as the action application and choose ‘Send Text Message’ as the event. Click ‘Connect’ and enter the necessary credentials such as the token and phone number ID. Follow these steps:

  • Map the recipient’s mobile number from the lead data.
  • Compose the message, including the lead’s name for personalization.
  • Click ‘Save and Send Test Request’ to send a test message.

Check your WhatsApp to confirm that the message was received. This demonstrates how Pabbly Connect facilitates communication with your leads instantly, enhancing your engagement.


5. Conclusion: Automate Your Business with Pabbly Connect

Using Pabbly Connect, you can effortlessly automate your Facebook leads, ensuring timely follow-ups through Google Sheets and WhatsApp. This integration saves time and enhances your business efficiency.

By following the steps outlined in this tutorial, you can create a seamless workflow that captures leads and communicates with them instantly. Start using Pabbly Connect today to automate your tasks and focus on growing your business!

How to Get Meta Ads Leads on WhatsApp Automatically

Watch Step By Step Video Tutorial Below


1. Accessing Pabbly Connect for Integration

To start integrating WhatsApp with Facebook leads, first access Pabbly Connect by visiting pabbly.com/connect in your browser. Here, you will find options to either sign in or create a free account, which allows you to explore the software with 100 free tasks every month.

If you’re a new user, click on “Sign Up Free” to get started. Existing users can simply log in. Once logged in, navigate to the Pabbly Connect dashboard to begin setting up your automation.


2. Creating a Workflow in Pabbly Connect

Next, you will create a new workflow in Pabbly Connect. Click on “Create New Workflow” and choose to create from scratch or use AI to generate a workflow. For this tutorial, we will start with a fresh workflow.

In the AI workflow builder, input a prompt describing your desired automation. For instance, you can type “When a new lead comes in from Facebook, send a WhatsApp message via Pabbly Chatflow.” This will set the foundation for your automation.

  • Select the trigger event as “New Lead Instant” from Facebook.
  • Choose the action as “Send Text Message” via Pabbly Chatflow.

After confirming your selections, click on “Approve and Create” to finalize your workflow setup in Pabbly Connect.


3. Connecting Facebook Leads to Pabbly Connect

To connect your Facebook leads to Pabbly Connect, select the Facebook app and authorize access to your account. Choose the specific Facebook page that you want to connect and select the lead form you wish to use.

Once connected, you will be prompted to select the lead form from the dropdown menu. Make sure to choose the correct form that captures the lead details you need. After confirming, click on “Save and Send Test Request” to ensure everything is working correctly.


4. Integrating WhatsApp for Notifications

Now, it’s time to integrate WhatsApp to receive notifications for new leads. In Pabbly Connect, select “Add a New Connection” and enter your WhatsApp account details. You will need to generate an API token from your Pabbly Chatflow account to complete this step.

Once you have the token, navigate to the settings in Pabbly Chatflow and copy the API token. Paste this token into the designated field in Pabbly Connect and save your settings. Now, you can enter the WhatsApp number where you want to receive the lead notifications.

  • Enter the message format you want to receive, including fields like name, phone, email, and property type.
  • Map the data from the Facebook lead response to your WhatsApp message.

After mapping the data, click on “Save and Send Test Request” to verify that you receive the WhatsApp message correctly.


5. Testing the Integration

To ensure your integration is working flawlessly, conduct a test by generating a new lead through your Facebook lead form. Once the lead is submitted, check your WhatsApp for the notification.

If everything is set up correctly, you should receive a WhatsApp message with the lead details instantly. This confirms that Pabbly Connect has successfully automated the process of notifying you about new leads via WhatsApp.

In case you do not receive the message, revisit your settings in Pabbly Connect to troubleshoot any issues. Make sure all fields are correctly mapped and that your API token is accurate.


Conclusion

This tutorial demonstrates how to integrate WhatsApp with Facebook leads using Pabbly Connect. By following these steps, you can automate lead notifications and streamline your communication effectively.

Top 5 ChatGPT Automation Hacks You Need to Try 🤯

Watch Step By Step Video Tutorial Below


1. Automate Instagram Posts with Now and OpenAI

Now you can automate Instagram posts using OpenAI. This integration allows you to create unique captions and images for your posts effortlessly. By connecting Now with OpenAI, you streamline the process of generating content for your Instagram account.

To set this up, follow these steps:

  • Connect your Now account to OpenAI.
  • Configure the Instagram API settings in Now.
  • Set the prompt for OpenAI to generate captions.

Once this setup is complete, your Instagram posts will be created automatically based on the generated content, saving you time and effort.


2. Manage Google Business Reviews with OpenAI

OpenAI can now handle your Google business reviews through integration with Now. This feature is beneficial for business owners who receive numerous reviews daily. Instead of replying manually, let OpenAI generate responses automatically.

Follow these steps to set up this integration:

  • Link your Now account with OpenAI.
  • Connect your Google business profile to Now.
  • Configure OpenAI to analyze incoming reviews.

With this setup, OpenAI will analyze each review, generate a suitable reply, and post it directly to your Google business profile, enhancing customer engagement.


3. Handle Instagram DMs Automatically with OpenAI

Now you can manage Instagram DMs efficiently using OpenAI. This integration is crucial for businesses that rely on Instagram for customer inquiries. OpenAI will generate replies to any messages received.

To implement this automation, follow these steps:

  • Connect Now with OpenAI.
  • Set up the Instagram messaging API in Now.
  • Configure the prompt for OpenAI to generate DM replies.

Once configured, OpenAI will automatically reply to DMs, ensuring no customer inquiries go unanswered and improving overall customer satisfaction.


4. Create a Telegram Bot with Now and OpenAI

You can create a Telegram bot that utilizes OpenAI for automated responses. This is especially useful for managing group messages and queries from clients or students. The integration with Now makes this process seamless.

To set up your Telegram bot, follow these steps:

  • Link your Now account to OpenAI.
  • Connect Now with your Telegram account.
  • Configure OpenAI to analyze incoming messages.

After completing these steps, your Telegram bot will automatically generate replies to incoming messages, ensuring efficient communication with your audience.


5. Generate Vlogs Automatically Using Google Sheets and OpenAI

Now you can automate vlog creation using OpenAI and Google Sheets. This integration allows you to input ideas into Google Sheets, and OpenAI will generate complete vlogs based on those ideas.

To set this up, follow these steps:

  • Connect Now with OpenAI.
  • Link Google Sheets to your Now account.
  • Configure OpenAI to generate vlogs based on the input from Google Sheets.

Once configured, OpenAI will generate vlogs automatically, saving you time and enhancing your content creation process.


Conclusion

Integrating Now with OpenAI streamlines various tasks, from managing Instagram posts to handling Google reviews. This powerful combination enhances productivity and automates repetitive tasks, allowing you to focus on growing your business.

Build an AI Social Media Agent for Automatic Posting

Watch Step By Step Video Tutorial Below


1. Accessing Pabbly Connect for Social Media Automation

To start automating your social media posts, you first need to access Pabbly Connect. Open your browser and search for Pabbly.com. Once on the homepage, you will see options to sign in or sign up for a free account.

If you are a new user, click on “Sign Up Free” to get started. Existing users can simply click on “Sign In”. New users can access 100 free tasks every month, making it easy to explore the software.


2. Creating a Workflow in Pabbly Connect

Once logged in, navigate to the Pabbly Connect dashboard. Here, you will create a new workflow. Click on “Create Workflow” and select the option to create from scratch.

In this section, you will set up the workflow to generate social media content automatically. You will be prompted to define the trigger for your workflow. Choose a schedule to trigger the automation on specific days, like Sundays and Wednesdays.

  • Select “Schedule Workflow” as the trigger.
  • Choose the days of the week for posting.
  • Set the time for automation, e.g., 11:00 AM.

After setting the trigger, save your settings to proceed to the next step of your workflow creation.


3. Generating Content Using Pabbly Connect

Now that your workflow is set up, the next step is to generate content for your social media posts. For this, you will utilize the AI capabilities of Pabbly Connect. In the workflow, add an action step to generate content using Gemini AI.

Choose the option to create and publish content. You will need to provide a prompt that describes the content you want to generate. After entering the prompt, select the model and method for generating the content.

  • Select “Gemini 2.5 Flash” from the model dropdown.
  • Choose “Generate Content” as the method.

Once you have configured these settings, save the action step to complete the content generation setup.


4. Sharing Posts on Facebook and Instagram

After generating the content, the next step is to share it on your social media accounts. This is where Pabbly Connect truly shines, as it allows you to post seamlessly on both Facebook and Instagram.

Start by adding another action step in your workflow to share the generated content. For Instagram, select the option to create and publish a photo. For Facebook, choose to create a page photo post.

  • Map the generated content to the respective fields for Instagram.
  • Map the same content for Facebook’s post description.

After mapping the fields, review your workflow settings and click on “Save and Send Request” to share your posts. You will receive a successful response indicating that your posts have been shared.


5. Conclusion

Using Pabbly Connect to automate your social media posting on platforms like Facebook and Instagram is straightforward. By following the steps outlined in this guide, you can efficiently create and share content without manual effort. This automation not only saves time but also ensures consistency in your social media presence.

With the power of Pabbly Connect, you can easily manage your social media marketing and focus on growing your business.

I Collect WhatsApp Responses in Google Sheets Automatically

Watch Step By Step Video Tutorial Below


1. Accessing Pabbly Connect for Integration

To begin integrating WhatsApp messages into Google Sheets, first, access Pabbly Connect. Navigate to the Pabbly Connect website and log in to your account. If you are a new user, you can sign up for free and receive 100 tasks to test the integration.

After logging in, you will be directed to your dashboard. Here, you can start creating your workflow by clicking on the “Create Workflow” button. This is the foundation for capturing WhatsApp messages and storing them systematically in Google Sheets.


2. Creating a Workflow in Pabbly Connect

In this step, you will create a workflow to capture WhatsApp messages. Click on the “Create Using AI” option to use the new workflow builder. Enter the prompt to collect WhatsApp responses, specifying that you want to capture messages using the WhatsApp Cloud API.

  • Select WhatsApp Cloud API as your trigger manager.
  • Set the trigger event to “Message Notification”.
  • Click “Approve and Create” to finalize the workflow setup.

Once you’ve created the workflow, you will receive a webhook URL from Pabbly Connect. This URL is crucial for connecting WhatsApp Cloud API to your workflow, allowing it to capture messages automatically.


3. Configuring WhatsApp Cloud API with Pabbly Connect

Next, you need to configure the WhatsApp Cloud API with the webhook URL provided by Pabbly Connect. Copy the webhook URL and navigate to your WhatsApp Cloud API setup. In the configuration section, locate the webhook settings and paste the copied URL into the callback URL field.

Additionally, you will need a verification token. Scroll down in your WhatsApp Cloud API settings to find this token, copy it, and paste it into the appropriate field in your configuration. After entering the token, save the settings to complete the setup.


4. Capturing WhatsApp Messages in Pabbly Connect

With the WhatsApp Cloud API configured, return to your Pabbly Connect workflow and click on the “Recapture” button. This allows you to test the connection by sending a message through WhatsApp. Once you send a message, Pabbly Connect will capture the response and display it in your workflow.

  • Verify that the message ID, sender name, and phone number are captured accurately.
  • Ensure all subscriptions are turned on for the connection to work seamlessly.

This step confirms that your WhatsApp Cloud API is successfully connected to Pabbly Connect, allowing for real-time message capture.


5. Adding WhatsApp Messages to Google Sheets

Now that you can capture WhatsApp messages, it’s time to send this data to Google Sheets. In your Pabbly Connect workflow, click on the Google Sheets step and select the “Connect” button. Choose the option to add a new connection, and sign in with your Google account.

Once connected, select the specific spreadsheet where you want to record the messages. Map the fields for ID, name, phone number, and message in the Google Sheets headers. This mapping ensures that each new message received will be updated automatically in your Google Sheets.

Finally, send a test request to verify that the integration works. You should see the WhatsApp message recorded in your Google Sheets, confirming that your integration is complete and functioning smoothly.


Conclusion

In this tutorial, we explored how to integrate WhatsApp messages into Google Sheets using Pabbly Connect. By following these steps, you can automate the process of recording messages systematically in a structured format.

All-in-One WhatsApp Chatbot: Save Leads & Reply Using AI 🤖

Watch Step By Step Video Tutorial Below


1. Accessing Pabbly Connect for Integration

To create an all-in-one WhatsApp chatbot, the first step is to access Pabbly Connect. This platform serves as the central hub for integrating various applications like WhatsApp and Google Sheets.

Visit the Pabbly Connect website and log in to your account. If you are a new user, you can sign up for free and get started with your integrations. Once logged in, navigate to the dashboard where you can create a new workflow for your WhatsApp chatbot.


2. Setting Up Your WhatsApp Chatbot Using Pabbly Connect

In this section, you will set up the WhatsApp chatbot using the features of Pabbly Connect. First, you need to create a flow for the chatbot. This flow will trigger based on user inputs.

  • Choose a trigger event such as a keyword or a user starting a conversation.
  • Set the keyword to initiate the chatbot, for example, ‘hello’.
  • Create a welcome message that will be displayed when the user triggers the chatbot.

Once these settings are configured, you can add buttons to the chatbot, such as ‘View Rooms’ and ‘Ask Questions’. This will enhance user interaction and guide them through the booking process.


3. Integrating Booking Process with Google Sheets via Pabbly Connect

Next, you will integrate the booking process with Google Sheets using Pabbly Connect. This integration allows you to save booking data automatically. After collecting user inputs like name, check-in date, and room type, you will send this information to Google Sheets.

  • Use the API request node in Pabbly Connect to connect your WhatsApp chatbot with Google Sheets.
  • Enter the webhook URL provided by Pabbly Connect into the API request node.
  • Map the fields such as full name, check-in date, and room type to ensure data is saved correctly.

After completing these steps, any booking made through the chatbot will automatically populate in the designated Google Sheets, streamlining your data management.


4. Responding to User Queries with AI in Pabbly Connect

In addition to booking, your WhatsApp chatbot can also respond to user queries using AI features available in Pabbly Connect. This allows for a seamless customer service experience.

To set this up, assign an AI assistant to handle questions like booking inquiries or service availability. You can create a knowledge base that the AI will reference to provide accurate responses.

Ensure that the AI assistant is configured to respond with a welcome message, making the interaction friendly and engaging. This feature will significantly enhance customer satisfaction by providing instant replies to common questions.


5. Finalizing Your WhatsApp Chatbot and Saving the Flow

After setting up all the components of your WhatsApp chatbot, it’s time to finalize the flow using Pabbly Connect. Review all settings and ensure that the integrations are working as expected.

Once confirmed, save your flow by clicking the save button in Pabbly Connect. This will ensure that your chatbot is live and ready to handle bookings and inquiries from customers.

Testing the chatbot is essential. Send test messages to check if the booking details are being captured in Google Sheets and if the AI assistant is responding correctly.


Conclusion

In this tutorial, you learned how to create an all-in-one WhatsApp chatbot using Pabbly Connect. This integration allows for seamless booking management and efficient customer interaction, enhancing overall business operations.

Send Form Responses to Notion Automatically

Watch Step By Step Video Tutorial Below


1. Accessing Pabbly Connect for Integration

To begin the integration process, you need to access Pabbly Connect. Start by opening your browser and navigating to pabbl.com/connect. This platform is essential for connecting various applications, including Notion and Tyform.

If you are new to Pabbly Connect, click on the “Sign up for free” option in the top right corner. This allows you to explore the platform with 100 free tasks each month, which is perfect for testing your integrations.


2. Creating a Workflow in Pabbly Connect

Once logged in, you will be directed to the workflow builder of Pabbly Connect. This is where you will set up your automation. Click on the “Add Trigger” button to start the process. A trigger is an event that starts your workflow.

  • Select “Form Builder” as your trigger application.
  • Choose the event as “New Entry”.
  • Connect your Tyform account by adding a new connection.

After selecting your form, click on “Save and Send Test Request” to ensure everything is set up correctly. This step is crucial as it verifies the connection between Pabbly Connect and Tyform.


3. Submitting the Form via Tyform

Now that your workflow is set up, you can proceed to submit a form through Tyform. Open the form link in a new tab and fill in the required details. For instance, enter a name, mobile number, and city before clicking “Submit”.

Once you submit the form, Pabbly Connect will capture the response. You should see the data reflected in your workflow within a few seconds, confirming that the integration is functioning correctly.


4. Adding Notion as an Action in Pabbly Connect

Next, you will add Notion as an action step in your workflow. Click on “Add New Action Step” and search for Notion. Select it as your action application to proceed.

  • Choose the event as “Create Database Item”.
  • Connect your Notion account by adding a new connection.
  • Grant permissions for Pabbly Connect to access your Notion pages.

After setting up the connection, you will need to map the fields from your Tyform submission to the Notion database. This mapping allows the data to flow seamlessly from Tyform to Notion, ensuring all entries are recorded automatically.


5. Finalizing Your Automation in Pabbly Connect

With everything set up, you can finalize your automation. Click on “Save and Send Test Request” to ensure that the data from Tyform is correctly added to your Notion database. You should receive a confirmation message indicating that a new database item has been created.

Now, every time a new form submission is received, Pabbly Connect will automatically add the details to your Notion database without any manual intervention. This automation saves time and reduces the risk of errors in data entry.


Conclusion

In this tutorial, we explored how to automate data entry between Notion and Tyform using Pabbly Connect. By following the steps outlined, you can streamline your workflow and enhance productivity.

Build a Free WhatsApp Chatbot for Online Coaching

Watch Step By Step Video Tutorial Below


1. Accessing Pabbly Connect for WhatsApp Integration

To start integrating your WhatsApp chatbot, you need to access Pabbly Connect. Open your browser and navigate to Pabbly’s official site. If you are a new user, sign up for free to explore the features.

Once you are logged in, you will have access to the dashboard. Here, you can manage your integrations. Ensure that you have added your WhatsApp number in Pabbly Connect to proceed with the setup.


2. Creating a New Flow in Pabbly Connect

After accessing Pabbly Connect, navigate to the “Flow” section from the left sidebar. Click on the “Add Flow” button to create a new workflow for your WhatsApp chatbot.

  • Select a suitable name for your flow.
  • Choose a trigger event that initiates the chatbot.
  • You can select “User Starts a Conversation” as your trigger.

By selecting this trigger, you ensure that the chatbot responds whenever a user initiates a conversation. This is a crucial step in setting up your WhatsApp chatbot using Pabbly Connect.


3. Designing Your WhatsApp Chatbot Flow

Once the trigger is set, you can design the flow of your chatbot. Use the drag-and-drop feature in Pabbly Connect to add messages and buttons that guide users through the conversation.

For instance, you can create buttons for options like “Explore Courses” and “Book a Free Demo”. Each button should lead to a specific response or action based on user selection. Here’s how to set it up:

  • Add a message node that welcomes users.
  • Include buttons for different courses offered.
  • Connect each button to the corresponding messages.

Using Pabbly Connect, you can create a seamless flow that enhances user interaction with your WhatsApp chatbot.


4. Collecting User Information with Pabbly Connect

To make your chatbot more effective, you can collect user information such as name and preferred time slot. In Pabbly Connect, use the “Ask Question” feature to prompt users for this information.

For example, after a user selects to attend a demo class, you can ask them to provide their name and preferred time. This data will be stored in the contact custom fields of Pabbly Connect, allowing for personalized follow-ups.

Follow these steps to set up data collection:

  • Drag and drop the “Ask Question” node into your flow.
  • Enter the question prompt and select the required field.
  • Repeat for each piece of information you wish to collect.

By implementing these features in Pabbly Connect, you enhance your chatbot’s capability to engage users effectively.


5. Finalizing Your WhatsApp Chatbot in Pabbly Connect

After designing the flow and collecting user information, it’s time to finalize your WhatsApp chatbot. Click the “Save Flow” button in Pabbly Connect to ensure all changes are recorded.

Once saved, your chatbot will operate as planned whenever a user initiates a conversation. Test the flow to confirm that all buttons and responses work correctly. This ensures a smooth user experience.

To summarize the final steps:

  • Review all messages and buttons for accuracy.
  • Conduct a test run to check the flow.
  • Launch your chatbot for users to interact with.

With Pabbly Connect, you have successfully created a WhatsApp chatbot that can assist users effectively.


Conclusion

In this tutorial, we demonstrated how to integrate a WhatsApp chatbot using Pabbly Connect. By following these steps, you can enhance user engagement and streamline communication for your services.

I Built a Smart WhatsApp AI Chatbot in 5 Minutes (Step-by-Step)

Watch Step By Step Video Tutorial Below


1. Setting Up Pabbly Connect for WhatsApp Integration

To start integrating WhatsApp with Pabbly Connect, first access Pabbly Connect by visiting the Pabbly website. If you’re a new user, create an account; existing users can simply log in. This platform serves as the backbone for connecting WhatsApp with various applications, enabling seamless automation.

After logging in, navigate to the dashboard and click on the “Create Workflow” button. This is where you will set up the integration process. Select WhatsApp as your trigger application, which will initiate actions based on messages received. Ensure you have your WhatsApp business number ready for the next steps.


2. Configuring the WhatsApp AI Assistant Using Pabbly Connect

Now that you have set up Pabbly Connect, it’s time to configure the AI assistant for WhatsApp. First, head to the Pabbly Chatflow interface. Here, you will define how your AI assistant interacts with users. Click on “Add AI Assistant” and select the WhatsApp integration.

  • Select your WhatsApp number linked to the Pabbly account.
  • Choose the AI model to use, such as OpenAI.
  • Set the temperature for creativity, with 0 being focused and 1 being creative.

After these configurations, you will need to enter your OpenAI API key to establish a connection between the AI assistant and the OpenAI service. This key is crucial for the AI to generate responses based on user queries.


3. Building the Knowledge Base for Your AI Assistant

With the AI assistant configured, the next step involves building a knowledge base that will inform the assistant’s responses. In Pabbly Connect, navigate to the knowledge source tab and upload a document containing relevant information about your business. This could be in PDF or text format.

Once uploaded, ensure that the knowledge base is processed correctly. This document will serve as the brain for your AI assistant, enabling it to answer customer queries accurately. Test this by sending sample questions through WhatsApp to see how the AI utilizes the knowledge base.


4. Customizing Your AI Assistant Interface with Pabbly Connect

Next, you can customize the interface of your AI assistant within Pabbly Connect. This includes setting up the header, footer, and initial messages that users will see when they interact with the assistant on WhatsApp. Choose a catchy name for your assistant that represents your brand.

  • Enter a header display name, like “Power Pulse Fitness”.
  • Add a footer message and customize the visual elements to match your branding.
  • Select a profile picture for the assistant to enhance user engagement.

Once you have customized the interface, save your settings. This will ensure that your AI assistant looks professional and is ready for customer interaction.


5. Enabling Your AI Assistant for WhatsApp Using Pabbly Connect

The final step is to enable your AI assistant for WhatsApp through Pabbly Connect. Go to the inbox settings and activate the AI auto-replies feature. You can choose to enable this for all contacts or select specific ones.

To finalize, test the AI assistant by sending various queries through WhatsApp. Ensure that the assistant responds accurately based on the knowledge base you provided. This automation will help save time and enhance customer service without manual intervention.


In conclusion, using Pabbly Connect to integrate WhatsApp with an AI assistant allows businesses to automate customer interactions efficiently. This guide has detailed every step needed to create a responsive AI assistant tailored to your needs. Start using this powerful tool today to streamline your customer service!