Ideal For: All the ceiling fans manufacturers, electronic shops, cottage industries, MSME and other merchants can use this method to sell ceiling fans online.
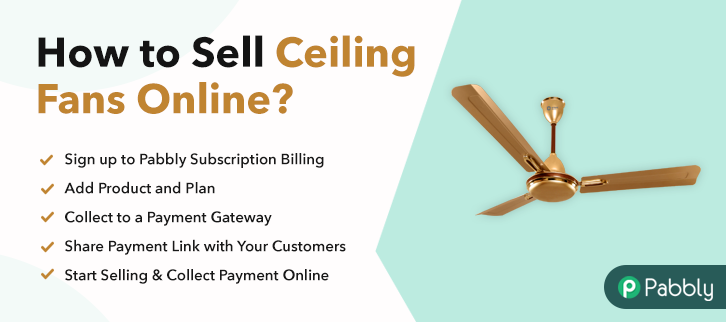
Why Choose this Method To Sell Ceiling Fans Online?
Unlike any other solution, this method allows you to:
- List and sell your ceiling fans for FREE. Absolutely no payment required.
- No need to pay commission on any of your sale.
- Multiple payment options like PayPal, Credit Card, etc to collect payment from a single place.
- Sell one time or recurring subscriptions of your ceiling fans.
- Collect payments & sell products in any currency as per your requirement.
- Give discounts on your products by offering special coupon codes.
- Add sales commission agents to help you in selling ceiling fans online.
You have a conventional brick and mortar store selling ceiling fans but after the end of the season, the demand has dried up. To offset the losses you are planning to start ceiling fans selling business online. However, you are hesitant as you are new in this game and don’t know a thing about e-commerce. But don’t worry, we have covered the benefits and steps to sell ceiling fans online.
The advantages of selling ceiling fans online are numerous like higher product discovery by global audiences, competitive pricing, easy and accurate revenue management, no middleman commission, 24×7 automated online shop, better marketing, etc.
Now, to begin your first e-commerce store, we will use an awesome tool called Pabbly Subscription Billing. The benefit of using this software is through its checkout pages you can sell ceiling fans online. Some other benefits are
- Unlimited Listing Of Products
- Multiple Billing Models
- Create Coupons, Plans, Discounts
- Custom Domain
- Automatic Email Notification on Payment Completion/Failure
- Import/Export Customer Data
- Revenue Tracking
- Auto Retrial on Card Declines
With these features, you will definitely have a lead over your competitors. So why wait, let us create our first checkout page to start selling ceiling fans online.
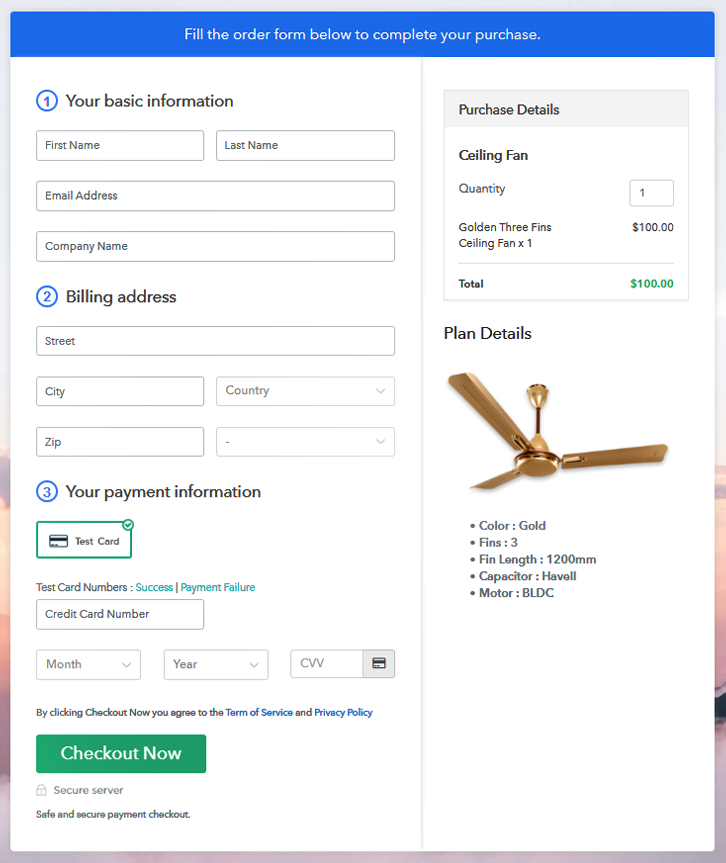
Final View of Checkout Page For Your Ceiling Fans Selling Business
Step 1: Log in to Pabbly Subscription Billing

Find Pabbly Subscription Billing in your browser and landing on their website click on “Sign up Free“. Either you can sign in through your, Gmail account or you can fill in fields like name, email address and then press the “Sign Up” button.
Sign Up For Free!
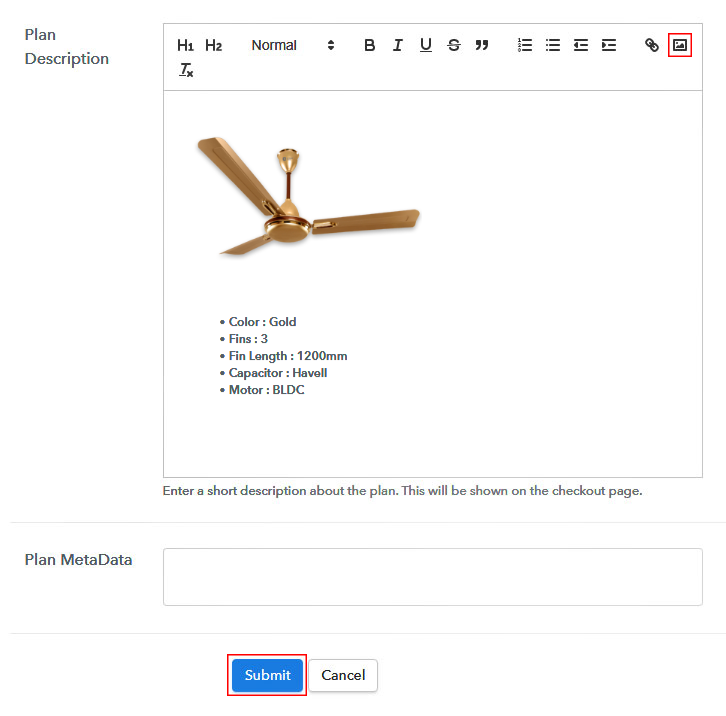
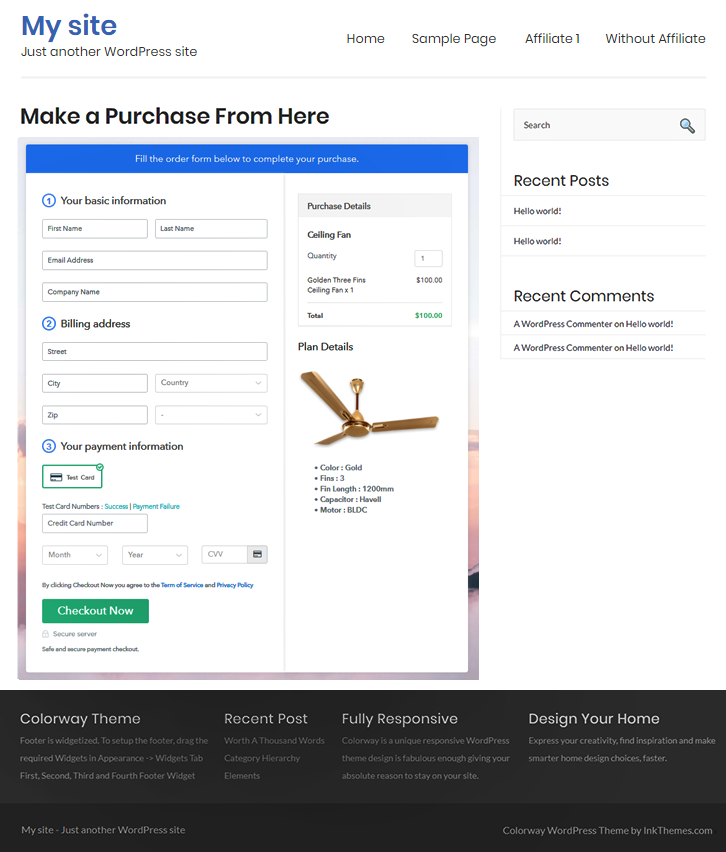
Click on the “Access Now” button of the software, a page will redirect with fields like company name, select currency, and phone number. Just fill out those details to continue creating a checkout page for a ceiling fan To prevent glitches during transactions, Pabbly Subscription Billing provides a dummy payment gateway where you can beta test the entire payment experience of the customer in advance. Payment gateways such as Razorpay, Stripe, and many more can be easily integrated using Pabbly Subscription Billing. There is an integration guide for each of them below this para. But I am going ahead to enable the test payment option to continue the process. You have to add the required product title, in this case, it is ‘Ceiling Fans’. Fill up the details and your product is created. Note: Here you can add all the products related to the similar category by creating plans for each of them. Let’s rollout plans for different kinds of ceiling fans available in your store. Here, in the plan page, you will fill in details like plan name, code, price, setup fees, etc. Scrolling down you will find different billing models like one-time payment, recurring, based on cycles, etc. Select your preferred billing model that suits your needs and yes you can change it anytime Upload high definition images of your ceiling fans by clicking on the image button. Now give some comprehensive information on ceiling fans like the rotor speed, blades, power intake, etc preferably in bullet points or numerical points. Then press the “Submit” button. Moreover, using the same process, you can list more products. Follow up the recommended steps to preview the checkout page: Just copy the link and add the checkout page to sell ceiling fans online at any preferable place on your WordPress site. Further, paste the plan link on a text editor of the WordPress dashboard. Next, click the “Publish” button, after making changes. Note: In case you want to sell multiple products via a single checkout page, you can create a multi-plan checkout page otherwise skip this step. Excellent!! You have finally made your first checkout page in Pabbly Subscription Billing to sell ceiling fans online. Since these are your baby steps, you may encounter some hiccups but eventually, you will master all its features to fully dominate the e-commerce world. Now, you may have some queries regarding these steps, go ahead and drop your questions in the comment section below. We will reply to you at the earliest.Step 2: Select Subscription Billing

Step 3: Account Setup

Step 4: Connect Payment Gateways & Start Ceiling Fans Selling Business Online

Step 5: Add Product For Your Ceiling Fans
 Assuming that the payment gateway integration went well, so let’s move on to add the products. Below the “Enable Payments” segment there is the “Add your product” section click on it. This will generate a dialog box with a blue button “Add New Product”. Click on it.
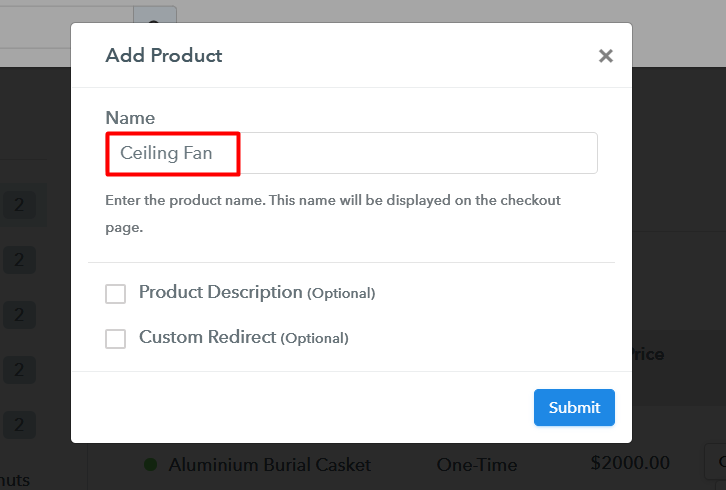
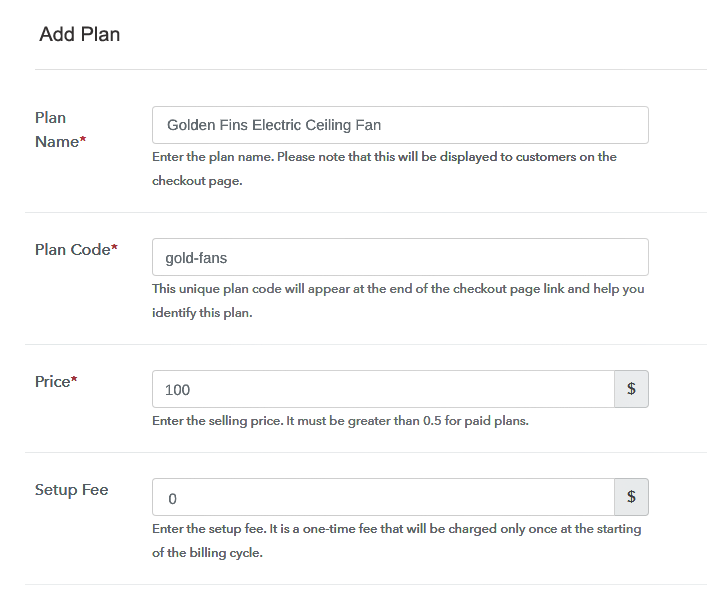
Step 6: Add Plans
(a) Select Add New Plan

(b) Specify the Plan & Pricing Details
(c) Add Image & Description of Ceiling fans
Step 7: Share your Checkout Page

Step 8: Preview Checkout Page
(a) Click on the View Button

(b) Take a Look at the Checkout Page
Step 9: Embed Checkout Page in Site & Sell Ceiling Fans Online

(a) Edit the Page & Paste the Copied Link

(b) Save & Publish the Checkout Page

(c) Check out the Final Look of your Checkout Page on WordPress Site
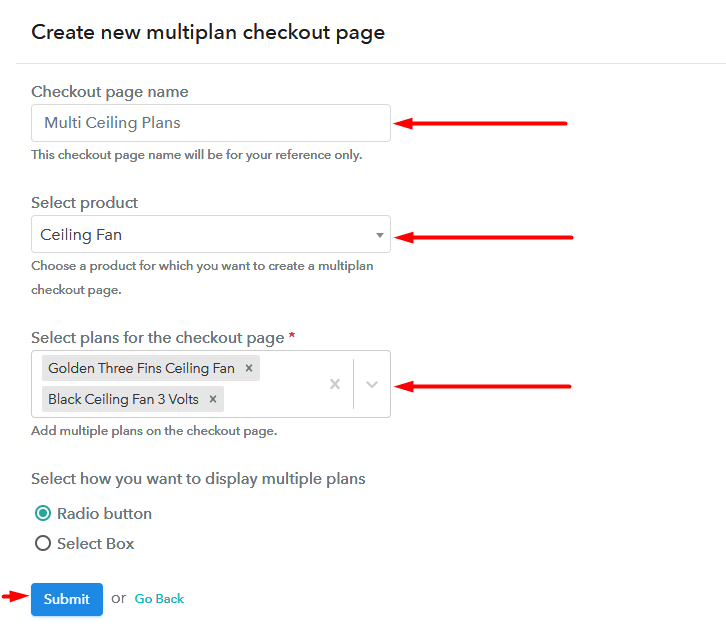
Step 10: Multiplan Checkout Page
(a) Click on Add Mutiplan Checkout

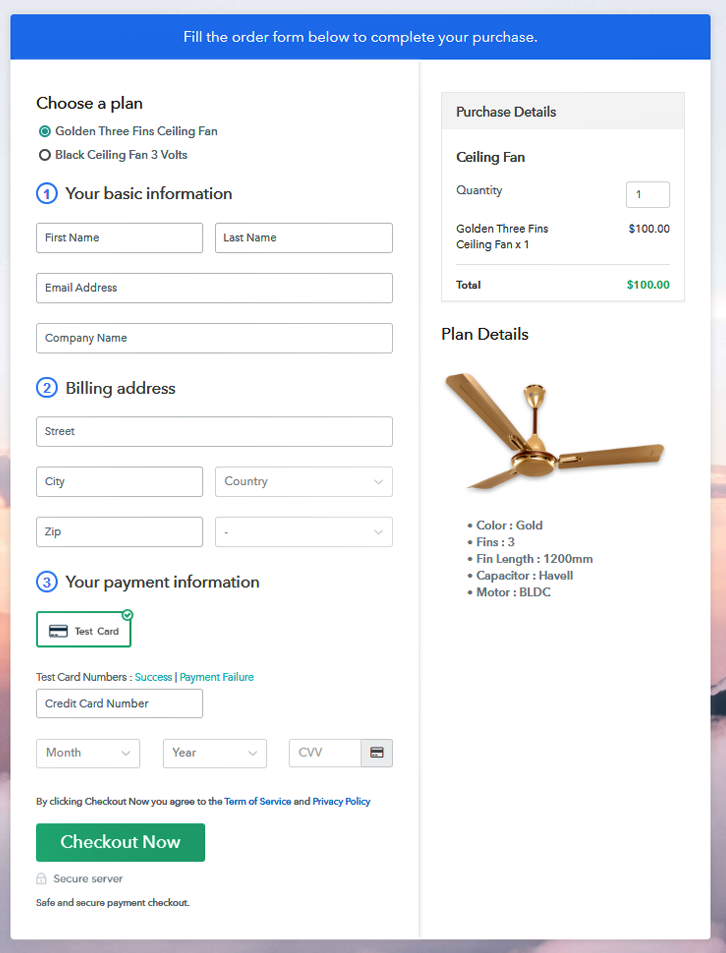
(b) Add Plans to Sell Multiple Ceiling Fans from Single Checkout Page
(c) Take a Look at the Checkout Page
Wrapping Up
You May Also Like To Read –


