Ideal For: All the ceiling material manufacturers, ceiling material sellers, retail hardware shop owners, and other merchants can use this method to take their ceiling material selling business online.
Why Choose this Method To Sell Ceiling Materials Online?
Unlike any other solution, this method allows you to:
- List and sell your ceiling materials for FREE. Absolutely no payment required.
- No need to pay commission on any of your sales.
- Multiple payment options like PayPal, Credit Card, etc to collect payment from a single place.
- Sell one time or recurring subscriptions of your ceiling materials.
- Collect payments & sell products in any currency as per your requirement.
- Give discounts on your products by offering special coupon codes.
- Add sales commission agents to help you in selling ceiling materials online.
Lying in bed and staring ceiling for no particular reason, actually great therapy for some of us. But what if we remove plain ceiling with a fancy one then it would be lovely. Nowadays people love to decorate their ceiling and that’s why selling ceiling materials business is on-demand. And, if you own the ceiling materials business, it is time to take another step by bringing it online.
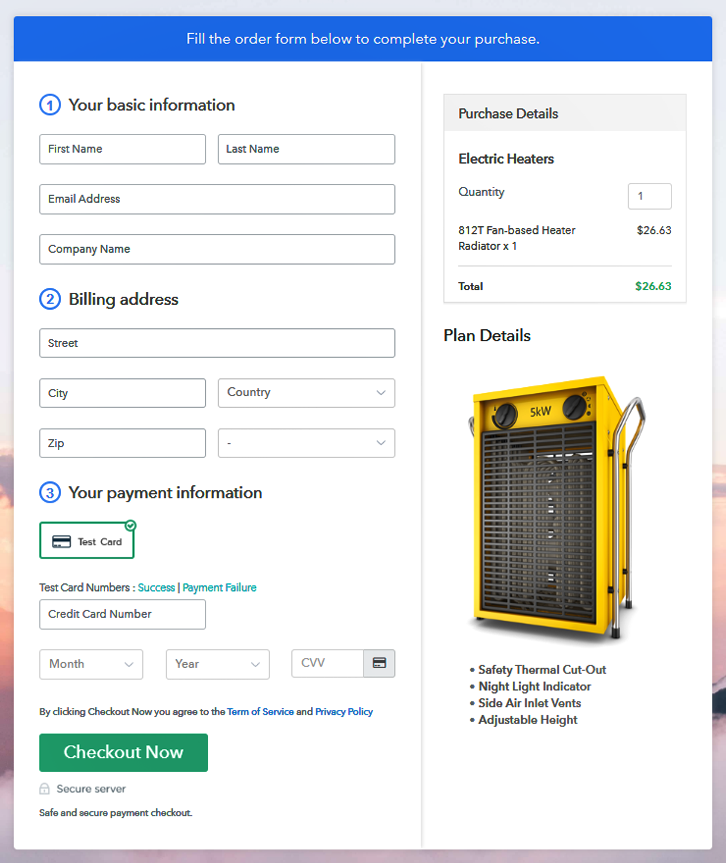
By doing so, you will reach out to customers instantly and it will boost your revenue too. Luckily, we have a software named Pabbly Subscription Billing that can fit with your requirement. The software lets you create a startling checkout page for selling ceiling materials online. Some of its distinct features involve:
- List various ceiling materials in a single checkout page
- Offer unlimited discount and coupon codes to customers
- Create multiple billing models using software
These are some of the features and now put light on the process of creating a checkout page for selling ceiling materials using a tool.
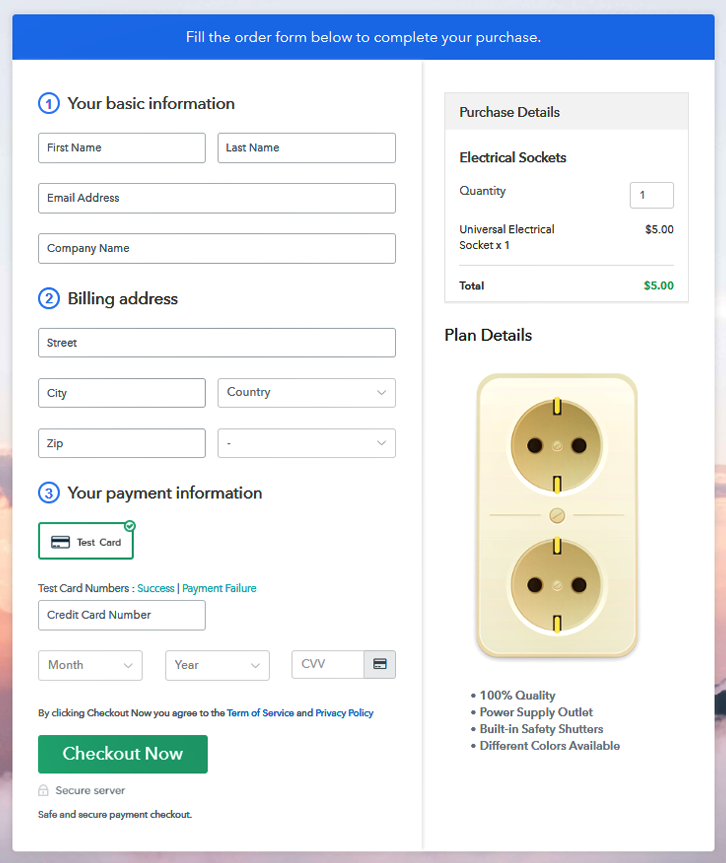
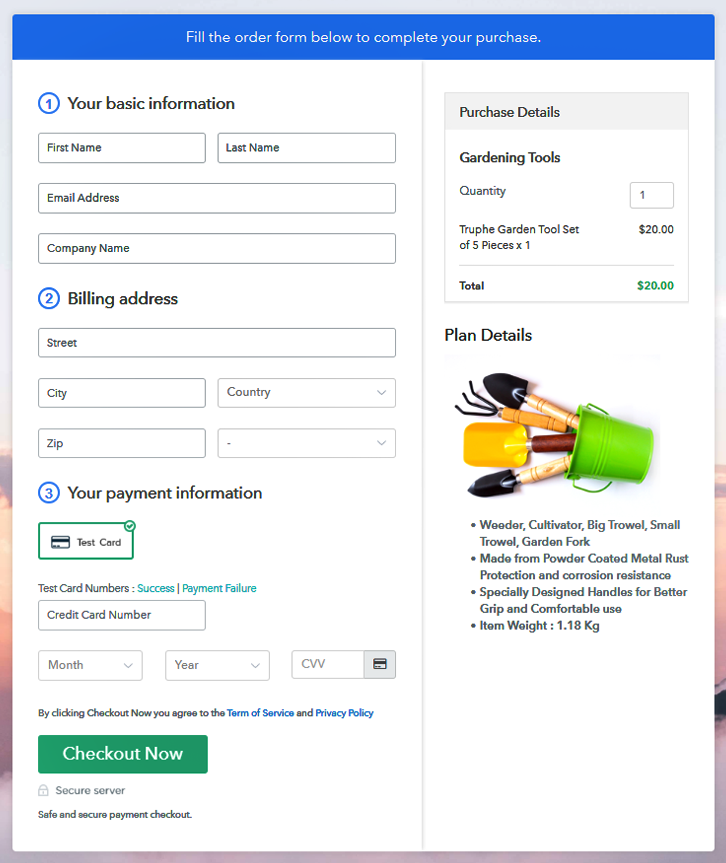
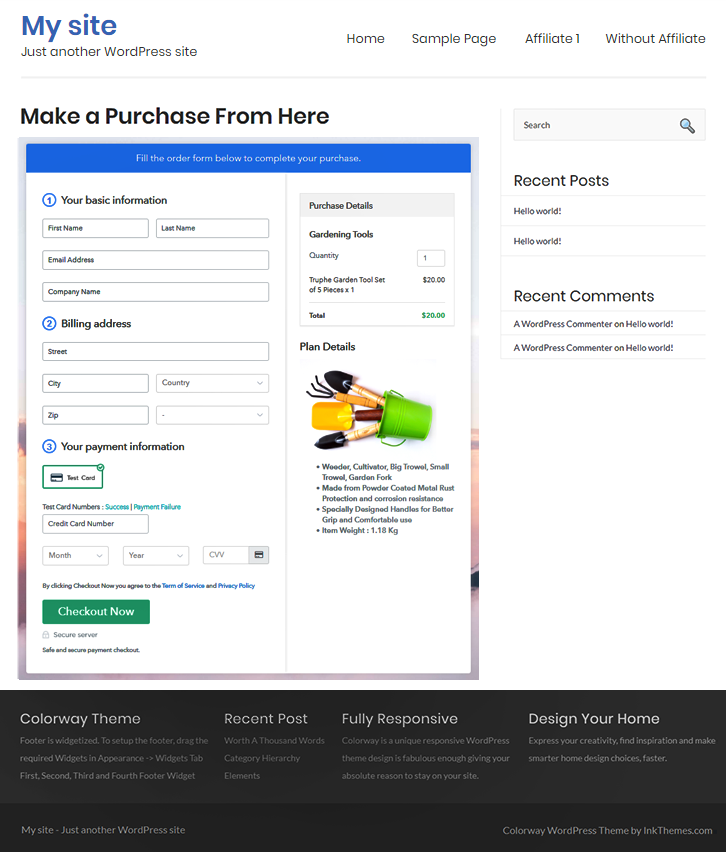
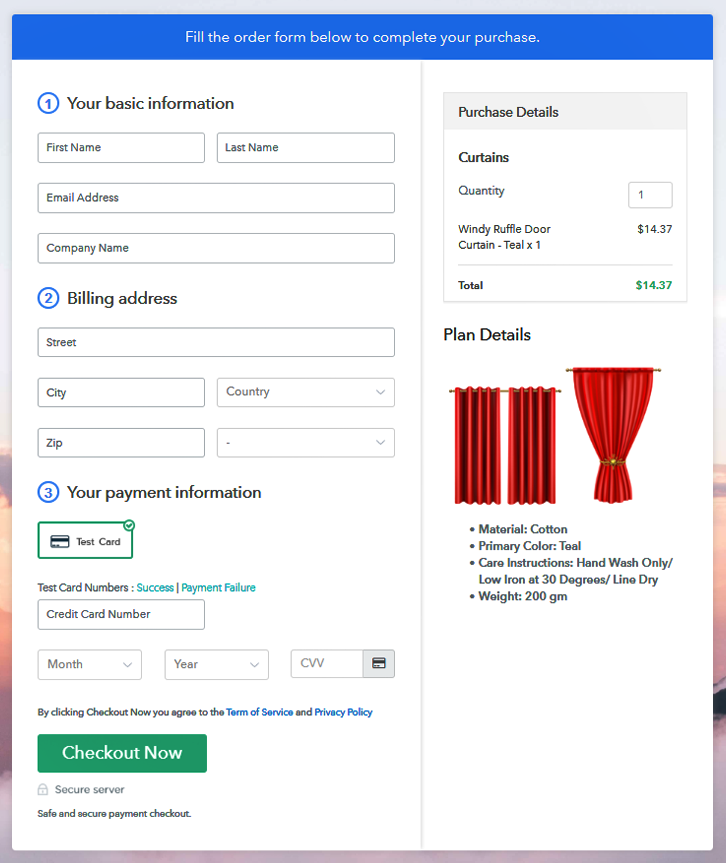
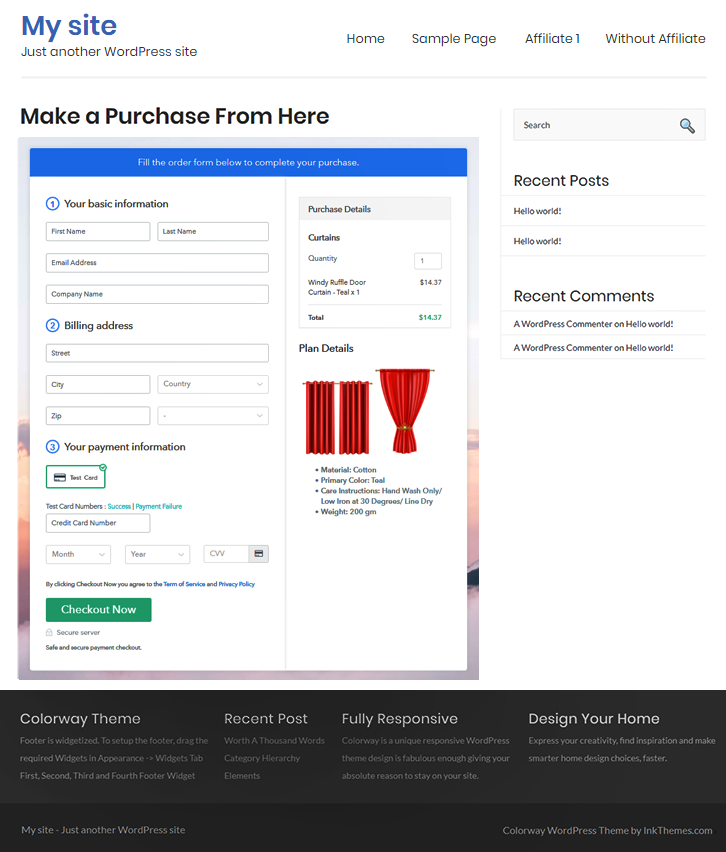
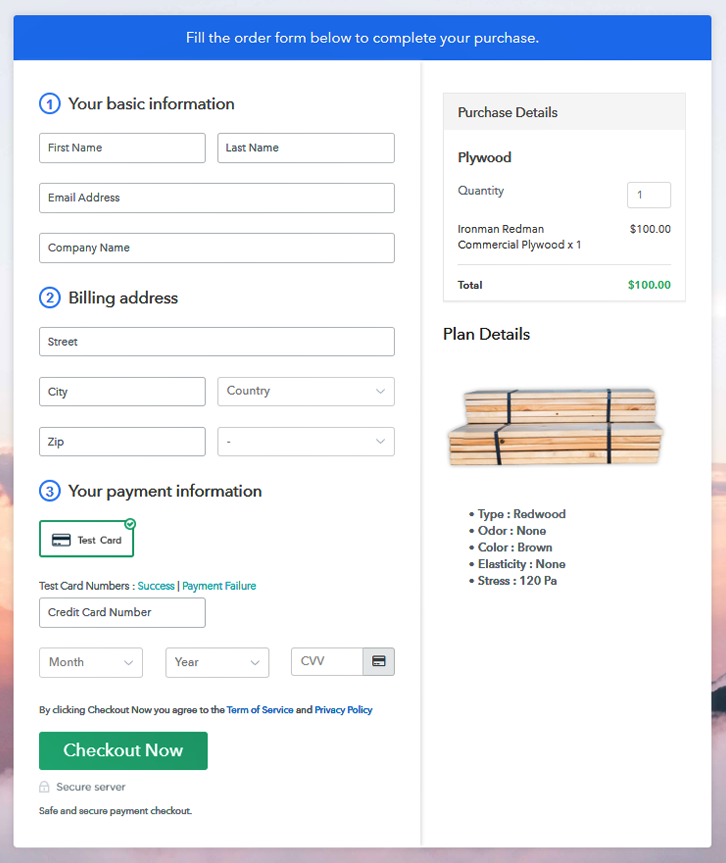
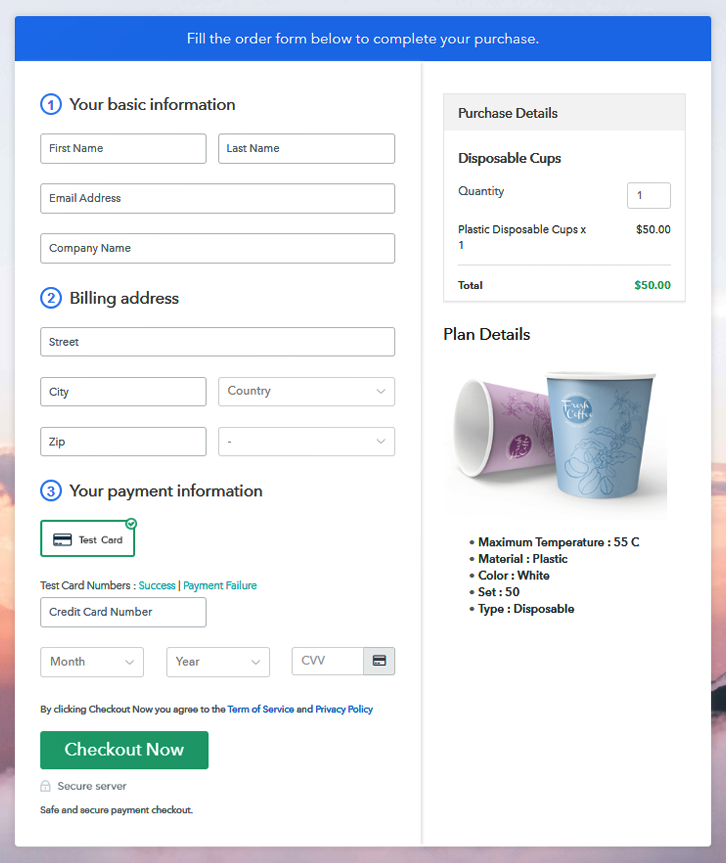
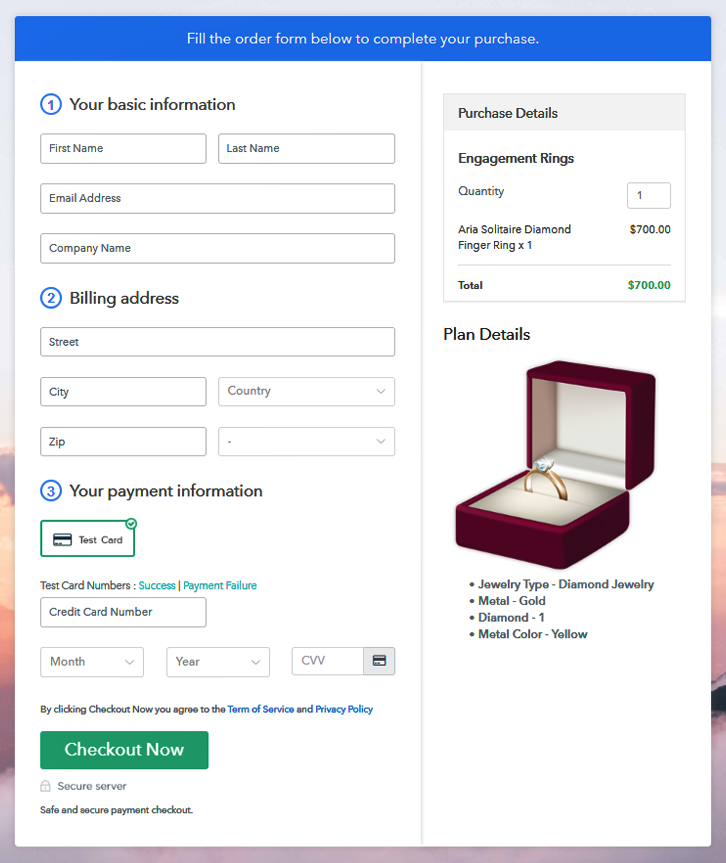
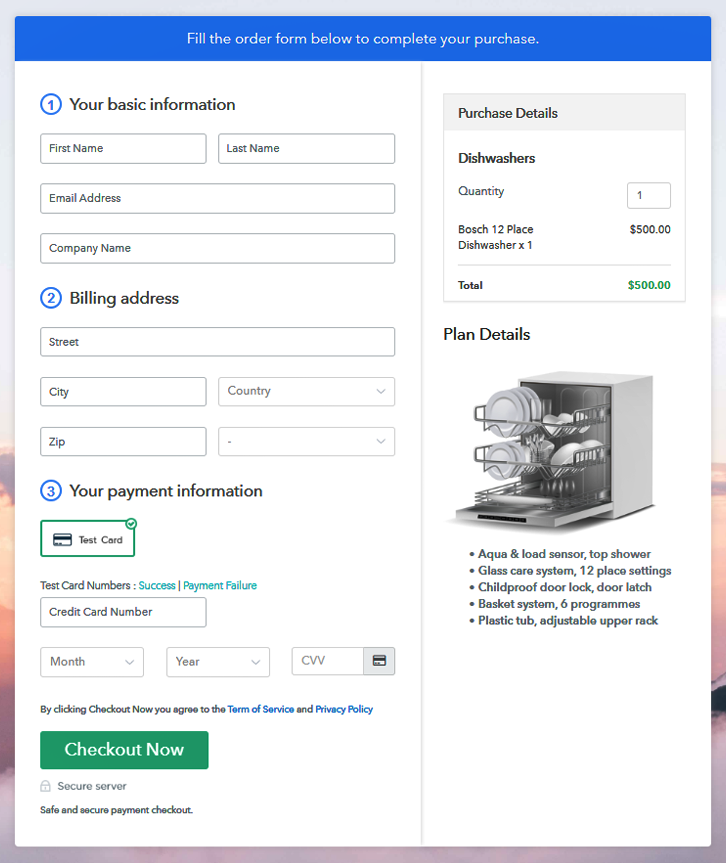
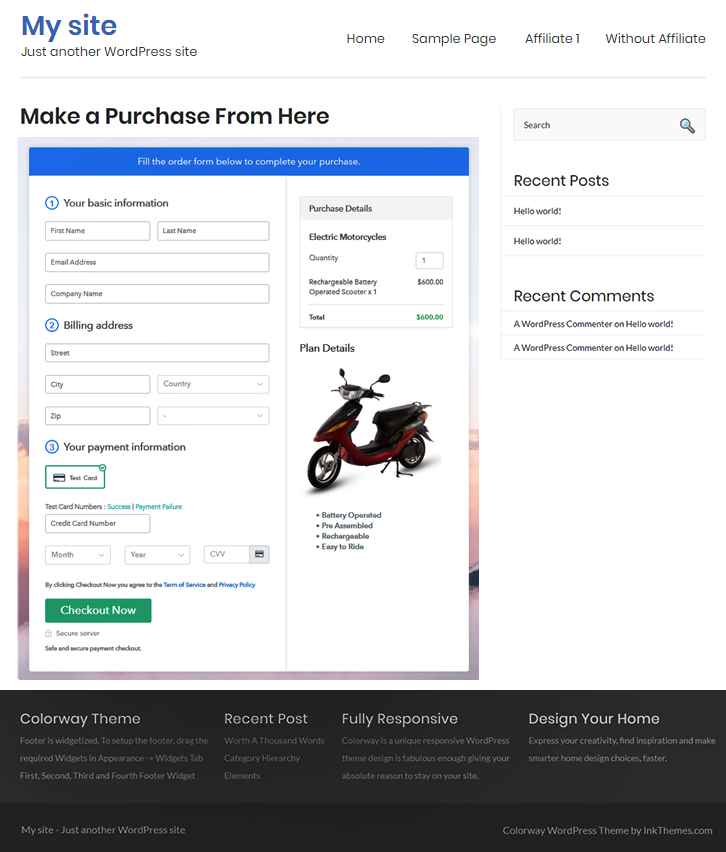
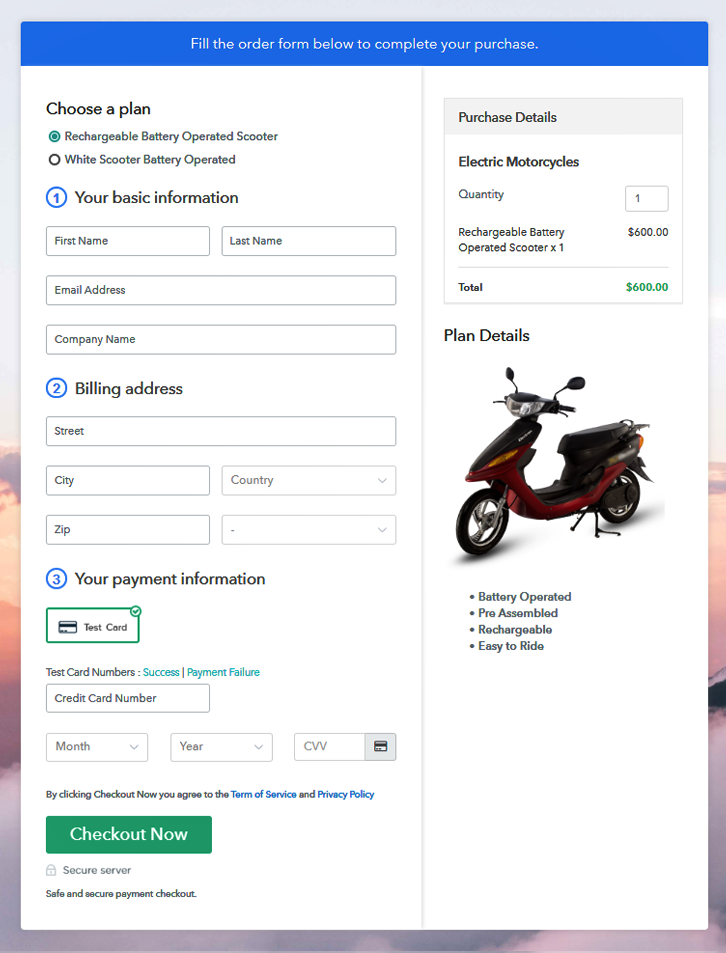
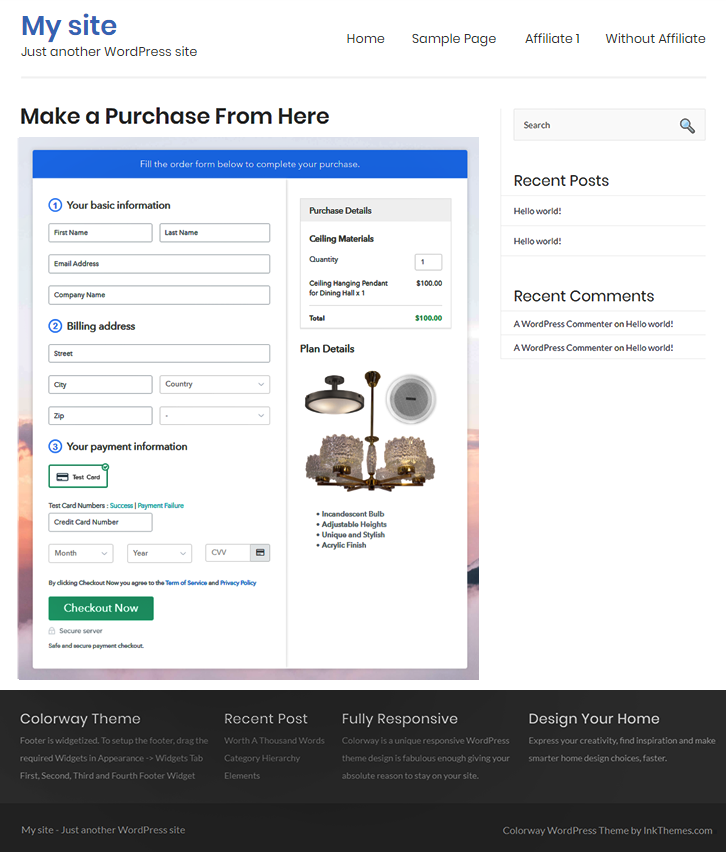
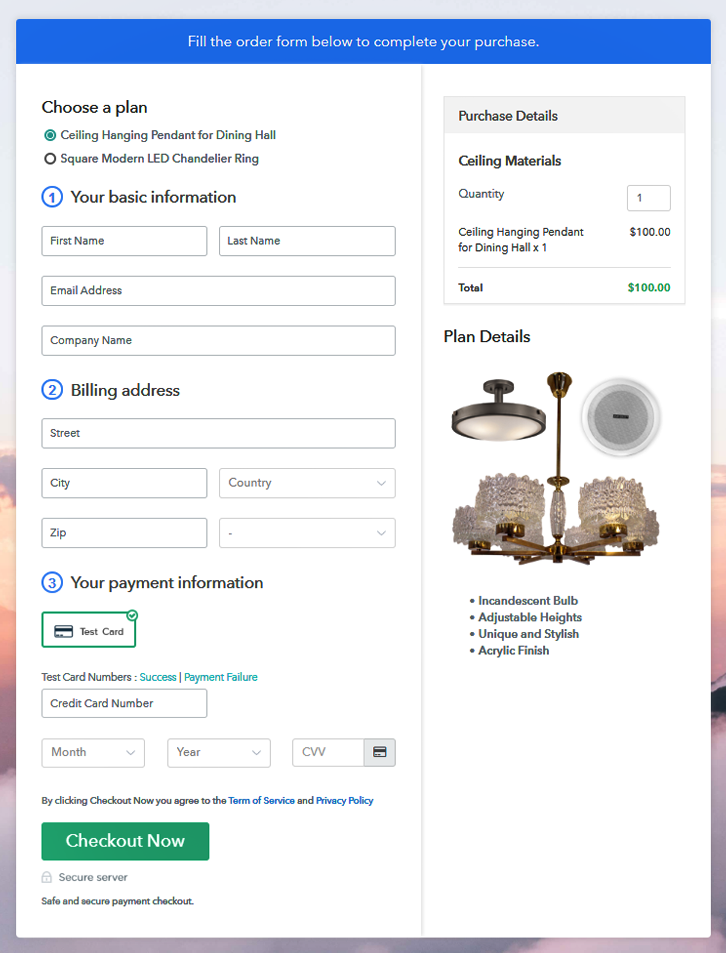
Final View of Checkout Page For Your Ceiling Materials Selling Business

Step 1: Log in to Pabbly Subscription Billing

Begin the process for creating a checkout page for selling ceiling materials online by visiting the Pabbly Subscription Billing in your browser. Moreover, click on the “Sign up Free“ button. Further, either manually filled out the details or sign in using your Gmail account.
Sign Up For Free!
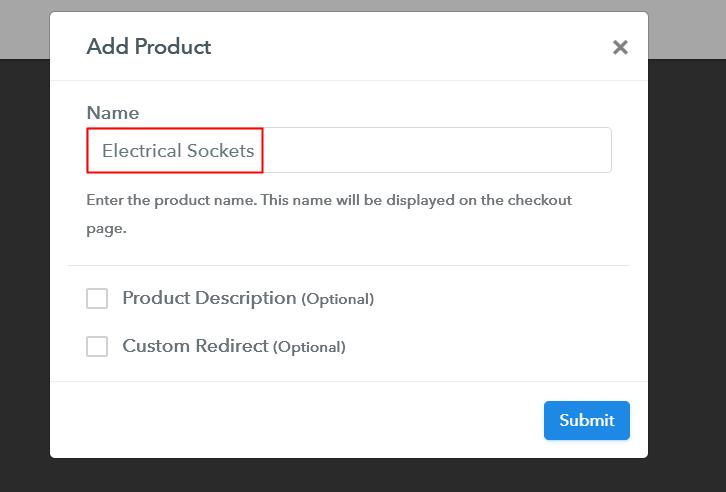
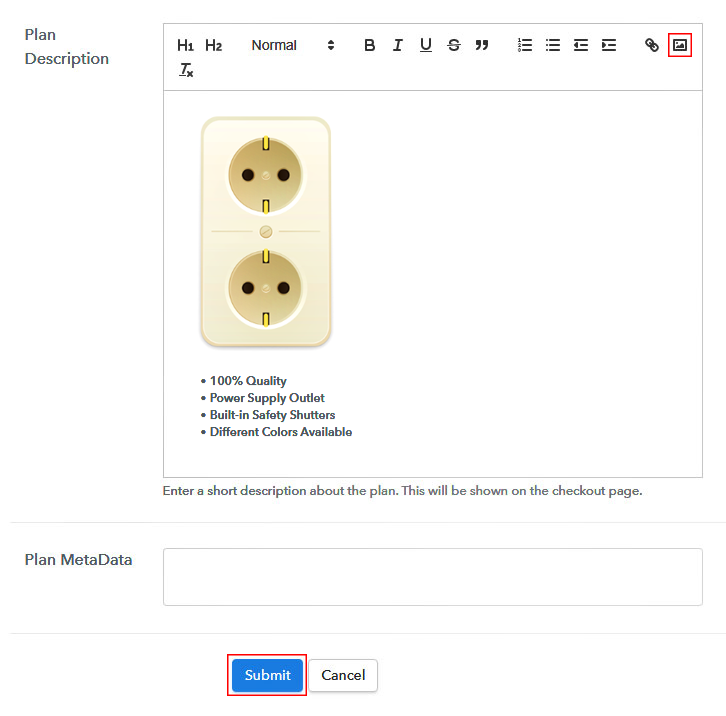
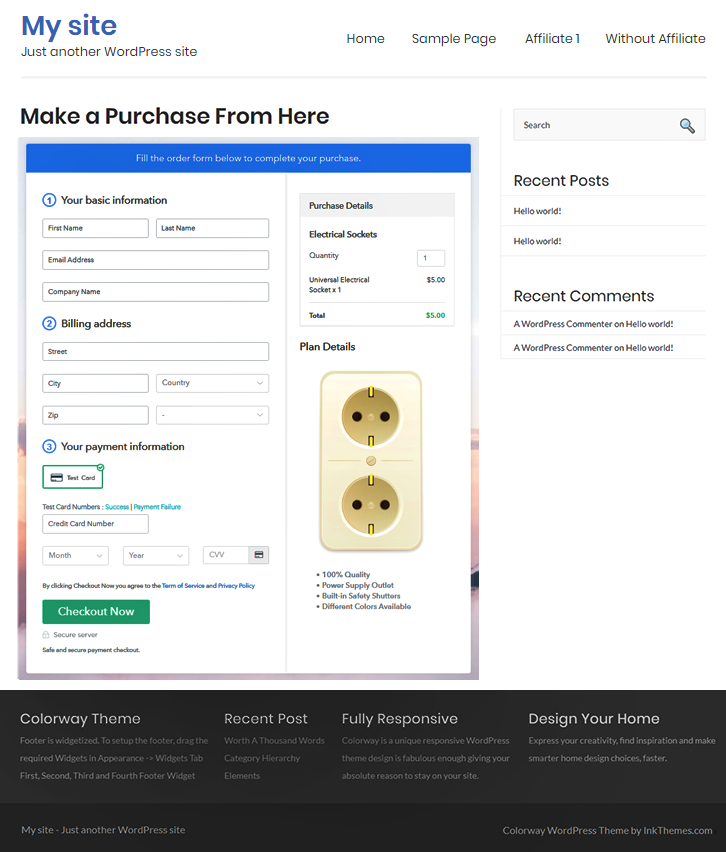
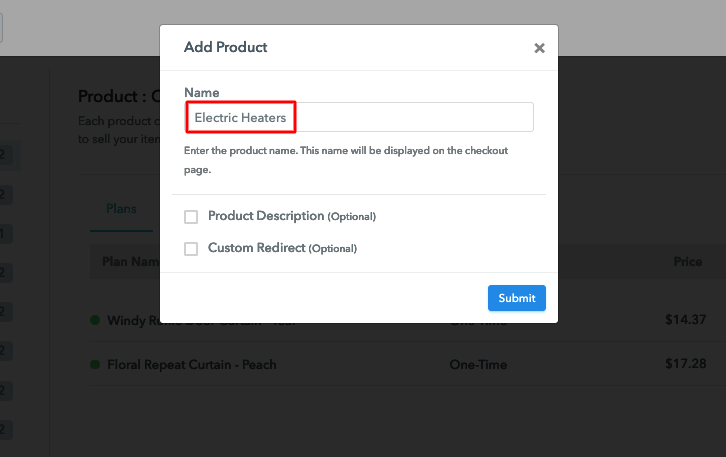
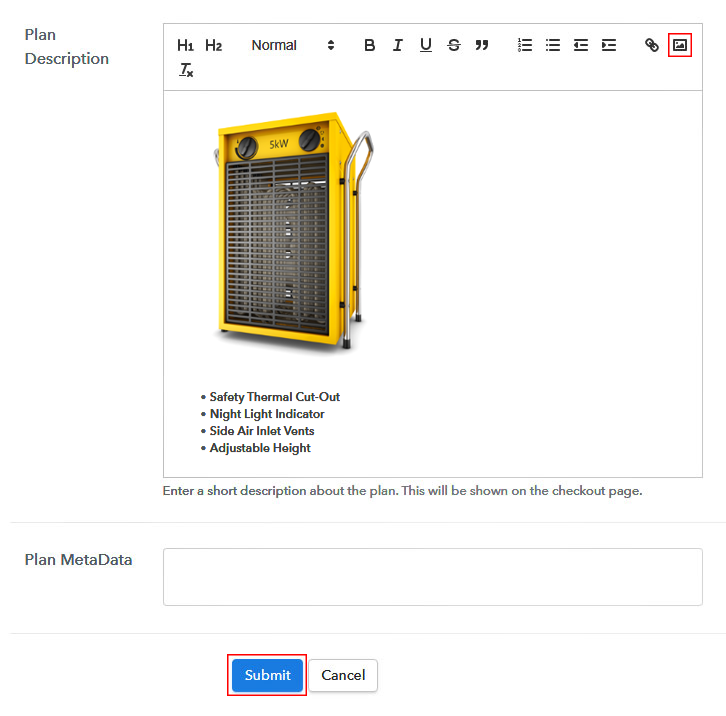
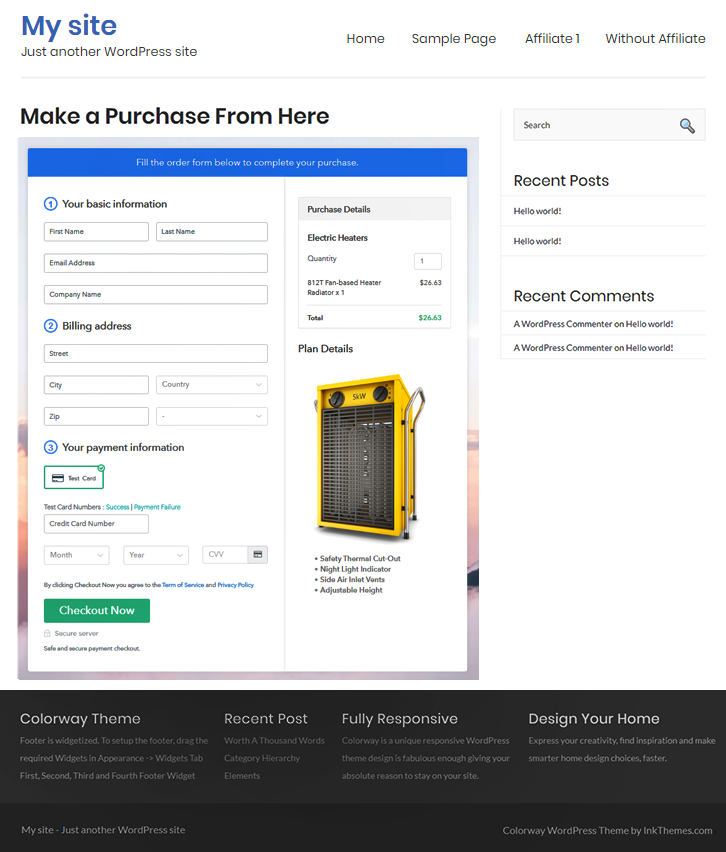
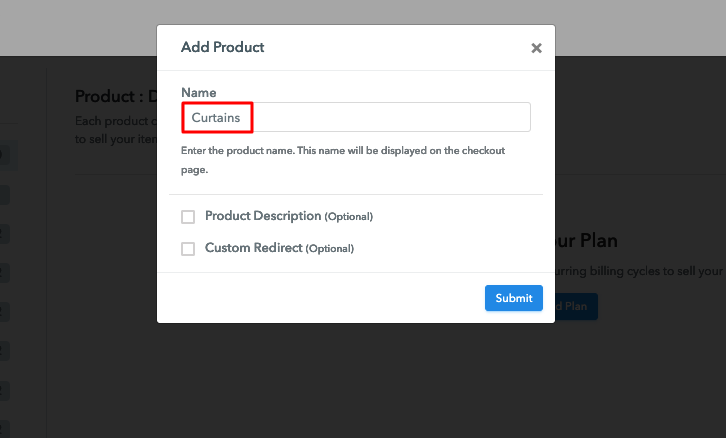
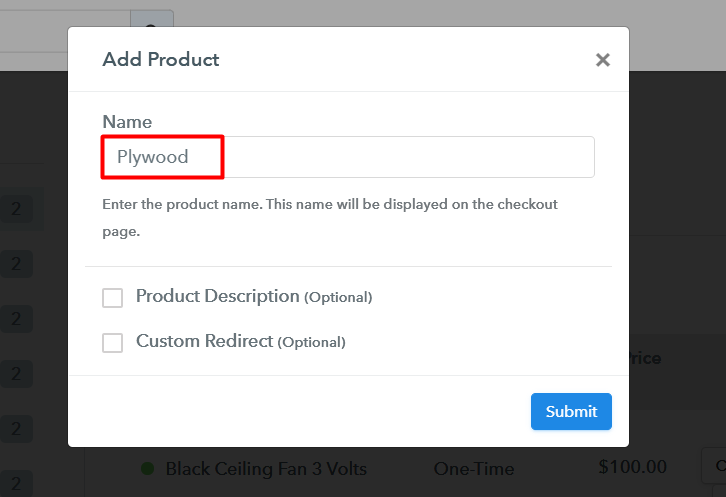
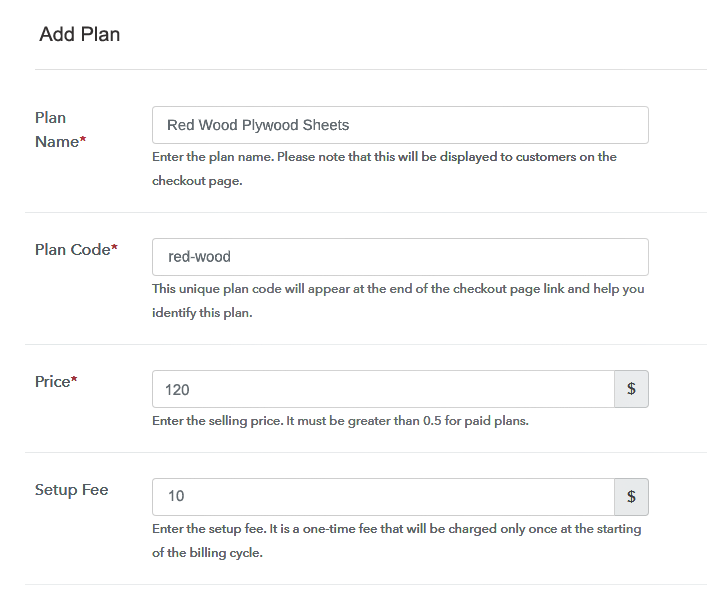
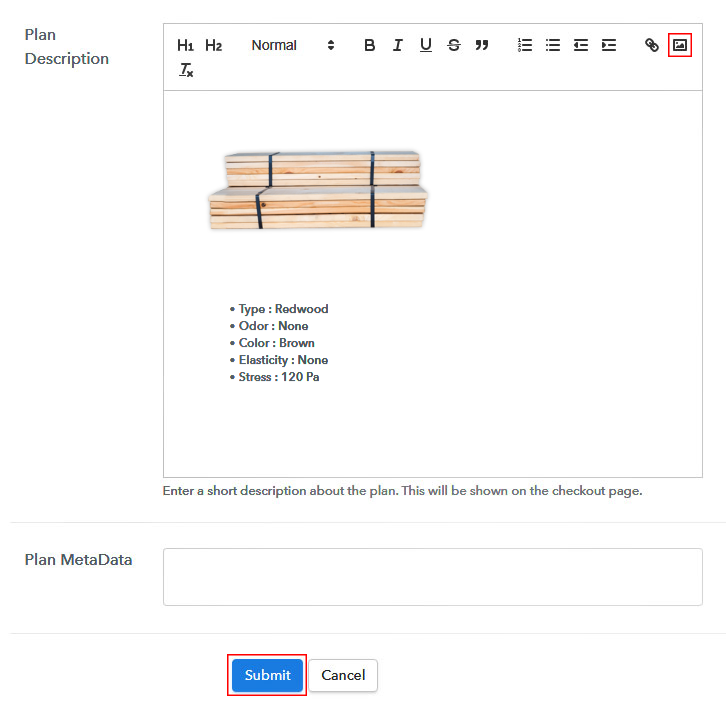
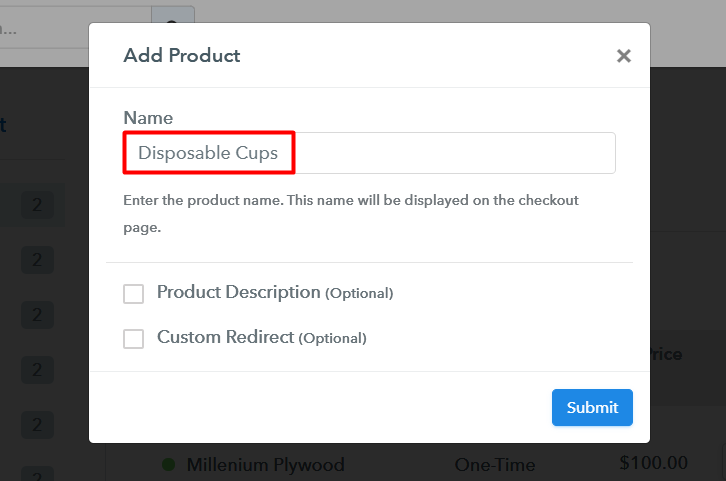
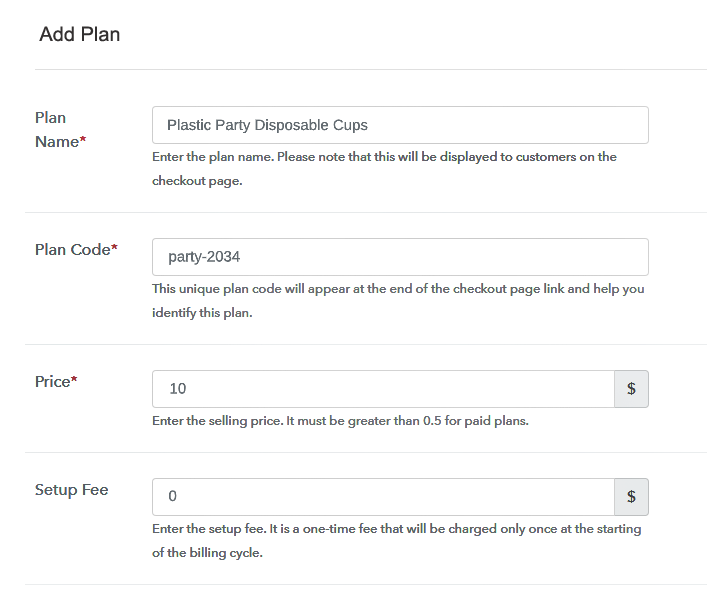
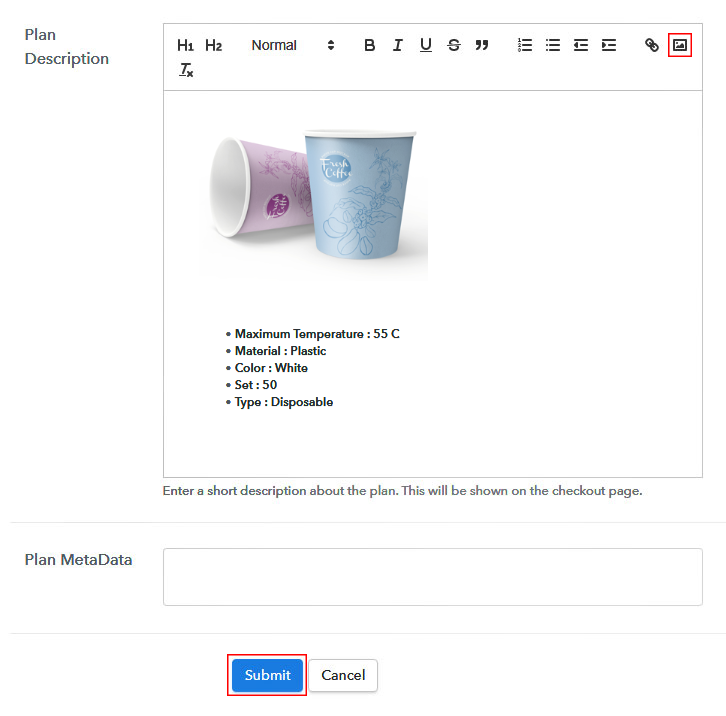
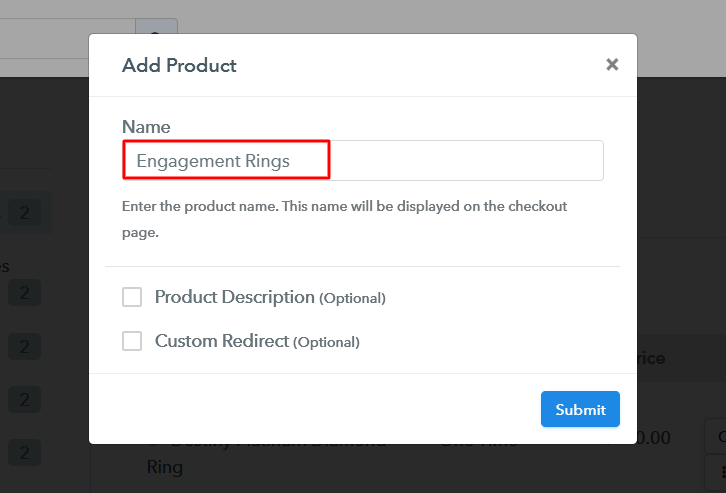
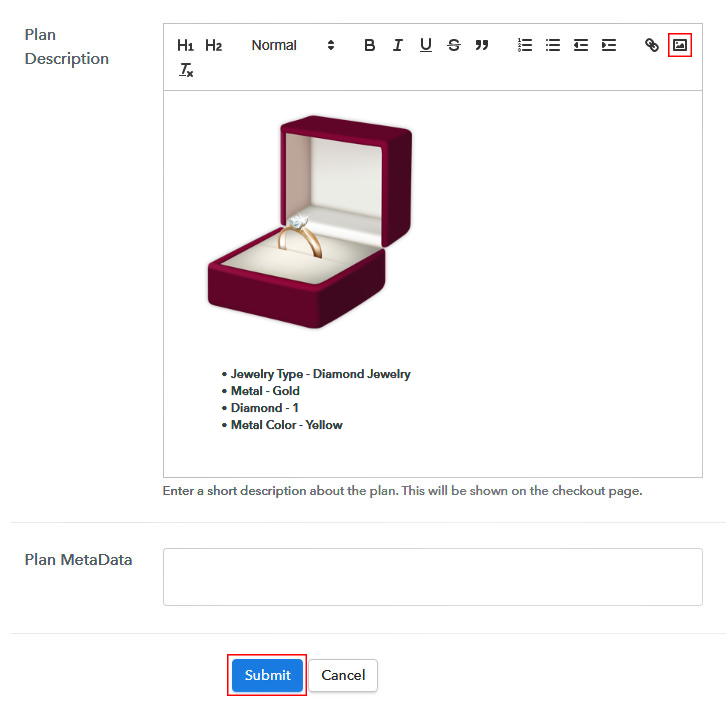
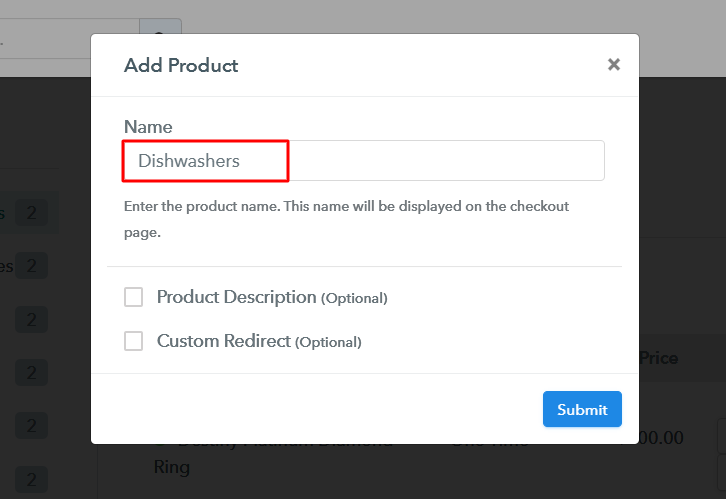
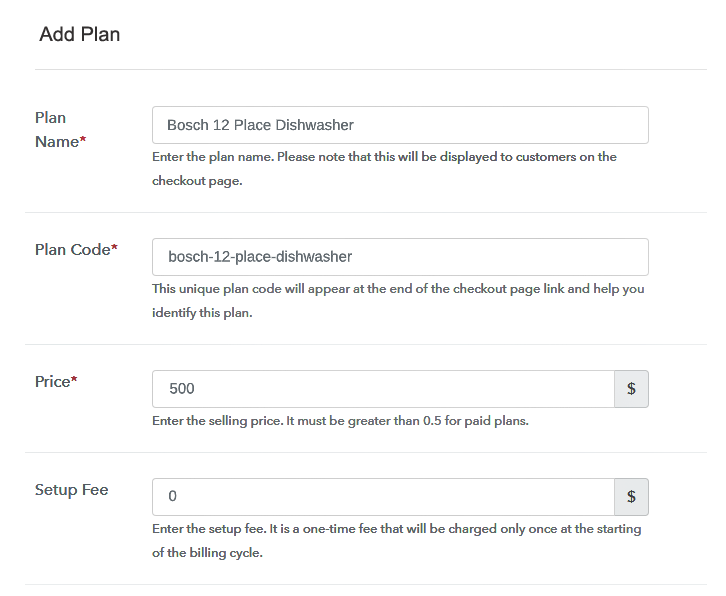
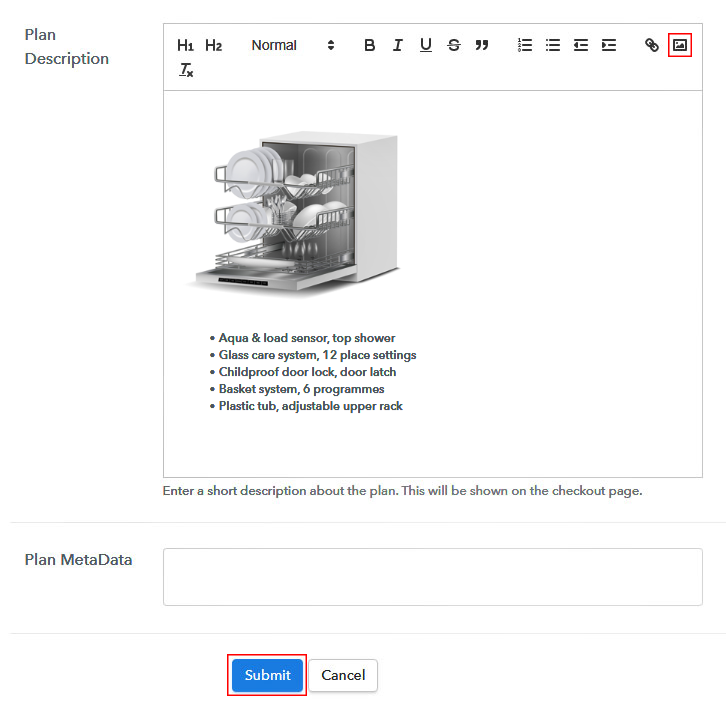
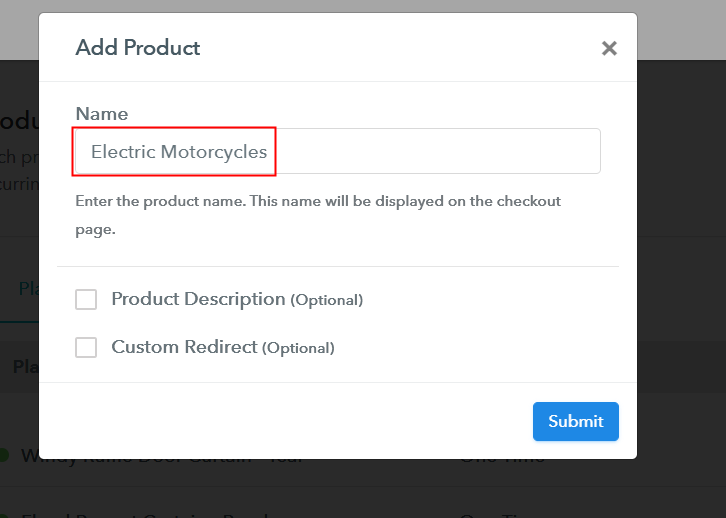
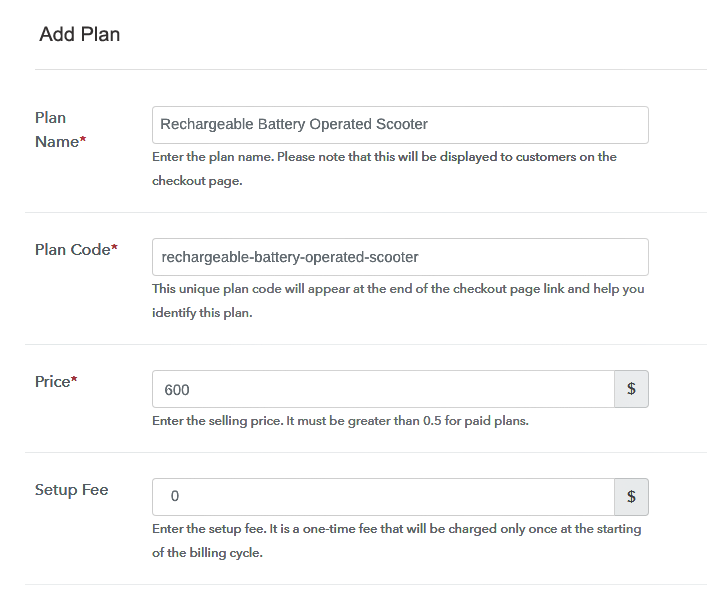
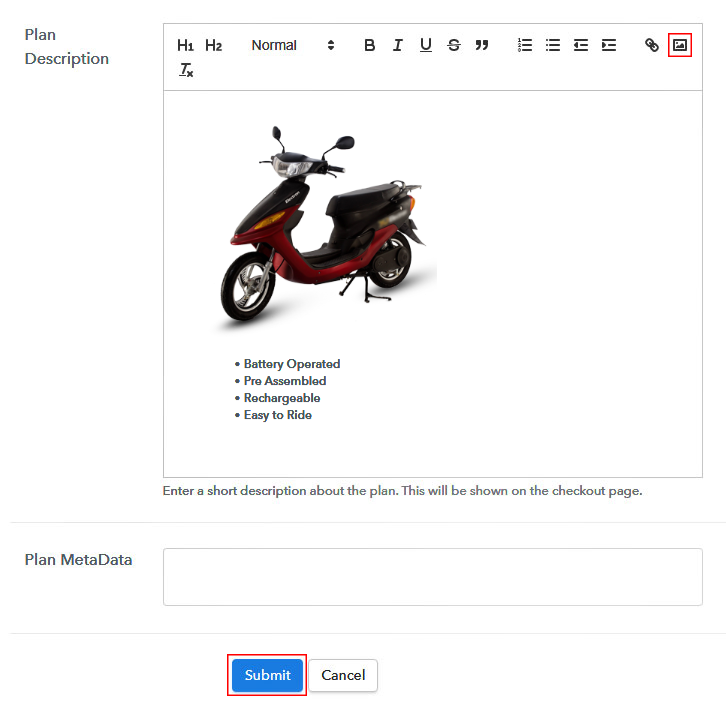
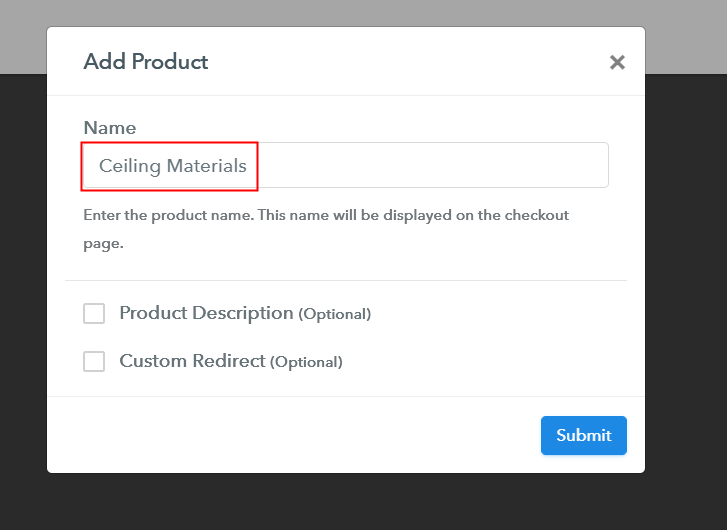
Moreover, after clicking on the “Access Now” button of the software, a page will redirect with fields like company name, select currency, and phone number. Simply fill out those details to continue creating a checkout page for the ceiling materials. The subsequent step is to gain knowledge about software payment procedures using a “Test Payment Gateway”. Here, we are continuing the checkout page process for the ceiling materials using a test payment gateway. Additionally, it is packed with various payment gateways like PayPal, Stripe, etc. Besides, below we are stating the payment integration guides. Further, add the name, which in our case is “Ceiling Materials”. Here you can specify the type like ceiling panels, ceiling tiles, etc. Also, write a short description of the ceiling materials to seize the customer’s attention. Note: Here you can add all the products related to the similar category by creating plans for each of them. Let’s rollout plans for different kinds of ceiling materials available in your store. The following thing to do is fill all the details of the ceiling materials like plan name, code, price, set-up fee, and much more to continue. Moreover, it is necessary to write a brief description of the ceiling materials using bullets, images, etc, to bring possible customers to the checkout page. Next, click on the “Submit” button to add the ceiling materials on the checkout page. Finally, you can add multiple plans and kinds of ceiling materials in your product list which you want to sell online. Follow up the recommended steps to preview the checkout page: Just copy the link and add the checkout page to sell ceiling materials online at any preferable place on your WordPress site. Moreover, paste the plan link on a text editor of the WordPress dashboard. Following, click the “Publish” button, after making changes. Note: In case you want to sell multiple products via a single checkout page, you can create a multi-plan checkout page otherwise skip this step. With the advancement in home decor and stuff, ceiling materials business is going to be a huge success in the coming time. And, it is best to start selling ceiling materials online using Pabbly Subscription Billing. Don’t wait anymore, follow all the above-mentioned steps, and start your own ceiling materials business online without any trouble. So, go and grab your deal, let us know what you think in the comments section.Step 2: Select Subscription Billing

Step 3: Account Setup

Step 4: Connect Payment Gateways & Start Ceiling Materials Selling Business Online

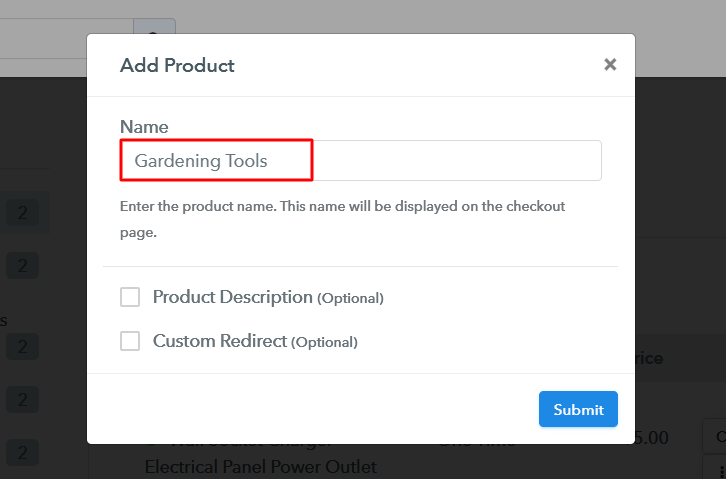
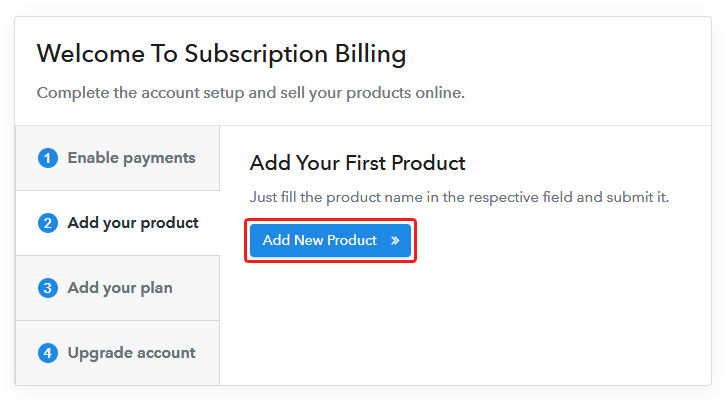
Step 5: Add Product For Your Ceiling Materials

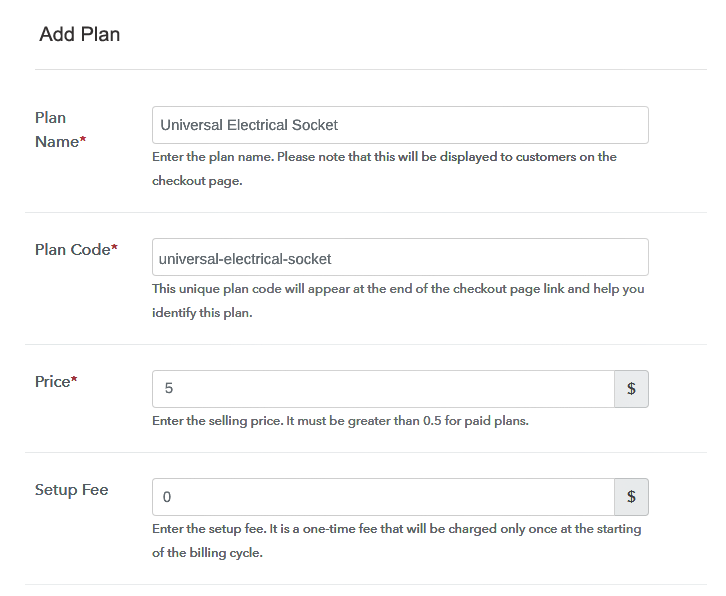
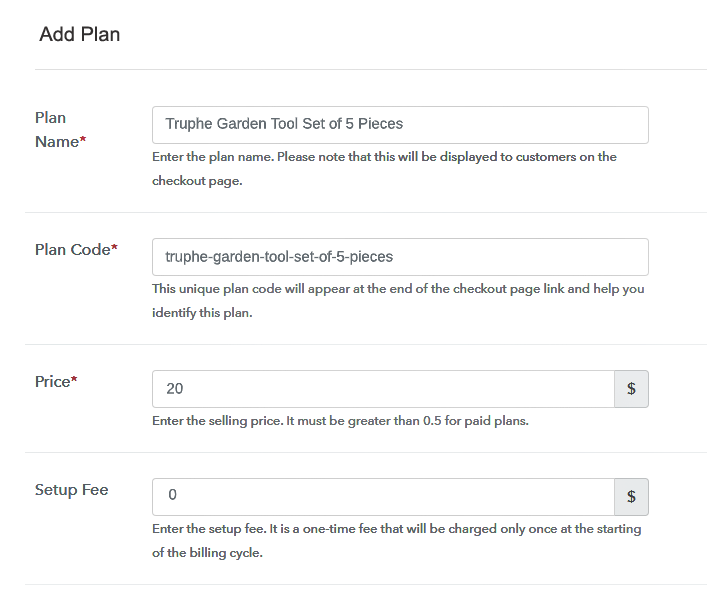
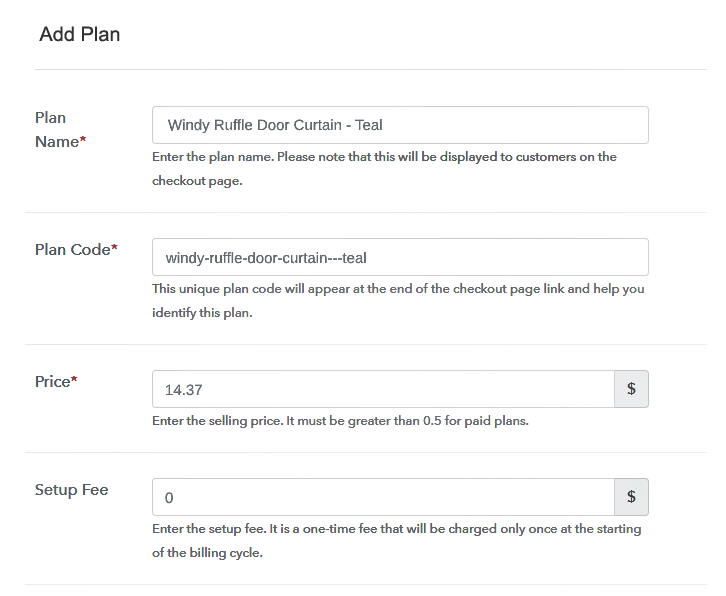
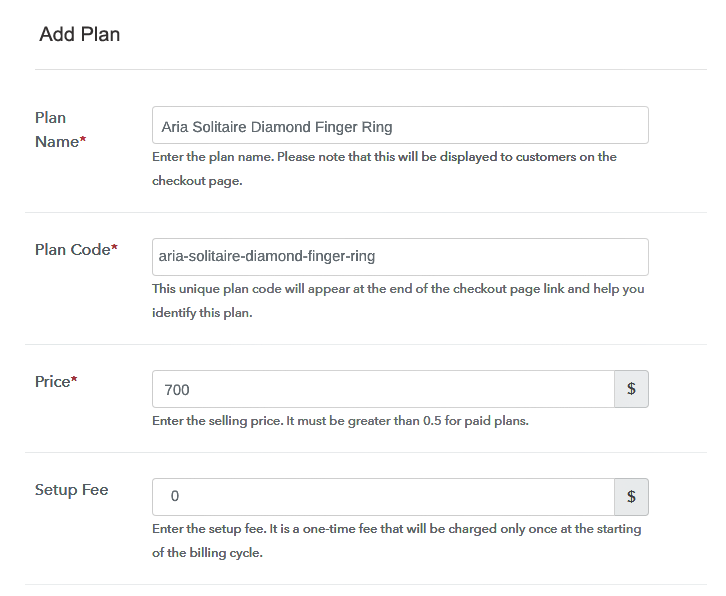
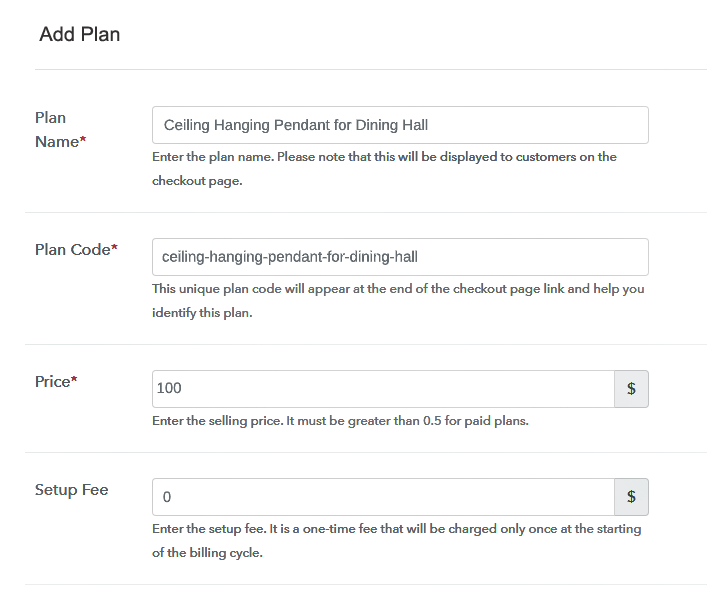
Step 6: Add Plans
(a) Select Add New Plan

(b) Specify the Plan & Pricing Details
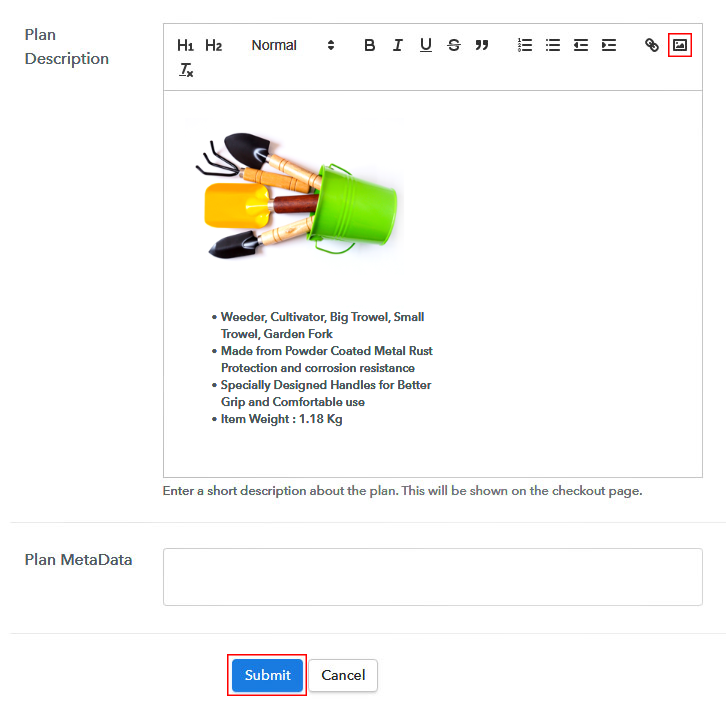
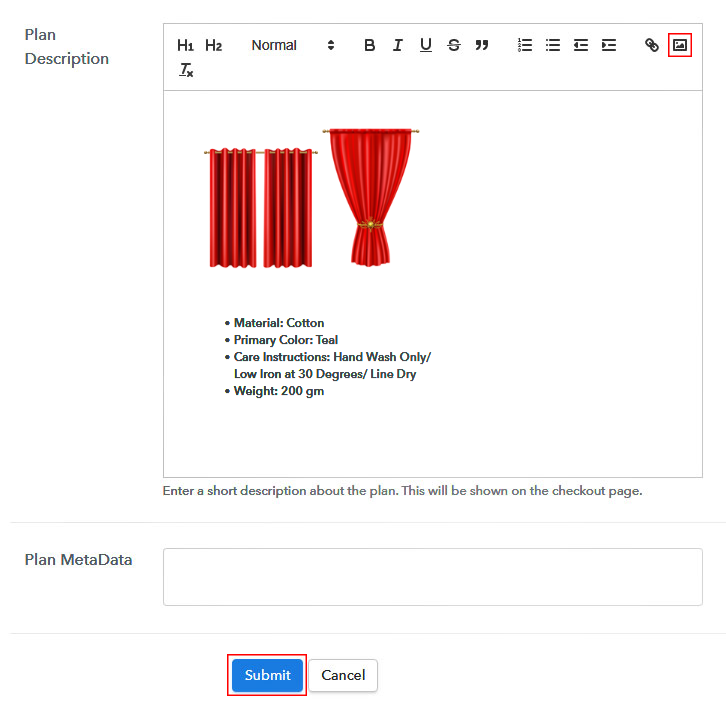
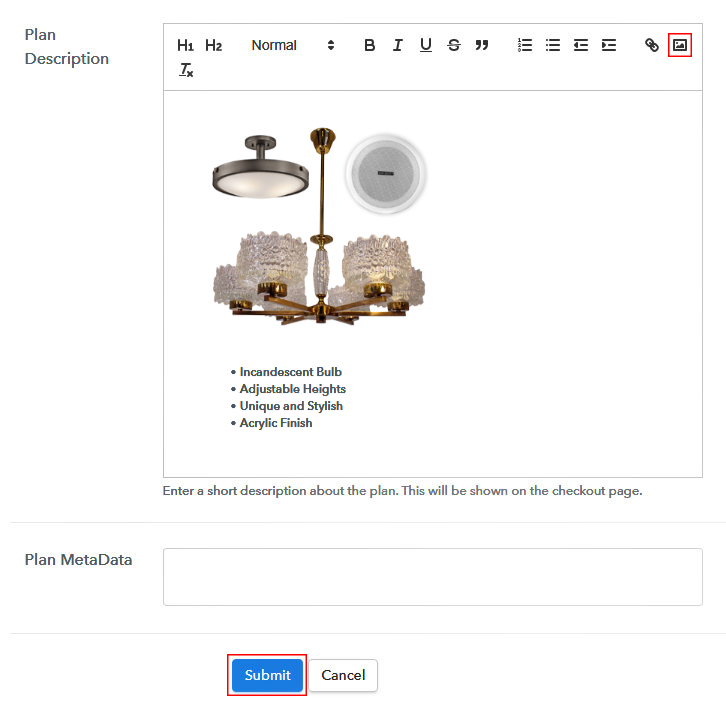
(c) Add Image & Description of Ceiling Materials
Step 7: Share your Checkout Page

Step 8: Preview Checkout Page
(a) Click on the View Button

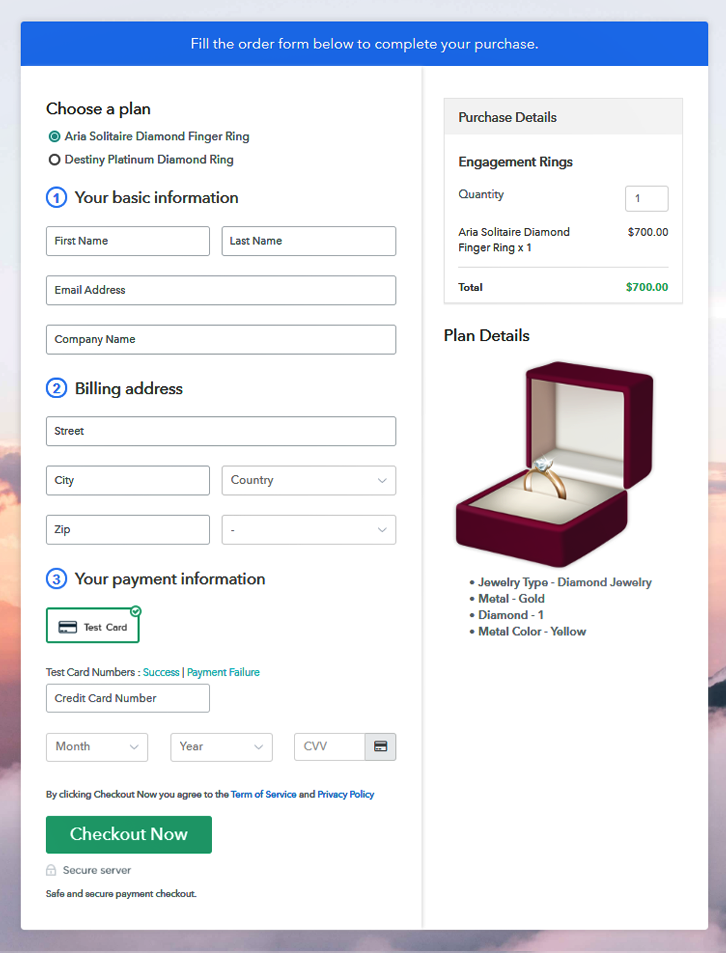
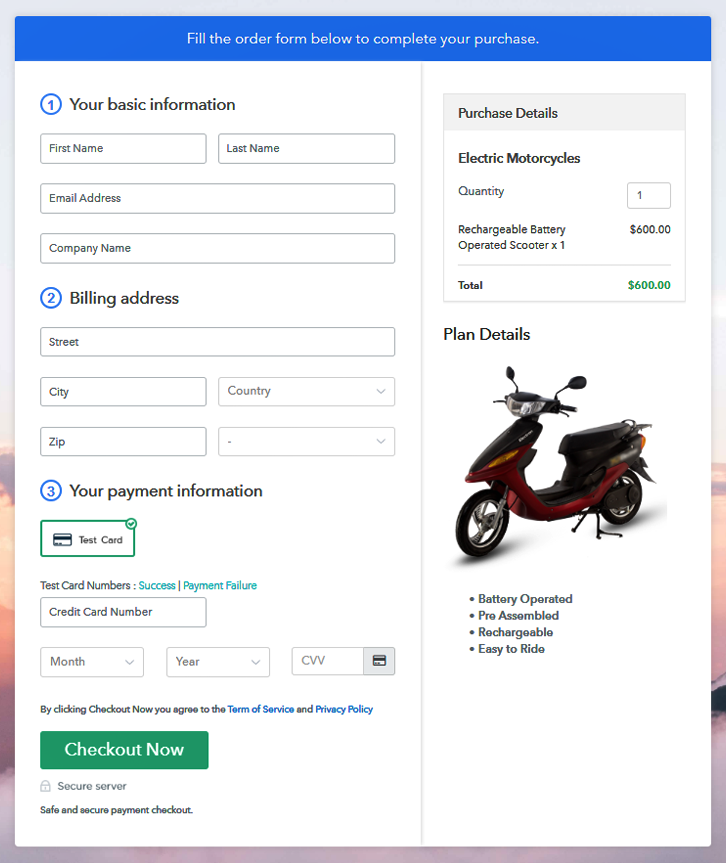
(b) Take a Look at the Checkout Page
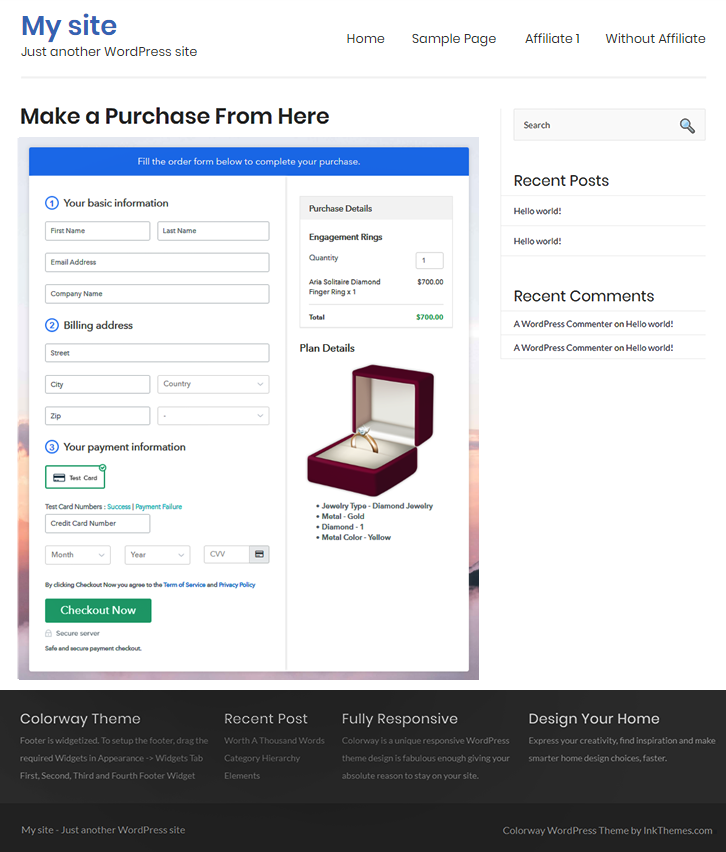
Step 9: Embed Checkout Page in Site & Sell Ceiling Materials Online

(a) Edit the Page & Paste the Copied Link

(b) Save & Publish the Checkout Page

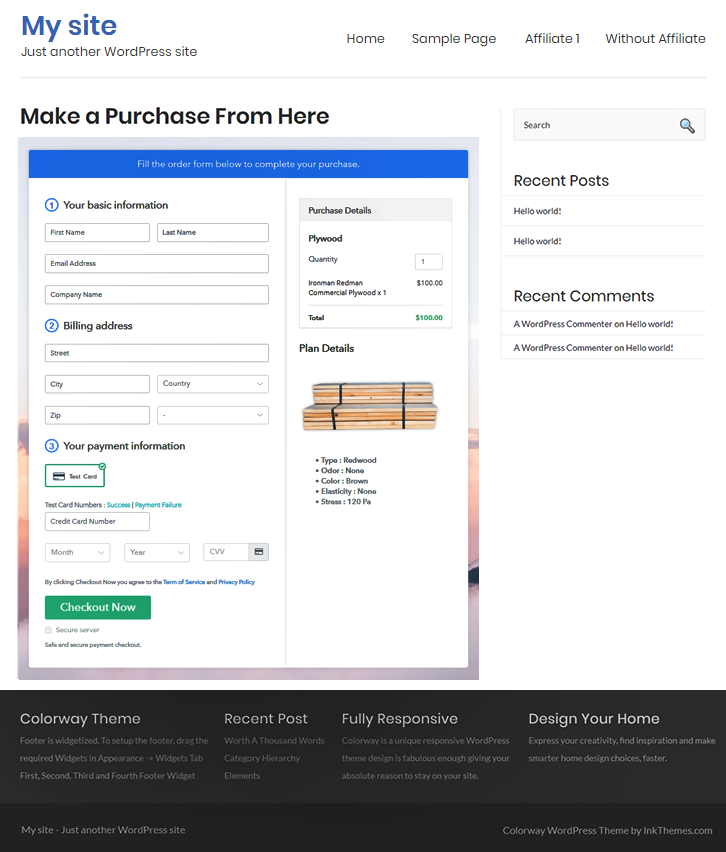
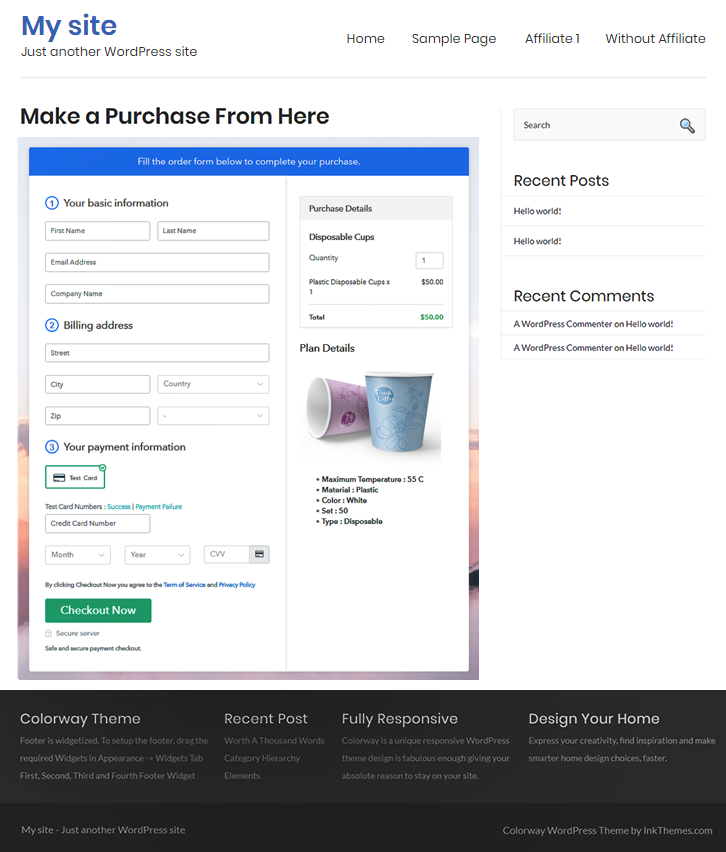
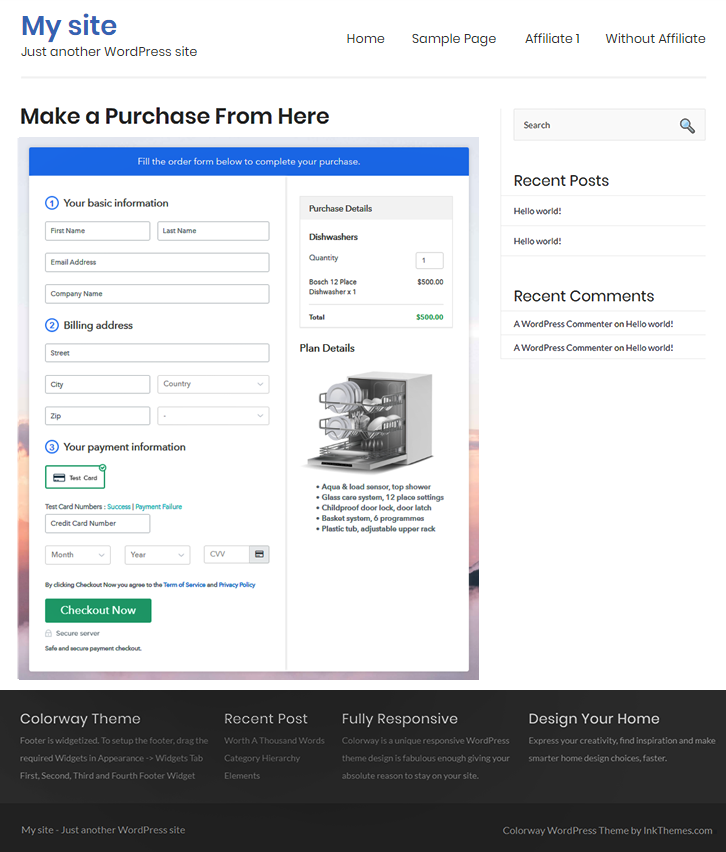
(c) Check out the Final Look of your Checkout Page on WordPress Site
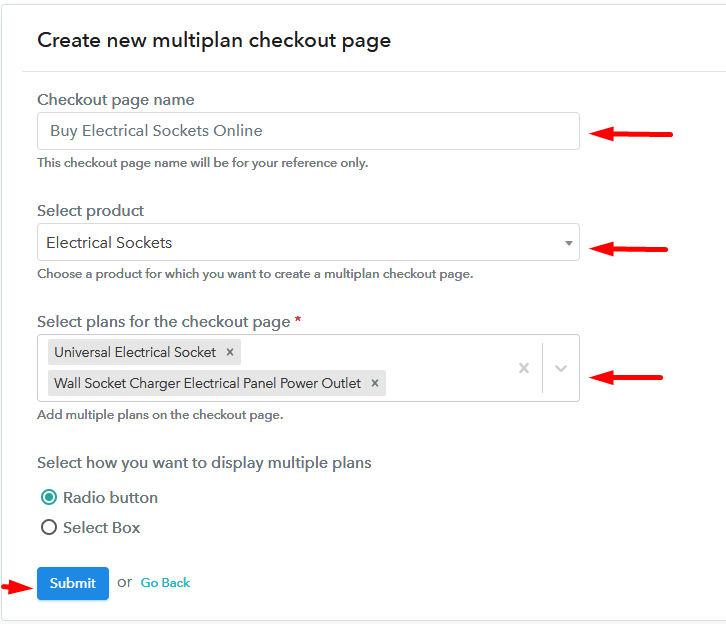
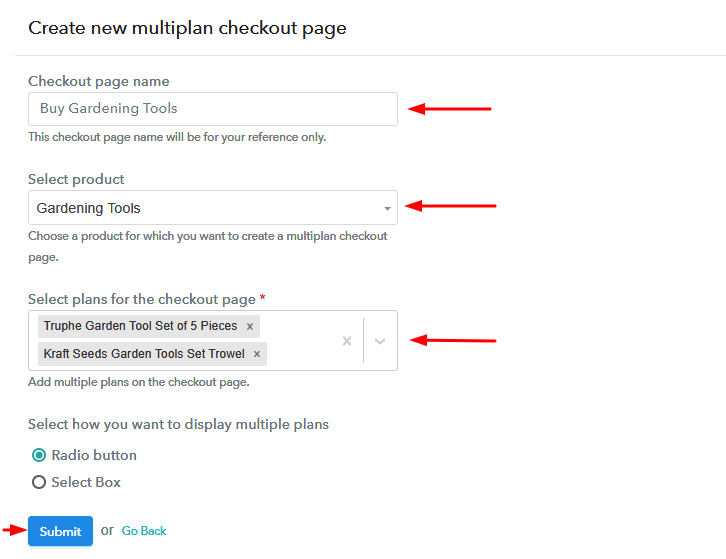
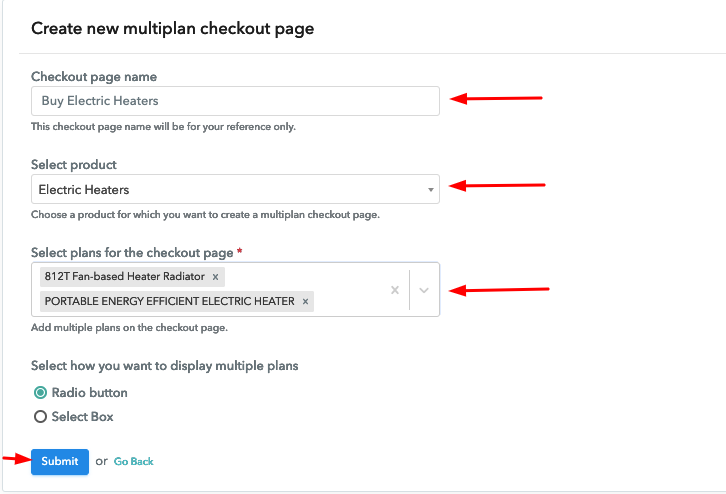
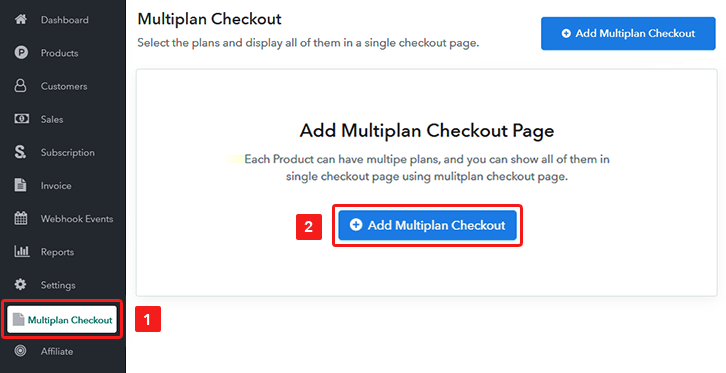
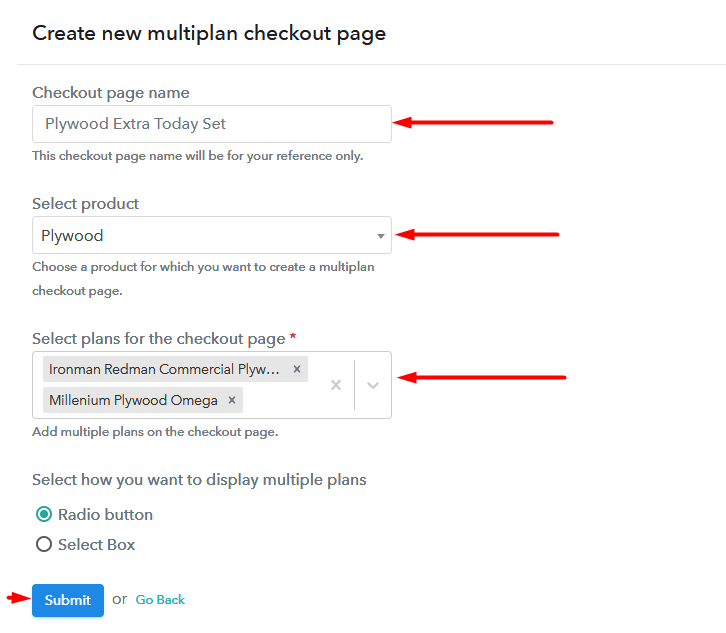
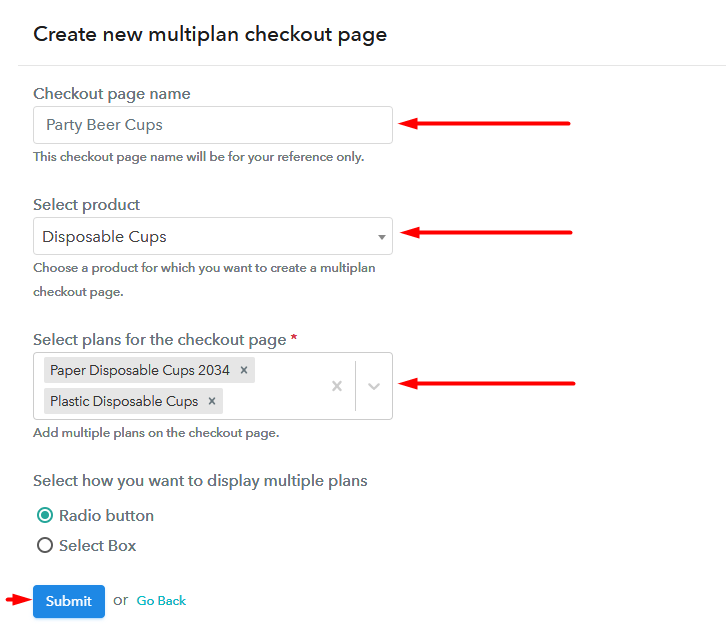
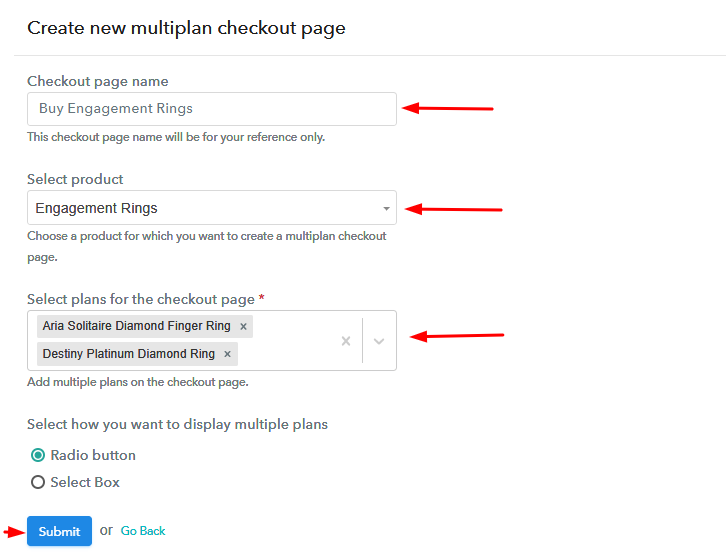
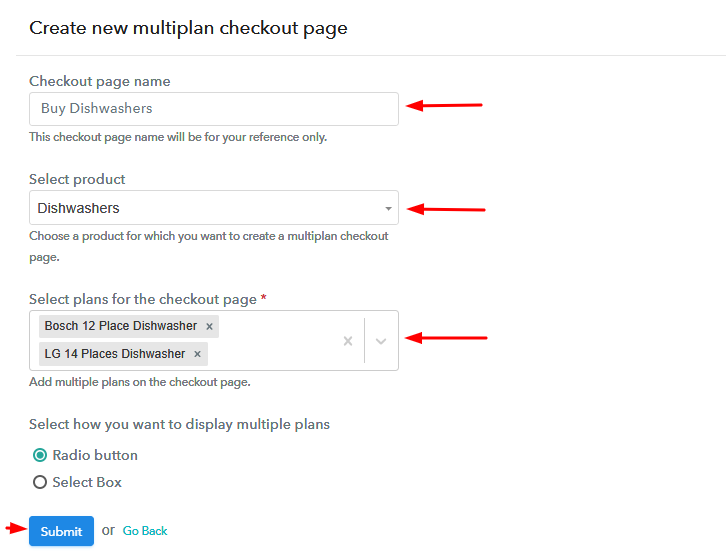
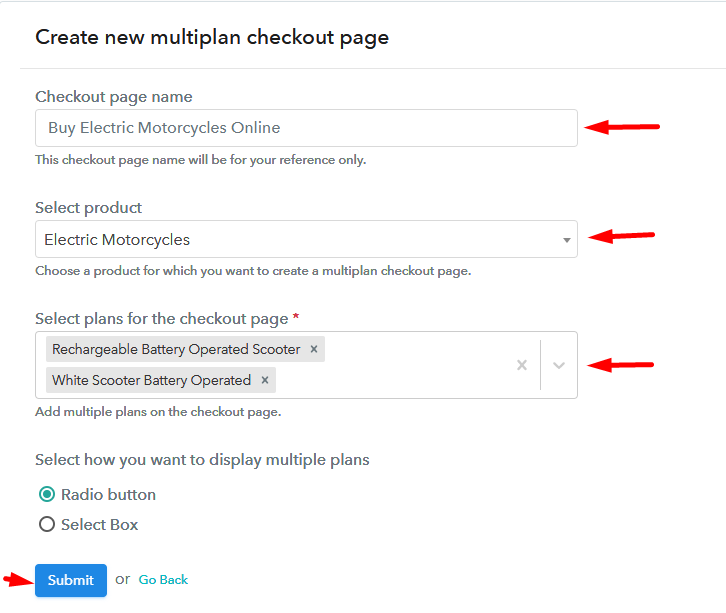
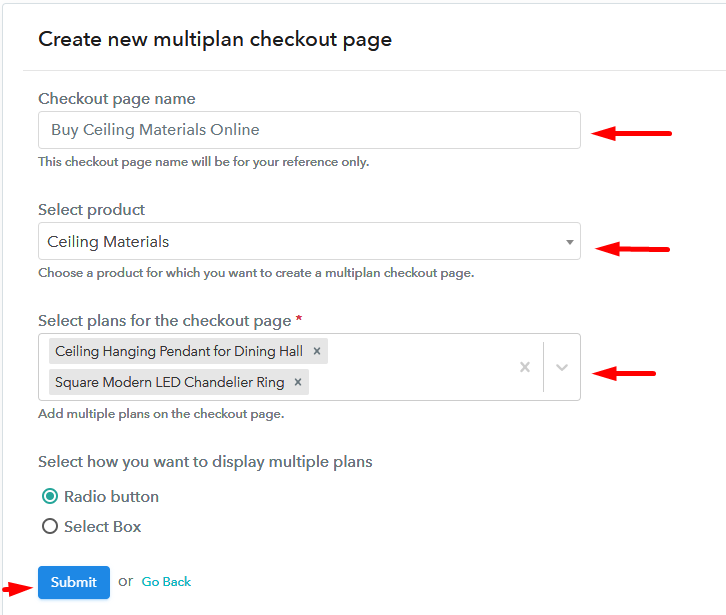
Step 10: Multiplan Checkout Page
(a) Click on Add Mutiplan Checkout

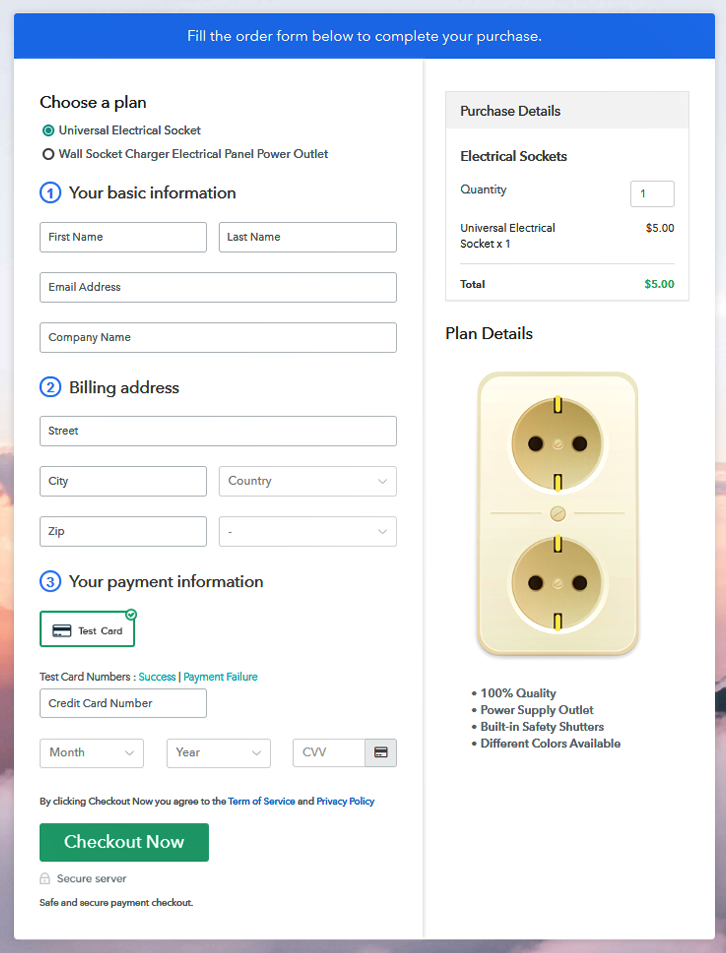
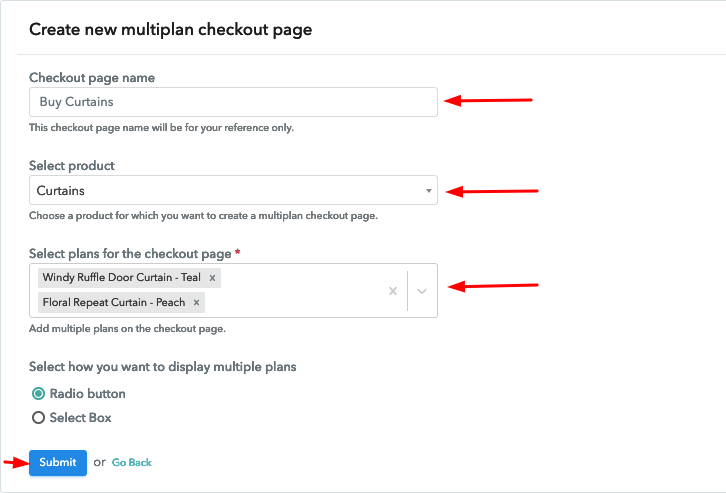
(b) Add Plans to Sell Multiple Ceiling Materials from Single Checkout Page
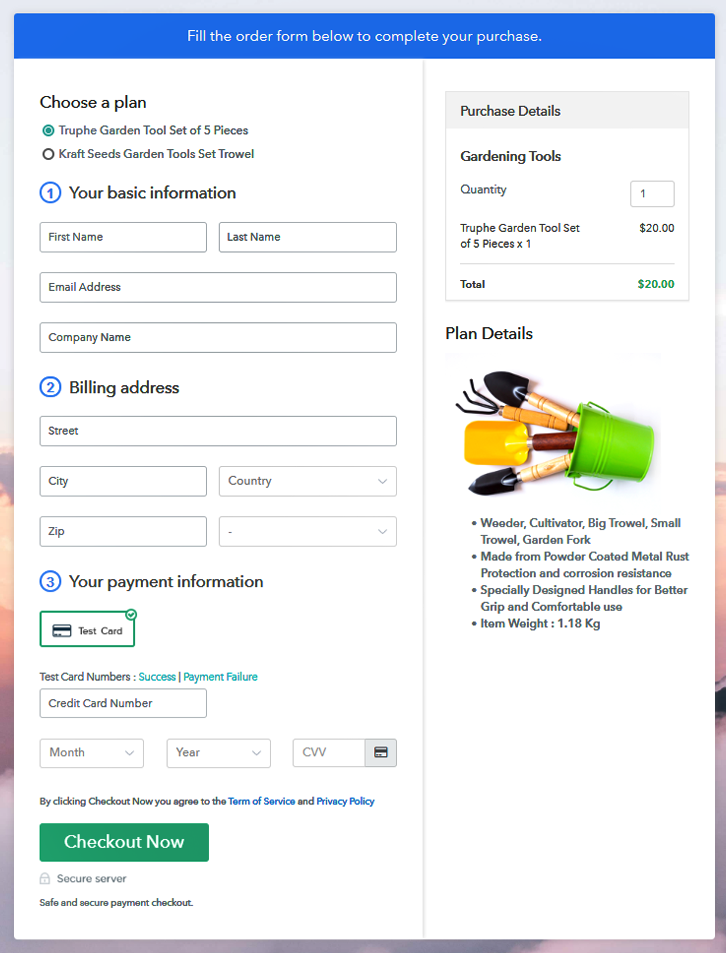
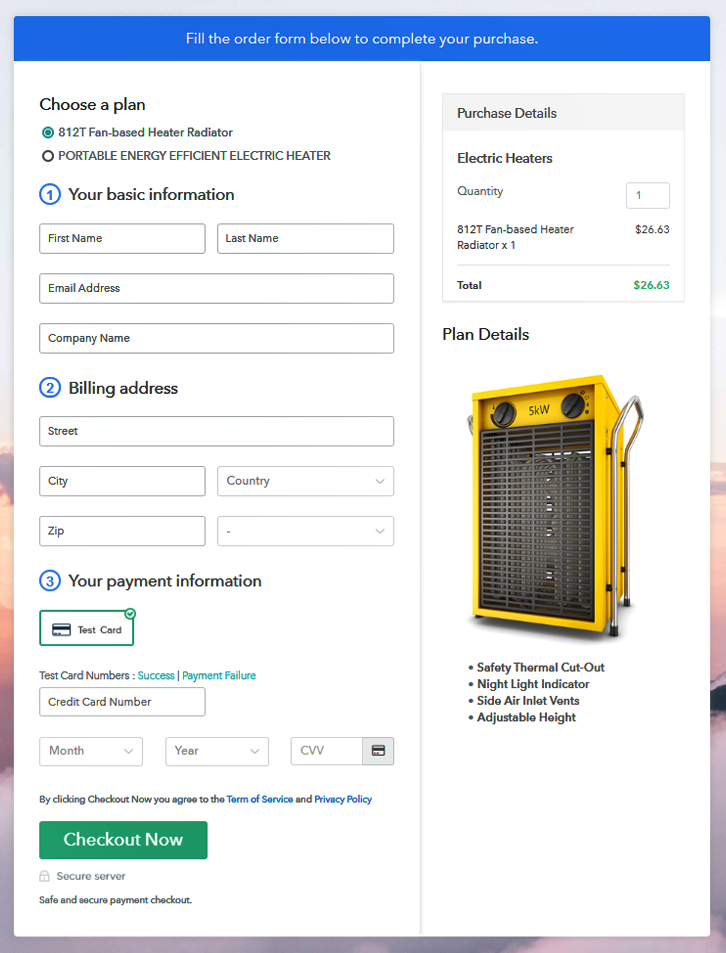
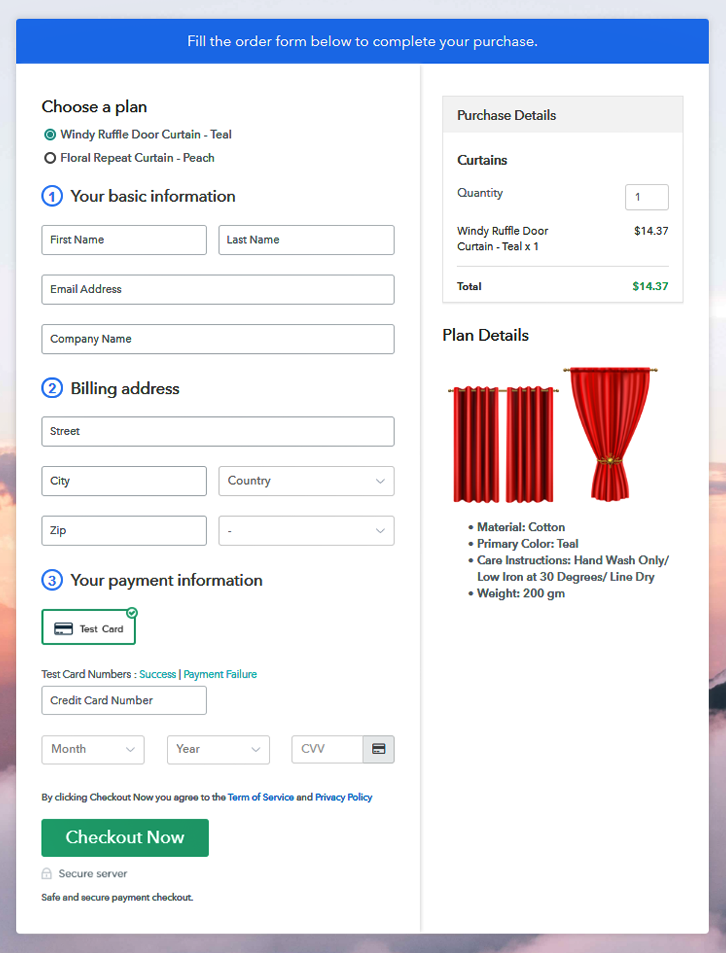
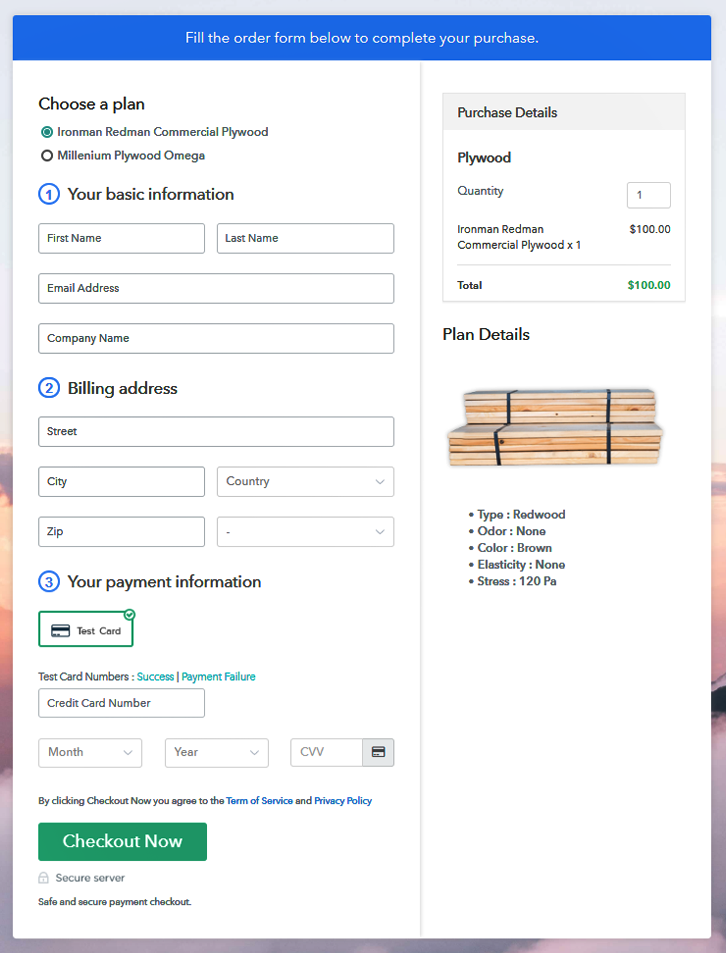
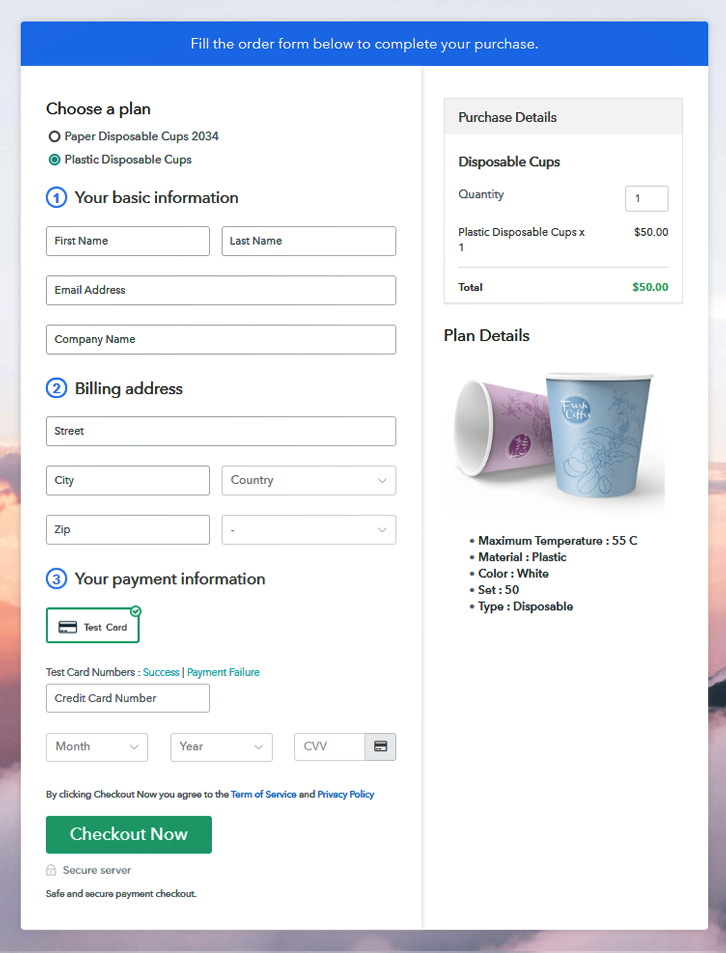
(c) Take a Look at the Checkout Page
Wrapping Up
You May Also Like To Read –