Ideal For: All the cooking gas manufacturers, gas miners, frackers, cooking gas dealers, cooking gas exporters and other merchants can use this method to sell cooking gas online.
Why Choose this Method to Sell Cooking Gas Online?
Unlike any other solution, this method allows you to:
- List and sell your cooking gas for FREE. Absolutely no payment required.
- No need to pay commission on any of your sale.
- Multiple payment options like PayPal, Credit Card, etc to collect payment from a single place.
- Sell one time or recurring subscriptions of your cooking gas.
- Collect payments & sell products in any currency as per your requirement.
- Give discounts on your products by offering special coupon codes.
- Add sales commission agents to help you in selling cooking gas online.
Cooking gas is increasingly being used as the best alternative to solid fuels as it produces less smoke and has a lower carbon footprint. This can be understood from the fact that in less than a decade, more than 450 million people made access to cooking gas. And most of these new connections to households were made in countries like India and China. So, as an exporter of cooking gas, you are dabbling with the idea to sell cooking gas online to capture demands from these countries and more.
Now, in this article, we will recommend a Saas tool called Pabbly Subscription Billing to create checkout pages to sell cooking gas online. The advantages of using this method are many like collecting payment in offline/online mode, no transaction costs or hidden charges, easy tax management, etc. Some additional features include:
- Unlimited Listing of Products
- Tracking Revenues
- Custom Domain
- Create Coupons/ Plans/Discounts
- Insert Custom Logos
So, let’s create our first checkout page with Pabbly Subscription Billing to start selling cooking gas online
Note: Cooking gas is highly inflammable, hence it is advisable to meet the minimum perquisites mandated by the regulatory authorities before selling cooking gas online.
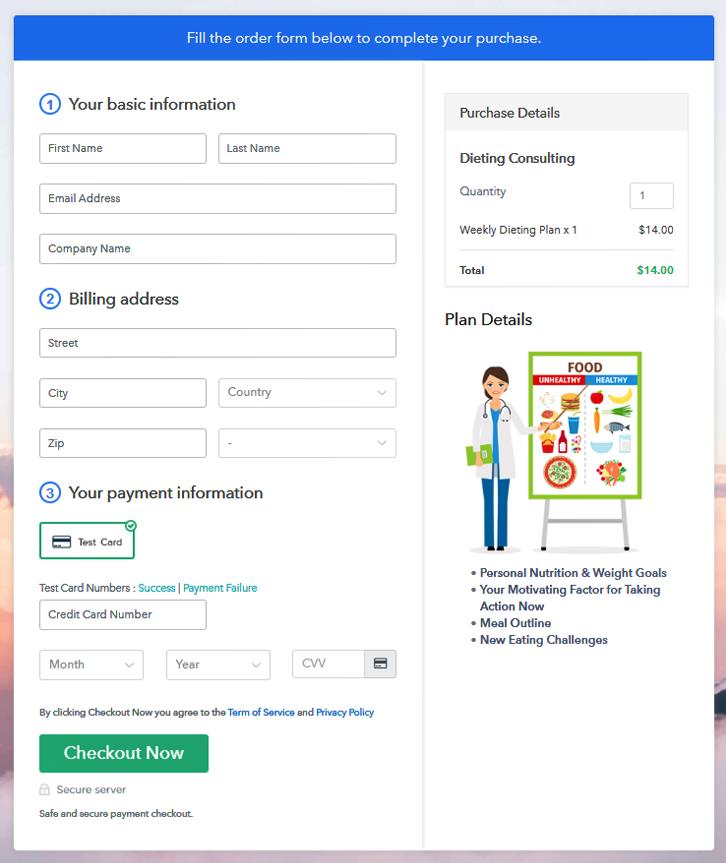
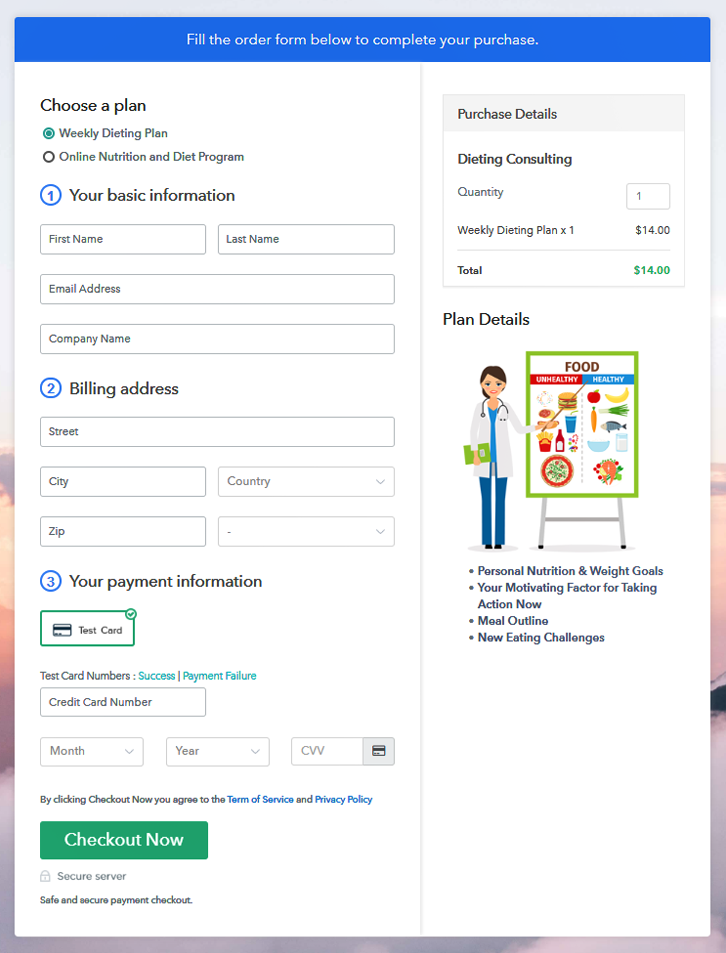
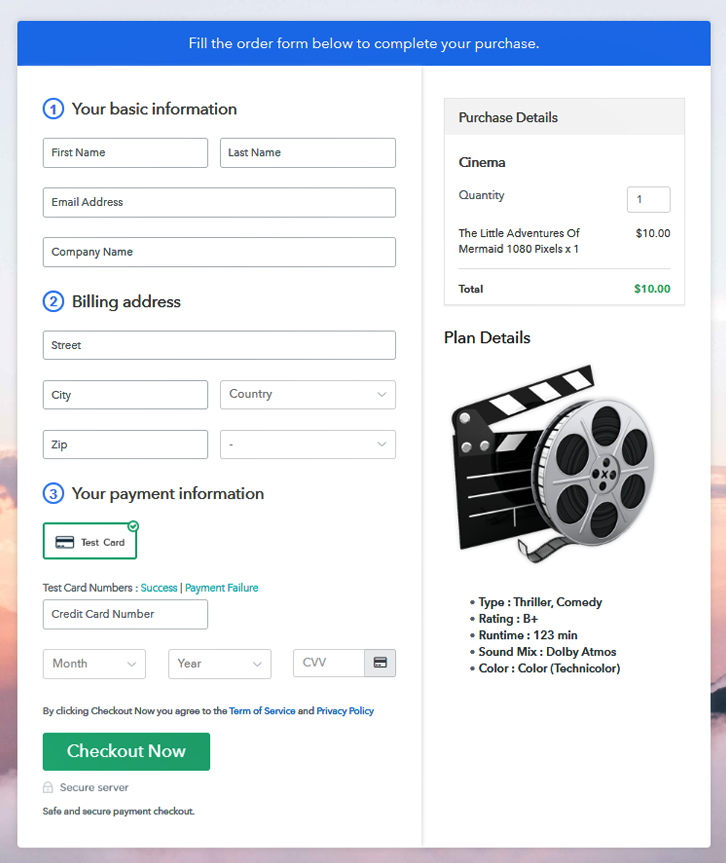
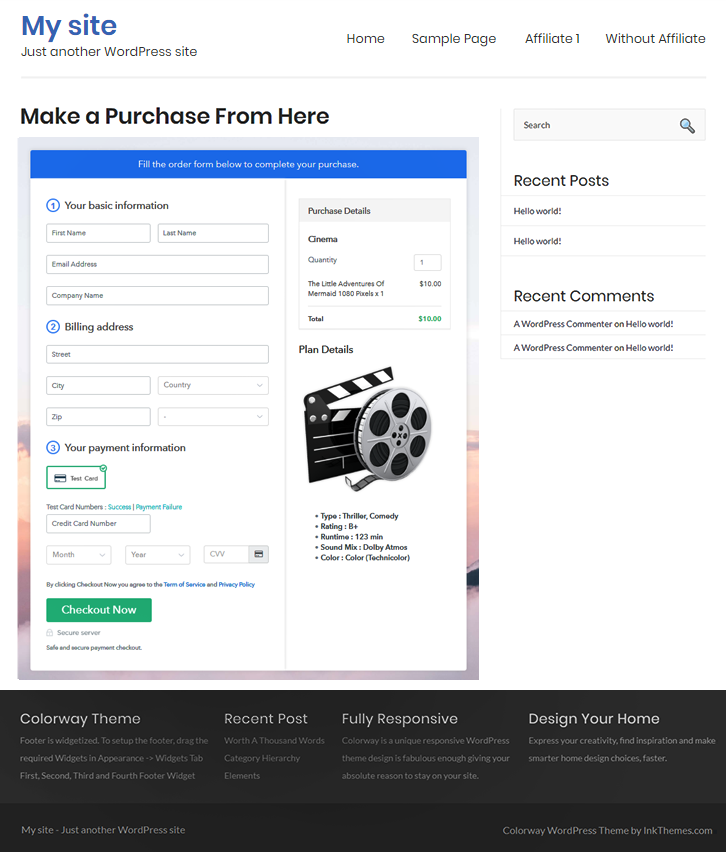
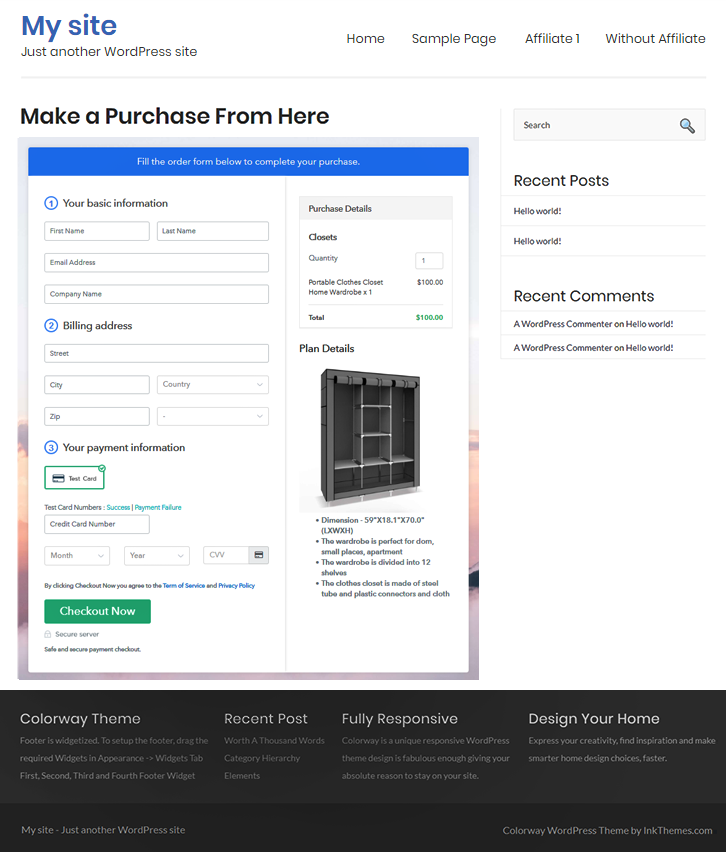
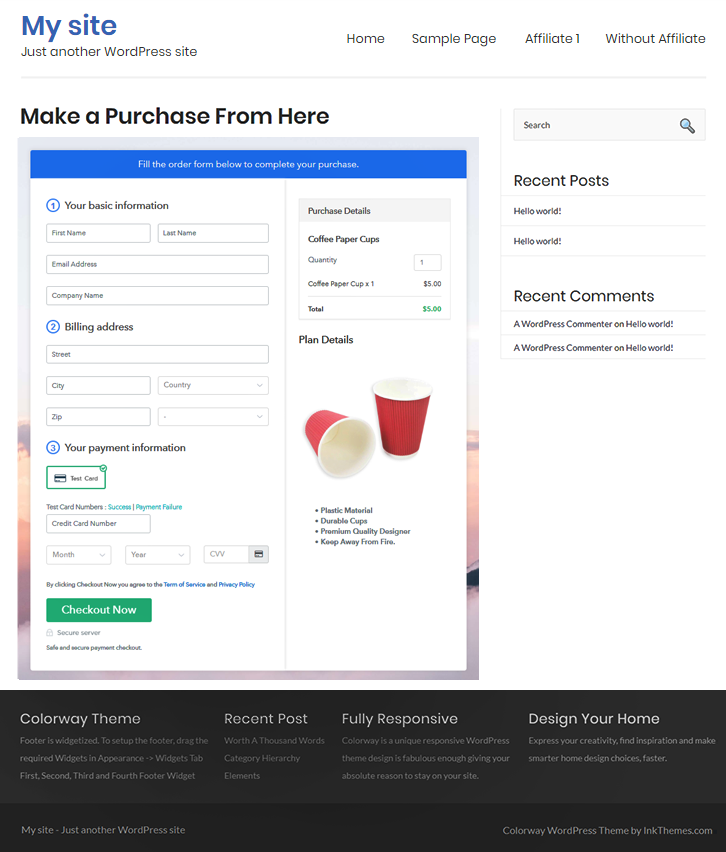
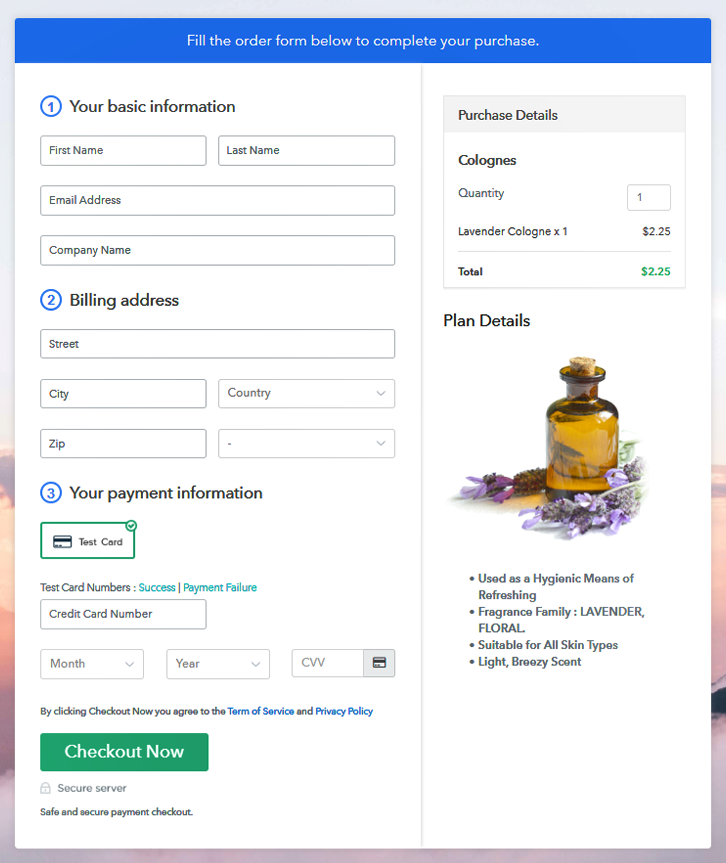
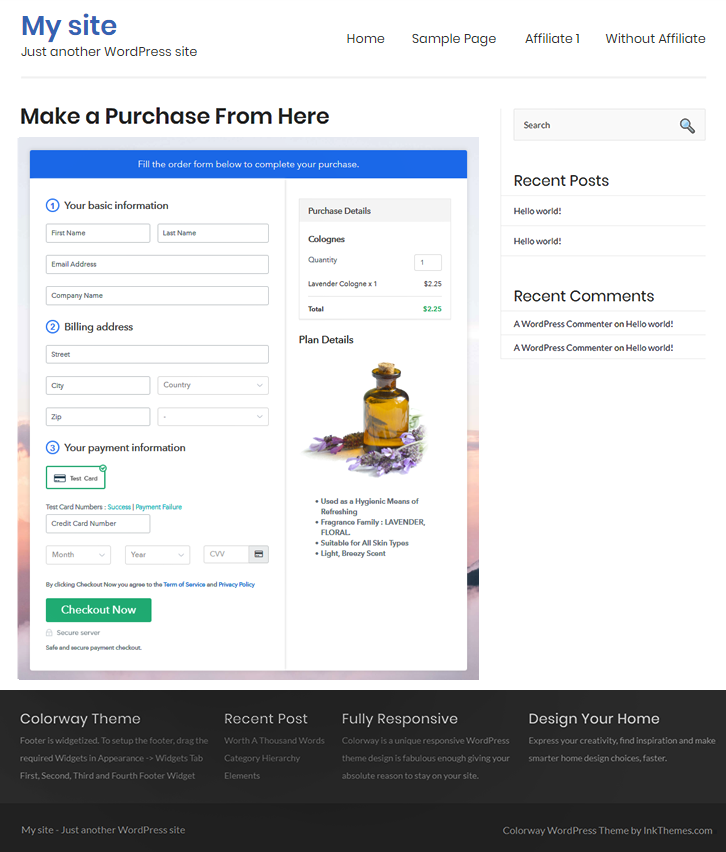
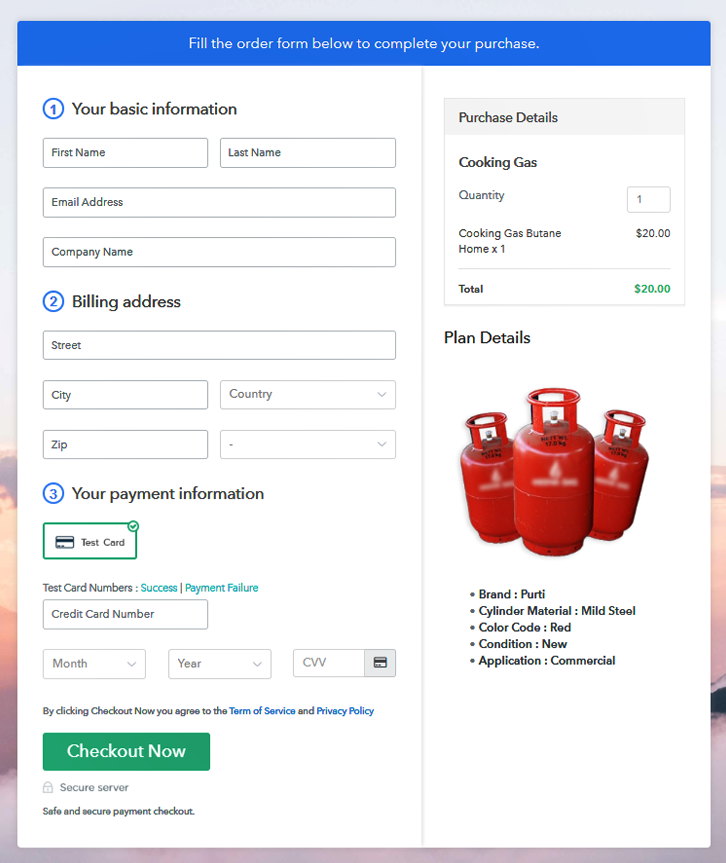
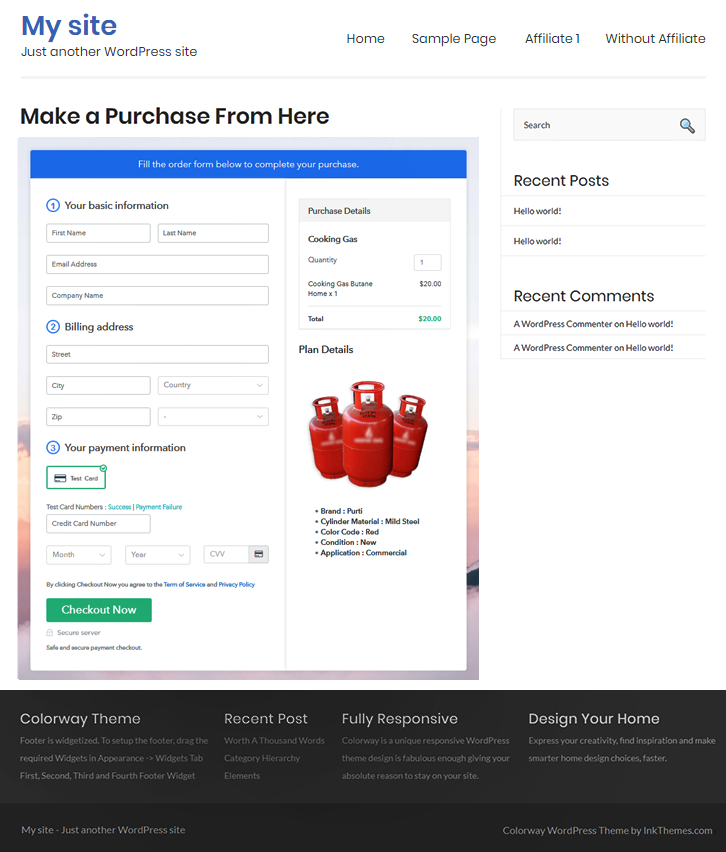
Final View of Checkout Page For Your Cooking Gas Selling Business
Step 1: Log in to Pabbly Subscription Billing

To begin the process look for the website Pabbly Subscription Billing in your search engine. Now on reaching their website click on the “Sign up Free“ button. Either manually fill all the information or simply sign in using your Gmail account.
Sign Up For Free!
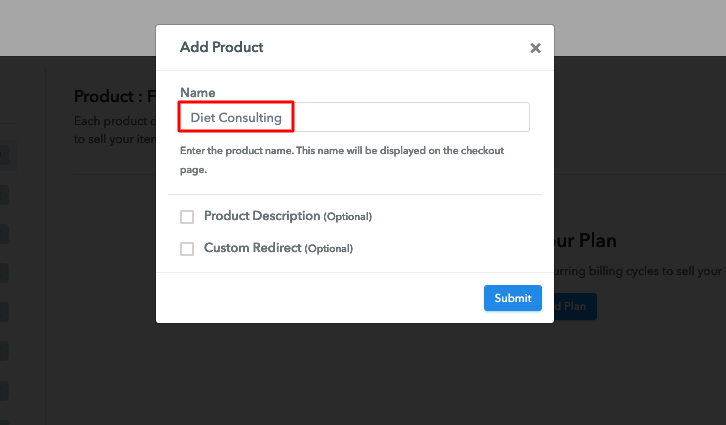
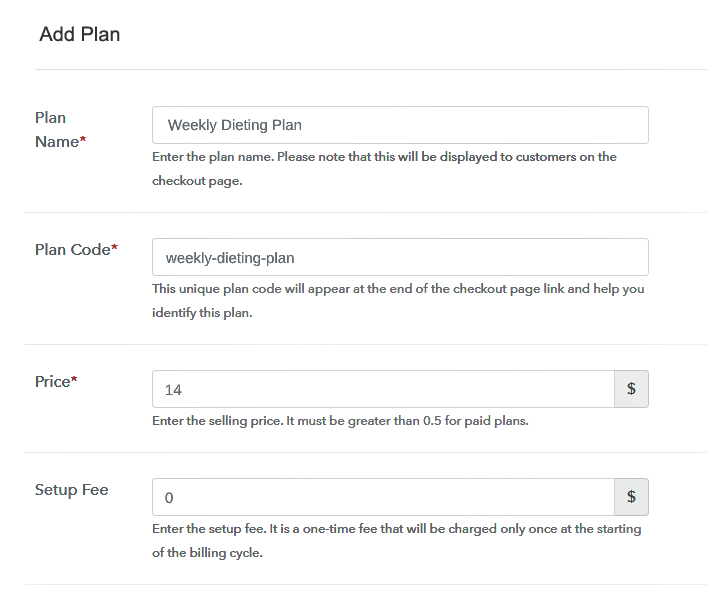
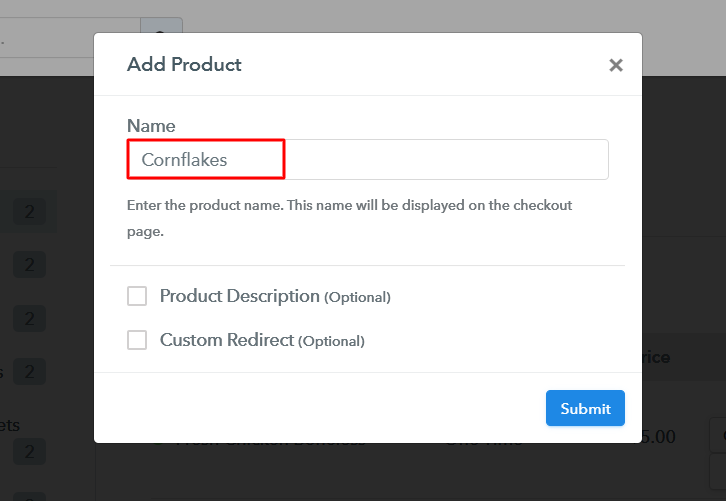
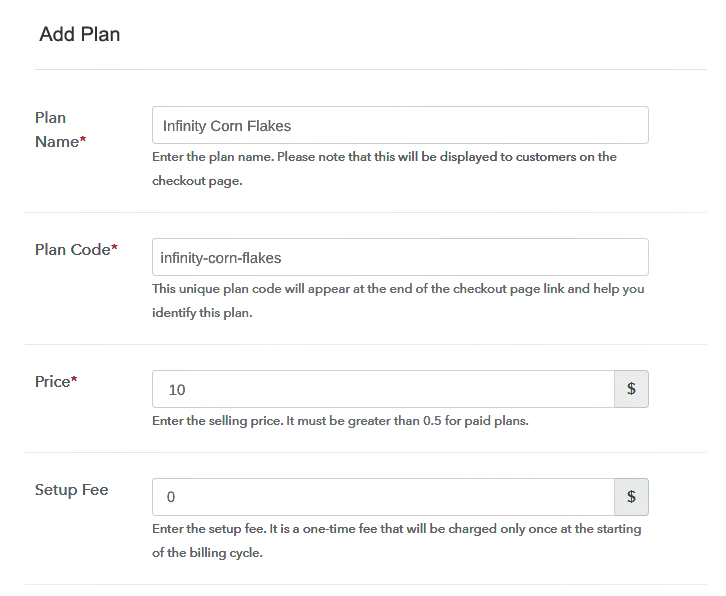
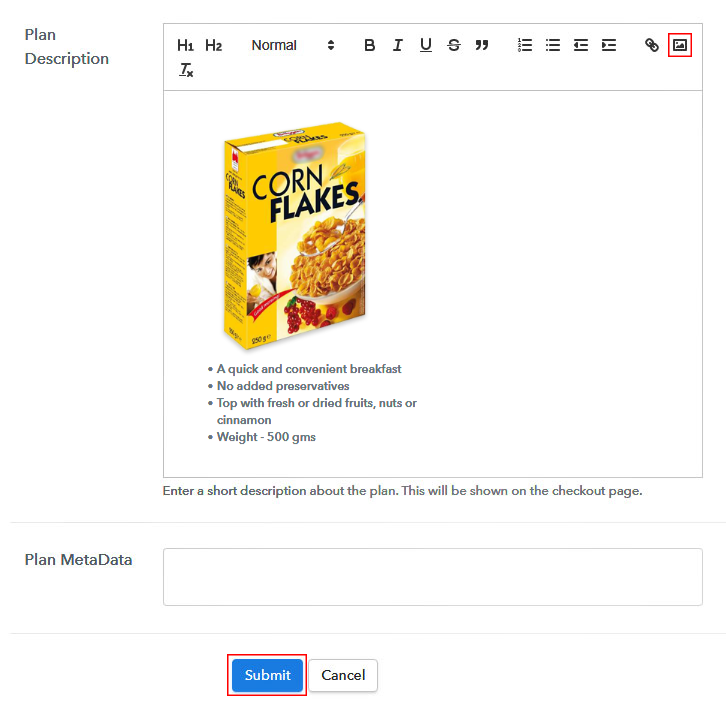
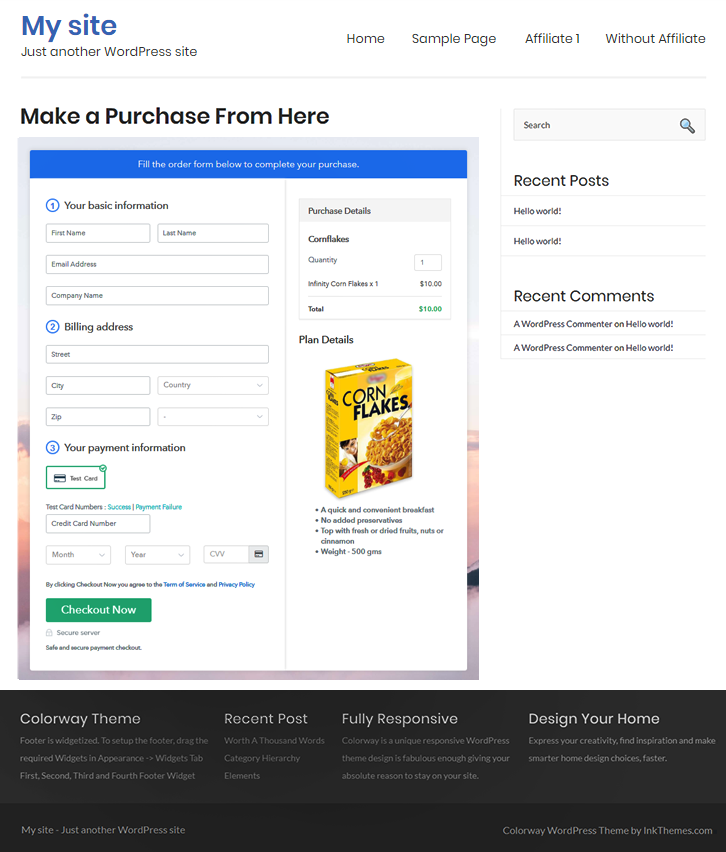
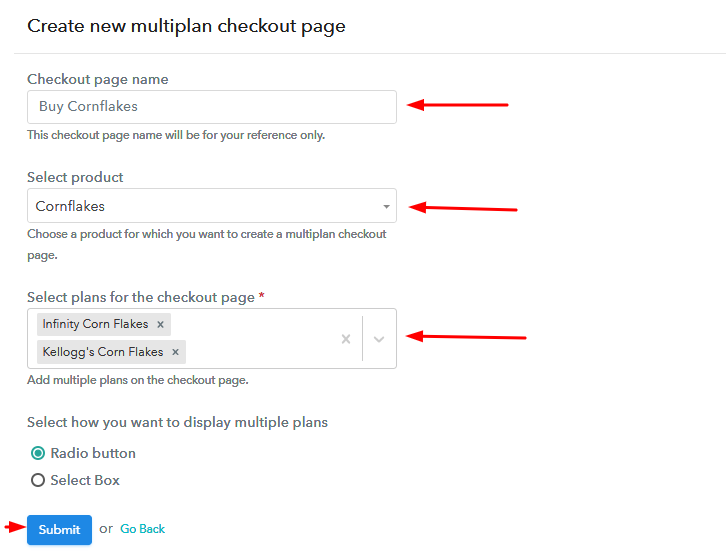
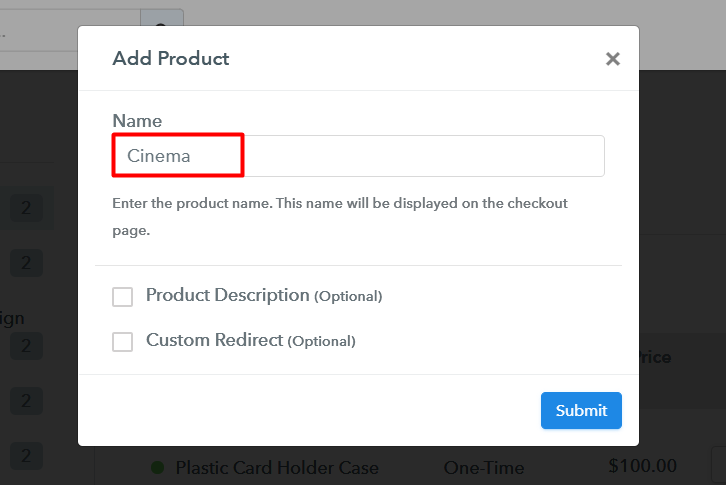
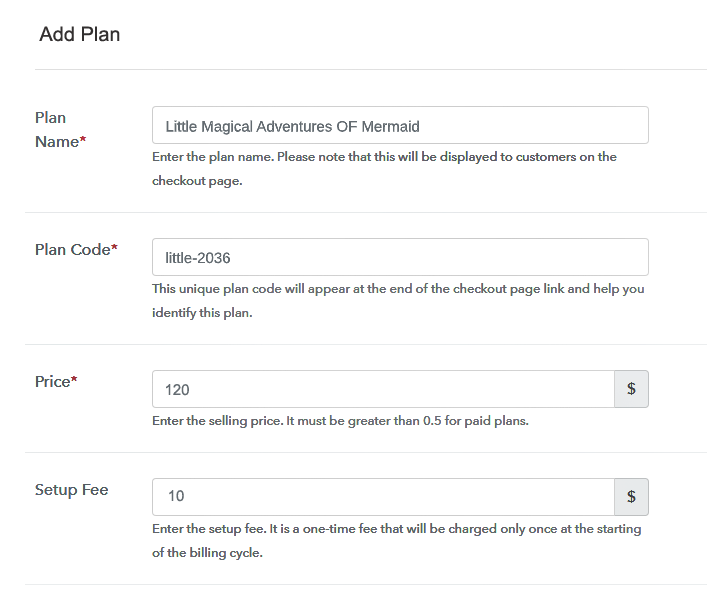
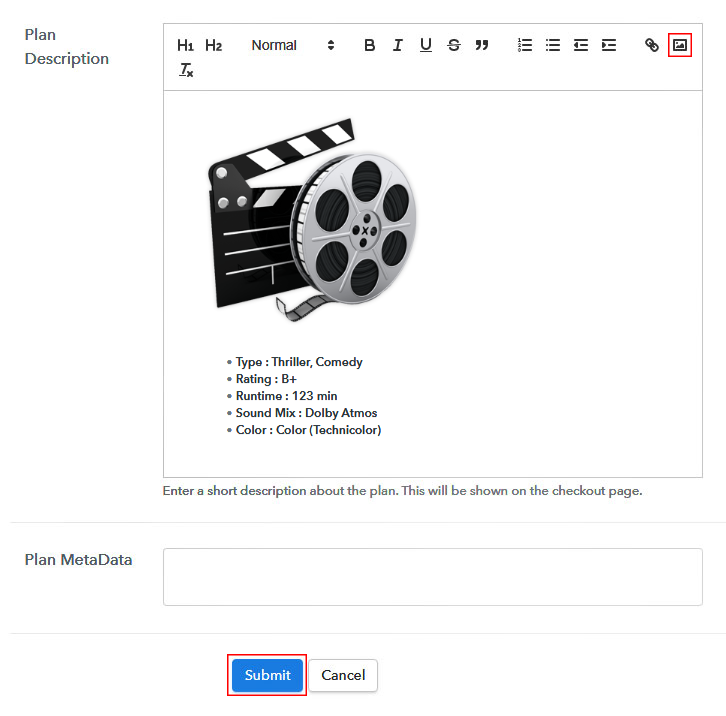
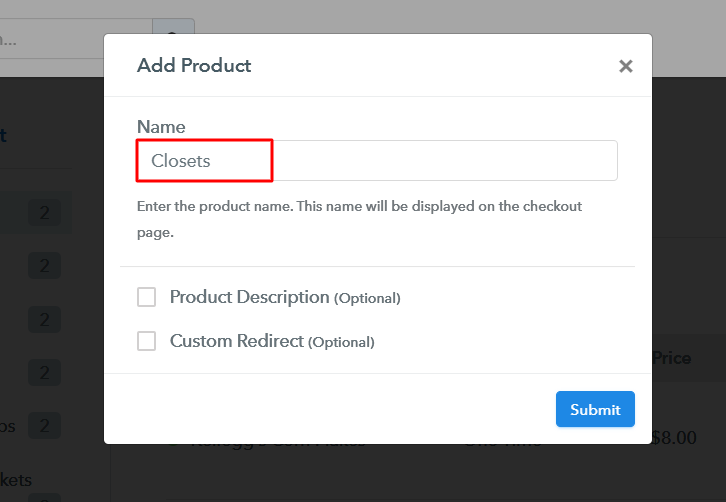
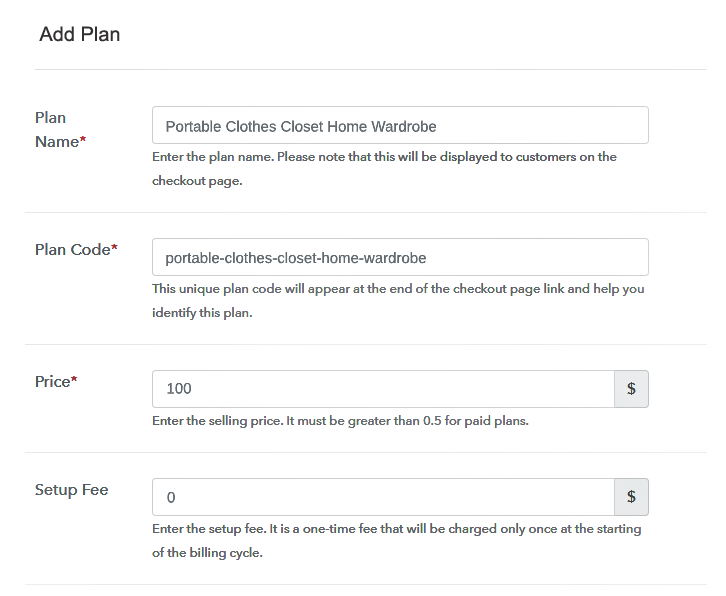
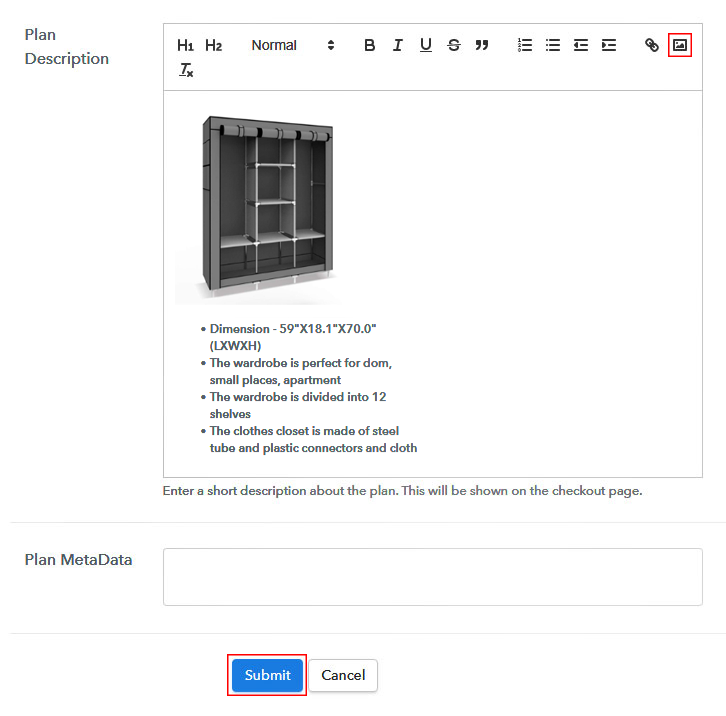
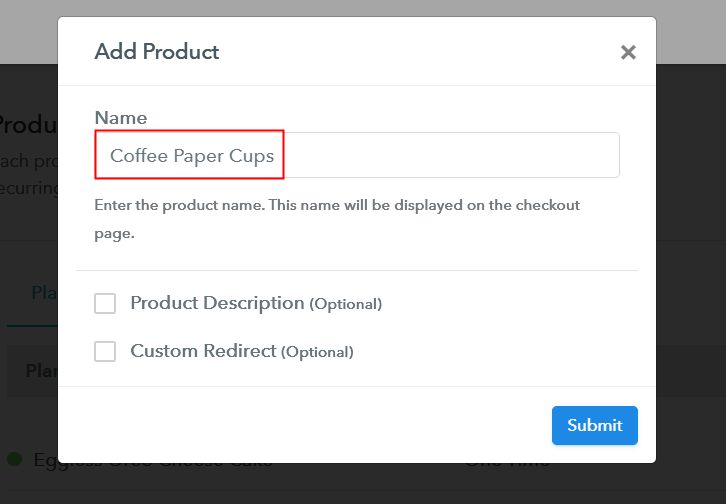
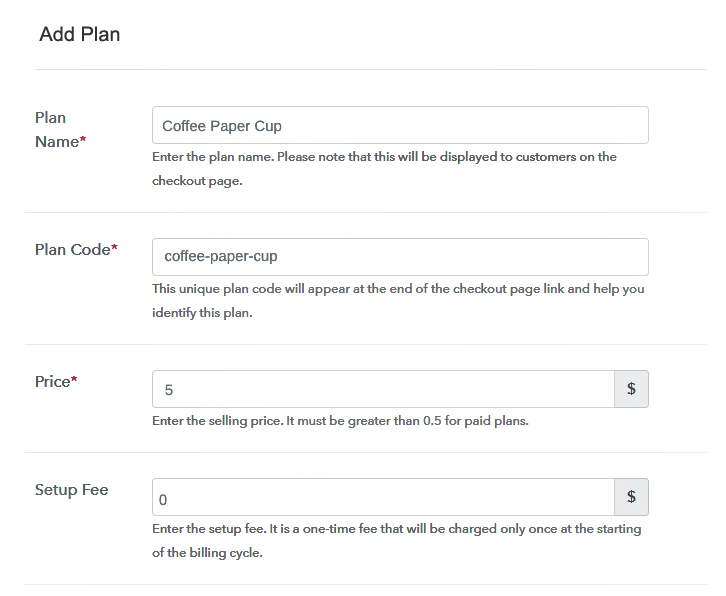
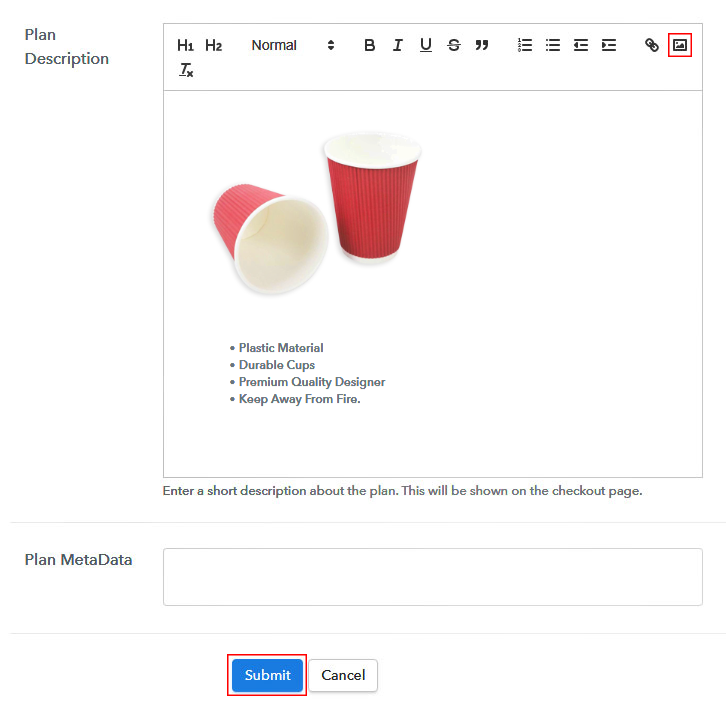
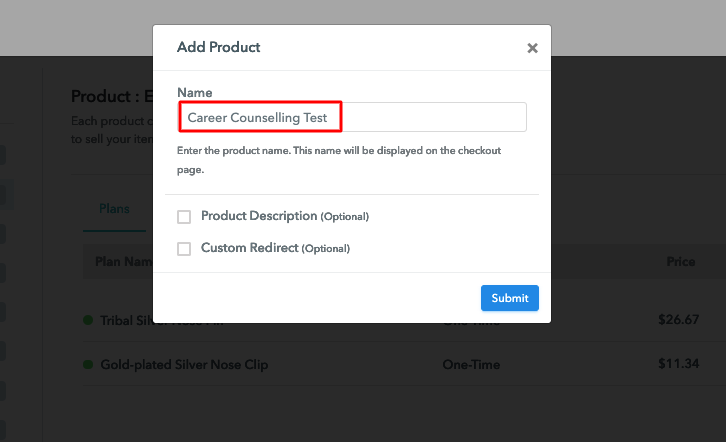
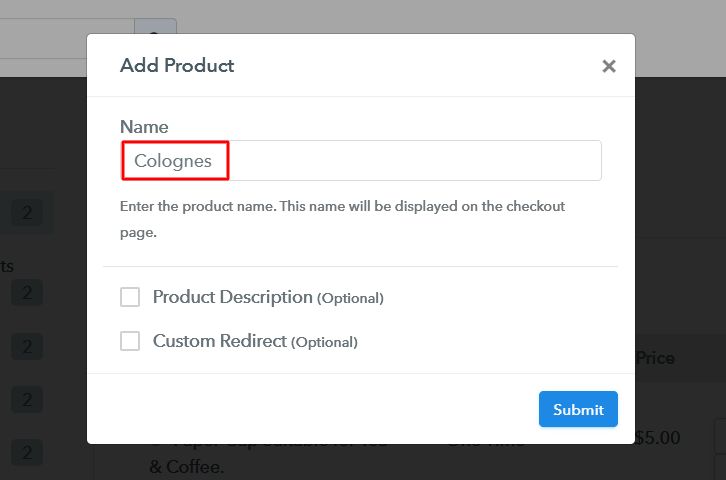
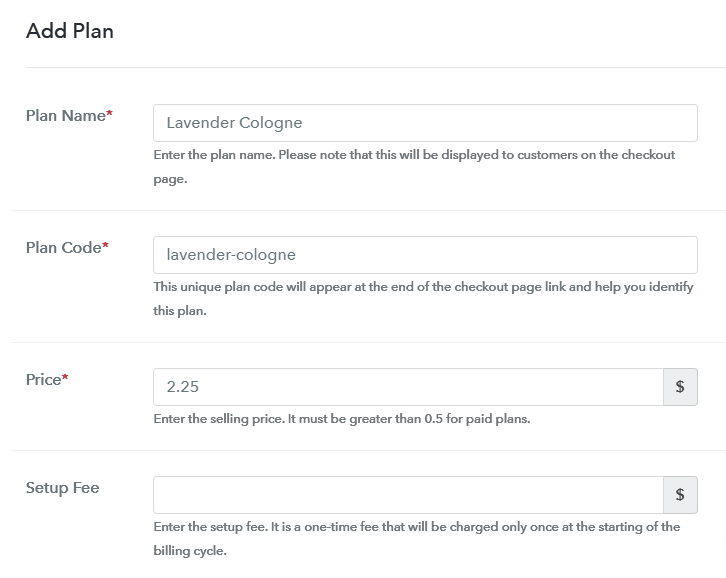
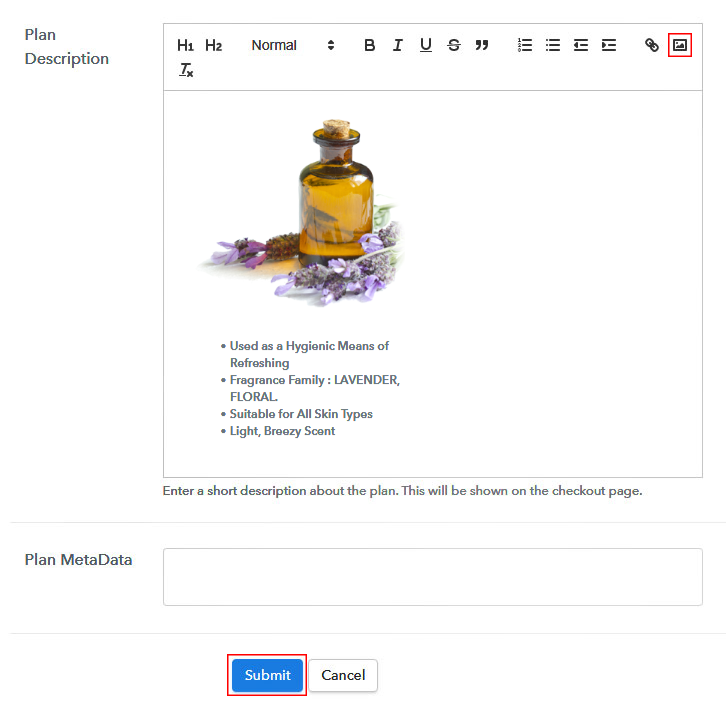
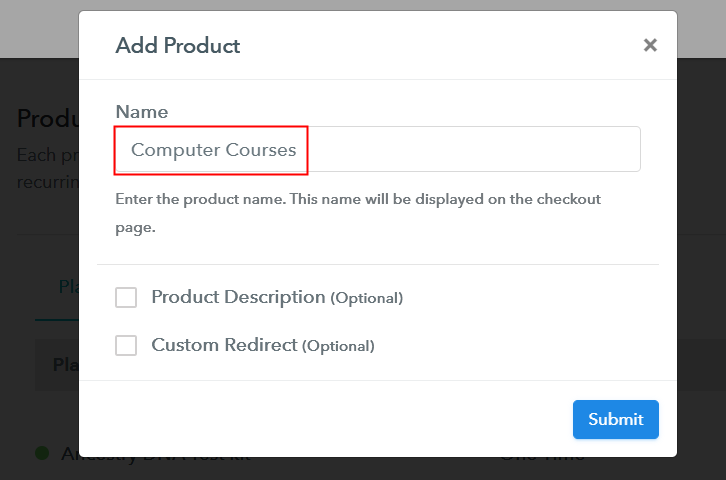
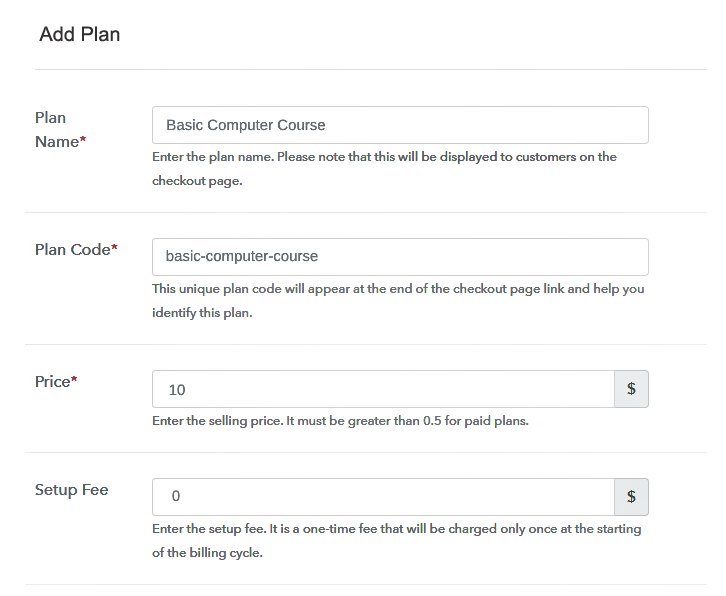
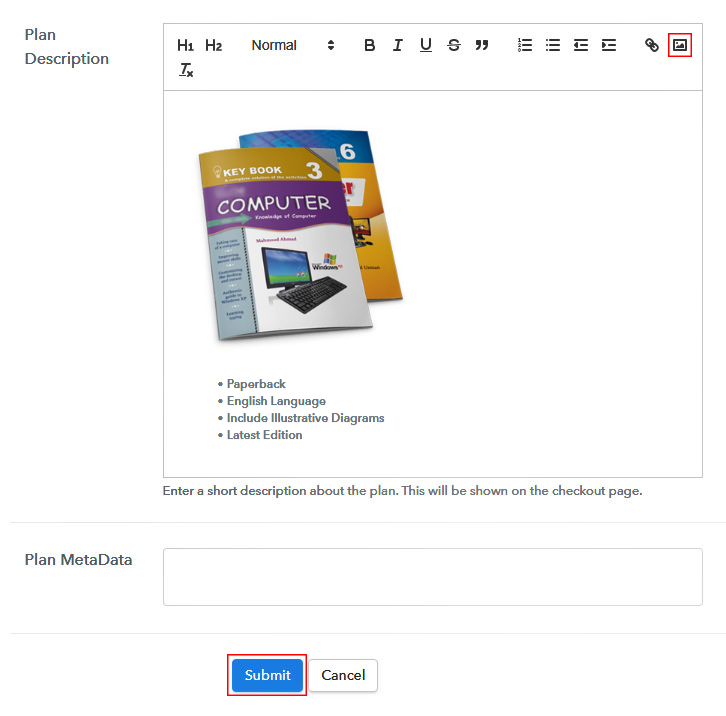
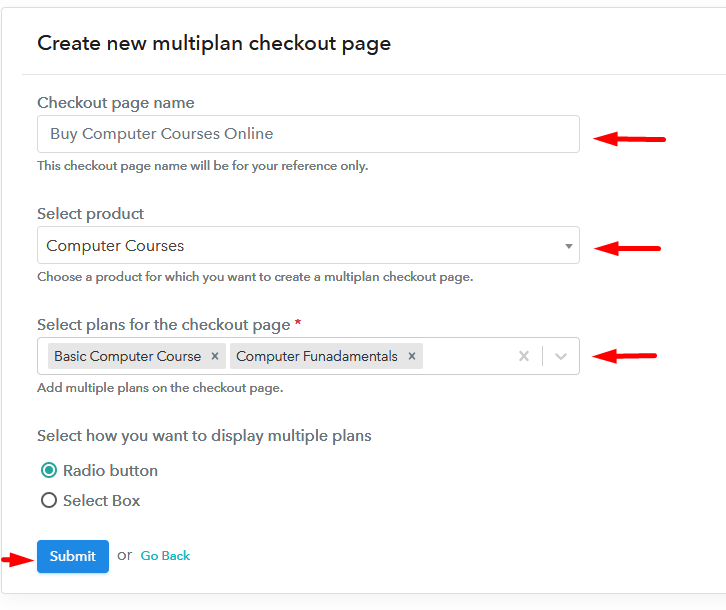
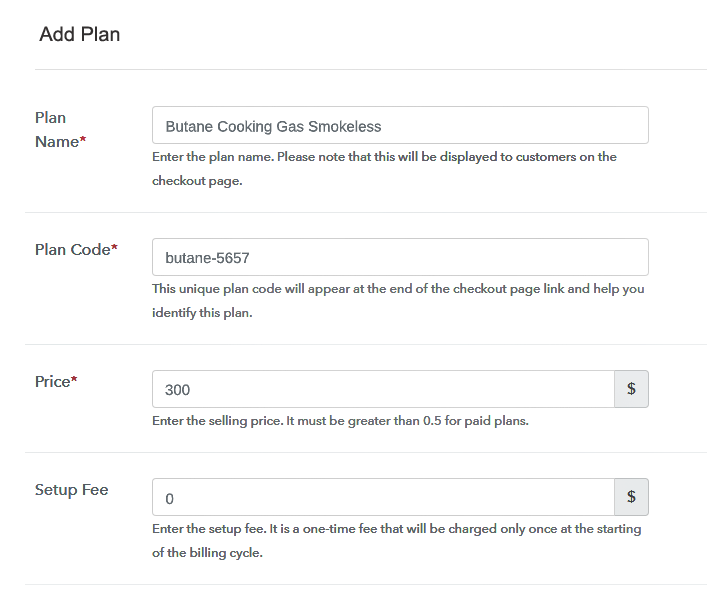
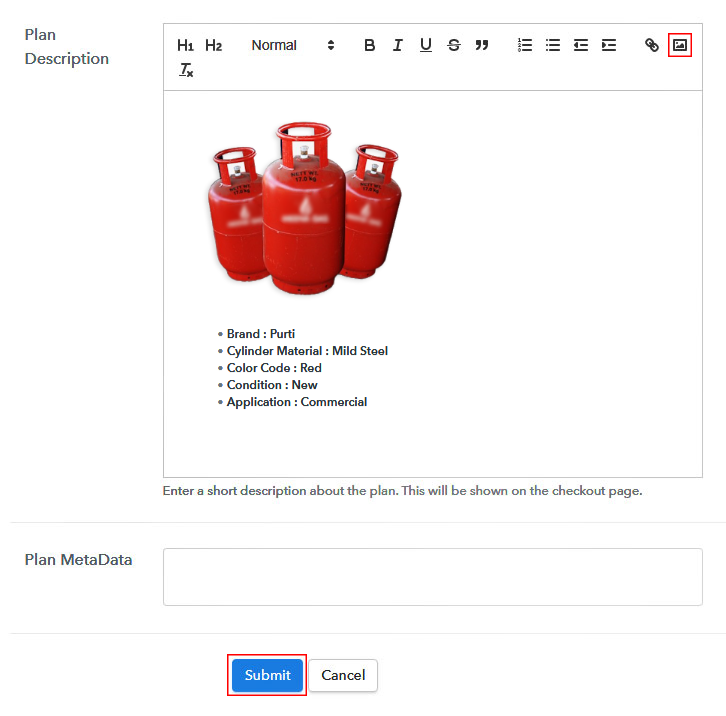
A dialog box will be generated and you will fill in the details like company name, currency, phone number, etc. Now after filing in the information press the blue “Continue” button to complete the process. Pabbly Subscription Billing has a dummy payment gateway for you to beta test the transaction experience of the customer to remove shortcomings beforehand. Just click on the “Enable Test Payment” option to start testing out this feature. You can integrate many payment gateways PayPal, Authorize.net, Stripe, etc with Pabbly Subscription Billing. Below this paragraph, there are manuals to embed the payment gateway of your choice. So, I am going to enable the test payment option to continue the process. I am going with the assumption that the payment integration went well. So let’s move on to add product with the “Add New Product” button will summon a dialog box. Here you can enter the name of the cooking gas and provide a product description, also even redirect to a particular website. Fill out all the details like the name of the product and voila your product is created. Note: Here you can add all the products related to the similar category by creating plans for each of them. Let’s rollout plans for different kinds of cooking gas available in your store. In the plan page, fill in information like plan name, code, price, setup fees, etc. Moreover, while coming down you will find different billing models like one-time payment, recurring, based on cycles, etc. Now, choose the one that interests you the most. Furthermore, you can change it any time you want. You should upload some high definition images of your gas container by clicking on the image button. Then after uploading the image give concise information of your gas container like type, weight, volume, etc, and then press the “Submit” button. Later, using the same process, you can list more products Follow up the recommended steps to preview the checkout page: Just copy the link and add the checkout page to sell cooking gas online at any suitable place on your WordPress site. Further, paste the plan link of the cooking gas on a text editor of the WordPress dashboard. Next, click the “Publish” button, after making changes. Note: In case you want to sell multiple products via a single checkout page, you can create a multi-plan checkout page otherwise skip this step. You are amazing !! So easily you created your first checkout page to sell cooking gas online with Pabbly Subscription Billing. With some effort, you will master all the features in this software to rule the online market. But since these are your baby steps, you may have some trouble here and there. Don’t worry as we are here to guide you through the comment section. Thank YouStep 2: Select Subscription Billing

Step 3: Account Setup

Step 4: Connect Payment Gateways & Start Cooking Gas Selling Business Online

Step 5: Add Product For Your Cooking Gas


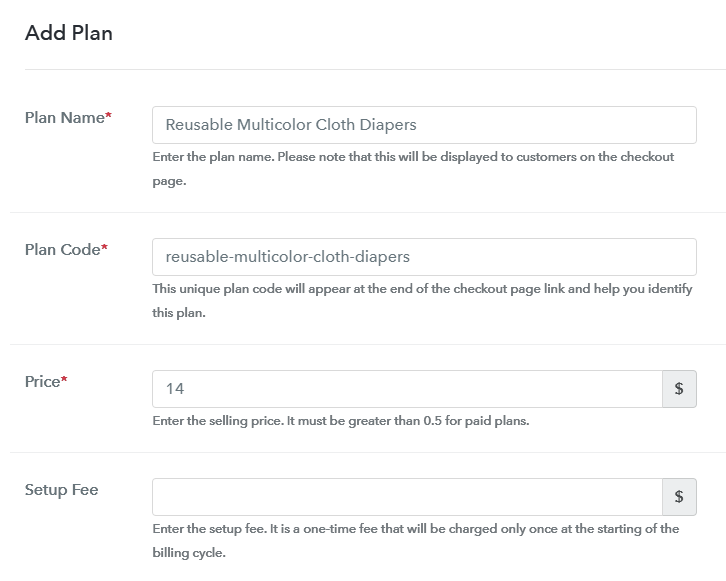
Step 6: Add Plans
(a) Select Add New Plan

(b) Specify the Plan & Pricing Details
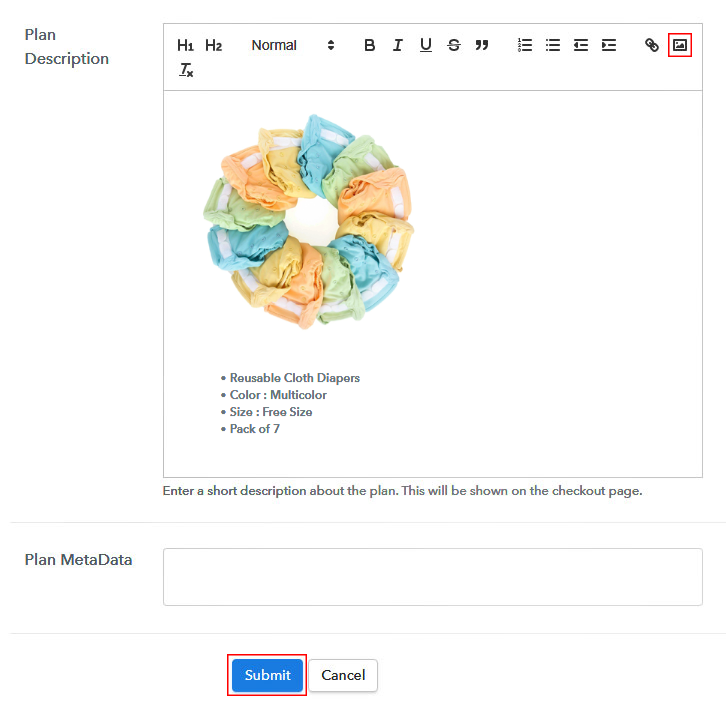
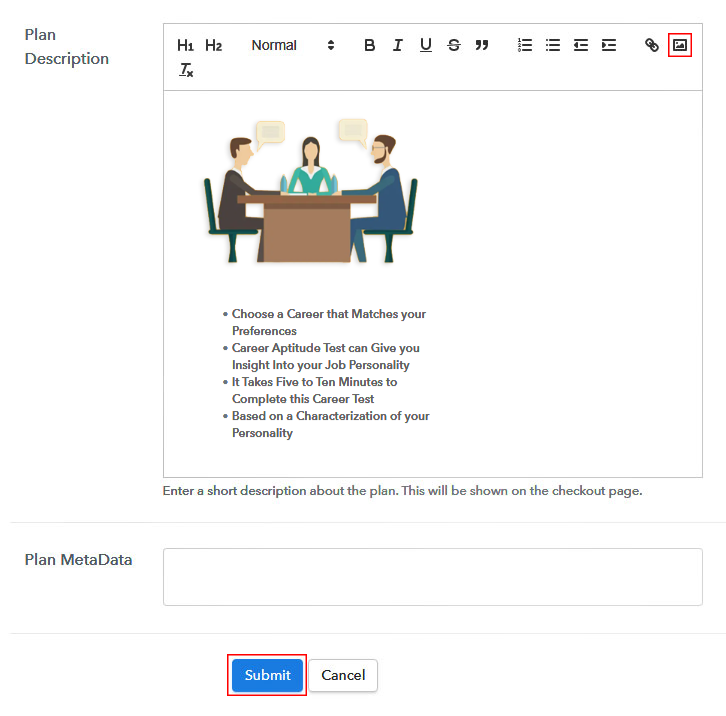
(c) Add Image & Description of Cooking Gas
Step 7: Share your Checkout Page

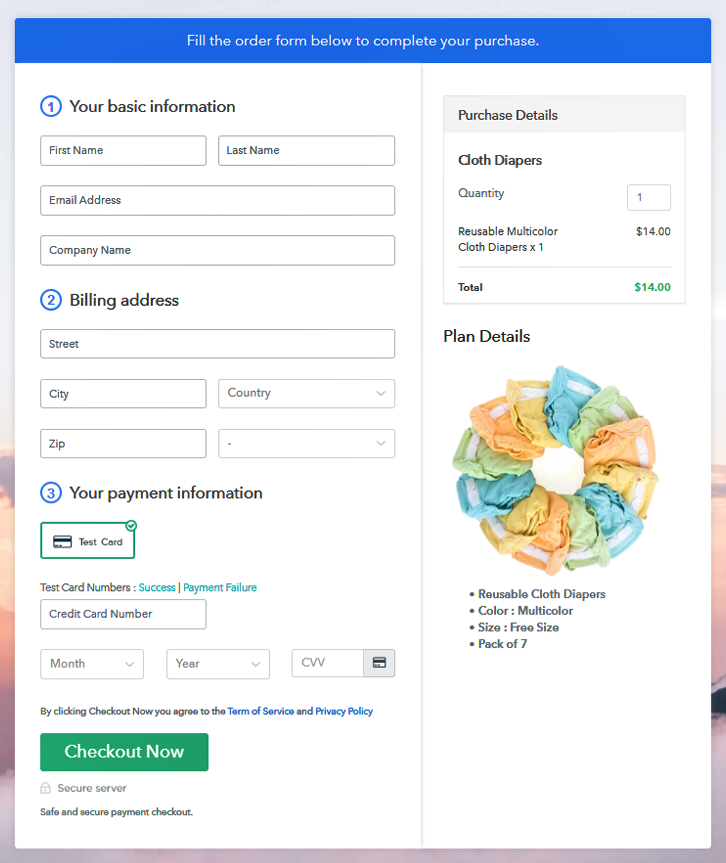
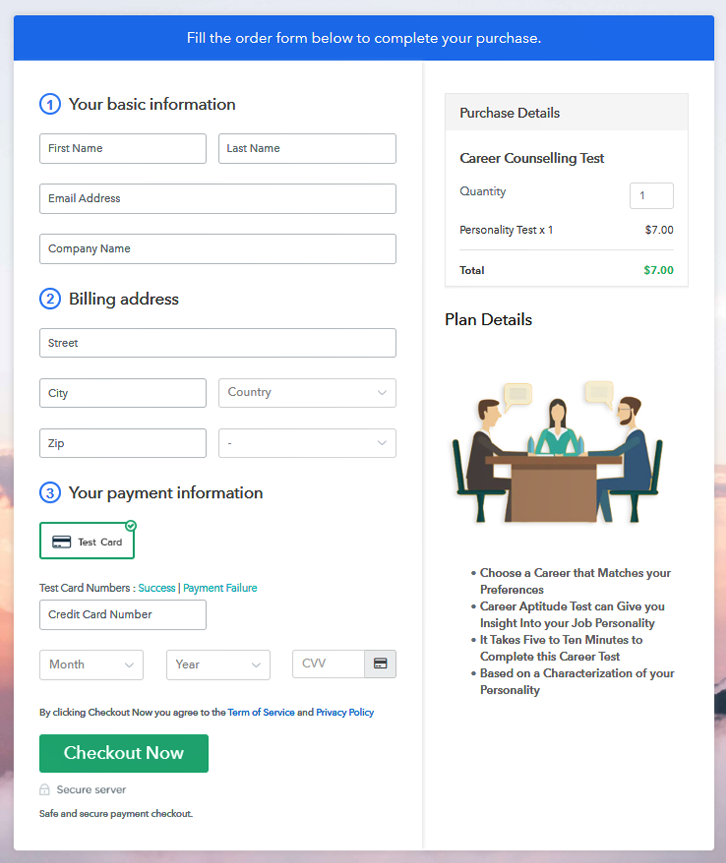
Step 8: Preview Checkout Page
(a) Click on the View Button

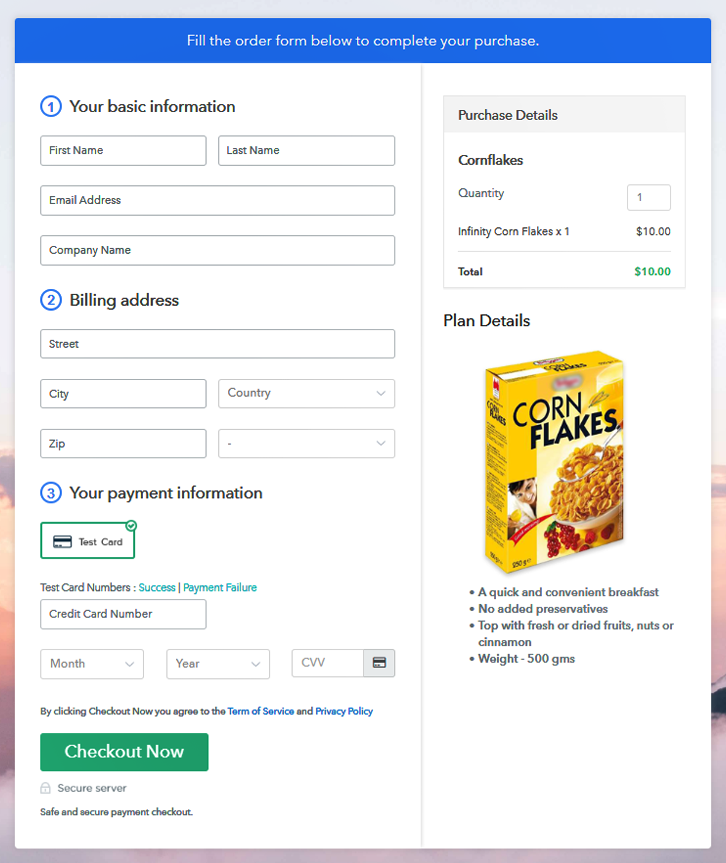
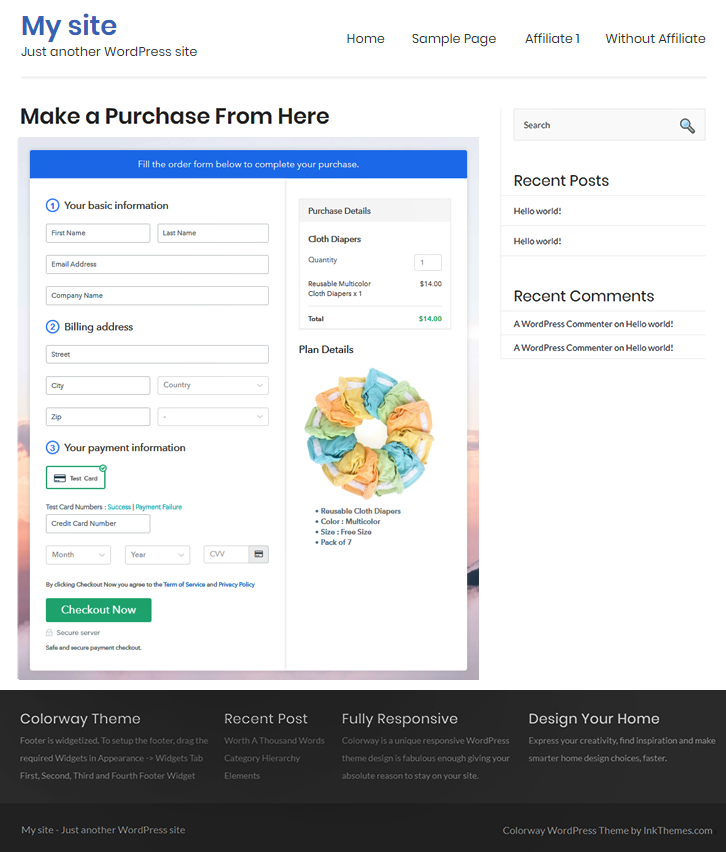
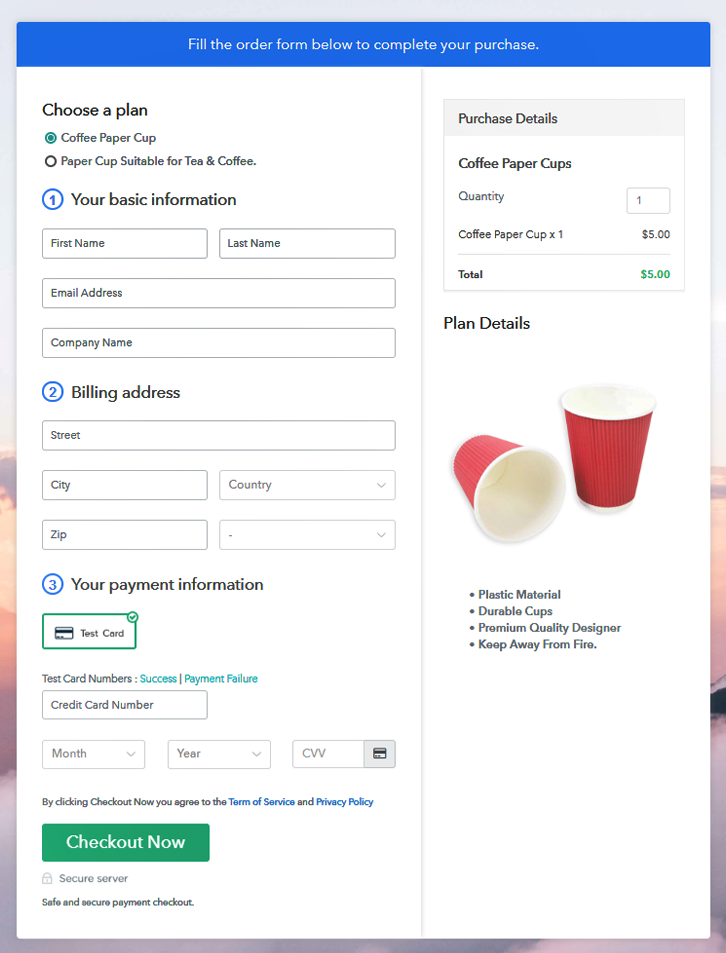
(b) Take a Look at the Checkout Page
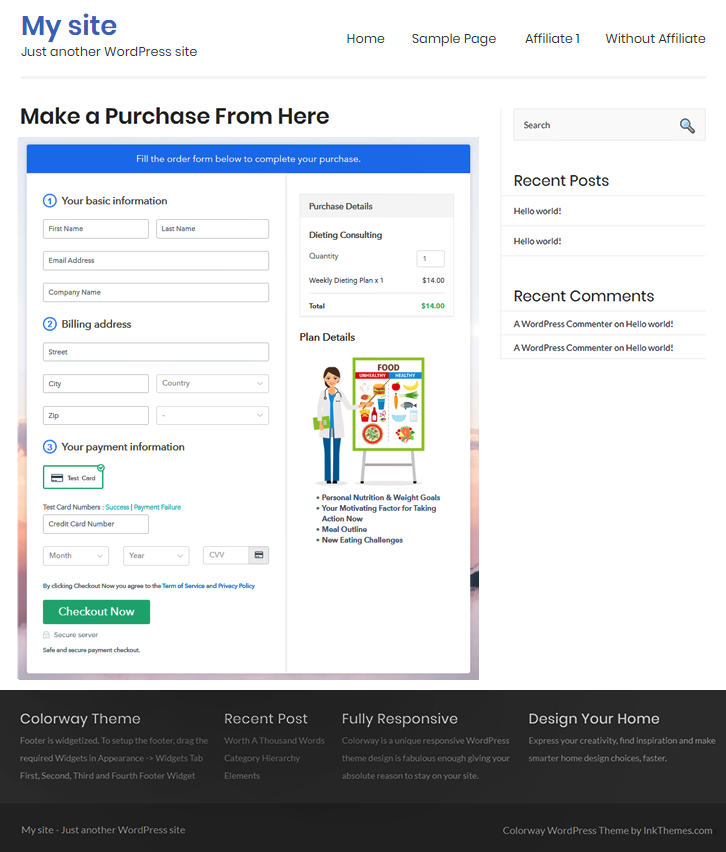
Step 9: Embed Checkout Page in Site & Sell Cooking Gas Online

(a) Edit the Page & Paste the Copied Link

(b) Save & Publish the Checkout Page

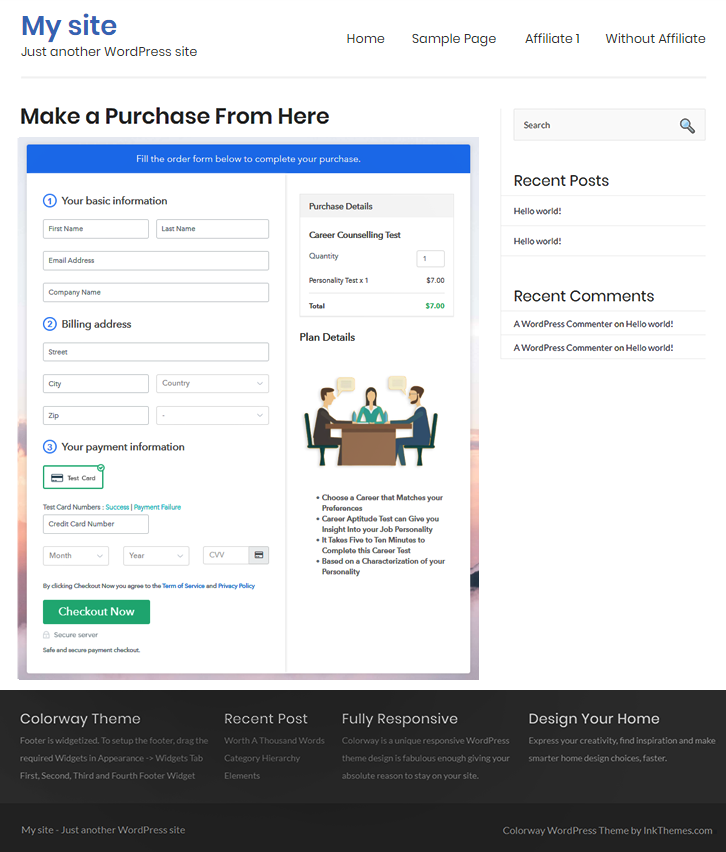
(c) Check out the Final Look of your Checkout Page on WordPress Site
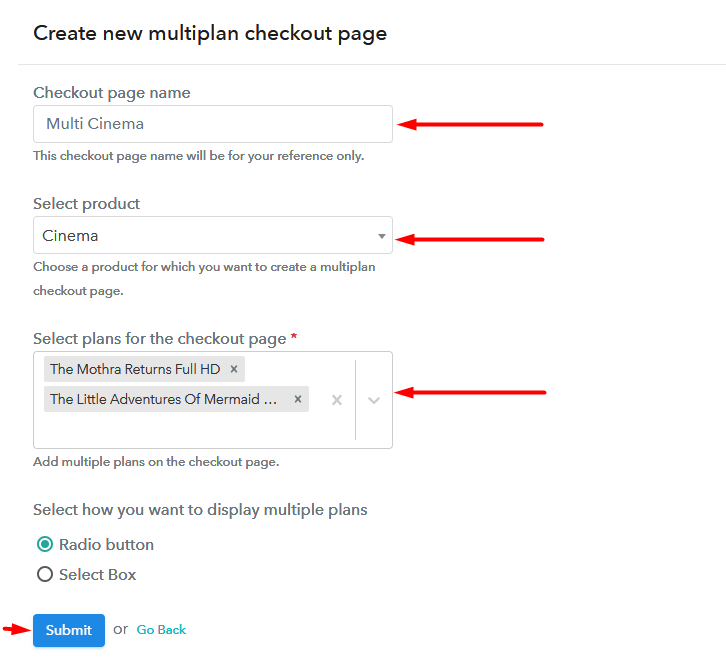
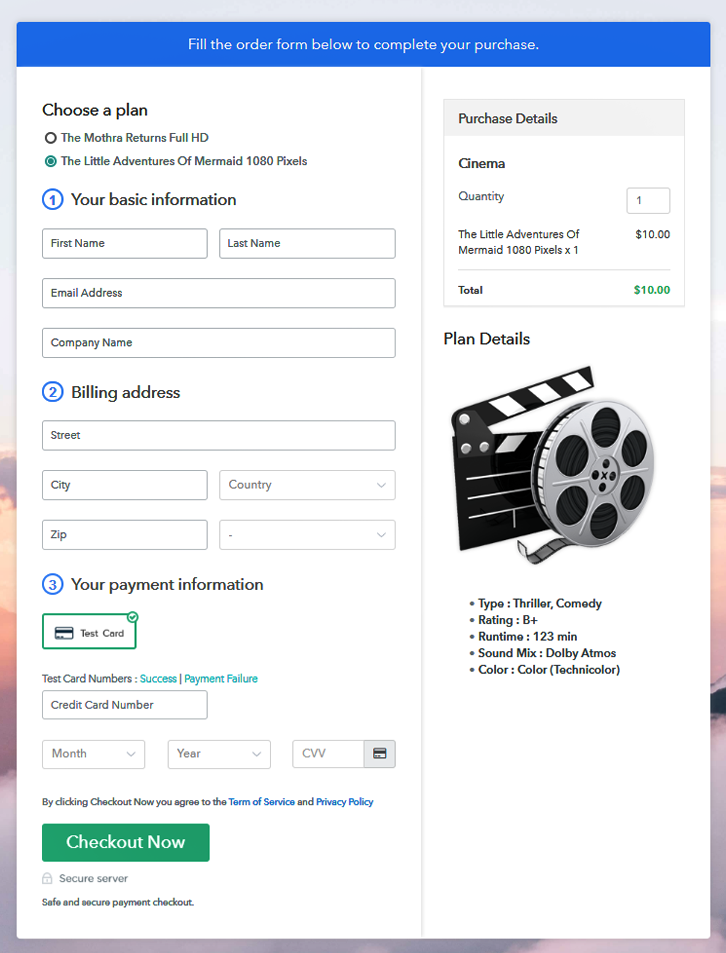
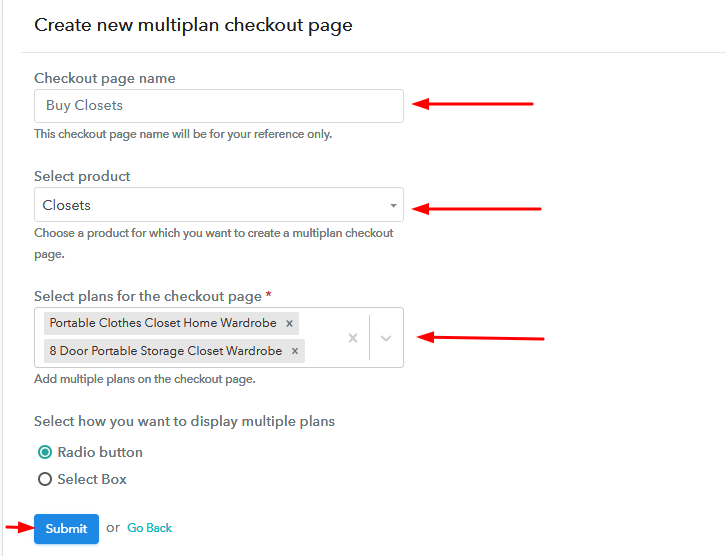
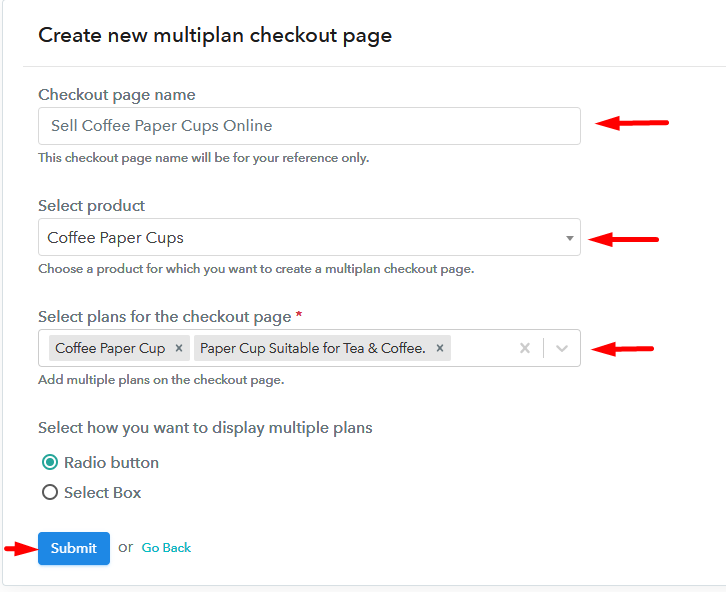
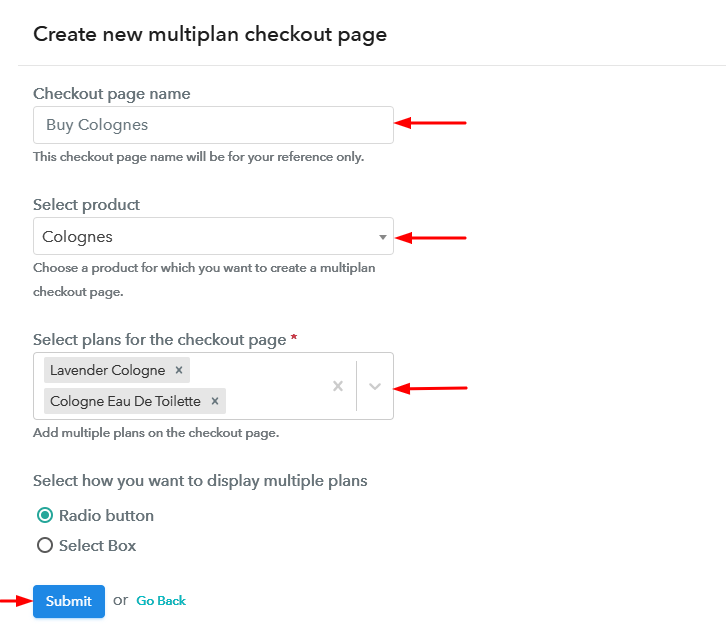
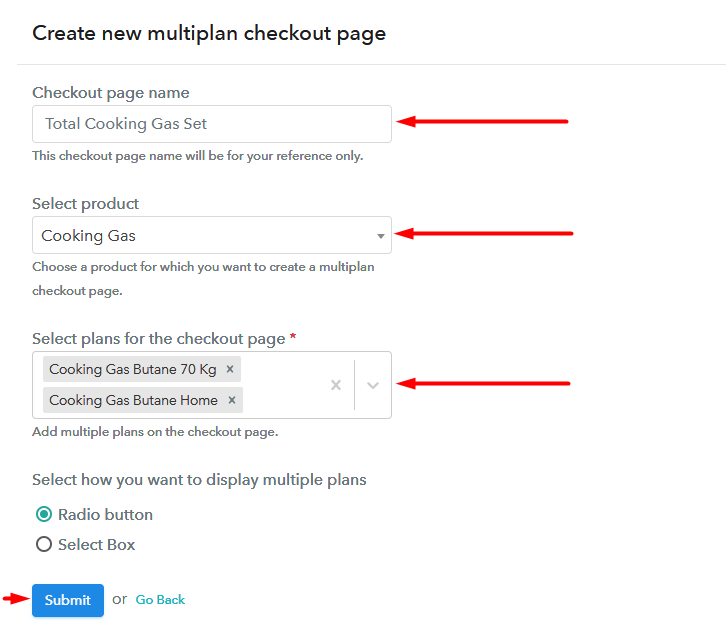
Step 10: Multiplan Checkout Page
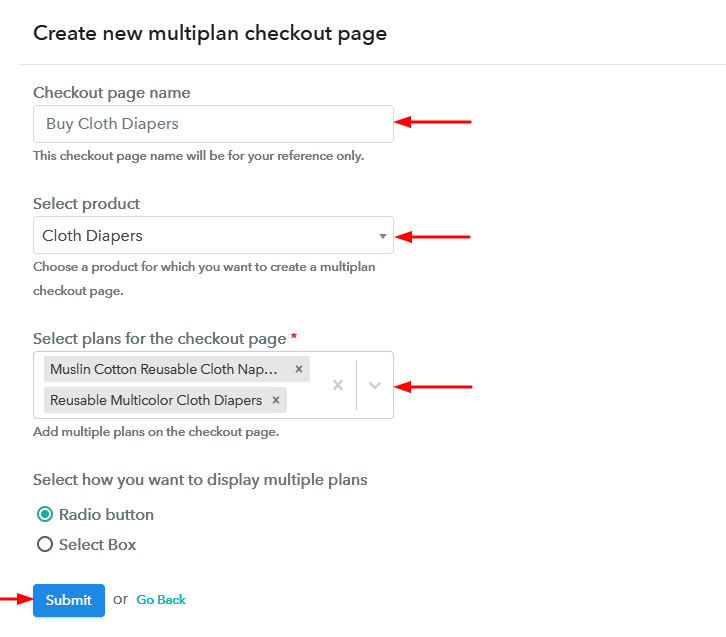
(a) Click on Add Mutiplan Checkout

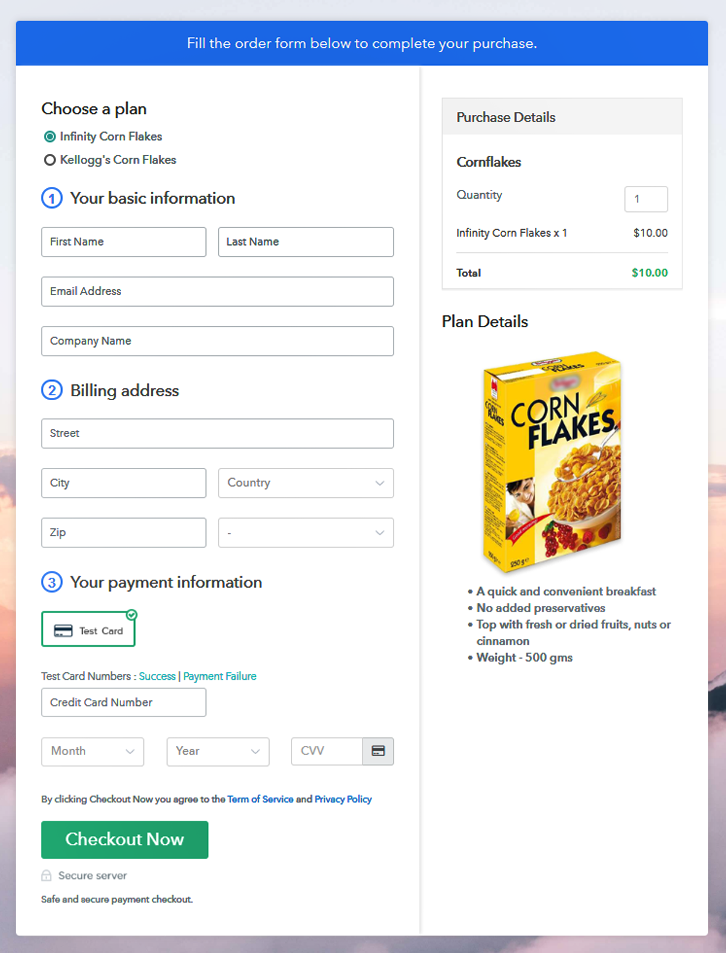
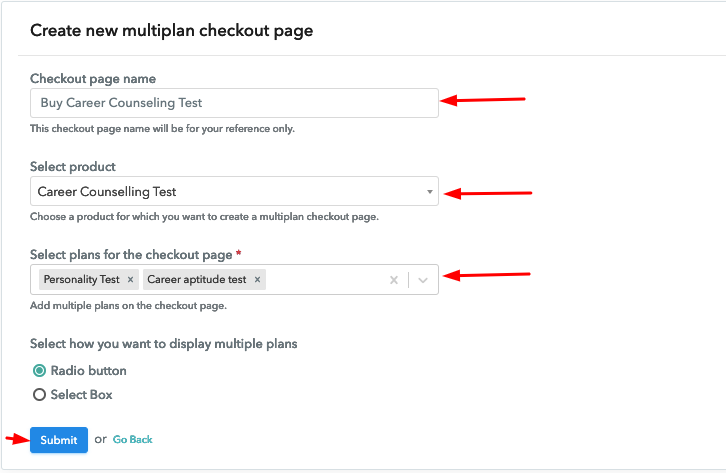
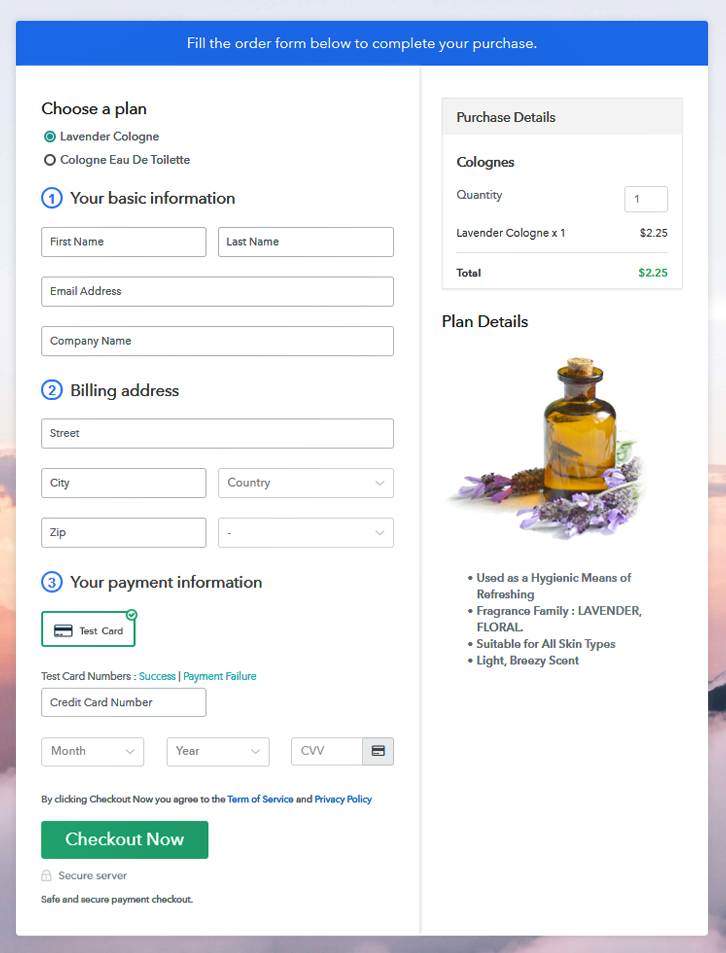
(b) Add Plans to Sell Multiple Cooking Gas from Single Checkout Page
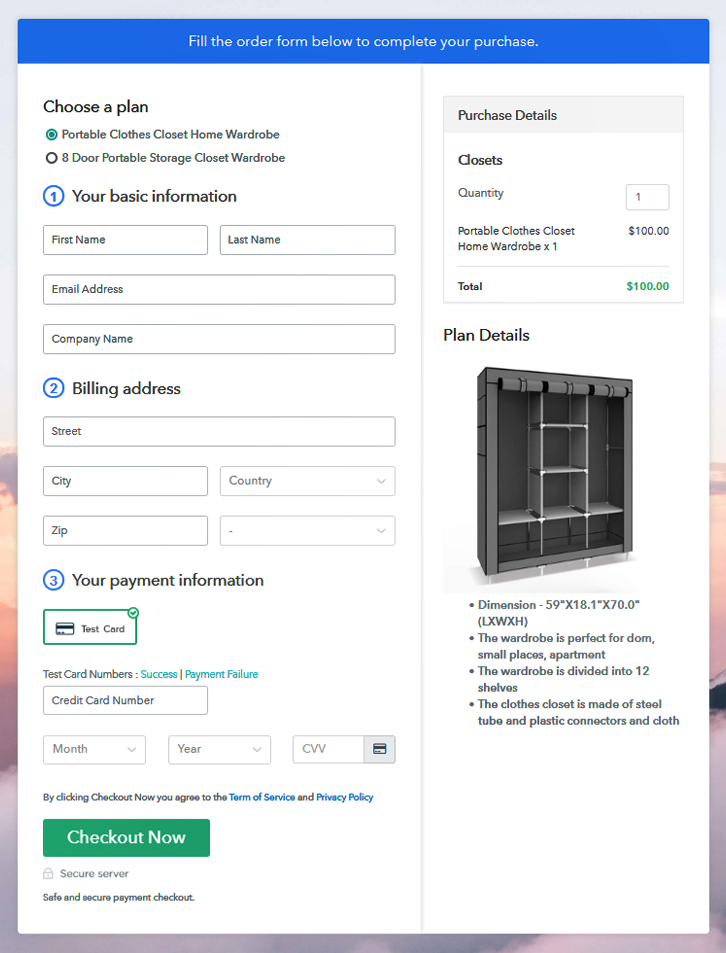
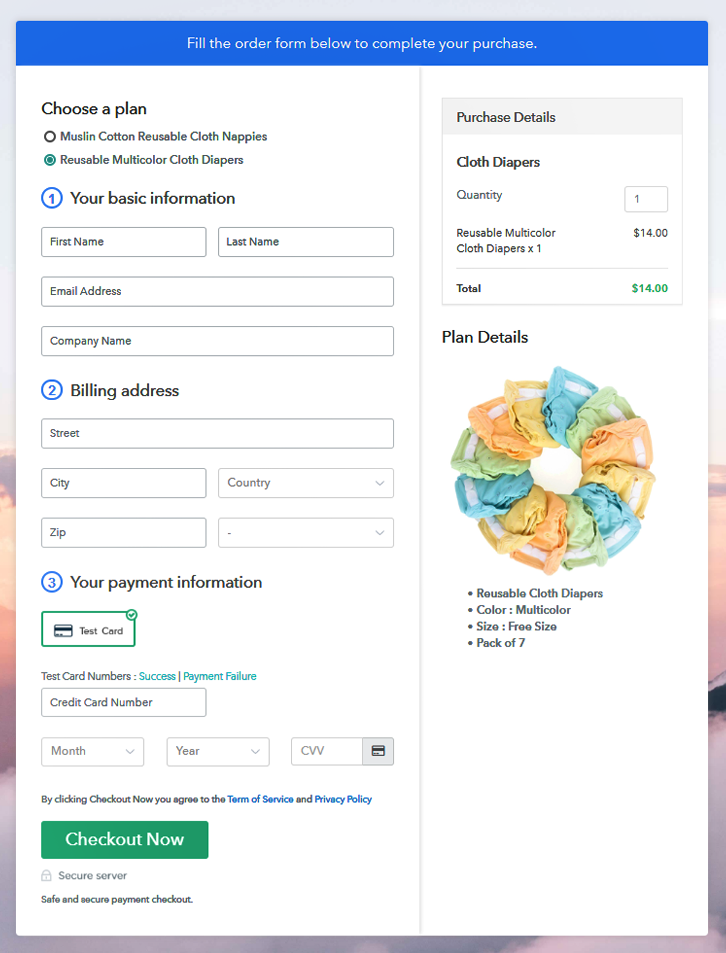
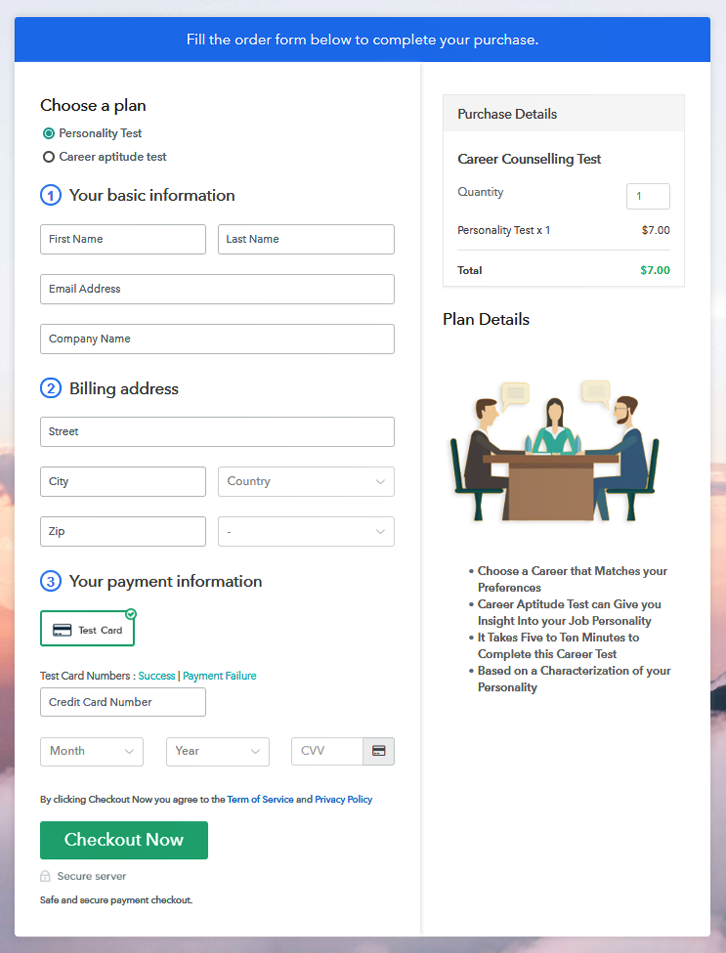
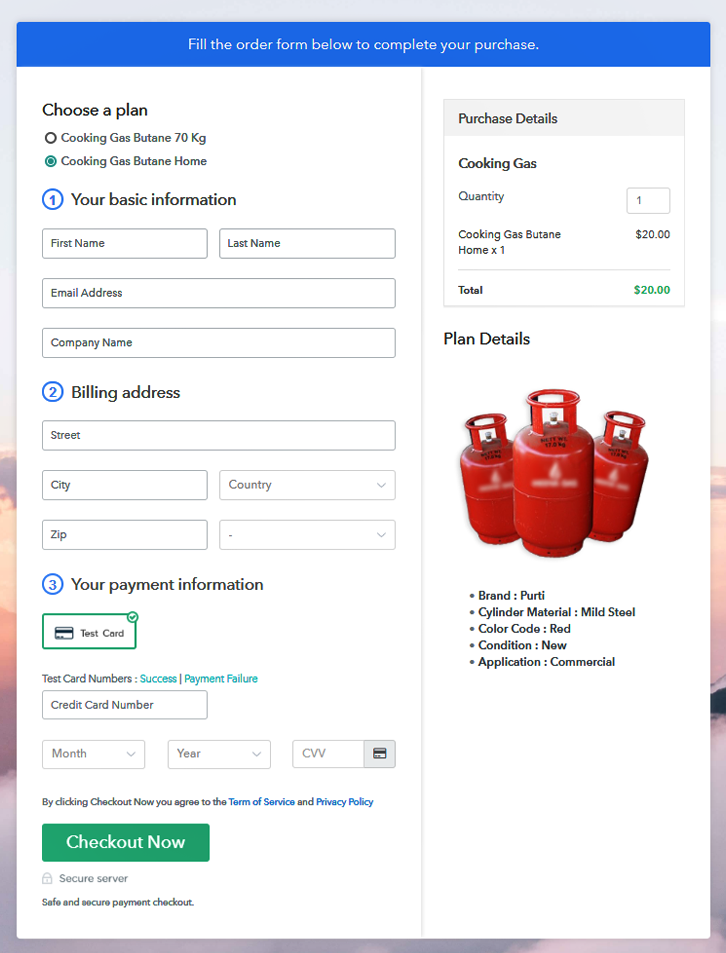
(c) Take a Look at the Checkout Page
Wrapping Up
You May Also Like To Read –