Ideal For: All the cornflakes manufacturers, cornflakes sellers, local shop owners, cornflakes makers, and other merchants can use this method to sell cornflakes online.
Why Choose this Method to Sell Cornflakes Online?
Unlike any other solution, this method allows you to:
- List and sell your cornflakes for FREE. Absolutely no payment required.
- No need to pay commission on any of your sale.
- Multiple payment options like PayPal, Credit Card, etc to collect payment from a single place.
- Sell one time or recurring subscriptions of your cornflakes.
- Collect payments & sell products in any currency as per your requirement.
- Give discounts on your products by offering special coupon codes.
- Add sales commission agents to help you in selling cornflakes online.
Breakfast is considered as the most important meal of the day. And a huge amount of people prefer eating cornflakes in their breakfast as it is rich in fiber proteins, etc. That is the reason why cornflakes selling business never gets down. Therefore, taking this business online could be the right step that can help you increase your revenues in no time.
Hence, we would like to suggest an amazing software that can help you to start cornflakes business online i.e, Pabbly Subscription Billing. Using this tool you can create stunning checkout pages that can be embedded in your websites and shared on social media accounts. Here are the advantages that this software includes:
- List and Sell Unlimited Designs Online
- No Transaction Fees
- Collect Payment Offline/Online
- Add Tax and Delivery Charges
- Revenue Management
- Tracking & Analytics
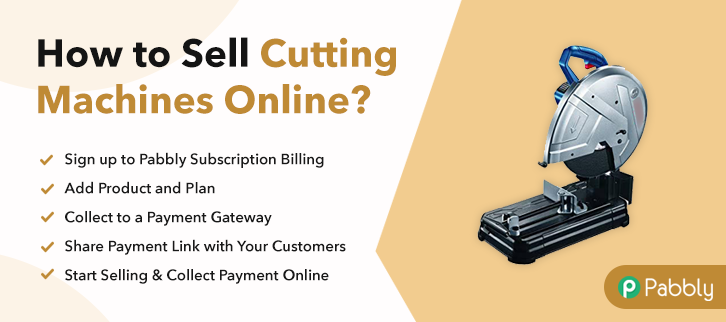
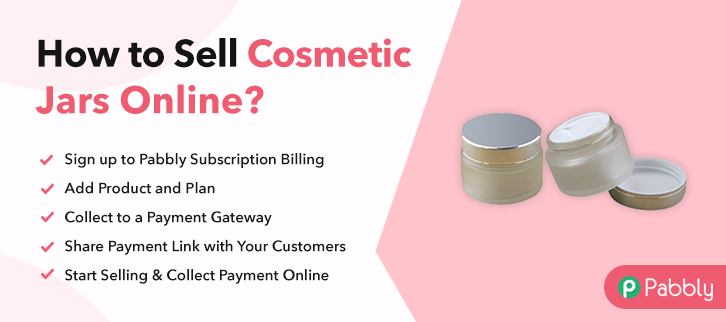
Now, let’s get started by creating a checkout page with Pabbly Subscription Billing to sell cornflakes online.
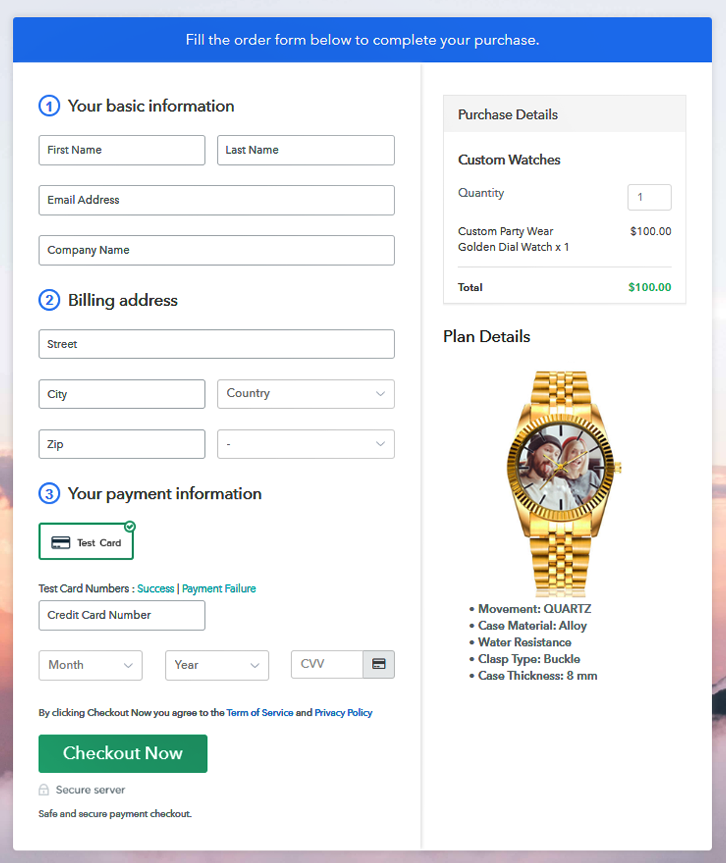
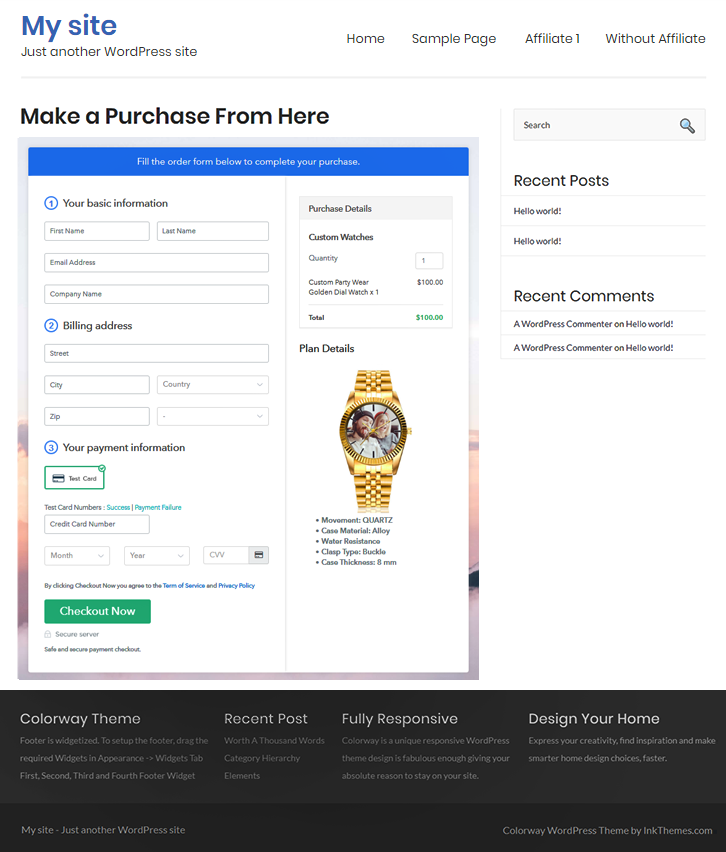
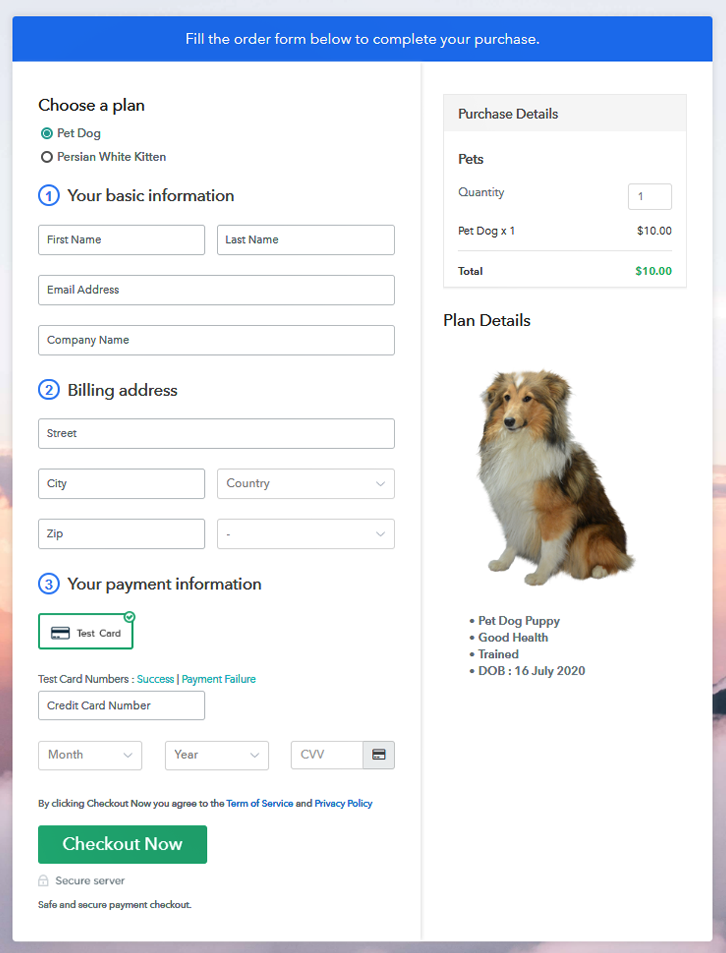
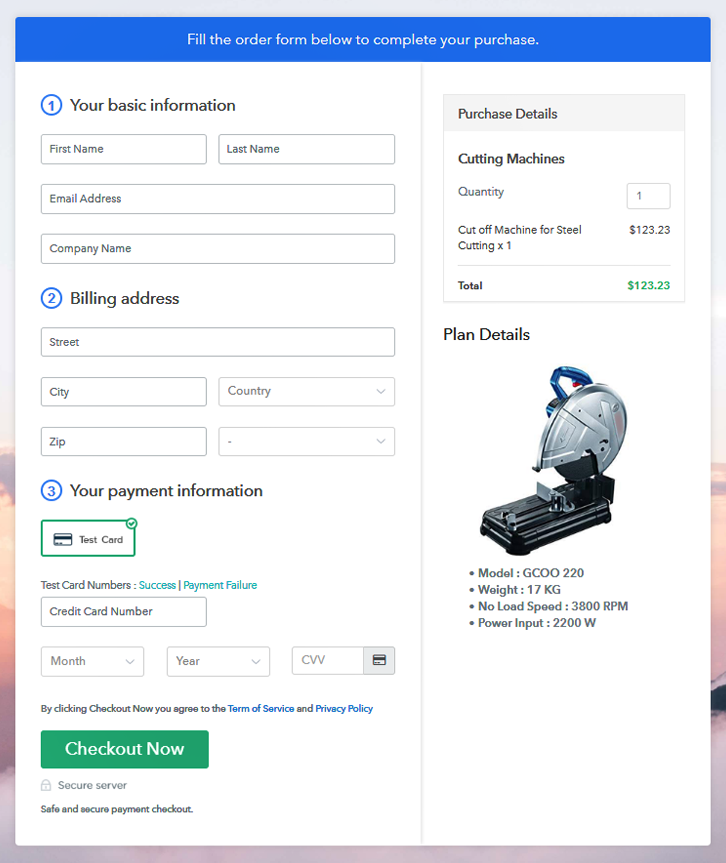
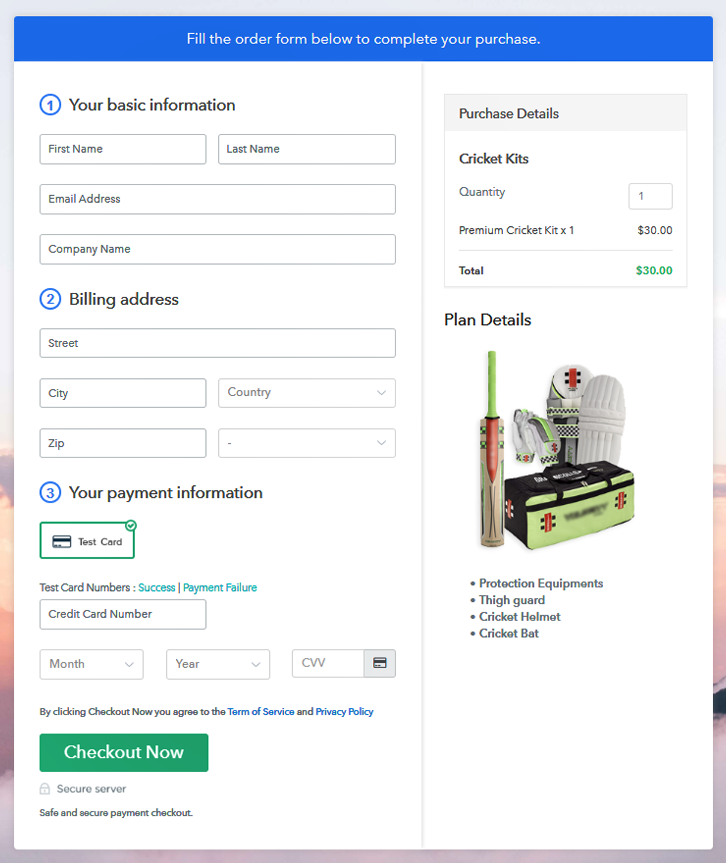
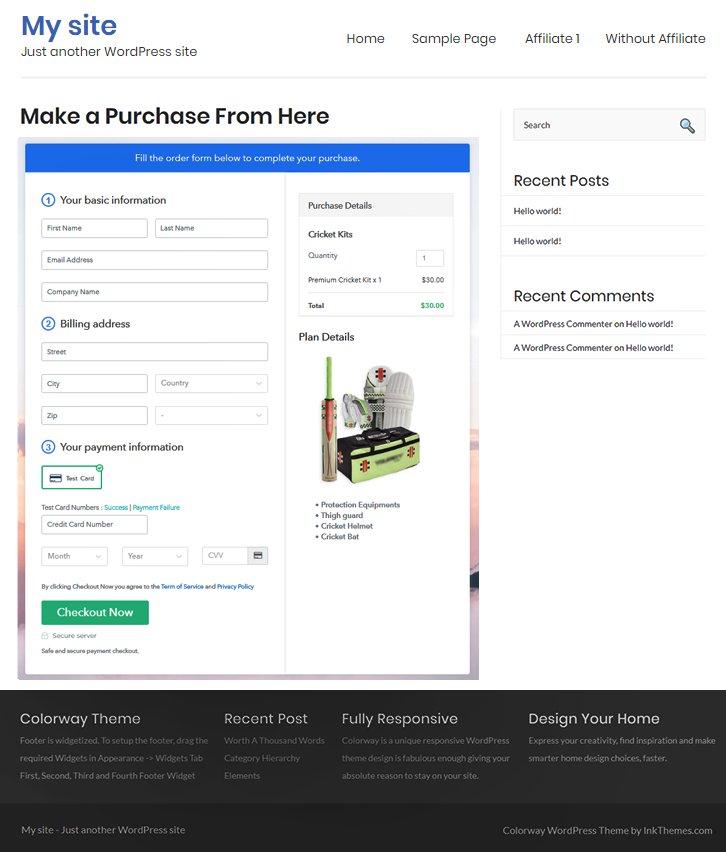
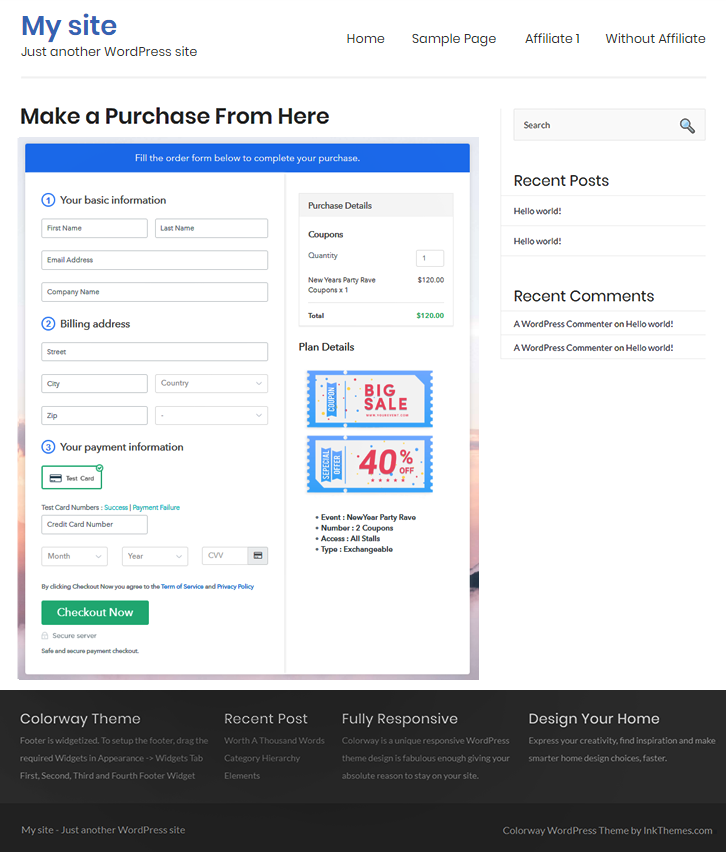
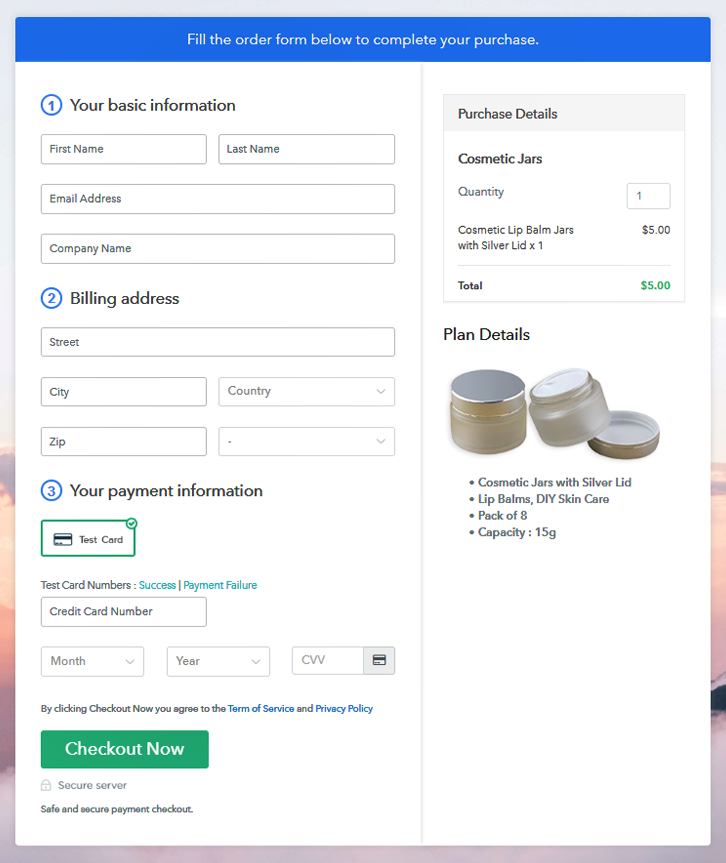
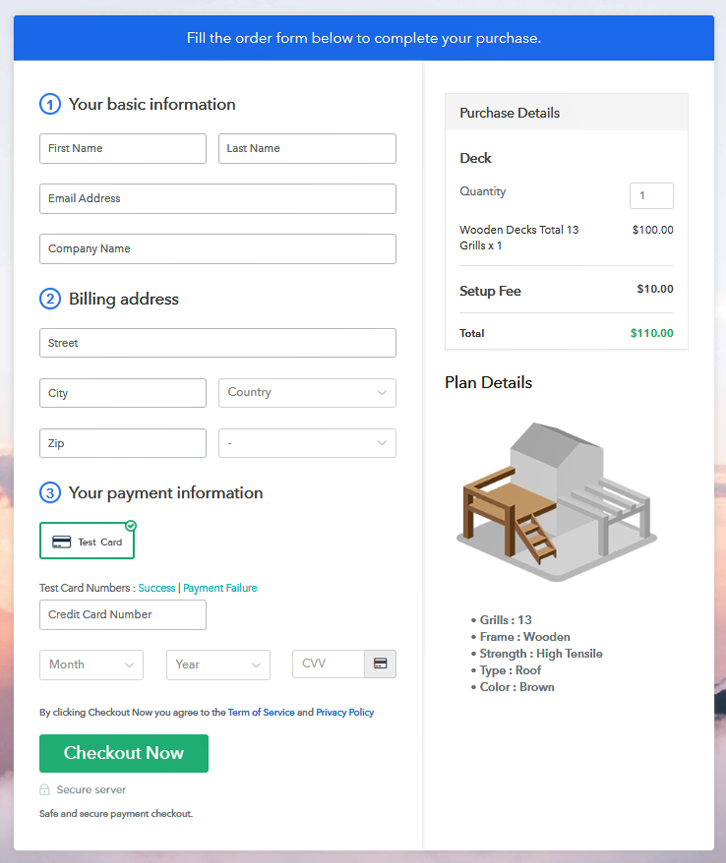
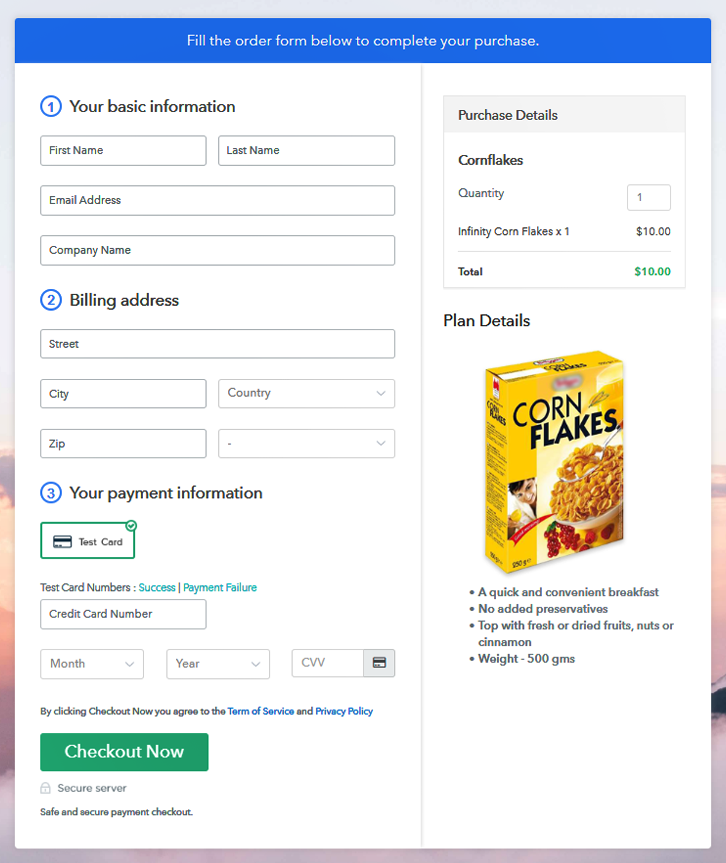
Final View of Checkout Page For Your Cornflakes Selling Business
Step 1: Log in to Pabbly Subscription Billing

To begin the whole procedure, you need to go on the Pabbly Subscription Billing website. Later, simply click on the “Sign up Free“ button. You can complete the signup process by either manually filling all the details or simply sign in via Gmail account.
Sign Up For Free!
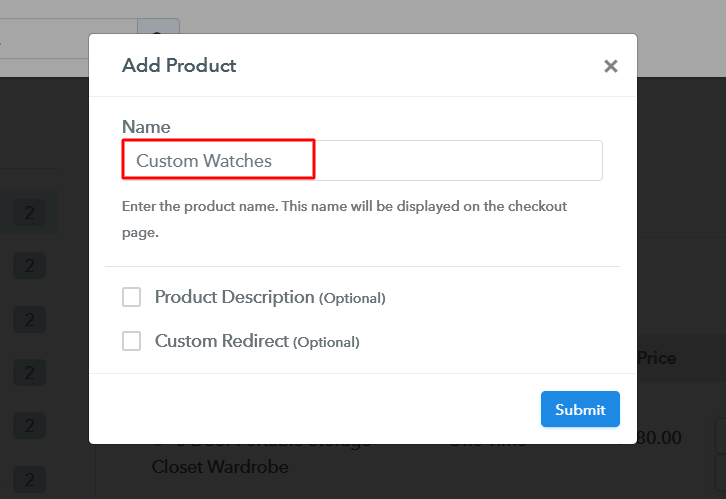
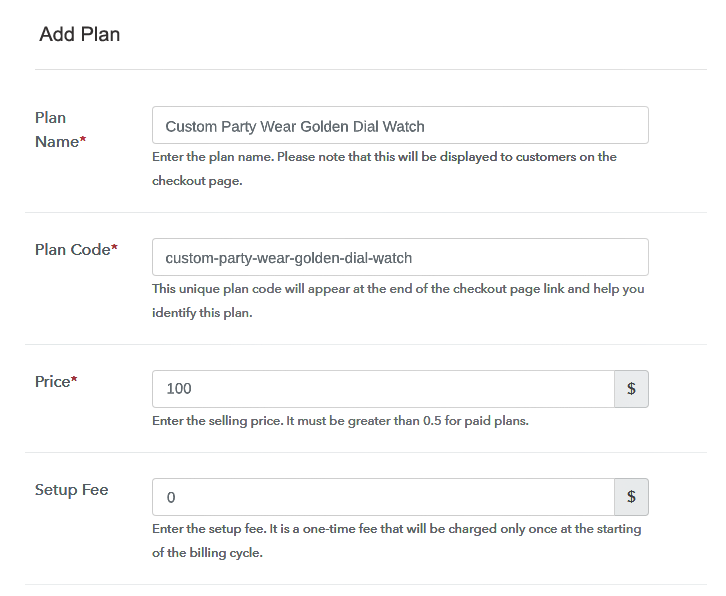
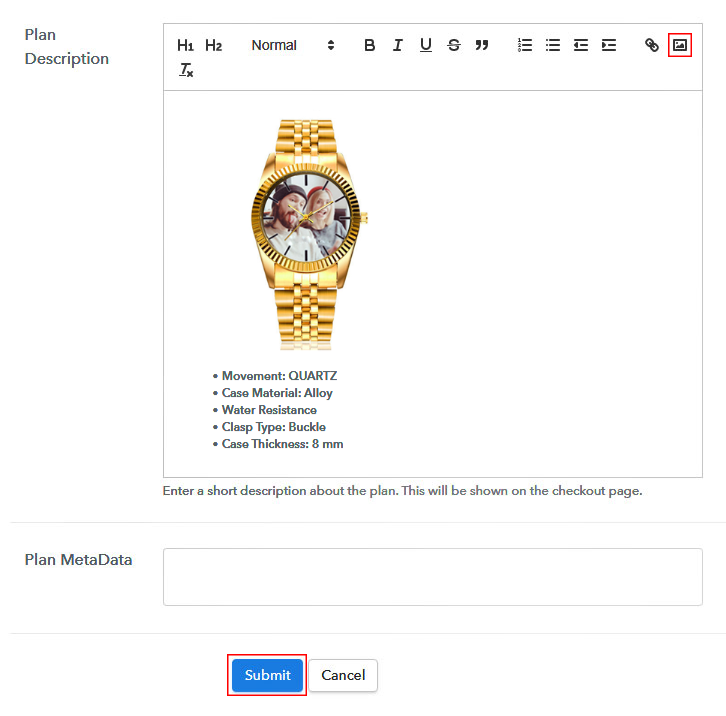
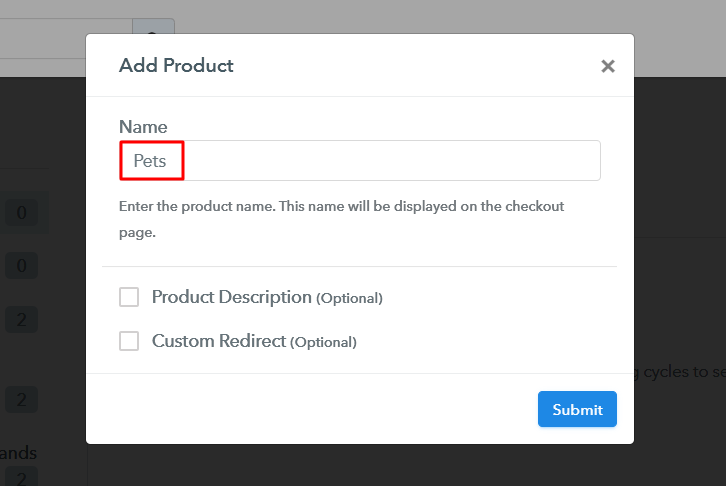
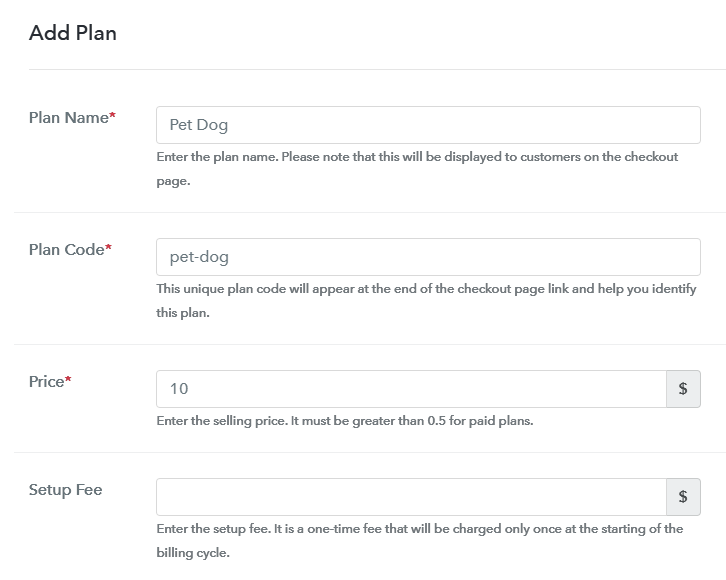
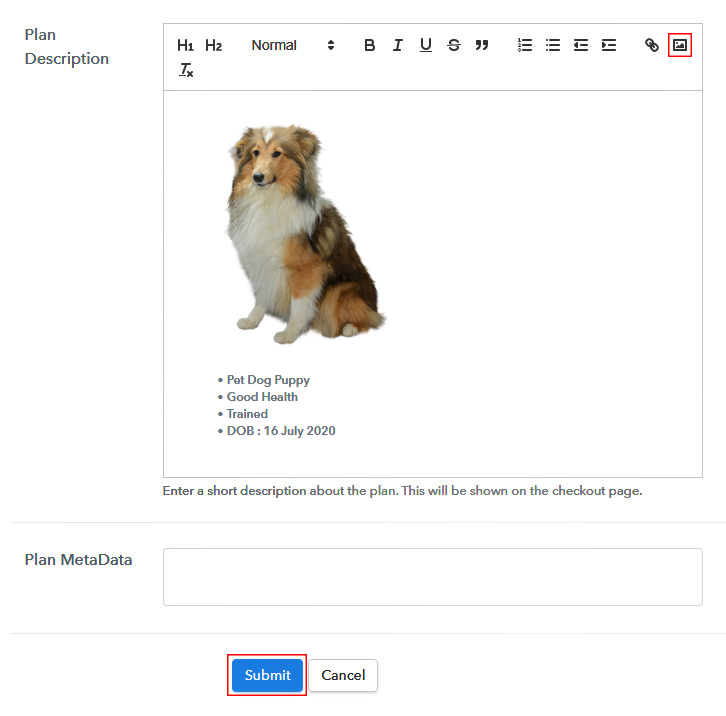
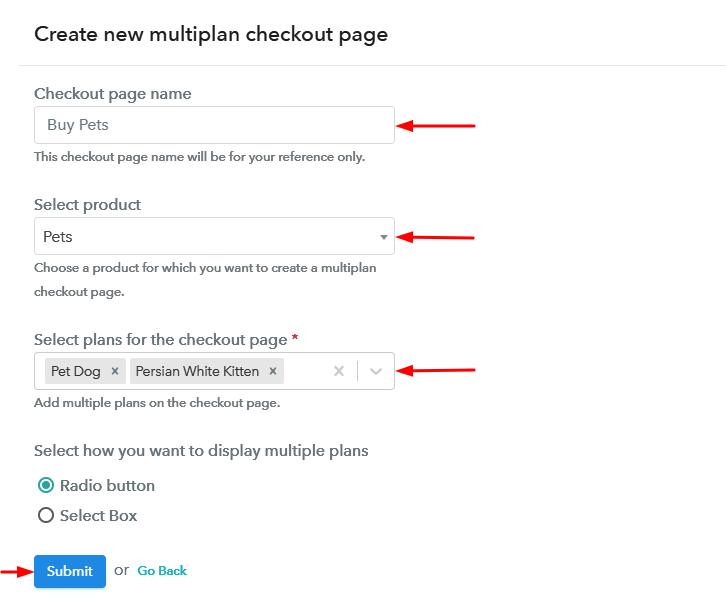
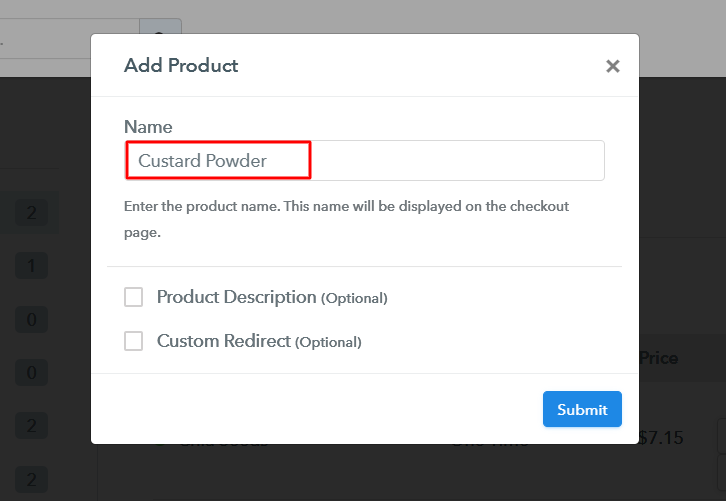
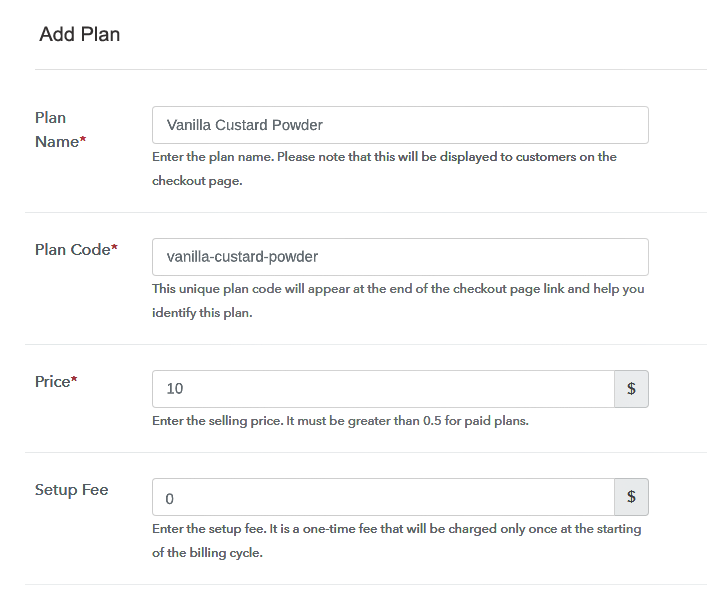
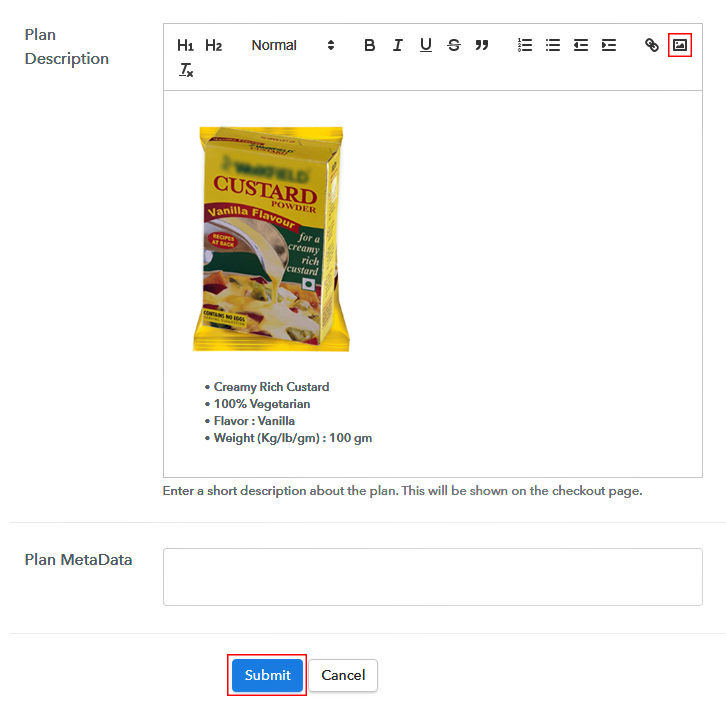
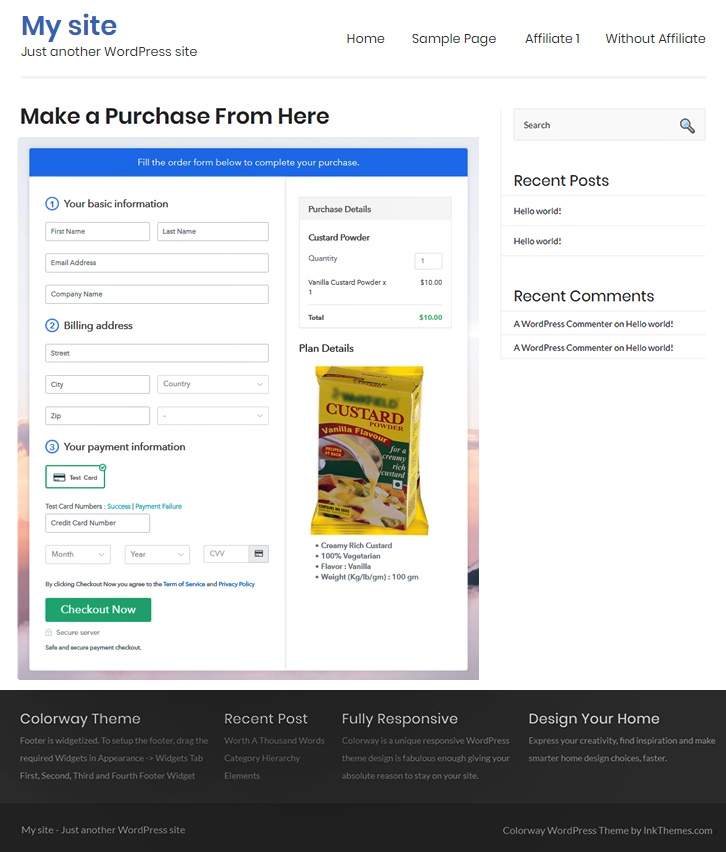
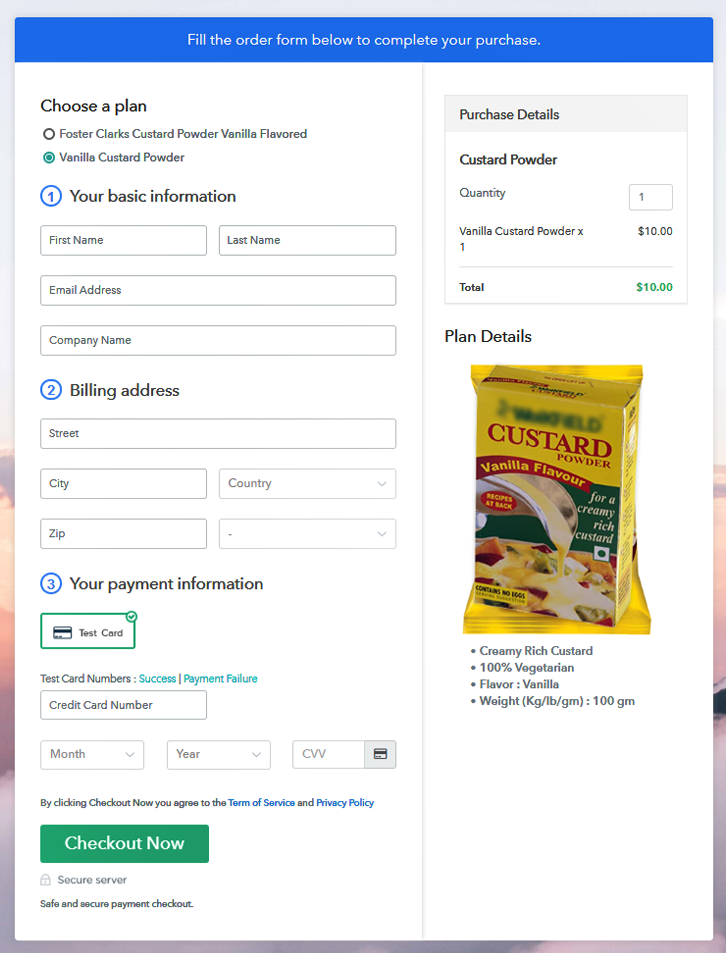
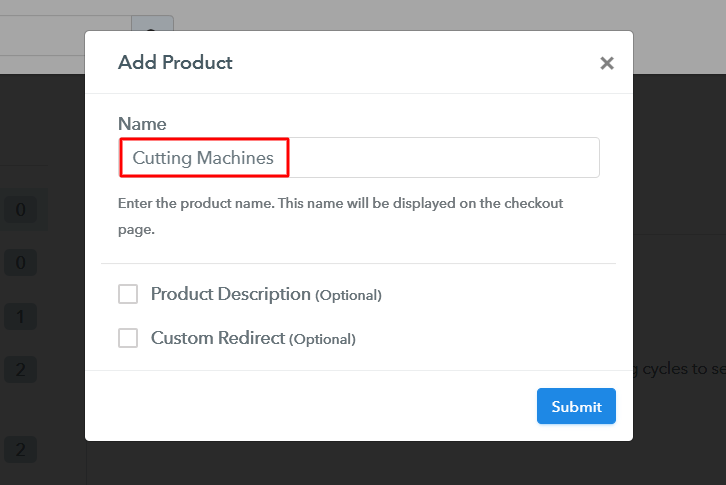
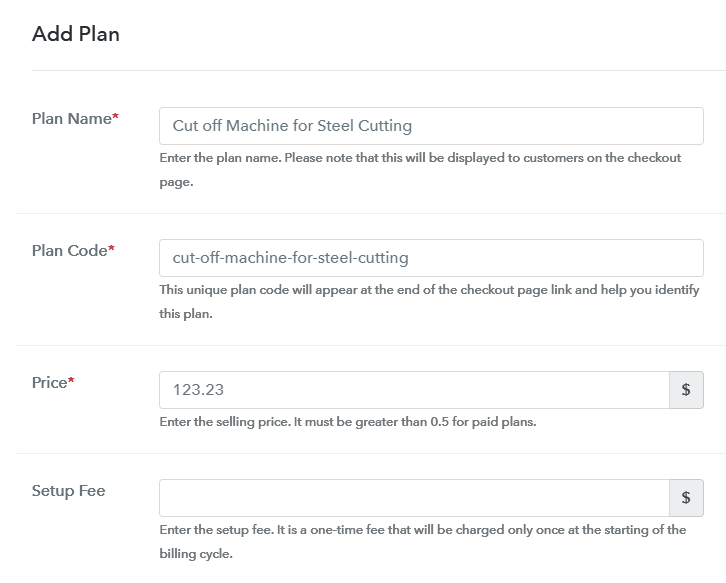
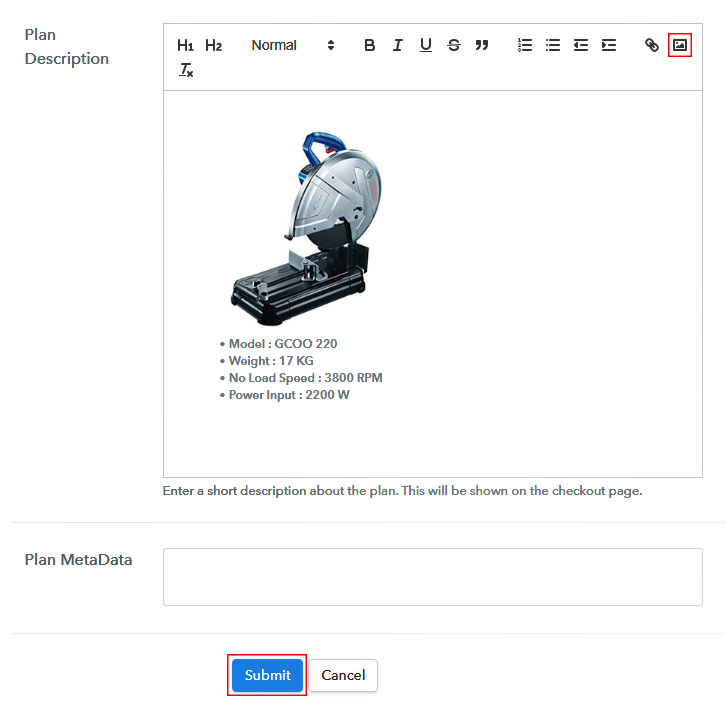
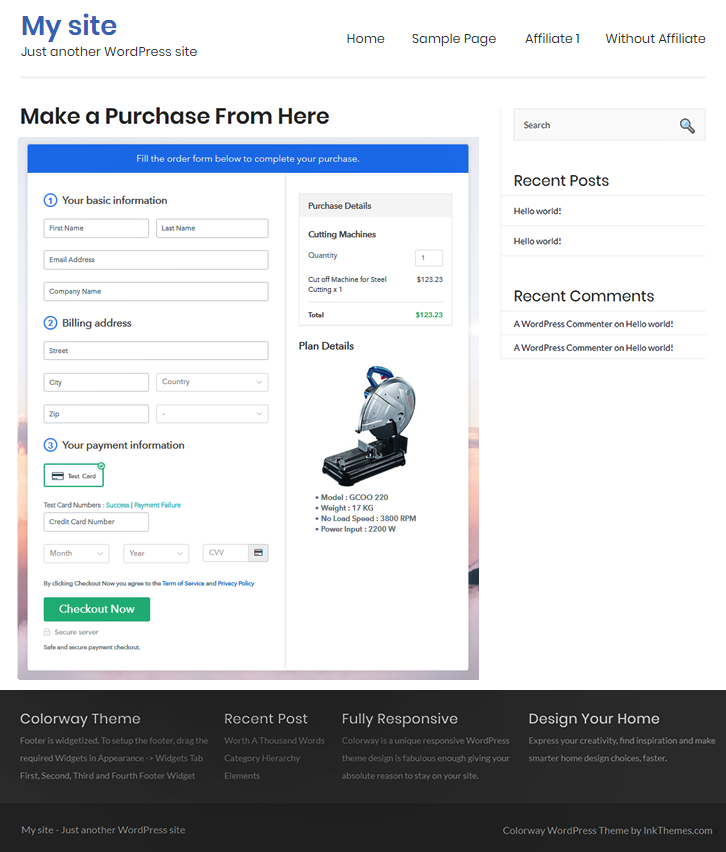
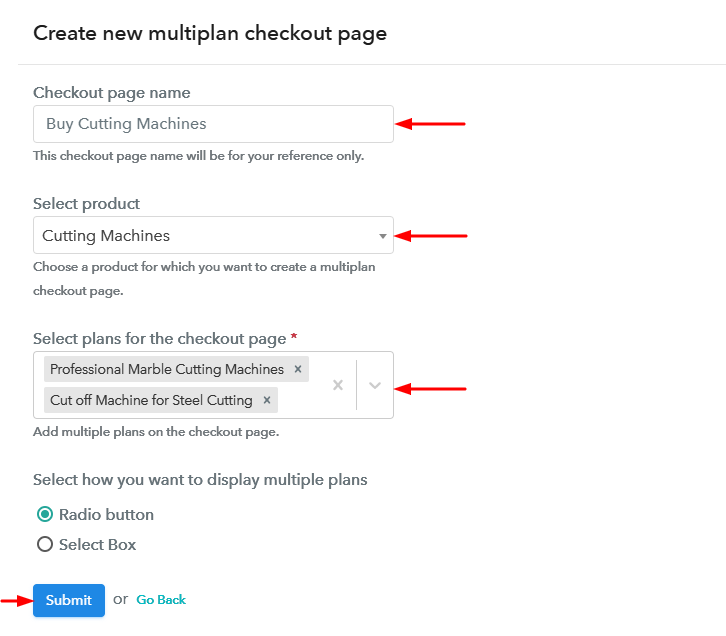
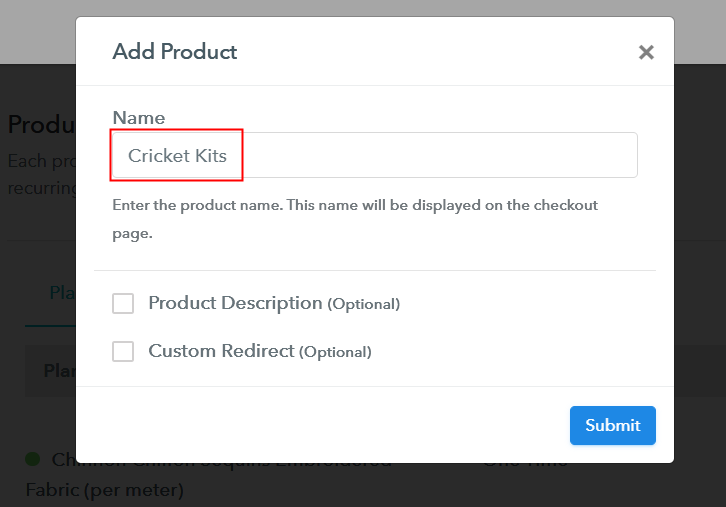
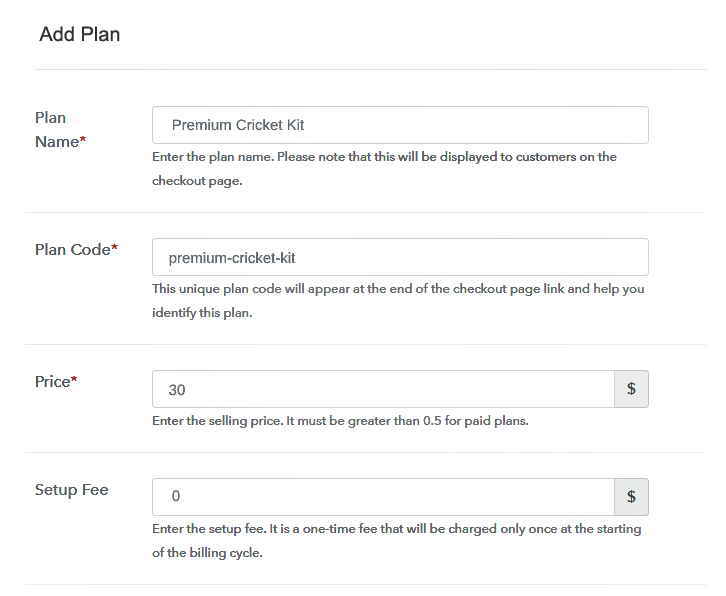
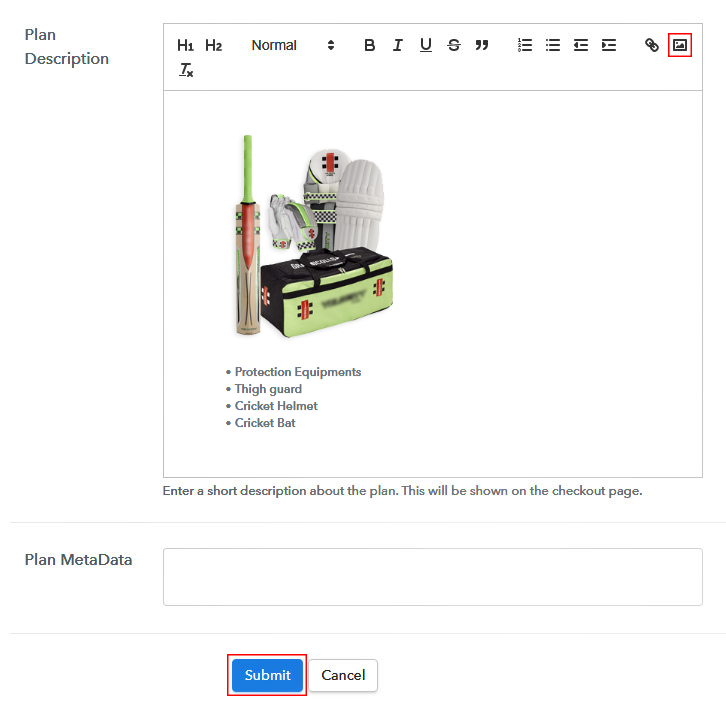
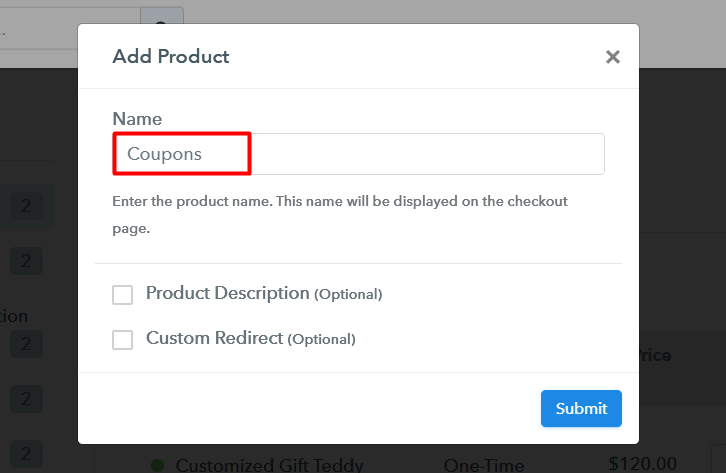
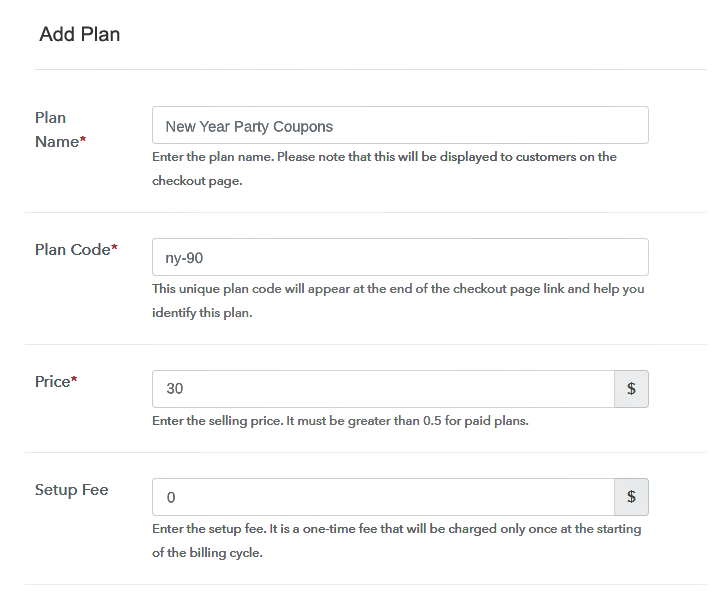
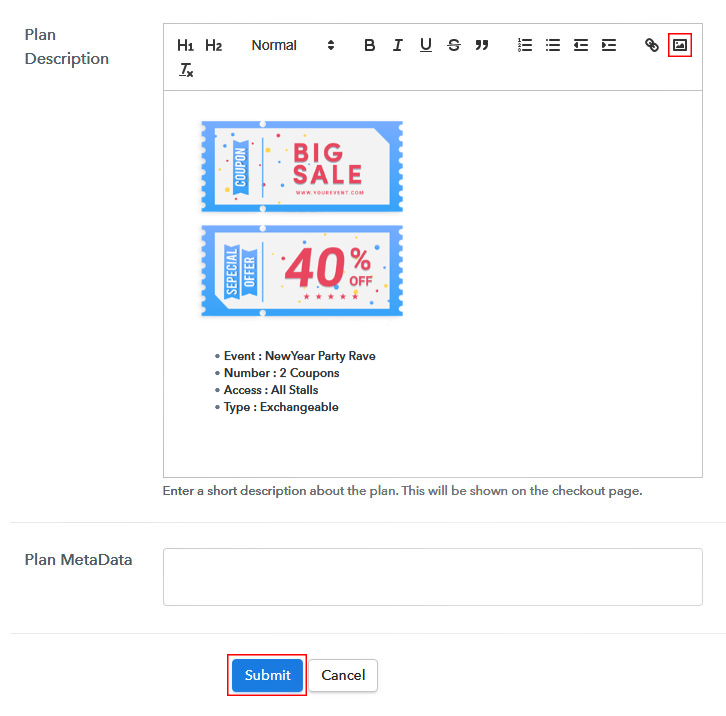
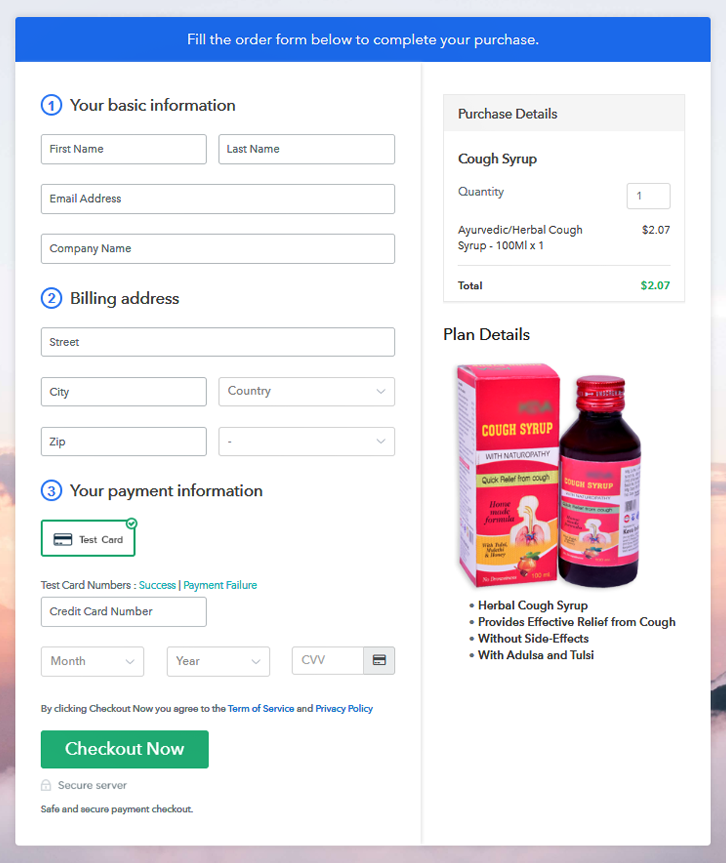
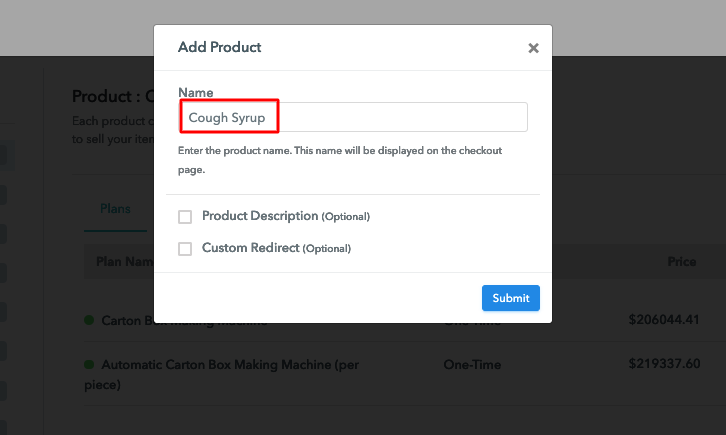
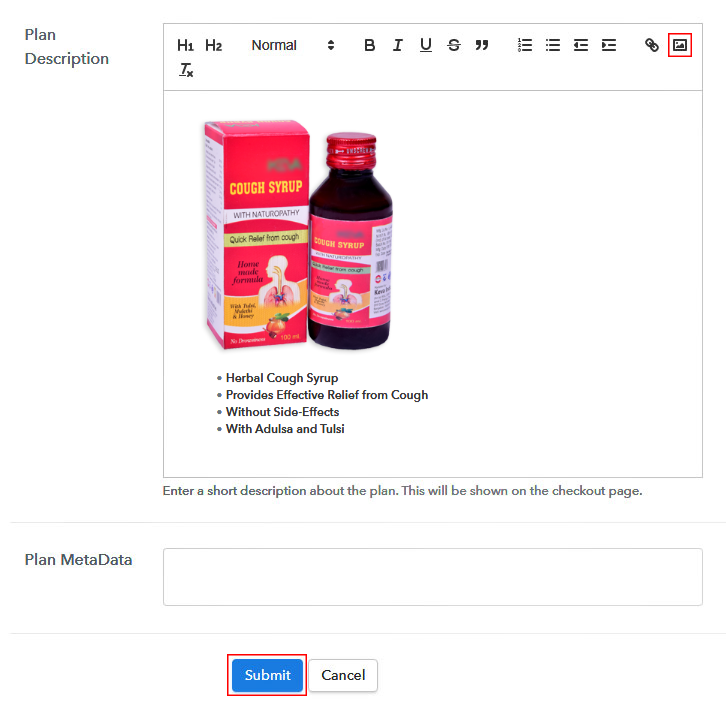
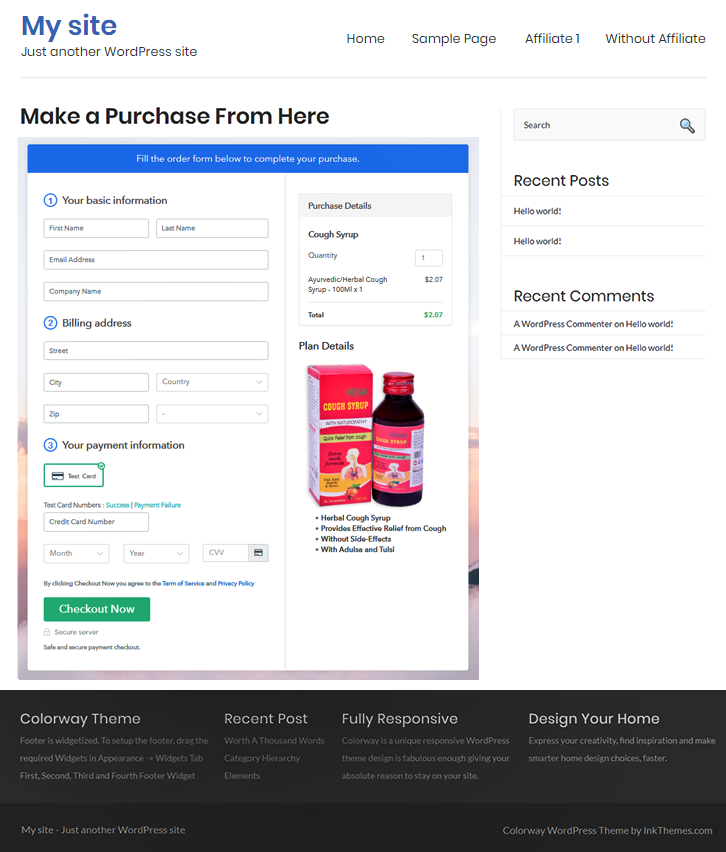
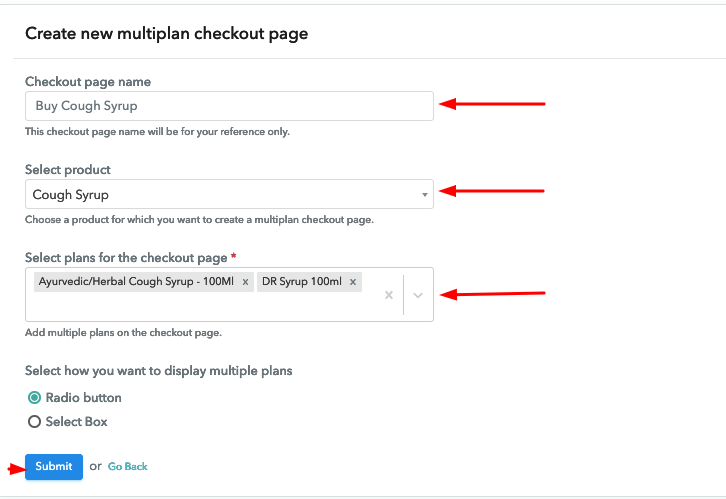
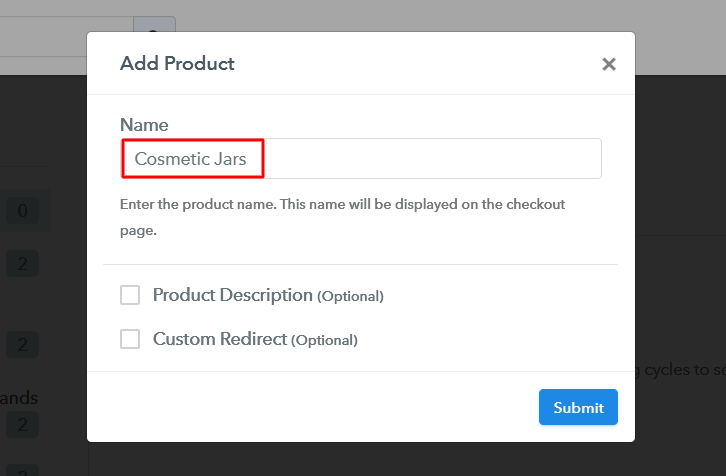
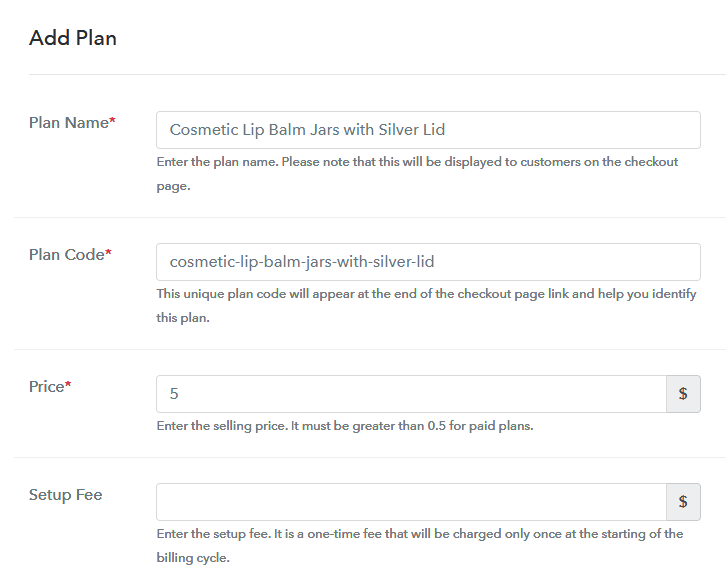
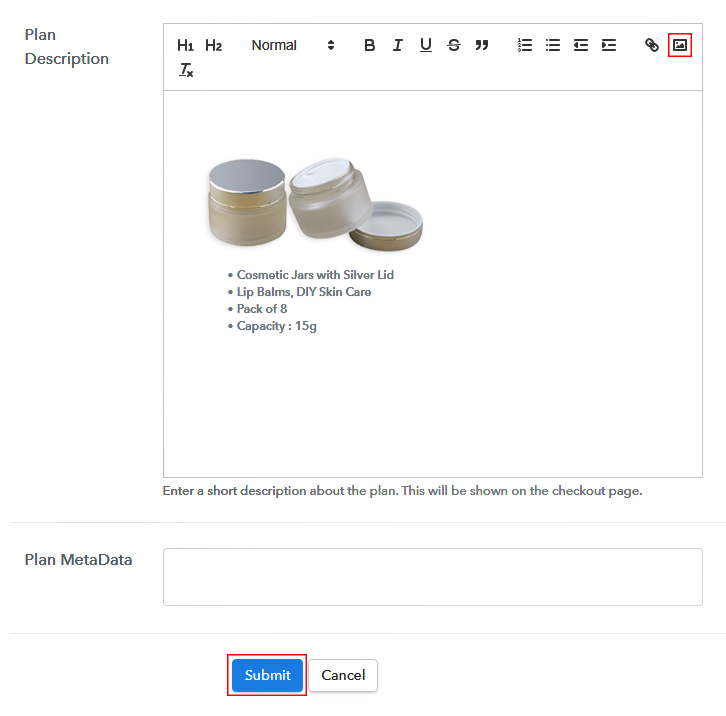
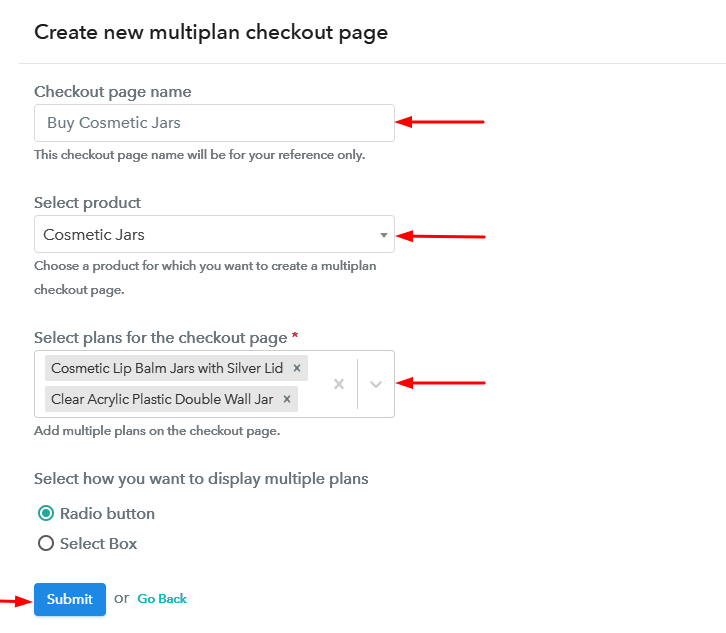
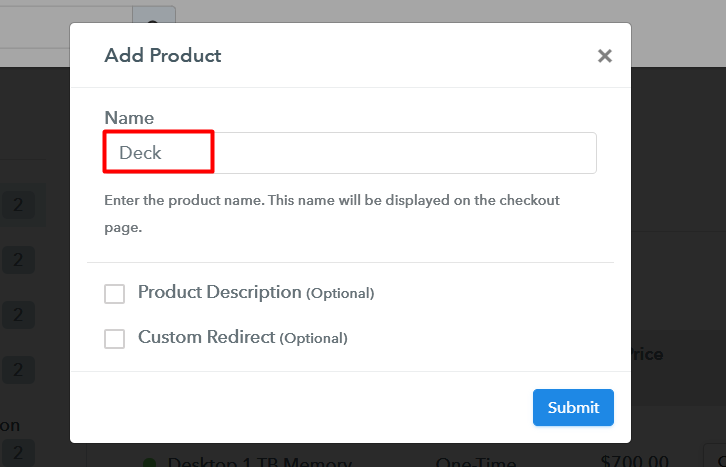
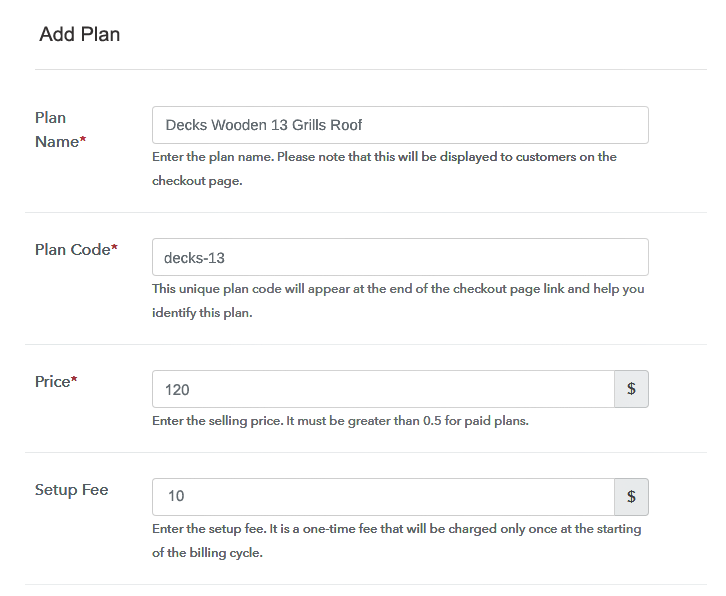
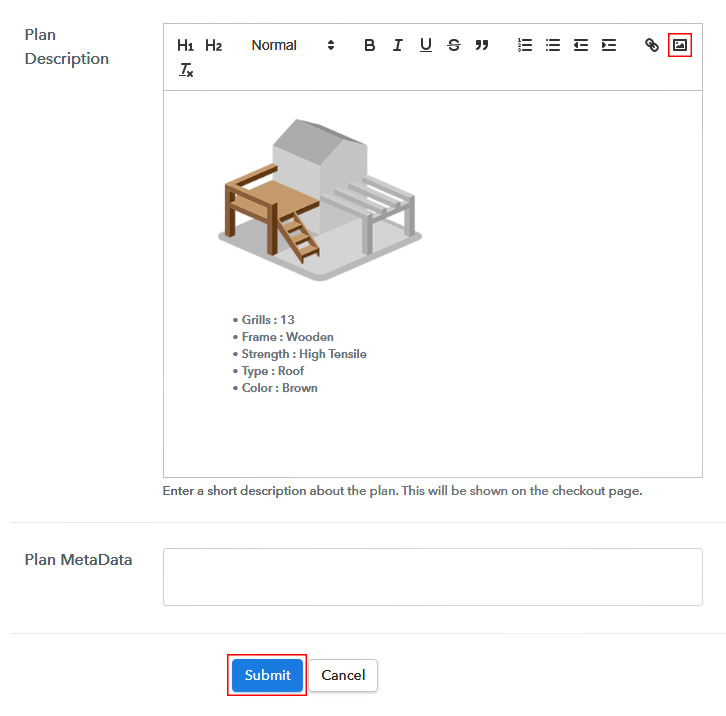
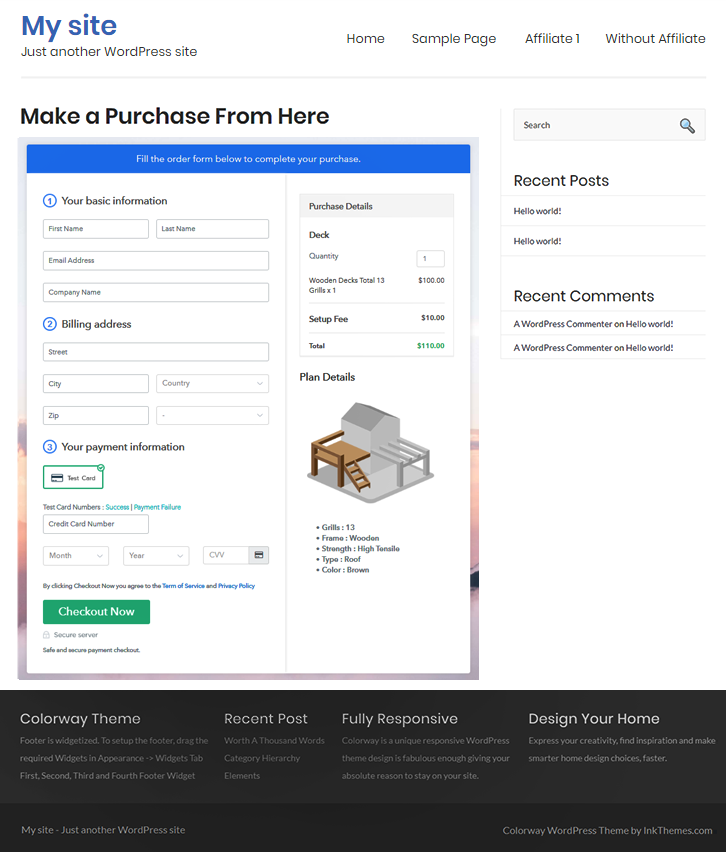
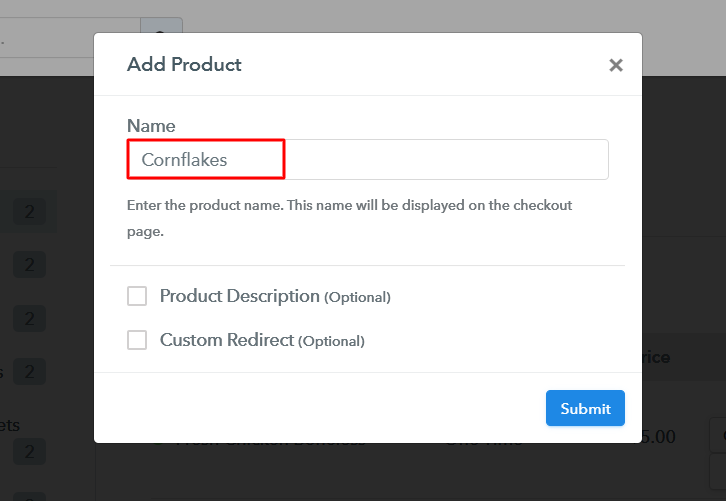
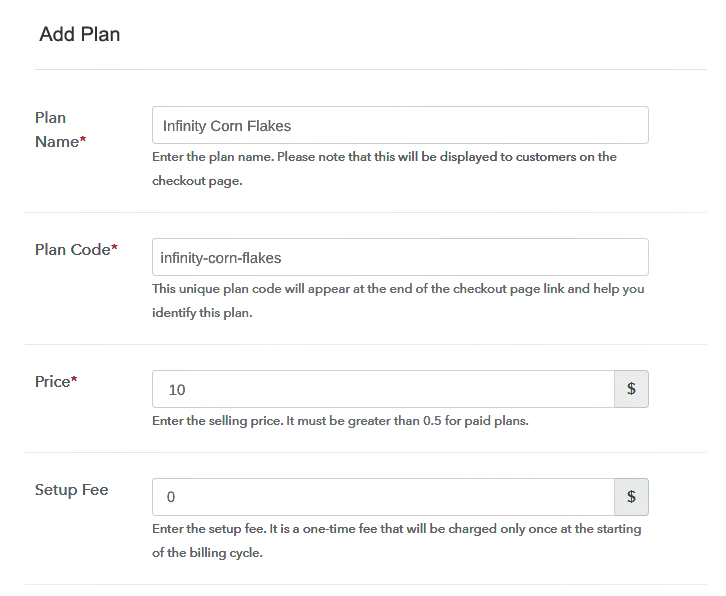
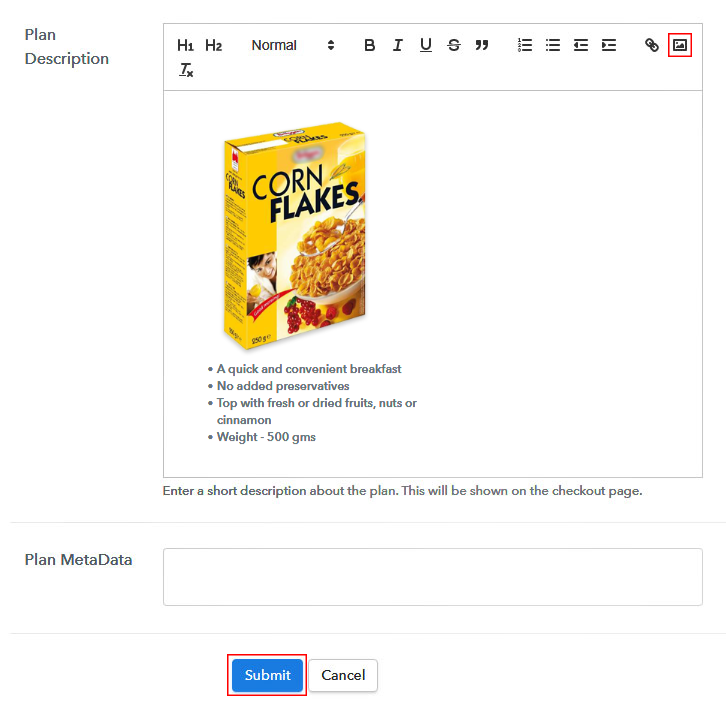
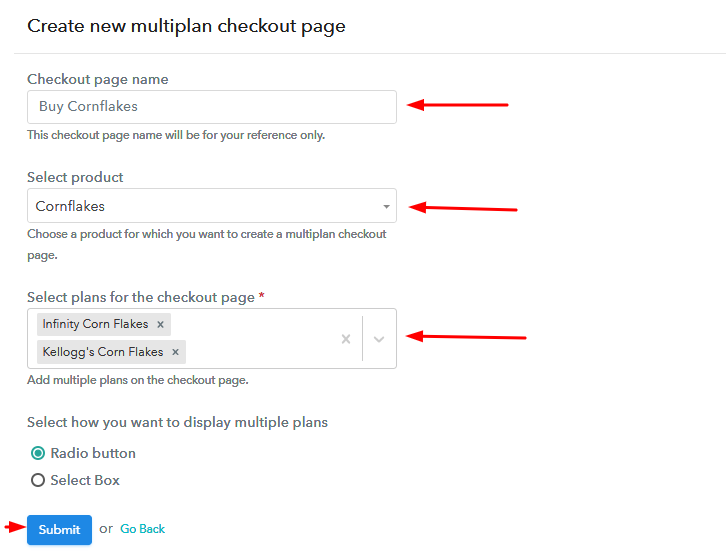
A dialog box will be generated after clicking on the “Acess Now” button where you need to enter the details like company name, currency, phone number, etc. Once you complete filling the whole information, just press the blue “Continue” button to complete the entire process. Pabbly Subscription Billing provides a dummy payment gateway to provide customers a seamless payment experience. Here, you can test the complete payment experience by pressing the “Enable Test Payment” option. Not only that, but Pabbly Subscription Billing allows you to integrate with many payment gateways like PayPal, Authorize.net, Stripe, etc. Beneath this paragraph, you can find their integration guides to embed the payment gateway of your choice. After embedding payment gateway, its time to add your product by pressing the “Add New Product” button. This will generate a dialog box where you need to enter the name of the cornflakes and give a product description. Fill out all the details like the name of the product and voila your product is created. Note: Here you can add all the products related to the similar category by creating plans for each of them. Now, its time to add plans for different varieties of cornflakes available in your shop. Later, you need to fill in information like plan name, code, price, setup fees, etc to complete the process. Now add some pictures of your cornflakes and insert them using the upload image button. Besides that, you can even give a brief about the cornflakes by providing some useful information about cornflakes like flavor, fiber, etc. When you finish doing that just press the “Submit” button. Moreover, by using the same steps mentioned above you can list more products of cornflakes that you want to sell online. In order to sell your products online, you can share the checkout links by using these three methods: Follow up the recommended steps to preview the checkout page: Now, copy the link and add the checkout page to sell cornflakes online at any suitable place on your WordPress site. Additionally, paste the plan link of the cornflakes on a text editor of the WordPress dashboard. Subsequently, press the “Publish” button, after making changes. Note: In case you want to sell multiple products via a single checkout page, you can create a multi-plan checkout page otherwise skip this step. Just by following these 10 easy steps, you can start your cornflakes business online. All you need to do is log in to Pabbly Subscription Billing and your cornflakes business is set online. So, go ahead and start creating checkout pages to sell cornflakes online. Besides, if you have any query write it in the comment section below. We will get back to you as soon as possible. Thank You!!Step 2: Select Subscription Billing

Step 3: Account Setup

Step 4: Connect Payment Gateways & Start Cornflakes Selling Business Online

Step 5: Add Product for Your Cornflakes

Step 6: Add Plans
(a) Select Add New Plan

(b) Specify the Plan & Pricing Details
(c) Add Image & Description of Cornflakes
Step 7: Share your Checkout Page

Step 8: Preview Checkout Page
(a) Click on the View Button

(b) Take a Look at the Checkout Page
Step 9: Embed Checkout Page in Site & Sell Cornflakes Online

(a) Edit the Page & Paste the Copied Link

(b) Save & Publish the Checkout Page

(c) Check out the Final Look of your Checkout Page on WordPress Site
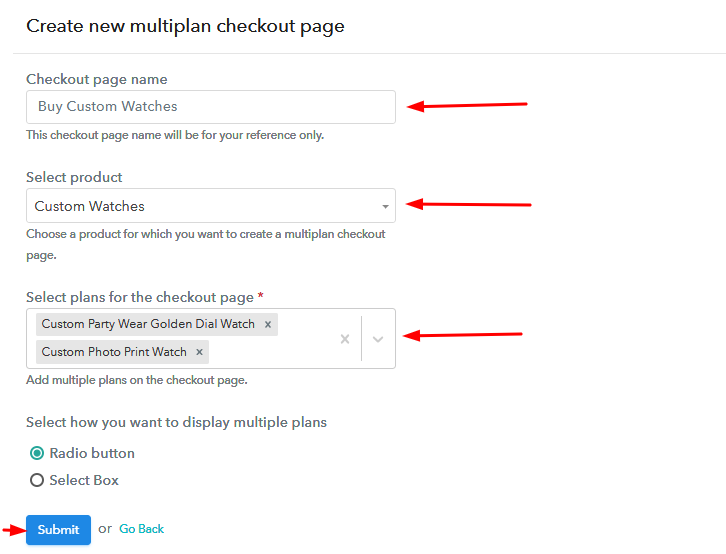
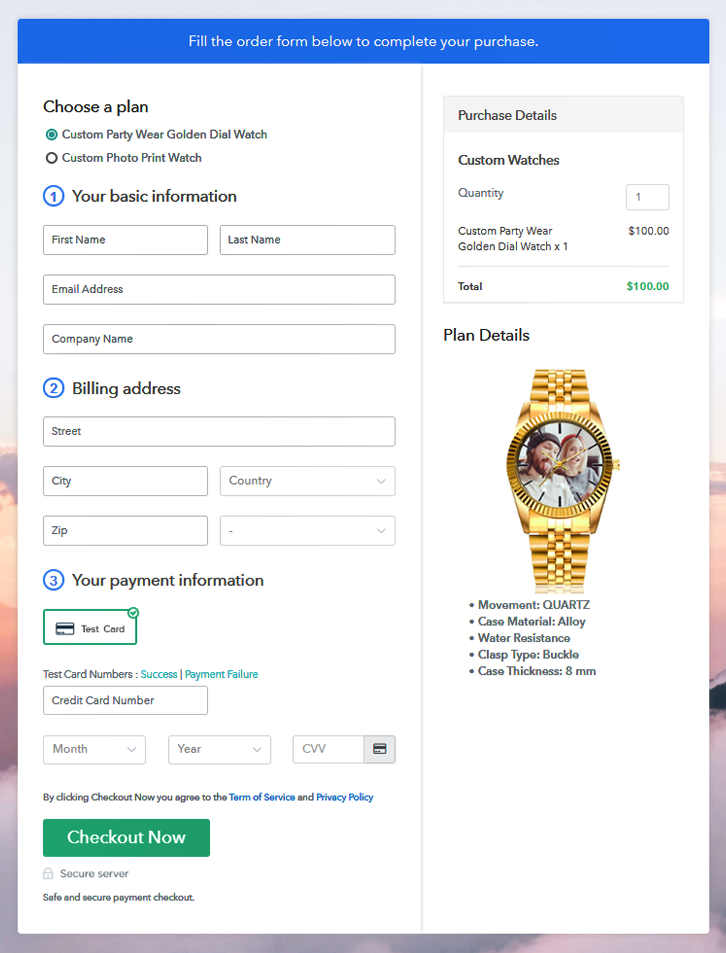
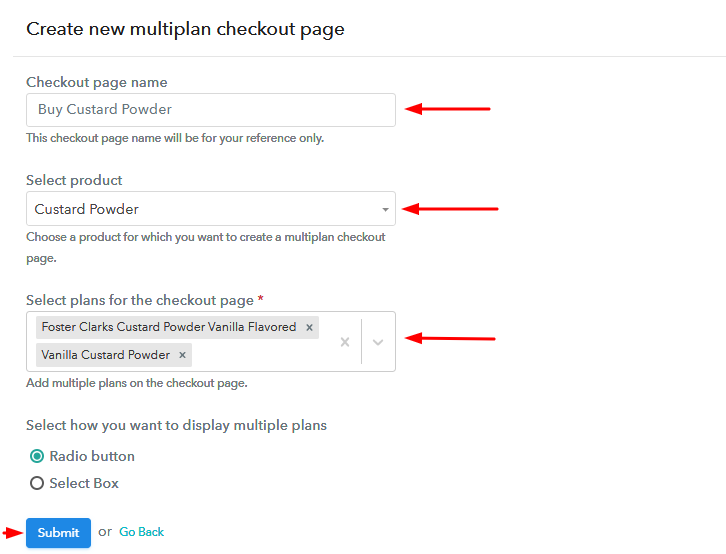
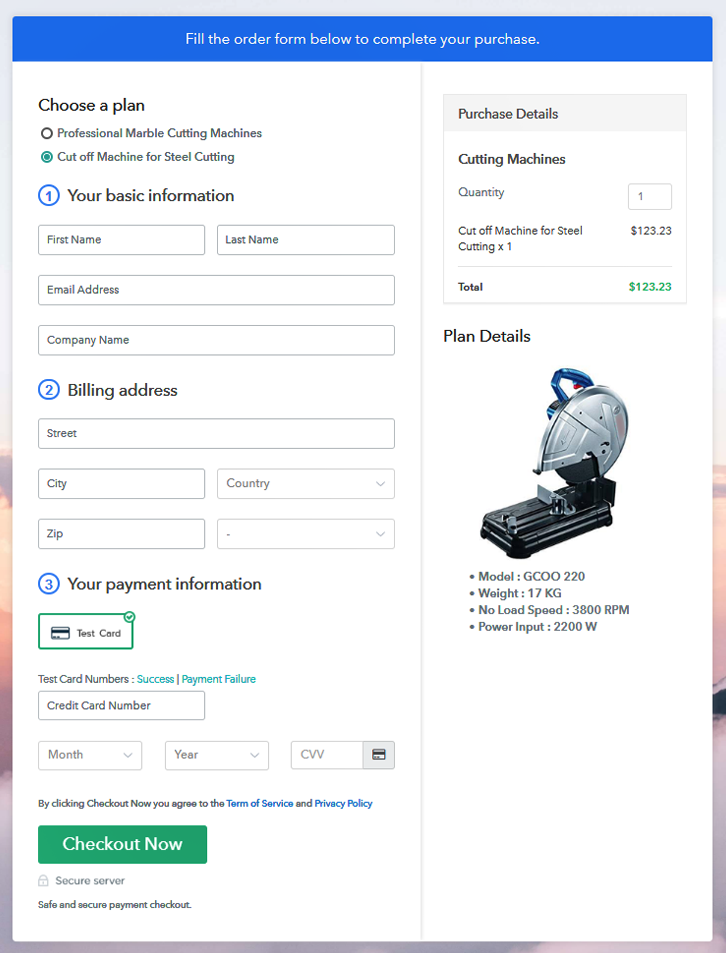
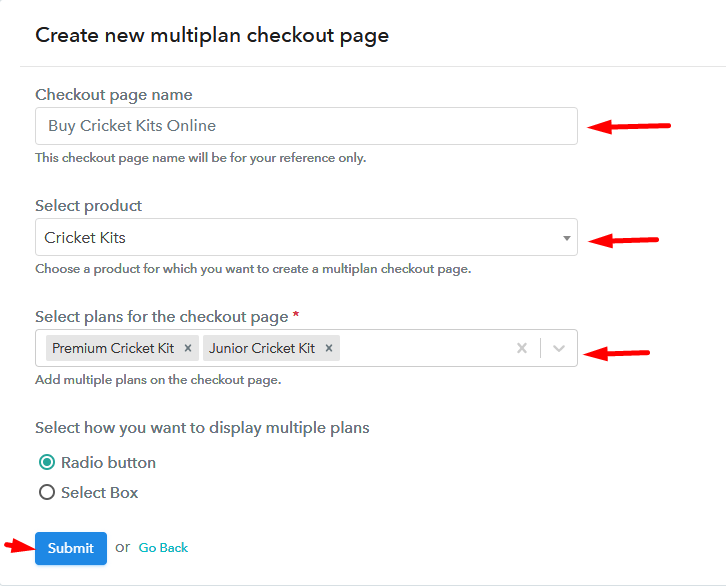
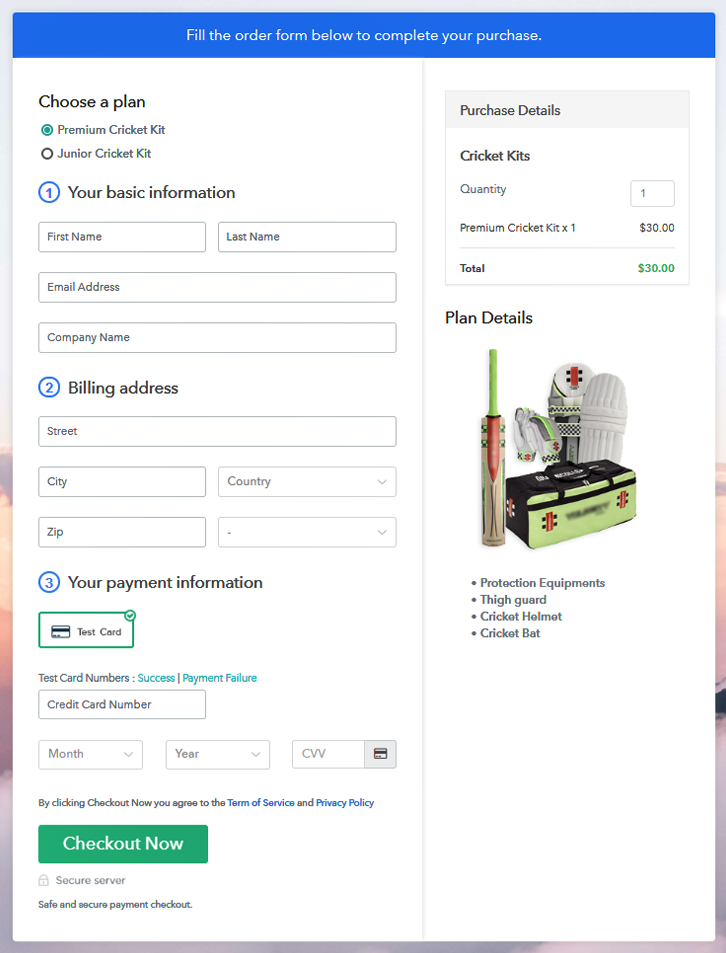
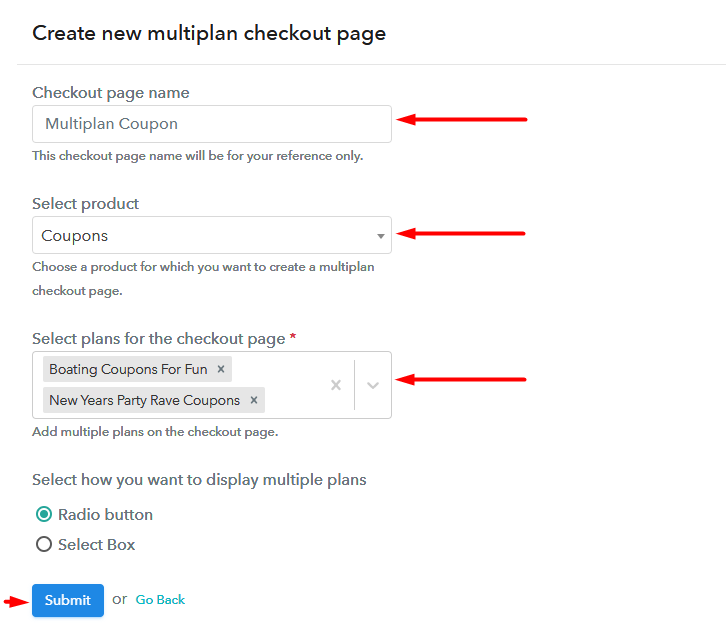
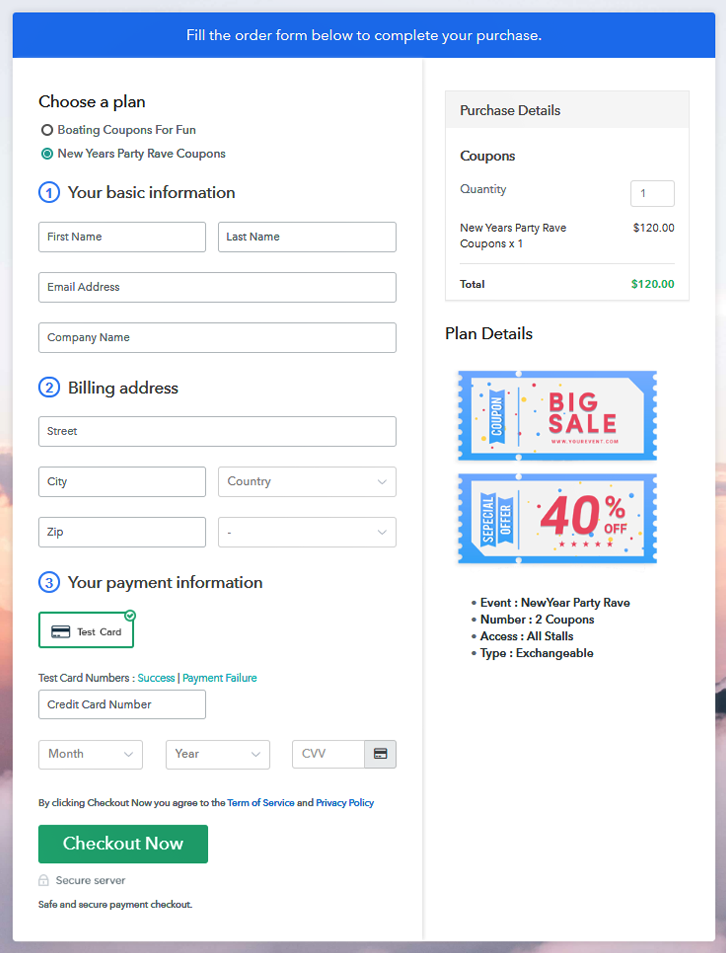
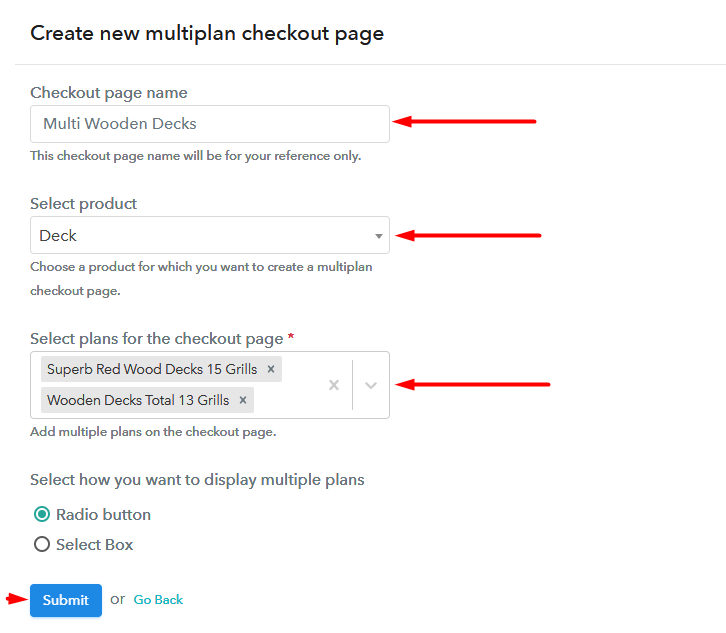
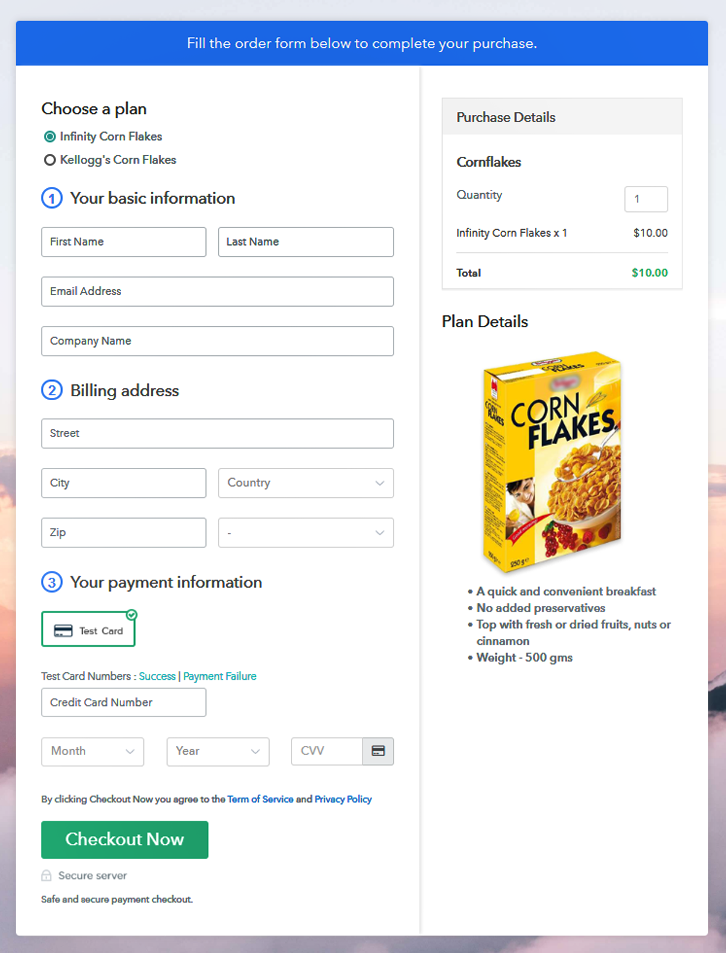
Step 10: Multiplan Checkout Page
(a) Click on Add Mutiplan Checkout

(b) Add Plans to Sell Multiple Cornflakes from Single Checkout Page
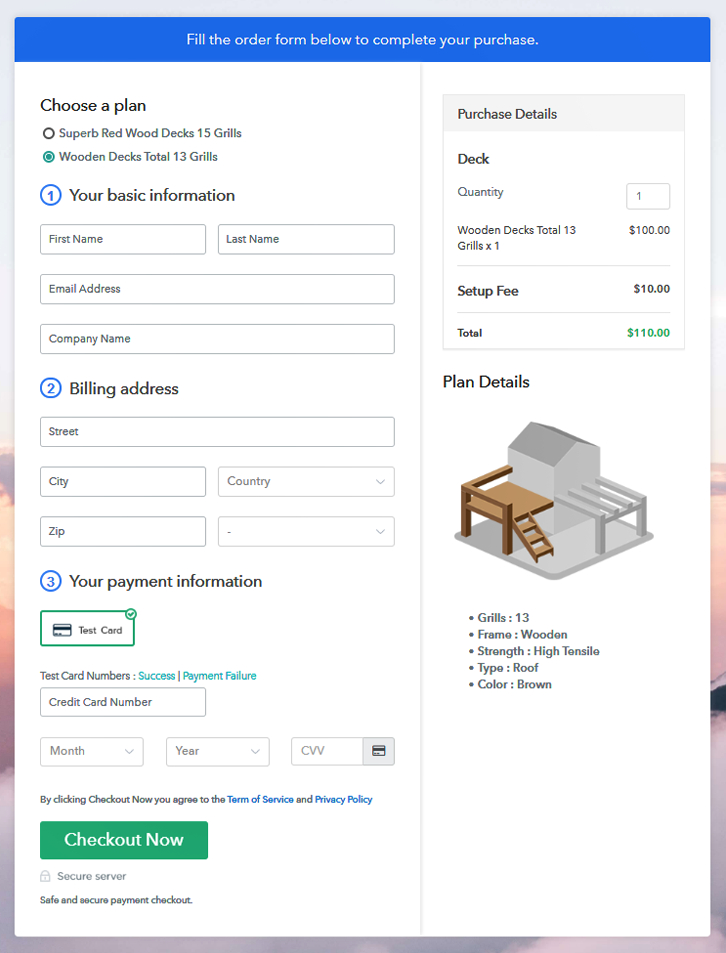
(c) Take a Look at the Checkout Page
Wrapping Up
You May Also Like To Read –