Ideal For: All the flash drive manufacturers, flash drive sellers, retail flash drive shop owners, and other merchants can use this method to take their flash drives selling business online.
Why Choose this Method To Sell Flash Drives Online?
Unlike any other solution, this method allows you to:
- List and sell your flash drives for FREE. Absolutely no payment required.
- No need to pay commission on any of your sale.
- Multiple payment options like PayPal, Credit Card, etc to collect payment from a single place.
- Sell one time or recurring subscriptions of your flash drives.
- Collect payments & sell products in any currency as per your requirement.
- Give discounts on your products by offering special coupon codes.
- Add sales commission agents to help you in selling flash drives online.
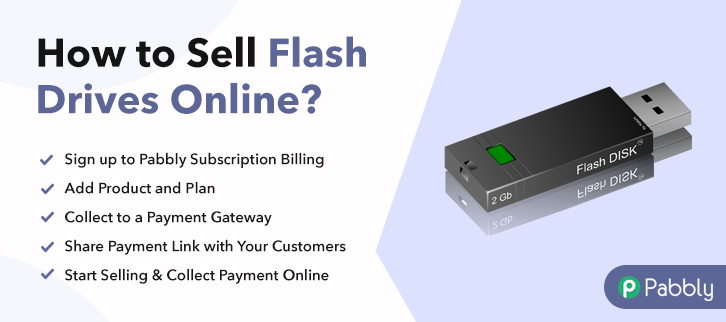
USB flash drives play an important role in the digital world we live in, these are the most used plug & play device nowadays. So, if you are planning to sell flash drives then you must be looking for a smarter way to start flash drives business online. Well, we can tell you how?
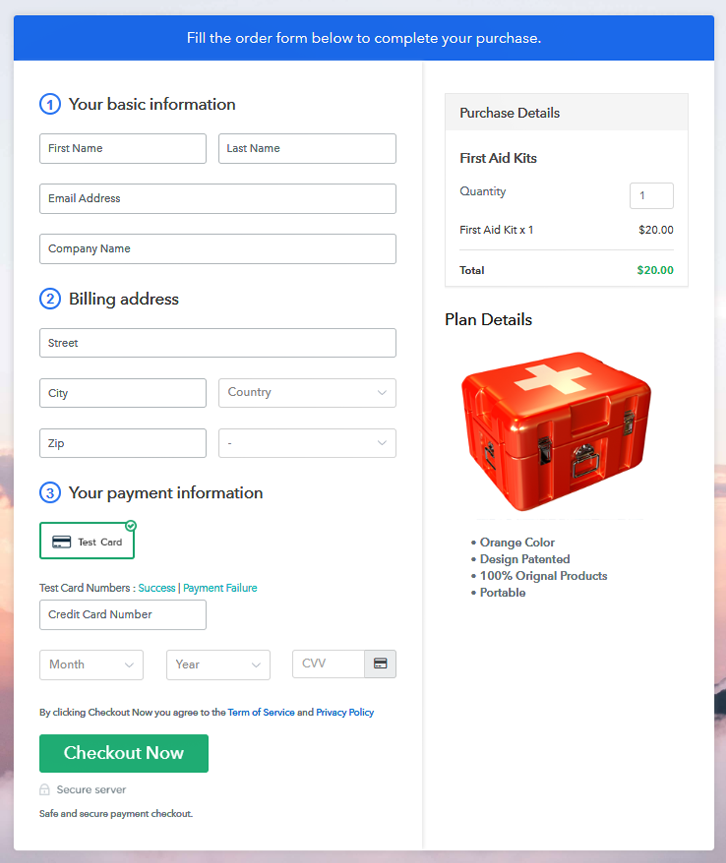
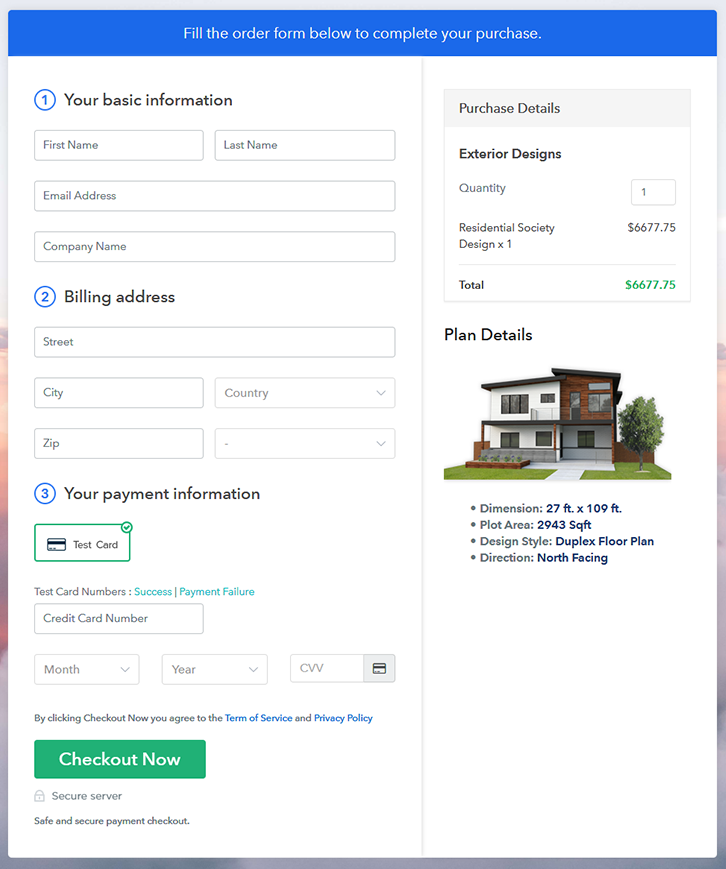
In this blog, we’ll explain the step by step procedure towards making checkout pages for selling flash drives online. These checkout pages will help you in displaying your product, its features, pricing etc and collect payments at the same time.
Moreover, billing & invoicing automation will ease up your work. Also, the dashboard will let you keep a record of all the payments and items as well as manage them.
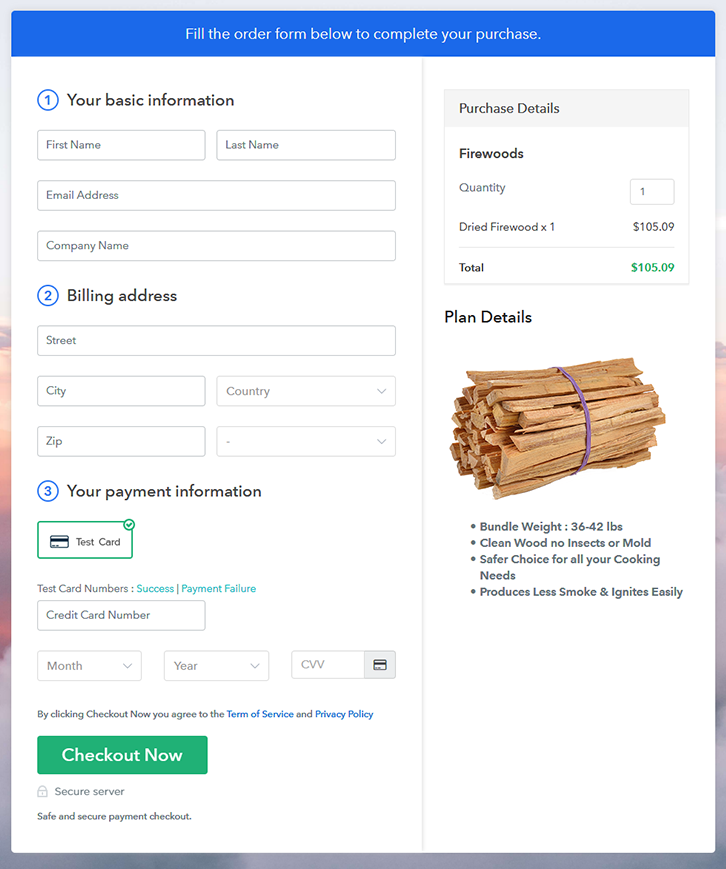
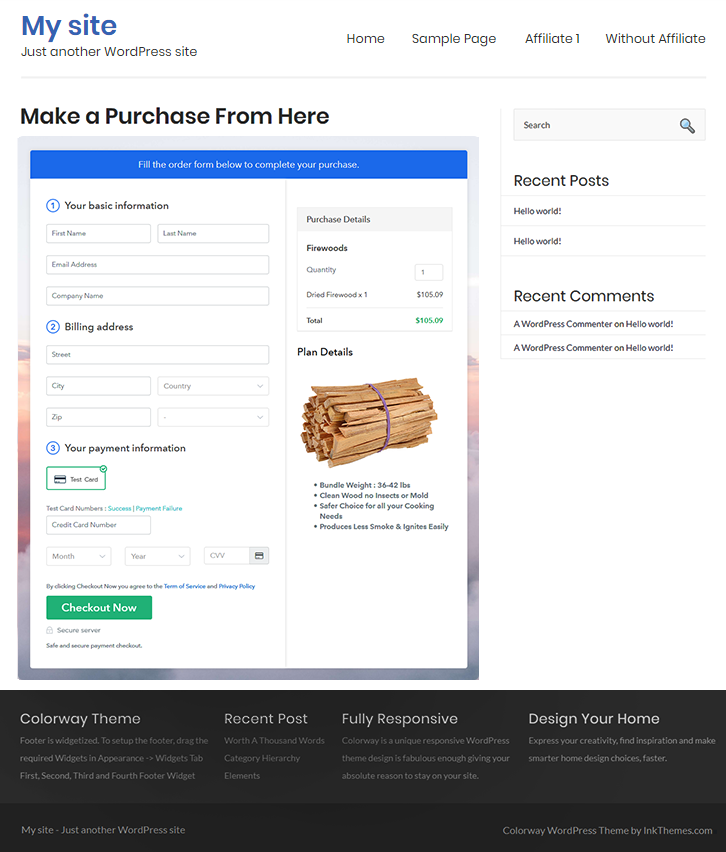
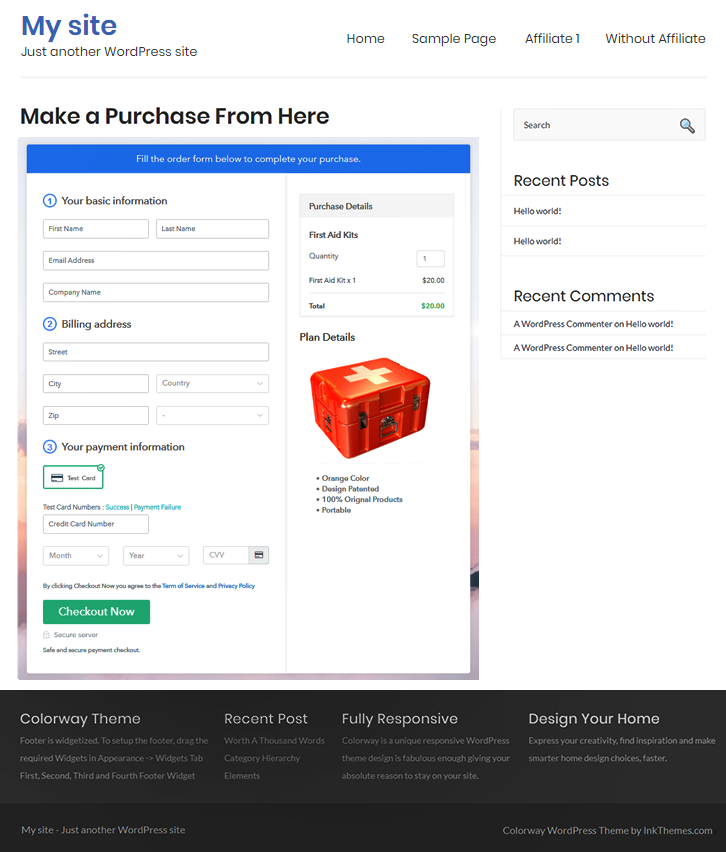
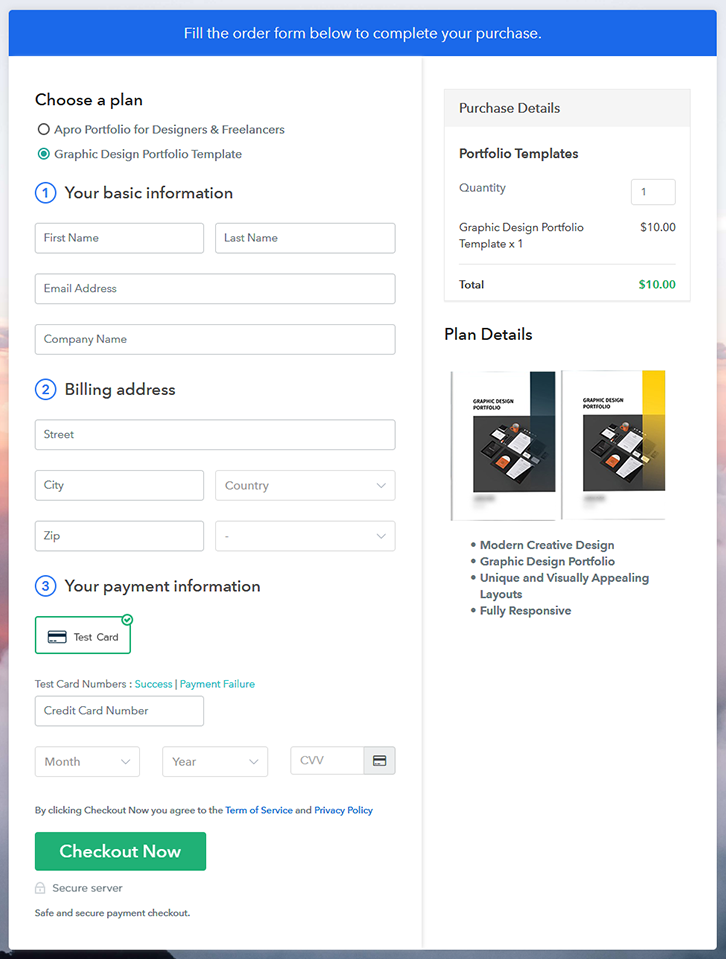
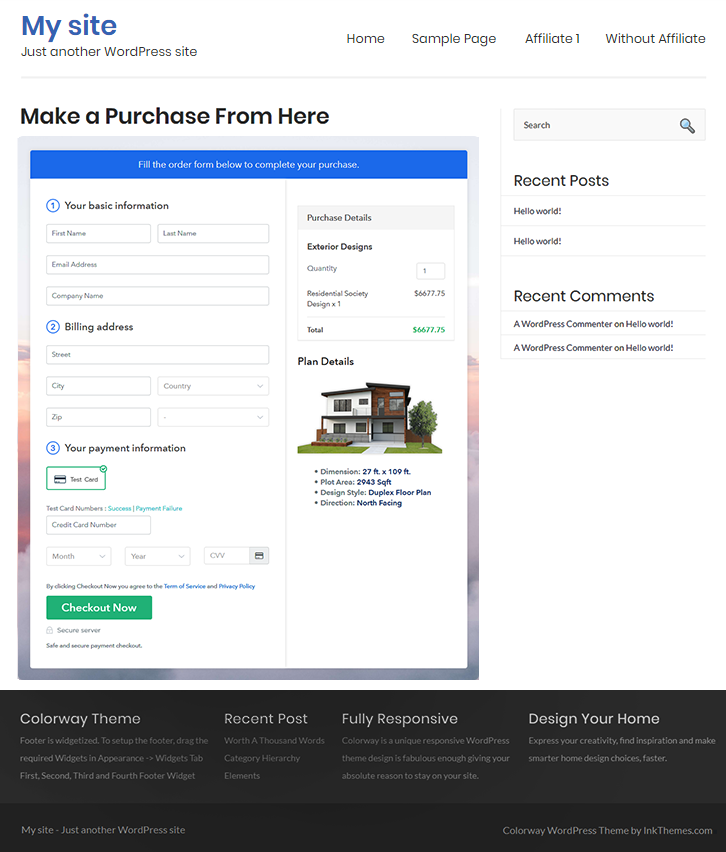
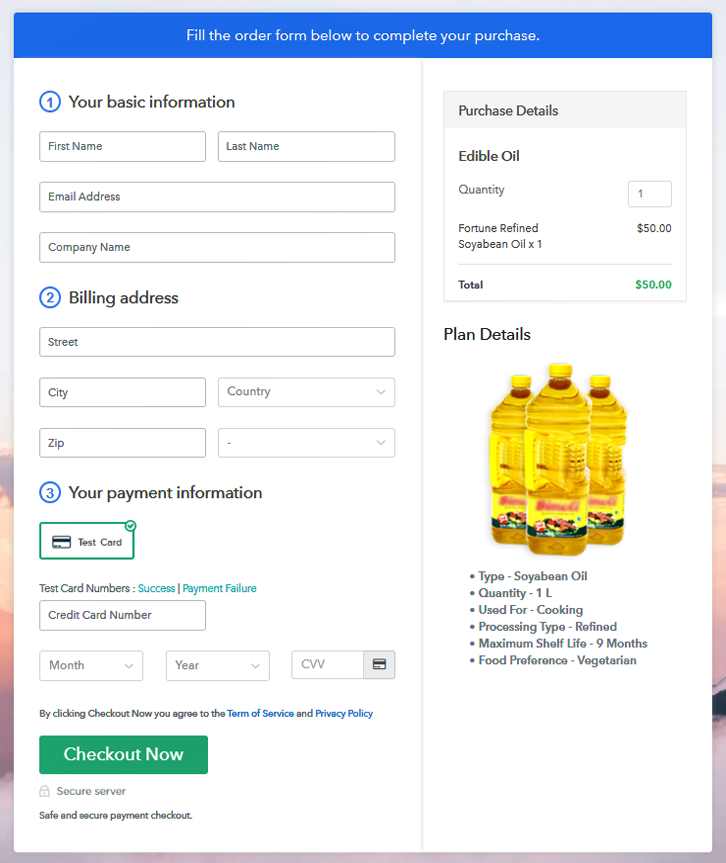
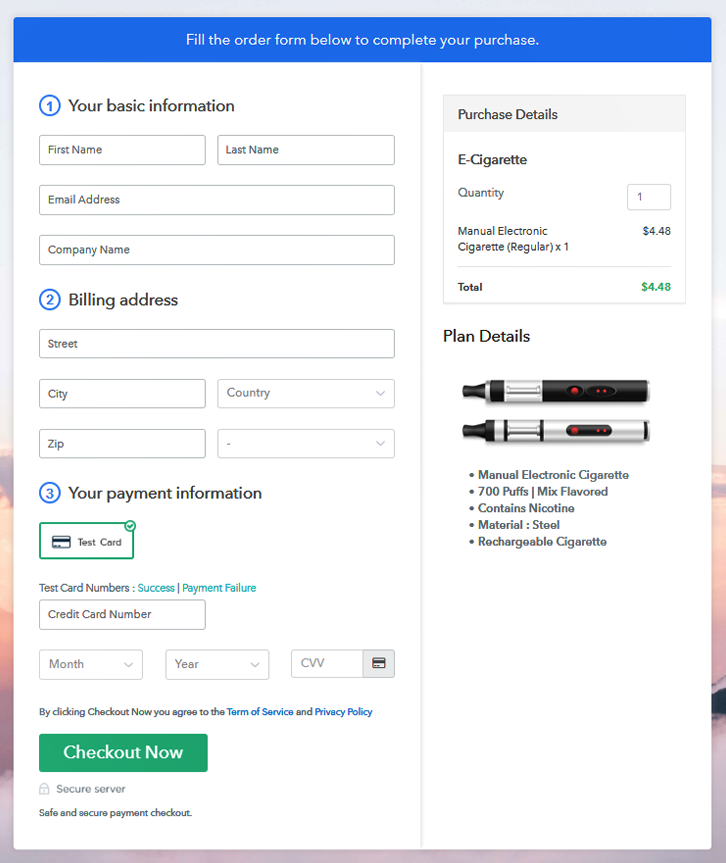
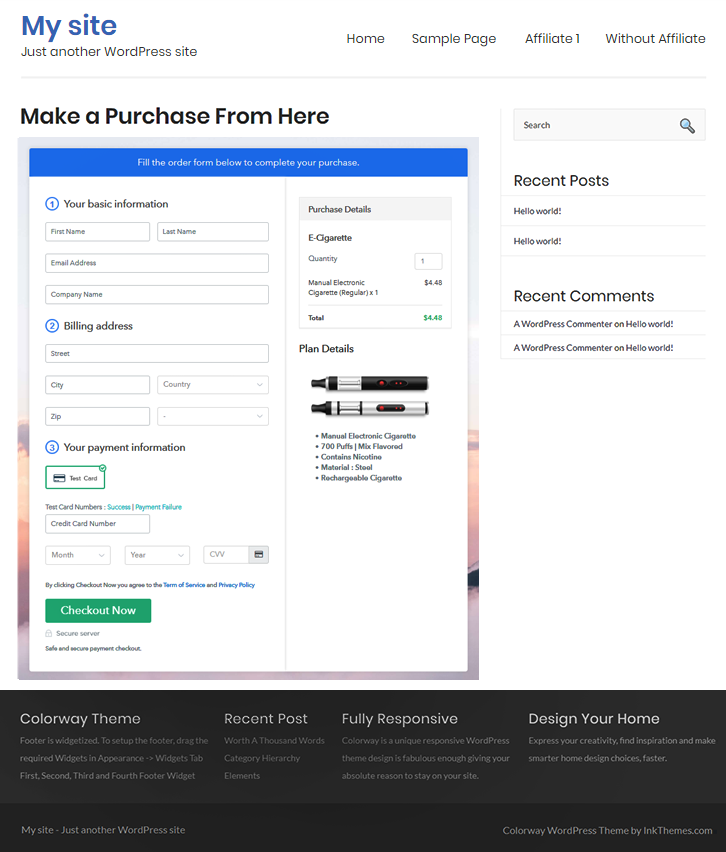
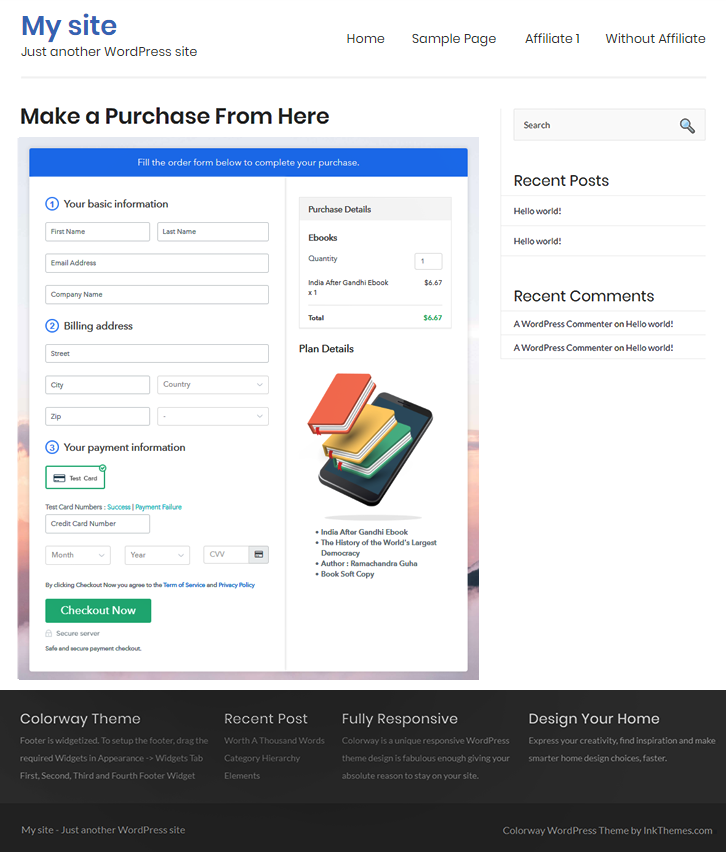
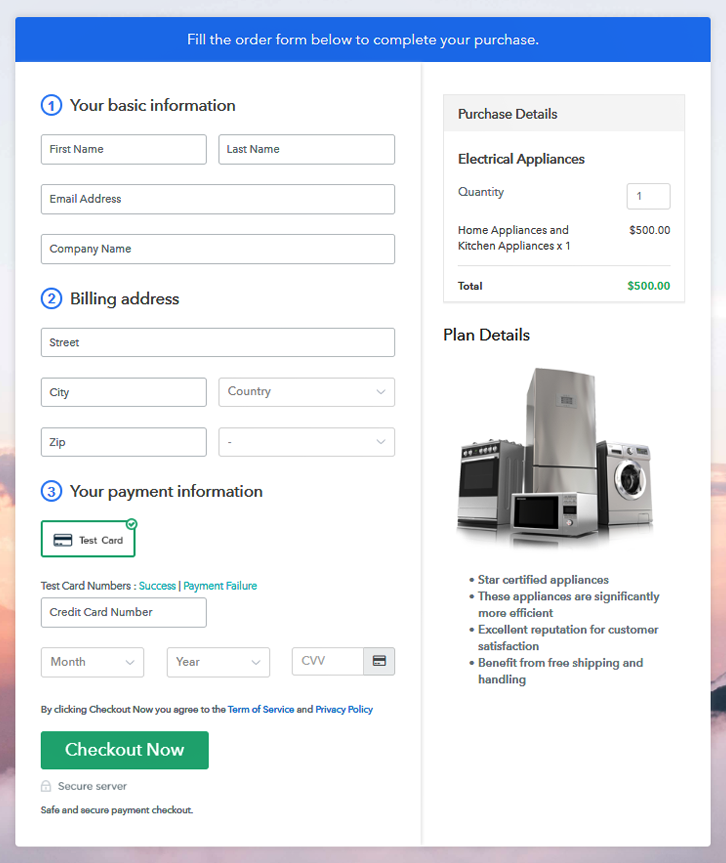
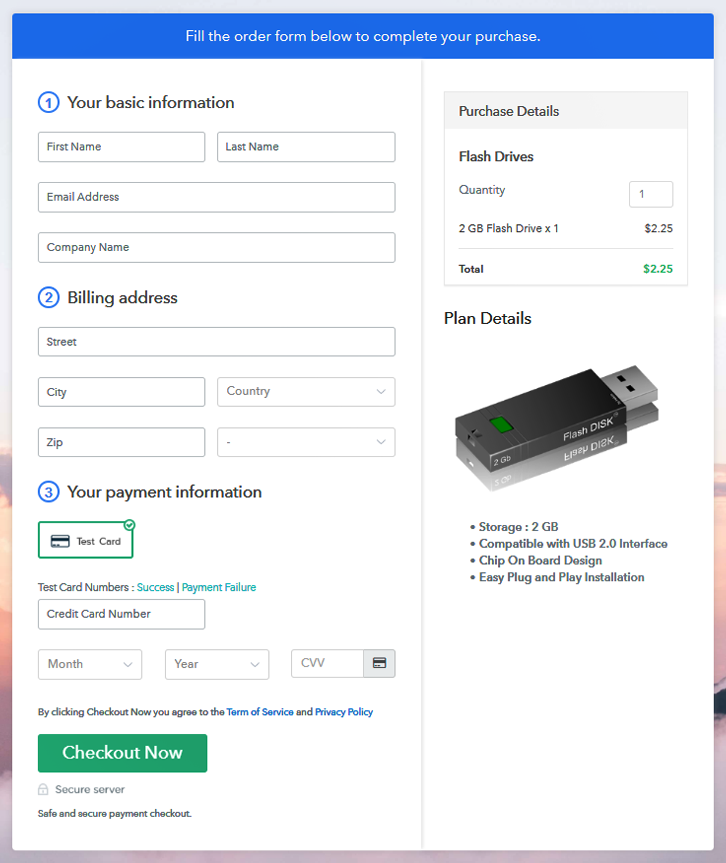
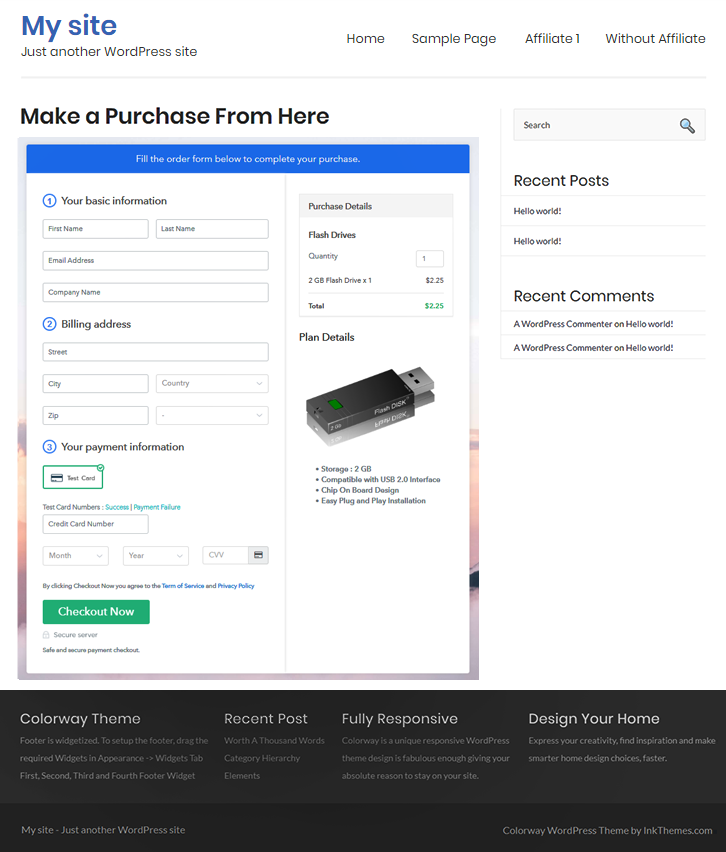
Final View of Checkout Page For Your Flash Drives Selling Business
Step 1: Log in to Pabbly Subscription Billing

To start flash drives business online, initiate the process by visiting Pabbly Subscription Billing website & then hit the ‘Sign Up Free‘ button. On the next registration page redirect either use a Google account of manual sign-up.
Sign Up For Free!
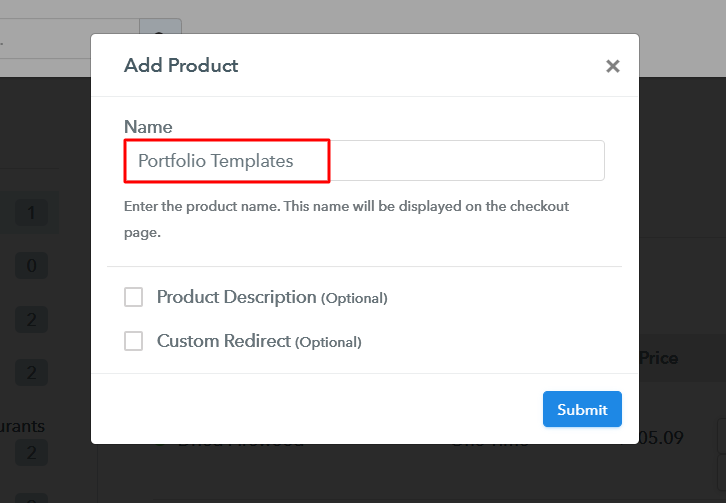
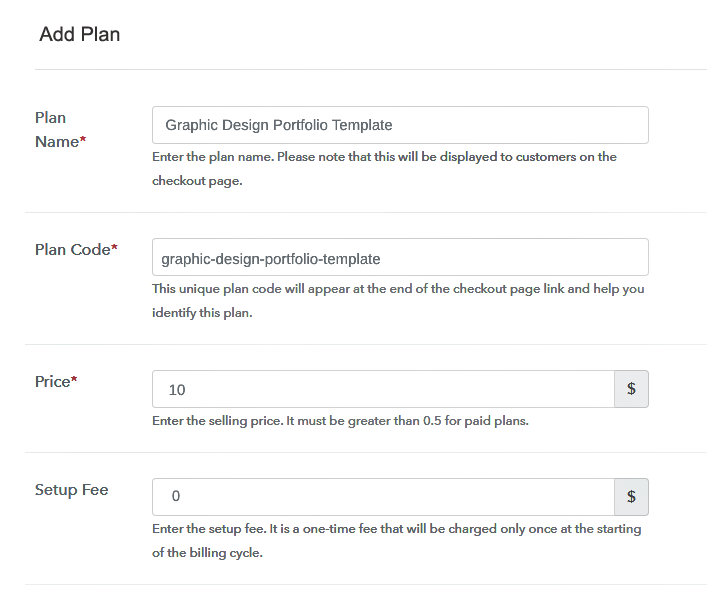
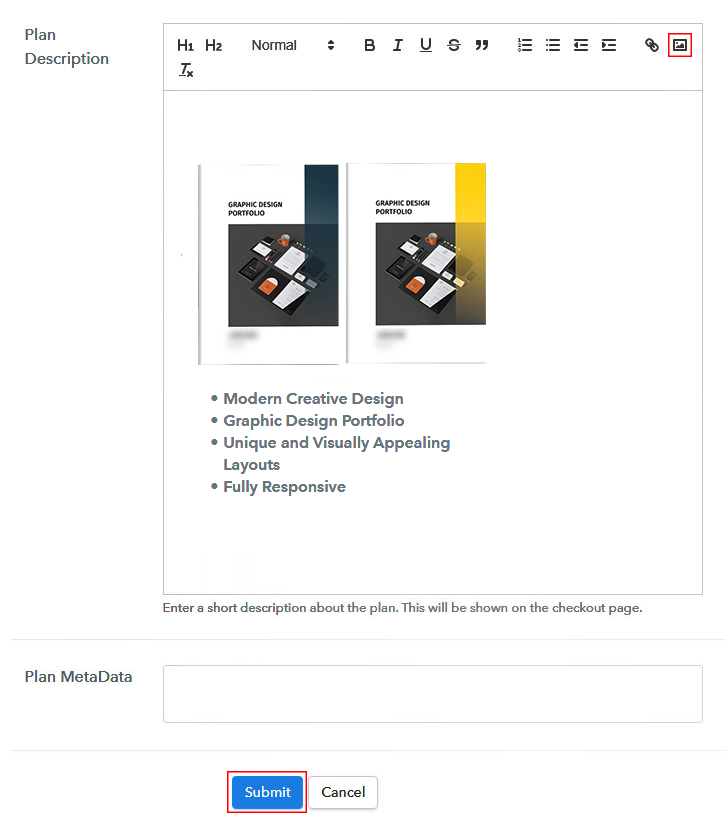
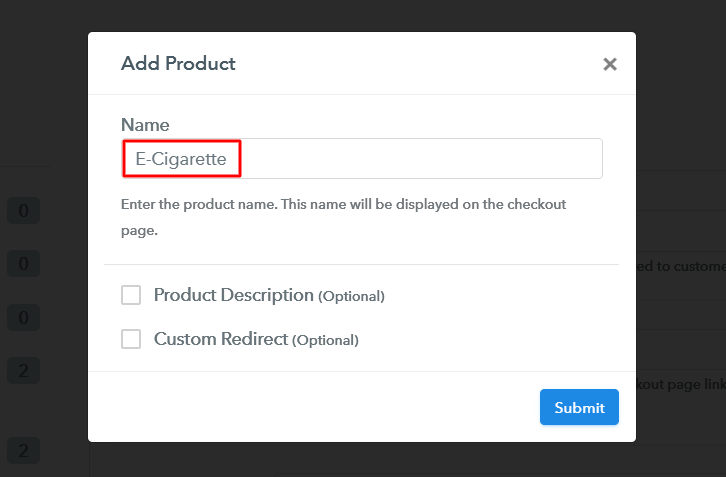
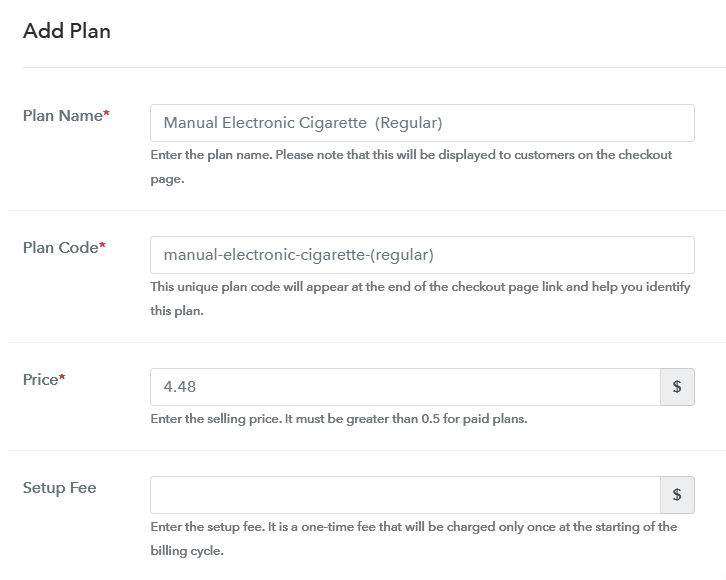
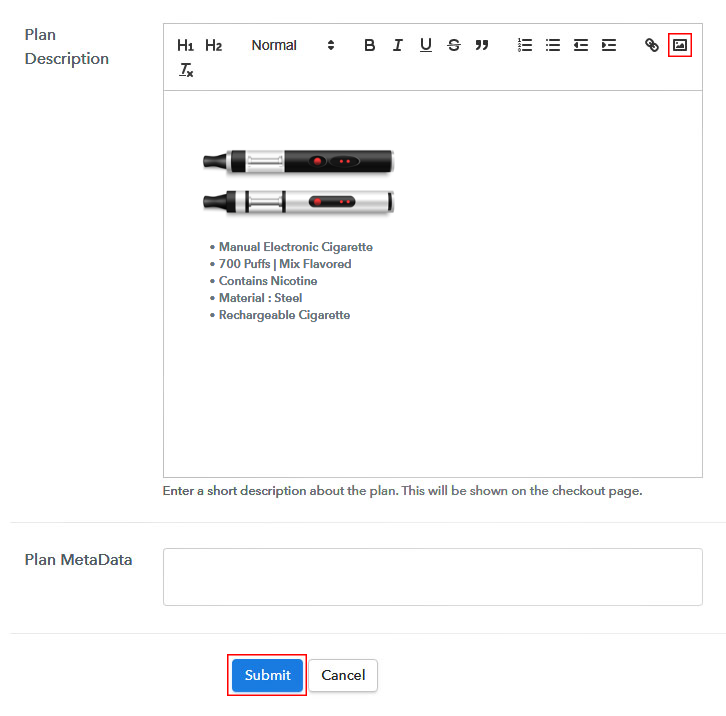
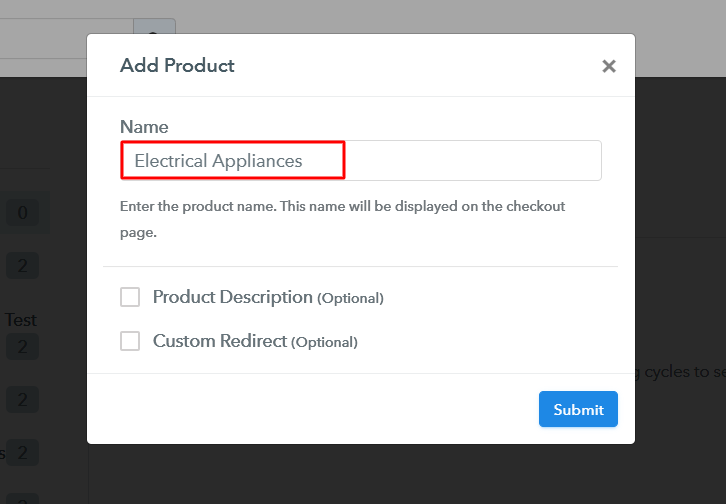
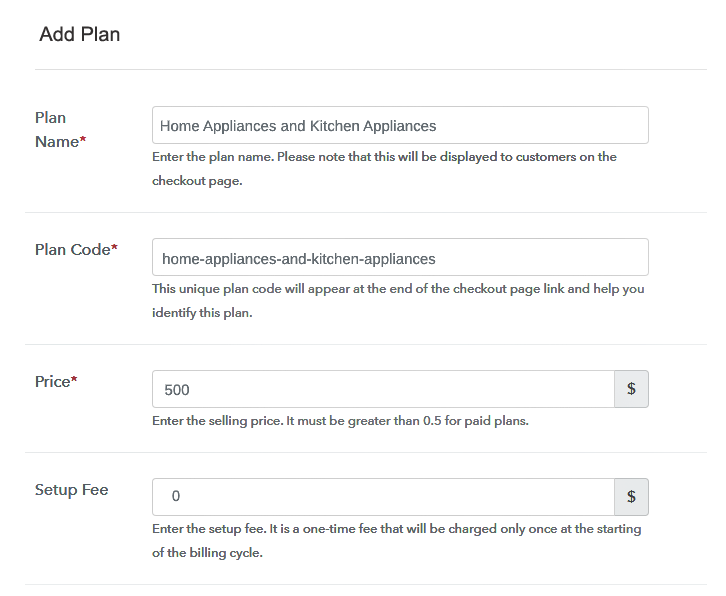
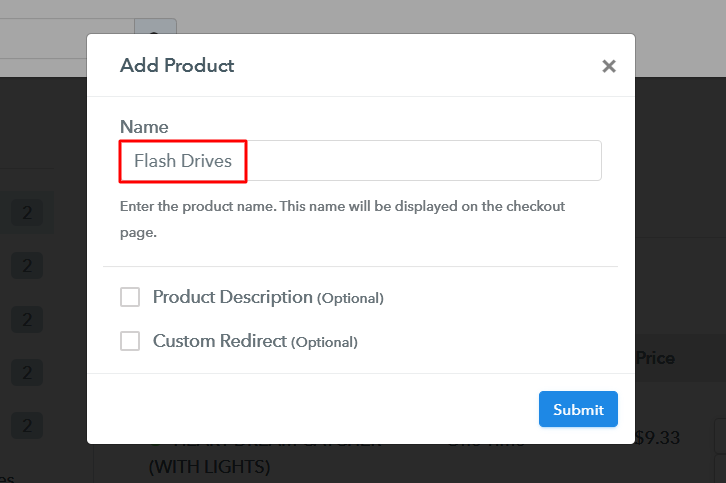
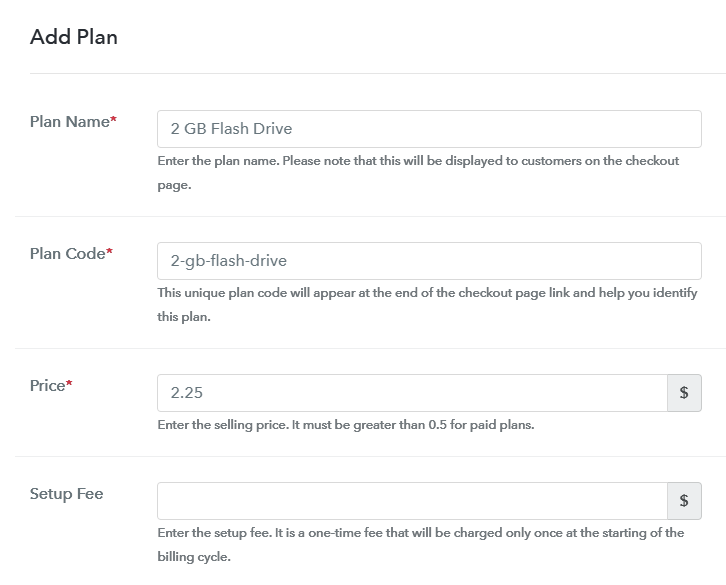
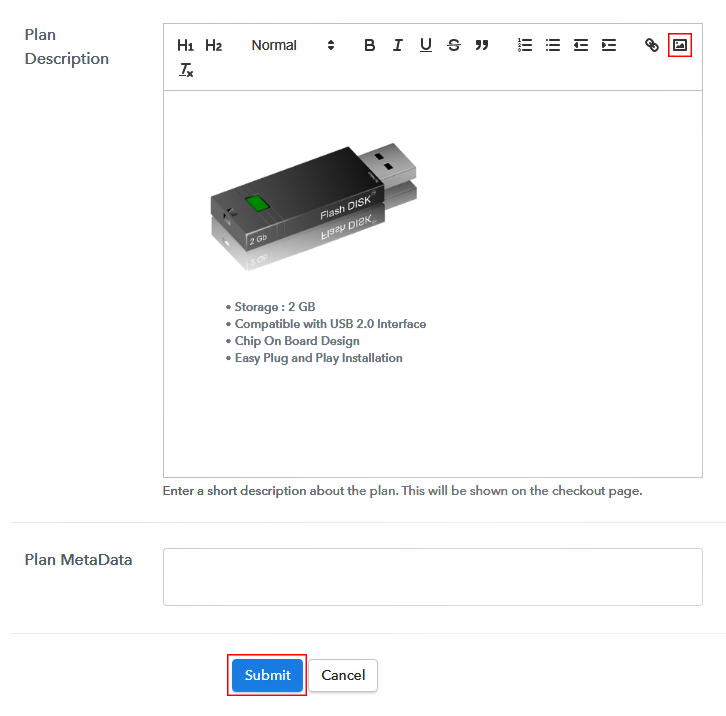
Next, a window will pop-open to fill in some company details such as a company name, currency & phone number required. Now, you have to connect a payment gateway. You can also use the test payment method for testing, just like me. But, integrate a payment method from the following choices available with their integration guides. After all the system choices are done, you can start adding products. You can also differentiate product based on their categories. As we will add plans to them more further. Fill in the required details and submit the page. Note: Here you can add all the products related to the similar category by creating plans for each of them. Let’s start adding plans for different kinds of flash drives available in your store. You can add a name, code, price etc and st up the set-up fee, billing cycle and more information related to the flash drives in the plan details page. Also, you can showcase an image with some features of the flash drives that you wanna sell. Submit this plan details page and a checkout page will be created instantly to sell flash drives online. Likewise, you can create other plans for selling flash drives online as well. To start selling flash drives online, you can share and embed the checkout pages in there different ways. Follow up the recommended steps to preview the checkout page: Just copy the link and add the checkout page to sell flash drives online at any preferable place on your WordPress site. Further, paste the plan link on a text editor of the WordPress dashboard. Next, click the “Publish” button, after making changes. Note: In case you want to sell multiple products via a single checkout page, you can create a multi-plan checkout page otherwise skip this step. Well, this is how you can sell flash drives online super fast & easily. The billing and invoicing process are also automatic. Further, you’ll get a well-functioning dashboard to keep a record of all the items & payments. Most importantly, it provides multiple reliable options for payment gateway methods & you can collect payments in multiple currencies.Step 2: Select Subscription Billing

Step 3: Account Setup

Step 4: Connect Payment Gateways & Start Flash Drives Selling Business Online

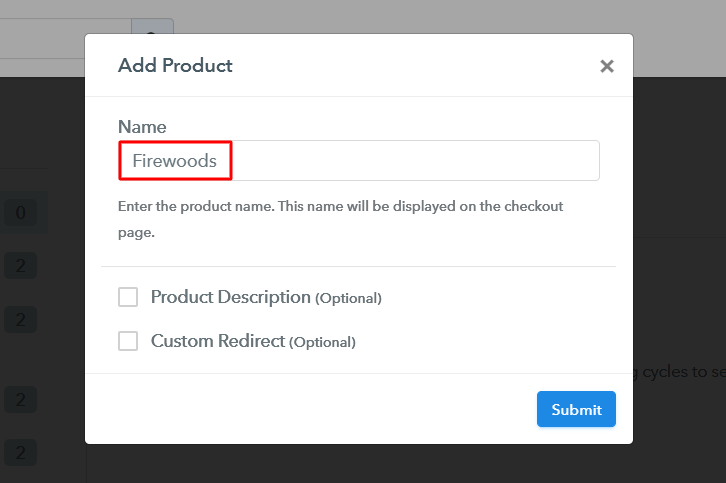
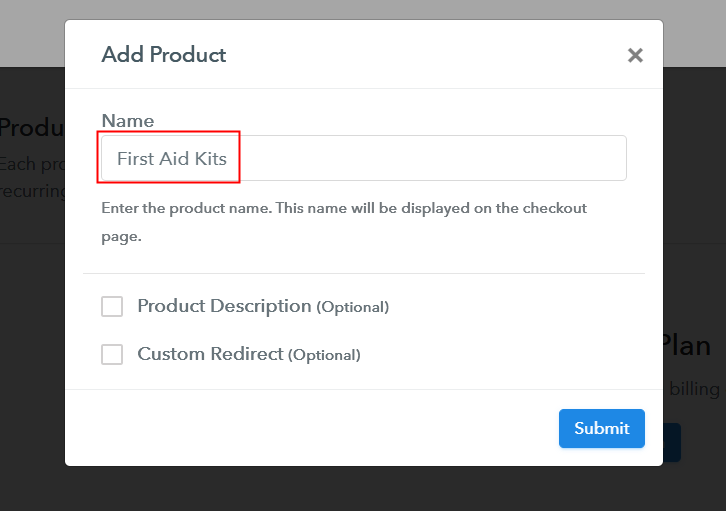
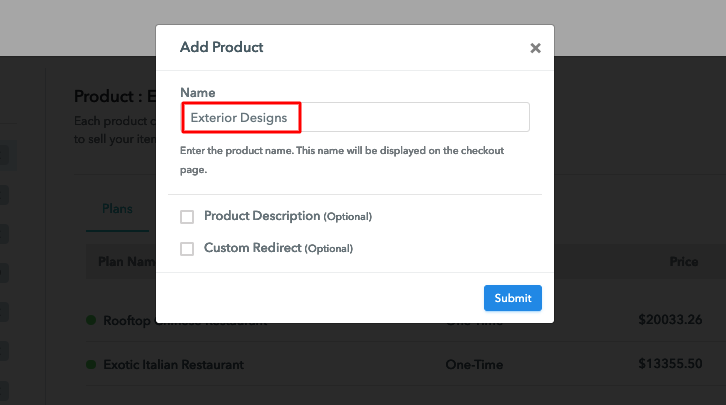
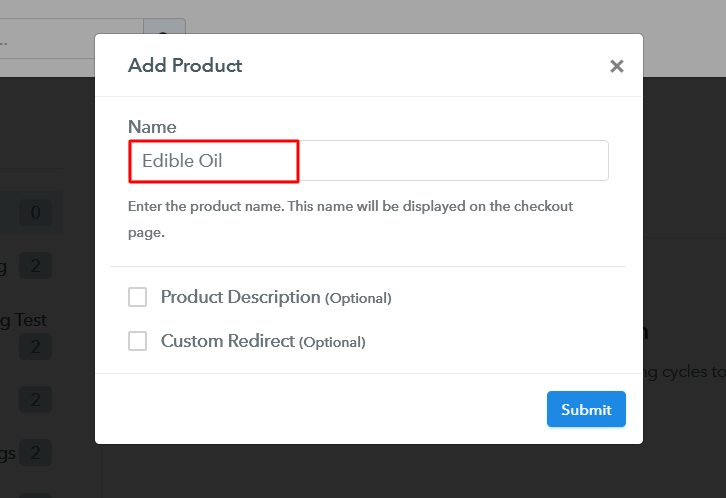
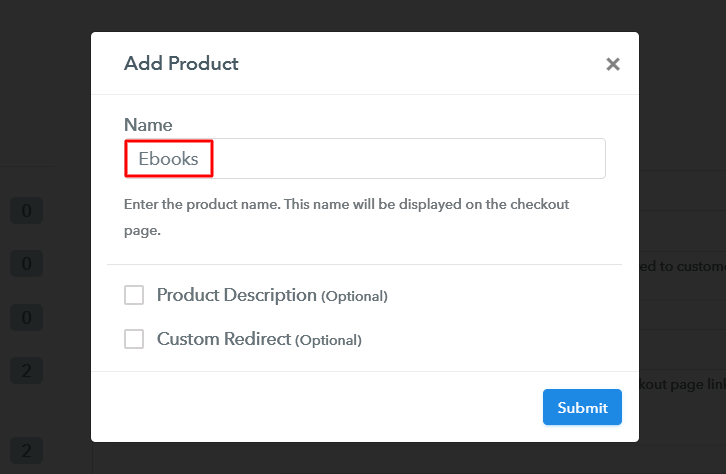
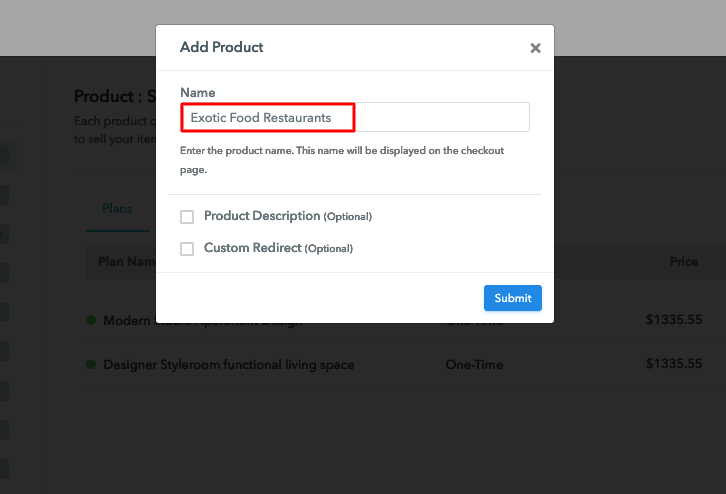
Step 5: Add Product For Your Flash Drives

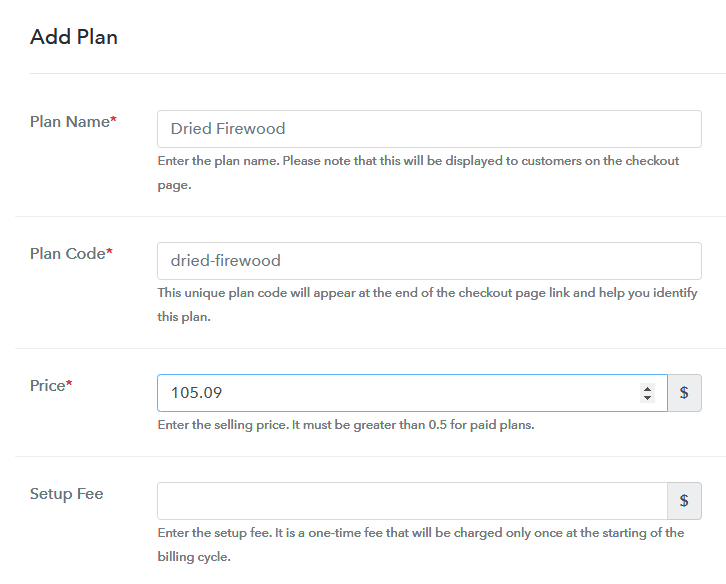
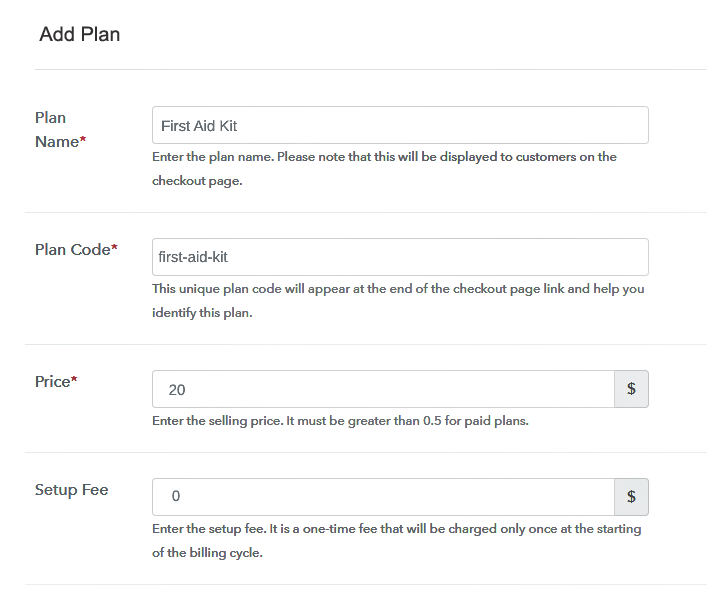
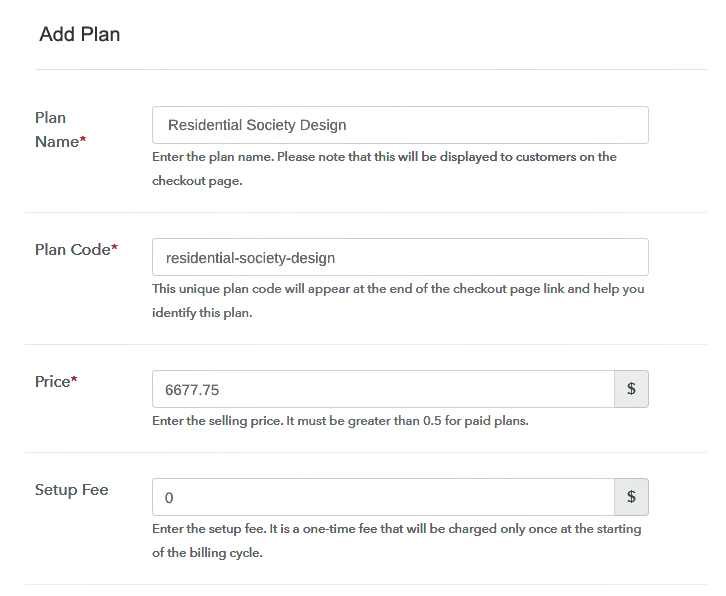
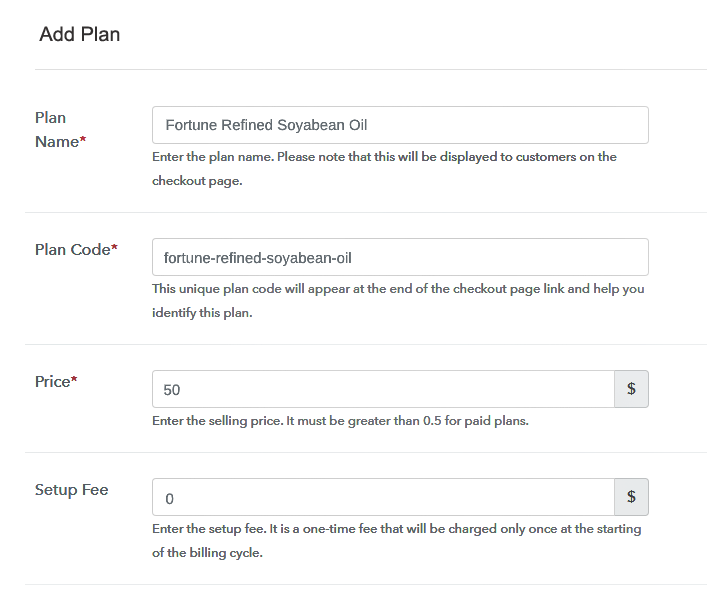
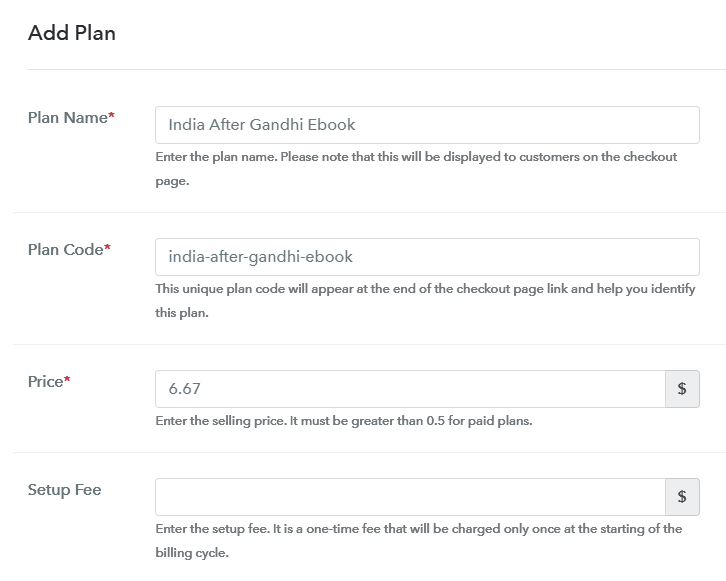
Step 6: Add Plans
(a) Select Add New Plan

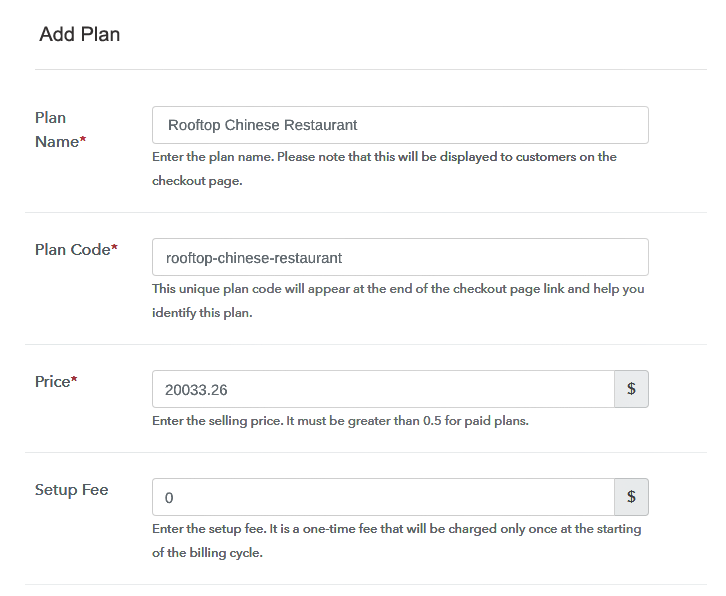
(b) Specify the Plan & Pricing Details
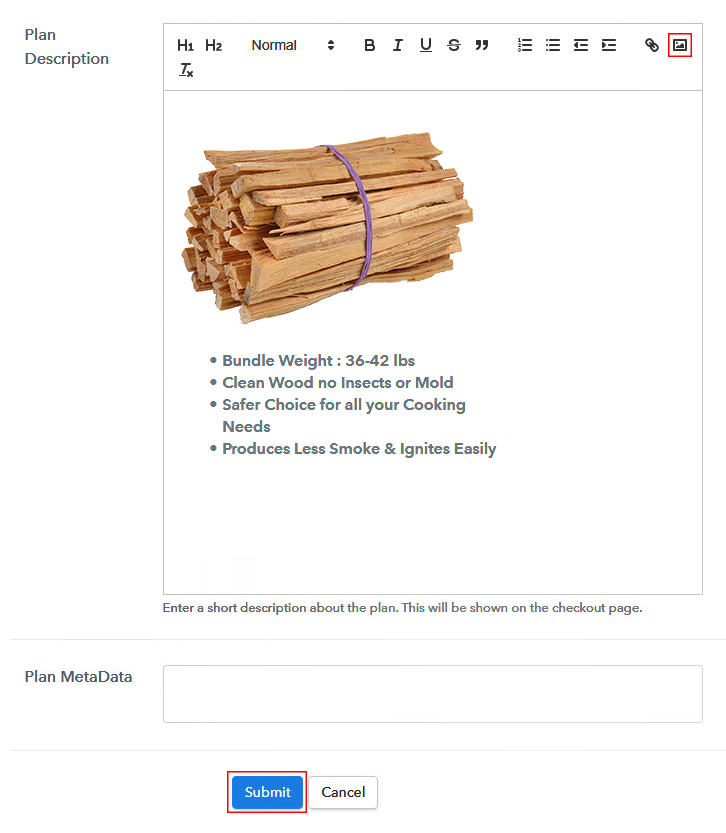
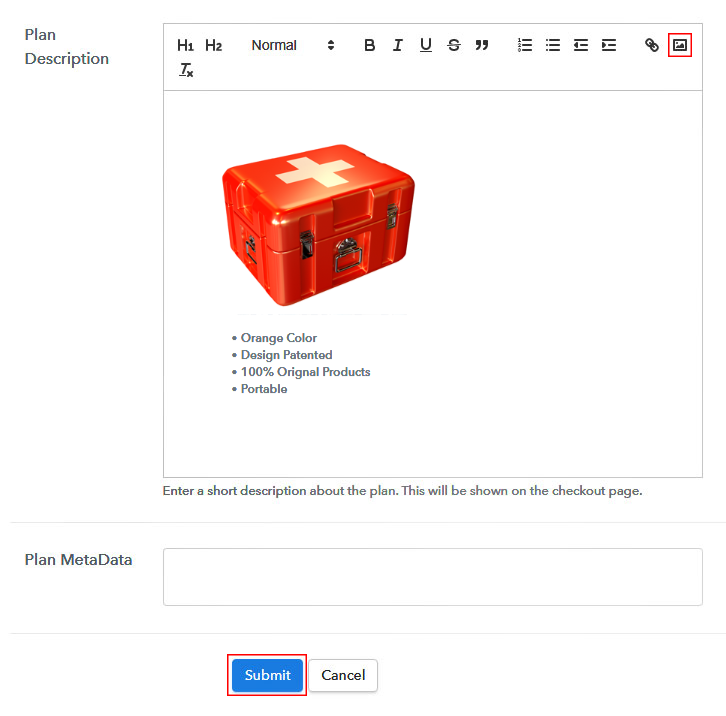
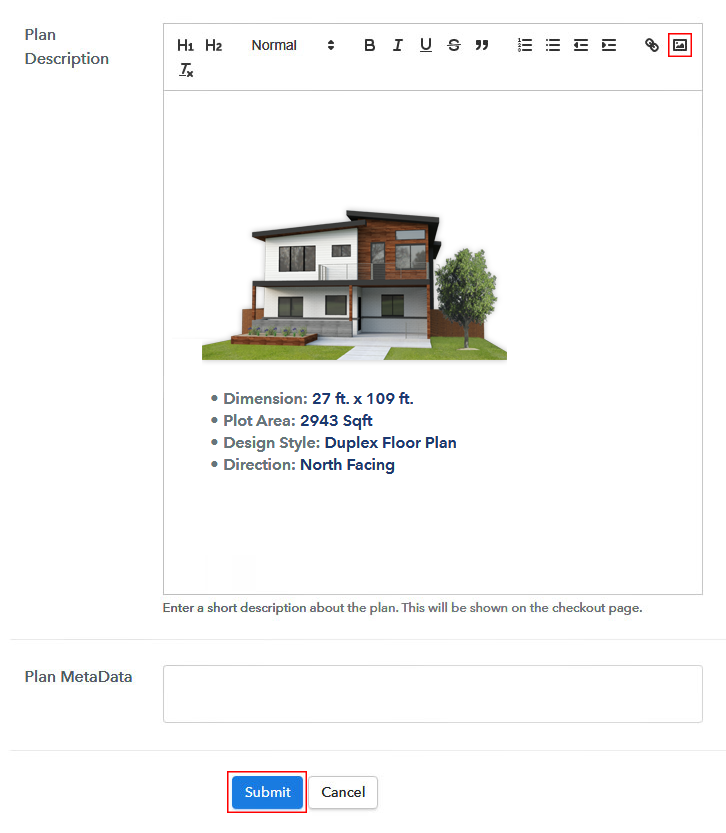
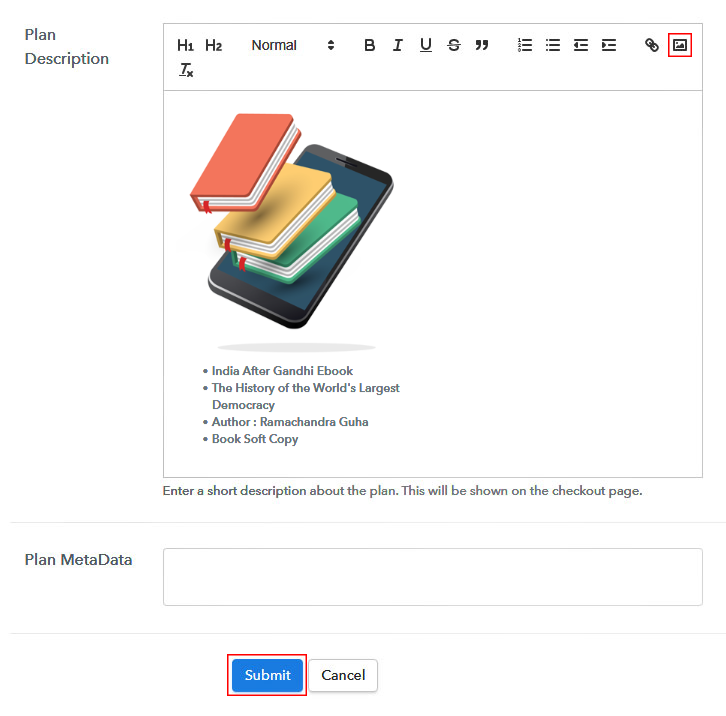
(c) Add Image & Description of Flash Drives
Step 7: Share your Checkout Page

Step 8: Preview Checkout Page
(a) Click on the View Button

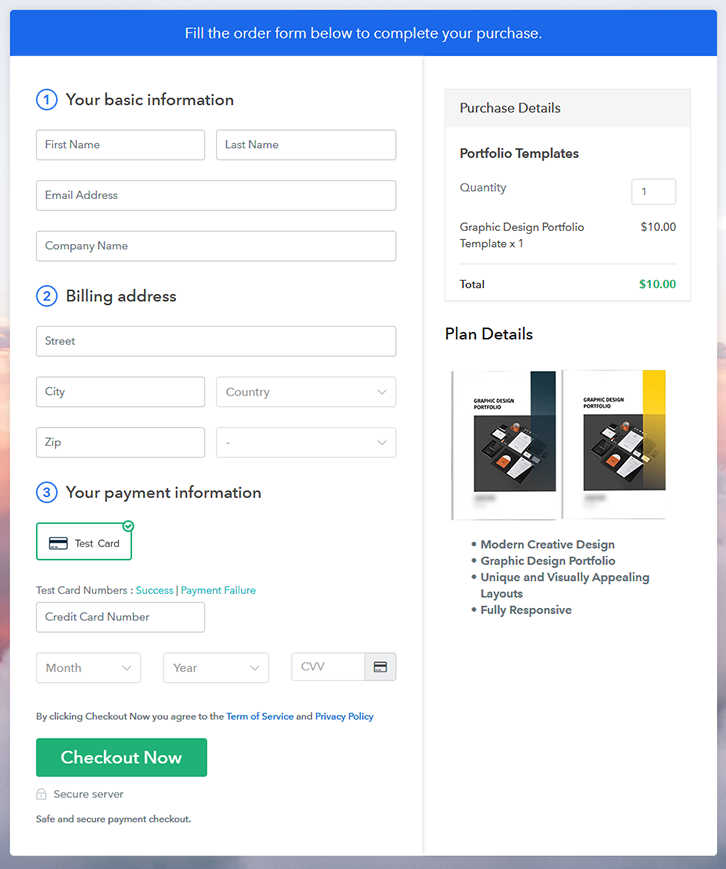
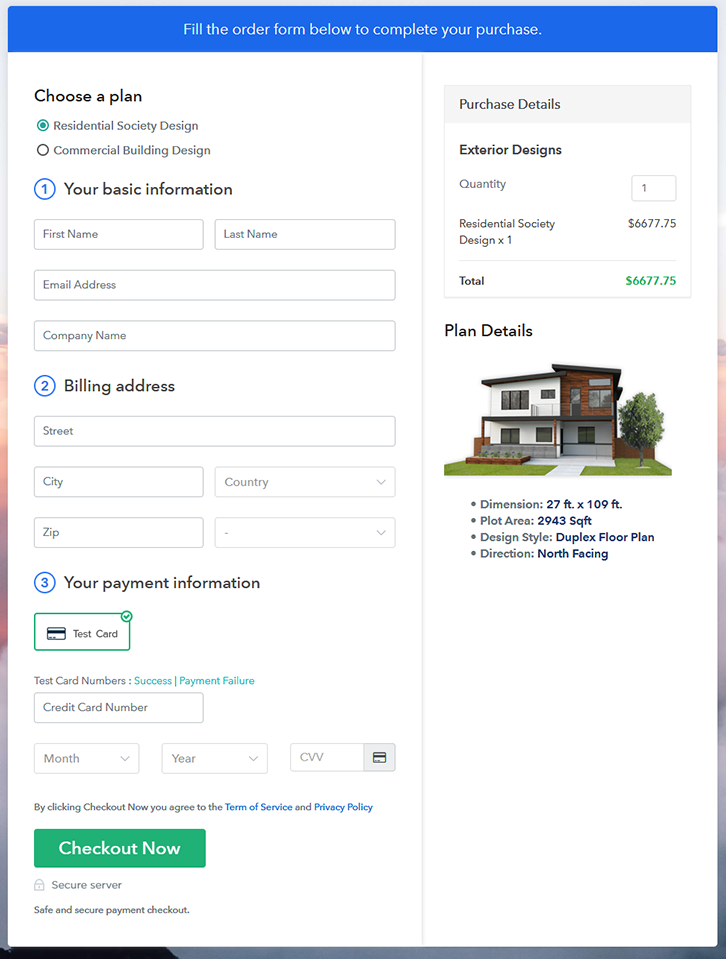
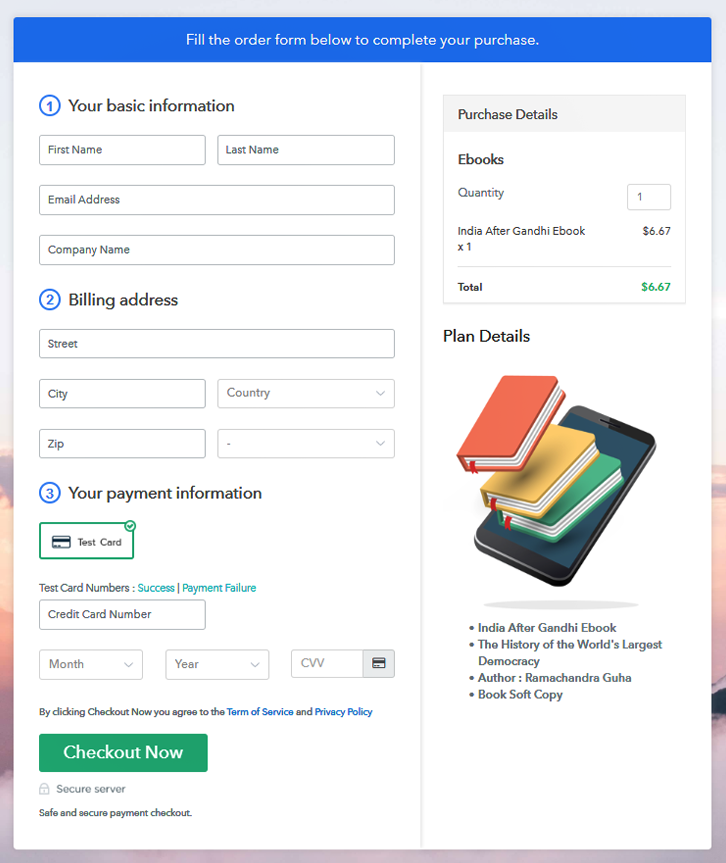
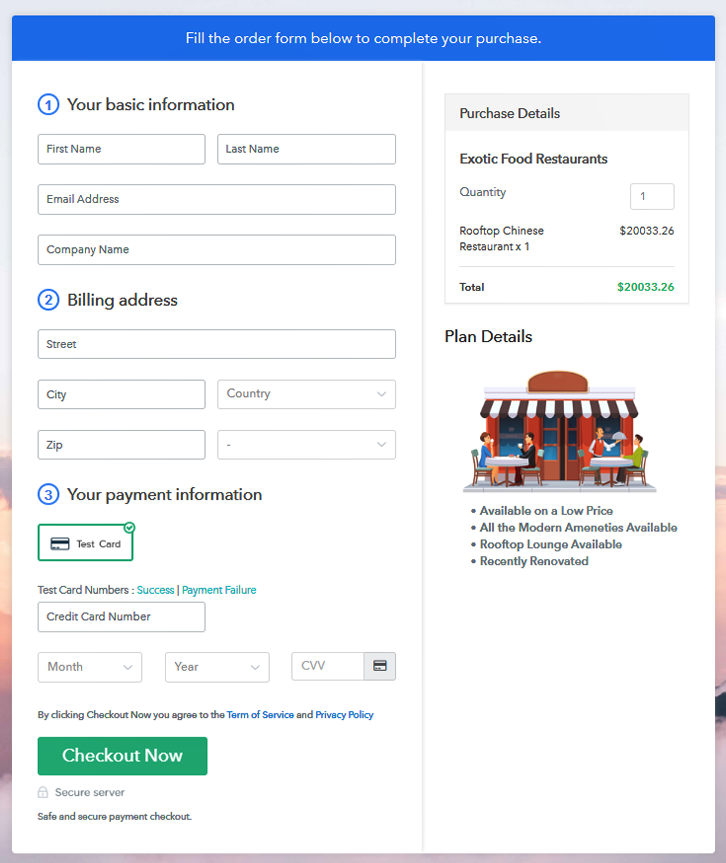
(b) Take a Look at the Checkout Page
Step 9: Embed Checkout Page in Site & Sell Flash Drives Online

(a) Edit the Page & Paste the Copied Link

(b) Save & Publish the Checkout Page

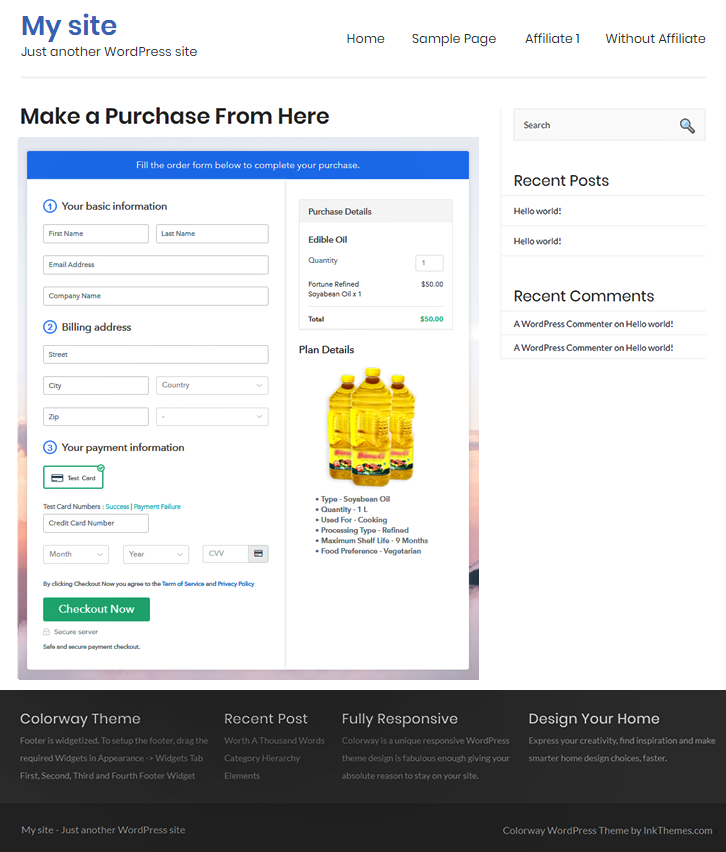
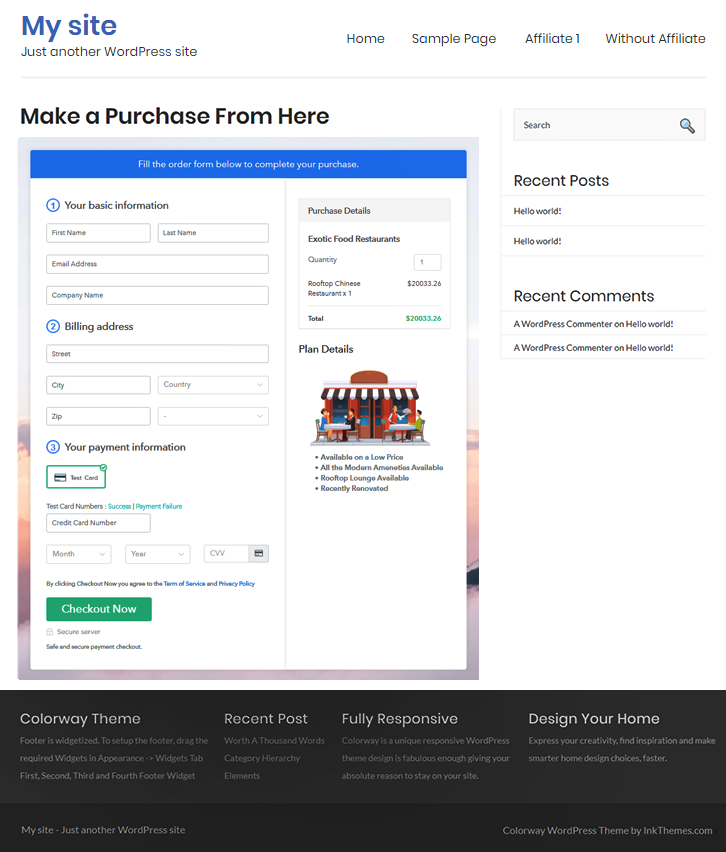
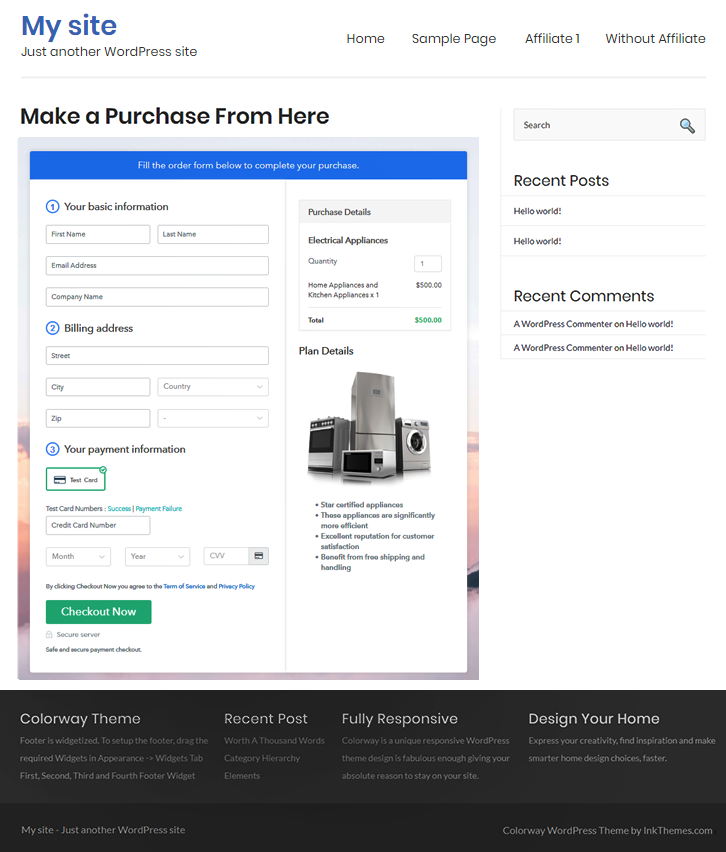
(c) Check out the Final Look of your Checkout Page on WordPress Site
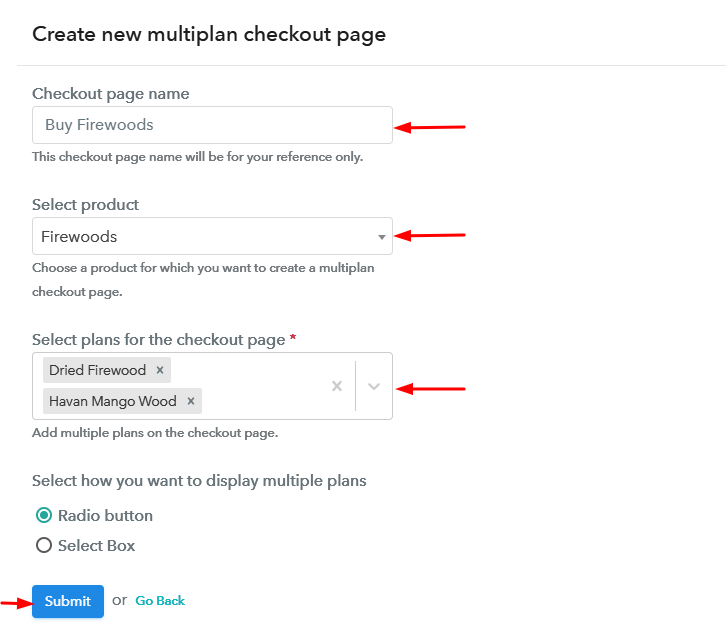
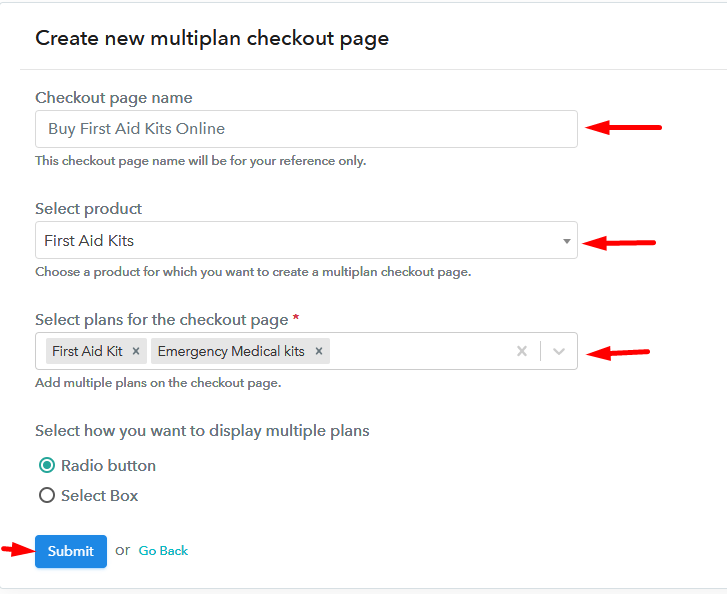
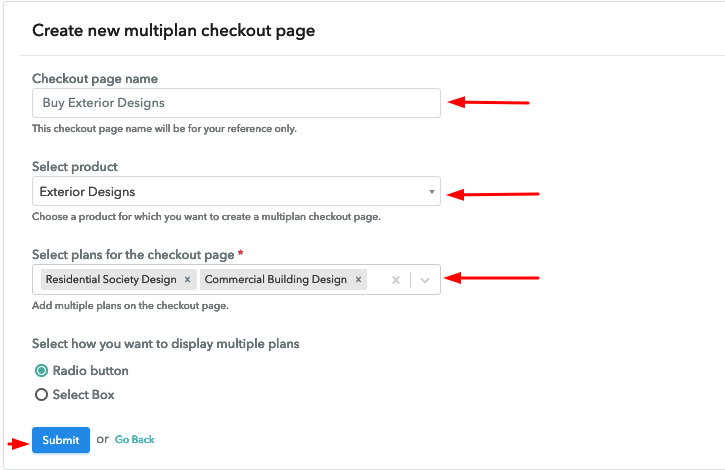
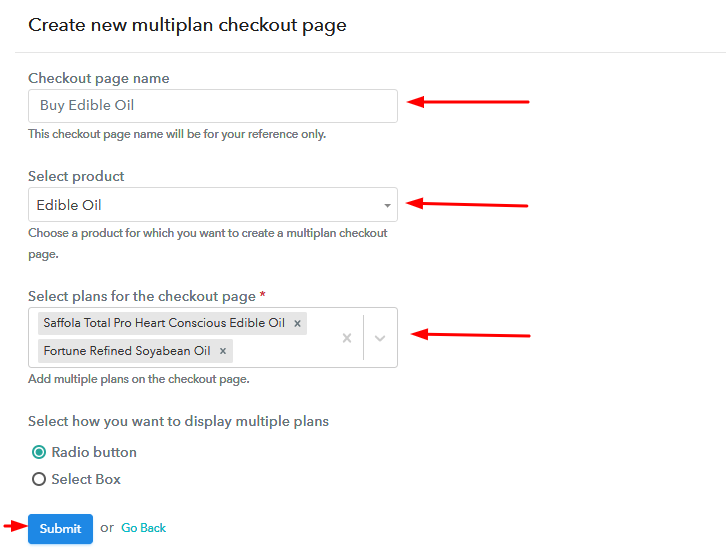
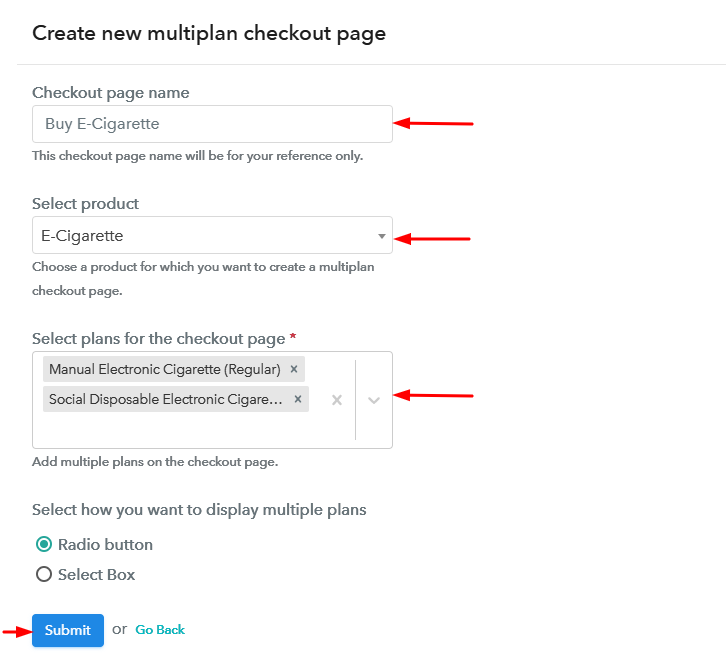
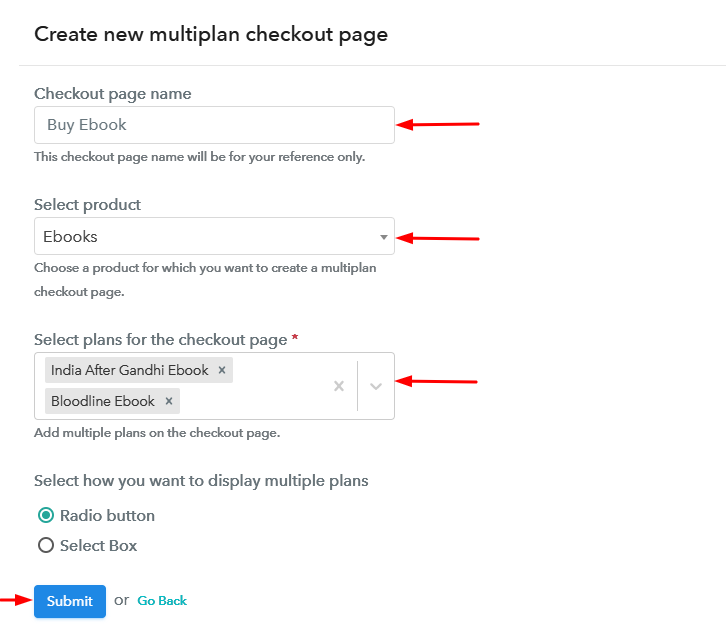
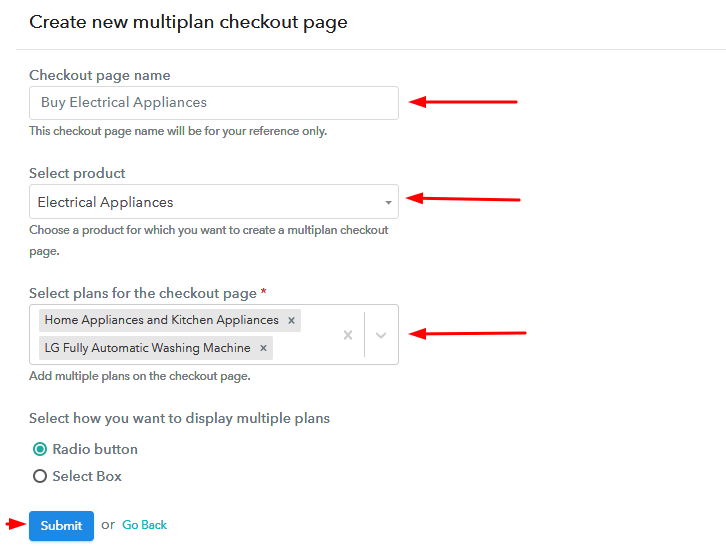
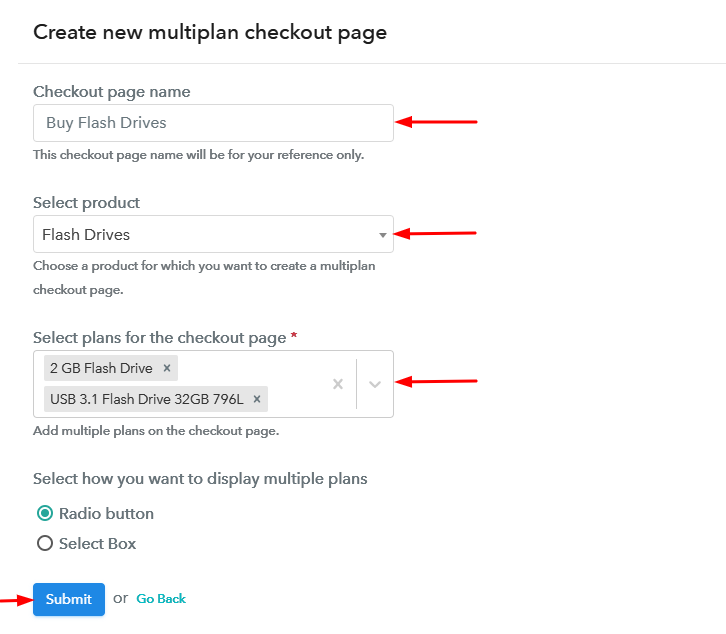
Step 10: Multiplan Checkout Page
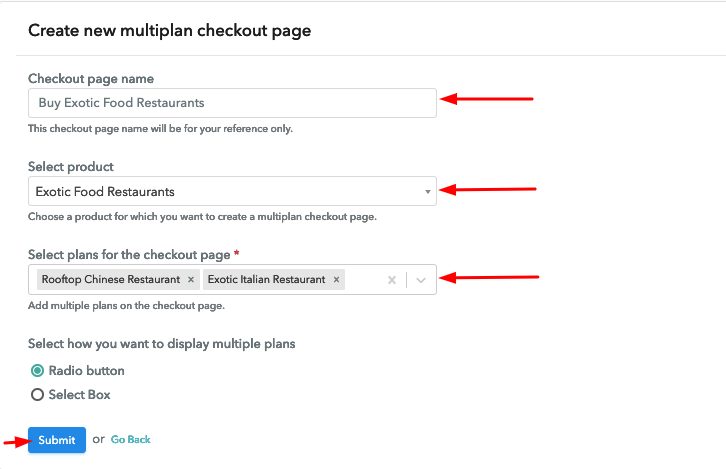
(a) Click on Add Mutiplan Checkout

(b) Add Plans to Sell Multiple Flash Drives from Single Checkout Page
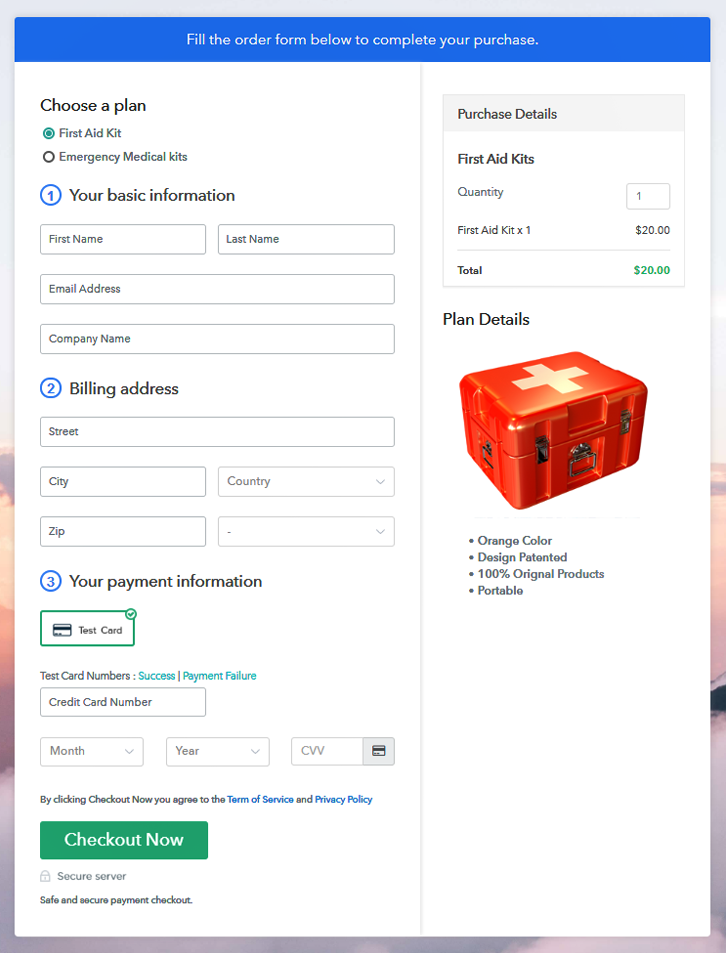
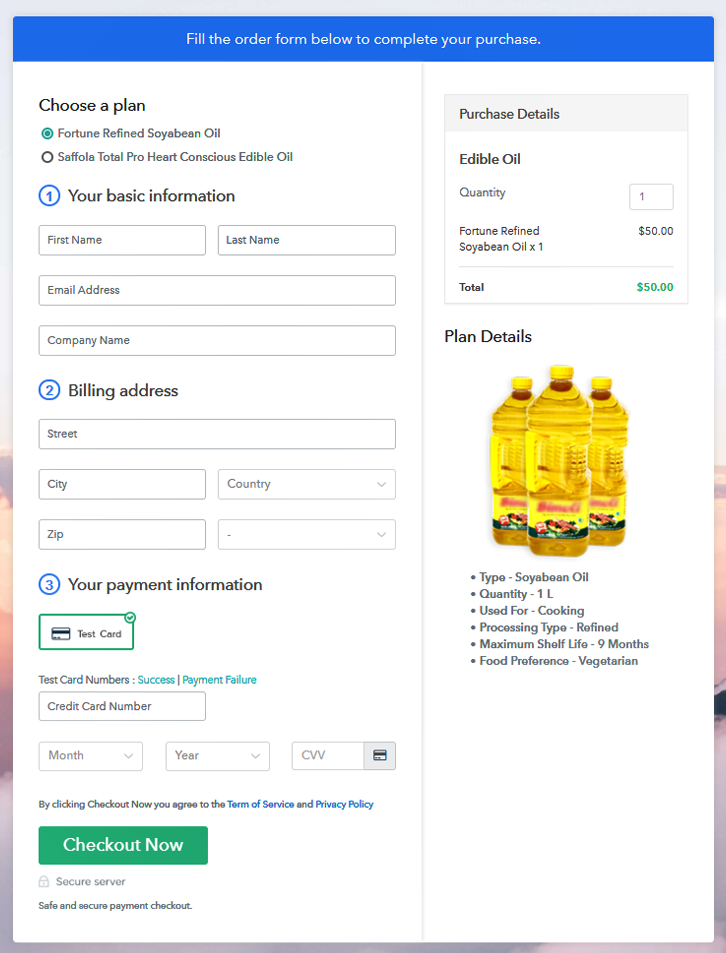
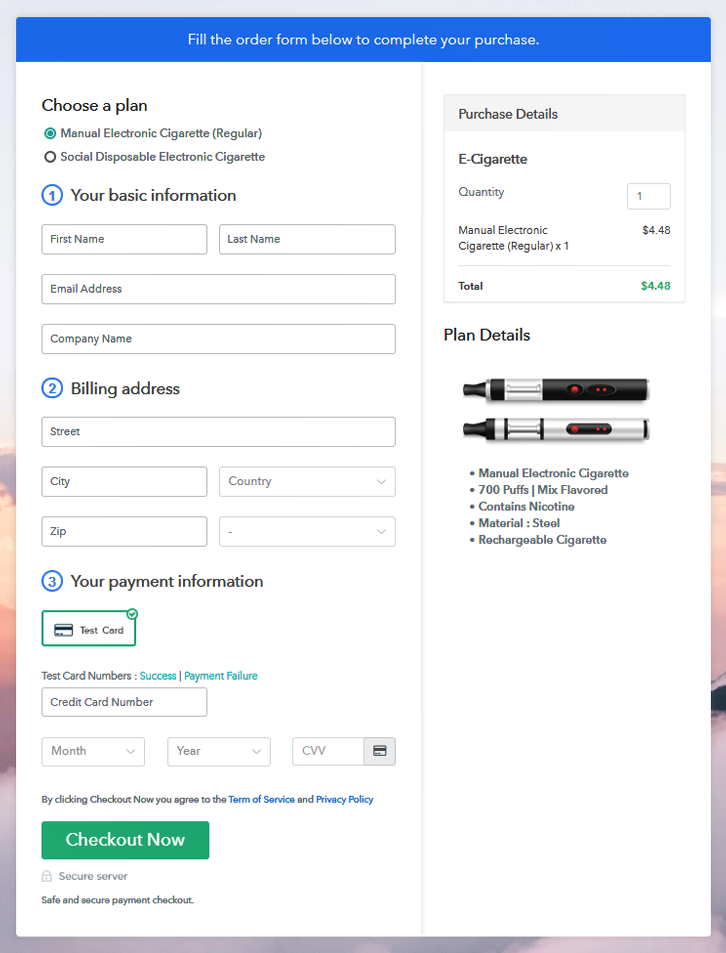
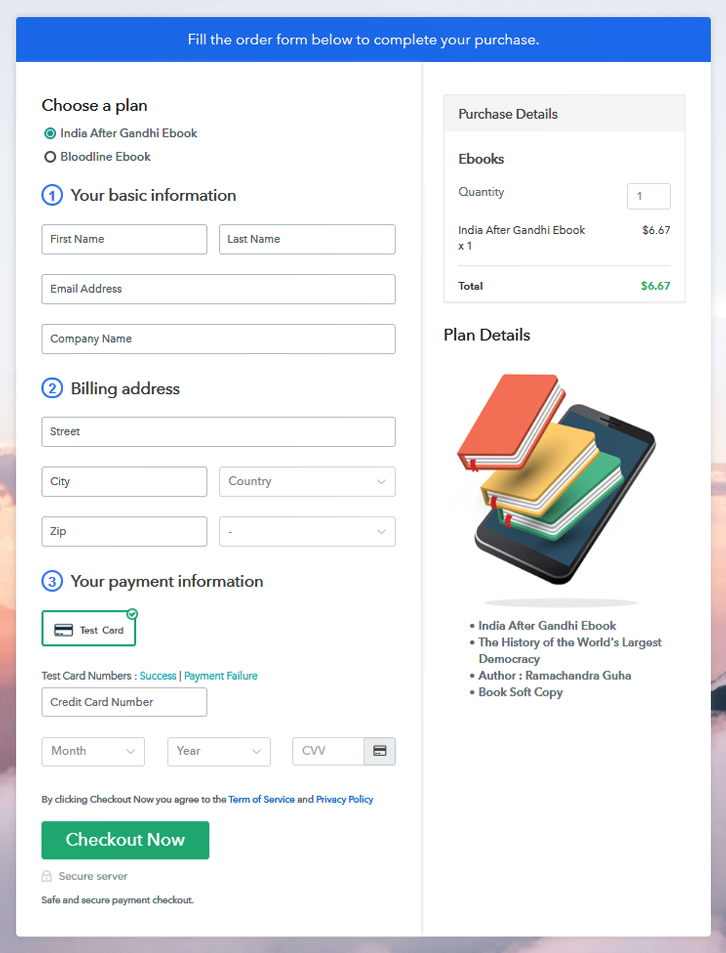
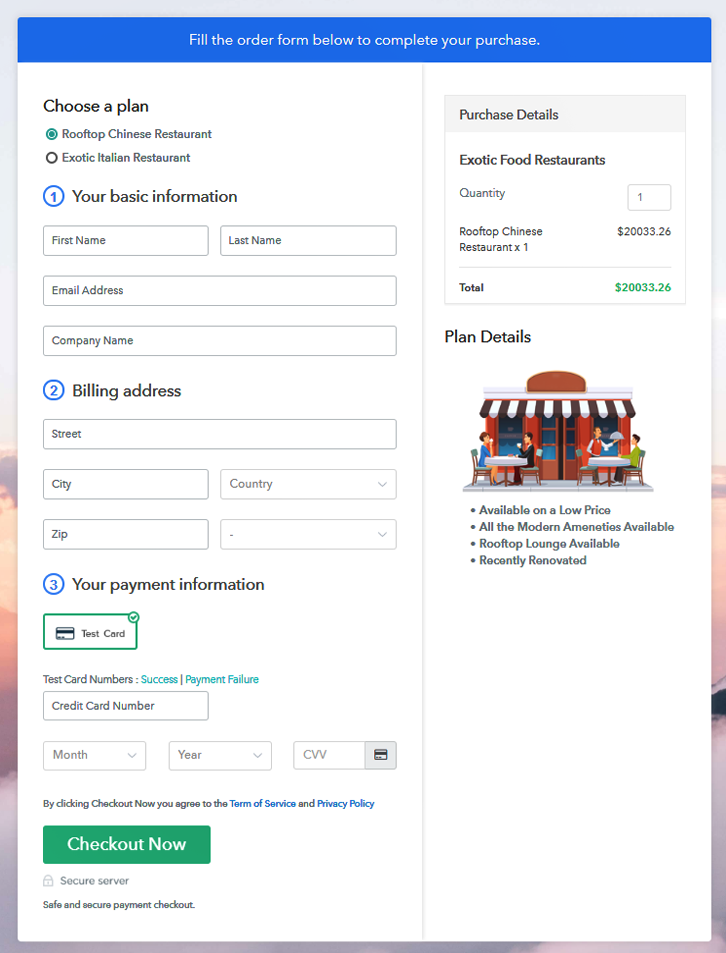
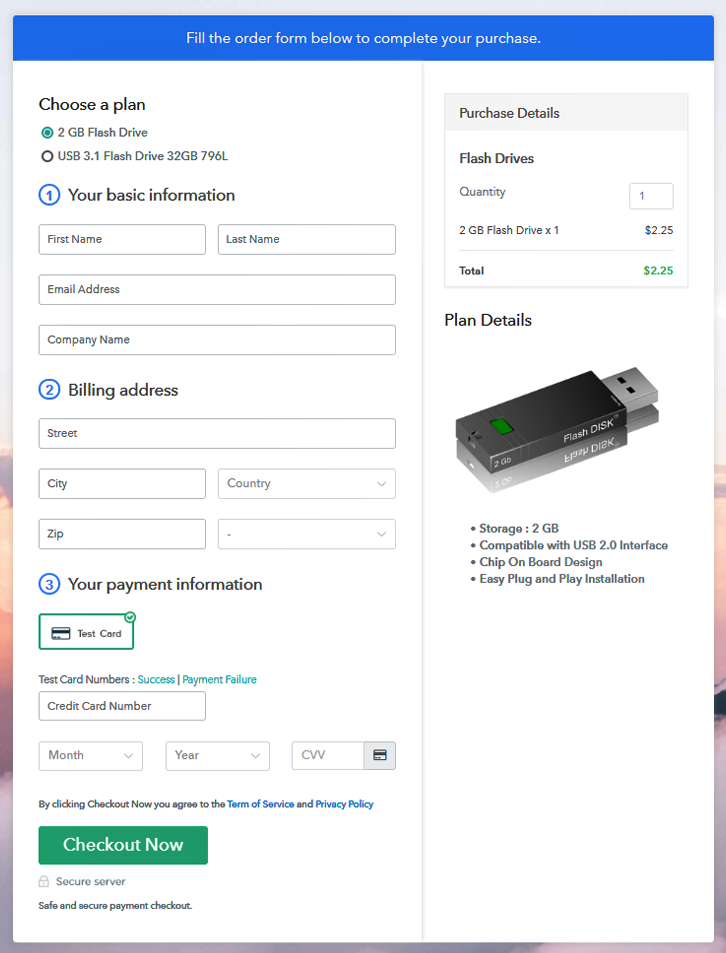
(c) Take a Look at the Checkout Page
Wrapping Up
You May Also Like To Read –