Ideal For: All the festival shops, hotels, food stores, cultural departments and other merchants can use this method to sell festival foods online.
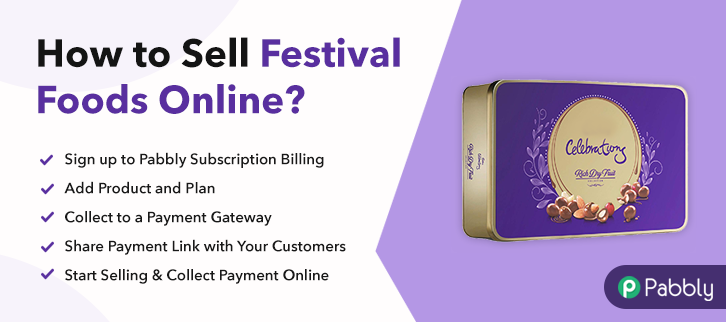
Why Choose this Method to Sell Festival Foods Online?
Unlike any other solution, this method allows you to:
- List and sell your festival foods for FREE. Absolutely no payment required.
- No need to pay commission on any of your sale.
- Multiple payment options like PayPal, Credit Card, etc to collect payment from a single place.
- Sell one time or recurring subscriptions of your festival foods.
- Collect payments & sell products in any currency as per your requirement.
- Give discounts on your products by offering special coupon codes.
- Add sales commission agents to help you in selling festival foods.
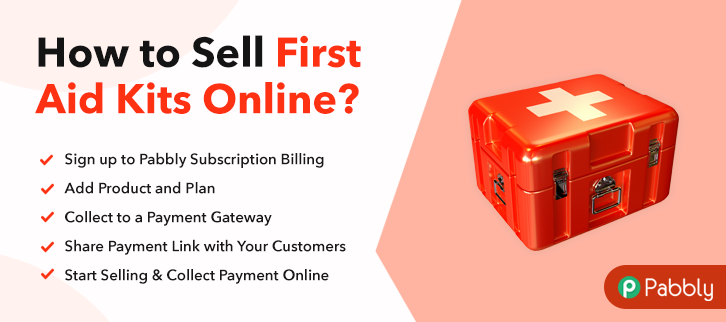
If you are looking for a cheap and easy process to sell festival foods online, you have reached the right article. But before, let me tell you the benefits of selling festival foods online. Well, for starters, you will be inundated with offers from around the world, higher profits due to competitive bidding, lower logistics, flexible working hours, etc.
Now, this article recommends an online tool called Pabbly Subscription Billing, which requires no technical skill to start an online business. The advantage of using this software over others is that you can create incredible checkout pages to list and sell festival foods online without paying any transaction fees. Besides you can add your own logo and collect payments in both offline/online modes. Some other advantages are :
- Unlimited Products Listing
- Revenue Tracking
- Auto Credit Card Reattempts on Decline
- Generate Unlimited Revenues
- Create Unlimited Coupons, Plans & Discounts
- Automatic Email Notifications
- Easy Import/ Export Customer Data
- Custom Domain
So, enough chit-chat lets create our first checkout page with Pabbly Subscription Billing to sell festival foods online.
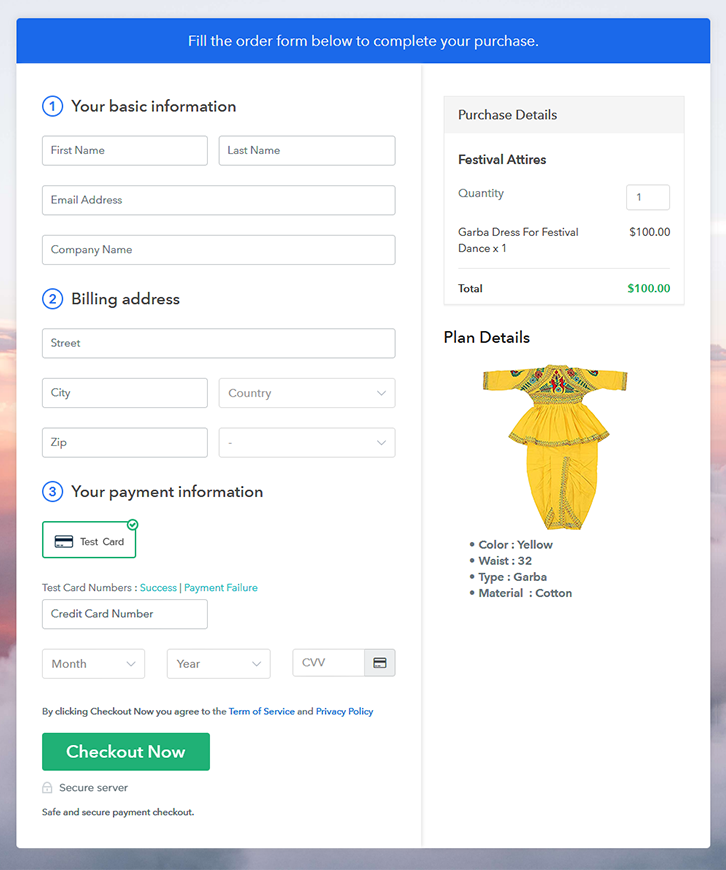
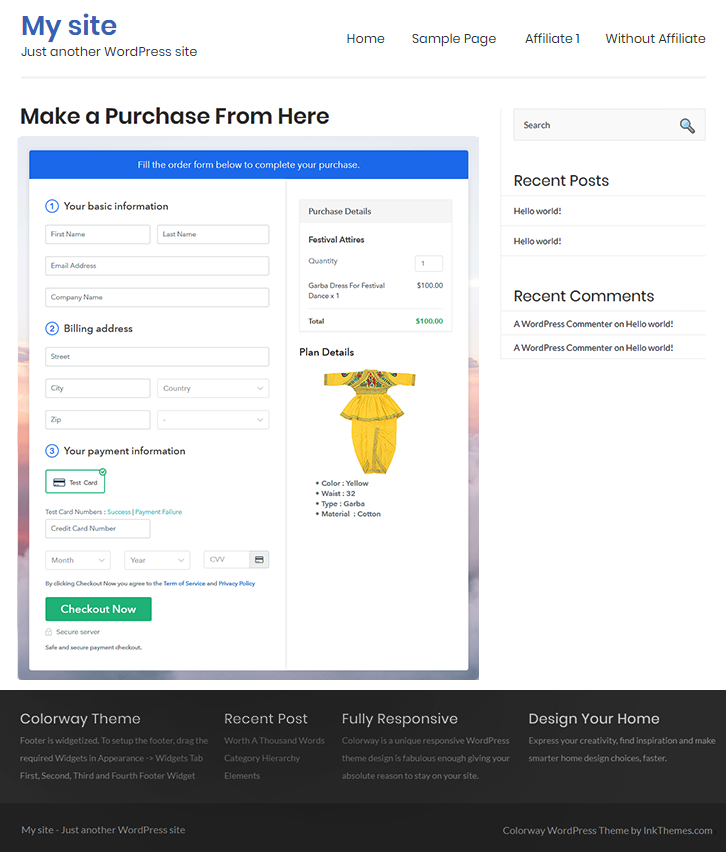
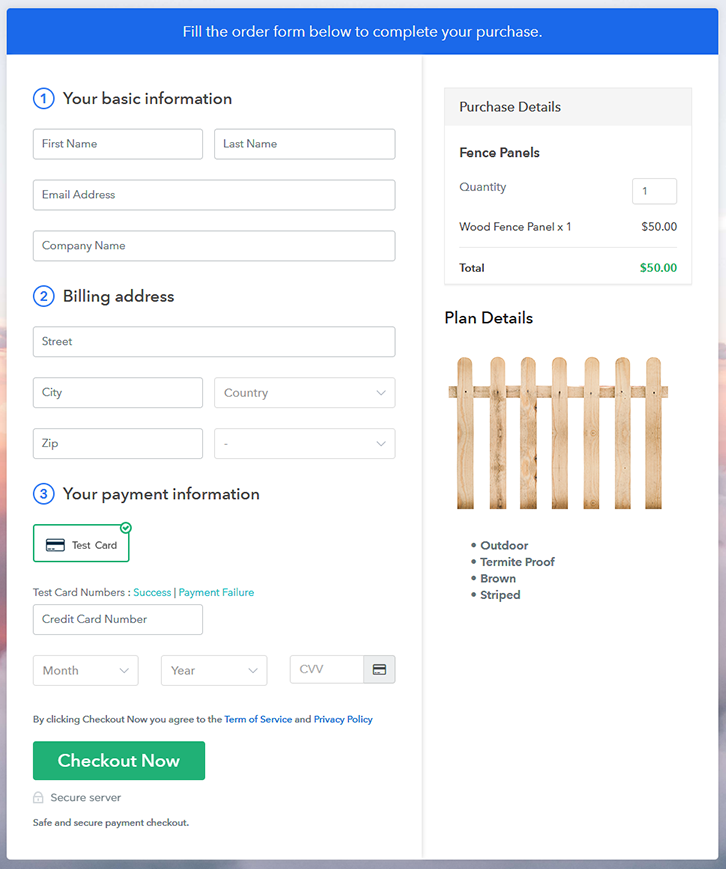
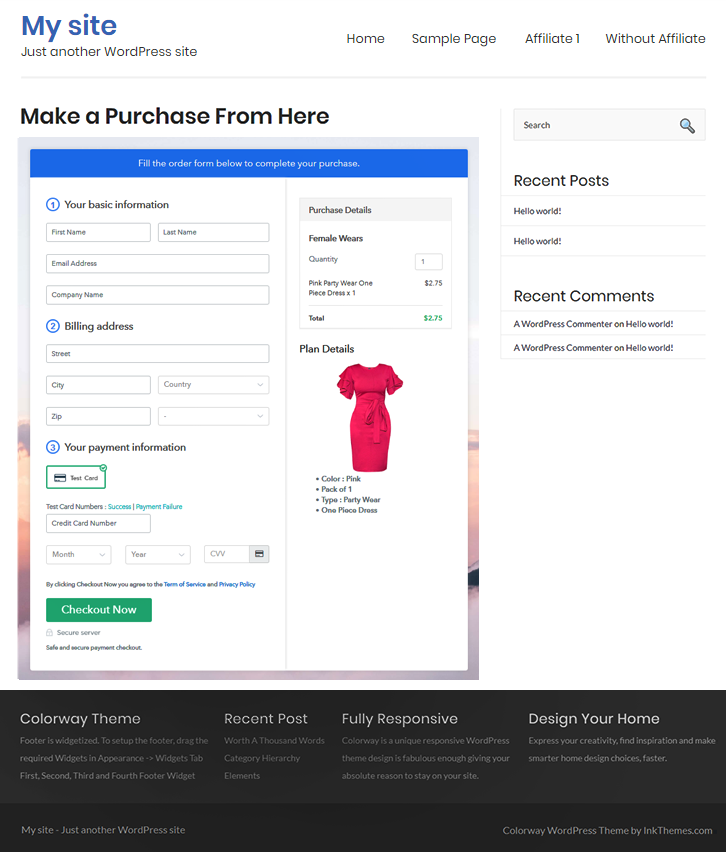
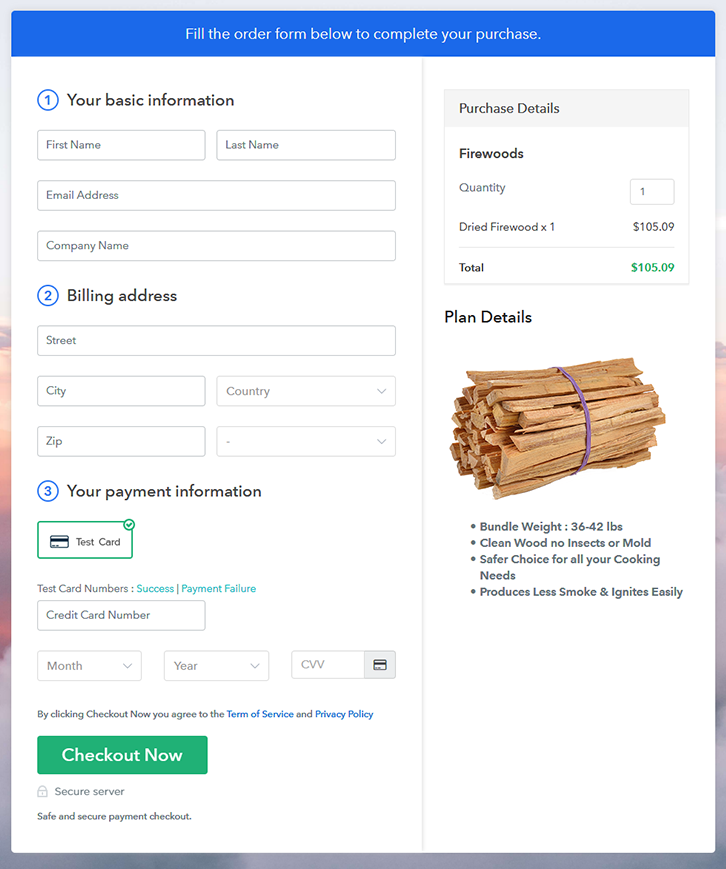
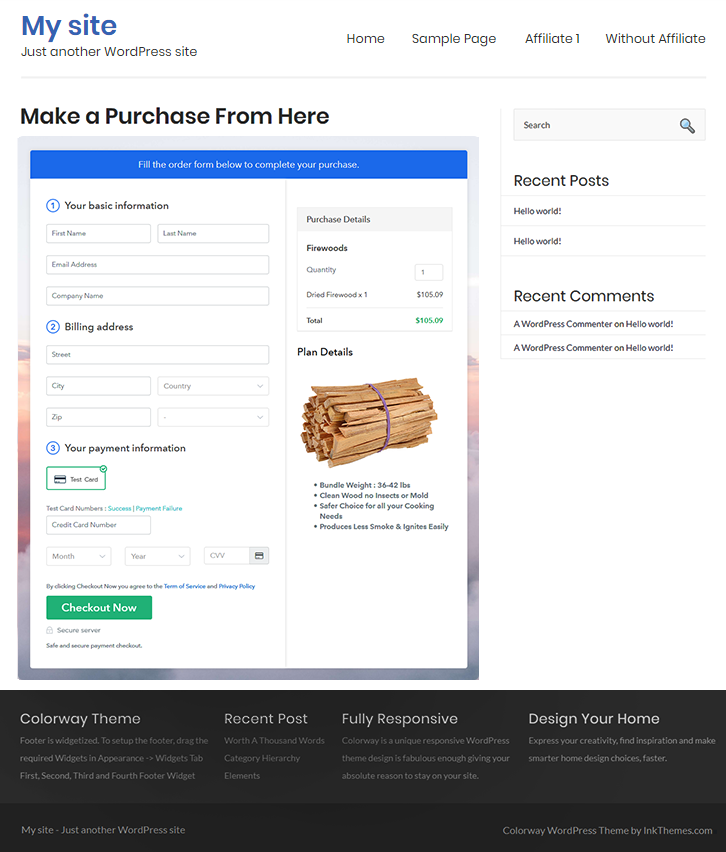
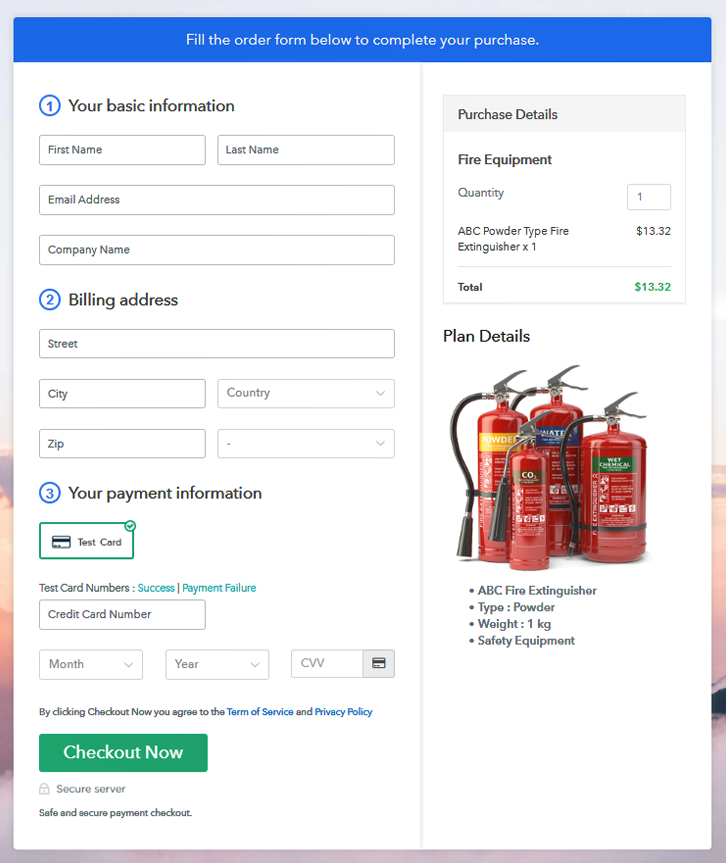
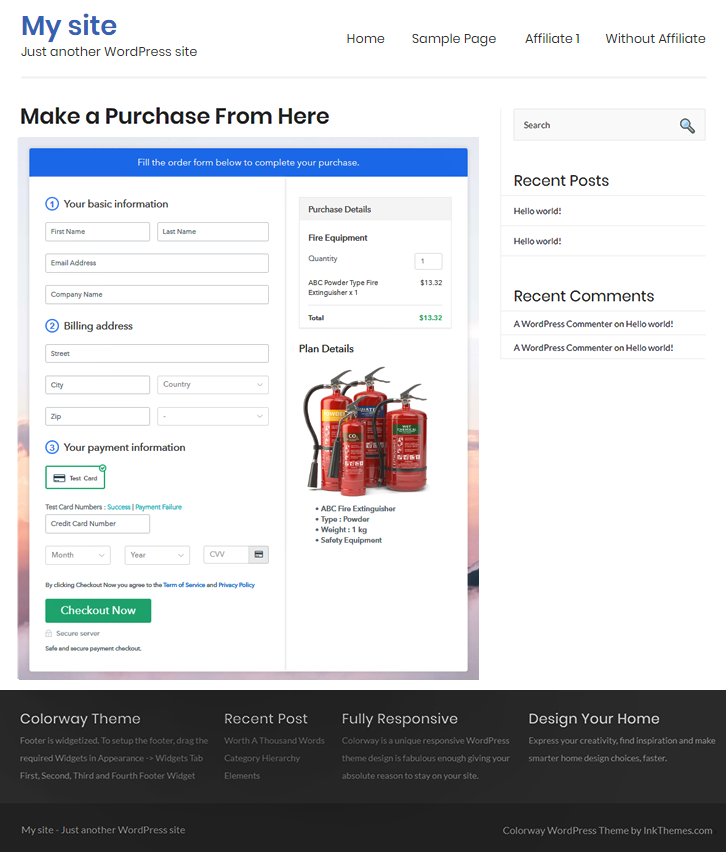
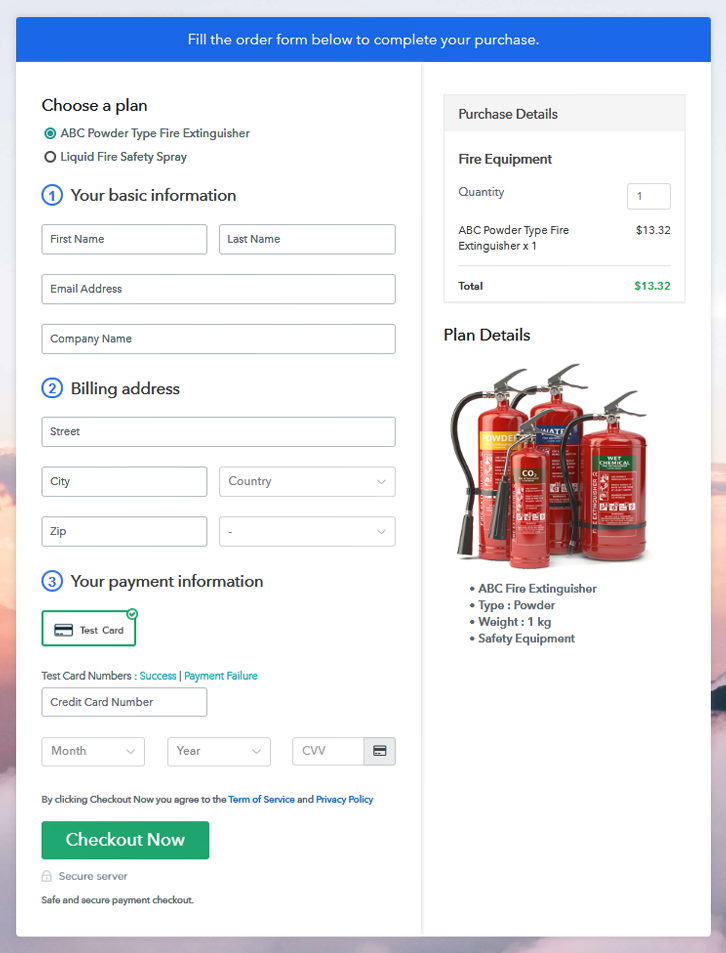
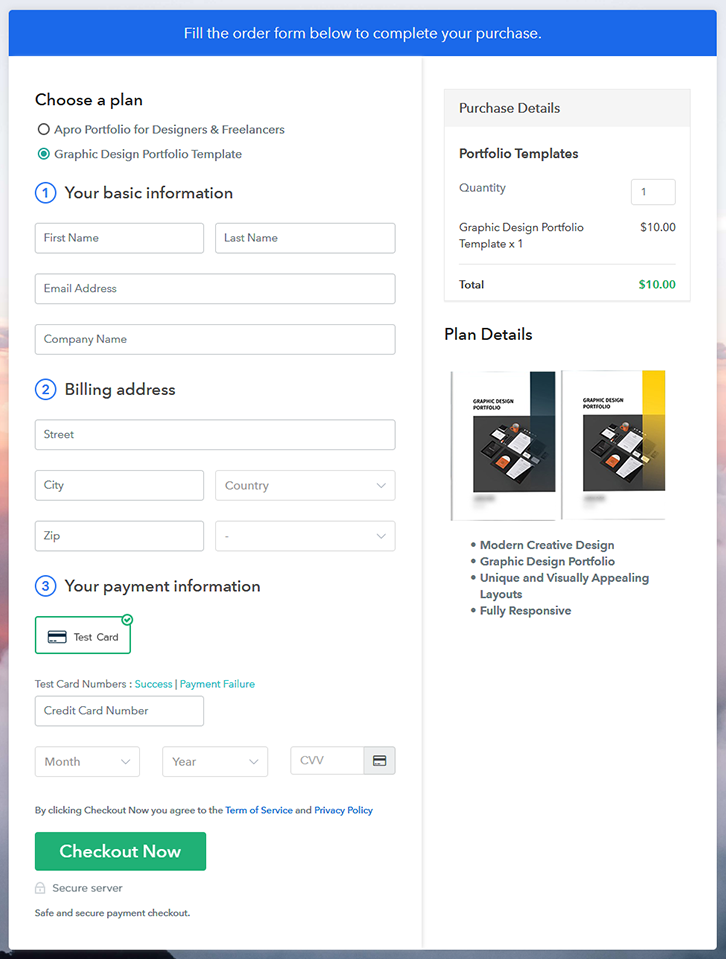
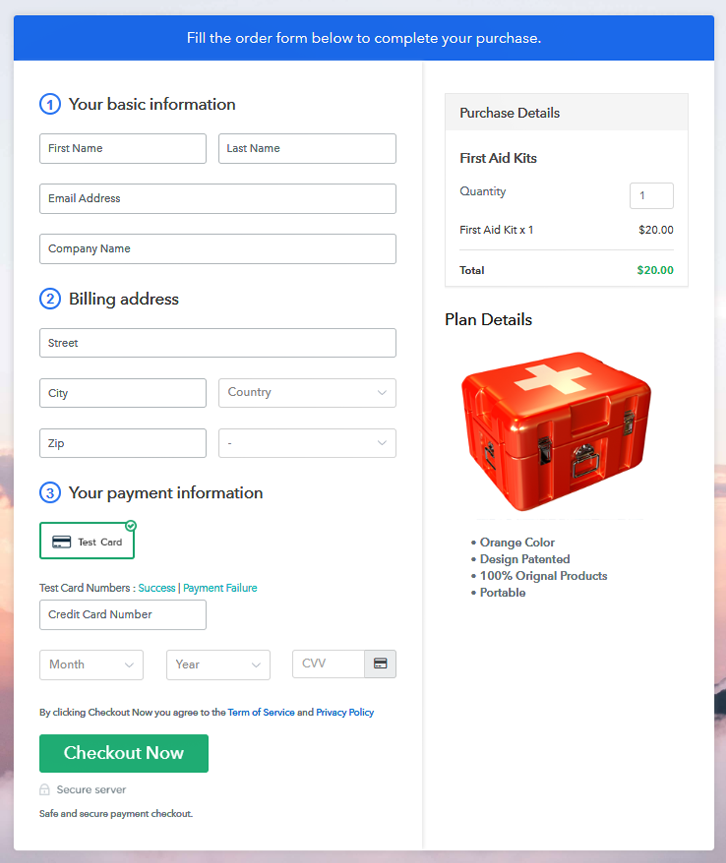
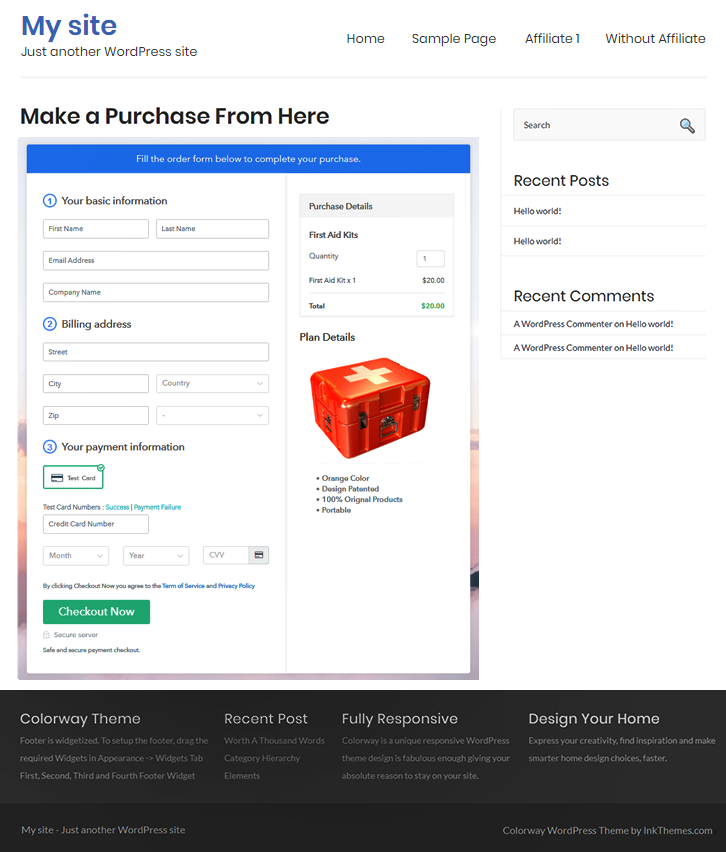
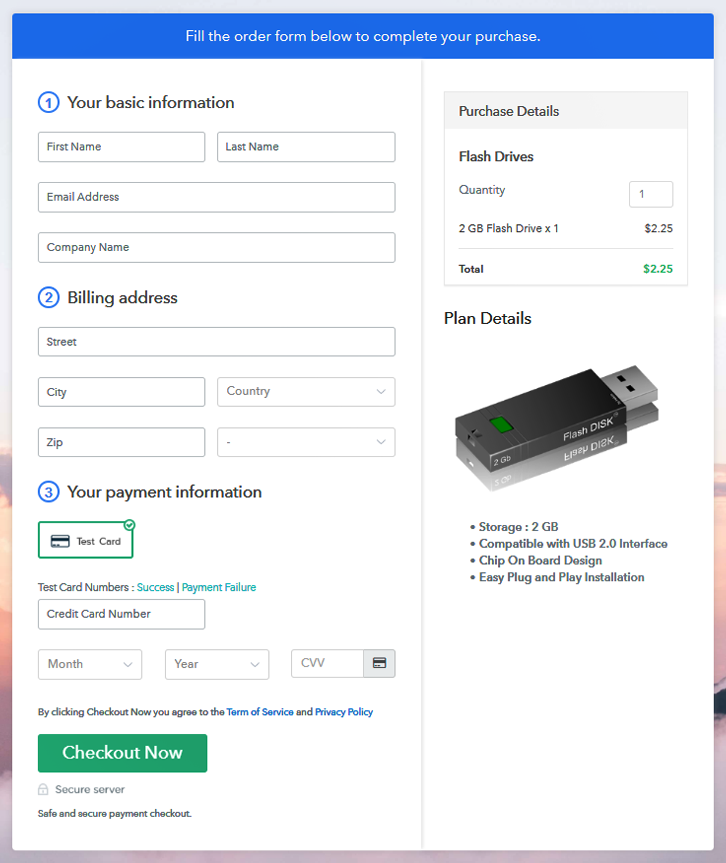
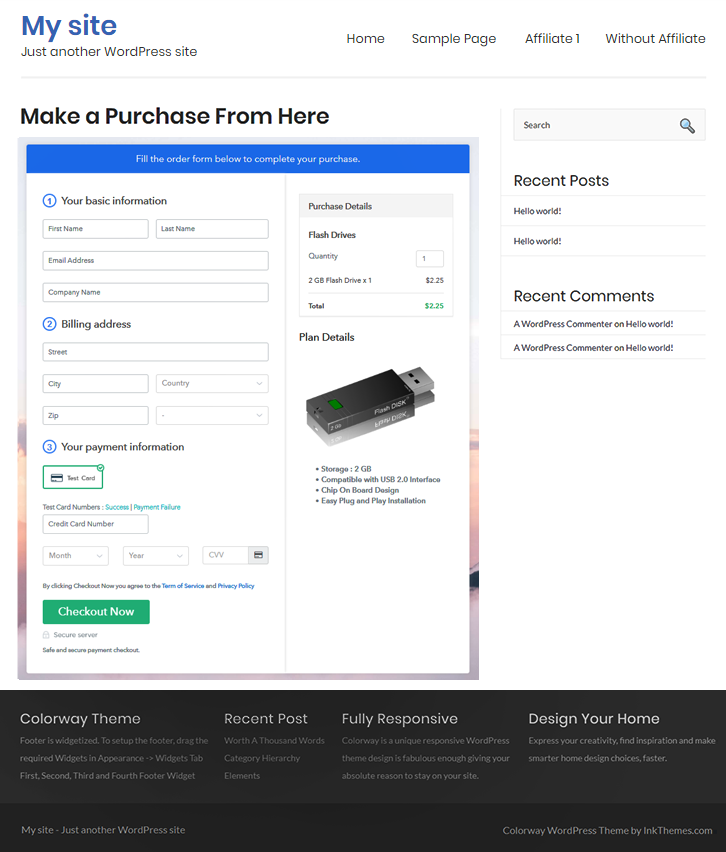
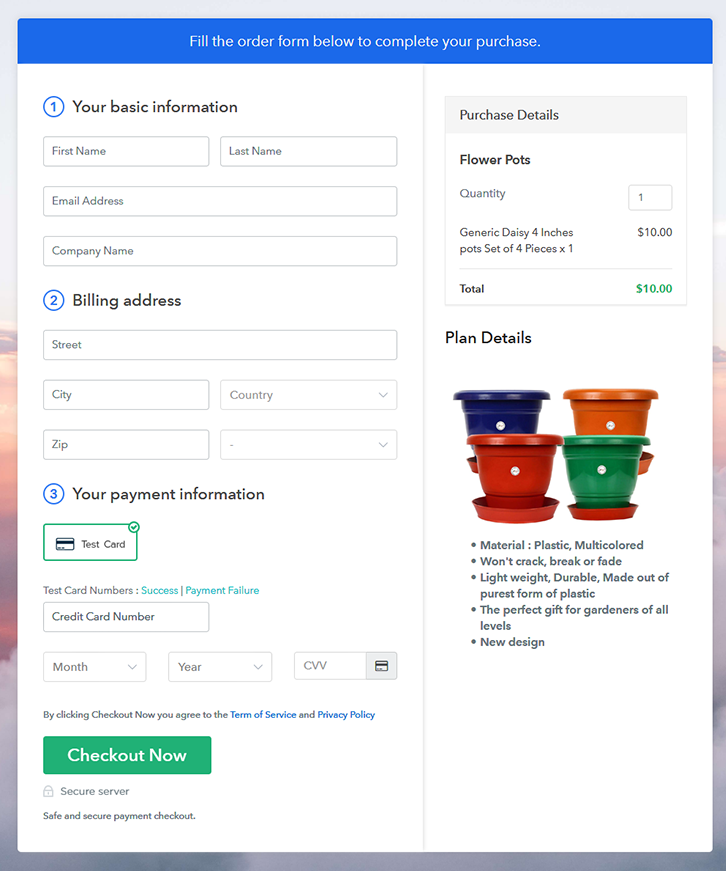
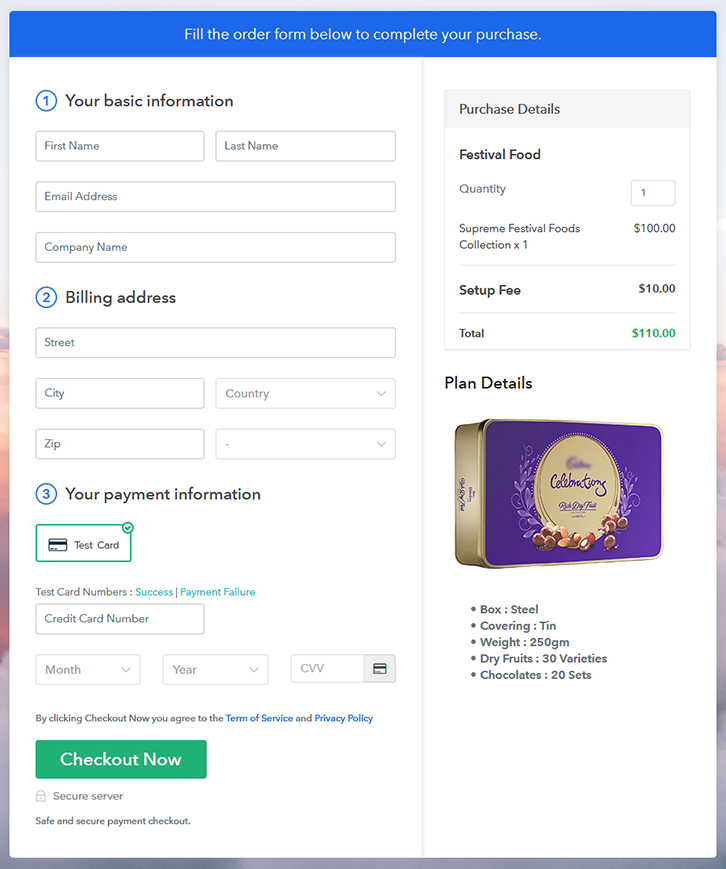
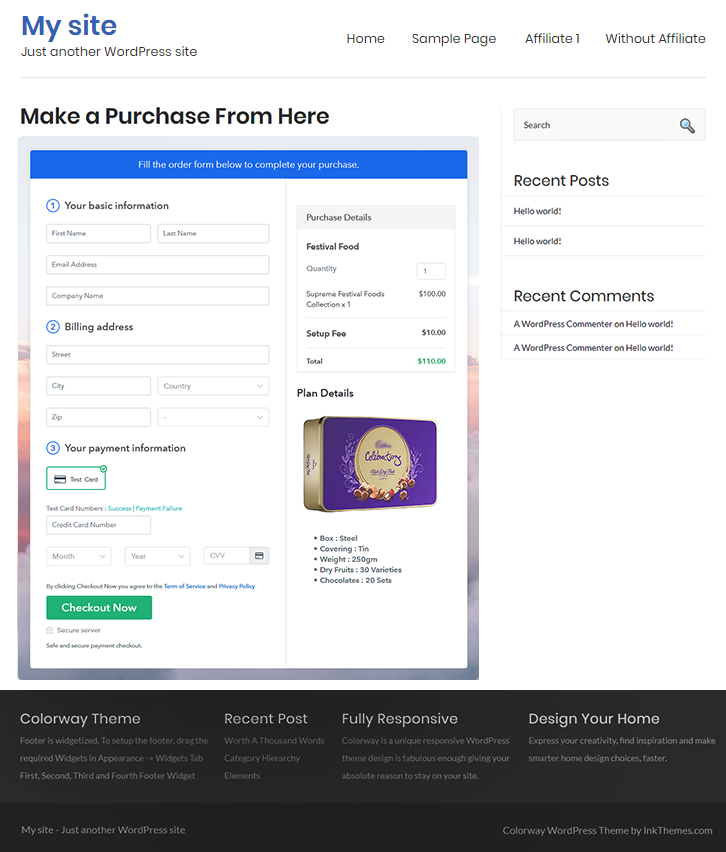
Final View of Checkout Page for your Festival Foods Selling Business
Step 1: Log in to Pabbly Subscription Billing

First to start the process look for the website Pabbly Subscription Billing in your search engine. Here click on the “Sign up Free“ button. You can either manually fill all the information or simply sign in using your Gmail account.
Sign Up For Free!
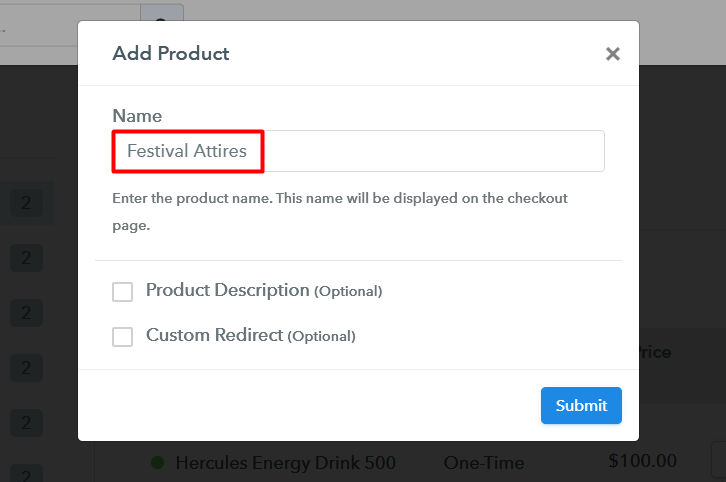
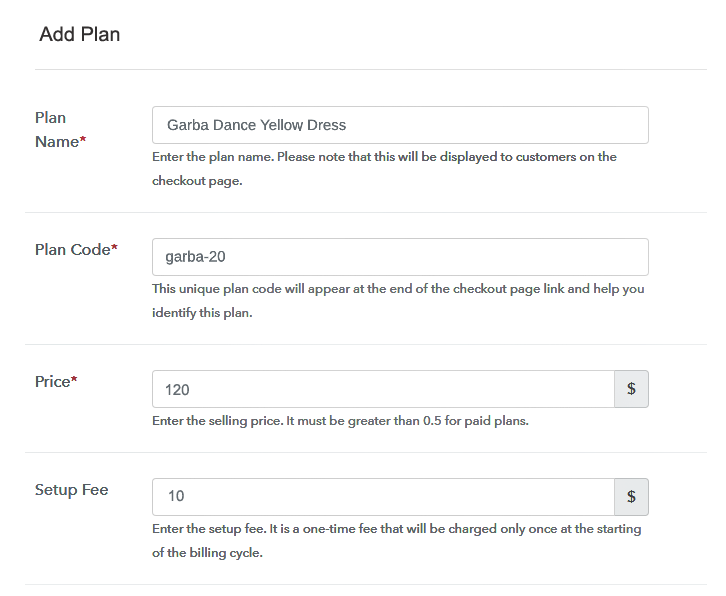
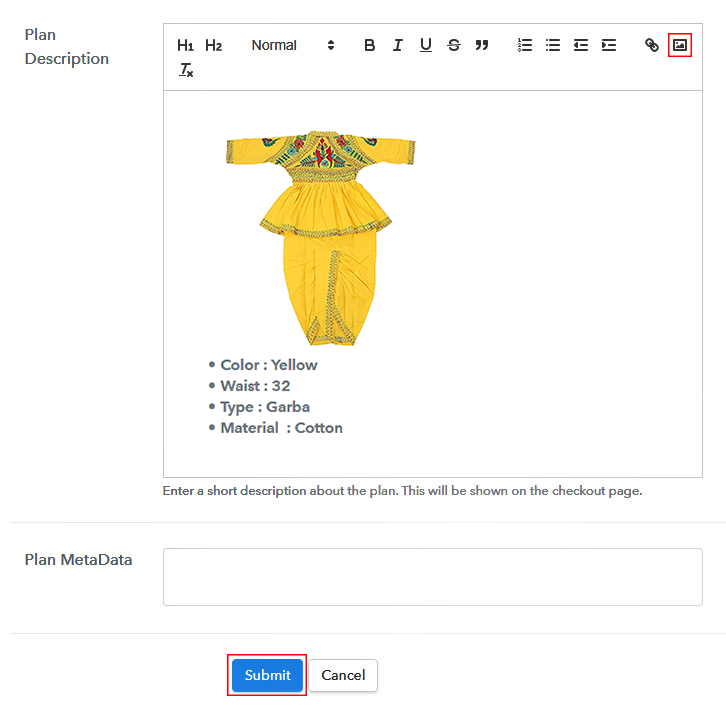
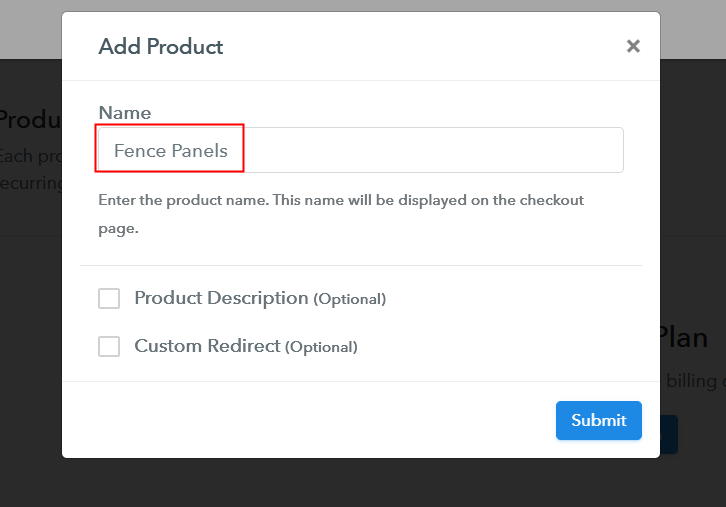
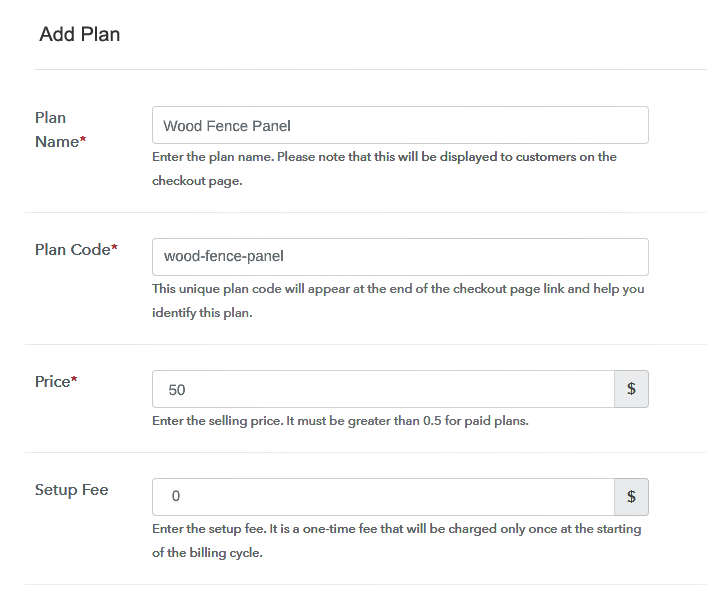
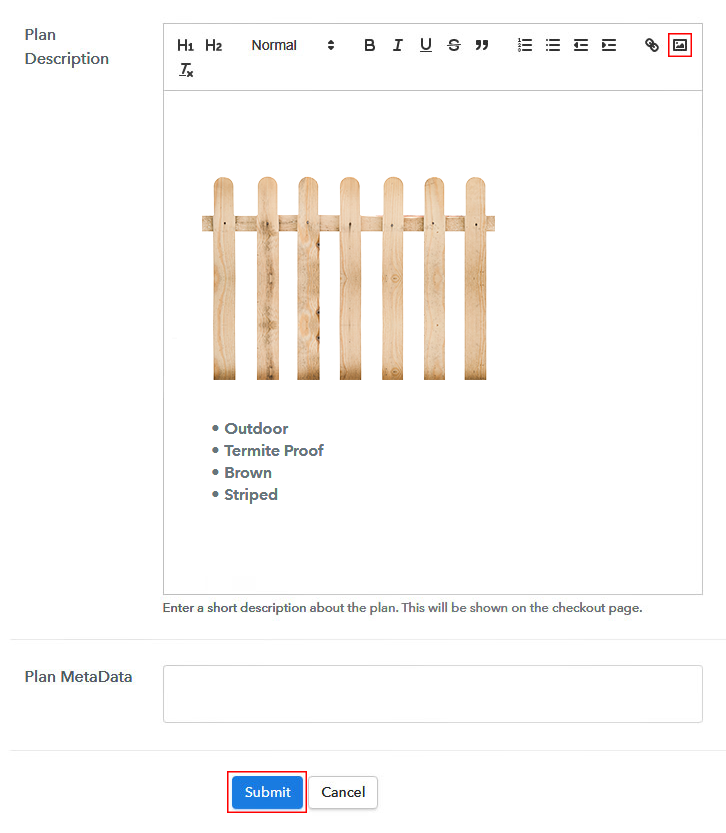
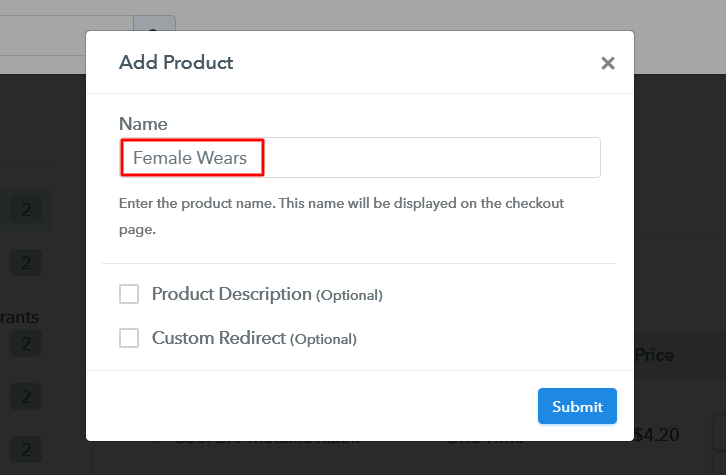
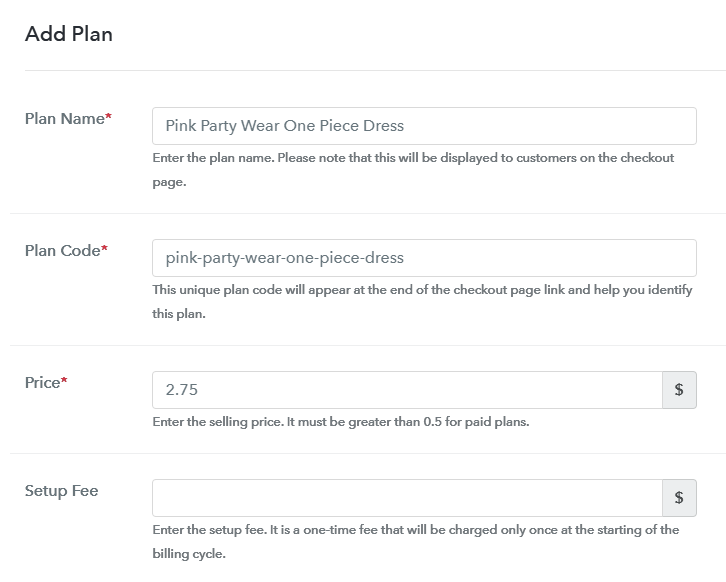
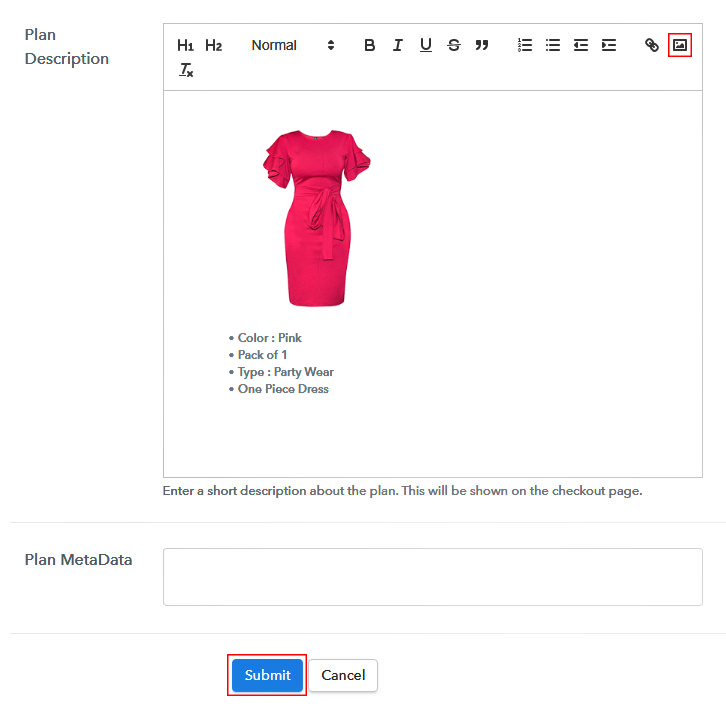
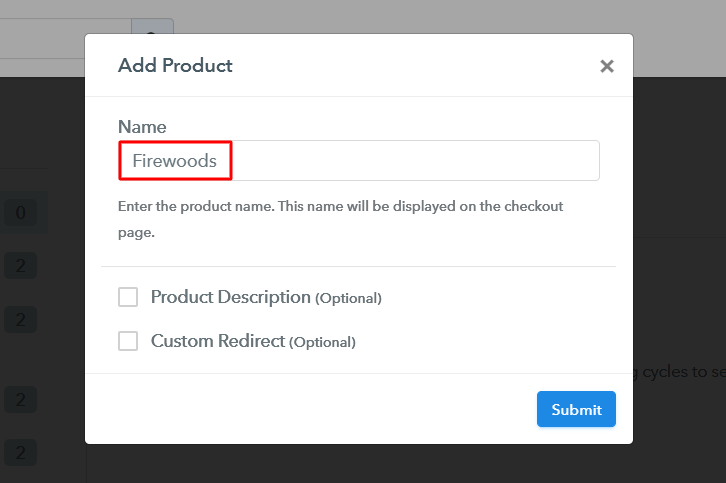
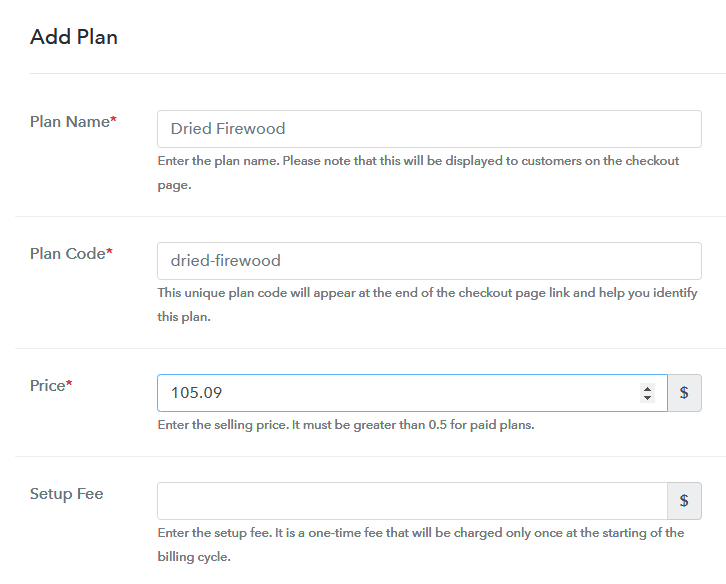
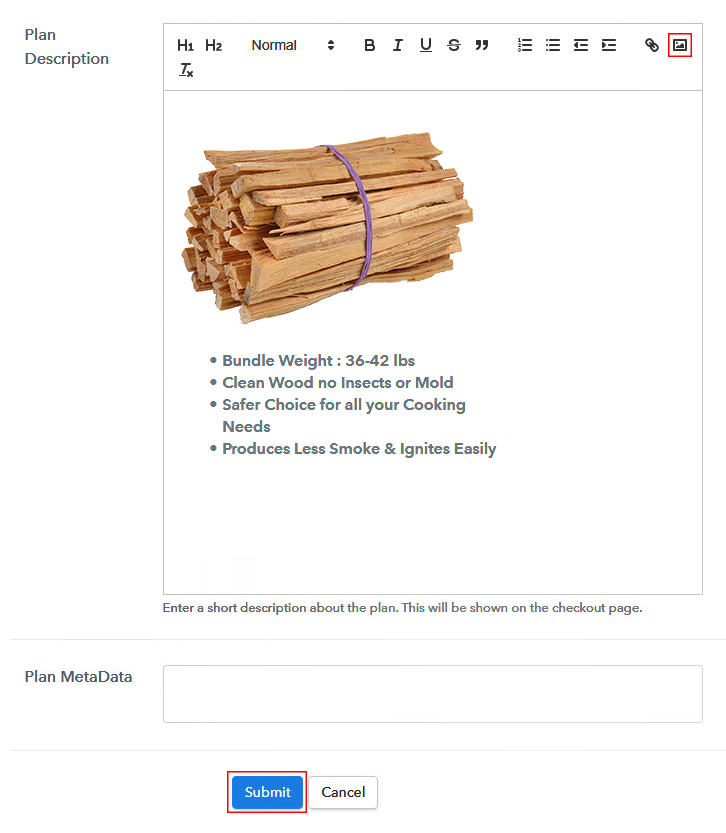
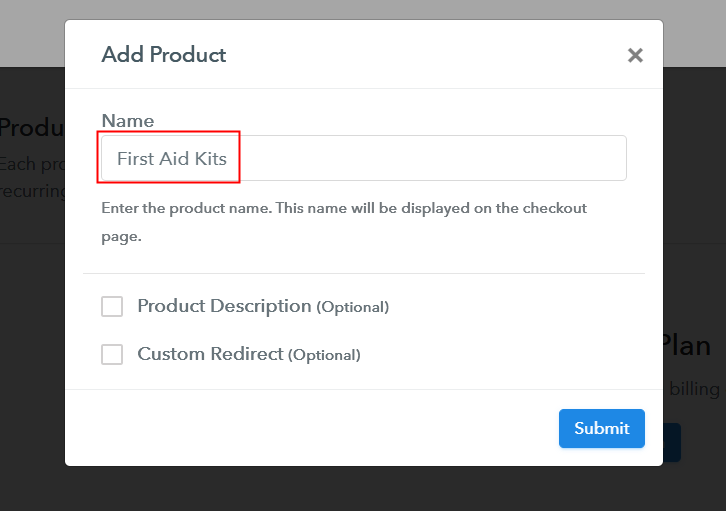
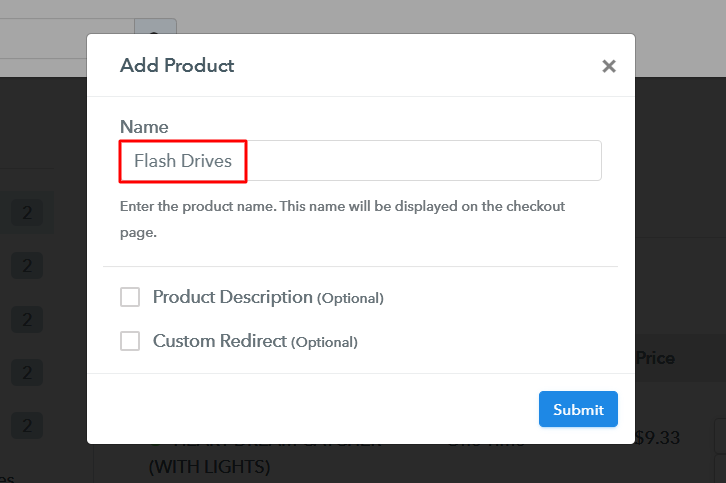
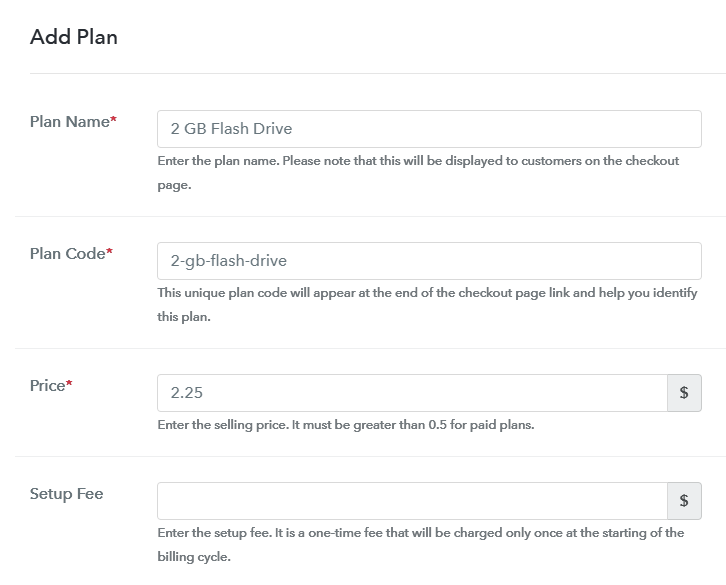
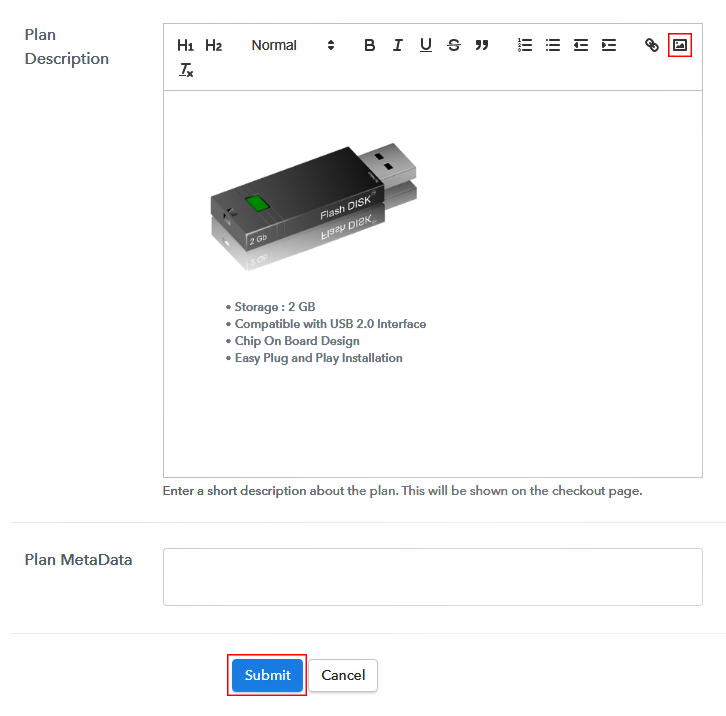
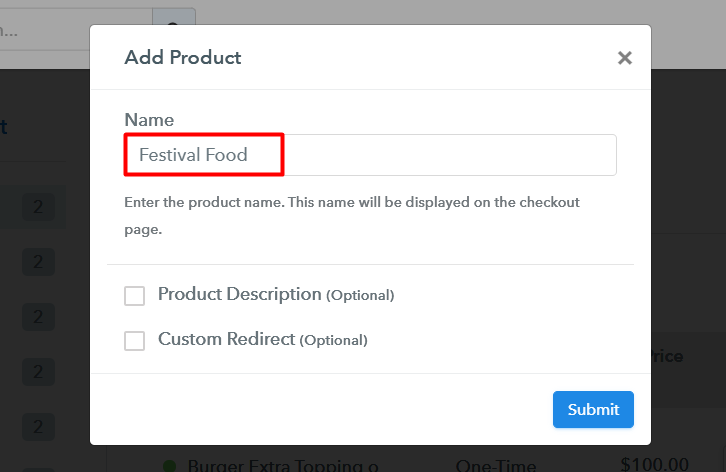
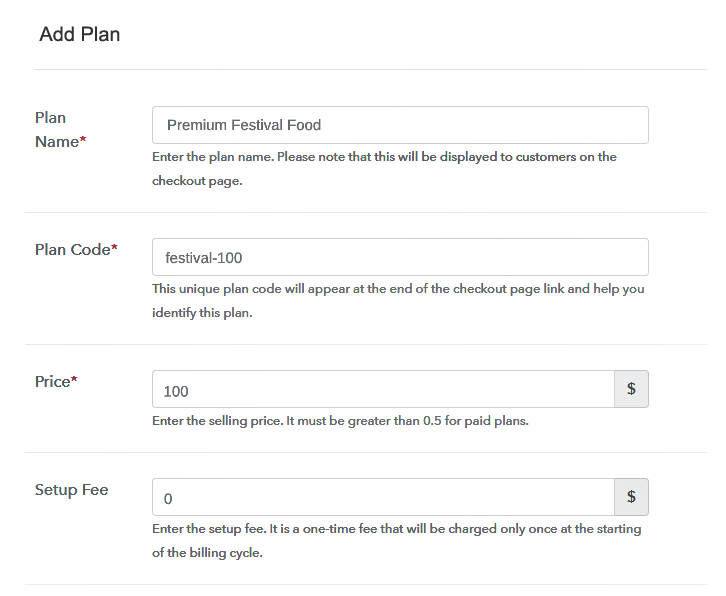
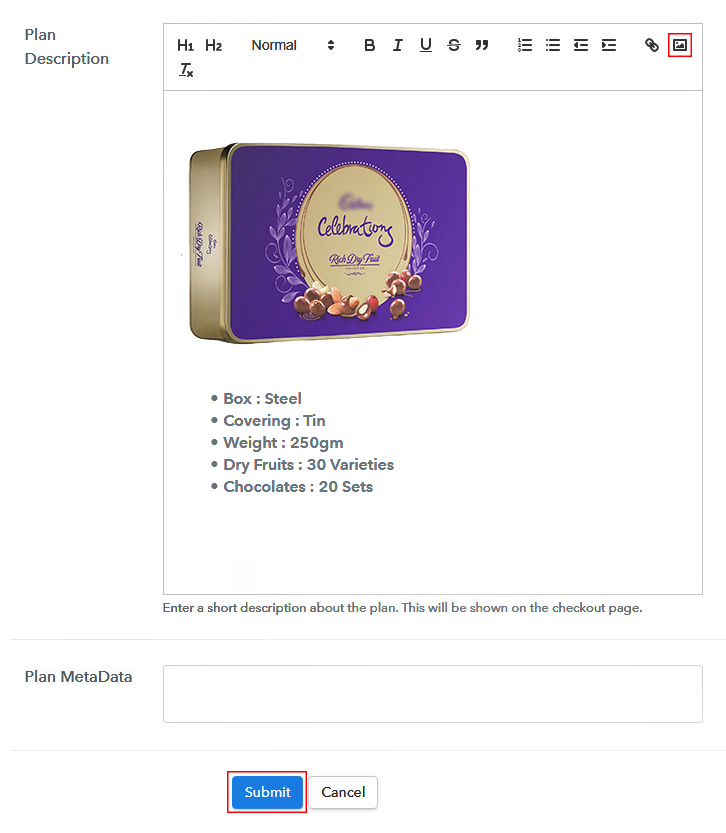
Click on the “Access Now” button of the software, a page will redirect with fields like company name, select currency, and phone number. Just fill out those details to continue creating a checkout page for festival foods. To prevent glitches during transactions, Pabbly Subscription Billing provides a dummy payment gateway where you can beta test the entire payment experience of the customer in advance. Payment gateways such as Razorpay, Stripe, and many more can be easily integrated using Pabbly Subscription Billing. There is an integration guide for each of them below this para. But I am going ahead to enable the test payment option to continue the process. I am hoping that the payment gateway integration went well, so let’s start adding the products. Below the “Enable Payments” segment there is the “Add your product” section click on it. This will generate a dialog box with a blue button “Add New Product”. Click on it. You have to add the required product title, in this case, it is ‘festival foods’. Fill out all the details like the name of the product and voila your product is created. Note: Here you can add all the products related to the similar category by creating plans for each of them. Now let’s create plans for different kinds of festival foods available in your store. In the plan page, fill in information like plan name, code, price, setup fees, etc. Moreover, while coming down you will find different billing models like one-time payment, recurring, based on cycles, etc. Now, choose the one that interests you the most. Furthermore, you can change it any time you want. Take some good images of festival foods and upload it by clicking the image button. After uploading the images add some important information about festival foods like expiry, date of manufacture, etc, and then press the “Submit” button. Using the same process, you can list more products. Follow up the recommended steps to preview the checkout page: Also, just copy the link and add the checkout page to sell the festival foods online at any suitable place on your WordPress site. Further, paste the plan link of the fast-food on a text editor of the WordPress dashboard. Next, click the “Publish” button, after making changes. Note: In case you want to sell multiple products via a single checkout page, you can create a multi-plan checkout page otherwise skip this step. So, you learned a simple and easy method to sell caskets online with Pabbly Subscription Billing. Don’t restrict yourself with the steps mentioned in the article, go ahead, and explore the software. Its mind-blowing features will definitely rock your e-commerce world. Since you are new to this, you may have some doubts about the payment processing and billing, so feel free to ask any questions in the comment section below. Thank You.Step 2: Select Subscription Billing

Step 3: Account Setup

Step 4: Connect Payment Gateways & Start Festival Foods Selling Business Online

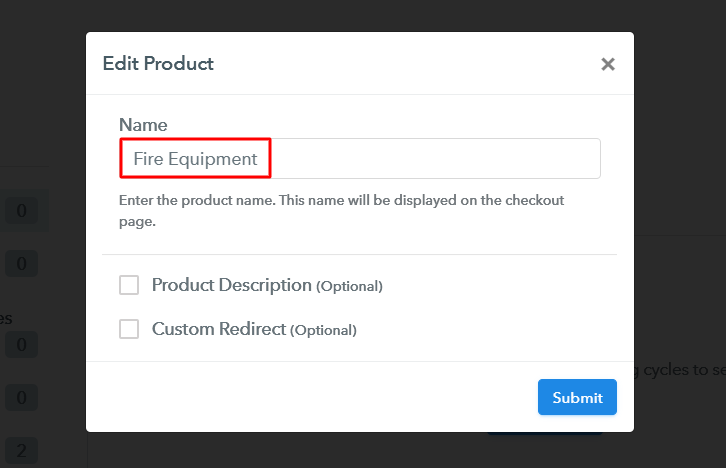
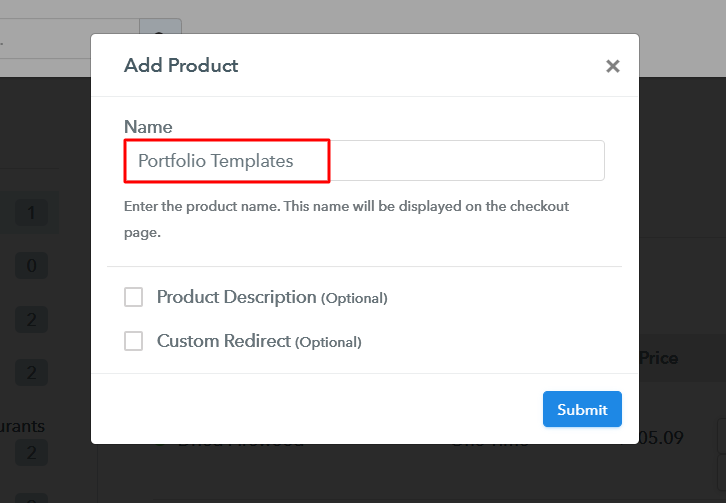
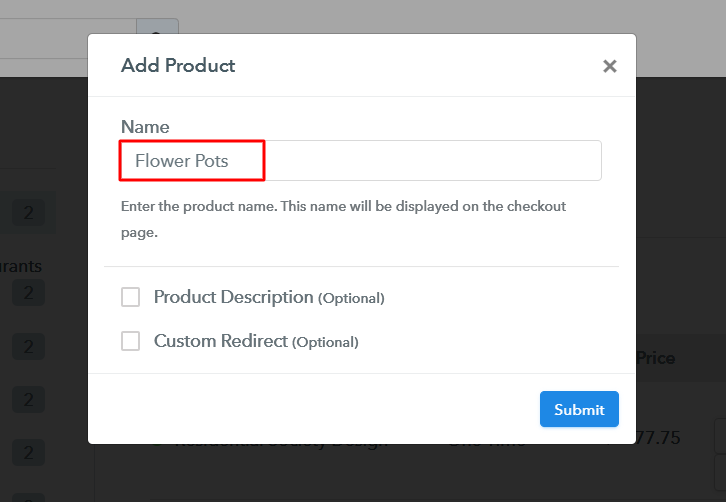
Step 5: Add Product for your Festival Foods

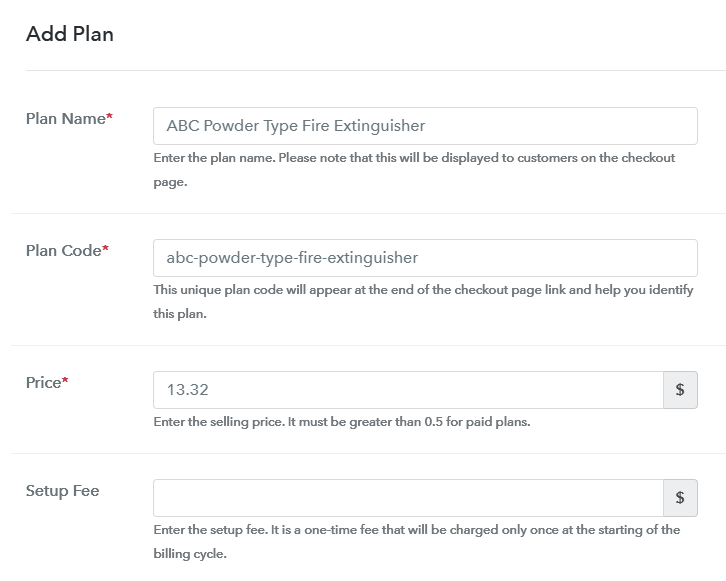
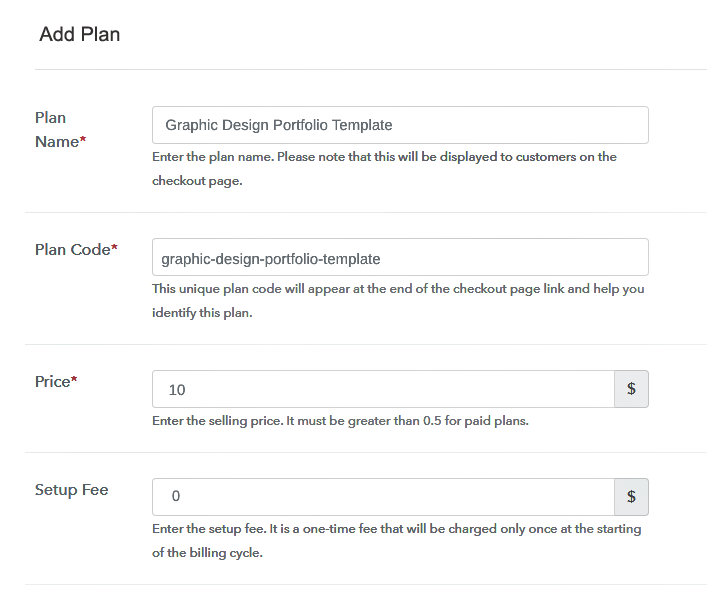
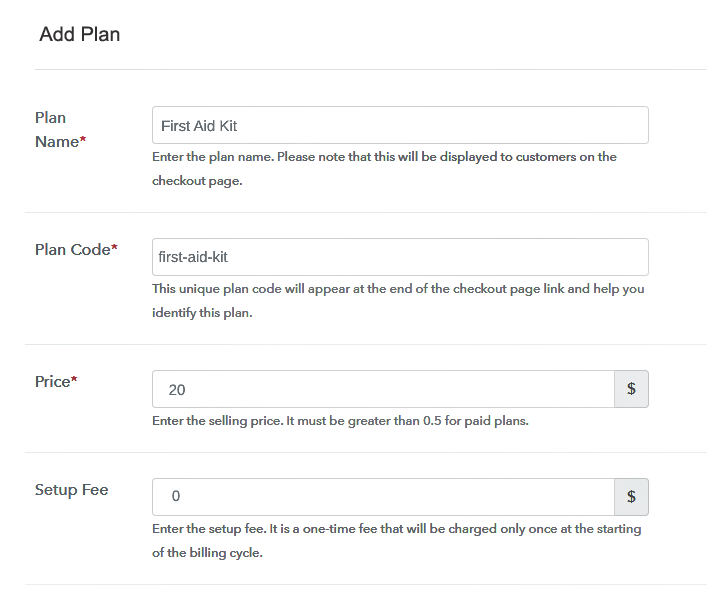
Step 6: Add Plans
(a) Select Add New Plan

(b) Specify the Plan & Pricing Details
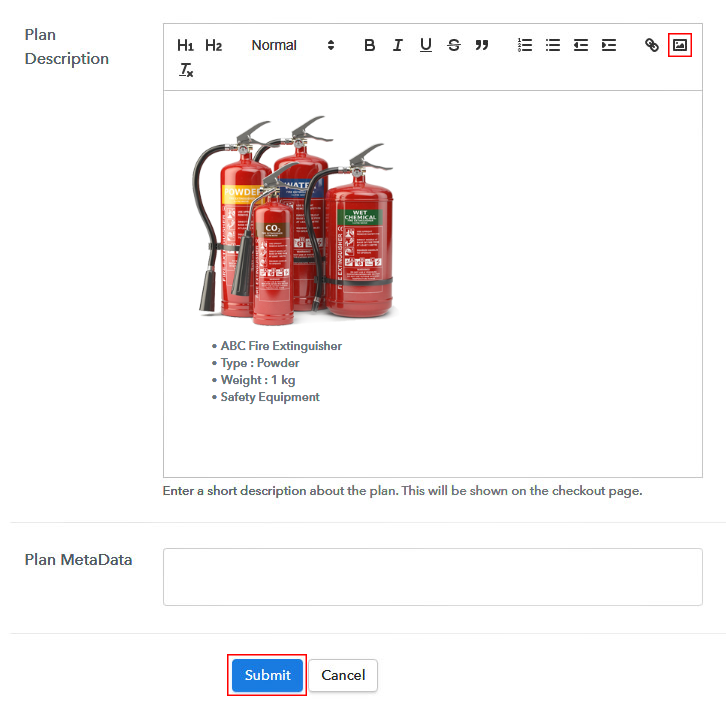
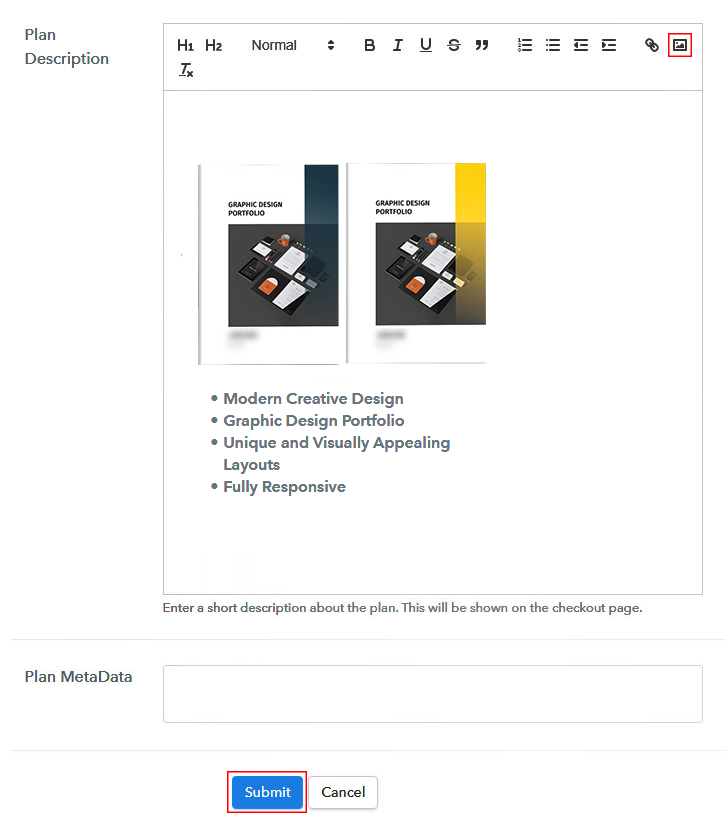
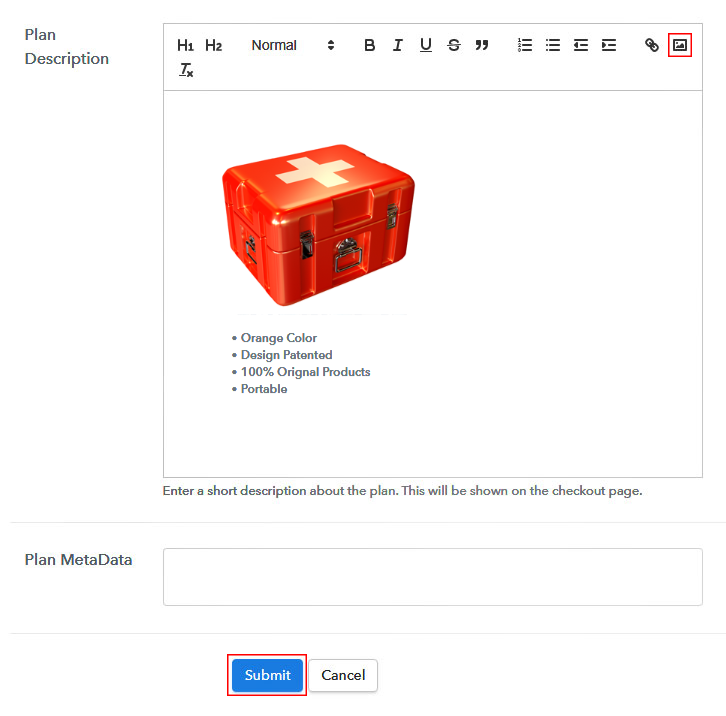
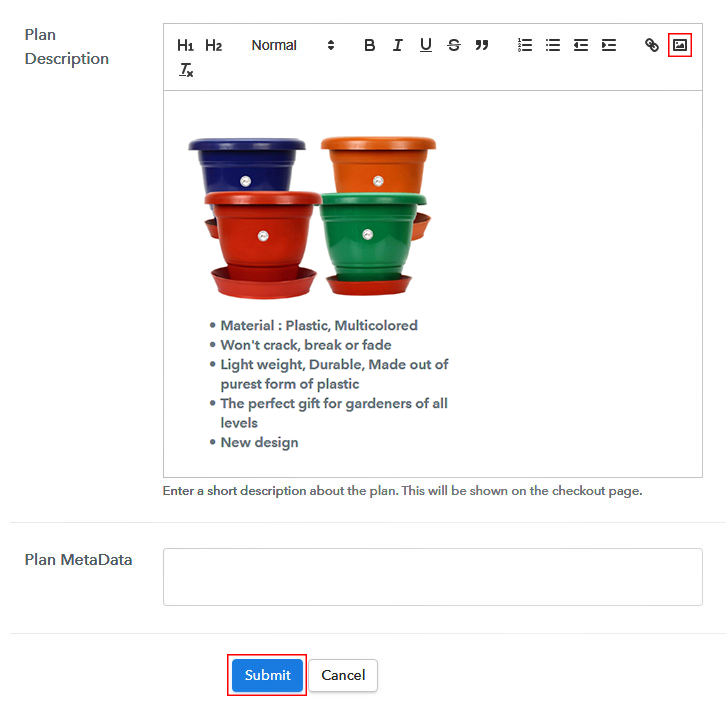
(c) Add Image & Description of Festival Foods
Step 7: Share your Checkout Page

Step 8: Preview Checkout Page
(a) Click on the View Button

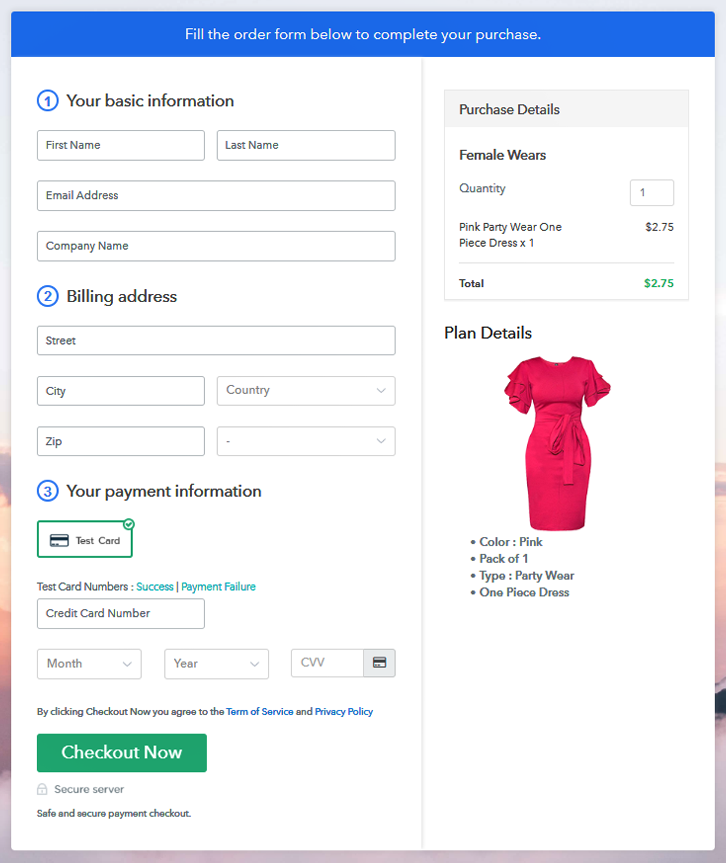
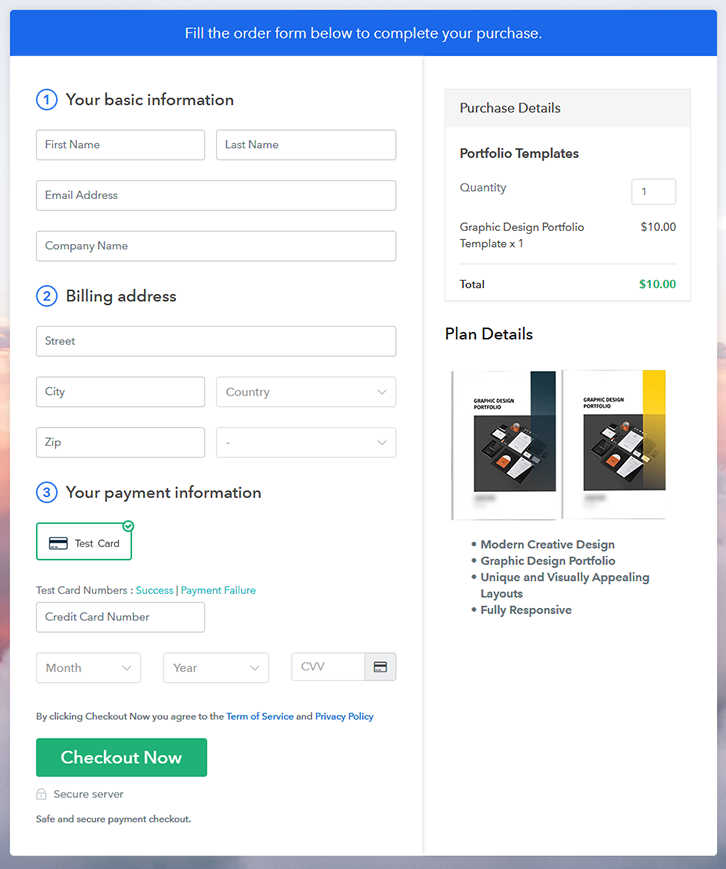
(b) Take a Look at the Checkout Page
Step 9: Embed Checkout Page in Site & Sell Festival Foods Online

(a) Edit the Page & Paste the Copied Link

(b) Save & Publish the Checkout Page

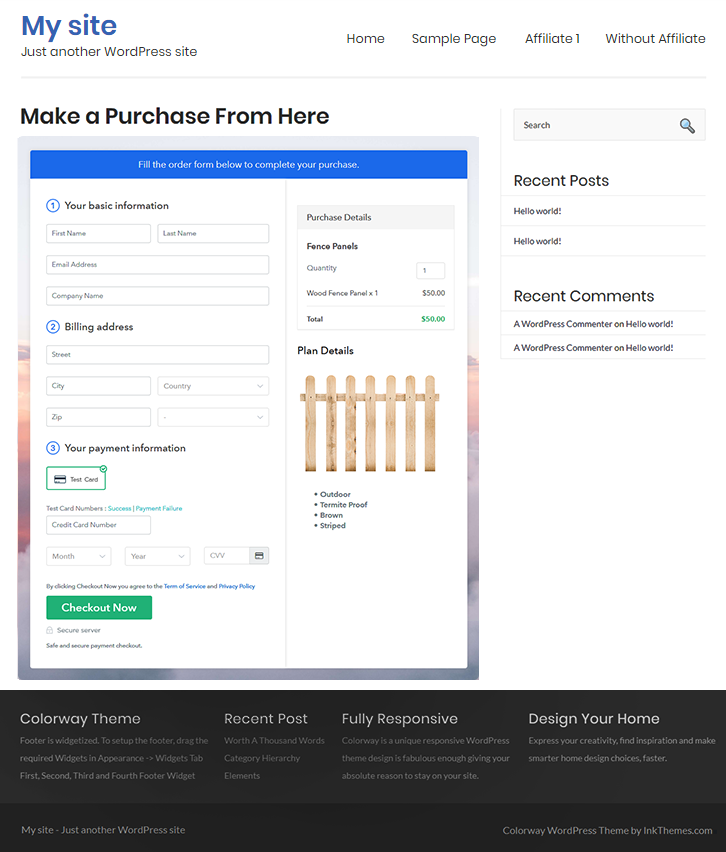
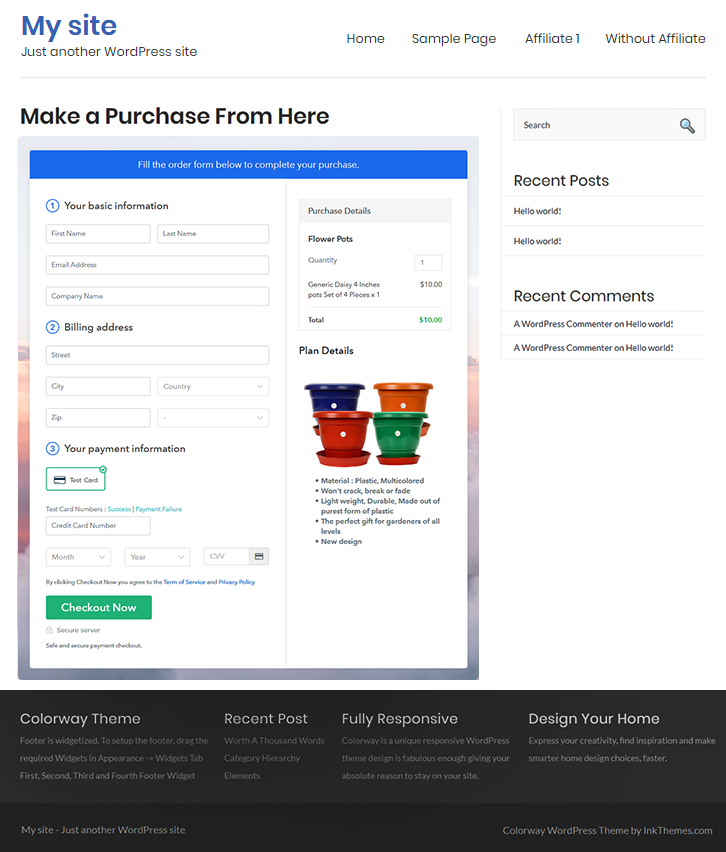
(c) Check out the Final Look of your Checkout Page on WordPress Site
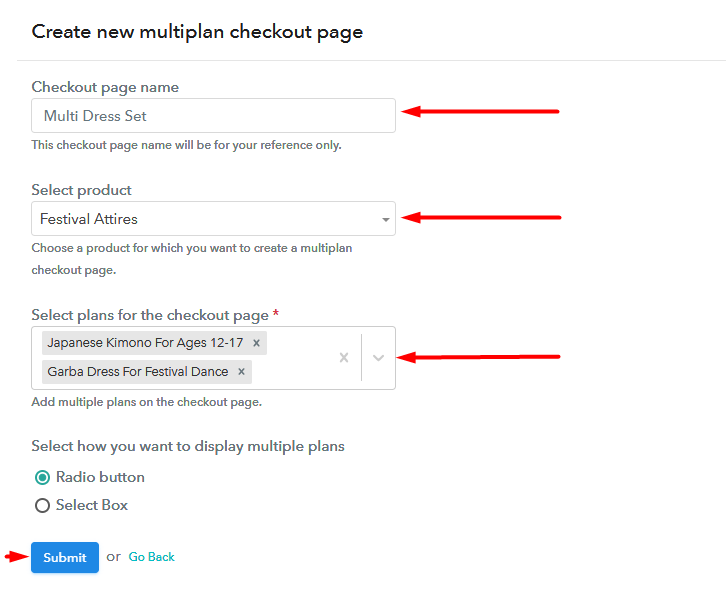
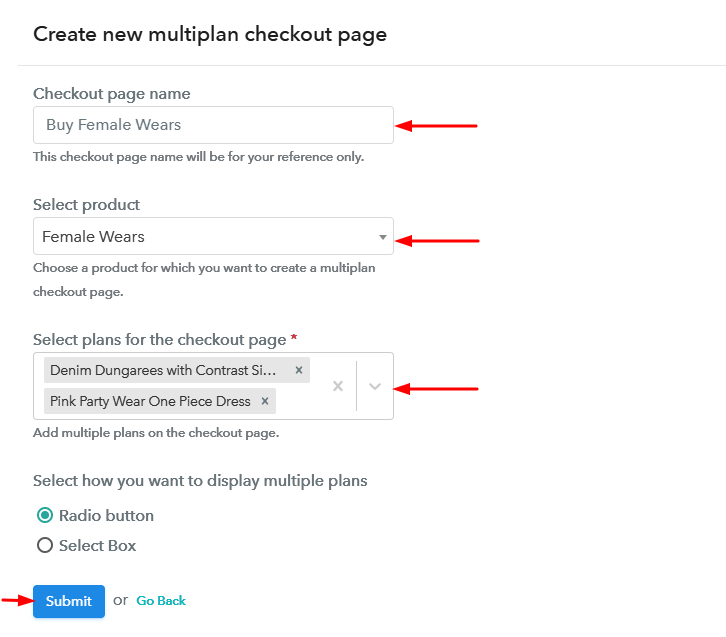
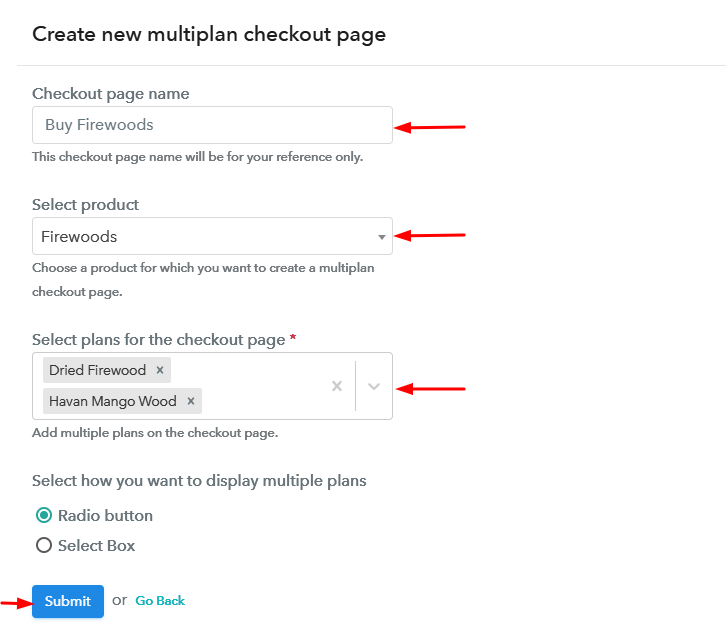
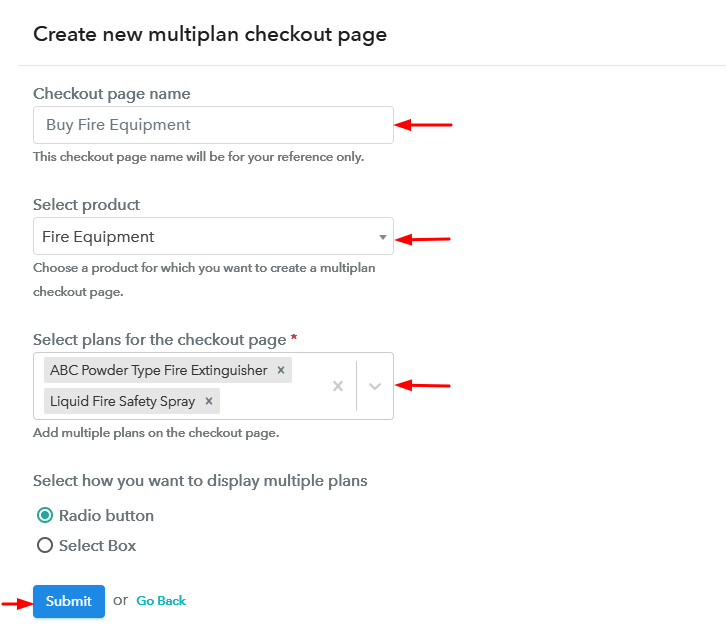
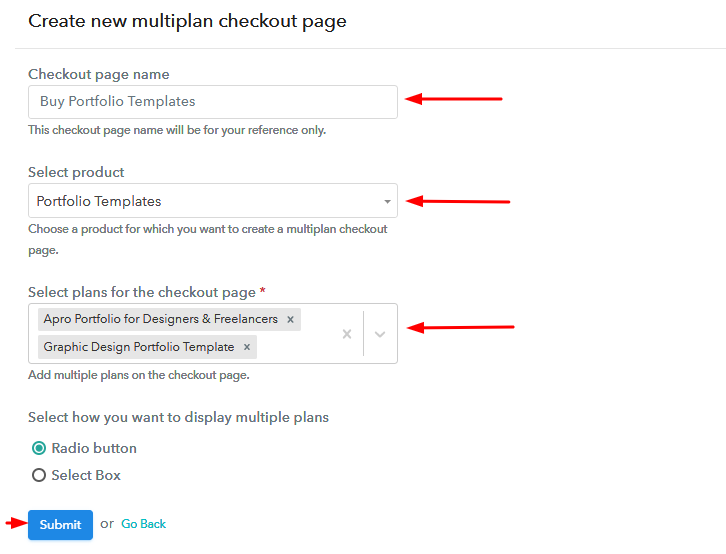
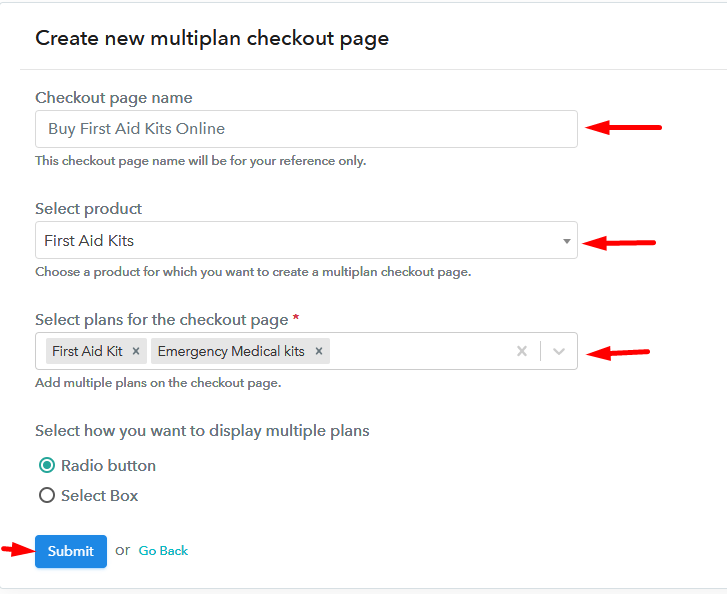
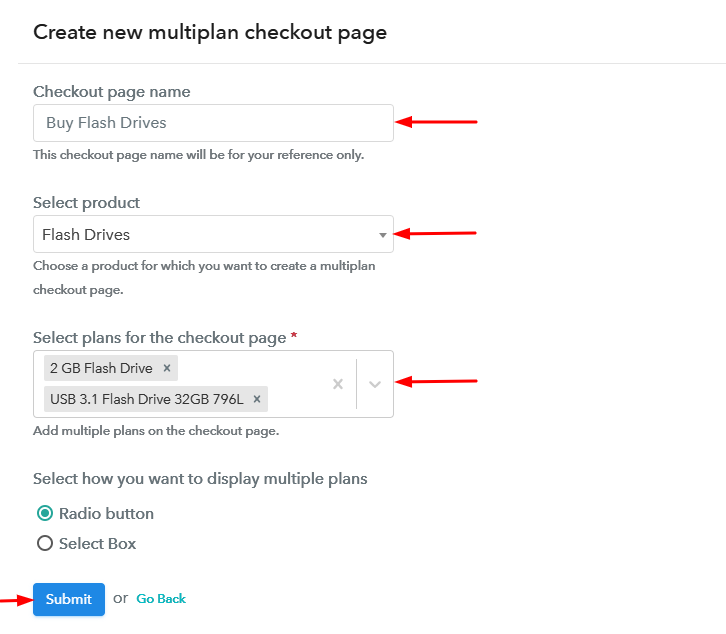
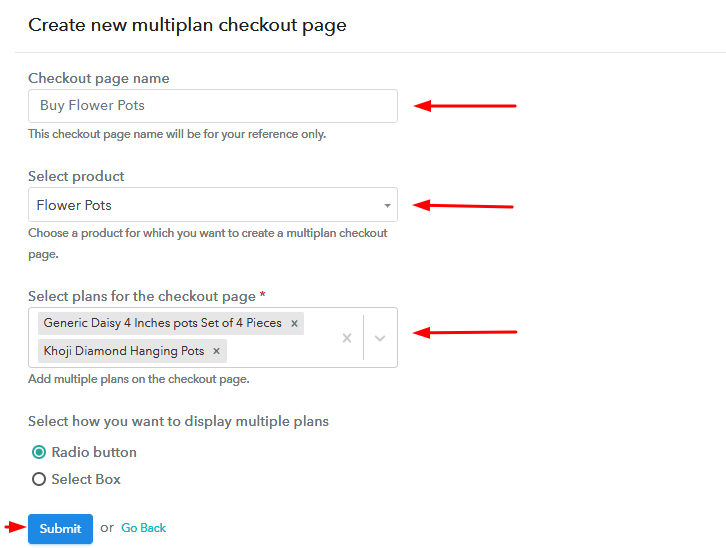
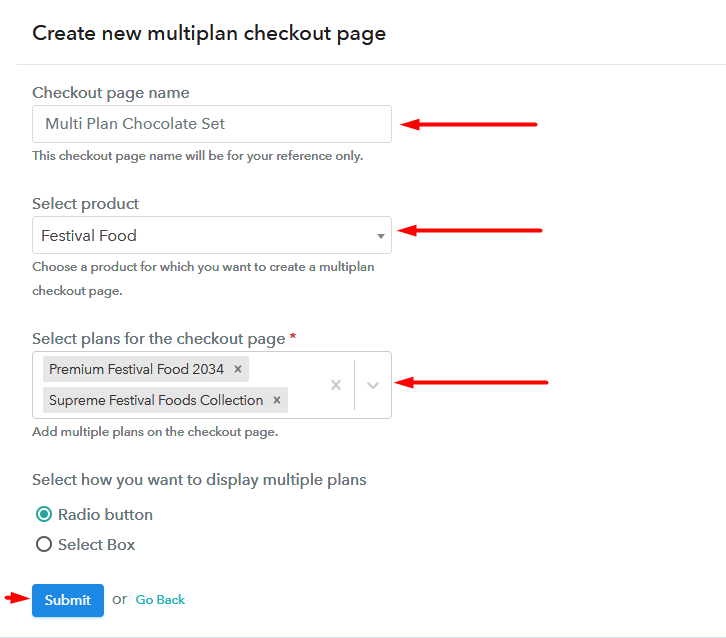
Step 10: Multiplan Checkout Page
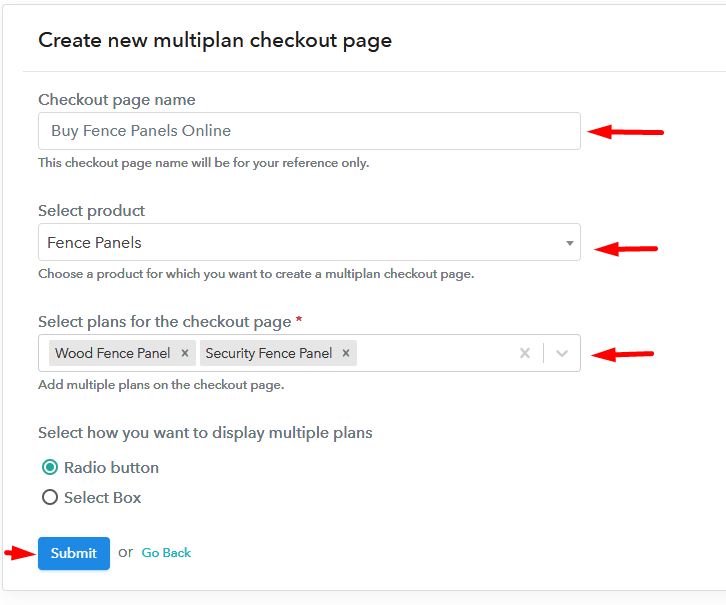
(a) Click on Add Mutiplan Checkout

(b) Add Plans to Sell Multiple Festival Foods Online from Single Checkout Page
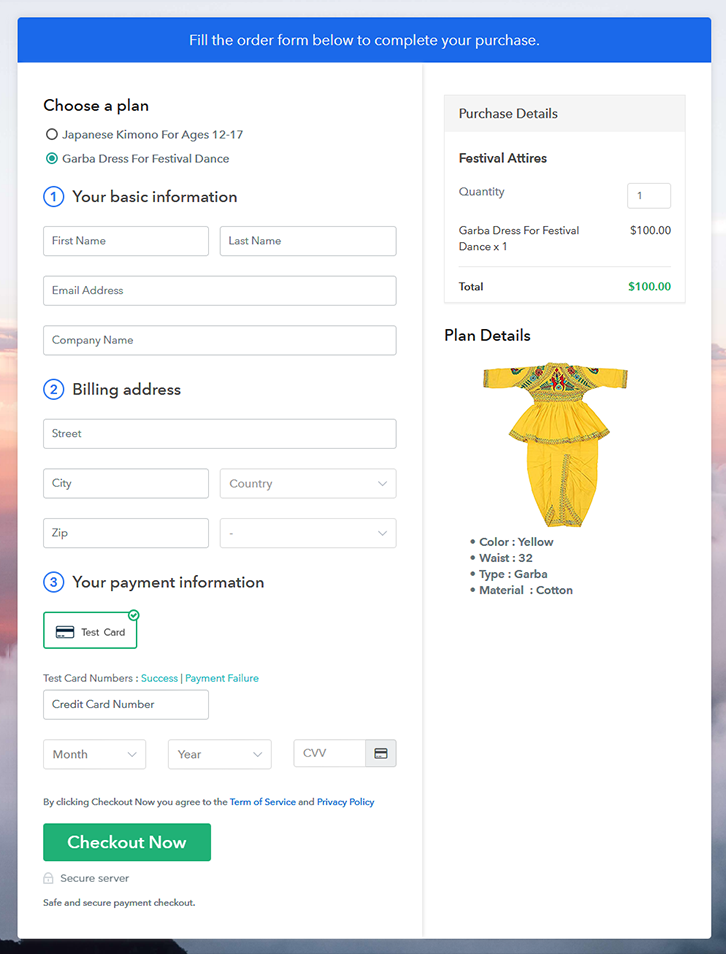
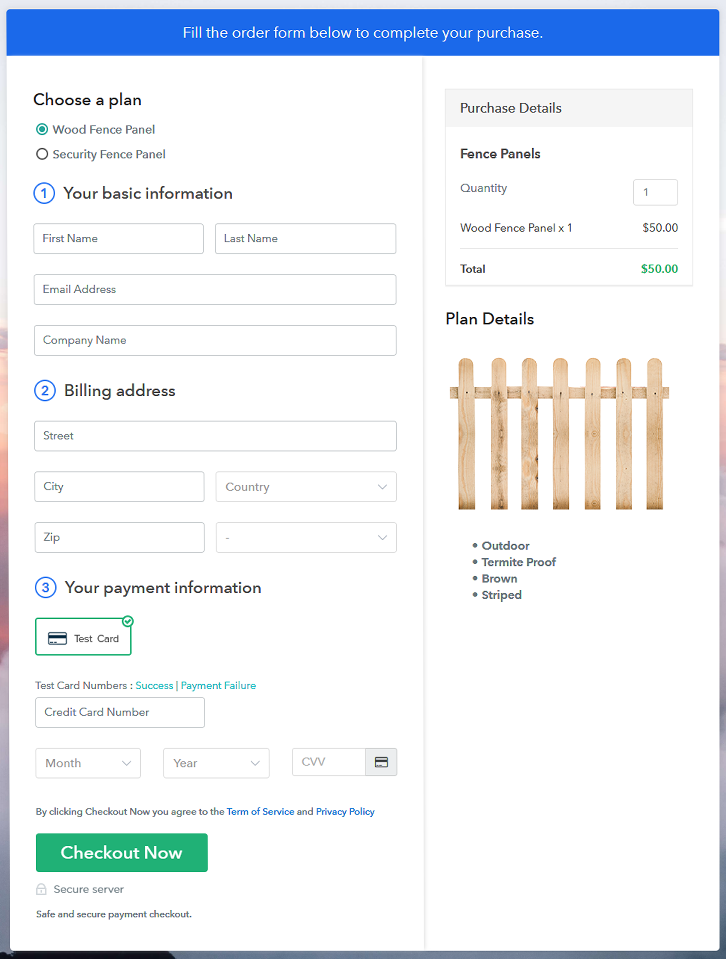
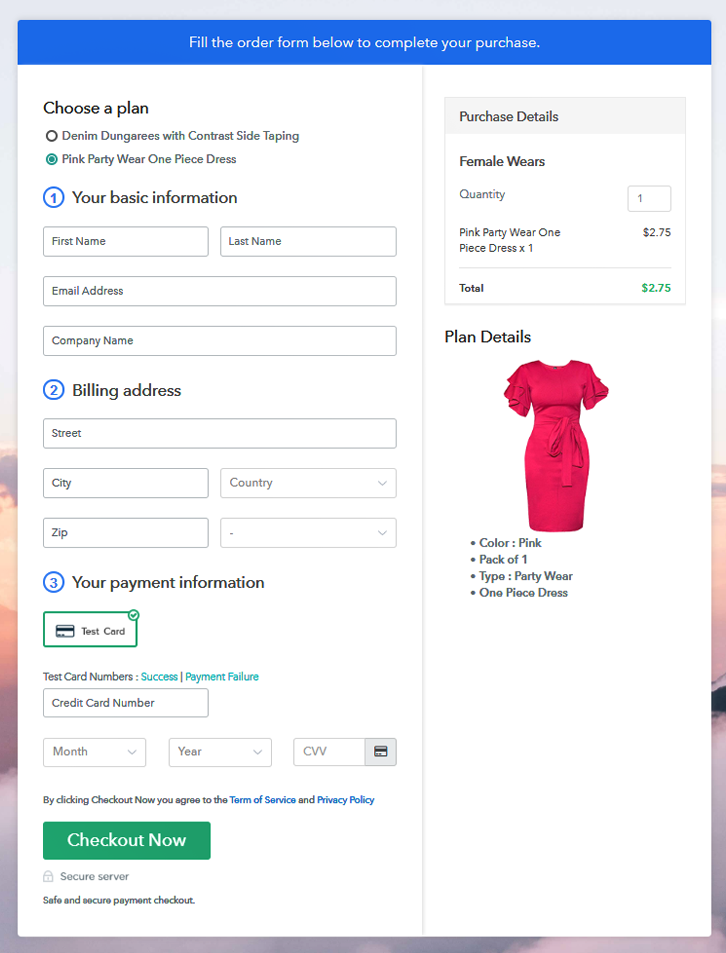
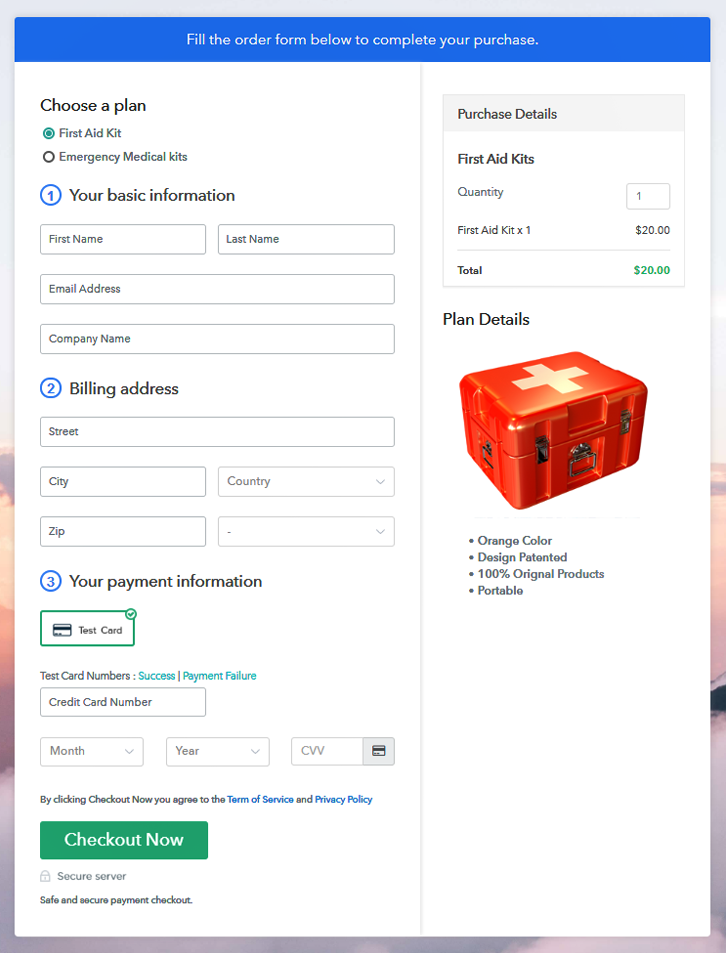
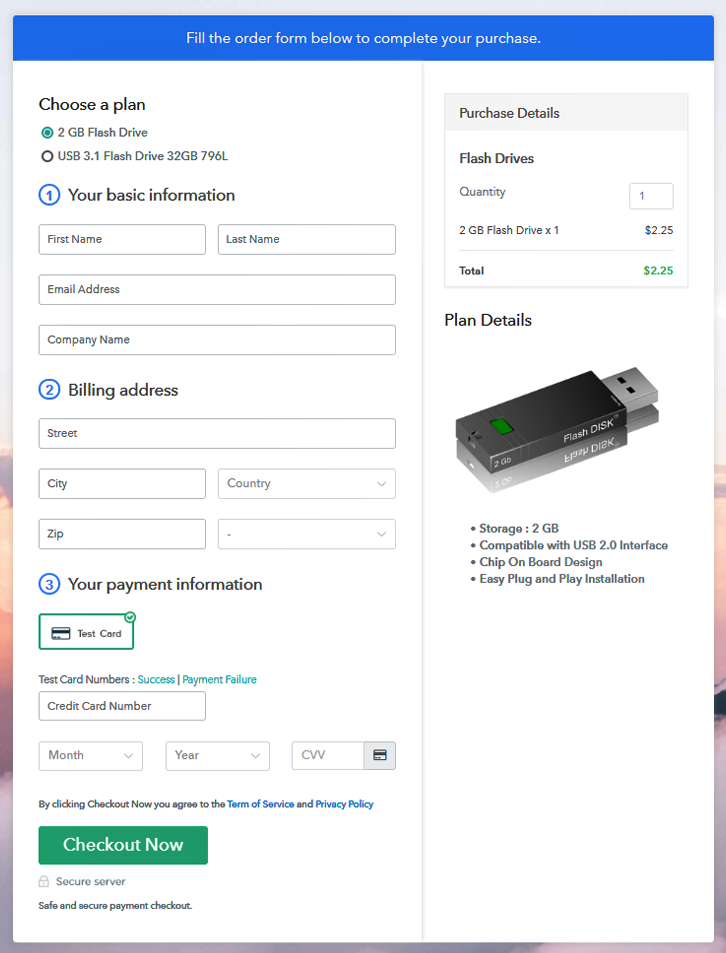
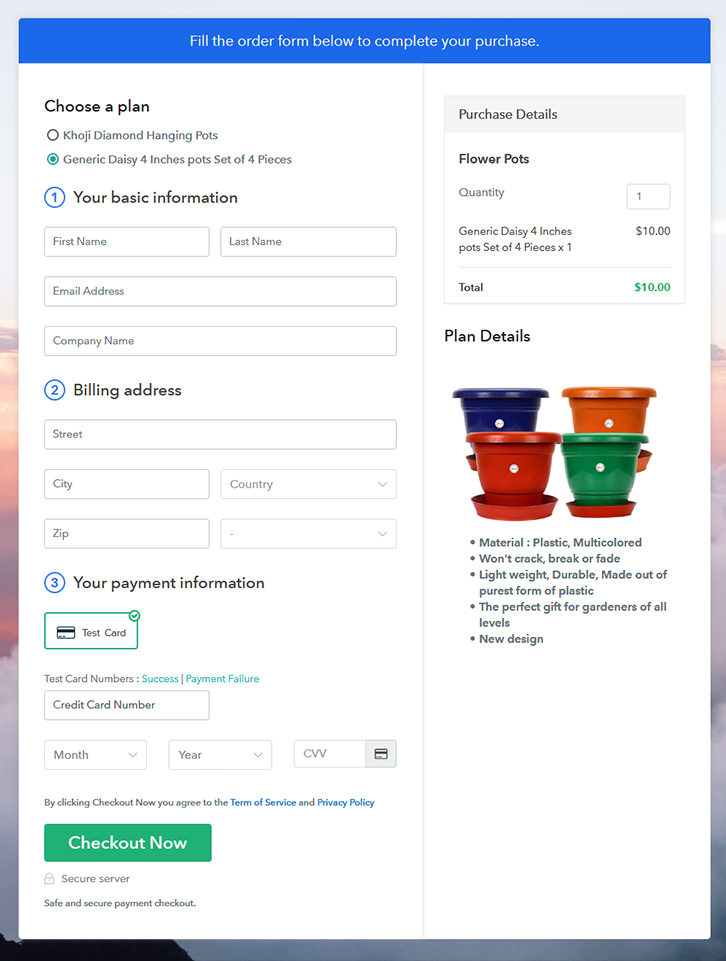
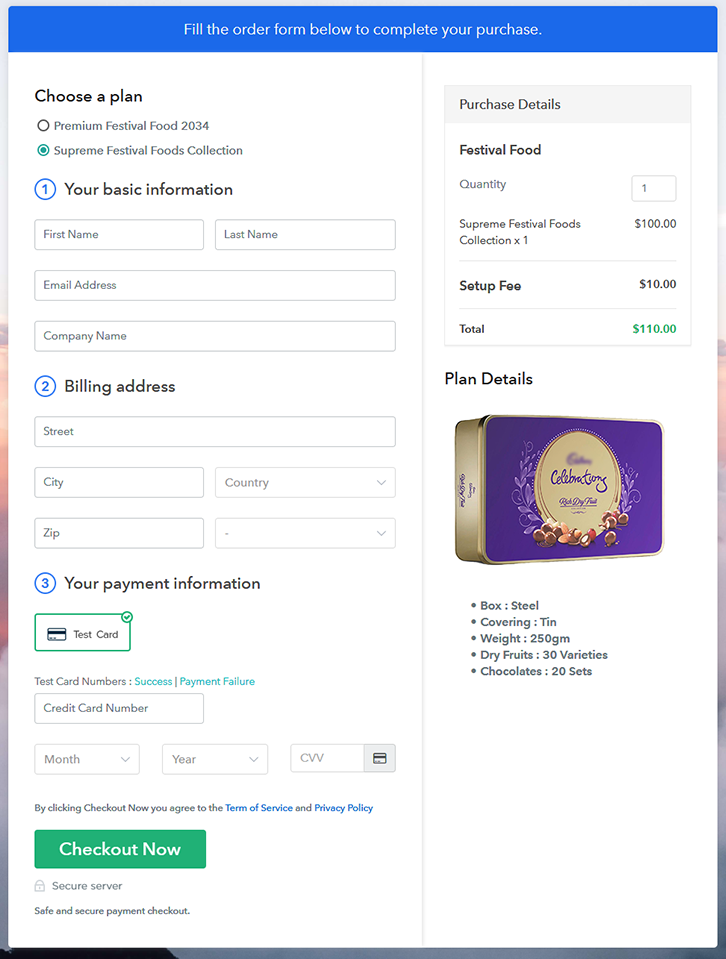
(c) Take a Look at the Checkout Page
Wrapping Up
You May Also Like To Read –