Save Google Ads Leads to Google Sheets Automatically

Watch Step By Step Video Tutorial Below


1. Accessing Pabbly Connect for Automation

To start automating your Google Ads leads, first access Pabbly Connect. Open your browser and go to the Pabbly Connect landing page by entering pabbl.com/connect. If you are new, click on the “Sign Up for Free” button.

This free trial allows you to integrate up to 100 Google Ads leads into your spreadsheet each month. After testing, you can decide on a subscription plan that suits your needs.


2. Creating a Workflow in Pabbly Connect

Once logged in, click on the “Create Workflow” button to begin. This opens the workflow builder where you will set up the automation. Click on the “Add Trigger” button and select Google Ads as your trigger application.

  • Choose “New Lead Form Entry” as the event.
  • Click on “Connect” to receive your webhook URL.
  • Copy this URL for use in your Google Ads campaign.

Now, navigate to your Google Ads campaign and paste the webhook URL in the lead delivery section. This connects Google Ads with Pabbly Connect.


3. Setting Up Google Ads to Capture Leads

In your Google Ads campaign, ensure you have created a lead form to collect necessary details. This includes fields like name, email, phone number, and city. Make sure to add this lead form to your campaign.

  • Click on the “Add Lead Forms” button to select the fields you want.
  • Ensure the lead delivery section is set up correctly with the webhook URL.

Once these steps are completed, you can test the connection by sending test data. This confirms that your Google Ads leads are now integrated with Pabbly Connect.


4. Adding Google Sheets to Your Workflow

Next, you will add Google Sheets as an action application in your workflow. Click on “Add New Action Step” and select Google Sheets. For the event, choose “Add New Row” and click on “Connect”.

If you have previously connected Google Sheets to Pabbly Connect, select the existing connection. Otherwise, create a new connection by signing in with your Google account and granting the necessary permissions.


5. Mapping Lead Data to Google Sheets

After connecting Google Sheets, select the specific spreadsheet and sheet where you want to save the lead data. Use the mapping feature in Pabbly Connect to insert data dynamically from the previous step.

  • Map fields like first name, last name, email, phone number, and city.
  • Ensure you save and send a test request to confirm the data is added.

Once confirmed, your workflow is set. Now, every time a new lead is generated, their details will automatically populate in your Google Sheets, streamlining your lead management process.


Conclusion

This tutorial demonstrated how to use Pabbly Connect to automate the integration of Google Ads leads into Google Sheets. By following these steps, you can ensure that no lead gets missed, allowing your sales team to respond promptly and efficiently.

One Tool That Connects All Your Business Apps

Watch Step By Step Video Tutorial Below


1. Introduction to Pabbly Connect and Its Importance in Automation

Pabbly Connect is an essential tool for automating business processes effectively. With Pabbly Connect, you can seamlessly integrate various applications, enhancing productivity and efficiency.

In today’s competitive landscape, many businesses are leveraging automation to streamline their operations. By using Pabbly Connect, you can eliminate manual tasks and focus on growth. This tool allows you to automate repetitive tasks, freeing up valuable time for your business.


2. Setting Up Pabbly Connect for Your Business

To start using Pabbly Connect, first, sign up for a free account on their website. Once registered, you can access the dashboard where you can create your first automation.

After logging in, follow these steps to set up your automation:

  • Navigate to the “Create Workflow” section.
  • Select the trigger application, such as Google Sheets.
  • Choose the action, like sending a WhatsApp message.

These steps will help you set up the integration. Pabbly Connect acts as the bridge between your applications, ensuring smooth data flow and automation.


3. Automating Lead Management with Pabbly Connect

Lead management is crucial for any business. With Pabbly Connect, you can automate the process of capturing leads from Facebook or Instagram and storing them in Google Sheets.

Here’s how to automate lead management:

  • Set up a trigger for new leads in Facebook Lead Ads.
  • Add an action to store lead details in Google Sheets.
  • Send a follow-up message to the lead via WhatsApp.

By using Pabbly Connect, you can ensure that no lead is missed, and all follow-ups are done automatically, enhancing your conversion rates.


4. Managing Reviews Automatically Using Pabbly Connect

Managing customer reviews is vital for maintaining a good reputation. With Pabbly Connect, you can automate the process of responding to reviews on your Google Business Profile.

To set this up, follow these steps:

  • Create a trigger for new reviews on your Google Business Profile.
  • Set up an action to automatically reply to the review.
  • Log the review details in Google Sheets for tracking.

Pabbly Connect simplifies review management, allowing you to maintain customer engagement effortlessly.


5. Automating Content Creation and Posting with Pabbly Connect

For content creators, automating the posting process can save a lot of time. With Pabbly Connect, you can automatically upload videos from Google Drive to your YouTube channel.

Here’s how to set this up:

  • Set up a trigger for new files in Google Drive.
  • Select the action to upload the file to YouTube.
  • Schedule the posting time for optimal engagement.

Using Pabbly Connect for content automation allows you to focus on creating quality content while the tool handles the posting.


Conclusion

In conclusion, utilizing Pabbly Connect can significantly enhance your business operations through automation. By integrating various applications, you can streamline processes, manage leads, and create content effortlessly. Start using Pabbly Connect today to transform your business and save valuable time.

This AI Writes Complete Blog Posts in Minutes

Watch Step By Step Video Tutorial Below


1. Accessing Pabbly Connect for Automation

To start automating your Google Blogger posts, you need to access Pabbly Connect. Open your browser and visit pabbly.com/connect. Here, you can either sign up for a free account or log in if you are an existing user.

Once logged in, you will see options to create workflows. If you’re new, you can explore the features with 100 free tasks each month. This is the first step to automating your blog posts.


2. Creating a Workflow in Pabbly Connect

After accessing Pabbly Connect, click on “Access Now” to enter the dashboard. Here, you can create a new workflow by selecting “Create from Scratch” or using the “Quick Builder” option for faster setup.

  • Select “Create from Scratch” for a detailed setup.
  • Use “Quick Builder” for a simplified workflow creation.
  • Describe your automation goals clearly in the prompt.

Once you have described your workflow, select the trigger that will initiate the automation. In this case, you will set it to trigger at a specific time daily.


3. Setting Up the Trigger in Pabbly Connect

In Pabbly Connect, triggers are essential as they determine when your automation will start. For this automation, choose a schedule trigger that runs every day at a specific time, such as 12 p.m.

After setting the trigger, you will receive a confirmation that the trigger is successfully set. This is crucial for ensuring your blog posts are generated and published automatically at the desired time.


4. Generating Blog Content Using AI

Next, you will use AI to generate both the blog title and the content. In Pabbly Connect, select the AI tool (e.g., Gemini) to create the blog title first. Input relevant prompts to guide the AI in generating a suitable title.

After the title is generated, you will repeat the process to create the full blog article. Map the title generated in the previous step into your content generation prompt to ensure consistency.

  • Use Gemini to generate the blog title and content.
  • Map the title dynamically to ensure it updates automatically.
  • Ensure to save each step to maintain the workflow integrity.

Once both the title and content are generated, you will be ready to publish the blog post automatically.


5. Publishing Your Blog Post on Google Blogger

Finally, you will connect Pabbly Connect to your Google Blogger account to publish the generated content. Click on “Sign in with Google” and select your account to grant access.

After connecting, you will need to provide your blog ID and set the post status to live. This ensures that your newly generated blog post is published immediately without needing manual intervention.

  • Select your blog ID from the dropdown menu.
  • Set the post status to live for immediate publication.
  • Test the request to ensure successful publishing.

Once you receive a successful response, your blog post is now live on Google Blogger, completing the automation process.


Conclusion

In this tutorial, we explored how to automate your Google Blogger posts using Pabbly Connect. By setting up triggers, generating content with AI, and publishing automatically, you can save time and streamline your blogging process.

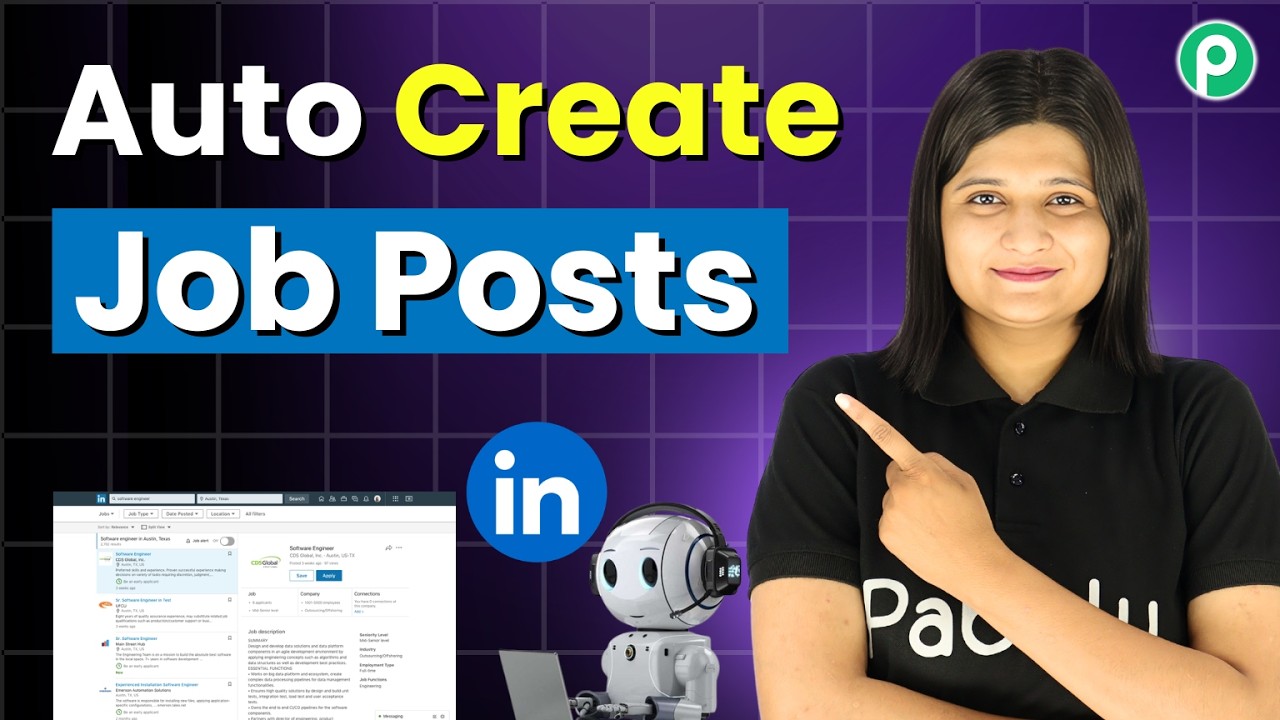
Automatically Create LinkedIn Job Opening Posts Using AI

Watch Step By Step Video Tutorial Below


1. Introduction to Pabbly Connect for LinkedIn Automation

In this tutorial, we will explore how to use Pabbly Connect to automate LinkedIn posts using Google Sheets and OpenAI. This integration allows you to create professional job opening posts effortlessly.

By leveraging the capabilities of Pabbly Connect, you can streamline the process of posting job details on LinkedIn. This automation is particularly useful for businesses looking to maintain a consistent online presence without manual input.


2. Setting Up Pabbly Connect

To begin, you need to access Pabbly Connect. Go to the Pabbly website and sign in or create a new account. Once logged in, you will be directed to the dashboard where you can manage your workflows.

Follow these steps to create a new workflow:

  • Click on the ‘Create Workflow’ button.
  • Name your workflow, for example, “Automatically Create LinkedIn Job Opening Post Using AI”.
  • Select a folder to save your workflow.

Your workflow is now created successfully in Pabbly Connect. Next, you need to set a trigger application.


3. Connecting Google Sheets as the Trigger Application

In this step, you will configure Google Sheets as your trigger application in Pabbly Connect. The trigger will activate whenever new data is added to your Google Sheet.

To do this, select Google Sheets as your trigger application and choose the event as “New or Updated Spreadsheet Row”. Click on the connect button to establish the connection.

Next, you will receive a webhook URL from Pabbly Connect. This URL acts as a bridge between Google Sheets and your workflow. Follow these steps:

  • Open your Google Sheets and navigate to Extensions > Add-ons > Get Add-ons.
  • Search for “Pabbly Connect Webhooks” and install it.
  • Refresh your Google Sheets and go to Extensions > Pabbly Connect Webhooks > Initial Setup.

Paste the webhook URL and specify the trigger column (the last column that will trigger the workflow). Click on ‘Send Test’ to ensure the connection works.


4. Generating LinkedIn Posts Using OpenAI

After setting up Google Sheets, the next step is to generate a LinkedIn post using OpenAI through Pabbly Connect. Select OpenAI as your action application and choose the action event as “Chat GPT”.

Connect OpenAI by providing your API key. If you don’t have one, create a new secret key in OpenAI and paste it into Pabbly Connect. Once connected, select the model you wish to use.

In the prompt section, enter a detailed request for the LinkedIn post. You can map the data from Google Sheets to the prompt, ensuring it includes job title, company, location, and other relevant details:

  • Create a professional LinkedIn job opening post using details below.
  • Include key skills, qualifications, and a clear call to action.
  • Limit the output to 120-180 words.

After entering your prompt, save and test the request to generate the LinkedIn post content.


5. Posting to LinkedIn Using Pabbly Connect

The final step is to post the generated content to LinkedIn using Pabbly Connect. Add a new action step in your workflow and select LinkedIn as the action application.

Choose the action event as “Share Simple Text”. Connect your LinkedIn account by entering your credentials. Once connected, map the message content from OpenAI to the LinkedIn post.

Set the visibility to public and save the workflow. You can now test the request to post your content. After testing, check your LinkedIn profile to confirm the post appears as intended.


Conclusion

In this tutorial, we demonstrated how to automate LinkedIn posts using Pabbly Connect, Google Sheets, and OpenAI. This automation simplifies the process of creating professional job posts, saving time and effort for businesses.

Build a 24/7 WhatsApp Chatbot for Hospitals

Watch Step By Step Video Tutorial Below


1. Creating a WhatsApp Chatbot with Let and Pabi

The integration of Let and Pabi allows you to create a WhatsApp chatbot for hospitals. This chatbot can help patients book appointments and contact hospitals directly through WhatsApp. To start, you need to initiate the chatbot by sending a message like ‘hello’.

Once the chatbot is activated, it responds with a welcome message along with two buttons: ‘Book Appointment’ and ‘Contact Hospital’. This setup makes it easy for users to navigate and access the services they need.


2. Setting Up the Pabi Flow

To configure the flow in Pabi, you must visit the Pabi Chat Flow page at the designated URL. Here, you can either sign up for a new account or log in if you are an existing user. Signing up gives you access to 100 free credits monthly, which is perfect for testing your chatbot.

  • Visit Pabi Chat Flow URL.
  • Sign up for a free account or log in.
  • Add your WhatsApp number to your account.

After logging in, you will see options to create triggers for your chatbot. A trigger can be a keyword or a user-initiated message. Here, you will set the trigger to a keyword like ‘hello’ to activate the chatbot.


3. Building the Chatbot Flow with Let and Pabi

Using Pabi, you can build the chatbot flow by dragging and dropping various message and action blocks. Start by sending a welcome message when the user initiates the chat. You can also include media, such as an image of the hospital.

Once the welcome message is set, create buttons for ‘Book Appointment’ and ‘Contact Hospital’. When users click ‘Book Appointment’, prompt them to select a department. You can create a list of departments by using a list node in Pabi.

  • Add a media node for the hospital image.
  • Create buttons for user interaction.
  • Use a list node to display departments.

After the user selects a department, you can ask for their full name and preferred appointment date and time. This information will help in scheduling their appointment efficiently.


4. Finalizing the Chatbot Setup

Once all nodes are set up in Pabi, ensure to save your flow. This step is crucial as it locks in all the configurations you’ve made. After saving, your WhatsApp chatbot will be fully functional, allowing users to book appointments and contact the hospital directly.

In this step, you can also customize confirmation messages that will include user-specific details like their full name. This personalization enhances user experience and builds trust.

After finalizing your setup, you can test the chatbot by sending a message to see if it responds correctly and guides users through booking an appointment or contacting the hospital.


5. Conclusion: Benefits of Integrating Let with Pabi

Integrating Let with Pabi using Make offers hospitals an efficient way to manage patient interactions. By implementing a WhatsApp chatbot, hospitals can streamline appointment bookings and provide instant contact information.

This integration not only enhances patient engagement but also reduces manual workload for hospital staff. Start using Pabi to create your own WhatsApp chatbot today and improve your hospital’s service delivery.

AI Creates & Posts Content Automatically

Watch Step By Step Video Tutorial Below


1. Accessing Pabbly Connect for Instagram Automation

To start automating your Instagram posts, access Pabbly Connect by visiting pabbl.com/connect. If you’re a new user, click on the “Sign up for free” button in the top right corner to create an account.

Once you have signed up, you can explore the features of Pabbly Connect. The platform allows you to automate tasks between various applications, making it easier to manage your social media accounts efficiently.


2. Setting Up Your Workflow in Pabbly Connect

After logging into Pabbly Connect, navigate to the workflow builder. This is where you will create your automation. Click on the “Add Trigger” button to begin setting up your workflow.

For your trigger application, select “Scheduled by Pabbly”. Set the event to “Scheduled Workflow” and choose the frequency as daily at 12:00 p.m. This ensures that your Instagram posts are published at the same time every day.

  • Choose the trigger application: Scheduled by Pabbly
  • Set the event to Scheduled Workflow
  • Select the frequency: Daily at 12:00 p.m.

Once you have configured these settings, click on “Save” to finalize your trigger setup.


3. Generating Content with Pabbly Connect

The next step in your workflow involves generating content for your Instagram posts. Click on “Add New Action Step” and select “Gemini” as your action application.

Choose the event “Generate Content” and connect to your existing Gemini API key. If you haven’t created a connection yet, follow the prompts to generate a new API key from your Google AI Studio.

  • Select Gemini as the action application
  • Choose the event: Generate Content
  • Input your unique prompt for generating captions

Once the content is generated, it will be used for your Instagram post. Make sure to format your prompt according to your audience’s needs.


4. Posting the Generated Content on Instagram

Now that you have your content ready, it’s time to post it on Instagram. Click on “Add New Action Step” again and select “Instagram for Business” as your action application.

For the event, choose “Create, Upload, and Publish Photo”. Make sure your Facebook account is connected to Instagram since this is necessary for the integration through Pabbly Connect.

  • Select Instagram for Business as the action application
  • Choose the event: Create, Upload, and Publish Photo
  • Ensure Facebook is connected to your Instagram account

After mapping your photo URL and caption, click on “Save and Send Test Request” to post your content. This will ensure your Instagram account receives the new post automatically.


5. Conclusion: Automate Your Instagram Posts with Pabbly Connect

By following these steps, you can successfully automate your Instagram posts using Pabbly Connect. This integration allows for seamless scheduling and posting of content, saving you time and effort.

Utilizing Pabbly Connect not only enhances your social media management but also ensures consistent engagement with your audience. Start automating your Instagram posts today!

Sync Google Forms with Notion Automatically

Watch Step By Step Video Tutorial Below


1. Accessing Pabbly Connect for Automation

To start automating your workflows, you first need to access Pabbly Connect. Simply visit pabbly.com/connect in your web browser. This platform is designed to facilitate seamless integrations between various applications.

Once on the homepage, you will see options to either sign in or sign up for a free account. If you’re a new user, click on the “Sign Up Free” button to create your account. This will give you access to 100 free tasks every month, allowing you to explore the features of Pabbly Connect without any cost.


2. Setting Up Google Forms in Pabbly Connect

After logging into Pabbly Connect, you will be taken to the workflow page where you can set up your automation. Here, the first step is to add a trigger application. For this automation, select “Google Forms” as your trigger application.

  • Search for Google Forms in the application list.
  • Choose the event as “New Response Received”.
  • Click on the “Connect” button to generate a webhook URL.

This webhook URL is crucial as it will connect your Google Forms to Pabbly Connect. Copy this URL, as you will need it in the next steps to complete the integration.


3. Linking Google Forms to Pabbly Connect

Now that you have the webhook URL, navigate to your Google Form. Go to the “Responses” tab and select the option to link it to a Google Sheet. This will allow you to capture all responses in a structured format.

  • Select “Extensions” from the menu in Google Sheets.
  • Click on “Add-ons” and then choose “Get Add-ons”.
  • Search for “Pabbly Connect Webhook” and install it.

After installing, go back to “Extensions”, select “Pabbly Connect Webhooks”, and choose “Initial Setup”. Here, paste the webhook URL you copied earlier and specify the trigger column, which is typically the last data column in your Google Sheet. Click “Submit” to finalize the setup.


4. Mapping Data from Google Forms to Notion

With the Google Form responses now linked to Pabbly Connect, the next step is to map this data to your Notion database. In Pabbly Connect, add Notion as your action application.

Search for “Notion” and select it. Choose the event as “Create Database Item”. You will need to connect your Notion account by clicking on “Add New Connection”. Select the appropriate pages and grant access to allow Pabbly Connect to manage your Notion database.

  • Select the database where you want to store the leads.
  • Map the fields from Google Forms to Notion using Pabbly Connect’s mapping feature.
  • Click on “Save and Send Test Request” to verify the integration.

Once you receive a positive response, your integration is successful, and data from Google Forms will now automatically populate your Notion database.


5. Finalizing Your Automation with Pabbly Connect

To ensure that your automation works seamlessly, make sure to enable the “Send on Event” option in the Pabbly Connect Webhook settings within your Google Sheet. This will ensure that every new form submission is automatically sent to Pabbly Connect.

With everything set up, you can now submit a test response through your Google Form. After submitting, check your Notion database to confirm that the details have been added correctly. This confirms that your automation is functioning as intended.

In summary, using Pabbly Connect to integrate Google Forms with Notion allows you to automate data entry, saving you time and reducing manual errors. This powerful tool can help streamline your workflows and enhance productivity.


Conclusion

In this tutorial, we explored how to automate Google Forms submissions to Notion using Pabbly Connect. This integration simplifies data management and enhances productivity by eliminating manual entries. Start using Pabbly Connect today to streamline your workflows!

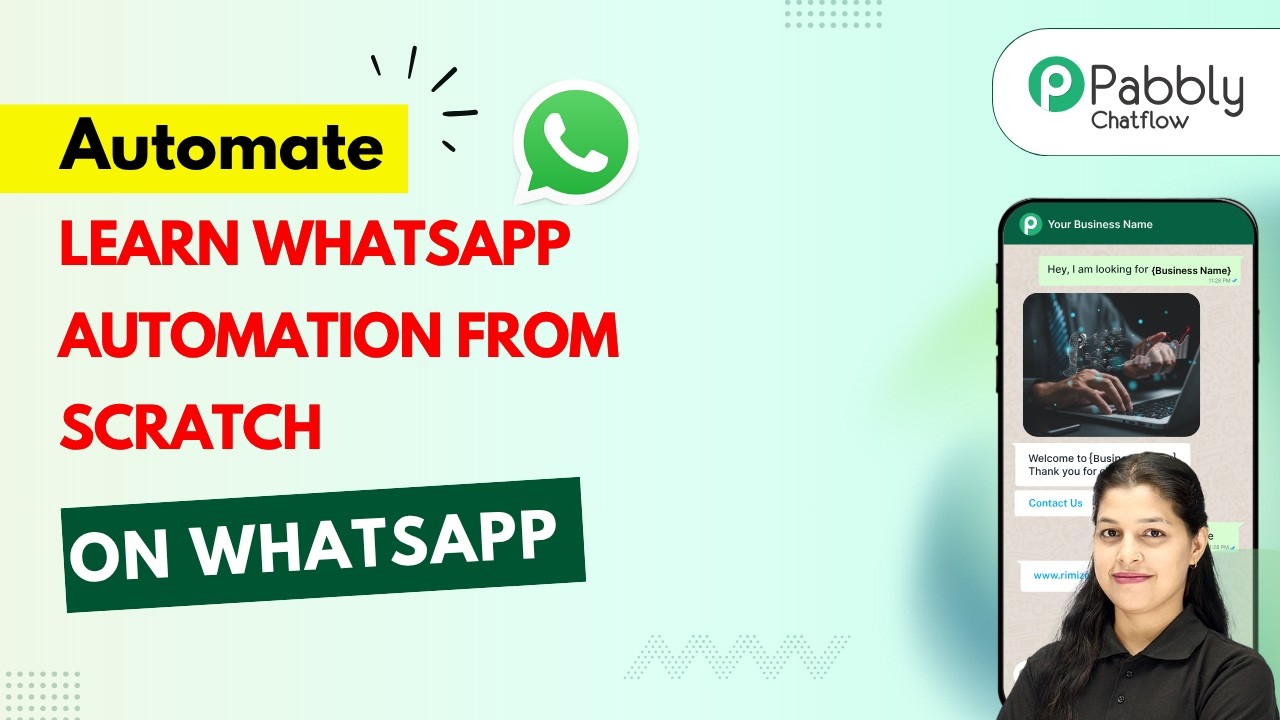
Learn WhatsApp Chatbot Automation from Scratch

Watch Step By Step Video Tutorial Below


1. Accessing Pabbly Chatflow to Create Your WhatsApp Chatbot

To create your WhatsApp chatbot, first, you need to access Pabbly Chatflow. You can do this by typing the URL pabbly.com/chatflow in your browser. This will take you to the homepage of Pabbly Chatflow, where you can either sign in or sign up for a free account.

If you’re a new user, click on the “Sign Up Free” button. By signing up, you receive 100 free credits each month to explore Pabbly Chatflow and create your chatbot. Existing users can simply log in to their accounts to get started.


2. Setting Up Your WhatsApp Chatbot in Pabbly Chatflow

Once logged into Pabbly Chatflow, you will be directed to the flow page. This is where you will create your WhatsApp chatbot. The first step is to add your WhatsApp number, which will be used for the chatbot interactions.

Next, you need to set up a trigger that will initiate your chatbot. This trigger can be a specific keyword or a user starting a conversation. For example, you can use the keyword “hello” to initiate the chatbot. Here’s how to set it up:

  • Enter the keyword in the designated field.
  • You can add multiple keywords if needed.

After setting the trigger, you can start building your chatbot flow using various message and action blocks available in Pabbly Chatflow.


3. Creating the Chatbot Flow with Pabbly Chatflow

In this section, you will create the actual flow of the chatbot. Start by dragging and dropping a welcome message block into the flow. This message will greet your users when they initiate a conversation. You can customize the message to include buttons for actions, such as “Book Service” and “Ask Questions”.

For the “Book Service” button, you will need to create a list of services available. Here’s how to do it:

  • Select the list block and provide a title for the service list.
  • Add items to the list, such as “Apartment”, “Office”, etc.

This way, users can select the type of service they want, and you can capture their preferences within Pabbly Chatflow.


4. Collecting User Information Through Pabbly Chatflow

After users select a service, you need to collect their information, such as their name and appointment details. You can do this by adding an “Ask Question” block in the flow. For example, prompt the user to enter their name and preferred date and time for the service.

Here’s how to set this up:

  • Use the “Ask Question” block to request the user’s name.
  • Follow up with a date and time selection block to provide available slots.

This ensures that you gather all necessary information for booking the service through Pabbly Chatflow.


5. Finalizing Your Chatbot Flow in Pabbly Chatflow

After collecting user information, you can finalize the flow by sending a confirmation message. This message will thank the user and confirm their appointment details. Use a text block to create a personalized message that includes the user’s name.

Additionally, if users have questions, you can assign an AI assistant to the “Ask Questions” button. This assistant can respond to user queries based on the knowledge base you provide. Follow these steps:

  • Select the AI assistant node and connect it to the “Ask Questions” button.
  • Set up a welcome message for the AI assistant to greet users.

With this, your WhatsApp chatbot will be fully functional, automating conversations and responding to user inquiries effectively through Pabbly Chatflow.


Conclusion

In this tutorial, you learned how to create a WhatsApp chatbot using Pabbly Chatflow. By following the steps outlined, you can automate customer interactions and provide seamless service booking. Start using Pabbly Chatflow to enhance your customer engagement today!

Send Welcome Offer Messages to New Typeform Leads Automatically

Watch Step By Step Video Tutorial Below


1. Accessing Pabbly Connect for Integration

To start integrating Typeform with WhatsApp, you first need to access Pabbly Connect. Simply navigate to the Pabbly website by typing pabbly.com in your browser. Once there, sign in to your account or create a new one if you’re a first-time user.

After logging in, you’ll find yourself on the Pabbly dashboard. Click on the “Pabbly Connect” option to open the app. From here, you can create a new workflow that will automate sending WhatsApp messages whenever a new form submission occurs in Typeform.


2. Creating Your Workflow in Pabbly Connect

In this section, you will create a workflow that sends welcome messages automatically. Click on the “Create Workflow” button in Pabbly Connect and name your workflow something like “Send Welcome Offer Messages to New Typeform Leads Automatically”.

Next, choose the folder for your workflow, such as “Forms Automation”, and click “Create”. This will set up a new workflow where you can define the trigger and action steps necessary for the integration.

  • Select Typeform as the trigger application.
  • Choose the trigger event as “New Entry”.
  • Connect your Typeform account to Pabbly Connect.

After selecting your trigger, you will need to specify the Typeform you want to connect. This will allow Pabbly Connect to listen for new submissions and trigger the subsequent actions.


3. Configuring the Typeform Connection

Once you have set up the trigger in Pabbly Connect, you will need to configure the Typeform connection. Enter the form that you want to use, such as a registration form, and click “Save and Send Test Request”.

This action will allow Pabbly Connect to wait for the webhook response from Typeform. To test this, submit a new entry in your Typeform form. After submission, you should see the captured response in your Pabbly Connect workflow, confirming that the connection is successful.

  • Ensure all required fields are filled out in your Typeform.
  • Check for any errors in the submission process.

This step is crucial as it verifies that Pabbly Connect is correctly receiving data from Typeform.


4. Sending WhatsApp Messages via Pabbly Chatflow

Now that you have captured the Typeform submission, the next step is to send a WhatsApp message using Pabbly Chatflow. Add a new action step in your workflow and select Pabbly Chatflow as the action application.

In the action event, choose “Send Text Message” and connect your Pabbly Chatflow account. You’ll need to enter your API key to establish this connection. This allows Pabbly Connect to send messages through WhatsApp whenever a new lead is captured.

  • Map the recipient’s phone number from Typeform submission.
  • Customize your message to include the user’s name and a welcome offer.

After mapping all necessary fields, click “Save and Send Test Request” to see if the WhatsApp message is sent successfully. Check your WhatsApp to verify receipt of the message.


5. Conclusion

In this tutorial, we demonstrated how to use Pabbly Connect to automate sending WhatsApp messages from Typeform submissions. By following these steps, you can easily set up a seamless integration that enhances your lead engagement.

Using Pabbly Connect, businesses can streamline their communication processes and ensure timely responses to new leads. This integration not only saves time but also improves customer experience significantly.

The Smartest Way to Run WhatsApp Marketing Campaigns

Watch Step By Step Video Tutorial Below


1. Accessing Pabbly Connect for WhatsApp Integration

To start integrating WhatsApp with Pabbly Connect, you first need to access the platform. Open your browser and go to the Pabbly Connect website. If you are a new user, click on “Sign Up for Free” to create an account. Existing users can simply log in to their accounts.

Once logged in, you will be directed to the Pabbly Connect dashboard. Here, you can see various applications available for integration. Make sure to select WhatsApp as your primary application for this integration process.


2. Setting Up a WhatsApp Broadcast Using Pabbly Connect

To set up a WhatsApp broadcast, navigate to the “Broadcast” feature in your Pabbly Connect dashboard. This feature allows you to send messages to multiple contacts without creating a group. Click on the “Create New Broadcast” button to begin.

  • Select the type as “Broadcast Campaign”.
  • Name your broadcast, e.g., “New Launch Offer”.
  • Choose the contact list to send your message.

After filling in the details, proceed to select the contacts from your list. You can upload a CSV file for bulk contacts or select existing ones. This flexibility is what makes Pabbly Connect an essential tool for your marketing needs.


3. Creating a Message Template for Your Broadcast

In this step, you will create a message template for your WhatsApp broadcast using Pabbly Connect. Navigate to the “Templates” section and click on “Create New Template”. This is where you can draft your message that will be sent to your contacts.

Ensure your message includes all necessary details about your new product launch. You can also attach images to make your message more engaging. Once your template is ready, save it for the next steps.


4. Testing and Scheduling Your WhatsApp Broadcast

Before sending your broadcast, it’s crucial to test it. Use the “Send Test Message” option in Pabbly Connect. Enter your WhatsApp number to receive a preview of how your message appears. This step is vital to ensure everything looks perfect before reaching your audience.

  • Select “Schedule” if you want to send the message later.
  • Choose a specific date and time for your broadcast.

After testing, click on the “Add Broadcast” button to finalize your broadcast settings. This feature allows you to manage your marketing campaigns effectively using Pabbly Connect.


5. Monitoring Your Broadcast Results with Pabbly Connect

Once your WhatsApp broadcast is sent, you can monitor its performance through Pabbly Connect. Go to the “Stats” section to view the delivery status of your messages. Here, you can see data such as sent, delivered, and failed messages.

This analytics feature helps you understand the effectiveness of your campaigns. You can also resend messages to contacts who did not receive them initially, ensuring maximum reach for your marketing efforts.


Conclusion

Integrating WhatsApp with Pabbly Connect simplifies your marketing campaigns significantly. By following these steps, you can efficiently reach your audience and promote your products. Utilize the powerful features of Pabbly Connect for all your automation needs.