One Click to Reach Thousands with WhatsApp Broadcast

Watch Step By Step Video Tutorial Below


1. Accessing Pabbly Connect for WhatsApp Broadcasts

To start using Pabbly Connect for WhatsApp broadcasts, first navigate to pabbly.com/chartflow in your browser. This will direct you to the Pabbly Chatflow homepage, where you can sign up or log in.

If you’re a new user, click on the “Sign up for free” option. For existing users, simply sign in. After logging in, you will be taken to the Pabbly apps dashboard, where you can access the various features of Pabbly Connect.


2. Setting Up Your WhatsApp Account in Pabbly Connect

Once you are in the Pabbly Chatflow dashboard, the next step is to connect your WhatsApp account. This is crucial for sending messages to your customers. Click on “Access Now” to start the process of connecting your WhatsApp number.

Follow these steps to connect your WhatsApp account:

  • Click on the WhatsApp settings option.
  • Follow the prompts to verify your WhatsApp number.
  • Ensure your account is properly set up to send messages.

After connecting your WhatsApp, you will be ready to send broadcasts through Pabbly Connect. This integration makes it easy to communicate with multiple customers at once.

Turn WhatsApp Into a 24/7 Customer Help Desk

Watch Step By Step Video Tutorial Below


1. Accessing Pabbly Connect for Integration

To transform WhatsApp into a 24/7 help desk, you first need to access Pabbly Connect. This integration platform allows you to connect various applications seamlessly.

Start by visiting the Pabbly Connect website. Once you’re there, sign in or create a new account. After logging in, you can explore the dashboard where you’ll create the integration workflow.


2. Setting Up Pabbly Chatbot with WhatsApp

In this step, you will set up Pabbly Chatbot to work with WhatsApp. This integration enables automated responses to customer queries. Begin by navigating to the Pabbly Chatbot section within Pabbly Connect.

  • Select the WhatsApp integration option.
  • Add your WhatsApp number to the Pabbly Chatbot account.
  • Choose a trigger event to initiate the chatbot.

Using Pabbly Connect, you can configure the chatbot to respond instantly to customer inquiries, ensuring a smooth support experience.


3. Configuring Chatbot Responses

Once your Pabbly Chatbot is set up, the next step is to configure responses. This is where you define how the chatbot interacts with users. Use Pabbly Connect to create welcome messages and support options.

Begin by creating a welcome message that greets users when they initiate a conversation. Then, implement buttons for various support categories like returns and refunds.

  • Add a button labeled ‘View Support Options’.
  • Create a list of issues the user can select from.
  • Assign custom fields to track user selections.

Utilizing Pabbly Connect for these configurations ensures that your chatbot effectively addresses customer queries in real-time.


4. Implementing AI Assistance with Pabbly Connect

To enhance your WhatsApp help desk, integrate AI assistance through Pabbly Connect. This feature allows the chatbot to handle more complex queries automatically. Assign an AI assistant to your chatbot workflow.

When a user describes their issue, the AI assistant can provide tailored responses based on the input. Ensure that you select the correct AI assistant from your Pabbly Chatbot settings.

By leveraging Pabbly Connect, you can make your help desk operational 24/7, providing users with immediate support without manual intervention.


5. Finalizing and Saving the Chatbot Flow

After configuring all elements of your chatbot, it’s time to save your flow. This final step in Pabbly Connect ensures that your setup is complete and ready for use.

Click the save button on the flow page to finalize your configuration. Once saved, your WhatsApp help desk will be operational, ready to assist customers anytime.

With Pabbly Connect, you can easily manage and update your chatbot as needed, ensuring it remains effective and relevant.


Conclusion

In this tutorial, we explored how to use Pabbly Connect to transform WhatsApp into a 24/7 help desk. By integrating Pabbly Chatbot and AI assistance, businesses can ensure instant responses to customer inquiries.

Build a WhatsApp Bot That Helps Customers Choose Products

Watch Step By Step Video Tutorial Below


1. Introduction to Pabbly Connect and WhatsApp Bot

Pabbly Connect is an essential tool for building a WhatsApp bot that helps customers choose products seamlessly. This tutorial walks you through the process of integrating Pabbly Connect with WhatsApp to create a chatbot that responds to customer inquiries efficiently.

In today’s fast-paced market, having a WhatsApp bot can significantly enhance customer experience by providing quick responses. By utilizing Pabbly Connect, businesses can automate product inquiries, making it easier for customers to browse and order products directly through WhatsApp.


2. Setting Up Pabbly Connect for Your WhatsApp Bot

To begin, access the Pabbly Connect dashboard by visiting the Pabbly website. If you don’t have an account, create one to receive 100 free credits monthly, perfect for testing your bot setup.

  • Visit Pabbly.com and sign up for an account.
  • Select Pabbly Connect from your dashboard.
  • Navigate to the flow builder page to create a new chatbot flow.

Once you are on the flow builder, click on the “Add Flow” button to start creating your WhatsApp bot. Name your flow appropriately to reflect its purpose.


3. Building the Chatbot Flow with Pabbly Connect

Now that you have set up Pabbly Connect, it’s time to build the chatbot flow. Start by selecting the trigger events, which will initiate responses based on customer inputs. You can set keywords like “hi” and “hello” to trigger a welcome message.

For example, when a customer sends a greeting, your bot should respond with a welcome message and options to browse products or contact the store. To achieve this, utilize the action buttons within Pabbly Connect:

  • Add a text button for the welcome message.
  • Create quick reply buttons for “Browse Products” and “Contact Store”.

Link these buttons to their respective actions in the flow to ensure smooth navigation for customers.


4. Product Selection Process Using Pabbly Connect

Once the welcome message is set, the next step is to allow customers to select products. When a customer clicks the “Browse Products” button, the bot should respond with a list of product categories.

To implement this, use the list button feature in Pabbly Connect. You can categorize products under headers such as cleansers, serums, and moisturizers:

  • Create a list button with product categories.
  • Link each product category to its respective product images and details.

This setup ensures that when customers select a category, they receive relevant product options along with images, prices, and an order button.


5. Finalizing the Order with Pabbly Connect

After customers select their desired products, the bot should guide them through the ordering process. This involves asking for the quantity and customer details like name and address.

In Pabbly Connect, implement the following steps to finalize orders:

  • Add custom fields for capturing customer information.
  • Create a final message that confirms the order details using the custom fields.

This personalized approach enhances customer satisfaction and ensures accurate order processing. Once everything is set, save your flow to make it live!


Conclusion

In conclusion, using Pabbly Connect to build a WhatsApp bot allows businesses to automate customer interactions efficiently. By following this tutorial, you can create a tailored chatbot that enhances the shopping experience for your customers.

Implementing this system will not only streamline your sales process but also improve customer satisfaction significantly. Start building your WhatsApp bot with Pabbly Connect today!

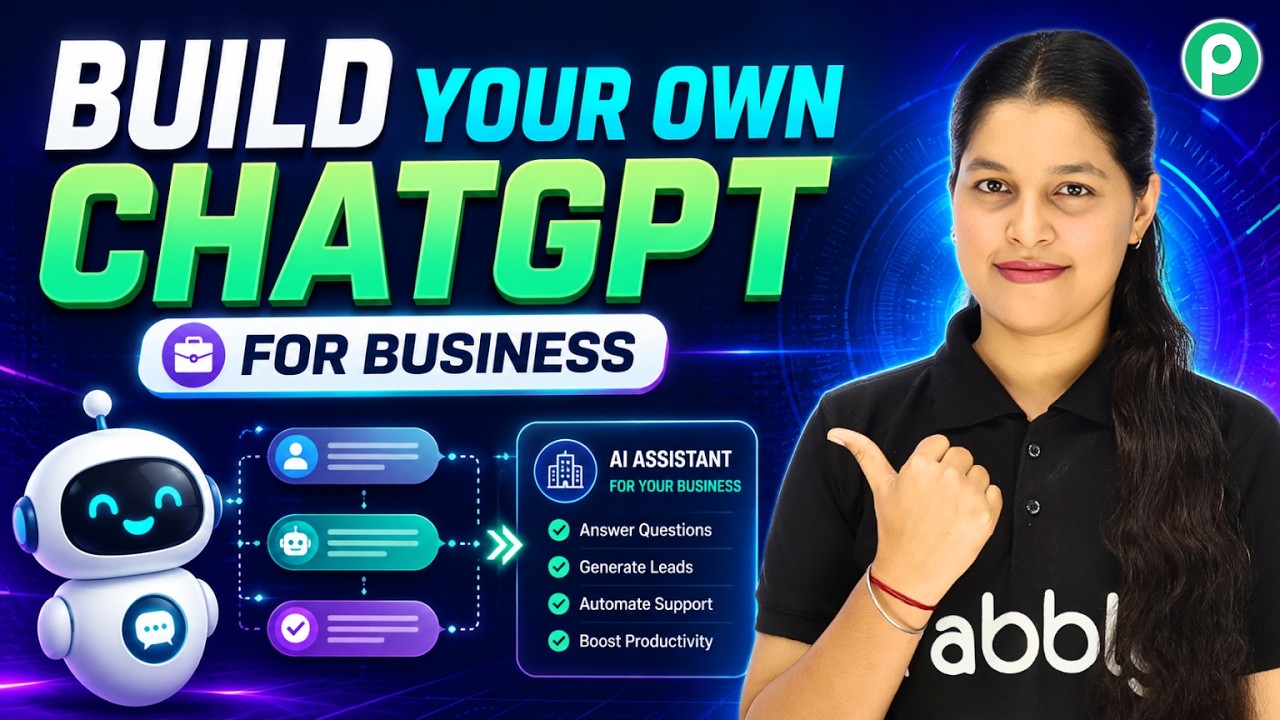
Create Your Own ChatGPT for Business

Watch Step By Step Video Tutorial Below


1. Accessing Pabbly Connect for Integration

To start integrating Now, API, GPD, and other applications, you first need to access Pabbly Connect. This platform acts as the central hub for your automation needs, allowing seamless connections between various applications.

Begin by visiting the Pabbly Connect website. If you are a new user, you can sign up for a free trial to explore its features. Existing users can simply log in to access their dashboard. Once logged in, you can create a new integration workflow.


2. Setting Up Your Integration Workflow

In this section, you will learn how to set up your integration workflow using Pabbly Connect. Click on the “Create Workflow” button to start. You will be prompted to name your workflow, which helps in identifying it later.

  • Select the trigger application (e.g., Now, API).
  • Configure the trigger settings based on your requirements.
  • Test the trigger to ensure it captures the right data.

After setting up the trigger, you can proceed to define the actions that will take place once the trigger is activated. This is where Pabbly Connect excels, enabling you to automate tasks across various applications seamlessly.


3. Configuring Your AI Assistant

Next, configure your AI assistant within Pabbly Connect. This involves selecting the AI model you want to use, such as GPD or GPT. You will need to input your API key, which can be obtained from the respective AI service provider.

Ensure that you set the temperature for your AI responses. A lower temperature (0.0) provides more focused answers, while a higher temperature (1.0) offers more creative responses. Adjust this setting according to your business needs.

  • Enter the API key in the designated field.
  • Configure the knowledge base that the AI will use to respond to queries.
  • Set up retry attempts and fallback messages for better user experience.

Once everything is configured, you can save your settings. This step is crucial as it ensures your AI assistant is ready to handle customer queries efficiently.


4. Embedding Your AI Assistant into Your Business

After configuring your AI assistant, Pabbly Connect allows you to embed it into your business website. Simply click on the “Embed” button to retrieve the script code.

This script can be pasted directly into your website’s HTML code. Once embedded, your AI assistant will be live and ready to interact with customers. This integration enhances customer engagement by providing instant responses to their inquiries.

  • Copy the provided script code.
  • Paste the code into your website’s HTML.
  • Test the assistant to ensure it functions correctly on your site.

This simple process of embedding your assistant showcases how Pabbly Connect simplifies complex integrations into manageable tasks.


5. Enabling AI Assistant for All Contacts

To ensure that your AI assistant is available for all contacts, navigate to the settings in Pabbly Connect. Here, you can enable AI auto replies for your entire contact list.

Simply select the contact list you wish to enable the assistant for. This feature allows your customers to receive instant responses without waiting for human intervention, enhancing the overall customer experience.

  • Go to the “Inbox Settings” section.
  • Enable the AI auto replies option.
  • Select the AI assistant you wish to enable.

Once enabled, your AI assistant will be active for all selected contacts, ensuring that queries are resolved instantly, showcasing the powerful capabilities of Pabbly Connect.


Conclusion

In this tutorial, we explored how to use Pabbly Connect to integrate Now, API, GPD, and other tools effectively. By following these steps, you can enhance your business automation and provide instant customer support through your AI assistant.

Create a WhatsApp Chatbot That Converts Visitors Into Leads

Watch Step By Step Video Tutorial Below


1. Setting Up Pabbly Connect for WhatsApp Integration

To start using Pabbly Connect for integrating WhatsApp chatbots, first, you need to create an account on Pabbly. Visit the Pabbly website and sign up. Once you have your account, you will receive 100 free credits every month to explore the software.

After logging in, navigate to the Pabbly Connect dashboard. Here, you will find various features of Pabbly Connect. Select the option to create a new workflow that will facilitate the integration between your WhatsApp and the chatbot.


2. Creating Your Chatbot Flow in Pabbly Chartflow

With Pabbly Connect, you can create a chatbot flow using the Chartflow feature. Click on the “Add Flow” button to begin. You will need to name your flow and choose a trigger event, which in this case will be a message received from WhatsApp.

  • Select the trigger event as “Message Received”.
  • Enable case-sensitive matching for user messages.
  • Add keywords that your customers might use.

Once you set up the trigger, you can add welcome messages and quick reply buttons to guide users through the chatbot experience. This is where Pabbly Connect truly shines, allowing you to automate responses based on user interactions.


3. Collecting Lead Information Automatically

As users interact with your chatbot, Pabbly Connect enables you to collect valuable lead information automatically. For instance, once a user selects a service, the chatbot will prompt them to enter their full name, email address, and project description.

To set this up, use the “Ask Question” feature within the flow. You can specify the type of information required and the format in which it should be submitted. Make sure to connect each question to its respective custom field in Pabbly Connect for effective data collection.

  • Ask for the user’s full name.
  • Request the user’s email address.
  • Gather a brief description of their requirements.

By using Pabbly Connect, all the details provided by the user are stored in real-time, ensuring that your sales team has organized leads ready for follow-up.


4. Storing Data in Google Sheets via Pabbly Connect

After collecting the lead information, you can use Pabbly Connect to automatically store this data in Google Sheets. To do this, set up an API request in your flow that directs the collected information to a designated Google Sheet.

In the API request node, specify the URL generated by Pabbly Connect. This URL will allow the flow to send data directly to your Google Sheets. Ensure that you map all the custom fields correctly, as this is crucial for data accuracy.

  • Select Google Sheets as the action application.
  • Choose the event as “Add New Row”.
  • Map the fields from the previous application to the Google Sheets fields.

Once set up, every time a user submits their information, it will be automatically added to your Google Sheets, streamlining your data management process.


5. Finalizing Your Chatbot Flow and Testing

After all the steps are configured, it’s time to finalize your chatbot flow. Save your progress in Pabbly Connect and test the entire workflow to ensure everything functions as expected. You can simulate user interactions to check if the chatbot responds correctly and if the data is stored properly.

Make adjustments as necessary based on your testing. Ensure that the flow is user-friendly and that all responses are personalized based on the input received. This is vital for creating a professional customer experience.

Once you are satisfied with your setup, your WhatsApp chatbot will be fully operational, allowing you to engage with customers efficiently and effectively. With Pabbly Connect, you can automate responses, capture leads, and manage data seamlessly.


Conclusion

Integrating WhatsApp chatbots using Pabbly Connect allows businesses to automate customer interactions efficiently. By following this tutorial, you can streamline your lead collection and improve customer engagement.


Automatically Create HubSpot Contacts from Leads

Watch Step By Step Video Tutorial Below


1. Setting Up Pabbly Connect for Automation

To start automating your HubSpot CRM with Google Sheets, you need to access Pabbly Connect. Begin by navigating to the Pabbly Connect website at pabbly.com/connect. Here, you can either sign up for a free account or log in if you’re an existing user.

Once logged in, you will be directed to the workflow page. This is where you can create a new automation workflow. Pabbly Connect allows you to integrate multiple applications seamlessly, making it the ideal choice for automating your tasks.


2. Creating a Workflow in Pabbly Connect

In this step, you will create a workflow that triggers when a new lead is added to Google Sheets. Select Google Sheets as your trigger application in Pabbly Connect. Choose the event as “New or Updated Spreadsheet Row” to initiate the workflow.

  • Select Google Sheets as the trigger application.
  • Choose the event: New or Updated Spreadsheet Row.
  • Build the connection to Google Sheets.

After selecting the trigger, Pabbly Connect will provide you with a webhook URL. This URL is essential for connecting Google Sheets with Pabbly Connect, allowing it to automatically fetch data whenever a new entry is made.


3. Configuring Google Sheets to Work with Pabbly Connect

Now, navigate to your Google Sheets where you have your leads listed. To integrate with Pabbly Connect, you need to set up the webhook URL. Go to Extensions, select Add-ons, and find Pabbly Connect Webhooks.

  • Access Extensions > Add-ons > Get Add-ons.
  • Search for Pabbly Connect Webhooks and install it.
  • Select Initial Setup to paste the webhook URL.

In the Initial Setup dialog, enter the webhook URL and specify the trigger column, which is the last column of your data (e.g., column D). After submitting, your Google Sheets will be ready to send data to Pabbly Connect.


4. Adding Leads to HubSpot CRM via Pabbly Connect

With your Google Sheets set up, the next step is to add leads to HubSpot CRM. In Pabbly Connect, select HubSpot CRM as your action application. Choose the event as “Create a Contact” to add new leads automatically.

To build the connection, click on “Add New Connection” and select your HubSpot account. Once connected, you will see various fields to fill in. Here, you will use the mapping feature to automatically fill in the contact details from the Google Sheets data.

  • Map the email address from Google Sheets to HubSpot.
  • Map the first name, last name, and phone number accordingly.
  • Click “Save and Send Test Request” to finalize the integration.

Upon successful mapping, you will receive a positive response confirming that the contact has been created in HubSpot CRM. This demonstrates how Pabbly Connect automates the entire process, saving you time and effort.


5. Conclusion: Streamlining Your Business with Pabbly Connect

In this tutorial, you learned how to automate the process of adding leads from Google Sheets to HubSpot CRM using Pabbly Connect. This integration not only saves time but also reduces manual errors, allowing you to focus on more important tasks.

By following the steps outlined, you can easily set up similar automations for other applications, enhancing your business efficiency. Start using Pabbly Connect today to streamline your operations and improve productivity!

WhatsApp AI Agent for Organic Food Stores | 24/7 Customer Support & Order Assistant

Watch Step By Step Video Tutorial Below


1. Accessing Pabbly Connect to Set Up Your WhatsApp Chatbot

To create a WhatsApp chatbot, you’ll first need to access Pabbly Connect. Start by visiting the Pabbly website and signing into your account. If you are a new user, you can sign up for a free account, which provides credits to test the features.

Once signed in, navigate to the Pabbly Connect dashboard. Here, you will find various applications available for integration. To create your WhatsApp chatbot, select the option for Pabbly Chatflow. This is where you will manage your chatbot settings and configurations.


2. Connecting Your WhatsApp Number in Pabbly Connect

After accessing Pabbly Chatflow, the next step is to connect your WhatsApp number. Click on the `Add WhatsApp Number` button. You will have the option to connect via the preferred method or manually using a token.

  • Select the `Connect WhatsApp` option for easy integration.
  • Follow the prompts to enter your WhatsApp details.
  • Ensure your WhatsApp number is verified to receive messages.

After completing the connection process, you should see your WhatsApp number listed in the Pabbly Chatflow dashboard. This integration allows your chatbot to send and receive messages through WhatsApp seamlessly.


3. Creating Your AI Assistant with Pabbly Connect

To create an AI assistant, navigate to the AI assistant section in Pabbly Chatflow. Click on the `Add Assistant` button. You will need to name your assistant, for example, “WhatsApp AI Agent for Organic Food Stores.” This name will help you identify the assistant later.

Next, select the instruction type as `AI Agent` from the dropdown menu. This setting will determine how the assistant interacts with users. Adjust the temperature setting to control the creativity of responses. A setting of 0.8 is recommended for a balance between creativity and focus.

  • Set the AI model to GPT-5 for enhanced responses.
  • Enter your OpenAI API key to connect the assistant to the AI model.
  • Toggle on additional settings like header and footer messages.

By configuring these settings, your AI assistant will be ready to respond to customer queries effectively, showcasing the capabilities of Pabbly Connect.


4. Setting Up Knowledge Base for Your Chatbot

The next step in using Pabbly Connect is to establish a knowledge base that your AI assistant will use to provide accurate information. You can upload a detailed file containing product information, contact details, and FAQs relevant to your business.

To upload your knowledge base, click on the `Upload File` option and select the relevant document from your device. Ensure that the document is comprehensive, covering all aspects of your business, such as product categories and customer support details.

  • Include detailed descriptions of products, services, and support options.
  • Make sure the file is in a supported format for easy upload.
  • Verify that the uploaded file is accessible to the AI assistant.

Once the knowledge base is established, your AI assistant will be equipped to provide accurate responses to customer inquiries, enhancing user experience through Pabbly Connect.


5. Assigning Your AI Assistant to Contacts in Pabbly Connect

The final step involves assigning your newly created AI assistant to specific contacts or groups within Pabbly Connect. Navigate to the inbox settings and select the `AI Auto Reply` settings option. Here, you can enable auto-replies and assign the AI assistant to different contact lists.

Choose the contacts you want to assign the assistant to, or select all contacts for broader coverage. Save your settings to ensure that your AI assistant is activated for those contacts.

  • Select specific groups or all contacts for assignment.
  • Save the rules to finalize the assignment process.
  • Test the assistant to ensure it responds correctly to user queries.

With these settings in place, your WhatsApp chatbot powered by Pabbly Connect will be fully operational, ready to assist customers with their inquiries efficiently.


Conclusion

In summary, using Pabbly Connect to create a WhatsApp chatbot allows businesses to automate customer interactions effectively. By following these detailed steps, you can enhance your business communication and improve customer satisfaction.

Automatically Add Leads to Privyr CRM

Watch Step By Step Video Tutorial Below


1. Accessing Pabbly Connect for Automation

To start automating your lead management, you need to access Pabbly Connect. If you are an existing user, simply open your workflow builder. New users should navigate to pabbly.com/connect in their browser.

Once on the landing page, click on the “Sign Up for Free” button located in the top right corner. This will allow you to create a free trial account to explore Pabbly Connect and its features.


2. Creating Your Workflow in Pabbly Connect

After logging in, you will be directed to the workflow builder of Pabbly Connect. Here, you will set up the trigger and action for your automation. The trigger initiates the workflow, while actions define what happens next.

To create your workflow, click on the “Add Trigger” button. Select “Google Ads” as your trigger application and choose the event as “Lead Form Entry”. Click on “Connect” to receive your webhook URL.

  • Open your Google Ads account.
  • Navigate to the “Lead Forms” section.
  • Paste the webhook URL into the lead delivery options.

Once you have pasted the URL, click on “Send Test Data” to test the connection between Google Ads and Pabbly Connect. You should see a confirmation that test data has been sent.


3. Connecting Your CRM with Pabbly Connect

Next, you will connect your CRM to Pabbly Connect. Click on the “Add New Action Step” and search for your CRM application, such as Prevyr. Select the event as “Create a Client” and click on “Connect”.

If you have not created a connection before, you will need to add a new connection. This requires an authentication token from your CRM. Navigate to your CRM’s automation settings to find and copy this token.

  • Go to your CRM’s automation settings.
  • Search for Pabbly Connect and click on “Configure”.
  • Copy the authentication token and paste it in Pabbly Connect.

After saving the connection, you can begin mapping the fields from your lead form to your CRM. This ensures that all relevant information such as name, email, and phone number is captured accurately.


4. Mapping Data from Google Ads to CRM via Pabbly Connect

Mapping data is essential in Pabbly Connect to ensure that the right information is sent to your CRM. After connecting to your CRM, you will enter the details for each lead.

Instead of manually entering data, use the mapping feature in Pabbly Connect. This allows you to dynamically insert data from previous steps. For example, map the name and email fields directly from the lead form.

To map additional fields like city or age, toggle the mapping button on. This will allow you to create custom fields based on your specific requirements. After mapping all necessary fields, click on “Save and Send Test Request” to finalize the setup.


5. Expanding Your Automation with Pabbly Connect

With Pabbly Connect, you can expand your automation beyond just Google Ads and your CRM. You can integrate other applications like WhatsApp, Gmail, and Google Sheets to automate communication and data management.

For instance, you can set up actions to send WhatsApp messages or emails to new leads instantly. This multi-step automation enhances your lead management process by ensuring timely follow-ups.

To add more steps, simply click on “Add Action Step” and repeat the process for each application you want to integrate. This flexibility makes Pabbly Connect a powerful tool for automating various business processes.


Conclusion

In this tutorial, we explored how to use Pabbly Connect to automate lead management by integrating Google Ads with your CRM. This process eliminates manual input and ensures timely follow-ups with leads. Start using Pabbly Connect today to streamline your operations and enhance productivity!

How to Send One WhatsApp Message to Multiple Contacts at Once

Watch Step By Step Video Tutorial Below


1. Accessing Pabbly Connect for WhatsApp Integration

To begin sending bulk WhatsApp messages, you need to access Pabbly Connect. Open your browser and navigate to pabyt.com/chatflow. Here, you will find options to sign up or log in if you are an existing user.

If you’re new, click on “Sign Up for Free” to create an account. Once logged in, you will see all the applications available within Pabbly Connect. Click on “Access Now” to enter the Pabbly Chatflow dashboard.


2. Creating a Message Template in Pabbly Chatflow

Before sending messages, you need a message template in Pabbly Connect. Navigate to the “Templates” section within your dashboard. Here, you can create and manage your templates.

  • Click on “Add Template” to create a new message.
  • Draft your message and attach any images as needed.
  • Ensure your template is approved by Meta to use for broadcasting.

Once your template is created and approved, you are ready to proceed to the broadcast section to send your messages.


3. Setting Up a WhatsApp Broadcast with Pabbly Connect

After preparing your message template, navigate to the “Broadcast” section in Pabbly Connect. Click on the “Add Broadcast” button to start creating your broadcast campaign.

In the broadcast setup, you will need to:

  • Select the type as “Broadcast Campaign”.
  • Name your campaign, e.g., “New Sale Offer”.
  • Choose the contact list to which you want to send the messages.

Ensure you have a contact list ready, either by creating one from scratch or using an existing list within Pabbly Connect.


4. Adding Contacts from Google Sheets to Pabbly Connect

To send messages to your contacts, you first need to import them into Pabbly Connect. You can do this by uploading a CSV file containing your contacts from Google Sheets.

Follow these steps to add contacts:

  • Download your Google Sheets data as a CSV file.
  • Click on “Add Contact” in the Contacts section of Pabbly Connect.
  • Upload the CSV file and click “Add Contact” to import them.

Once your contacts are uploaded, you can select them for your broadcast campaign.


5. Testing and Scheduling Your Broadcast in Pabbly Connect

Before sending your broadcast, it’s crucial to test it. In Pabbly Connect, you can send a test message to your WhatsApp number to ensure everything is working correctly.

To test your broadcast, enter your WhatsApp number and click “Send Test Message”. If successful, you will see a confirmation message. After testing, you can choose to send your broadcast immediately or schedule it for a later time.

To schedule your broadcast:

  • Select the option to schedule the message.
  • Choose a future date and time for sending.

Click “Add Broadcast” to finalize your setup. You can later view stats for your broadcast to see how many messages were sent, delivered, or read.


Conclusion

Using Pabbly Connect, sending bulk WhatsApp messages is a straightforward process. By following the steps outlined, you can easily integrate your contacts from Google Sheets, create message templates, and manage your broadcasts effectively.

This integration not only saves time but also enhances your communication efforts with customers. Start using Pabbly Connect today for efficient WhatsApp messaging!

How to Add Google Ads Leads to Freshsales CRM

Watch Step By Step Video Tutorial Below


1. Accessing Pabbly Connect for Integration

To start integrating Google Ads with your CRM, you need to access Pabbly Connect. First, open your web browser and visit the Pabbly Connect website at www.pabbly.com/connect. If you’re new, sign up for a free account to receive 100 free tasks monthly.

Once logged in, you can explore the features of Pabbly Connect. If you find it useful, consider purchasing a one-time plan for lifetime access. This setup will help automate the process of adding Google Ads leads to your CRM seamlessly.


2. Setting Up Google Ads Trigger in Pabbly Connect

The next step involves setting up a trigger in Pabbly Connect to capture new leads from Google Ads. Select the Google Ads application and choose the “New Lead Form Entry” trigger event. This will allow you to gather data whenever a new lead is generated.

  • Choose the trigger event: New Lead Form Entry.
  • Copy the webhook URL provided by Pabbly Connect.
  • Go to your Google Ads account and paste the URL in the lead delivery section.

After pasting the URL, click on the “Apply” button to save your settings. This ensures that every new lead generated through Google Ads will send data to Pabbly Connect.


3. Testing the Google Ads Trigger

To ensure that your setup is working correctly, you need to test the trigger in Pabbly Connect. After configuring the webhook, send test data from Google Ads to the webhook URL. Click the “Test Data Send” button in Pabbly Connect.

Within a few seconds, you should see a response captured in Pabbly Connect. This indicates that the integration is functioning properly. You can view the test data, which includes dummy details like phone number and email address.


4. Connecting Your CRM to Pabbly Connect

Now that the trigger is set up, it’s time to connect your CRM to Pabbly Connect. For this tutorial, we will use Freshsales as the CRM. Select Freshsales from the action step options and choose “Add New Contact” as the action event.

Next, you will need to provide your Freshsales API key and domain. Copy the domain from your Freshsales account and paste it into the corresponding field in Pabbly Connect. Then, retrieve your API key from the personal settings section of your Freshsales account and paste it as well.


5. Mapping Data to Create a New Contact

The final step is mapping the data captured from Google Ads to create a new contact in your CRM via Pabbly Connect. You will need to map fields such as email address, first name, last name, and phone number.

  • Map the email address with the prefix “work”.
  • Map the phone number with the prefix “primary”.
  • Select the lead source as “ad lead”.

After mapping the necessary fields, click on the “Send Test Request” button. If successful, you will receive a response with the contact ID, confirming that the new contact has been created in your Freshsales account.


Conclusion

In this tutorial, you learned how to automate the process of adding Google Ads leads to your CRM using Pabbly Connect. By following these steps, you can streamline your lead management and improve efficiency in your business operations.