Boost Instagram Leads with DM Auto-Replies

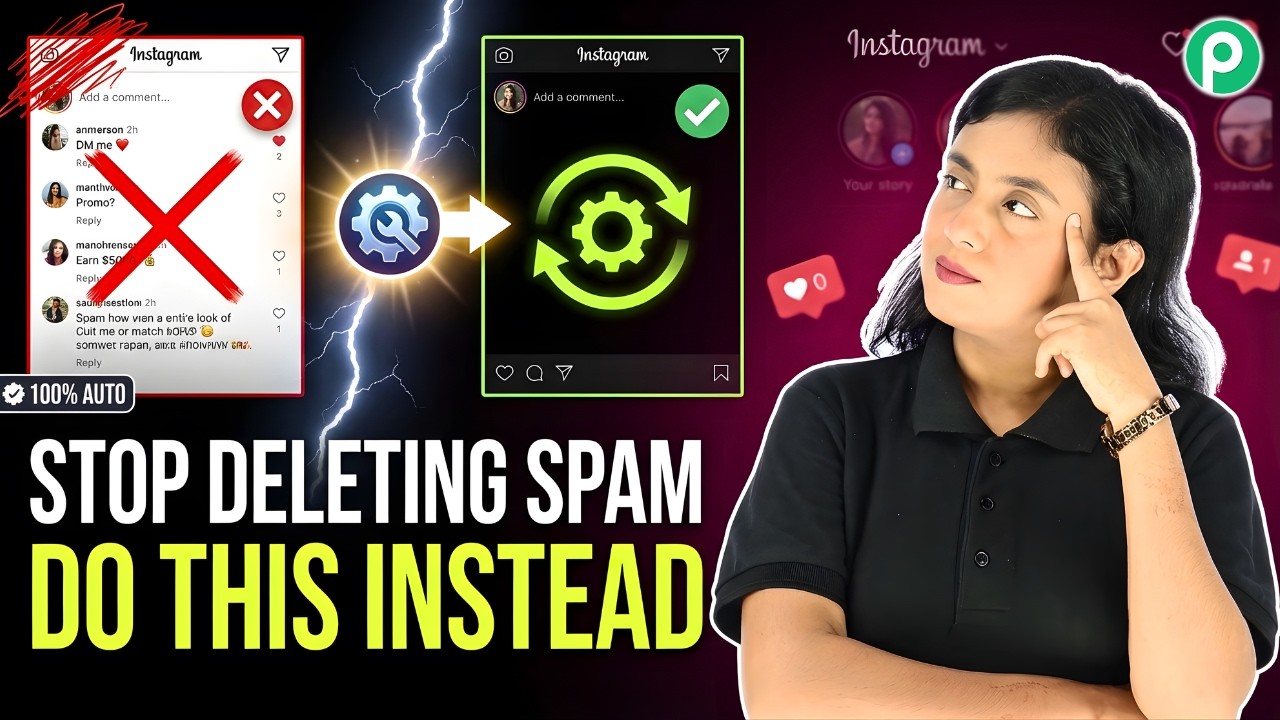
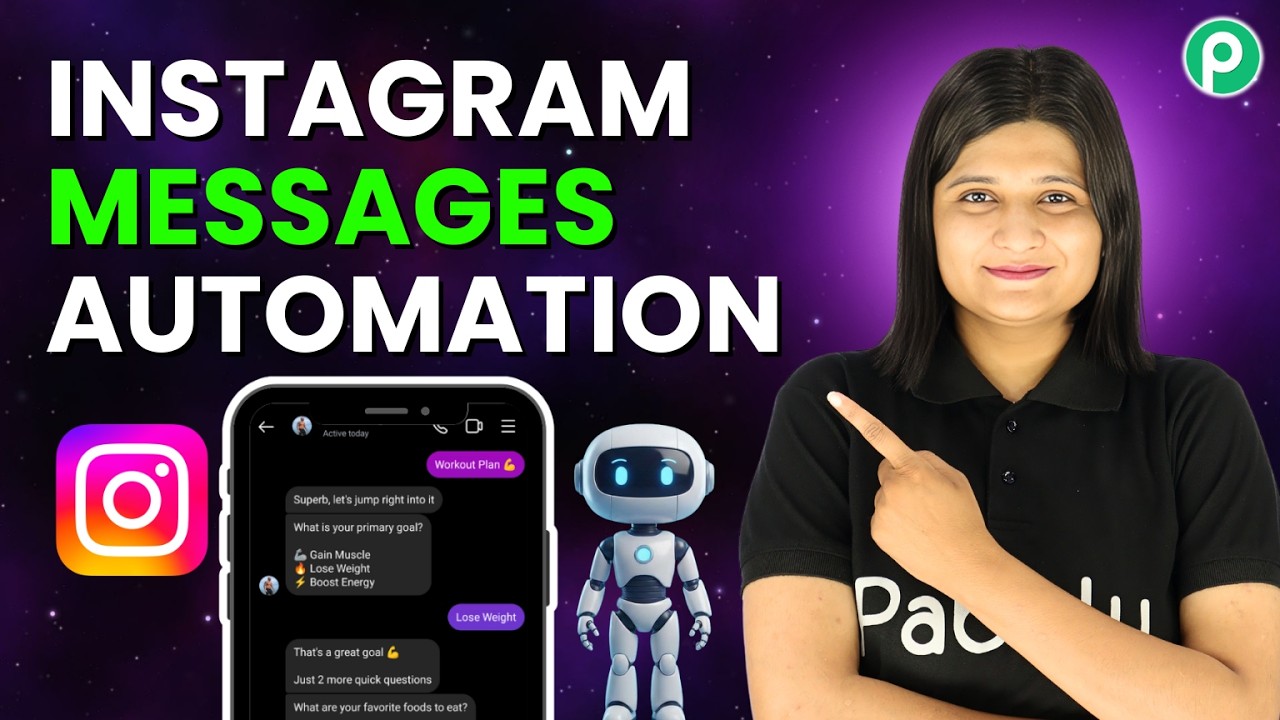
Learn how to automate your Instagram DM replies using Pabbly Connect. This step-by-step guide shows you how to integrate Instagram with Open AI for effective lead management.

Watch Step By Step Video Tutorial Below


1. Accessing Pabbly Connect for Instagram Automation

To start automating your Instagram DM replies, first, access Pabbly Connect. Open your browser and type in Pabbly.com. Once on the site, sign in to your existing account or sign up for a free account to explore its features.

After signing in, you will see the Pabbly apps page. Click on the Pabbly Connect option to access the app dashboard. This dashboard allows you to create workflows that automate tasks between different applications, including Instagram and Open AI.


2. Creating a New Workflow in Pabbly Connect

To create a new workflow, click on the ‘Create Workflow’ button in Pabbly Connect. You will be prompted to select a workflow builder. Choose the new beta option for a modern experience, and name your workflow ‘Boost Instagram Leads with DM Auto-Replies’.

  • Select the folder for your workflow, such as ‘Instagram Automations’.
  • Click on ‘Create’ to finalize your workflow setup.

Once created, you will need to set your trigger application to Instagram Developer. This will initiate the workflow whenever a new DM is received. After selecting Instagram Developer, choose the trigger event as ‘New Message’ and click on connect.


3. Setting Up Instagram Connection in Pabbly Connect

For the Instagram connection in Pabbly Connect, if you do not have an existing connection, click on ‘Add New Connection’. You will need to enter your Instagram token and account identifier. Follow the provided hyperlink to access the connection guide.

To generate the token, navigate to the Meta for Developers page. Create a new app by clicking on ‘Create App’ and follow the prompts to set it up. Make sure to select the necessary permissions, such as managing messages on Instagram, and click on ‘Next’ until you reach the dashboard.

  • Add required permissions for Instagram.
  • Generate your access token and copy it back to Pabbly Connect.

Once you have entered the token, make sure to toggle on the webhook subscription. This ensures that your workflow will respond to new DMs automatically.


4. Integrating Open AI for Automated Replies

Now that your Instagram connection is set up in Pabbly Connect, the next step is to add Open AI to generate automated replies. Click on ‘Add New Action Step’ and choose Open AI as your action application. Select ‘Chat GPT’ as the event and connect it.

You will need to enter the API token for Open AI. If you don’t have one, create a new secret key in your Open AI account. Copy this key and paste it into the connection field in Pabbly Connect.

Select the model you want to use, such as ‘GPT-4 Mini’. Enter the prompt that defines how the AI should respond to inquiries.

Make sure to map the incoming message from Instagram to the prompt field. This ensures that the AI generates responses based on the specific inquiries it receives.


5. Sending Automated Replies Back to Instagram

After generating the response from Open AI, the final step is to send this reply back to the user on Instagram using Pabbly Connect. Add another action step and select Instagram Developer again. Choose the ‘Send Message’ option and connect.

In the action configuration, you will need to map the sender ID and the generated reply from Open AI. This allows the system to send the correct response back to the user who initiated the DM.

Map the sender ID from the incoming message. Map the text message that was generated by Open AI.

Once everything is set up, click on ‘Save and Send Test Request’ to verify that the automated reply is functioning correctly. You should see the response appear in your Instagram messages.


Conclusion

By following these steps, you can effectively automate your Instagram DM replies using Pabbly Connect and Open AI. This integration not only saves time but also enhances customer engagement by providing instant responses. Start implementing this solution today to boost your Instagram leads!

Ensure you check out Pabbly Connect to create business automation workflows and reduce manual tasks. Pabbly Connect currently offer integration with 2,000+ applications.

I Stopped Deleting Instagram Spam Comments Manually — Do This Instead

Learn how to automate the deletion of spam comments on Instagram using Pabbly Connect. Follow this detailed tutorial for a seamless integration process. Explore systematic approaches to creating efficient automation solutions that convert technical concepts into practical, implementable instructions.

Watch Step By Step Video Tutorial Below


1. Setting Up Pabbly Connect for Instagram Spam Comment Deletion

To automate the deletion of spam comments on Instagram, you will need to use Pabbly Connect. Start by accessing Pabbly Connect through your web browser. If you are new to Pabbly, you can sign up for a free account, which gives you access to 100 free tasks each month to explore its features.

Once you have signed into your Pabbly Connect account, create a new workflow. This workflow will consist of two main steps: a trigger and an action. The trigger will be set to Instagram, allowing you to capture new comments made on your posts.


2. Configuring the Instagram Trigger in Pabbly Connect

To set up the trigger in Pabbly Connect, select Instagram as your trigger application. The event you want to choose is ‘New Comment’, which will capture any new comments made on your Instagram posts.

Click on the ‘Connect’ button to establish a connection. You can use an existing connection or create a new one by providing the necessary token and account identifier. Follow the provided instructions to generate these details from your Meta Developer account.

  • Select Instagram as the trigger application.
  • Choose the event ‘New Comment’.
  • Connect your Instagram account using the token and account identifier.

Once connected, click on ‘Save and Send Test Request’ to ensure that Pabbly Connect is properly capturing comments from your Instagram account.


3. Integrating AI for Spam Detection

After successfully setting up the Instagram trigger in Pabbly Connect, the next step is to integrate an AI tool for spam detection. In this tutorial, we will use OpenAI for this purpose. Add an action step in your workflow and select OpenAI as the action application.

Choose the event ‘Chat GPT’ and click on the ‘Connect’ button. You will need to provide the API token from your OpenAI account to establish this connection. Once connected, you will set up a prompt that instructs the AI to classify comments as spam or not spam.

  • Select OpenAI as the action application.
  • Set the event to ‘Chat GPT’.
  • Enter a prompt that instructs the AI to analyze the comment for spam.

Click on ‘Save and Send Test Request’ to check if the AI is successfully analyzing the comments.


4. Filtering Out Spam Comments

With the AI integration complete, the next step in Pabbly Connect is to filter out comments identified as spam. Add a new action step and select ‘Filter by Pabbly’. This filter will ensure that only comments classified as spam by the AI will proceed to the next step.

Configure the filter to check if the message content equals ‘spam’. If the condition is met, the workflow will continue to the next action, which is to delete the spam comment from Instagram.

Add a filter step to check if the AI’s response is ‘spam’. Configure the filter to proceed only if the condition is true.

This filtering process ensures that only unwanted spam comments are targeted for deletion, leaving genuine comments intact.


5. Deleting Spam Comments with Pabbly Connect

The final step in your automation workflow is to delete the spam comments from Instagram using Pabbly Connect. Add another action step and select Instagram as the action application. Set the event to ‘Delete Comment’.

To complete the deletion process, you will need to map the comment ID from the previous steps. This ID corresponds to the spam comment that was detected by the AI. Once mapped, click on ‘Save and Send Test Request’ to execute the deletion.

Select Instagram as the action application. Choose the event ‘Delete Comment’. Map the comment ID from the previous step.

After executing this step, the spam comment will be removed from your Instagram post, completing the automation process. You can now enjoy a cleaner Instagram feed without the hassle of manually deleting spam comments.


Conclusion

By leveraging Pabbly Connect, you can easily automate the deletion of spam comments on Instagram, saving you time and effort. This integration streamlines your workflow and enhances your social media management.

Ensure you check out Pabbly Connect to create business automation workflows and reduce manual tasks. Pabbly Connect currently offer integration with 2,000+ applications.

How to Fully Automate Job Applications & Interview Scheduling

Learn how to fully automate job applications and interview scheduling using Pabbly Connect, Google Forms, Gmail, Airtable, and Google Meet in this step-by-step tutorial. Eliminate manual repetitive tasks from your workflow. Discover proven automation methods with intuitive steps designed for efficiency-minded professionals.

Watch Step By Step Video Tutorial Below


1. Accessing Pabbly Connect for Automation

To automate job applications and interview scheduling, the first step is to access Pabbly Connect. Navigate to Pabbly.com and sign in or create a free account. New users can benefit from 100 free tasks per month, enabling you to explore the powerful features of Pabbly Connect.

Once logged in, locate the Pabbly Connect dashboard. This is where all integrations are created. Click on the ‘Access Now’ button to enter the integration setup area. Here, you can create workflows that connect Google Forms, Gmail, Airtable, and Google Meet seamlessly through Pabbly Connect.


2. Creating a Workflow for Job Applications

In this section, you will create a workflow to automate job applications using Pabbly Connect. Start by clicking the ‘Create’ button to begin a new workflow. Name your workflow something like ‘Fully Automate Job Applications and Interview Scheduling’ for easy identification.

  • Select the trigger application as Google Forms.
  • Choose the event as ‘New Response Received’.
  • Connect your Google account to Pabbly Connect.

After selecting your Google Form, test the connection to ensure it captures new job applications successfully. This integration is crucial as it allows Pabbly Connect to trigger actions based on form submissions.


3. Scheduling Interviews with Google Meet

Once you have set up the trigger with Google Forms, the next step is to schedule interviews using Google Meet. In the workflow, add an action step and select Google Meet as the application. Choose the action event as ‘Schedule Meeting’.

Connect your Google account again, if not already connected. Fill in the meeting details, including the candidate’s name and the scheduled date and time. Ensure that you map the data from the Google Form responses to the appropriate fields in Google Meet. This is where Pabbly Connect streamlines the process of scheduling interviews automatically based on candidate availability.


4. Sending Confirmation Emails via Gmail

After scheduling the interview, you will want to notify the candidate via email. Add another action step in your workflow and select Gmail as the application. Choose ‘Send Email’ as the action event.

  • Map the candidate’s email address from the Google Form response.
  • Set the email subject as ‘Interview Confirmation’.
  • Compose the email body to include the meeting link and details.

This step ensures that candidates receive timely notifications about their interviews, enhancing their experience. With Pabbly Connect, you can personalize these emails with dynamic data from your Google Form submissions.


5. Notifying Your Team on Google Chat

Finally, to keep your team informed, you can set up a notification in Google Chat. Add one last action step in your workflow and select Google Chat as the application. Choose ‘Create Message’ as the event.

Map the necessary details such as the candidate’s name, role, and scheduled time into the message. This allows your team to stay updated on new interviews. Pabbly Connect facilitates real-time notifications, ensuring that your team is always in the loop regarding candidate interviews.


Conclusion

By following these detailed steps using Pabbly Connect, you can fully automate job applications and interview scheduling. This integration not only saves time but also improves communication with candidates and your team. Automate your hiring process today with Pabbly Connect!

Ensure you check out Pabbly Connect to create business automation workflows and reduce manual tasks. Pabbly Connect currently offer integration with 2,000+ applications.

Build an AI Agent to Summarize Large Documents into Google Sheets

Learn how to use Pabbly Connect to automate summarizing large documents into Google Sheets. Step-by-step tutorial on integration with Google Drive and AI tools. Transform complex automation concepts into accessible, actionable steps that eliminate unnecessary manual work while maximizing existing application capabilities.

Watch Step By Step Video Tutorial Below


1. Accessing Pabbly Connect to Start Your Automation

To build an AI agent that summarizes large documents into Google Sheets, you first need to access Pabbly Connect. Open your browser and search for Pabbly.com, then click on the ‘Connect’ option to reach the dashboard.

Here, you will find options to either sign in if you are an existing user or sign up for a free trial. New users can take advantage of 100 free tasks every month to explore the software. After signing in, click on the ‘Access Now’ button to enter the Pabbly Connect interface.


2. Creating a Workflow in Pabbly Connect

Once you are on the Pabbly Connect dashboard, the next step is to create a new workflow. Click on the ‘Create’ button, which prompts you to select between the Beta version and the Classic version. For this tutorial, choose the Beta version for its enhanced flexibility.

  • Click on the ‘Select’ button to proceed.
  • Name your workflow, for example, ‘AI Agent to Summarize Large Documents into Google Sheets’.

After naming your workflow, you will see options to set up triggers and actions. This is where Pabbly Connect will facilitate the connection between Google Drive and your AI tool for summarization.


3. Setting Up the Trigger for Google Drive

In this step, you will configure the trigger that captures new files uploaded to your Google Drive. Select ‘Google Drive’ as the trigger application, then choose ‘New File in a Specific Folder’ as the event.

Next, you will need to connect your Google account. Click on ‘Connect’ and choose your account. After granting access, specify the folder where your documents will be uploaded. This is crucial as Pabbly Connect will monitor this folder for new files.


4. Adding AI Action to Summarize Documents

After setting up the trigger, the next step involves adding an action to utilize an AI tool for summarization. Select the AI tool you wish to use, such as OpenAI, and choose the event ‘Extract Content from PDF’.

  • Connect to your OpenAI account by generating an API key.
  • Map the required data fields, including the PDF URL and the prompt for summarization.

With Pabbly Connect, this action allows the AI to read the document and generate a summary automatically, which will be sent to the next step.


5. Updating Google Sheets with the Summary

The final step is to update your Google Sheets with the summarized content. Select ‘Google Sheets’ as the action application and choose ‘Add a New Row’ as the event.

Connect your Google Sheets account and specify the spreadsheet and sheet where you want the data to be added. Map the fields for the document name, link, and the generated summary. This ensures that every time a new document is summarized, it gets logged in your Google Sheets through Pabbly Connect.


Conclusion

Using Pabbly Connect, you can efficiently automate the process of summarizing large documents into Google Sheets. This integration not only saves time but also enhances productivity by allowing you to focus on essential tasks while the AI handles document summarization.

Ensure you check out Pabbly Connect to create business automation workflows and reduce manual tasks. Pabbly Connect currently offer integration with 2,000+ applications.

Turn RSS Feed into Blogger Posts Automatically

Learn how to turn RSS feeds into Blogger posts automatically using Pabbly Connect. Follow this step-by-step tutorial for seamless integration. Revolutionize your productivity approach with just a few strategic clicks. Uncover professional methods for connecting applications and creating workflows that reclaim hours of your week.

Watch Step By Step Video Tutorial Below


1. Accessing Pabbly Connect for Automation

To automate Blogger posts using RSS feeds, start by accessing Pabbly Connect. If you’re a new user, visit pabbl.com/connect and sign up for a free trial. This allows you to explore the platform with 100 free tasks per month, enabling you to turn up to 100 RSS feeds into Blogger posts automatically.

After signing up, log into your account and navigate to the workflow builder. This is where you will create the automation that connects your RSS feed to Blogger. Ensure you familiarize yourself with the interface, as this is crucial for setting up your integration effectively.


2. Setting Up the RSS Feed Trigger in Pabbly Connect

In this step, you will set up the trigger to fetch data from the RSS feed. Click on the ‘Add Trigger’ button within Pabbly Connect. Search for ‘RSS by Pabbly’ and select it. For the event, choose ‘New Item in Feed’ and click on ‘Connect’.

  • Enter the RSS feed URL from your desired publisher.
  • Select the filter type as ‘Default’.
  • Click on ‘Save and Send Test Request’ to fetch data.

Upon successful setup, you will receive a response containing the title, link, publish date, and description from the RSS feed. This data will be used to generate your Blogger post.


3. Generating Content Using Google Gemini

Next, you will generate content for your Blogger post using Google Gemini. Click on ‘Add New Action Step’ in Pabbly Connect and search for ‘Gemini’. Select it and choose the event ‘Generate Content’ before clicking ‘Connect’.

If you have an existing connection, select it; otherwise, create a new one by entering your API key from Google AI Studio. After connecting, you will need to input a prompt for content generation. Ensure you map the title, description, and link from the RSS feed into the prompt to make it dynamic.

  • Select the model as ‘Gemini 2.5 flash’.
  • Choose the method ‘Generate Content’.
  • Click on ‘Save and Send Test Request’ to generate the content.

This action will create a blog post draft in your Blogger account based on the content generated from the RSS feed.


4. Posting the Generated Content to Blogger

After generating the content, the next step is to post it on Blogger. Click on ‘Add New Action Step’ again and search for ‘Google Blogger’. Select it and choose the event ‘Create a Post’ before clicking ‘Connect’. using Pabbly Connect

Sign in with your Google account to establish a connection. Choose the blog ID where you want to post the content. You can map the title and content generated by Gemini into the respective fields. Set the status of the post according to your preference, either as a draft or live.

Map the title from the RSS feed. Map the content generated by Gemini. Choose the post status (Draft/Live).

Once everything is mapped correctly, click on ‘Save and Send Test Request’. You will receive a confirmation that the post has been successfully drafted in your Blogger account.


5. Conclusion: Automating Blogger Posts with Pabbly Connect

In conclusion, using Pabbly Connect to automate the process of turning RSS feeds into Blogger posts is straightforward and efficient. This integration allows you to streamline your content creation process without manual intervention.

Ensure you check out Pabbly Connect to create business automation workflows and reduce manual tasks. Pabbly Connect currently offer integration with 2,000+ applications.

Check out Pabbly Connect – Automate your business workflows effortlessly! Sign Up Free – Start your journey with ease! 10,000+ Video Tutorials – Learn step by step! Join Pabbly Facebook Group – Connect with 21,000+ like minded people!

By following the steps outlined in this tutorial, you can set up your automation to fetch news from your chosen RSS feed, generate engaging content using Google Gemini, and publish it directly to your Blogger account. Start your free trial of Pabbly Connect today and enhance your blogging experience!


How to Send Post-Purchase Follow-Up Emails Using AI After WooCommerce Orders

Learn how to automate post-purchase follow-up emails using Pabbly Connect with WooCommerce and OpenAI. Step-by-step guide included. Eliminate manual repetitive tasks from your workflow. Discover proven automation methods with intuitive steps designed for efficiency-minded professionals.

Watch Step By Step Video Tutorial Below


1. Accessing Pabbly Connect for Automation

To start sending post-purchase follow-up emails, you need to use Pabbly Connect. First, open your browser and go to the Pabbly Connect homepage by typing Pabbly.com/connect. Here, you’ll find options to either sign in or sign up for a free account.

If you’re new to Pabbly Connect, select the ‘Sign Up Free’ option. This gives you access to 100 free tasks each month to practice automation. Existing users can simply click ‘Sign In’ to access their dashboard where all Pabbly applications are available.


2. Creating a Workflow in Pabbly Connect

Once logged into Pabbly Connect, click on the ‘Create Workflow’ button to start building your automation. You can choose to create from scratch or use AI for assistance. For this tutorial, select ‘Create from Scratch’.

Next, you’ll be prompted to choose between two workflow builders: the modern beta version or the classic version. Opt for the beta version for a more flexible experience. After that, name your workflow appropriately, such as ‘Send Post Purchase Follow-Up Emails Using AI After WooCommerce Orders’.

  • Click on the ‘Create’ button.
  • Select ‘WooCommerce’ as your trigger application.
  • Choose ‘New Order Created’ as the app event.

This setup will ensure that every new order triggers the workflow automatically.


3. Configuring WooCommerce with Pabbly Connect

After selecting WooCommerce, you will receive a webhook URL from Pabbly Connect. This URL serves as a bridge to connect WooCommerce with Pabbly. Copy this URL and navigate to your WordPress dashboard.

In your WordPress dashboard, go to WooCommerce settings. Under the ‘Advanced’ tab, find the ‘Webhooks’ section. Click on ‘Add Webhook’ to create a new webhook for the new order event.

  • Name the webhook as ‘New Order Email’.
  • Set the status to active.
  • Select ‘Order Created’ for the topic.
  • Paste the copied webhook URL in the delivery URL field.

Save the webhook to finalize the integration with Pabbly Connect. This allows WooCommerce to send data to Pabbly Connect whenever a new order is created.


4. Generating Email Content Using OpenAI

With the webhook set up, return to Pabbly Connect to capture the webhook response. Click on ‘Capture Webhook Response’ to receive data from WooCommerce. Place a test order in your WooCommerce store to generate a sample response.

Once the order is placed, you will see the order details in Pabbly Connect. Now, add a new action step and choose OpenAI as the action app. Select ‘Chat GPT’ as your app event to generate the email content automatically.

Click ‘Connect’ to create a connection with OpenAI. Enter your OpenAI API key when prompted. Select the AI model, such as GPT-4 Mini.

Map the required fields to create a prompt that includes customer details and order information. This will allow OpenAI to generate personalized email content.


5. Sending the Email via Gmail

After generating the email content, it’s time to send it using Gmail. Add another action step in Pabbly Connect and select Gmail as your action app. Choose the ‘Send Email’ event to configure the email sending process.

Connect your Gmail account by either using an existing connection or creating a new one. Fill in the required fields, including the sender’s name and email address, recipient’s email, subject, and email content generated by OpenAI. Make sure to map the recipient’s email from the WooCommerce response.

Set the email subject to include the customer’s name. Map the content generated by OpenAI into the email body. Choose whether to send as plain text or HTML.

Finally, click on ‘Save and Send Test Request’ to verify that the email is sent successfully. Check your Gmail account to confirm receipt of the email.


Conclusion

By following these steps, you can automate the process of sending post-purchase follow-up emails using Pabbly Connect, WooCommerce, and OpenAI. This integration not only saves time but also enhances customer engagement through personalized communication.

Ensure you check out Pabbly Connect to create business automation workflows and reduce manual tasks. Pabbly Connect currently offer integration with 2,000+ applications.

How to Post from Facebook to X (Twitter) Automatically

Learn how to automate posting from Facebook to X (Twitter) using Pabbly Connect. Follow this detailed tutorial for seamless integration. Build sophisticated automated workflows in less time than you think. This guide translates complex integrations into straightforward steps for immediate implementation.

Watch Step By Step Video Tutorial Below


1. Setting Up Pabbly Connect for Facebook and X Integration

To automate posting from Facebook to X, you first need to access Pabbly Connect. Open your browser and go to pabbl.com/connect. If you are a new user, click on the ‘Sign up for free’ option in the top right corner. This will allow you to create an account and explore the platform with 100 free tasks monthly.

Once logged in, navigate to the workflow builder. This is where you will create your automation workflow. Ensure that all your applications, including Facebook and X, are logged in to streamline the connection process.


2. Creating the Trigger for Facebook Posts in Pabbly Connect

In your Pabbly Connect workflow, click on the ‘Add Trigger’ button to begin. Search for ‘Facebook Pages’ and select it as your trigger application. For the event, choose ‘New Post’ to capture any new posts made on your Facebook page.

  • Select your Facebook page after connecting your account.
  • Click on ‘Save and Send Test Request’ to capture the response.

Once you create a new post on Facebook, Pabbly Connect will wait for the webhook response, capturing the details of the post you just made. This is a crucial step to ensure that your automation works seamlessly.


3. Generating a Tweet Using Google Gemini

After capturing your Facebook post, the next step in Pabbly Connect is to generate a tweet from this content. Click on ‘Add New Action Step’ and search for ‘Google Gemini’. Select it and choose the event ‘Generate Content’ to convert your Facebook post into a tweet.

To connect Google Gemini, you will need to provide an API key. Navigate to Google AI Studio, create your API key, and paste it back into Pabbly Connect. This allows you to use Gemini’s capabilities to transform your Facebook post into a suitable tweet.


4. Posting the Generated Tweet on X

With the tweet generated, the final step is to post it on X (formerly Twitter). Click on ‘Add New Action Step’ again, search for ‘X’, and select it. Choose the event ‘Create Tweet’ to set up the posting action.

  • Connect your X account by providing your Client ID and Secret.
  • Map the message field to the content generated by Google Gemini.

After saving this step, Pabbly Connect will automatically post the generated tweet on your X account whenever you create a new post on Facebook. This automation ensures that your social media presence is enhanced effortlessly.


5. Conclusion: Automate Your Facebook to X Posting with Pabbly Connect

In conclusion, using Pabbly Connect allows you to automate the process of posting from Facebook to X seamlessly. By setting up triggers and actions, you can ensure that your posts reach a wider audience without additional effort. This integration not only saves time but also enhances your social media strategy.

Ensure you check out Pabbly Connect to create business automation workflows and reduce manual tasks. Pabbly Connect currently offer integration with 2,000+ applications.

Check out Pabbly Connect – Automate your business workflows effortlessly! Sign Up Free – Start your journey with ease! 10,000+ Video Tutorials – Learn step by step! Join Pabbly Facebook Group – Connect with 21,000+ like minded people!

Try implementing this automation today with Pabbly Connect and experience the benefits of streamlined social media management. If you have any questions or need assistance, feel free to reach out for support.


Launch WhatsApp AI Agents in Minutes

Learn how to launch WhatsApp AI Agents in minutes using Pabbly Chatflow. This detailed tutorial covers every step for seamless integration. Learn step-by-step how to create, test, and optimize chatbots that enhance customer experience while reducing support workload.

Watch Step By Step Video Tutorial Below


1. Access Pabbly Chatflow for WhatsApp Integration

To launch WhatsApp AI Agents efficiently, the first step is to access Pabbly Chatflow. Simply search for Pabbly.com in your browser and navigate to the Chatflow section. Here, you can either sign in or create a new account to get started with your WhatsApp integration.

Once logged in, you will be directed to the dashboard of Pabbly Chatflow. This platform allows you to manage all your WhatsApp communications seamlessly. If you are new, consider signing up for a free trial to explore the features offered.


2. Adding Your WhatsApp Number in Pabbly Chatflow

Next, you need to add your WhatsApp number to Pabbly Chatflow. Click on the ‘Add Number’ button within your dashboard. You will see two methods for adding your number; choose the one that suits you best.

  • Select the method to register your WhatsApp number.
  • Follow the prompts to verify your number.

After successfully adding your number, you can start utilizing Pabbly Chatflow to manage customer queries through WhatsApp. This integration allows for effective communication and automated responses.


3. Creating Your WhatsApp AI Agent

To create a WhatsApp AI Agent using Pabbly Chatflow, navigate to the AI Assistant feature. Click on the ‘Add’ button to create a new assistant. You will be prompted to name your assistant and choose the type of instructions you want to set.

Choose ‘AI Agent’ from the dropdown menu. This will automatically update the basic instructions. You can further customize your AI Agent by adjusting settings like creativity and response style. Make sure to save your changes to finalize the setup.


4. Configuring AI Agent Settings in Pabbly Chatflow

After creating your AI Agent, the next step is to configure its settings. In Pabbly Chatflow, you can specify various parameters like the response temperature and API key integration. This ensures your AI Agent responds accurately to user queries.

  • Set the response temperature to control creativity.
  • Enter your OpenAI API key for enhanced functionality.

These configurations are crucial for ensuring that your AI Agent can effectively assist customers on WhatsApp. Once configured, make sure to save the settings to activate your WhatsApp AI Agent.


5. Assigning Your AI Agent to WhatsApp Chats

Finally, to assign your newly created AI Agent to your WhatsApp chats, go to the inbox settings in Pabbly Chatflow. Here, you can enable the AI Assistant feature and select the contacts you want your agent to respond to.

Click on the ‘Save’ button to apply these settings. Your AI Agent is now ready to handle customer inquiries on WhatsApp, providing instant replies and support.


Conclusion

In this tutorial, we explored how to launch WhatsApp AI Agents using Pabbly Chatflow. By following the steps outlined, you can automate customer interactions and improve communication efficiency in minutes. Start utilizing Pabbly Chatflow today for seamless WhatsApp integration!

Ensure you check out Pabbly Connect to create business automation workflows and reduce manual tasks. Pabbly Connect currently offer integration with 2,000+ applications.

Never Miss a YouTube Comment Again (Auto Replies)

Learn how to automate replies to YouTube comments using Pabbly Connect. Follow this step-by-step guide to enhance your engagement effortlessly! Implement the precise methodologies leading organizations use to automate repetitive tasks, illustrated with practical examples designed for immediate application.

Watch Step By Step Video Tutorial Below


1. Setting Up Pabbly Connect for Auto Replies

To start automating replies to YouTube comments, you need to access Pabbly Connect. Open a new tab and enter the URL Pabbly.com/connect to reach the Pabbly Connect homepage.

Once there, you have options to sign in or sign up for a free account. If you’re a new user, select the ‘Sign Up Free’ option to create your account, which provides you with 100 free tasks each month. Existing users can simply click ‘Sign In’ to access their accounts.


2. Creating a New Workflow in Pabbly Connect

After logging into your Pabbly Connect account, you will be directed to the dashboard. Here, you can create a new workflow by clicking on the ‘Create Workflow’ button. You will be prompted to choose between creating from scratch or using AI.

  • Select ‘Create from Scratch’ to begin.
  • Choose the Beta Workflow Builder for a modern experience.

Next, name your workflow, for example, ‘Auto Reply to YouTube Comments,’ and select a folder for better organization. After that, click the ‘Create’ button to proceed to the workflow page.


3. Adding YouTube as the Trigger App

In this step, you will add YouTube as the trigger app in your Pabbly Connect workflow. Click the ‘Add Trigger’ button and search for YouTube. Select it as your trigger app and choose the event ‘New Comment on a Channel’.

Now, connect your YouTube account by clicking the ‘Connect’ button. You will need to authorize Pabbly Connect to access your YouTube channel. Once connected, select your channel and specify how many comments you want to fetch at once, typically one comment is sufficient.


4. Generating Auto Replies Using Open AI

After setting up the trigger, it’s time to generate replies to the comments. Add a new action step and search for Open AI. Choose the ‘Chat GPT’ option to generate responses for your YouTube comments. using Pabbly Connect

Connect to Open AI by entering your API token. If you don’t have one, create it through the Open AI API keys page. Once connected, you will need to configure the model (select GPT-4) and provide a prompt that instructs Open AI on how to respond to the YouTube comments.

  • Enter the prompt detailing how to respond to comments.
  • Use mapping to insert the actual comment text dynamically.

Click ‘Save and Send Test Request’ to generate a reply based on the comment received. This will ensure that every comment gets a personalized response.


5. Sending Replies Back to YouTube

Finally, you will need to send the generated reply back to the YouTube comment. Add another action step and select YouTube again, this time choosing the option ‘Reply to Comment’. Use the existing connection you created earlier.

In the fields provided, map the reply text generated by Open AI and the comment ID from the YouTube trigger. This ensures that the correct reply is sent to the appropriate comment. Click ‘Save and Send Request’ to finalize the setup.

Now, set the trigger time to check for new comments every 10 minutes. This way, Pabbly Connect will keep your YouTube comments engaged automatically!


Conclusion

Using Pabbly Connect, you can effortlessly automate replies to your YouTube comments, enhancing viewer engagement and saving time. This setup allows you to respond instantly to every comment, ensuring no interaction goes unnoticed. Start using Pabbly Connect today to streamline your YouTube channel management!

Ensure you check out Pabbly Connect to create business automation workflows and reduce manual tasks. Pabbly Connect currently offer integration with 2,000+ applications.

How to Automatically Reply to Facebook Messages Using AI

Learn how to automatically reply to Facebook messages using AI with Pabbly Connect. This step-by-step tutorial guides you through the integration process. Revolutionize your productivity approach with just a few strategic clicks. Uncover professional methods for connecting applications and creating workflows that reclaim hours of your week.

Watch Step By Step Video Tutorial Below


1. Accessing Pabbly Connect for Integration

To start automatically replying to Facebook messages using AI, first, access Pabbly Connect. You can do this by visiting Pabbly.com/n in your browser. This will take you to the Pabbly Connect homepage.

Once there, you will see options to either sign in or sign up for a free account. New users can click on ‘Sign Up Free’ to get 100 free tasks every month, allowing you to explore the software’s capabilities.


2. Creating a Workflow in Pabbly Connect

After signing in, navigate to the Pabbly Connect dashboard and click on the ‘Create Workflow’ button. You will then be prompted to name your workflow, such as ‘Automatically Reply to Facebook Messages Using AI.’ Choose a relevant folder for your workflow.

  • Click on ‘Create’ to initiate the workflow.
  • Select the Beta version for a more flexible experience.
  • Set up the trigger event as Facebook Messenger with the event type as New Message Sent to Page.

Once you have set up the trigger, click on ‘Connect’ to build your connection with Facebook Messenger through Pabbly Connect. You will need to select your Facebook account and grant access to Pabbly Connect to manage your messages.


3. Setting Up AI Replies Using Pabbly Connect

With your trigger configured, the next step involves setting up the action to generate replies using AI. Select the action application as your AI tool, such as Gemini or Open AI, and choose the event as Generate Content.

  • Map the data from the trigger step to the action step.
  • Input the relevant prompt for generating a reply based on the received message.
  • Save your action and send a test request to verify the integration.

By following these steps, you can successfully generate AI-driven replies for incoming messages on your Facebook page using Pabbly Connect. Ensure that the AI tool is configured correctly to generate appropriate responses based on customer queries.


4. Sending Replies Back to Facebook Messenger

After generating replies with your AI tool, the final step is to send these responses back to Facebook Messenger. Select Facebook Messenger as the action application again, and choose the event as Send Message.

Map the necessary fields such as Page ID, Sender ID, and Message Content. Confirm the connection and save your settings. Send a test message to ensure the setup works correctly.

This integration allows your customers to receive instant replies on Facebook Messenger, enhancing customer engagement and satisfaction through Pabbly Connect.


5. Testing and Verifying Your Setup

To ensure everything is working seamlessly, send a test message to your Facebook page from another account. Check if the automated reply is generated and sent back through Pabbly Connect.

If the reply is received successfully, your automation is set up correctly. This step is crucial to confirm that the integration between Facebook Messenger and your AI tool via Pabbly Connect is functioning as intended.


Conclusion

Using Pabbly Connect, you can automate replies to Facebook messages effortlessly. This integration not only saves time but also enhances customer interaction through AI-driven responses. Start setting up your automation today!

Ensure you check out Pabbly Connect to create business automation workflows and reduce manual tasks. Pabbly Connect currently offer integration with 2,000+ applications.