AI WhatsApp Assistant for Patient Queries

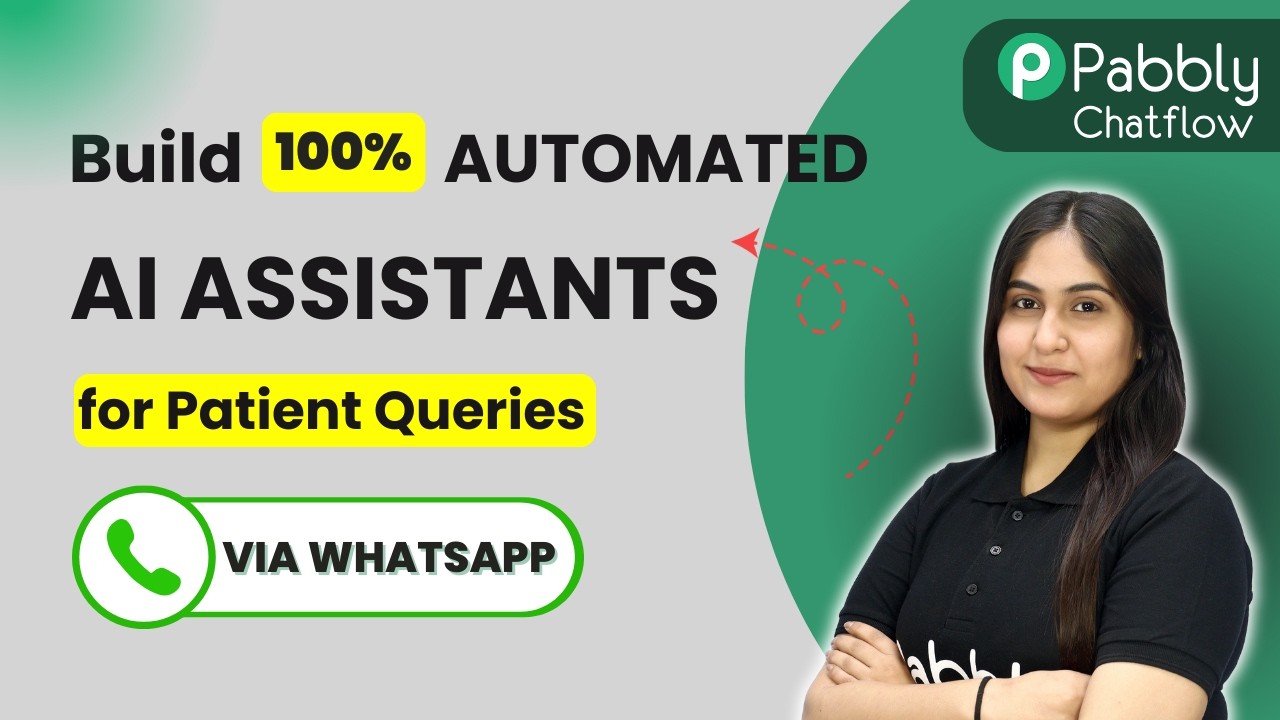
Learn how to set up an AI WhatsApp Assistant for patient queries using Pabbly Chatflow. Step-by-step tutorial for seamless integration. Explore how leading businesses automate customer interactions with carefully designed chat sequences that feel natural and helpful.

Watch Step By Step Video Tutorial Below


1. Accessing Pabbly Chatflow for Your WhatsApp Integration

To create an AI WhatsApp Assistant for patient queries, you first need to access Pabbly Chatflow. Start by visiting the Pabbly Chatflow website and signing in or signing up for a free account. If you are a new user, click on the ‘Sign Up Free’ button to create your account.

Once logged in, you will be directed to the Pabbly dashboard where you can see all your applications. Click on the ‘Access Now’ button to open Pabbly Chatflow. Here, you can manage your WhatsApp integration and configure your AI assistant.


2. Creating Your AI Assistant in Pabbly Chatflow

In this section, you will learn how to create your AI assistant using Pabbly Chatflow. Click on the ‘Add’ button to create a new assistant. You will be prompted to give a name to your assistant. After naming it, click on the ‘Add’ button to proceed.

  • Choose the type of assistant you want to create.
  • Select the instruction type from the dropdown menu, such as AI Agent or Customer Support Agent.
  • Fill in the necessary configuration details for your assistant.

After selecting the instruction type, basic instructions will be displayed. Customize these instructions as per your requirements. This process is crucial to ensure that your AI assistant can handle patient queries effectively.


3. Configuring AI Settings for Patient Queries

Now that you have created your AI assistant, it’s time to configure the AI settings in Pabbly Chatflow. You need to set parameters such as creativity, temperature, and the AI model you want to use. For instance, set the temperature to 0.4 for focused responses.

  • Select your AI model from the dropdown, like OpenAI’s GPT.
  • Add your OpenAI API key to connect the assistant with the AI model.
  • Set up header and footer messages for better user interaction.

Make sure to save your settings after configuring them. This ensures that your assistant will respond accurately to the patient queries it receives via WhatsApp.


4. Setting Up Knowledge Sources in Pabbly Chatflow

The next step is to set up a knowledge source for your assistant in Pabbly Chatflow. This knowledge source will allow the AI assistant to provide accurate answers to patient queries based on predefined information.

You can create a knowledge source by uploading a file in either PDF or plain text format. Once you have your file ready, upload it by selecting the file and clicking on the ‘Open’ button. This file should contain all the relevant information regarding your services and FAQs.


5. Assigning Your AI Assistant to WhatsApp Chats

Finally, you need to assign your AI assistant to your WhatsApp chats using Pabbly Chatflow. Navigate to the inbox settings and enable the auto-reply feature. Select the contact list that you want to assign the assistant to.

Once you have selected the contacts, click on the ‘Save’ button. This action will ensure that your AI assistant is now active and ready to respond to patient queries on WhatsApp.


Conclusion

By following these steps, you can successfully create an AI WhatsApp Assistant for patient queries using Pabbly Chatflow. This integration not only enhances communication but also improves patient engagement through instant responses.

Ensure you check out Pabbly Connect to create business automation workflows and reduce manual tasks. Pabbly Connect currently offer integration with 2,000+ applications.

Razorpay Payments to Google Sheets in Seconds (No Manual Work!)

Learn how to automate Razorpay payments to Google Sheets in seconds using Pabbly Connect. Follow this step-by-step tutorial for seamless integration. Discover how to seamlessly connect your essential tools through accessible instructions that make powerful automation available to professionals at every skill level.

Watch Step By Step Video Tutorial Below


1. Accessing Pabbly Connect for Automation

To begin integrating Razorpay payments with Google Sheets, first access Pabbly Connect by visiting Pabbly.com/connect. This platform enables seamless automation between different applications without any coding required.

Once on the Pabbly Connect page, you will see options to either sign in or sign up for a free account. If you are new to Pabbly Connect, click on ‘Sign Up Free’ to create your account. Existing users can simply click on ‘Sign In’ to access their dashboard.


2. Creating a New Workflow in Pabbly Connect

After signing into Pabbly Connect, navigate to the dashboard and click on the ‘Create Workflow’ button. You will be prompted to choose between the new beta version or the classic version for your workflow.

  • Select ‘New Beta’ for the latest features.
  • Name your workflow something like ‘Razorpay Payments to Google Sheets’.
  • Choose a folder, such as ‘Pabbly Connect’.

Once your workflow is named and the folder is selected, click on the ‘Create’ button. Your new workflow is now ready for configuration.


3. Setting Up the Trigger for Razorpay Payments

The next step in Pabbly Connect is to set up the trigger. This is crucial for automation. Select Razorpay as your trigger application and choose the event ‘Payment Captured’.

Click on the ‘Connect’ button, and Pabbly Connect will provide a webhook URL. Copy this URL as you will need it to link your Razorpay account with Pabbly Connect. Go to your Razorpay dashboard, click on ‘Developers’ and then select ‘Webhooks’ to add a new webhook.


4. Configuring the Webhook in Razorpay

In the Razorpay Webhook section, click on ‘Add New Webhook’. Paste the copied webhook URL from Pabbly Connect into the designated field. Set the secret key as ‘123’ and select the event as ‘Payment Captured’.

  • Ensure the webhook is saved successfully to enable data transmission.
  • You will see a status indicating that the webhook is waiting for a response.

To test the webhook, make a test payment through Razorpay. This will trigger the webhook and send data back to Pabbly Connect, confirming that the connection is successful.


5. Storing Payment Data in Google Sheets

With your Razorpay account connected to Pabbly Connect, the final step is to store the payment data in Google Sheets. Select Google Sheets as your next application in the workflow and choose the event ‘Add New Row’.

Click on ‘Connect’ and choose to add a new connection. Sign in with your Google account, granting Pabbly Connect the necessary permissions to access your Google Sheets.

Select the spreadsheet you want to use, such as ‘Razorpay Payments’. Map the fields from Razorpay to your Google Sheets, ensuring data flows correctly.

After mapping the required fields, click on ‘Save and Send Test Request’. Check your Google Sheets to verify that a new row has been added with the payment details.


Conclusion

By following these steps, you can seamlessly integrate Razorpay payments with Google Sheets using Pabbly Connect. This automation saves time and eliminates manual data entry, ensuring that your payment records are always up-to-date.

Ensure you check out Pabbly Connect to create business automation workflows and reduce manual tasks. Pabbly Connect currently offer integration with 2,000+ applications.

How to Build an AI Assistant That Responds to Voice Messages

Learn how to create an AI assistant that responds to voice messages using Pabbly Chatflow. Follow this detailed tutorial for step-by-step guidance. Explore how leading businesses automate customer interactions with carefully designed chat sequences that feel natural and helpful.

Watch Step By Step Video Tutorial Below


1. Accessing Pabbly Chatflow to Create Your AI Assistant

To build an AI assistant that responds to voice messages, you need to access Pabbly Chatflow. Start by opening a new tab and visiting the Pabbly Chatflow landing page. Here, you will find options to sign in or sign up for free.

If you are a new user, signing up will grant you 100 free credits each month to explore Pabbly Chatflow features. Once signed in, you will be directed to your dashboard, where you can begin creating your AI assistant.


2. Creating Your AI Assistant in Pabbly Chatflow

Once on the dashboard of Pabbly Chatflow, navigate to the AI Assistant section. Click on the ‘Add Assistant’ button to start the creation process. You will need to name your assistant; for this tutorial, let’s name it ‘AI Assistant That Responds to Voice Messages’.

  • Select the instruction type as ‘Custom Prompt’.
  • Enter your custom instructions detailing the assistant’s objectives.
  • Set the temperature for the responses, typically around 0.5 for balanced creativity.

After entering the necessary details, you can proceed to configure the settings for your AI assistant.


3. Configuring AI Instructions in Pabbly Chatflow

In this step, you will configure the AI instructions for your assistant within Pabbly Chatflow. Start by selecting ‘Open AI’ as the AI to use and choose the model, for example, GPT-5 Mini. Make sure you have a paid Open AI account to access these features.

Next, you will need to generate an API key from your Open AI account. Click on the hyperlink provided in the Pabbly Chatflow interface to create a new API key. After generating it, copy the key and paste it into the designated field in Pabbly Chatflow.

Once the API key is set, you can configure additional settings like header messages, footer messages, and fallback messages. These will enhance the user experience when interacting with your AI assistant.


4. Uploading Knowledge Source in Pabbly Chatflow

A critical part of creating your AI assistant is uploading a knowledge source. This document will serve as the foundation for your assistant’s responses. Prepare a detailed PDF or TXT file that explains your business and the products you offer.

  • Make sure your document includes all necessary details, such as product descriptions and pricing.
  • Upload the file in the knowledge source section of Pabbly Chatflow.
  • Confirm the upload by checking for the vector ID displayed in the interface.

Once your knowledge source is uploaded, your AI assistant will be equipped to provide accurate responses based on the information in the document.


5. Activating Your AI Assistant in Pabbly Chatflow

After configuring all settings and uploading the knowledge source, the final step is to activate your AI assistant. Toggle the activation button on and save your settings to ensure your assistant is live and ready to respond to voice messages.

You can also embed your assistant on your website by copying the provided script from the Pabbly Chatflow interface. This allows customers to interact with your AI assistant directly through your website.

Once activated, you can test the AI assistant by sending voice messages through WhatsApp and observing how it responds to various queries in real time.


Conclusion

Creating an AI assistant that responds to voice messages using Pabbly Chatflow is a straightforward process. By following the steps outlined in this tutorial, you can enhance customer interactions and streamline communication effectively.

Ensure you check out Pabbly Connect to create business automation workflows and reduce manual tasks. Pabbly Connect currently offer integration with 2,000+ applications.

Never Miss a Customer Message Again with a WhatsApp AI Agent

Learn how to create a WhatsApp AI Agent using Pabbly Chatflow to ensure you never miss a customer message again. Step-by-step guide included. Discover how to design chat experiences that feel personal and responsive while handling customer inquiries automatically around the clock.

Watch Step By Step Video Tutorial Below


1. Accessing Pabbly Chatflow for WhatsApp Integration

To create a WhatsApp AI agent that ensures you never miss a customer message, start by accessing Pabbly Chatflow. Go to your browser and type in the URL Pabbly.com/chatflow. This will take you to the Pabbly Chatflow homepage.

If you are a new user, click on the ‘Sign Up Free’ button to create an account. Existing users can simply sign in. Ensure you have a WhatsApp number connected to your Pabbly Chatflow account for the integration to work properly.


2. Creating Your WhatsApp AI Agent in Pabbly Chatflow

Once logged into Pabbly Chatflow, navigate to the AI Assistant feature. Click on the ‘Create New Assistant’ button. You will be prompted to name your assistant, so choose a relevant name that reflects your business.

  • Click on the ‘Set’ button to proceed.
  • You will be directed to a flow window where you can set up your AI agent.
  • Select the AI instruction type from the dropdown.

In the flow window, choose the AI agent option and configure the basic settings. This includes setting the temperature for responses, selecting the AI to use, and entering your OpenAI API key. This is crucial for your Pabbly Chatflow AI agent to function effectively.


3. Configuring AI Settings for Optimal Responses

In this section, you will configure your AI settings. Start by setting the temperature, which determines how creative or focused the responses will be. A lower value means more focused answers, while a higher value allows for more creative responses.

Next, select the AI model you wish to use. For this tutorial, we will use GPT-3.5, but you can choose another model based on your requirements. Make sure to enter your OpenAI API key correctly to connect it with Pabbly Chatflow.

  • Enable the Assistant settings to customize header and footer messages.
  • Set up stop keywords that will allow users to stop the AI assistant at any time.

After configuring these settings, save your changes to ensure that your Pabbly Chatflow AI agent is set up correctly.


4. Uploading Knowledge Source for Customer Queries

The knowledge source is vital for your AI agent to respond accurately to customer queries. In Pabbly Chatflow, you can upload a file containing FAQs and other relevant information. This allows the AI to provide accurate and timely responses to customer questions.

To upload your knowledge source, select the option to upload a file in the specified format, either PDF or plain text. After selecting the file from your file manager, click on the ‘Open’ button to upload it.

Ensure that your knowledge source is comprehensive and covers all potential customer queries. After uploading, verify that the file is correctly processed in Pabbly Chatflow.

Once uploaded, your AI agent will be equipped to handle a variety of customer inquiries effectively.


5. Activating Your WhatsApp AI Agent

After setting up your WhatsApp AI agent in Pabbly Chatflow, the final step is to activate it. To do this, go back to the assistant settings and enable the agent by clicking on the activation button.

Once activated, you can assign your AI agent to your WhatsApp chats. This ensures that all customer messages are handled promptly without any missed inquiries.

Navigate to the inbox settings and select the AI reply settings. Choose the contact list and assign the assistant accordingly.

By following these steps, you will have successfully created a WhatsApp AI agent using Pabbly Chatflow that will help you never miss a customer message again.


Conclusion

In this tutorial, we explored how to create an efficient WhatsApp AI agent using Pabbly Chatflow. By following these steps, you can ensure that your business never misses a customer message again, enhancing customer satisfaction and engagement.

Ensure you check out Pabbly Connect to create business automation workflows and reduce manual tasks. Pabbly Connect currently offer integration with 2,000+ applications.

Why Businesses Are Using AI on WhatsApp

Learn how to automate WhatsApp conversations using Pabbly Chatflow, integrating AI for seamless customer interactions. Follow our step-by-step tutorial. Discover how to design chat experiences that feel personal and responsive while handling customer inquiries automatically around the clock.

Watch Step By Step Video Tutorial Below


1. Accessing Pabbly Chatflow to Automate WhatsApp Conversations

To automate your WhatsApp conversations, start by accessing Pabbly Chatflow. Simply open your browser and type in the URL: www.Pabbly.com/Pabbly-chatflow. This platform is designed to help you create AI agents that can manage your WhatsApp inquiries effectively.

Once on the Pabbly Chatflow homepage, sign in using your existing account or click on the ‘Sign Up for Free’ option if you are a new user. Signing up grants you access to 100 free tasks monthly, allowing you to explore the platform’s features and capabilities.


2. Setting Up WhatsApp Integration in Pabbly Chatflow

In this section, we will set up WhatsApp integration using Pabbly Chatflow. After logging in, navigate to the dashboard where you will see an option to add your WhatsApp number. Click on the ‘Add WhatsApp Number’ button to initiate the integration process.

  • Select the preferred method to connect your WhatsApp, either through the ‘Connect WhatsApp’ button or by using a manual token.
  • Follow the prompts to complete the integration, ensuring your WhatsApp number is successfully linked to Pabbly Chatflow.

Once your WhatsApp number is connected, you can start creating your AI assistant that will handle customer inquiries automatically, enhancing your business communication.


3. Creating Your AI Assistant in Pabbly Chatflow

Now that your WhatsApp is integrated, it’s time to create an AI assistant using Pabbly Chatflow. On the left sidebar, click on the ‘AI Assistant’ option. This section allows you to manage your AI assistants, including creating new ones.

To create a new AI assistant, click on the ‘Create AI Assistant’ button. You will need to name your assistant and set its instructions. Here, you can specify the type of AI agent you want to create and customize the responses based on your business needs.

  • Select the instruction type as ‘AI Agent’ and adjust the creativity settings according to your preference.
  • Enter your OpenAI API key for the AI to function effectively within Pabbly Chatflow.

After configuring the AI assistant, save your settings to ensure it is ready to respond to incoming WhatsApp messages.


4. Uploading Knowledge Base for Your AI Assistant

To enhance the effectiveness of your AI assistant, you’ll need to upload a knowledge base using Pabbly Chatflow. This knowledge base will guide the AI on how to respond to various customer inquiries. In the AI assistant settings, look for the ‘Knowledge Source’ section.

Choose the option to upload a file, and select the document containing your business information. Ensure this document is comprehensive, covering all aspects of your services, including pricing, appointment rules, and more. This will help the AI provide accurate responses to customer queries.

Make sure your knowledge base is detailed, ideally in a PDF or text format. Upload this document to the Pabbly Chatflow interface to ensure the AI has all necessary information.

Once uploaded, the AI assistant will utilize the information in this knowledge base to answer customer inquiries effectively.


5. Enabling Your AI Assistant for WhatsApp Chats

After creating your AI assistant and uploading the knowledge base, the final step is to enable it for WhatsApp chats using Pabbly Chatflow. Navigate to the ‘Inbox’ settings in the left sidebar. Here, you can configure your AI assistant to respond to specific contacts or groups.

Select the AI assistant you created and save the settings. You can also enable AI auto-replies for all contacts, ensuring that every inquiry is handled promptly. This feature is crucial for maintaining customer engagement.

Choose whether to apply the AI assistant to all contacts or specific groups. Save your configurations to activate the AI assistant.

Once activated, your AI assistant will be ready to manage WhatsApp conversations, providing instant responses to customer inquiries and improving your business efficiency.


Conclusion

In conclusion, utilizing Pabbly Chatflow to automate WhatsApp conversations is an effective strategy for businesses looking to enhance customer interaction. By creating an AI assistant, uploading a comprehensive knowledge base, and enabling auto-replies, you can ensure your inquiries are managed efficiently. This integration not only saves time but also improves customer satisfaction.

Ensure you check out Pabbly Connect to create business automation workflows and reduce manual tasks. Pabbly Connect currently offer integration with 2,000+ applications.

How to Notify Team Members from Google Forms to Slack

Learn how to integrate Google Forms and Slack using Pabbly Connect to automate notifications for your team. Step-by-step tutorial included. Revolutionize your productivity approach with just a few strategic clicks. Uncover professional methods for connecting applications and creating workflows that reclaim hours of your week.

Watch Step By Step Video Tutorial Below


1. Accessing Pabbly Connect for Integration

To begin integrating Google Forms with Slack, you first need to access Pabbly Connect. Open a new tab and navigate to Pabbly’s official website at Pabbly.com/connect.

If you’re a new user, click on the ‘Sign Up Free’ option to create an account and enjoy 100 free tasks every month. Existing users can simply click on ‘Sign In’. After signing in, locate the ‘Access Now’ button for Pabbly Connect to enter the dashboard where you can create and manage your automation workflows.


2. Creating a Workflow in Pabbly Connect

Once you’re in the Pabbly Connect dashboard, click on the ‘+ Create Workflow’ button to start building your automation. You’ll be prompted to choose between the new beta workflow builder and the classic version; select the new beta version.

Next, enter the workflow name as ‘Notify Team Members from Google Forms to Slack’ and select a folder if necessary. Click on the ‘Create’ button to successfully create the workflow. This initial setup is crucial for automating notifications based on Google Forms submissions.


3. Setting Up the Trigger with Google Forms

The next step involves setting up a trigger in Pabbly Connect. Select Google Forms as the trigger application and choose the event ‘New Response Received’. This event will activate the automation whenever a new form submission is made.

Click on the ‘Connect’ button, and you will receive a webhook URL. Copy this URL, as it will be used to connect your Google Forms account to Pabbly Connect. Open your Google Forms account, go to the form you created, and navigate to the responses section.

  • Click on ‘Extensions’ and select ‘Pabbly Connect Webhooks’.
  • Choose ‘Initial Setup’ and paste the copied webhook URL.
  • Set the trigger column to ‘F’, which is the final data column.

After pasting the URL, click on ‘Send Test’ to verify the connection. If successful, you will see a confirmation in your Pabbly Connect workflow.


4. Configuring Slack Notifications

Now that Google Forms is connected to Pabbly Connect, it’s time to set up Slack as the action application. Click on the ‘+’ icon to add a new application and search for Slack.

Select ‘Send Channel Message’ as the action event. Click ‘Connect’ and choose to add a new connection. You will be asked to enter the token type; select ‘Bot’. After entering the token type, click ‘Save’. Allow the necessary permissions for Pabbly Connect to access your Slack account.

  • Select the channel ID where you want to send notifications (e.g., ‘new leads’).
  • Compose the message you want to send, like ‘New product catalog received’.
  • Map the fields from Google Forms to personalize the message.

Mapping is essential as it allows the automation to dynamically capture user data from each form submission. After mapping the necessary fields, click on ‘Save and Send Test Request’ to verify that the message is sent to your Slack channel.


5. Finalizing Your Automation

After successfully testing the Slack notification, your workflow is almost complete. Ensure to enable the toggle switch to activate your workflow in Pabbly Connect. If this toggle is not enabled, your automation will not function.

At this point, you can finalize your setup by clicking on ‘Save’. Your automation is now ready to notify the sales team automatically whenever a new submission is received through Google Forms. Remember, you do not need to click ‘Save and Send Test Request’ for future submissions; the automation will run automatically.


Conclusion

In this tutorial, we’ve demonstrated how to use Pabbly Connect to integrate Google Forms and Slack effectively. By following these steps, you can automate notifications for your team, enhancing productivity and communication.

Ensure you check out Pabbly Connect to create business automation workflows and reduce manual tasks. Pabbly Connect currently offer integration with 2,000+ applications.

Utilizing Pabbly Connect for such integrations simplifies workflows and ensures that your team stays informed in real-time. Start automating your processes today!

How to Send Discord Notifications Automatically

Learn how to send Discord notifications automatically using Pabbly Connect. Follow this detailed tutorial to set up integrations seamlessly. Transform complex automation concepts into accessible, actionable steps that eliminate unnecessary manual work while maximizing existing application capabilities.

Watch Step By Step Video Tutorial Below


1. Accessing Pabbly Connect for Automation

To send Discord notifications automatically, you first need to access Pabbly Connect. Start by navigating to the Pabbly Connect website. If you are a new user, go to pabbl.com/connect and sign up for free. This allows you to explore the platform’s features, including 100 free tasks per month.

Once you are on the Pabbly Connect dashboard, you will see the workflow builder. This is where you will create the automation that sends notifications to Discord. Click on the ‘Create Workflow’ button to begin setting up your integration.


2. Setting Up the Trigger in Pabbly Connect

In this step, you will set up the trigger for your automation. Click on the ‘Add Trigger’ button in Pabbly Connect. For the trigger application, search for and select ‘Typeform’. Then, choose the event as ‘New Entry’ to capture new registrations from your Typeform.

  • Select ‘Typeform’ as the trigger application.
  • Choose the event ‘New Entry’.
  • Click on ‘Connect’ to establish the connection.

After selecting the connection, if you haven’t created one before, click on ‘Add New Connection’. Ensure that you are logged into your Typeform account to allow Pabbly Connect to access your forms. Once connected, select the specific form you want to use and click ‘Save and Send Test Request’ to proceed.


3. Capturing the Response from Typeform

After clicking ‘Save and Send Test Request’, Pabbly Connect will wait for a webhook response. To capture this response, you need to submit a test entry through your Typeform. Go back to your Typeform and fill it out with test data.

  • Enter a test first name and last name.
  • Provide a test email address.
  • Submit the form to generate a response.

Once the form is submitted, Pabbly Connect will capture the response and you can move on to the next step, which involves sending notifications to Discord.


4. Configuring Discord Action in Pabbly Connect

Now, it’s time to set up the action that sends notifications to Discord. Click on ‘Add Action Step’ in Pabbly Connect and search for ‘Discord’. Select Discord and choose the event as ‘Send Channel Message’. This will allow you to send messages to a specific channel in your Discord server.

To set this up, you will need to connect your Discord account by providing a webhook URL. Go to your Discord server settings, navigate to Integrations, and create a new webhook. Copy the webhook URL and paste it into Pabbly Connect.


5. Finalizing Your Automation in Pabbly Connect

After pasting the webhook URL in Pabbly Connect, you will need to configure the message that will be sent to your Discord channel. You can customize the message to include the details captured from the Typeform response. Use the mapping feature in Pabbly Connect to dynamically insert these details into your message.

Once you have set up the message, click on ‘Save and Send Test Request’ to test the automation. If everything is configured correctly, you should receive a notification in your Discord channel confirming that the automation is working. This completes the setup for sending Discord notifications automatically.


Conclusion

In this tutorial, we explored how to send Discord notifications automatically using Pabbly Connect. By following the steps outlined, you can seamlessly integrate Typeform with Discord, ensuring your team is notified in real-time whenever a new registration occurs. This powerful automation can enhance your team’s communication and efficiency.

Ensure you check out Pabbly Connect to create business automation workflows and reduce manual tasks. Pabbly Connect currently offer integration with 2,000+ applications.

Shopify Order Alert Automation You NEED in 2026

Learn how to automate Shopify order alerts using Pabbly Connect for seamless notifications via Slack and Gmail. Follow our step-by-step guide for 2026! Master proven automation processes with practical implementation examples and strategic recommendations you can apply immediately in your workflow.

Watch Step By Step Video Tutorial Below


1. Accessing Pabbly Connect for Shopify Order Alert Automation

To begin automating your Shopify order alerts, first access Pabbly Connect by visiting pabby.com in your browser. This platform serves as the central hub for integrating Shopify with other applications like Slack and Gmail.

Once on the Pabbly website, you can either sign in if you are an existing user or sign up for a free account to explore the features. Signing up gives you access to 100 free tasks monthly, allowing you to test the automation capabilities of Pabbly Connect.


2. Creating a Workflow in Pabbly Connect

After logging into Pabbly Connect, navigate to the dashboard and click on the ‘Create Workflow’ button. You will then be prompted to choose between the new beta workflow builder and the classic version. Select the new beta version for a modern experience.

  • Click on ‘Create Workflow’.
  • Name your workflow as ‘Shopify Order Alert Automation You NEED in 2026’.
  • Select a folder for organization, such as ‘All Automations’.

Click on ‘Create’ to finalize the workflow setup. Once created, you will need to set up a trigger application, which will be Shopify in this case, to initiate the workflow whenever a new order is received.


3. Setting Up the Trigger for Shopify Orders

In your workflow, select Shopify as the trigger application and choose the ‘New Order’ event. To connect Shopify with Pabbly Connect, you will be provided with a webhook URL.

To set up the webhook, open your Shopify admin panel, navigate to ‘Settings’, and then to ‘Notifications’. Here, you will find the option to create a new webhook. Configure it to trigger on ‘Order Creation’ and paste the webhook URL from Pabbly Connect into the designated field. Ensure the format is set to JSON.

  • Select ‘Order Creation’ as the event type.
  • Paste the webhook URL from Pabbly Connect.
  • Choose JSON as the format.

Once saved, this webhook will facilitate the connection between Shopify and Pabbly Connect, allowing it to receive data whenever a new order is placed.


4. Testing the Connection and Capturing Data

After setting up the webhook, return to Pabbly Connect to test the connection. You will see a prompt indicating that it is waiting for a webhook response. To initiate this, place a test order on your Shopify store.

Fill in the necessary order details, such as customer name, email, and address, and complete the payment. Once the order is confirmed, Pabbly Connect will capture the order details, including the customer information and product purchased.

Enter customer details accurately during the test order. Ensure payment is completed to trigger the webhook. Check Pabbly Connect for the captured response.

Upon successful capture, you can review the order details in Pabbly Connect, confirming that the integration is functioning correctly.


5. Sending Notifications via Slack and Gmail

With the order details successfully captured, the next step is to notify your team via Slack and send a confirmation email to the customer. In Pabbly Connect, add a new action step and select Slack as the action application.

Choose the ‘Send Channel Message’ action, and connect your Slack account by entering the required token. Specify the channel ID where you want the message to be sent, and compose a message containing the order details using the mapping feature to dynamically insert customer information.

Select the Slack channel ID for order notifications. Compose a message using the mapping feature for dynamic content. Test the message sending to ensure it reaches the correct channel.

Following this, add another action step for Gmail to send a personalized email to the customer. Map the necessary fields such as recipient email, subject, and body content, ensuring that the email reflects the order details accurately.


Conclusion

By following this tutorial, you have successfully set up Shopify order alert automation using Pabbly Connect. This integration allows for seamless notifications to your team on Slack and personalized emails to customers, enhancing your e-commerce operations.

Ensure you check out Pabbly Connect to create business automation workflows and reduce manual tasks. Pabbly Connect currently offer integration with 2,000+ applications.

Utilizing Pabbly Connect not only streamlines your order management process but also ensures timely communication, making it an essential tool for your business in 2026.

Automating Data Segregation with Pabbly Connect

Learn how to automate data segregation using Pabbly Connect to integrate Google Sheets and Airtable seamlessly. Follow our step-by-step tutorial for efficient workflows. Transform complex automation concepts into accessible, actionable steps that eliminate unnecessary manual work while maximizing existing application capabilities.

Watch Step By Step Video Tutorial Below


1. Accessing Pabbly Connect for Automation

To begin automating data segregation, first access Pabbly Connect. This platform is essential for integrating various applications like Google Sheets and Airtable. Start by visiting the Pabbly Connect website and signing up for a free account, which allows you to create workflows effortlessly.

Once logged in, you will see the dashboard where you can create new workflows. Click on the ‘Create New Workflow’ button to initiate the automation process. Pabbly Connect provides a user-friendly interface to set up triggers and actions seamlessly.


2. Creating Your Workflow in Pabbly Connect

In this step, you will create a workflow named ‘Automating Data Segregation’. After naming your workflow, select a trigger application. For this example, we will use Jotform to capture new form responses. This integration is facilitated by Pabbly Connect, ensuring smooth data transfer.

  • Select Jotform as the trigger application.
  • Choose ‘New Response’ as the event.
  • Connect your Jotform account using the provided Webhook URL.

After setting up the trigger, Pabbly Connect will capture form responses automatically. This means you won’t have to manually check for new entries, saving you valuable time.


3. Filtering Data with Pabbly Connect

The next step is to filter the captured data using the ‘Filter by Pabbly’ feature. This allows you to segregate leads based on specific criteria, such as budget. In our example, we will filter responses with a budget greater than $100.

  • Set the filter condition to check if the budget is greater than $100.
  • Save and test the filter to ensure it works correctly.
  • Confirm that the filter returns the correct responses based on the budget.

Using Pabbly Connect for filtering ensures that only qualified leads are processed, streamlining your workflow and enhancing efficiency.


4. Storing Qualified Leads in Google Sheets

Once the data is filtered, the next action is to store the qualified leads in Google Sheets. Select Google Sheets as the action application in Pabbly Connect. Choose the event ‘Add New Row’ to ensure that each qualified lead is recorded appropriately.

Connect your Google account to allow Pabbly Connect access. Create a new Google Sheet to organize your leads. Map the fields from Jotform to the corresponding columns in Google Sheets.

This process ensures that all relevant information is captured and stored dynamically without manual input, thanks to Pabbly Connect facilitating the integration.


5. Testing the Integration Process

After setting up the integration, it’s essential to test the workflow to ensure everything functions smoothly. Submit a test response through the Jotform to verify that it meets the filter criteria.

Check your Google Sheets to confirm that the new row is added correctly if the budget exceeds $100. If the response does not meet the criteria, ensure that no new row is created in Google Sheets. This testing phase validates the efficiency of your automation, powered by Pabbly Connect.


Conclusion

In this tutorial, we explored how to automate data segregation using Pabbly Connect. By integrating Jotform, Google Sheets, and utilizing the filtering feature, you can streamline your lead management process. This automation not only saves time but also enhances your overall operational efficiency.

Ensure you check out Pabbly Connect to create business automation workflows and reduce manual tasks. Pabbly Connect currently offer integration with 2,000+ applications.

How to Create a Telegram Bot in Minutes for Free

Learn how to create a Telegram bot in minutes for free using Pabbly Connect. Follow this detailed tutorial for seamless integration. Explore efficient methods for automating routine tasks with clear, concise instructions suited for both newcomers and experienced professionals.

Watch Step By Step Video Tutorial Below


1. Getting Started with Pabbly Connect

To create a Telegram bot in minutes, you will first need to access Pabbly Connect. If you’re a new user, open your browser and navigate to pabbl.com/connect. Once there, you can sign up for free and receive 100 tasks monthly to explore the platform’s capabilities.

After signing up, log into your Pabbly Connect account. On the dashboard, click on the ‘Create Workflow’ button, which takes you to the workflow builder. This area is crucial as it allows you to set up triggers and actions for your automation.


2. Setting Up the Telegram Bot Trigger

In this step, you’ll configure the trigger for your Telegram bot using Pabbly Connect. Click on the ‘Add Trigger’ button, then search for and select ‘Telegram’ as your application. For the event, choose ‘Set Webhook/Watch Updates’ and click on ‘Connect’.

  • Select existing connection if available, or add a new connection.
  • To create a new connection, you will need a token from Telegram’s BotFather.
  • Open Telegram, search for ‘BotFather’, and follow the prompts to create your bot and obtain the token.

Once you have the token, paste it into the connection settings in Pabbly Connect. After saving, your Telegram bot will be successfully connected to Pabbly Connect.


3. Adding the Bot to Your Telegram Group

After connecting your Telegram bot with Pabbly Connect, you need to add it to the group where you want it to operate. Open your Telegram app, navigate to the group, and add the bot using its username.

Once added, you must promote the bot to an admin within the group. This step is crucial for the bot to send and receive messages properly. Use your mobile app to access the group settings and promote the bot to admin.


4. Configuring OpenAI Integration with Pabbly Connect

Now that your Telegram bot is set up, you will integrate OpenAI to generate images based on user requests. In your Pabbly Connect workflow, click on ‘Add New Action Step’ and search for OpenAI. Select it and choose the event ‘Generate Image’. using Pabbly Connect

  • Connect your OpenAI account by entering your API key.
  • Map the text input from the Telegram message to the OpenAI prompt field.
  • Set parameters like image size and quality before saving the action.

After configuring the settings, click on ‘Save and Send Test Request’. This action will generate an image based on the text input from the Telegram bot.


5. Sending the Generated Image Back to Telegram

Finally, you will send the generated image back to the Telegram group using Pabbly Connect. Click on ‘Add New Action Step’ again and select Telegram Bot. Choose the event ‘Send Photo’.

Enter the chat ID of your group and map the image URL generated by OpenAI. Set a caption for the image and click on ‘Save and Send Test Request’. This will send the image back to the Telegram group where users can see it.


Conclusion

Creating a Telegram bot in minutes using Pabbly Connect is a straightforward process. By following the steps outlined in this tutorial, you can easily set up a bot that generates images based on user requests. This integration not only enhances your Telegram experience but also showcases the powerful capabilities of Pabbly Connect.

Ensure you check out Pabbly Connect to create business automation workflows and reduce manual tasks. Pabbly Connect currently offer integration with 2,000+ applications.