AI Booking System for Salons (No More Missed Calls)

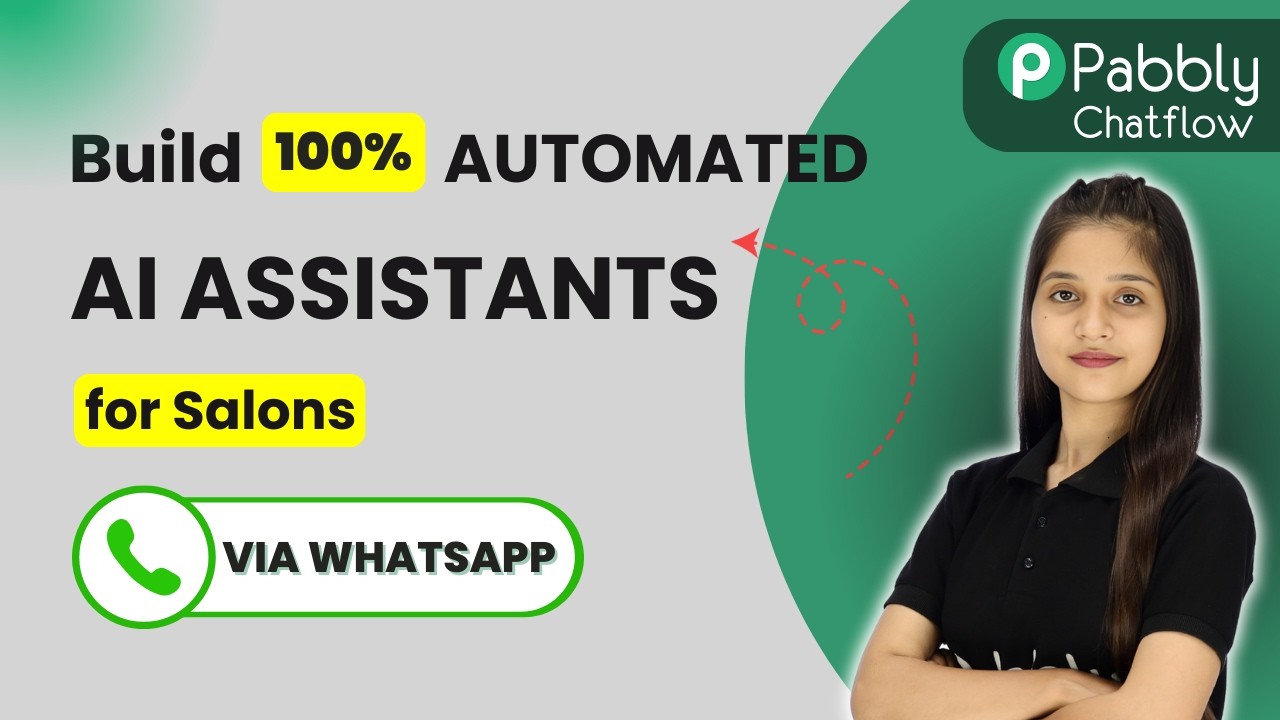
Learn how to create an AI booking system for salons using Pabbly Connect. This tutorial covers every step to automate bookings seamlessly. Develop expertise in application integration and learn how to design streamlined automation workflows using proven, simplified approaches.

Watch Step By Step Video Tutorial Below


1. Setting Up Pabbly Connect for Your AI Booking System

To create an AI booking system for salons, start by accessing Pabbly Connect. Open a new tab and visit Pabbly.com/chartflow. This platform allows you to automate WhatsApp messages and responses effectively.

If you are a new user, click on the ‘Sign Up Free’ option to receive 100 free credits monthly. Existing users should click on ‘Sign In’ to access the dashboard. After logging in, navigate to Pabbly Connect by selecting the ‘Access Now’ button.


2. Creating Your AI Assistant Using Pabbly Connect

Once in Pabbly Connect, you will need to create your AI assistant. Click on the ‘Plus AI Assistant’ button to start. Name your assistant ‘AI Booking System for Salons’ to reflect its purpose.

  • Select the instruction type as ‘AI Agent’.
  • Set the temperature to 0.5 for balanced responses.
  • Choose the model as ‘Open AI’ and select ‘GPT4 Mini’.

After setting these options, you will need to enter your OpenAI API key. Click on the provided link to generate a new secret key from the OpenAI platform. Once you have the key, paste it into the designated field in Pabbly Connect and click ‘Connect’.


3. Configuring AI Assistant Settings in Pabbly Connect

Next, configure your AI assistant settings in Pabbly Connect. You can add a header message, footer message, and set stop keywords. The header message serves as a welcome message, while the footer message can include contact information.

  • Set retry attempts to define how many times the assistant will attempt a response.
  • Add a fallback message in case of errors.
  • Upload a knowledge source file to provide specific answers related to your salon.

This knowledge base is crucial for delivering accurate responses tailored to your business. Ensure the file is in PDF or TXT format and under 90 MB.


4. Designing Your AI Assistant Interface with Pabbly Connect

Now, design the user interface of your AI assistant in Pabbly Connect. You can customize the heading and subheading messages to match your salon’s branding. The initial message should invite users to engage with the assistant.

Enable the toggle to activate your assistant. Click on ‘Save Assistant’ to finalize the design.

After saving, you can access the embed code to integrate the assistant into your website. Simply copy the code and paste it into your site to make your assistant available to users.


5. Testing Your AI Assistant with Pabbly Connect

With your AI assistant set up in Pabbly Connect, it’s time to test its functionality. Send a message to your assistant to check its responsiveness. For example, ask about the services offered by your salon.

Upon receiving your query, the assistant should provide a list of services along with pricing details. If you request to book a service, the assistant will ask for your preferred date and time, demonstrating its ability to handle bookings efficiently.

This testing phase ensures that your AI assistant is functioning as intended, providing accurate and business-specific responses, which is made possible through the knowledge base you uploaded earlier.


Conclusion

In this tutorial, we explored how to create an AI booking system for salons using Pabbly Connect. By following these detailed steps, you can automate your salon bookings and ensure no missed calls. This powerful integration enhances customer service and improves operational efficiency.

Ensure you check out Pabbly Connect to create business automation workflows and reduce manual tasks. Pabbly Connect currently offer integration with 2,000+ applications.

Automate Car Service Appointments with AI

Learn how to automate car service appointments using Pabbly Chatflow. Follow this detailed guide for seamless integration with WhatsApp and other applications. Implement professional chat automation that answers common questions, qualifies leads, and books appointments without human intervention.

Watch Step By Step Video Tutorial Below


1. Accessing Pabbly Chatflow for Car Service Automation

To automate car service appointments, the first step is accessing Pabbly Chatflow. Open your browser and navigate to the Pabbly Chatflow website. If you are a new user, click on the ‘Sign Up Free’ button to create your account. Once registered, you will receive 100 free credits every month, allowing you to create your AI assistant.

If you want to change your plan for unlimited access, consider purchasing a yearly or lifetime subscription. Use the provided coupon code for discounts. After signing in, you will be directed to the Pabbly Chatflow dashboard, where you can start building your AI assistant.


2. Adding Your WhatsApp Number in Pabbly Chatflow

After logging into Pabbly Chatflow, the next step is to add your WhatsApp number. Click on the ‘Add WhatsApp Number’ option in the dashboard. You can choose between the WhatsApp connect method or the manual token connect method to link your WhatsApp account.

  • Select your preferred method for connecting WhatsApp.
  • Follow the on-screen instructions to complete the connection.
  • Ensure your WhatsApp number is verified.

Once your WhatsApp number is successfully added, you can proceed to create your AI assistant, which will handle car service inquiries automatically.


3. Creating Your AI Assistant in Pabbly Chatflow

To create your AI assistant, navigate to the ‘AI Assistant’ section in Pabbly Chatflow. Click on the ‘Add Assistant’ button. Assign a name to your assistant, such as ‘Car Service Appointment AI Agent.’ This assistant will interact with customers via WhatsApp.

Follow these steps to configure your assistant:

  • Select the instruction type as AI agent.
  • Set the assistant’s role and constraints.
  • Adjust the temperature setting to control response creativity.

After configuring these settings, click ‘Save Assistant’ to ensure your AI assistant is ready to handle car service appointments.


4. Testing Your AI Assistant with WhatsApp

Once your AI assistant is set up in Pabbly Chatflow, it’s time to test its functionality. Open your WhatsApp and send a message that triggers the AI assistant. For instance, type ‘Service’ to initiate the interaction.

Upon sending the trigger keyword, you should receive an instant welcome message from your AI assistant, confirming that it is operational. If everything is working correctly, the assistant will guide you through the process of booking a car service appointment.

To ensure a seamless experience, verify that the assistant collects necessary details like the car brand, model, and service history. This automation will enhance your customer service efficiency.


5. Conclusion: Automate Your Car Service Appointments

By utilizing Pabbly Chatflow, you can effortlessly automate car service appointments through WhatsApp. This integration not only streamlines the booking process but also improves customer engagement. With the steps outlined in this guide, you can create your own AI-powered assistant to manage service inquiries efficiently.

Ensure you check out Pabbly Connect to create business automation workflows and reduce manual tasks. Pabbly Connect currently offer integration with 2,000+ applications.

Start automating your car service appointments today with Pabbly Chatflow and enhance your business operations!

How to Build a WhatsApp Chatbot That Collects Customer Data Automatically

Learn how to automate customer data collection with a WhatsApp chatbot using Pabbly Connect. Step-by-step tutorial for seamless integration. Develop expertise in application integration and learn how to design streamlined automation workflows using proven, simplified approaches.

Watch Step By Step Video Tutorial Below


1. Setting Up Pabbly Connect for WhatsApp Chatbot Integration

To build a WhatsApp chatbot that collects customer data automatically, you first need to access Pabbly Connect. Start by visiting the Pabbly website and signing in or creating a new account.

Once logged in, navigate to the Pabbly Connect dashboard. Here, you will create a new workflow that will link your WhatsApp chatbot to your data collection methods. This integration allows for seamless data transfer without manual input.


2. Creating Your WhatsApp Chatbot with Pabbly Chatflow

After accessing Pabbly Connect, the next step is to create your WhatsApp chatbot using Pabbly Chatflow. Click on the ‘Add Flow’ button to start building your chatbot.

  • Name your flow, for example, ‘WhatsApp Chatbot for Customer Data Collection’.
  • Set the trigger event as ‘Keyword Match’ to initiate the chatbot.
  • Define the keyword that will trigger the chatbot, such as ‘hello’.

With these steps, your WhatsApp chatbot is now ready to respond to user messages. This setup is crucial for automating customer interactions.


3. Integrating Google Sheets with Pabbly Connect

Now that your WhatsApp chatbot is created, it’s time to integrate it with Google Sheets through Pabbly Connect. This integration allows you to automatically store customer responses in a structured format.

To do this, go back to your Pabbly Connect workflow and select Google Sheets as your action app. Choose the event ‘Add New Row’ to ensure that each customer interaction is logged. Map the fields from your chatbot responses to the corresponding columns in your Google Sheet.


4. Testing Your WhatsApp Chatbot and Integration

After setting up the integration, it’s essential to test your WhatsApp chatbot. Send a message to your chatbot, and it should respond according to the flow you created. Check if the data appears in your Google Sheets as expected.

Use test data to validate that all fields are correctly mapped and that the information flows seamlessly from WhatsApp to Google Sheets via Pabbly Connect. This step ensures that your automation is functioning properly before going live.


5. Finalizing and Launching Your WhatsApp Chatbot

Once testing is complete and everything works smoothly, finalize your chatbot by saving all changes in Pabbly Connect. You can also create a fallback message to thank users for their input.

With your WhatsApp chatbot fully operational, you can now collect customer data automatically, reducing manual entry and improving efficiency. Share your chatbot with your team or clients to enhance their customer service experience.


Conclusion

In this tutorial, we demonstrated how to build a WhatsApp chatbot that collects customer data automatically using Pabbly Connect. By integrating WhatsApp with Google Sheets, you can streamline your data collection process and enhance your business operations.

Ensure you check out Pabbly Connect to create business automation workflows and reduce manual tasks. Pabbly Connect currently offer integration with 2,000+ applications.

Automatically Post on Tumblr Every Day

Learn how to automate daily posts on Tumblr with Pabbly Connect. This step-by-step tutorial covers all integration details and settings. Implement the precise methodologies leading organizations use to automate repetitive tasks, illustrated with practical examples designed for immediate application.

Watch Step By Step Video Tutorial Below


1. Accessing Pabbly Connect for Automation

To start automating your Tumblr posts, first access Pabbly Connect. If you’re a new user, visit pabbl.com/connect in your browser. This will take you to the landing page where you can sign up for free, allowing you to explore the features with 100 tasks every month.

Existing users can directly open the workflow builder in Pabbly Connect. This is where you will create your automation workflow. Remember, with the free plan, you can post on Tumblr a hundred times without any cost, making it an excellent opportunity to try out the platform.


2. Setting Up the Trigger for Daily Posts

The next step is to set up the trigger in Pabbly Connect. Click on the ‘Add Trigger’ button to begin. For the trigger application, search for ‘Schedule by Pabbly’. This will allow you to schedule your workflow.

  • Select ‘Schedule Workflow’ as the event.
  • Choose how often you want to run the workflow, selecting ‘Every Day’.
  • Set the time for the workflow to run, e.g., 1 PM.

After configuring the trigger, click on ‘Save’. Now your workflow is set to run every day at your chosen time. This is the foundation for automating your Tumblr posts using Pabbly Connect.


3. Generating Post Content Using OpenAI

After setting up the trigger, the next step is to generate the content for your Tumblr post. Click on ‘Add New Action Step’ and search for ‘OpenAI’. Select it and choose ‘ChatGPT’ as the event to generate text content.

If you have an existing connection, select it; otherwise, create a new connection using your OpenAI API key. To obtain this key, log in to your OpenAI account and generate a new secret key. Once you have the key, paste it into Pabbly Connect and save your connection.

  • Select the model of your choice for generating content.
  • Enter a prompt for the content you want to generate.

After entering the prompt, click on ‘Save and Send Test Request’. This will generate the message content that will be posted on Tumblr. With Pabbly Connect, you can dynamically create engaging posts every day.


4. Generating Images for Tumblr Posts

Next, we will generate an image for your post using OpenAI. Again, click on ‘Add New Action Step’, search for ‘OpenAI’, and select it. This time, choose the event ‘Generate Image’.

Use the same connection created earlier. Select the model, and for the prompt, map the caption generated in the previous step. This mapping allows Pabbly Connect to dynamically insert the generated text as the image prompt.

Specify the number of images to generate, e.g., 1. Choose the desired size and quality for the image.

Once you have configured the settings, click on ‘Save and Send Test Request’. The image will be created based on the prompt provided. This integration with Pabbly Connect ensures that your posts are visually appealing and relevant.


5. Posting on Tumblr Using Pabbly Connect

Finally, it’s time to post on Tumblr. Click on ‘Add New Action Step’, search for ‘Tumblr’, and select it. Choose ‘Create Photo Post’ as the event.

Connect your Tumblr account to Pabbly Connect if you haven’t done so already. Make sure you allow all necessary permissions for the connection. After connecting, select the blog where you want to post.

Map the image generated in the previous step. Map the caption generated from OpenAI. Set the post state to ‘Published’.

After saving and sending the test request, check your Tumblr to see the new post. With Pabbly Connect, your automation is complete, and you can now automatically post on Tumblr every day.


Conclusion

In this tutorial, we explored how to use Pabbly Connect to automate daily posts on Tumblr. By integrating OpenAI for content and image generation, you can streamline your posting process effectively. Start using Pabbly Connect today to enhance your social media automation!

Ensure you check out Pabbly Connect to create business automation workflows and reduce manual tasks. Pabbly Connect currently offer integration with 2,000+ applications.

WhatsApp AI Chatbot for Sports Club Registrations & Support

Learn how to set up a WhatsApp AI chatbot for sports club registrations using Pabbly Connect. Step-by-step guide for seamless integration. Discover hidden automation capabilities within your existing tools. This guide shows you how to connect your essential applications and permanently eliminate redundant manual processes.

Watch Step By Step Video Tutorial Below


1. Accessing Pabbly Connect for Integration

To create a WhatsApp AI Chatbot for sports club registrations, the first step is to access Pabbly Connect. Visit the Pabbly website and sign in or sign up for free to get started. Once logged in, navigate to the Pabbly Connect dashboard where all integrations are managed.

After signing in, you can utilize the free tasks offered by Pabbly to test the integration. Make sure you have your WhatsApp number ready for connecting with the chatbot. This step is crucial as it allows you to automate responses to queries from parents and trainers effectively.


2. Creating the WhatsApp AI Chatbot

Once you are in Pabbly Connect, the next step is to create your AI Chatbot. Click on the ‘Add AI Assistant’ option to begin the setup. Name this AI assistant as ‘Sports Club’ to reflect its purpose clearly.

  • Select AI instructions type as AI agent.
  • Set the temperature to 0.7 for a balanced response style.
  • Input your OpenAI API key to connect the AI model.

After completing these steps, ensure to save your settings. This setup will allow your AI assistant to respond to queries about sports club registrations automatically, making the process efficient and user-friendly.


3. Configuring the AI Assistant Settings

In this section, you will configure the settings for your AI assistant in Pabbly Connect. Start by defining the header and footer messages that will be displayed to users. This gives a professional touch to your chatbot interactions.

  • Add a stop keyword to allow users to opt-out of responses.
  • Set retry attempts for the AI to respond effectively.
  • Upload a knowledge source document containing FAQs and relevant information.

By guiding the AI assistant with detailed instructions and knowledge sources, you enhance its ability to provide accurate responses, ensuring that queries related to sports club registrations are handled efficiently.


4. Testing the AI Chatbot Functionality

After setting up your AI assistant, it’s time to test its functionality using Pabbly Connect. Send queries through WhatsApp to check if the chatbot responds accurately. For example, ask about the registration process for football coaching.

During testing, the chatbot should provide specific responses based on the input it receives. If it correctly answers questions regarding registration details, trial sessions, and batch timings, it indicates that the integration is successful and functioning as intended.


5. Finalizing the Integration and Deployment

Once testing is complete, finalize your integration in Pabbly Connect by ensuring all settings are saved. You can also assign the AI assistant to specific groups or all contacts in your WhatsApp. This allows for streamlined communication with all members of the sports club.

To assign the AI assistant, go to the inbox settings in Pabbly and enable auto-replies. This ensures that every query sent to your WhatsApp will be automatically addressed by your AI assistant, enhancing user experience and engagement.


Conclusion

Setting up a WhatsApp AI Chatbot for sports club registrations using Pabbly Connect streamlines communication and automates responses to inquiries. This integration not only saves time but also improves user satisfaction by providing instant answers to common questions.

Ensure you check out Pabbly Connect to create business automation workflows and reduce manual tasks. Pabbly Connect currently offer integration with 2,000+ applications.

Build an AI Lead Qualification Agent for Agencies

Learn how to create an AI Lead Qualification Agent using Pabbly Chatflow for your agency. Follow this step-by-step tutorial for seamless integration. Explore how leading businesses automate customer interactions with carefully designed chat sequences that feel natural and helpful.

Watch Step By Step Video Tutorial Below


1. Accessing Pabbly Chatflow for Your AI Lead Qualification Agent

To build your AI Lead Qualification Agent, the first step is to access Pabbly Chatflow. Simply visit the Pabbly website and navigate to the Chatflow section. If you’re a new user, click on the ‘Sign Up Free’ button to create your account. This will provide you with 100 free credits each month, allowing you to explore the features of Pabbly Chatflow.

After signing up, log into your account and click on the ‘Access Now’ button in the Chatflow box. This will take you to the Pabbly Chatflow dashboard where you can start creating your AI assistant. Remember, you need to add your WhatsApp number to enable the integration, which can be done by clicking on the ‘Add WhatsApp Number’ button on the left side.


2. Creating Your AI Lead Qualification Agent in Pabbly Chatflow

Now that you have access to Pabbly Chatflow, it’s time to create your AI Lead Qualification Agent. Click on the ‘AI Assistant’ option on the left sidebar, then press the ‘Add Assistant’ button. You will be prompted to name your assistant; enter ‘AI Lead Qualification Agent for Agencies’ and click ‘Add Assistant’ to proceed.

  • Select the AI instructions, which define how your assistant will interact with users.
  • Set the AI configuration parameters, including temperature and model selection.
  • Upload a knowledge source file that contains FAQs and business details.

Once you complete these steps, your AI assistant will be ready to interact with potential leads. This assistant will ask questions to qualify leads and schedule consultations automatically.


3. Configuring AI Instructions and Knowledge Source

The next step in Pabbly Chatflow is to configure the AI instructions for your Lead Qualification Agent. In the AI instructions section, define the role and constraints of your AI agent. This includes specifying the audience, purpose, and style of interaction. You can also adjust the temperature setting to control the creativity of responses.

For the knowledge source, upload a file that contains all relevant information about your agency. This file should include FAQs and any other details that might help the AI assist users effectively. Make sure the file is in PDF or TXT format and does not exceed the size limit of 90 MB.


4. Styling and Publishing Your AI Assistant in Pabbly Chatflow

After configuring the instructions and knowledge source, the next step is to style your assistant. In Pabbly Chatflow, you can adjust the theme, shape, and colors of your assistant to align with your brand identity. This customization enhances user experience and ensures consistency with your agency’s branding.

Once you are satisfied with the design, click on the ‘Save Assistant’ button to save your configurations. To deploy your assistant, you can either embed it on your website or connect it to your WhatsApp account. For WhatsApp, you will need to create a flow that triggers the assistant based on specific keywords.


5. Testing Your AI Lead Qualification Agent

With your AI Lead Qualification Agent configured and styled, it’s time to test its functionality. In Pabbly Chatflow, create a new flow and set the trigger to respond to specific keywords, such as ‘marketing’ or ‘agency.’ This ensures that whenever a potential lead sends these keywords, your AI assistant will engage with them.

After setting up the flow, test the integration by sending the trigger keywords via WhatsApp. Your AI assistant should respond with a welcome message and begin the qualification process. This testing phase is crucial to ensure that everything functions as intended before fully deploying your assistant.


Conclusion

Creating an AI Lead Qualification Agent using Pabbly Chatflow streamlines your agency’s lead qualification process. By following this step-by-step tutorial, you can effectively automate interactions and focus on high-intent prospects. Implementing this system enhances efficiency and improves client engagement.

Ensure you check out Pabbly Connect to create business automation workflows and reduce manual tasks. Pabbly Connect currently offer integration with 2,000+ applications.

Auto-Post RSS Feeds to Discord in Real Time

Learn how to auto-post RSS feeds to Discord in real time using Pabbly Connect. Follow this step-by-step guide for seamless integration. This comprehensive guide reveals exactly how to connect your applications and automate repetitive tasks — accessible for professionals of all technical backgrounds.

Watch Step By Step Video Tutorial Below


1. Access Pabbly Connect for Automation

To start the process of auto-posting RSS feeds to Discord, you need to access Pabbly Connect. Open your browser and navigate to Pabbly.com/connect.

Once on the homepage, you will see options to either sign in or sign up for free. New users can click on ‘Sign up free’ to get 100 free tasks every month, while existing users can simply sign in. This is the first step towards automating your Discord updates using Pabbly Connect.


2. Create a New Workflow in Pabbly Connect

After signing in, you will be directed to the Pabbly dashboard. To create your automation workflow, click on the ‘Create Workflow’ button. Here, you have the option to choose between the beta version or the classic version of the workflow builder.

For this tutorial, select the beta version for its modern features. You will then be prompted to name your workflow; enter ‘Auto Post RSS Feed to Discord in Real Time’ and select a folder for organization. Click the ‘Create’ button to proceed. This is how Pabbly Connect sets the foundation for your automation.


3. Set Up the Trigger for RSS Feed

In your new workflow, the first step is to set up the trigger. For this integration, select the RSS Reader from the app options in Pabbly Connect. Choose the event as ‘New Item in Feed’ to capture updates from your selected RSS feed.

Next, you will be prompted to enter the feed URL. For this example, use the Hindu’s RSS feed URL. Copy the URL from the RSS feed source and paste it into the designated field in Pabbly Connect. After selecting the feed type, click on ‘Save and Send Test Request’ to confirm the connection. You should receive a successful response, indicating that the trigger is set up correctly.


4. Configure the Action to Post on Discord

With the RSS trigger successfully set, it’s time to configure the action that will post updates to Discord. Choose Discord as your action application and select ‘Send Channel Message (Markdown)’ as the event. Click on ‘Connect’ to set up the connection.

To obtain the webhook URL for Discord, go to your Discord server, click on the server name, and navigate to ‘Server Settings’ > ‘Integrations’ > ‘Webhooks’. Create a new webhook, name it (e.g., ‘New Update’), and select the channel where you want the messages to be posted. Copy the webhook URL and return to Pabbly Connect to paste it into the appropriate field.

  • Select the channel for posting updates.
  • Configure the message format using mapped data from the RSS feed.
  • Test the setup by sending a test message to Discord.

After configuring the message format with dynamic data (like title and link from the RSS feed), click ‘Save and Send Test Request’. If successful, you will see the new message appear in your Discord channel, confirming that Pabbly Connect has successfully automated the process.


5. Summarize the Automation Steps

In summary, this tutorial demonstrated how to set up an automation using Pabbly Connect to post RSS feeds to Discord in real time. You first accessed Pabbly Connect, created a new workflow, set up an RSS feed trigger, and configured Discord as the action to post updates.

By following these steps, you can ensure that your Discord community receives the latest updates automatically, saving you time and ensuring that no updates are missed. This seamless integration highlights the power of Pabbly Connect in automating tasks effectively.


Conclusion

In conclusion, using Pabbly Connect to auto-post RSS feeds to Discord is a straightforward process that enhances communication within your community. By following the steps outlined, you can set up real-time updates effortlessly.

Ensure you check out Pabbly Connect to create business automation workflows and reduce manual tasks. Pabbly Connect currently offer integration with 2,000+ applications.

Collect Customer Details Automatically on WhatsApp

Learn how to collect customer details automatically on WhatsApp using Pabbly Connect and Pabbly Connect in this step-by-step tutorial. Build sophisticated automated workflows in less time than you think. This guide translates complex integrations into straightforward steps for immediate implementation.

Watch Step By Step Video Tutorial Below


1. Introduction to Pabbly Connect for WhatsApp Automation

Pabbly Connect is an automation platform that simplifies the integration of various applications. In this tutorial, we will use Pabbly Connect to automate the collection of customer details through WhatsApp.

By leveraging Pabbly Connect, you can create workflows that automatically gather client information and store it in Google Sheets. This streamlines your onboarding process and enhances customer interaction.


2. Creating a WhatsApp Chatbot in Pabbly Chatflow

To begin, access your Pabbly Chatflow account. Click on the ‘Add Flow’ button to create a new WhatsApp chatbot. This chatbot will interact with customers and collect their details.

  • Open your Pabbly Chatflow account and navigate to the ‘Flows’ section.
  • Click on ‘Add Flow’ to start creating your chatbot.
  • Set a trigger for your chatbot using keywords like ‘design’ or ‘lead’.

Once the flow is created, you can customize it by adding a welcome message and a series of questions to gather customer information. This is where Pabbly Connect plays a crucial role in managing the data collected.


3. Integrating Pabbly Connect with WhatsApp

After setting up your chatbot, the next step is to connect it with Pabbly Connect. This allows the data collected by your WhatsApp chatbot to be sent directly to your Pabbly Connect account.

In your Pabbly Chatflow, use the API feature to send the collected data to Pabbly Connect. You will need to input the webhook URL provided by Pabbly Connect to facilitate this integration.

  • Copy the webhook URL from your Pabbly Connect account.
  • Paste the URL into your chatbot’s API request settings.
  • Ensure that all parameters are correctly set to capture customer details.

This connection ensures that every interaction via WhatsApp is logged in your Pabbly Connect account, enabling seamless data management.


4. Storing Customer Data in Google Sheets

With the integration complete, the next step is to store the customer details in Google Sheets. This is done through Pabbly Connect, which allows you to create a workflow that adds a new row for each customer interaction.

To set this up, select Google Sheets as your action application in Pabbly Connect. Choose the option to add a new row and map the fields from your WhatsApp chatbot to the corresponding columns in your Google Sheet.

Select your Google Sheets account and authorize access. Map the customer details collected by the chatbot to the correct columns in your Google Sheet. Test the workflow to ensure data is being added correctly.

This setup allows you to maintain an organized record of all customer interactions, making follow-ups and management much easier.


5. Finalizing Your WhatsApp Chatbot

Once your data storage is set up, you can finalize your WhatsApp chatbot. This includes adding a confirmation message to inform customers that their details have been successfully collected.

In Pabbly Chatflow, add a final message that thanks the customer for their input and reassures them that a representative will contact them shortly. This enhances the customer experience and builds trust.

Create a final text message in your chatbot flow. Use dynamic fields to personalize the message with the customer’s name. Save and test the entire flow to ensure it operates smoothly.

With the chatbot completed, you can now effectively collect customer details automatically on WhatsApp using Pabbly Connect and Pabbly Chatflow, streamlining your onboarding process.


Conclusion

In this tutorial, we explored how to collect customer details automatically on WhatsApp using Pabbly Connect and Pabbly Chatflow. By setting up a WhatsApp chatbot and integrating it with Google Sheets, you can enhance your customer onboarding experience.

Ensure you check out Pabbly Connect to create business automation workflows and reduce manual tasks. Pabbly Connect currently offer integration with 2,000+ applications.

Utilizing Pabbly Connect for this process not only saves time but also ensures that all customer data is organized and easily accessible. Start automating your customer interactions today!

Automatically Send Instagram Leads to Salesforce CRM (Fully Automated)

Learn how to automatically send Instagram leads to Salesforce CRM using Pabbly Connect in this detailed tutorial. Follow step-by-step instructions for seamless integration. Master proven automation processes with practical implementation examples and strategic recommendations you can apply immediately in your workflow.

Watch Step By Step Video Tutorial Below


1. Accessing Pabbly Connect for Integration

To start integrating Instagram leads with Salesforce CRM, you need to access Pabbly Connect. First, visit the Pabbly website by typing Pabbly.com in your browser. Once on the site, sign in to your account. If you are new, you can sign up for free and get 100 tasks monthly.

After signing in, navigate to the Pabbly Connect app. Here, you can manage your workflows. To create a new workflow, click on the ‘Create Workflow’ button. Select the new beta builder for a more modern experience, and name your workflow ‘Automatically Send Instagram Leads to Salesforce CRM’ before clicking on ‘Create’.


2. Setting Up Instagram Lead Ads as the Trigger

In this section, you will set up Instagram Lead Ads as the trigger in Pabbly Connect. A trigger is an event that starts your automation. Click on the trigger application and select Instagram Lead Ads. Then, choose the trigger event as ‘New Lead Instant’ and click on ‘Connect’.

  • If you have an existing connection, select ‘Save’.
  • If not, click ‘Add New Connection’ and log in to your Instagram account.
  • Select the Facebook page associated with your Instagram account.

Once connected, you will need to select the lead form associated with your Instagram page. Navigate to the Meta for Developers page to get your lead form. After selecting the form, click on ‘Save and Send Test Request’ to verify the connection.


3. Testing the Integration with a Test Lead

Now, it’s time to test the integration in Pabbly Connect. After saving the test request, the workflow will change to waiting for a webhook response. You will need to submit a test lead to capture this response. Use the lead ads testing tool on Meta to create a test lead.

  • Select the page and lead form you previously set up.
  • Click ‘Create Lead’ to send the test data.

Check your workflow in Pabbly Connect to see if the details have been captured successfully. If the data appears, it confirms that your trigger setup is working correctly.


4. Adding Salesforce as the Action Application

Next, you will set up Salesforce as the action application in Pabbly Connect. Click on ‘Add New Action Step’ and search for Salesforce. Select the action event as ‘Create Contact’ and click on ‘Connect’. If you already have a connection, you can save it; otherwise, create a new connection.

After connecting to Salesforce, you will map the fields from your Instagram lead ads to the Salesforce contact fields. This is crucial for ensuring that the data is transferred correctly. Use the mapping feature to dynamically input the first name, last name, email address, and phone number from the lead data.


5. Finalizing the Integration and Creating Contacts

To finalize your integration in Pabbly Connect, click on ‘Save and Send Test Request’ after mapping the fields. This will create a contact in Salesforce based on the test lead data. You will receive a contact ID confirming that the lead has been successfully added to your Salesforce account.

To review the created contact, navigate to your Salesforce contacts. You should see the new contact with the details you mapped earlier. This confirms that your automation is working seamlessly, capturing leads from Instagram and sending them directly to Salesforce CRM.


Conclusion

In this tutorial, we demonstrated how to automatically send Instagram leads to Salesforce CRM using Pabbly Connect. By following the steps outlined, you can streamline your lead management process and ensure no potential customer is missed. This integration not only saves time but also enhances your workflow efficiency.

Ensure you check out Pabbly Connect to create business automation workflows and reduce manual tasks. Pabbly Connect currently offer integration with 2,000+ applications.

Automatically Add Facebook Leads to Systeme.io

Learn how to automatically add Facebook leads to Systeme.io with Pabbly Connect. Follow this detailed tutorial for seamless integration. Explore efficient methods for automating routine tasks with clear, concise instructions suited for both newcomers and experienced professionals.

Watch Step By Step Video Tutorial Below


1. Accessing Pabbly Connect for Integration

To automatically add Facebook leads to Systeme.io, start by accessing Pabbly Connect. If you are an existing user, simply open your workflow builder. If you are new, search for ‘Pabbly.com/connect’ in your browser to reach the Pabbly Connect landing page.

In the top right corner, click on the ‘Sign up for free’ option. This allows you to explore Pabbly Connect with up to 100 free tasks every month. Once you try it and find it beneficial, you can consider a subscription plan using the discount code provided.


2. Setting Up the Trigger in Pabbly Connect

Next, you need to set up the trigger in Pabbly Connect. Click on the ‘Add Trigger’ button and search for ‘Facebook Lead Ads’. Select it, and for the event, choose ‘New Lead Instant’ and click on ‘Connect’.

  • If you have an existing connection, select it; otherwise, create a new connection.
  • Make sure your Facebook account is logged in before continuing.
  • Select your Facebook page and lead form.

After selecting your page and lead form, ensure the response format is set to simple and click ‘Save and Send Test Request’. This will initiate the process of capturing the webhook response.


3. Capturing the Webhook Response

To capture the webhook response, open a new tab and search for ‘Meta for Developers’. Navigate to ‘Resources’ and then to ‘Developer Tools’. Here, select the ‘Lead Ads Debug Tool’.

  • Select the same page and form you used in Pabbly Connect.
  • Click the ‘Create Lead’ button to generate a test lead.

Once the lead is created, return to your Pabbly Connect workflow to see the captured test lead data. This confirms that the integration is working correctly.


4. Creating a Contact in Systeme.io

Now that you have captured the lead data, the next step is to create a new contact in Systeme.io using Pabbly Connect. Click on ‘Add New Action Step’ and search for ‘Systeme.io’. Select it and choose ‘Create Contact’ as the event.

Connect your Systeme.io account by entering your API key. To find this, log in to your Systeme.io account, go to your profile picture, and navigate to ‘Settings’. From there, access ‘Pabbly API Keys’ and create a new key. Copy the key and paste it into Pabbly Connect.


5. Mapping Lead Data and Finalizing Integration

In this step, you will map the lead data to create a new contact in Systeme.io. In Pabbly Connect, you will enter the lead’s email address dynamically using mapping, ensuring that the data updates with each new lead.

To map, enter a slash and search for the detail you wish to map. You can choose to fill other details or leave them blank as needed.

After mapping the email address, click on ‘Save and Send Test Request’. You should see a confirmation that a new contact has been created in Systeme.io. This completes the workflow, allowing new leads from Facebook to be automatically added to Systeme.io without manual intervention.


Conclusion

In this tutorial, we demonstrated how to automatically add Facebook leads to Systeme.io using Pabbly Connect. By following these steps, you can streamline your lead management process effectively.

Ensure you check out Pabbly Connect to create business automation workflows and reduce manual tasks. Pabbly Connect currently offer integration with 2,000+ applications.