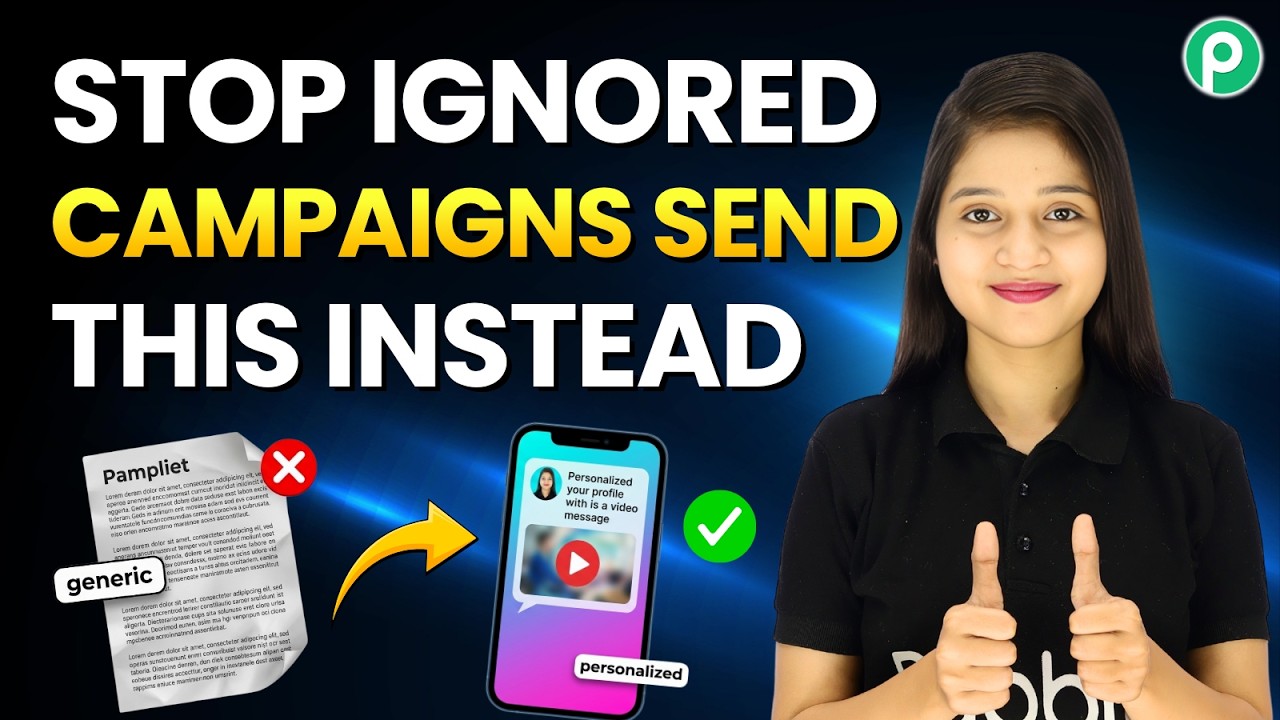
Your Health Campaigns Are Being Ignored… Until You Send This ⚡

Watch Step By Step Video Tutorial Below


1. Setting Up Pabbly Connect for WhatsApp Broadcasts

To start using Pabbly Connect, first, log into your account. This platform is essential for integrating various applications, including WhatsApp and CSV files. Once logged in, you’ll be directed to the dashboard where you can create new workflows.

Click on the ‘Create Workflow’ button to initiate the process. You will need to name your workflow, something like “Health Campaign Broadcast”. This helps in identifying your campaign later. Pabbly Connect allows for seamless integration between your CSV data and WhatsApp broadcasts, ensuring personalized messages reach your audience.


2. Adding Contacts to Pabbly Connect from CSV

Next, you need to add your contacts to Pabbly Connect. This is done by uploading a CSV file, which contains all your contact details. To create a CSV file, you can use Google Sheets or Excel. Make sure your file includes columns for first name, last name, and phone number.

  • Open Google Sheets or Excel and enter your contact details.
  • Download the file in CSV format.
  • In Pabbly Connect, go to the Contacts feature and click on ‘Add Contacts’.
  • Upload your CSV file by dragging and dropping it into the upload area.

After uploading, click on the ‘Insert’ button to finalize adding your contacts. This process ensures that your audience is ready to receive personalized messages through WhatsApp using Pabbly Connect.


3. Creating a WhatsApp Template in Pabbly Connect

To send personalized broadcasts, you need to create a WhatsApp template using Pabbly Connect. Navigate to the templates section and click on ‘Add Template’. This is where you define the message structure that will be sent to your contacts.

In the template creation window, enter your desired message, including variables for personalization, such as the recipient’s name. For example, you can use a placeholder like ‘$name’ to automatically insert each contact’s name when sending the message. This feature enhances engagement by making messages feel more tailored.


4. Scheduling the Broadcast with Pabbly Connect

Once your template is ready, the next step is to schedule your broadcast. In Pabbly Connect, you can choose to send the message immediately or schedule it for a later date. To schedule, select the desired date and time for your broadcast.

For instance, if you want to send your health campaign message on May 1st at 7:25 PM, set these parameters in the scheduling options. After confirming the details, click on the ‘Schedule Broadcast’ button. This ensures your message reaches your audience at the optimal time.


5. Viewing Broadcast Stats in Pabbly Connect

After scheduling your broadcast, Pabbly Connect allows you to track its performance. You can view detailed stats by clicking on the ‘View Stats’ button. This section provides insights into the delivery status of your messages, including sent, delivered, read, and ignored statuses.

Additionally, if any messages fail to deliver, you can easily resend them from this panel. This feature helps in optimizing your campaigns and ensuring that your messages are reaching your audience effectively.


In conclusion, using Pabbly Connect to integrate your CSV contacts with WhatsApp for health campaigns can significantly enhance your outreach. By following the steps outlined above, you can ensure your messages are personalized and delivered at the right time, leading to better engagement and response rates. Start leveraging Pabbly Connect for your next campaign and witness the difference it makes!
Post YouTube Videos to Facebook Automatically (No Manual Work)

Watch Step By Step Video Tutorial Below


1. Accessing Pabbly Connect for YouTube and Facebook Integration

To start automating your YouTube notifications to Facebook, access Pabbly Connect by visiting pabby.com/connect. This platform allows seamless integration between various applications.

If you are a new user, click on “Sign Up Free” to create an account and receive 100 free tasks monthly. Existing users can simply log in. Once on the main dashboard, you can begin setting up your workflow.


2. Creating Your Workflow with Pabbly Connect

In Pabbly Connect, workflows consist of triggers and actions. For this integration, your trigger will be a new YouTube video upload. Start by selecting “YouTube” as your trigger application.

  • Select “New Video in Channel” as the event.
  • Connect your YouTube account to allow Pabbly Connect to access your videos.
  • Choose your channel ID from the dropdown menu.

After setting up the trigger, click on “Save and Send Test Request” to confirm that Pabbly Connect can retrieve your latest video details. This step ensures that your integration is working correctly before moving forward.


3. Notifying Facebook with Your YouTube Video

Next, you’ll set up the action to notify your Facebook audience. Choose “Facebook Pages” as your action application in Pabbly Connect.

Select the event “Create Page Post” to automatically share your YouTube video link on your Facebook page. Ensure your Facebook account is connected to Pabbly Connect for smooth operation.

  • Choose the Facebook page where you want to post your video.
  • Insert a message that will accompany your post, including the video title.
  • Utilize mapping to dynamically insert the video title and URL from the previous step.

After configuring these fields, click “Save and Send Test Request” to publish your post. This will demonstrate that your automation is functioning as intended.


4. Testing Your Automation with Pabbly Connect

To ensure your automation is effective, upload a new video on YouTube. Use the title “Life is Not a Race, It’s a Journey” and set it to public. Once published, return to Pabbly Connect.

Click on “Save and Send Test Request” again to fetch the details of your newly uploaded video. Pabbly Connect will automatically pull the video title and URL, preparing to post it on Facebook.

After confirming the data retrieval, check your Facebook page to see if the post has been created successfully. This step is crucial for validating that your workflow is correctly set up and operational.


5. Conclusion: Enhance Your YouTube Channel with Pabbly Connect

By utilizing Pabbly Connect, you can effortlessly automate notifications from your YouTube channel to your Facebook page. This integration not only saves time but also helps maintain engagement with your audience.

Start using this automation today to grow your YouTube channel and keep your followers updated with your latest content. Pabbly Connect makes it easy to manage your integrations without any coding skills required.

This Automation Brings Dead Leads Back to Life 🔥

Watch Step By Step Video Tutorial Below


1. Accessing Pabbly Connect for Integration

To start using Pabbly Connect, first visit the Pabbly Connect website. This platform is essential for automating your workflows and integrating applications like Google Sheets and WhatsApp.

Once on the website, click the ‘Sign Up Free’ button if you are a new user. After creating your account, you will receive 100 free tasks each month, which allows you to experiment with automation and reactivation of leads.


2. Creating Your Workflow in Pabbly Connect

To create your workflow, log in to your Pabbly Connect account and click on ‘Create Workflow’. This will bring you to a blank page where you can set up your automation.

  • Select the trigger application, which will be ‘Schedule by Pabbly’.
  • Set the trigger event to ‘Schedule Workflow’.
  • Choose how often you want the workflow to run, for example, daily.

After setting the schedule, click on the ‘Save’ button. Your workflow will now trigger at the specified time every day, allowing for consistent follow-ups.


3. Fetching Leads from Google Sheets

Next, you need to fetch leads from your Google Sheets using Pabbly Connect. Click on the plus button to add an action application and select ‘Google Sheets’.

For the action event, choose ‘Get Rows’. You will need to connect your Google account and select the spreadsheet and sheet where your leads are stored. Ensure that the range is set correctly to capture all necessary data.


4. Sending WhatsApp Follow-Up Messages

After fetching the leads, the next step is to send WhatsApp messages using Pabbly Connect. Click the plus button again and select ‘Pabbly Chatflow’ as your action application.

  • Choose ‘Send Text Message’ as the event.
  • Connect your Pabbly Chatflow account using the API token.
  • Map the recipient’s WhatsApp number and message content dynamically.

Once the message is set up, click ‘Save and Send Test Request’ to ensure the message is sent successfully. This will help in reactivating leads who have not responded previously.


5. Setting Up Filters for Targeted Messaging

To ensure that only relevant leads receive messages, set up a filter in your Pabbly Connect workflow. Click on the plus button and select ‘Filter by Pabbly’.

Configure the filter to check if the lead’s status is equal to ‘No Reply’. This will prevent messages from being sent to leads who are already engaged. Click ‘Save and Send Request’ to finalize your filter settings.


Conclusion

By following this tutorial, you can effectively automate WhatsApp follow-ups using Pabbly Connect. This integration allows you to reactivate leads and boost your sales without manual effort. Start using Pabbly Connect today to optimize your lead management process!

Build an All-in-One WhatsApp Chatbot (Leads + Booking + Follow-ups)

Watch Step By Step Video Tutorial Below


1. Introduction to Pabbly Connect for WhatsApp Integration

Pabbly Connect is the central platform for integrating WhatsApp to automate responses for travel inquiries. By using Pabbly Connect, businesses can ensure immediate replies to customer queries, enhancing user engagement and reducing lost sales.

This integration allows travel agencies to set up an automated WhatsApp chatbot that handles inquiries, package browsing, and booking details, all seamlessly through Pabbly Connect. This means that whenever a customer reaches out, they receive instant assistance without manual intervention.


2. Setting Up Pabbly Chartflow for Automated Responses

To start, access your Pabbly Connect account and navigate to the Chartflow dashboard. Here, you can create a new flow specifically for WhatsApp integration. Begin by clicking on the “Add Flow” button to initiate the setup.

Once in the flow setup, you will need to select a trigger event. Choose the “Template Selected” trigger, which allows you to send personalized messages to users. After selecting this, click on the “Choose Template” button to pick your desired WhatsApp template.

  • Access Pabbly Chartflow from your Pabbly Connect dashboard.
  • Click on “Add Flow” to create a new automation.
  • Select “Template Selected” as the trigger event.
  • Choose your WhatsApp template from the available options.

By following these steps in Pabbly Connect, you can set up a structured flow for your WhatsApp communications, ensuring that users receive timely and relevant information.


3. Creating WhatsApp Templates in Pabbly Connect

Templates are crucial for sending personalized messages through WhatsApp. In Pabbly Connect, you can create a template that includes dynamic fields like the user’s name for a more personalized touch. Navigate to the templates feature and click “Add Template” to start designing your message.

When creating your template, ensure to include variables such as the user’s name within curly braces. This allows the template to automatically populate with the user’s information when sent. For example, you could create a message that reads: “Hello {name}, here are your travel options!” This level of customization enhances user experience and engagement.

  • Navigate to the templates section in Pabbly Connect.
  • Click on “Add Template” to create a new WhatsApp message.
  • Incorporate variables like {name} for personalization.
  • Save the template for future use in automated responses.

Utilizing templates effectively within Pabbly Connect not only streamlines communication but also helps in maintaining a professional image for your business.


4. Building the Chatbot Flow in Pabbly Connect

Once your template is ready, it’s time to build the chatbot flow. In Pabbly Connect, you can add various buttons and actions that guide users through the booking process. Start by adding a list button that presents users with travel package options.

For each package, you can create an action that asks users for their preferred travel dates, names, and contact numbers. This information can be captured using custom fields in Pabbly Connect, ensuring that responses are stored accurately for follow-up.

To summarize the process of building your flow:

  • Add a list button for travel packages in your flow.
  • Incorporate actions to ask for travel dates and personal details.
  • Utilize custom fields to capture user information effectively.

This structured approach in Pabbly Connect ensures that your chatbot can handle inquiries efficiently, providing a seamless experience for users.


5. Testing and Optimizing the Flow in Pabbly Connect

After setting up your chatbot flow, it’s essential to test it. Send the template message to your WhatsApp account to see how the automated responses work in real-time. This step is crucial to ensure that all elements are functioning as intended.

During testing, monitor how the chatbot responds to user inputs and make any necessary adjustments. For instance, if users are not receiving personalized messages, check your template and ensure variables are correctly implemented. Optimizing the flow based on feedback will enhance user satisfaction.

To effectively test and optimize your flow:

  • Send test messages to your WhatsApp to evaluate the flow.
  • Check for any issues with message personalization.
  • Make adjustments based on user interactions and feedback.

By thoroughly testing the flow in Pabbly Connect, you can ensure that your automated WhatsApp chatbot is ready to enhance customer engagement effectively.


Conclusion

Integrating WhatsApp with Pabbly Connect allows businesses to automate responses and improve customer interactions significantly. By following the steps outlined in this tutorial, you can set up an efficient system that ensures timely replies to inquiries, ultimately driving more bookings.

Send Bulk WhatsApp Offers & Get Instant Sales (Full Setup)

Watch Step By Step Video Tutorial Below


1. Accessing Pabbly Connect for Integration

To start integrating WhatsApp with Google Sheets, first, access Pabbly Connect. If you’re a new user, visit pabbl.com/connect and sign up for a free account. This allows you to send up to 100 WhatsApp messages monthly at no cost.

Existing users can simply log into their account. Once logged in, navigate to the workflow builder. Here, you will create the automation that connects Google Sheets and WhatsApp via Pabbly Connect.


2. Setting Up the Trigger in Pabbly Connect

In Pabbly Connect, create a new workflow by clicking on the “Add Trigger” button. Select Google Sheets as the trigger application. For the event, choose “New or Updated Spreadsheet Row” and click on “Connect” to receive the webhook URL.

  • Choose Google Sheets as the trigger application.
  • Select “New or Updated Spreadsheet Row” as the event.
  • Copy the webhook URL provided.

Next, open Google Sheets and install the Pabbly Connect Webhooks add-on. After installation, refresh your spreadsheet to see the add-on in the extensions tab. Now, go to Pabbly Connect Webhooks and set up the webhook URL and trigger column. This column will determine when data is sent to Pabbly Connect.


3. Sending WhatsApp Messages via Pabbly Chatflow

After setting the trigger, the next step involves sending WhatsApp messages using Pabbly Chatflow. Click on “Add New Action Step” and select Pabbly Chatflow for the action application. Choose “Send Text Message” as the event and connect your account.

If you haven’t created a connection yet, you will need to enter your API token from your Pabbly Chatflow account. Ensure you have added your WhatsApp number in Pabbly Chatflow settings before proceeding.


4. Mapping Data for Personalized Messages

Mapping is crucial for sending personalized WhatsApp messages. In Pabbly Connect, enter the recipient’s WhatsApp mobile number and the message content. Use the mapping feature to insert customer names dynamically into the message.

  • Map the customer’s first and last names to personalize each message.
  • Format your message appropriately, using stars for bold text.

After setting up the message, click on “Save and Send Test Request” to verify that your WhatsApp message is sent successfully. Check your WhatsApp to confirm receipt.


5. Sending Bulk Messages to Customers

To send messages to multiple customers at once, return to your Google Sheets. Use the Pabbly Connect Webhooks add-on and click on “Send All Data” to initiate the bulk messaging process. This sends all customer details to Pabbly Connect, which triggers the WhatsApp messages automatically.

For ongoing automation, enable the “Send on Event” option in the Pabbly Connect Webhooks add-on. This ensures that any new entries added to your Google Sheets will automatically trigger WhatsApp messages to those customers through Pabbly Connect.


Conclusion

By using Pabbly Connect and Pabbly Chatflow, you can effortlessly integrate WhatsApp with Google Sheets to send personalized messages to customers. This automation simplifies communication and enhances customer engagement without manual effort.

Boost Your Response Time with a WhatsApp AI Agent

Watch Step By Step Video Tutorial Below


1. Accessing Pabbly Connect to Create Your WhatsApp AI Agent

To create a WhatsApp AI agent, the first step is to access Pabbly Connect. Open your browser and navigate to the Pabbly website. Once there, you can either sign in or sign up for a new account.

After signing in, you will be directed to the Pabbly dashboard. Here, you can find various Pabbly applications. To begin, select Pabbly Connect, which will facilitate the integration process between WhatsApp and your AI agent.


2. Connecting WhatsApp to Pabbly Connect

Once you are in the Pabbly Connect dashboard, the next step is to connect your WhatsApp account. Click on the “Add WhatsApp Number” button. You will see options to connect via a preferred method or using a manual token.

  • Select the “Connect” option for a seamless integration.
  • Follow the on-screen instructions to authorize your WhatsApp account.
  • Ensure your WhatsApp number is correctly linked to your Pabbly account.

After successfully connecting your WhatsApp, you will see a confirmation message. This integration will allow your WhatsApp AI agent to function properly through Pabbly Connect.


3. Creating Your WhatsApp AI Agent Using Pabbly Connect

Next, navigate to the AI assistant section within Pabbly Connect. Here, you can create a new AI agent. Click on the “Create AI Assistant” button and name your agent, for example, “WhatsApp AI Agent”.

Once named, you will need to configure the AI settings. This includes selecting the instruction type, which should be set to “AI Agent”. Adjust the temperature setting to control the creativity of responses, typically set around 0.7 for balanced answers.

  • Enter your OpenAI API key to enable the AI functionalities.
  • Toggle on header and footer messages for added context in conversations.
  • Set up a fallback message for instances when the AI cannot respond.

These configurations will ensure that your WhatsApp AI agent is well-equipped to handle user queries effectively through Pabbly Connect.


4. Uploading Your Knowledge Base to Pabbly Connect

To enhance the functionality of your WhatsApp AI agent, it’s crucial to upload a detailed knowledge base. Within the Pabbly Connect interface, locate the upload section and select the file that contains your product information.

This knowledge base should include comprehensive details about your offerings, such as product descriptions, return policies, and customer service information. After uploading, ensure the file is formatted correctly, preferably in PDF format.

  • Include all relevant product data to improve AI responses.
  • Make sure the uploaded document does not exceed 10 pages if it contains images.
  • Review the knowledge base to ensure accuracy and completeness.

With a well-prepared knowledge base, your WhatsApp AI agent will deliver accurate information to users, enhancing their experience through Pabbly Connect.


5. Finalizing and Activating Your AI Agent in Pabbly Connect

After setting up your AI agent and uploading the knowledge base, it’s time to finalize the configuration. Ensure all settings are saved and the AI assistant is activated. This can be done by toggling the activation button in the Pabbly Connect interface.

Once activated, you can assign your AI agent to specific contact lists or groups. This allows the AI to respond to queries from multiple users simultaneously, automating your WhatsApp conversations effectively.

  • Select the contact lists or groups you wish to assign the AI agent to.
  • Save the settings to ensure the AI agent is deployed correctly.
  • Test the AI agent by sending queries to see how it responds.

This final step ensures your WhatsApp AI agent is operational and ready to engage users, all facilitated by Pabbly Connect.


Conclusion

In this tutorial, we explored how to create a WhatsApp AI agent using Pabbly Connect. By following the detailed steps, you can automate your WhatsApp conversations effectively. This integration enhances customer interaction and boosts efficiency for your business.

Build a WhatsApp AI Assistant for Health Clinics (24/7 Auto Replies) 🤯

Watch Step By Step Video Tutorial Below


1. Setting Up Your WhatsApp AI Assistant

WhatsApp integration with Now allows you to create an AI assistant that responds to queries 24/7. This AI assistant can handle various questions regarding your health clinic, making it easier for patients to get information.

To start, you will need to set up your assistant using PABY. This involves signing up on the PABY platform and accessing the dashboard to create your assistant.


2. Creating Your Assistant in PABY

To create your assistant, log in to PABY and navigate to the assistant section. Here, you can add a new assistant specifically for health clinics.

  • Select the type of assistant you want to create.
  • Name your assistant (e.g., Health Clinic Assistant).
  • Define the AI instructions and responsibilities.

Once you’ve set these parameters, your assistant will be added to your PABY account, ready for further customization.


3. Configuring AI Settings for Your Assistant

Configuring the AI settings is crucial for effective responses. In this step, you will select the AI model and set the temperature for responses.

Choose the OpenAI model and set the temperature to balance focused and creative replies. This setting will help your PABY assistant provide appropriate responses to patient inquiries.

  • Generate your API key from OpenAI.
  • Paste the API key into the designated field in PABY.
  • Toggle settings for header messages and fallback messages.

After configuring these settings, your assistant will be prepared to interact effectively with users on WhatsApp.


4. Uploading Knowledge Source for Your Assistant

To enhance the functionality of your assistant, you need to upload a knowledge source. This is where you provide detailed information about your health clinic.

In the knowledge source section, upload your documentation that includes clinic services, timings, and other relevant information. This will allow the AI to answer questions accurately.

  • Select the file from your computer to upload.
  • Ensure the document contains all necessary details about your clinic.
  • Confirm that the document is uploaded successfully in PABY.

With the knowledge source uploaded, your assistant will be equipped to provide informed responses to patient queries.


5. Activating and Testing Your Assistant

After completing the setup, it’s time to activate your assistant. Toggle the activation button in PABY to make your assistant live.

Next, conduct tests by asking questions through WhatsApp to see how well your assistant responds. For example, ask if appointments can be booked or if emergencies are treated.

Once you are satisfied with the performance, you can finalize the settings and ensure the assistant is automatically enabled for all WhatsApp chats.


Conclusion

Integrating WhatsApp with Now using PABY is a straightforward process that enhances communication in your health clinic. By following these steps, you can create a responsive AI assistant that provides valuable information to patients effectively.

Every Payment Auto-Saved in Google Sheets (No Manual Work 💸)

Watch Step By Step Video Tutorial Below


1. Accessing Pabbly Connect for Integration

To start integrating Razer Pay with Google Sheets, first access Pabbly Connect by visiting the Pabbly website. If you are new, click on the “Sign Up Free” option to create an account and receive 100 free tasks monthly. Existing users can simply sign in to continue.

Once logged in, navigate to your dashboard where you will find all Pabbly applications. Click on the “Access Now” button under Pabbly Connect to begin creating your workflow. This is the central platform that will facilitate the integration process between Razer Pay and Google Sheets.


2. Creating a New Workflow in Pabbly Connect

After accessing Pabbly Connect, click on the “Create Workflow” button. Choose the option to create from scratch and name your workflow, such as “Every Payment Autosaved in Google Sheets”. This name can be customized based on your preference.

  • Select the folder as Pabbly Connect.
  • Click the “Create” button to finalize your workflow setup.

With your workflow created, the next step is to set up the trigger application. In this case, select Razer Pay as your trigger application, which will initiate the workflow whenever a new payment is received. This is crucial for automating the process.


3. Setting Up the Trigger with Razer Pay

In the trigger setup, select the “Payment Captured” event from Razer Pay. After that, click on the “Connect” button. Pabbly Connect will generate a webhook URL that you will use to connect Razer Pay with Pabbly Connect.

Next, log into your Razer Pay account and navigate to the Payments section. Here, you will find the option to add a new webhook. Paste the webhook URL provided by Pabbly Connect into the designated field. Ensure you set the active event to “Payment Captured” before saving the webhook.


4. Mapping Data to Google Sheets

After successfully connecting Razer Pay with Pabbly Connect, the next step is to set up the action application, which will be Google Sheets. Choose “Add New Row” as the action event. Click on the “Connect” button and select “Add New Connection” to link your Google Sheets account.

  • Sign in with Google and grant permission to Pabbly Connect.
  • Select the spreadsheet named “Razer Pay Payments” for data storage.

Once connected, Pabbly Connect will display all fields from your selected Google Sheet. You will need to map the data received from Razer Pay into these fields. This dynamic mapping ensures that each payment’s details are recorded accurately in your Google Sheet.


5. Testing and Activating the Workflow

After mapping all necessary fields, click on the “Save and Send Test Request” button to ensure everything works correctly. Pabbly Connect will send the test data to Google Sheets, allowing you to verify that the integration is functioning as expected.

Once you confirm that the new record appears in your Google Sheet, make sure to enable the toggle for your workflow. If this toggle is not enabled, the automation will not work, and you will miss out on capturing future payments automatically.


Conclusion

In this tutorial, we demonstrated how to automate payment tracking by integrating Razer Pay with Google Sheets using Pabbly Connect. This powerful automation saves time and ensures your records are always up to date.

New Shopify Order? Instantly Notify Your Team on Slack (Full Automation)

Watch Step By Step Video Tutorial Below


1. Accessing Pabbly Connect for Integration

To start integrating Shopify with Slack, you first need to access Pabbly Connect. Open a new tab and navigate to Pabbly’s official site. If you’re new, click on the “Sign Up Free” option to create an account and explore the software with 100 free tasks each month.

For existing users, simply click on the “Sign In” option. Once logged in, locate the Pabbly Connect app and click on the “Access Now” button to reach your dashboard. Here, you can manage all your automation workflows in one place.


2. Creating a New Workflow in Pabbly Connect

Now that you’re in Pabbly Connect, it’s time to create a new workflow. Click on the “+ Create Workflow” button. You’ll see options to create from scratch or using AI. For this tutorial, choose “Create from Scratch”.

  • Select a name for your workflow, such as “New Shopify Order – Instantly Notify Teams on Slack”.
  • Choose a folder for your workflow, for example, “Pabbly Connect”.
  • Click on the “Create” button to finalize your workflow setup.

Your workflow is now created successfully. The next step is setting up a trigger to initiate the automation whenever a new order is placed in Shopify.


3. Setting Up Trigger for Shopify Orders

In this step, you will configure the trigger in Pabbly Connect to capture new orders from Shopify. Select Shopify as your trigger application and choose the event “New Order”.

Click on the “Connect” button, and you will receive a webhook URL. This URL is crucial for linking your Shopify account to Pabbly Connect. Now, navigate to your Shopify account, go to “Settings”, and select “Notifications”. Here, you will create a new webhook.

  • Click on “Create Webhook”.
  • Select the event as “Order Creation”.
  • Set the format to JSON and paste the webhook URL you copied from Pabbly Connect.
  • Choose the latest API version and click on “Save”.

Your webhook is now active, and Pabbly Connect is waiting for a response from Shopify. To test this, make a test purchase in your Shopify store.


4. Configuring the Action Step to Notify Slack

After successfully setting up the trigger, the next step is configuring the action in Pabbly Connect. Select Slack as your action application and choose the event “Send Channel Message”.

Click on the “Connect” button. You will have options to add a new connection or select an existing one. For this tutorial, choose to add a new connection and click on “Connect with Slack”. Enter the token type as “bot” and click on the “Save” button.

  • Authorize Pabbly Connect by allowing necessary permissions.
  • Select the channel ID where you want to send notifications, e.g., “Shopify New Orders”.
  • Map the order details dynamically using the response data from Shopify.

After mapping the necessary fields, click on “Save and Send Test Request” to verify the integration. You should see a new message in your Slack channel confirming the order details.


5. Finalizing Your Pabbly Connect Workflow

With your action step configured, it’s time to finalize your workflow in Pabbly Connect. Ensure that the toggle for enabling the workflow is turned on. This step is crucial; if it’s not enabled, your automation won’t function.

Once everything is set, you can test the entire workflow by placing a new order in your Shopify store. You should receive instant notifications in your Slack channel as configured. If you encounter any issues, feel free to reach out for support.

Remember, this automation not only saves time but also enhances communication within your team. With Pabbly Connect, you can easily set up similar integrations for other applications as well.


Conclusion

Integrating Shopify and Slack using Pabbly Connect allows for instant notifications on new orders, enhancing your team’s efficiency. This step-by-step guide illustrates how to set up your automation seamlessly.

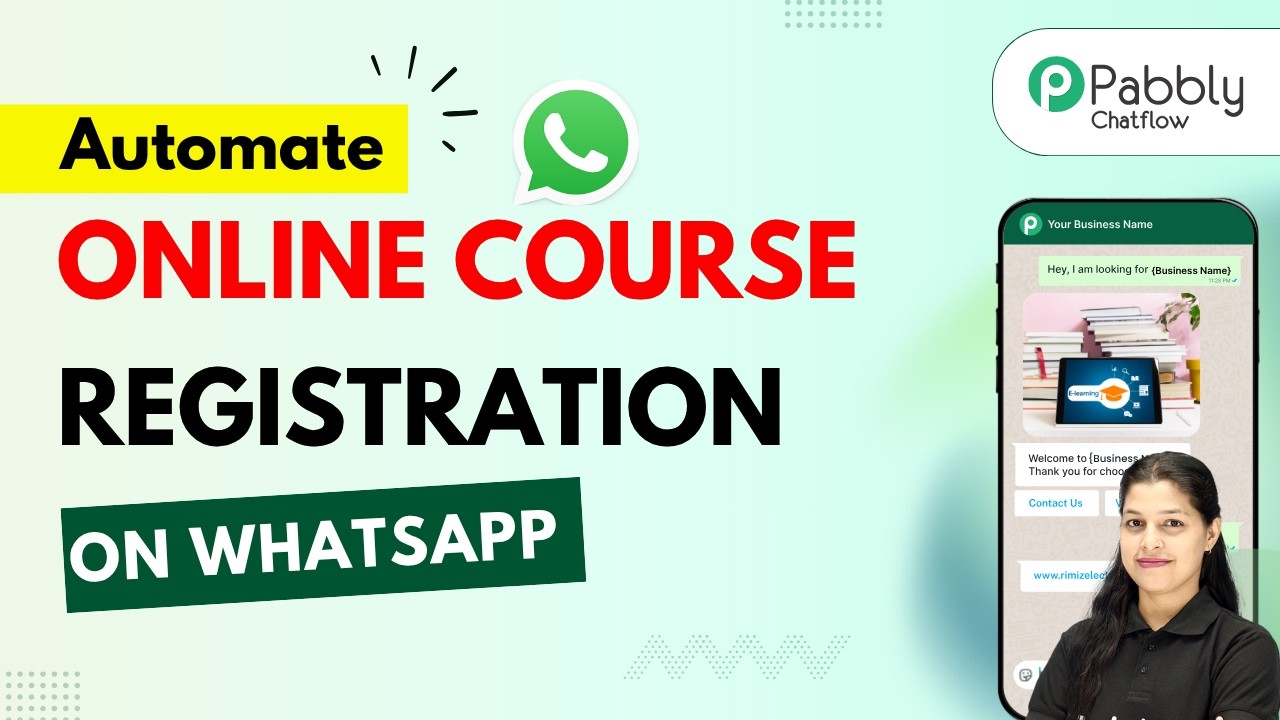
WhatsApp Chatbot for Online Course Registration

Watch Step By Step Video Tutorial Below


1. Creating the WhatsApp Chatbot Using Paby

To automate course registrations, you begin by creating a WhatsApp chatbot using Paby. This tool allows you to streamline the entire admission process, making it efficient and effective.

Using Paby, you can set up a chatbot that will handle inquiries and registrations automatically. This is particularly beneficial for educators and coaching institutes looking to manage multiple inquiries without losing potential leads.


2. Setting Up the Chatbot Flow in Paby

Next, you need to access the flow page of Paby to create the chatbot’s flow. If you’re new, type the URL paby.com/chatflow to access the homepage. Here, you can sign up for free and receive 100 free credits monthly.

  • Sign up or log in to Paby Chatflow.
  • Create a new flow named “WhatsApp Chatbot for Online Course Registration.”
  • Add a trigger event by entering the keyword “hello” to initiate the chatbot.

After setting the trigger, you can drag and drop message blocks to create a welcome message for users. This initial interaction is crucial for guiding potential students through the registration process.


3. Adding Course Options to the Chatbot

In this section, you can provide users with a list of courses available through your academy using Paby. This is done by creating a list node that will display options for students to choose from.

Ensure that each course has a title and description. For example, you might include courses like Web Development, Digital Marketing, and Data Science. Each course should have a corresponding button for registration.

  • Add a list node with header, body, and footer.
  • Provide titles and descriptions for each course.
  • Create a button for each course labeled “Register Now.”

After users select a course, your chatbot can then ask for their full name and email address, ensuring a smooth registration process.


4. Confirming Registration with Paby

Once the user has entered their details, you can set up a confirmation message using Paby. This message will summarize the user’s input and confirm their registration.

Utilize contact custom fields to personalize the confirmation message. For example, include their full name, email, and selected course in the message. This creates a tailored experience for each user.

  • Create a confirmation message node.
  • Use variables to include user details in the message.
  • Prompt the user to confirm their registration.

After confirming, the chatbot should send a final message congratulating the user on their enrollment in the Skill Nova Academy.


5. Conclusion

Integrating Are with Paby allows you to automate your course registration process effectively. By following these steps, you can create a WhatsApp chatbot that handles inquiries and registrations seamlessly.

Using Paby, you can save time and ensure that no potential students are lost due to manual processes. Start automating your admissions today!