Looking for a way to sync new Stripe customers to Shopify? If yes, then this article will walk you through the process of connecting Stripe to Shopify.

Actually, most of the time we want our customer’s data from Stripe into Shopify for further business purposes. Then we started looking out for a tool that can actually connect Stripe to Shopify. But finding a perfect and best automation tool is like searching a needle in a haystack.
Well! Not anymore, here we are recommending amazing automation software named Pabbly Connect. It is one of the simplest automation tools that remove all repetitive actions and saves a lot of time. Using this software, you can transfer data among different applications in real-time.
Why Choose This Method Of Integration?
In contrast with other integration services-
- Pabbly Connect does not charge you for its in-built apps like filters, Iterator, Router, Data transformer and more
- Create “Unlimited Workflows” and smoothly define multiple tasks for each action
- As compared to other services which offer 750 tasks at $24.99, Pabbly Connect proffers 50000 tasks in the starter plan of $29 itself
- Unlike Zapier, there’s no restriction on features. Get access to advanced features even in the basic plan
- Try before you buy! Before spending your money, you can actually signup & try out the working of Pabbly Connect for FREE
Now, the thing which makes it distinct, it doesn’t require any coding skill to operate even a newbie or amateur can work with it.
Further, the software doesn’t restrict you on features like unlimited workflows, premium apps, and much more even in its free plan.
Here, in this article, we will understand how one can integrate Stripe with Shopify using an automation tool i.e Pabbly Connect.
So, let’s begin the process.
Step 1: Sign up to Pabbly Connect

Start the process of connecting Stripe with Shopify by clicking on the “Sign Up Free” icon on the Pabbly Connect dashboard. Next, either manually fill-up all the details or sign up using Gmail credentials.
Try Pabbly Connect for FREE
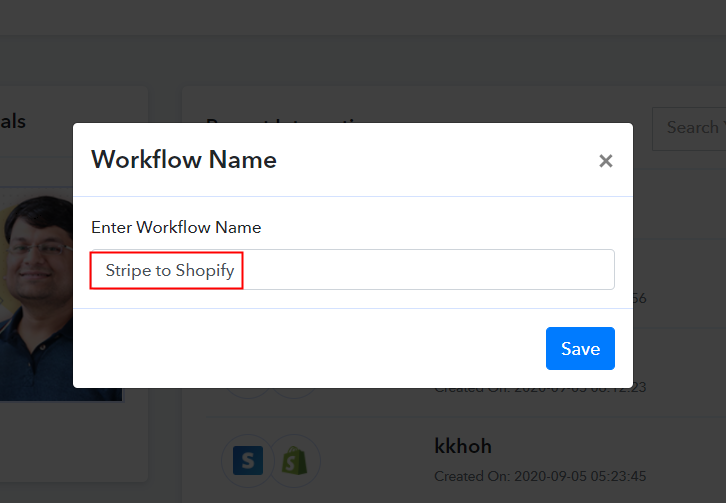
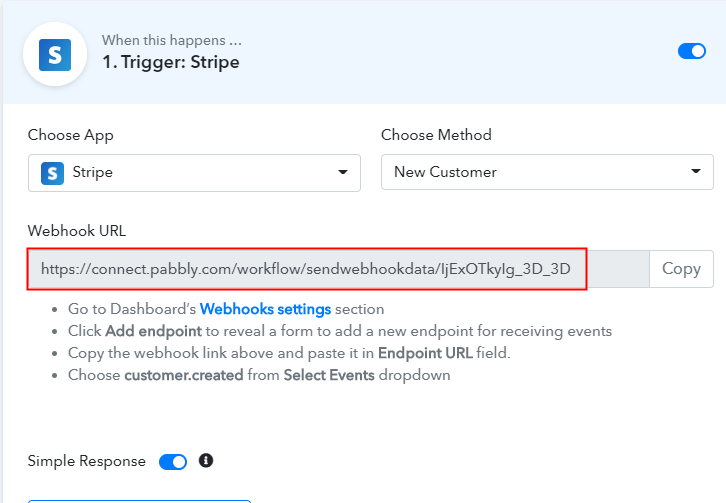
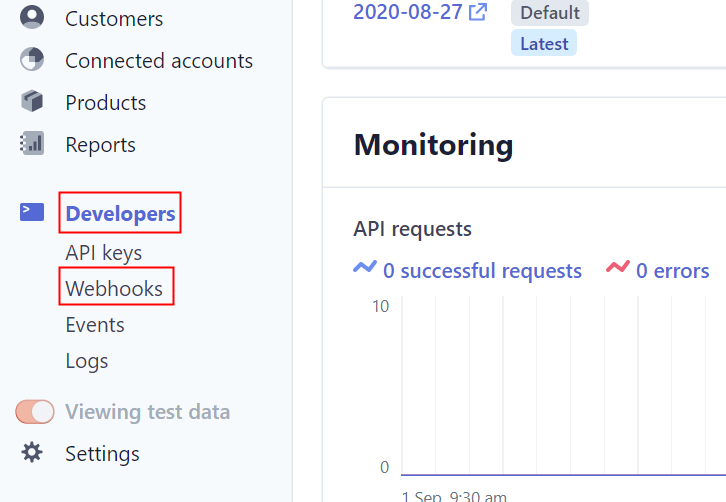
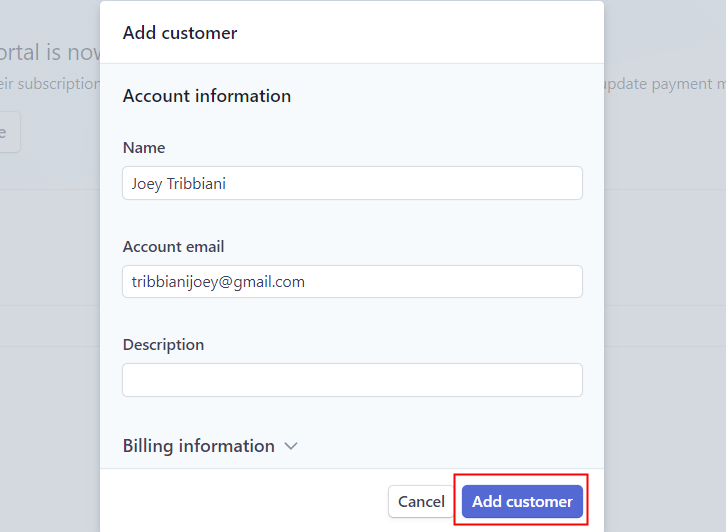
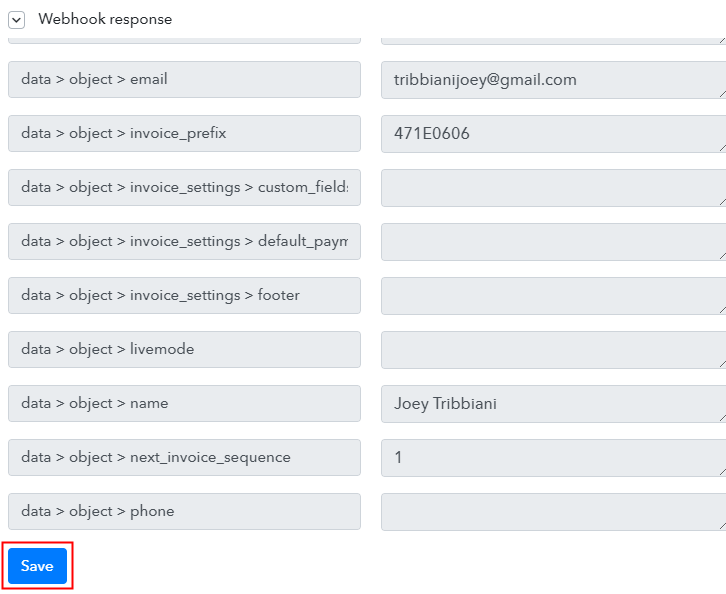
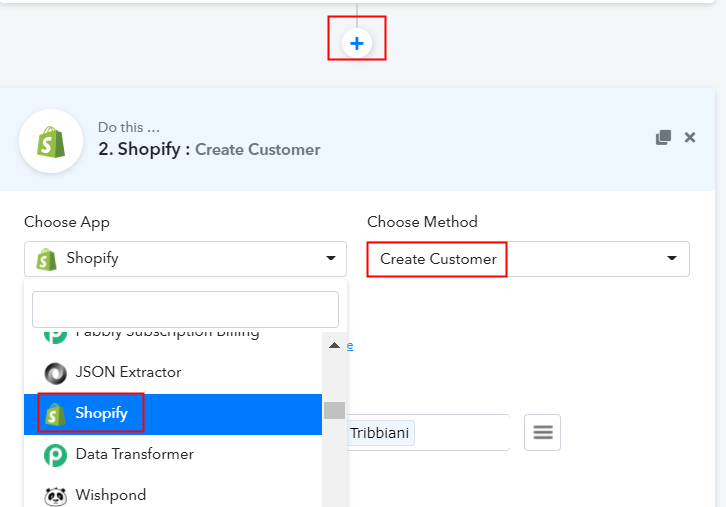
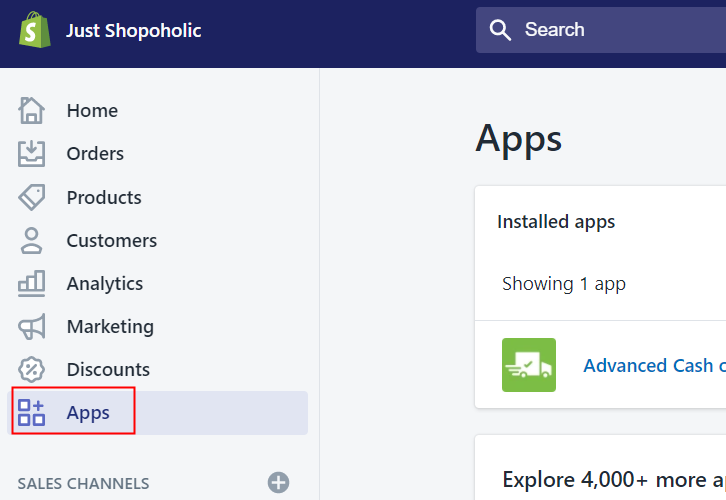
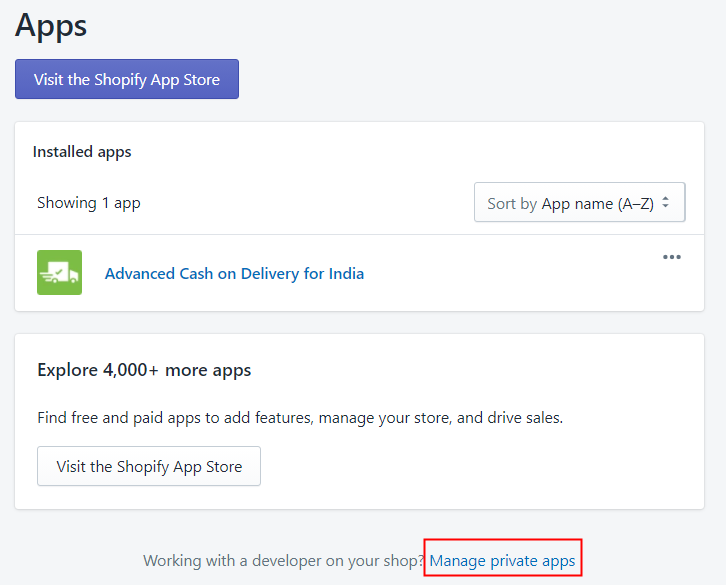
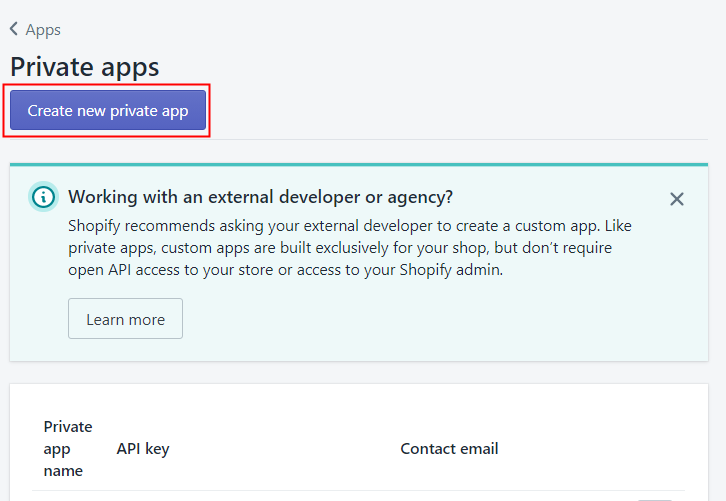
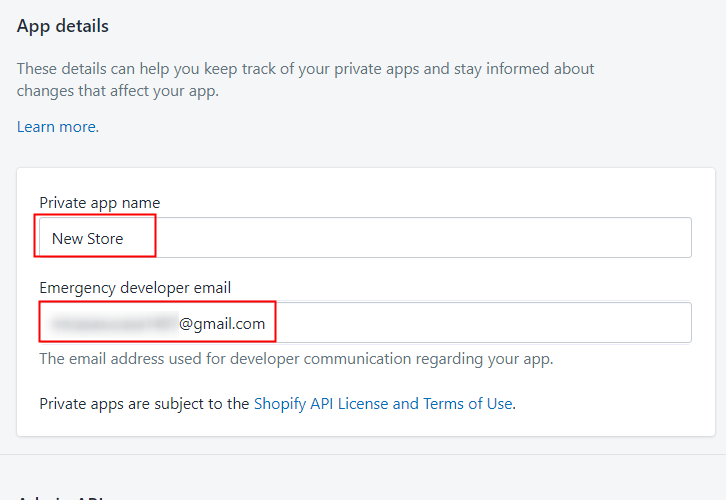
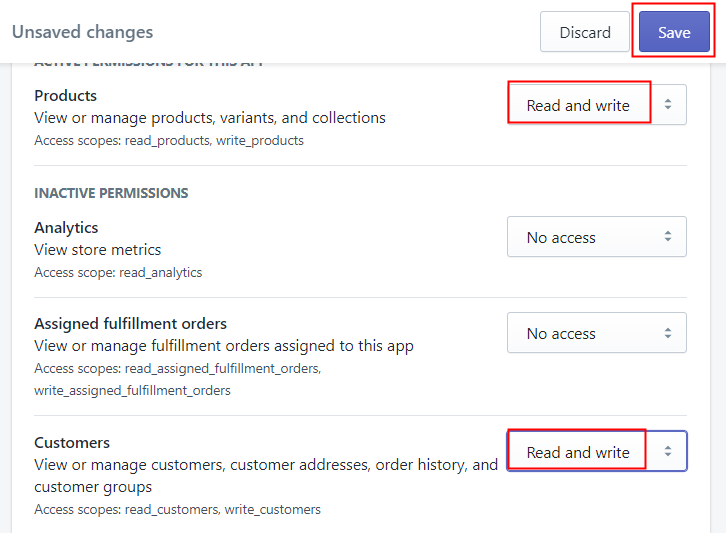
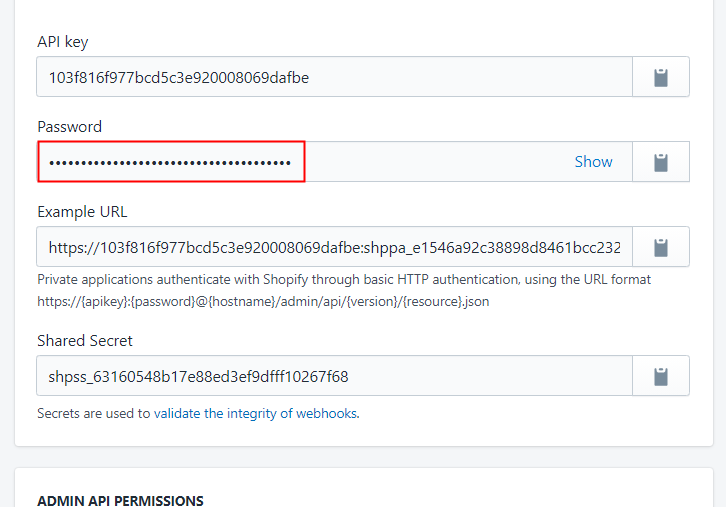
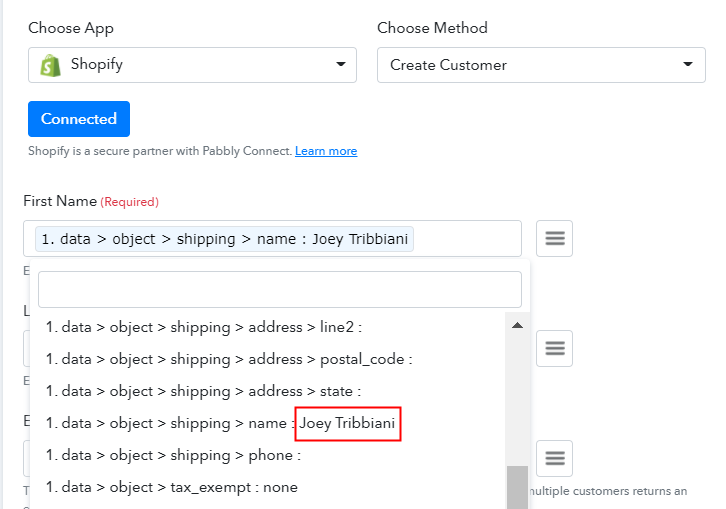
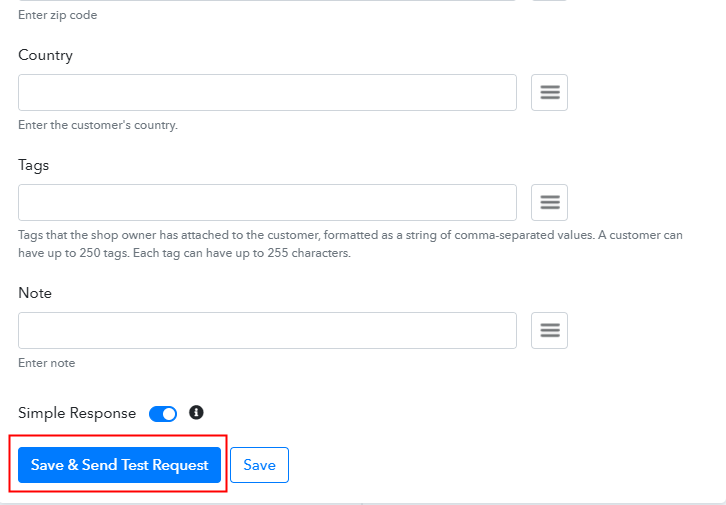
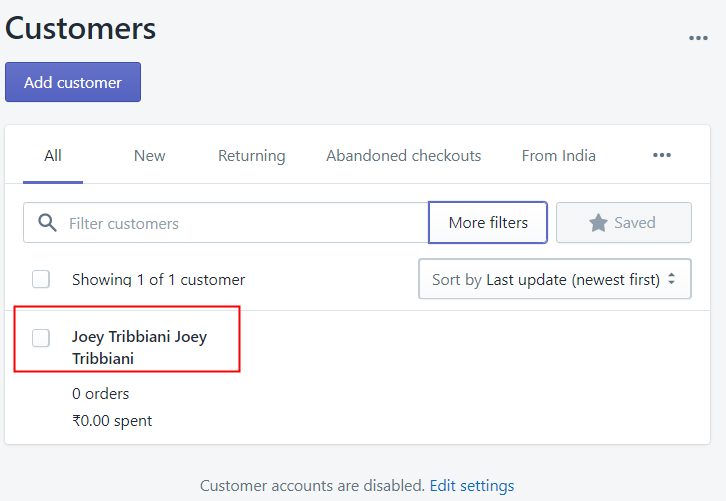
Further, after login into the account, click on the “Access Now” button of Connect. Begin the process of creating a workflow for online business automation by clicking the “Create New Workflow” button. Further, add the name of workflow which in our case is “Stripe to Shopify”. Nevertheless, you can name the workflow according to your needs. Further after creating a workflow, you have to choose the application you want to integrate. Using Pabbly Connect one can integrate or connect unlimited apps, tap here to get your access to unlimited workflows. The following step is to select “Stripe” from the dropdown, then choose the “New Customer” option to append every customer data from the software into Shopify. The following step is to copy the webhook URL which is appearing on the dashboard. To collect customer’s data from Stripe, you gotta paste the copied Webhook URL in the software. For that, you have to log in to your Stripe account. After login into the Stripe account, go to the “Developer” section on the left of the dashboard. Then click on the “Webhooks” option. Next, when you click on “Webhooks”, it will open up an endpoint tab, Just click on the “Add Endpoint” option to paste the Webhook URL. As soon as you click on the “Add Endpoint” option, it will open up the window with a certain option. Simply paste the copied URL in the “Endpoint URL” column. Make sure to select customer.created in the “Event to Send” column. Lastly, click on “Add Endpoint” to save the setting. Head back to the “Customer” section on the left of the dashboard, then click on the “New” button to add customers. After clicking on the “New” button, a pop-up will appear. Just fill all the required details and hit the “Add Customer” button at the bottom. But before pressing the button, make sure to click capture webhook response in the Pabbly Connect dashboard. As soon as you click on the “Add Customers” option, the entry will appear on the “Pabbly Connect” dashboard. Then, click on the “Save” option. To make this Stripe Shopify integration work, you have to choose the action for your trigger. Click on the “+” icon to add an action for your trigger. In our case, it is “Shopify”. Then, select the “Create Customer” option. After making all the necessary changes, click on the “Connected with Shopify” button. Further, it will open the authorization window, for which you have to log in to your Shopify account. To connect Stripe to Shopify, you need to paste the API key for which you have to log in to your Shopify account. After login, click on the “Apps” on the left section of the dashboard. When you click on “Apps” it will open up the new window. Below, you will see the “Manage Private Apps” option, simply click on it. Further, here click on the “Create New Private App” button. Now as soon as you click on the ” Create New App” button, it will open up a new window asking for a private app name and developer email. Fill all the details. Further, to make Shopify integration work, it will ask for certain access. Make sure to select the “Read and Write” option for product and customer. Finally, click on the “Save” option after making all changes. Now your private app is created, when you will click on it, the API key and Password will appear. Simply copy the password. Now go back to the Pabbly Connect dashboard to paste the API key. As we mentioned above, when you click on the “Connected” button in the Shopify section. It will open up the page with “New Credentials”. Below on this page, it will ask for API Key, paste your copied key there. It will also ask for a subdomain which is basically your store name. After ensuring all this, click the “Save” button. Next, map the required field from drop-down such as for the email field, select the email option, and for the name field select the name option. Subsequently, after filling all the details, save the setting and then “Send Test Request” to test the Stripe Shopify integration. Lastly, when you check the Customer section in Shopify, your entry will automatically appear there. Now you know how to sync new Stripe customers to Shopify. This is a one-time process, now all your manual work will be done by the online business automation tool i.e Pabbly Connect. Okay! Here we have mentioned all the crucial steps to sync new Stripe customers to Shopify using software Pabbly Connect. Now you know how easy is to integrate Stripe with Shopify. Not just this, one can connect unlimited apps within minutes using this software. Not to forget, almost every industry big or even small preferring automation tools to reduces manual effort. So, don’t confuse yourself anymore! Claim your access by signing up for a free account.Step 2: Access Pabbly Connect

Step 3: WorkFlow for Stripe with Shopify Integration
(a) Start with a New Workflow

(b) Name the Workflow
Step 4: Setting Trigger for Stripe – Shopify Integration
(a) Select Application you Want to Integrate

(b) Copy the Webhook URL
Step 5: Connecting Stripe to Pabbly Connect
(a) Go to Developer Section
(b) Click on Add Endpoint
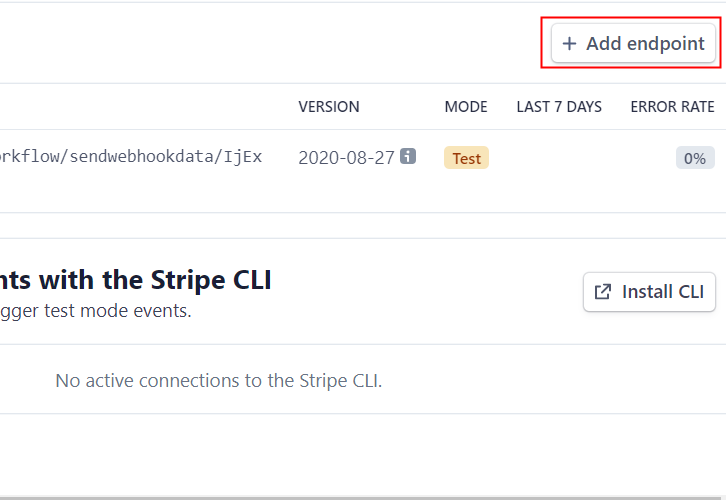
(c) Paste the Webhook URL
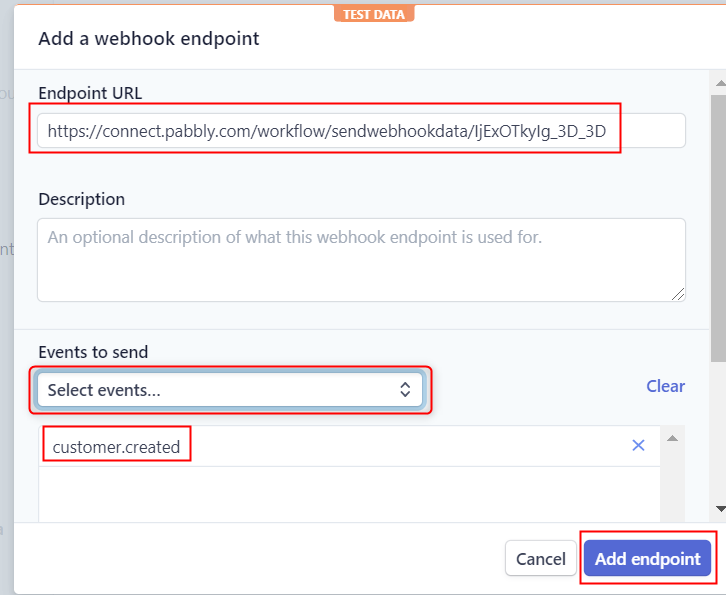
(d) Click on Customers
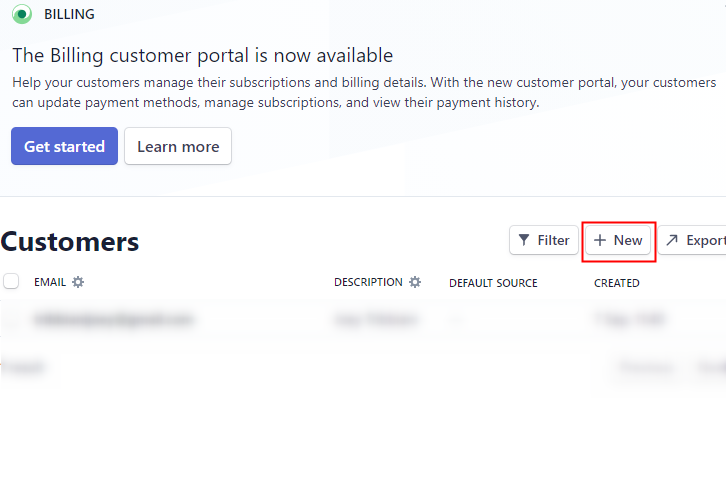
(e) Add Customers
Step 6: Test the Response in Pabbly Connect Dashboard
Step 7: Setting Action for Stripe – Shopify Integration
(a) Select Application you Want to Integrate
(b) Click the Connect Button

Step 8: Connecting Shopify to Pabbly Connect
(a) Click on Apps
(b) Manage Private Apps
(c) Create New Private App
(d) Fill all the details
(e) Active Permission
(f) Copy the API Key Password
Step 9: Paste API Key in Pabbly Connect Dashboard
(a) Fill API Key Password
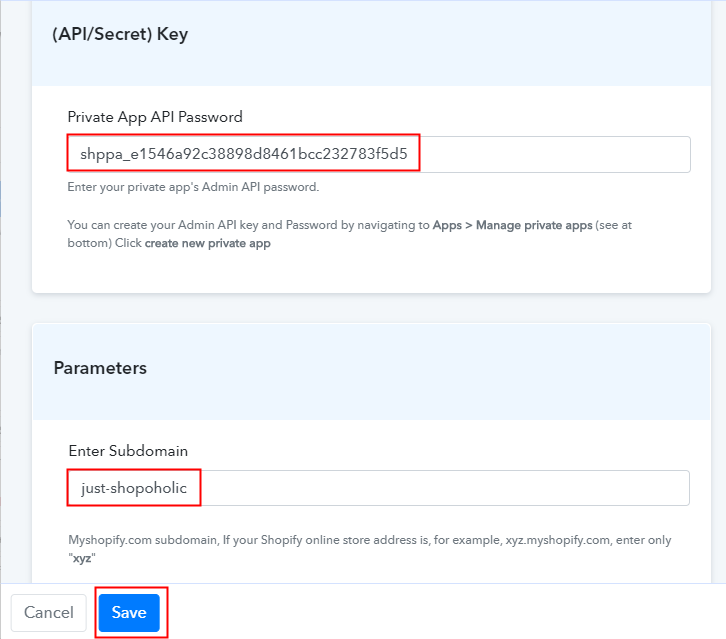
(b) Map Field Data
(c) Save and Send Test Request
Step 10: Check Response in Shopify Dashboard
Conclusion –
You May Also Like To Read –


