If you want to send all Facebook Lead Ads leads to a Gmail account automatically then we can tell you how. Well, all we need here is some kind of switch that can send data from one service to another.
In this article, we’re using Pabbly Connect as a switch between Facebook Lead Ads and Gmail. It allows you to automatically send information between these two apps within a few minutes. This way you will get an email as soon as a lead arrives.
With Pabbly Connect you can easily set-up a trigger and its respective action. Here, we’ll simply set-ut a trigger on Facebook Lead Ads that whenever a lead arrives, take action to send an email instantly on your Gmail account.
Pabbly Connect allows you to create unlimited workflows with instant triggers and multi-step calls. Also, it allows you to set filters and route data smoothly.
Let’s get started with the step by step procedure to send Facebook Lead Ads data to Gmail automatically.
Step 1: Sign up to Pabbly Connect

Firstly, visit the Pabbly official website and click on the ‘Sign-Up Free‘ button. On the signup page, either use your existing Google account or manually fill out the registration form details to get into the software.
Step 2: Access Pabbly Connect

Once you successfully sign up, click on the ‘Access Now’ button next to the Pabbly application ‘Connect’.
Step 3: Create a New WorkFlow
(a) Click over the Create New Workflow Button

Start with creating a workflow to send Facebook Lead Ads data to Gmail automatically and hit the ‘Create New Workflow’ button.
(b) Name the Workflow
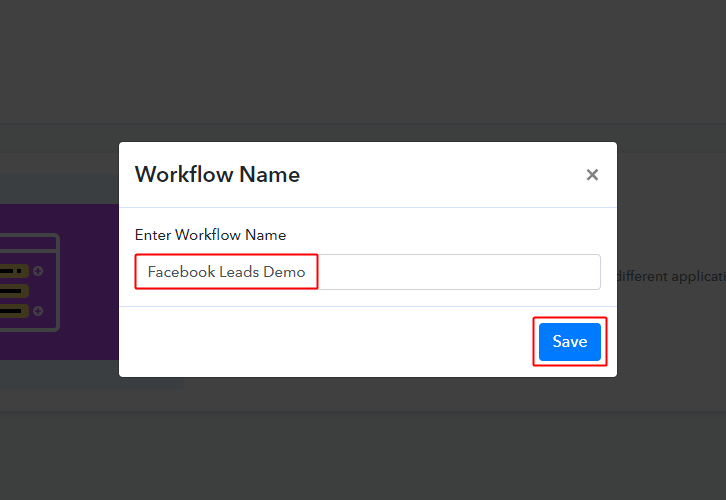
Name the Workflow as per your need and hit the ‘Save’ button.
Step 4: Set-up A Trigger to Send Facebook Lead Ads Data to Gmail
(a) Select Application to Integrate as Facebook Lead Ads
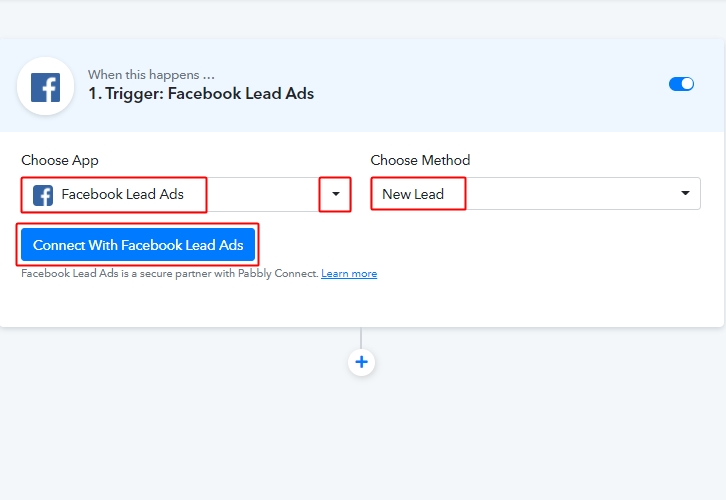
After creating a workflow, you’ll be asked to set-up a trigger.
Select the application to integrate as Facebook Lead Ads.
The method as ‘New Lead’.
And hit the ‘Connect with Facebook Lead Ads’ button.
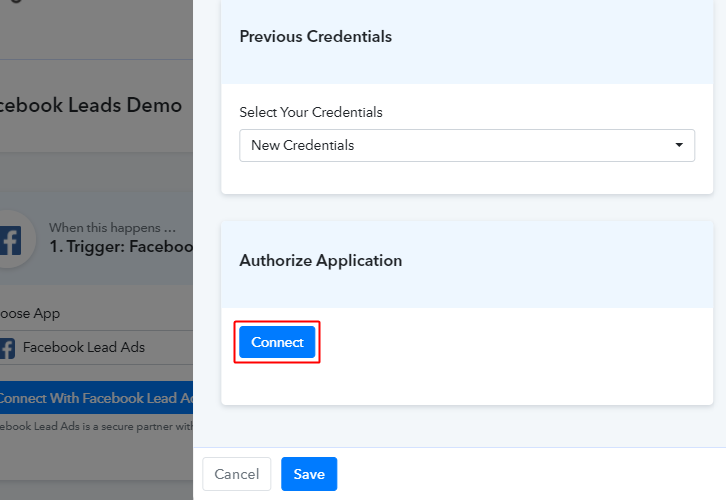
(b) Authorize the Facebook Account
(c) Facebook Lead Ads Trigger Settings
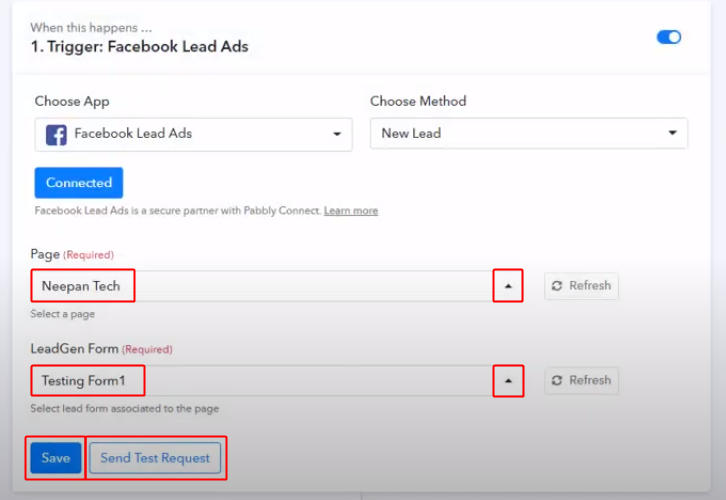
After authorizing the Facebook Lead Ads account, you need to fill out the page and lead form details.
Select a Page from the dropdown & also a Lead generation form too.
Then, hit the Save & Send Test Request button.
(e) Observe the Trigger’s Response
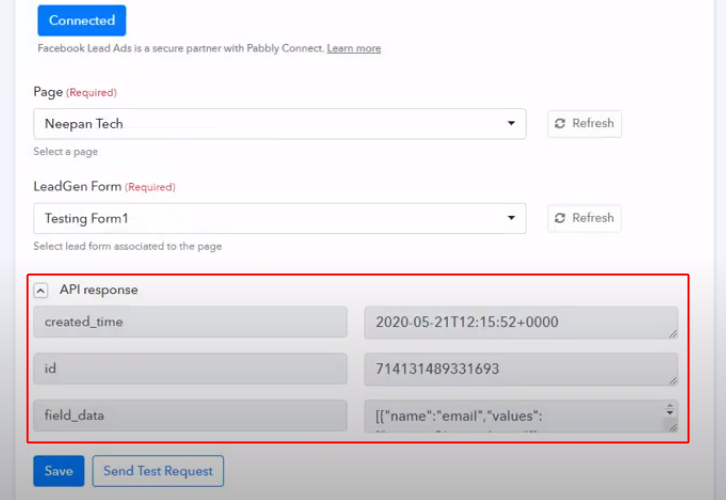
Observe the lead generation form data entries in the API response.
Step 5: Set-up an Action to Send Facebook Lead Ads Data to Gmail
In the trigger step, you will see that the field data is in JSON format. So, to perform an action over the data the data should be in plain text format. So, you must extract plain text from this JSON. And for this, we’ll need a JSON extractor.
(a) Integrate JSON Extractor to Extract Values from Response
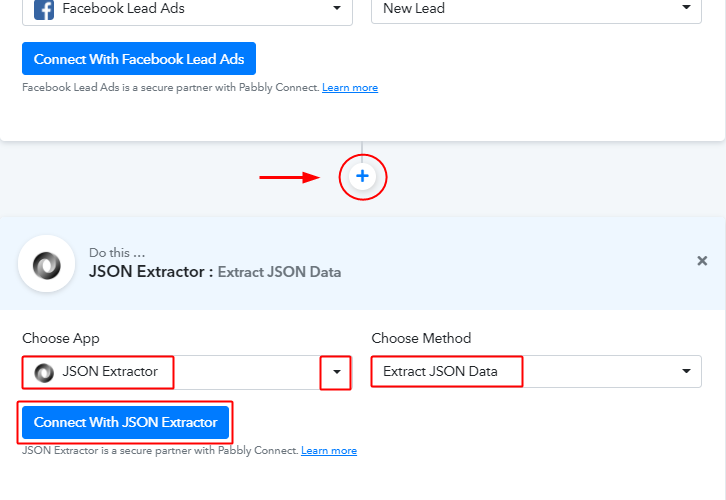
Click over the plus button next to the trigger window.
Select the app to integrate as ‘JSON Extractor’, the method as ‘Extract JSON Data’ and strike the ‘Connect with JSON Extractor’ button.
(b) Map the Response Value in JSON Extractor

Now, map the data that you want to extract by clicking the three vertical lines next to the data field.
Then save and send a test request to extract the data.
(c) Observe the Value After Extraction
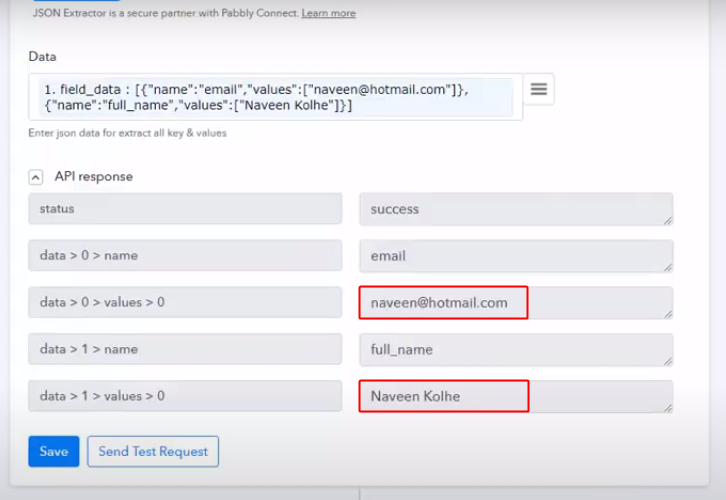
Observe the JSON extraction response and you’ll see the data that was in JSON format in now available in plain text.
Note: As Pabbly Connect is upgrading very fast so it is possible that they there will be no use of an JSON extractor in future. So, observe the data in step 4 and if you found elements like [{” around your data then only follow step 5 otherwise, simply skip it.
Step 6: Send the Lead Data via Gmail
(a) Select the App to Integrate as Gmail
To send the leads data, we can use Gmail or any other email marketing service. Here, I’m using Gmail to send emails to the leads.
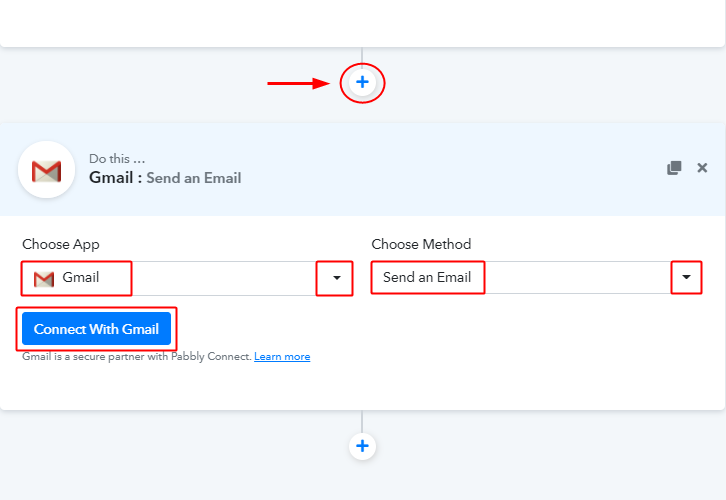
Firstly, click the’+’ button next to the JSON extractor window integration.
Select the app to integrate as Gmail from the drop-down. Check the method to be ‘Send an Email’ and hit the ‘Connect with Gmail’ button.
(b) Authorize the Gmail Account
Just like the Facebook account authorization, you have to authorize the Gmail account too. As all the emails would be sent to your Facebook leads through this account.
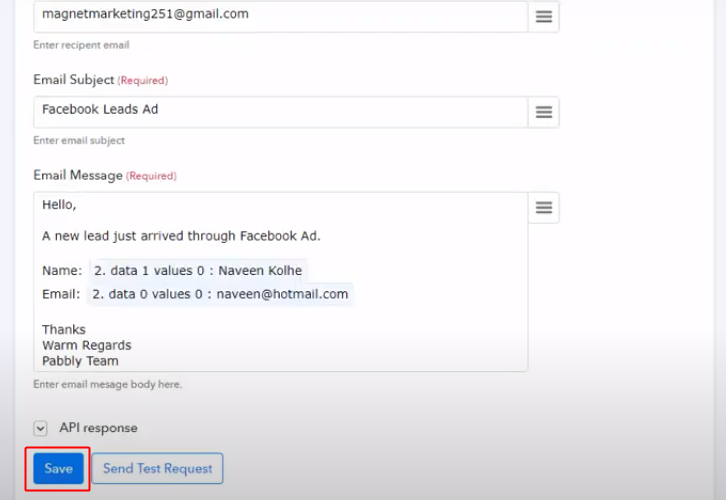
(c) Send Email to the Captured Leads
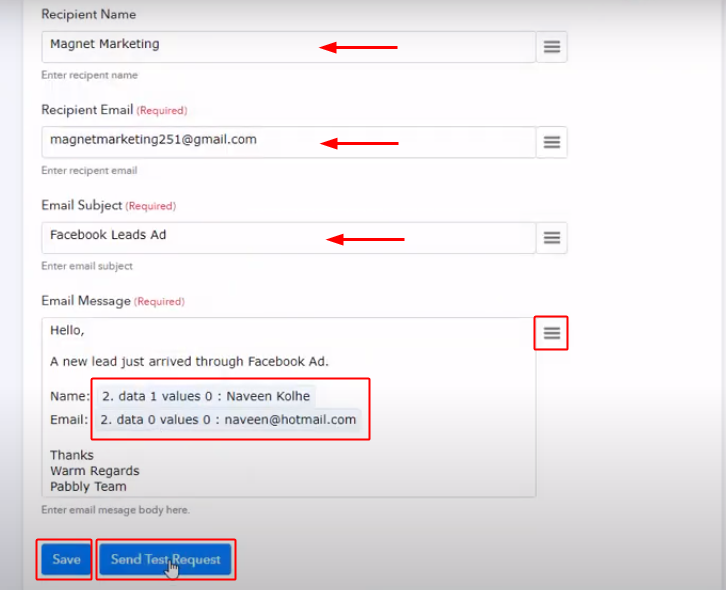
Once you authorize the Gmail account the system will ask you to fill out the email contents. Fill in the recipient’s name, recipients email, email subject & the email message. You can also use the data that you got from the API response such as the name, email etc.
When you are done with all the details, save & send a test request.
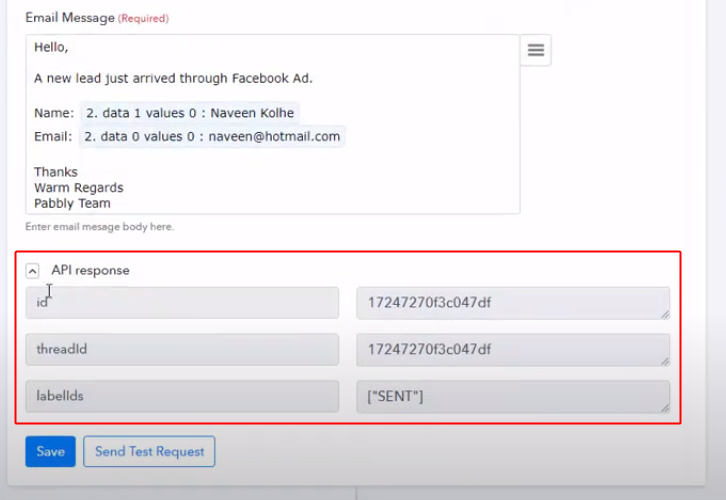
(d) Observe the Response for Sending Email to the Lead
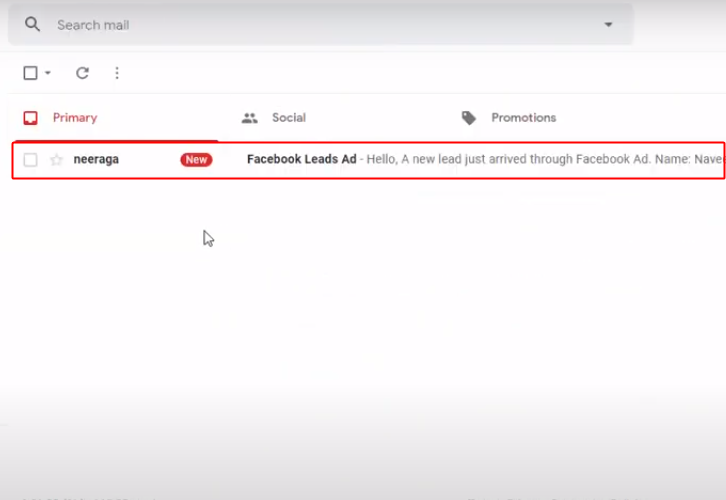
(e) Check the Email Received in your Account
Step 7: Save the Response
As we can see, the workflow is working as expected. So, simply save the workflow. And all future Leads will automatically arrive at your Gmail from now on.
Wind-up
This was the entire procedure to send Facebook lead ads data to Gmail automatically. Just follow the simple steps as described in this article and you’ll end up receiving an email instantly as a lead arrives at your Facebook Leads Ads account.
I hope this has helped you! For any further queries comment below.


