Are you looking for a way to integrate Aidaform with Pabbly Email Marketing? If so, then put a halt on your search as we are going to walk you through the process.
But before moving further, let’s put light on Aidaform. Basically, Aidaform is a form builder that lets you build a responsive form in minutes. Using a form, one can collect data from customers. And, many times we want this collected data into our email marketing software. So that we can send email to our prospects whenever needed. Collecting data through forms and then adding the same data into email marketing software is a lot of work.
That’s when people start searching for software that can make all this process a cakewalk. And here we are revealing one such software named Pabbly Connect that makes automation tasks a walk in the park. It offers seamless data transmission between multiple applications. With the help of software, one can avoid repetitive tasks. Other than this, there are various features available like filters, path routers, formatters, and much more to ease-up the whole automation process.
Here, in this article, we will understand the process of integrating Aidaform with Pabbly Email Marketing.
So, let’s get started.
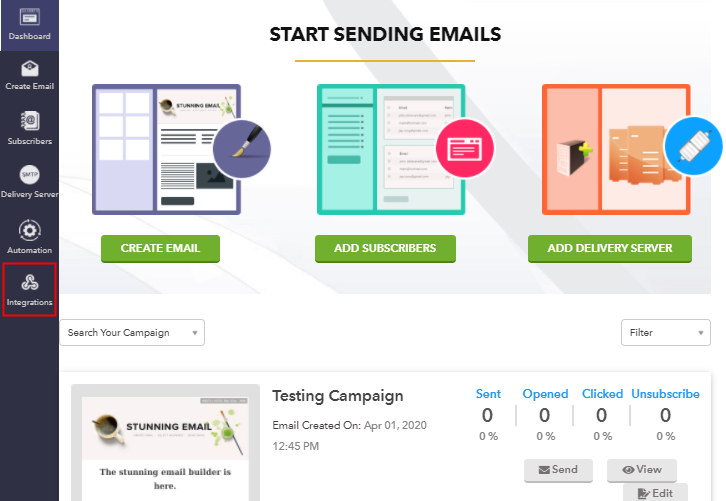
Step 1: Sign up to Pabbly Connect

Start the process by clicking on the “Sign Up Free” icon on the Pabbly Connect dashboard. Moreover, either manually enters all the details or sign up using Gmail credentials.
Try Pabbly Connect for FREE
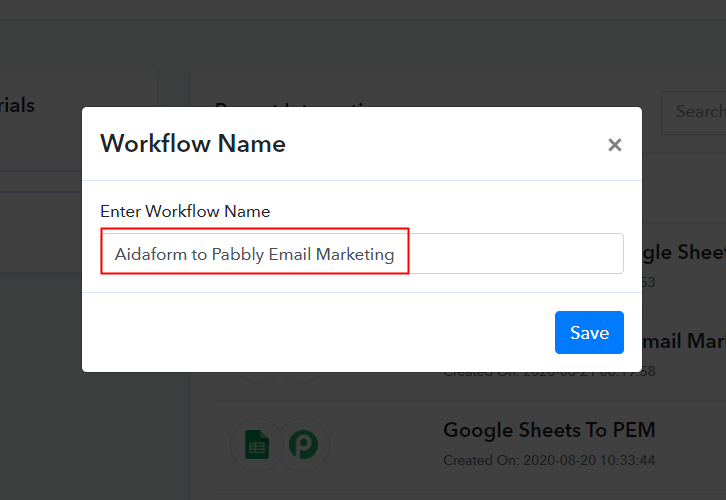
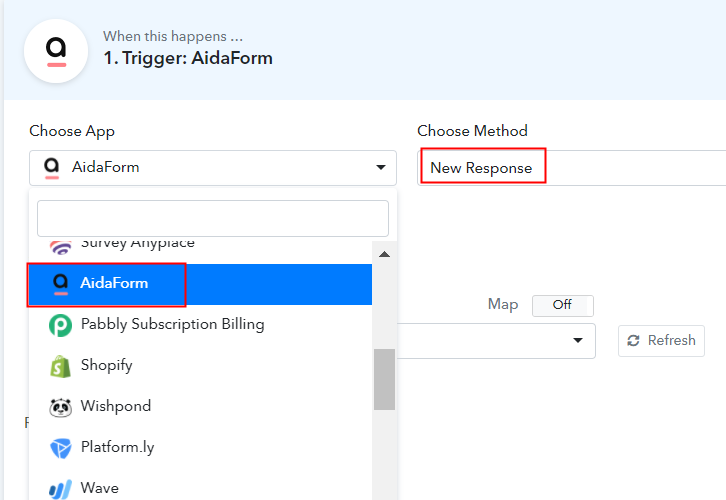
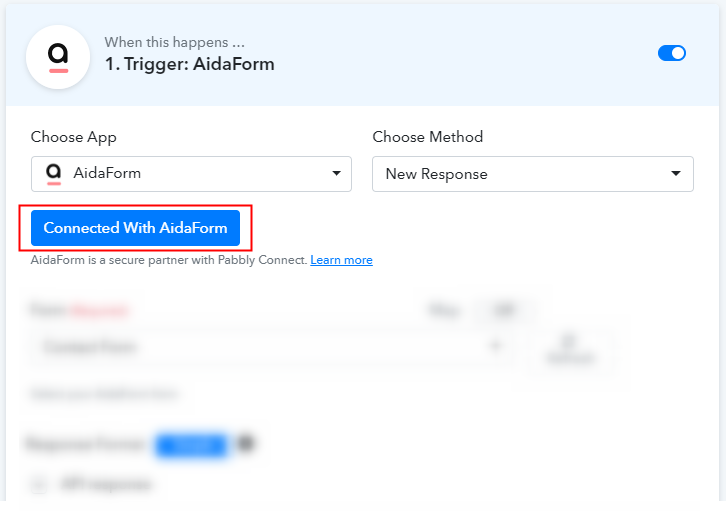
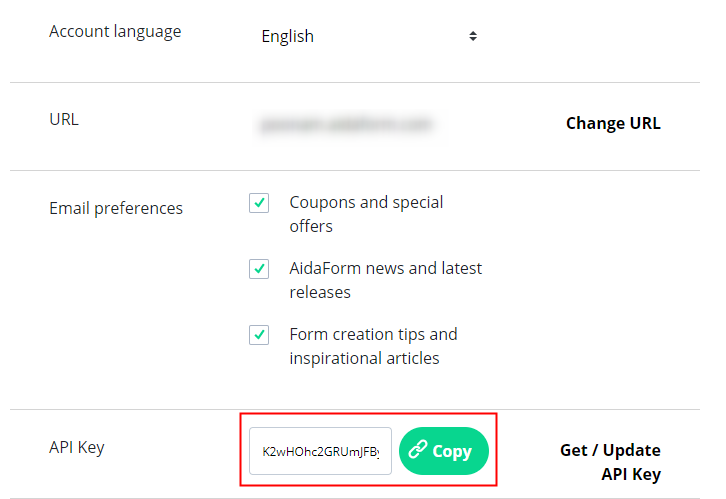
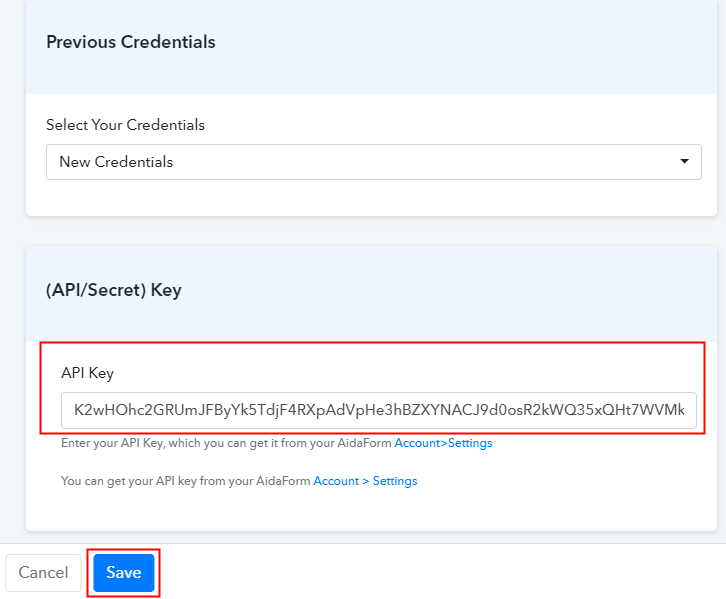
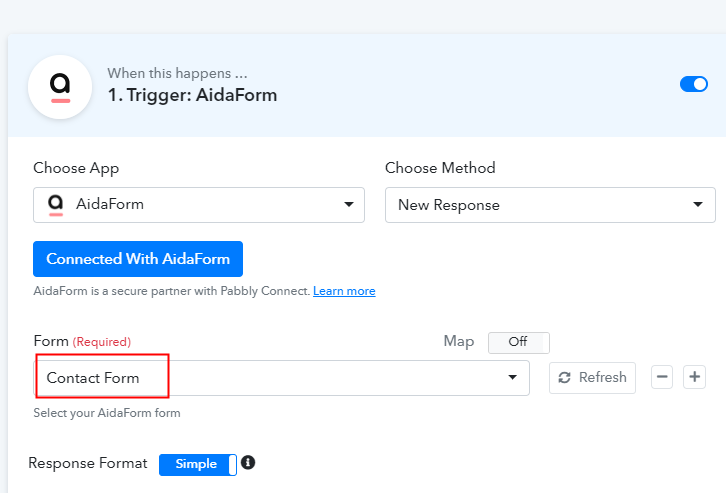
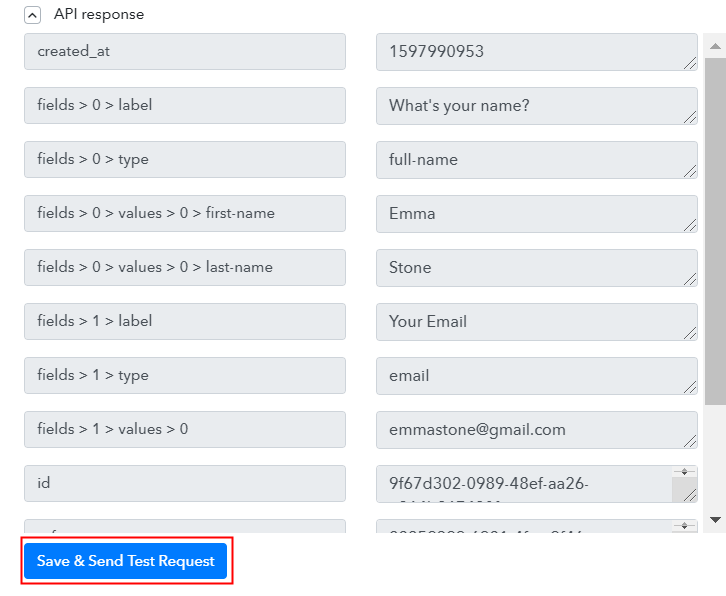
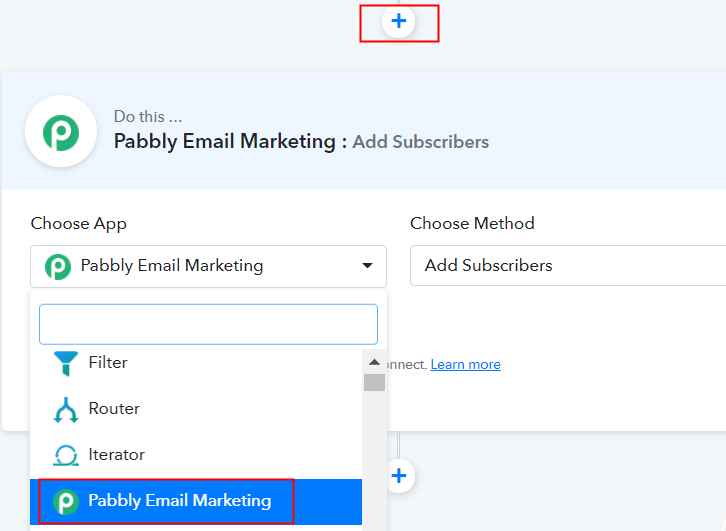
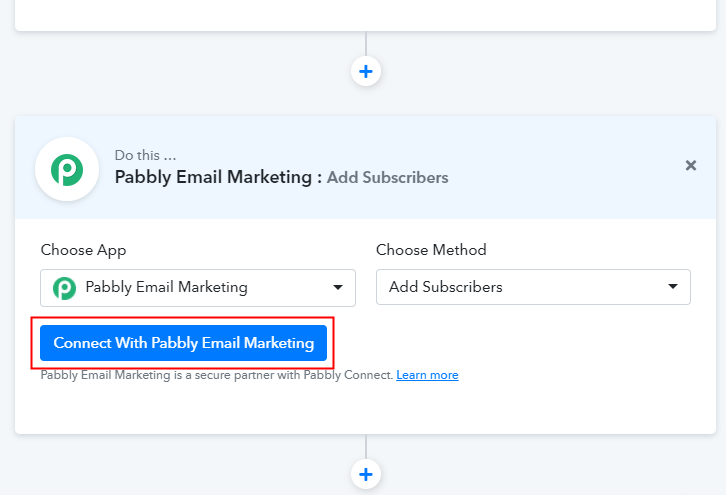
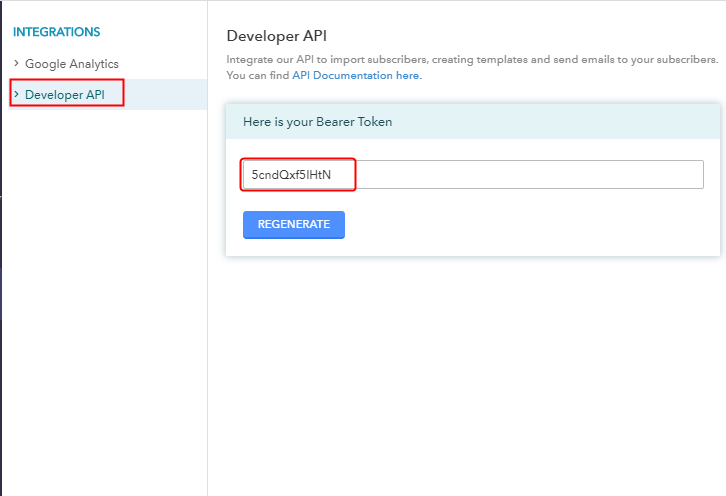
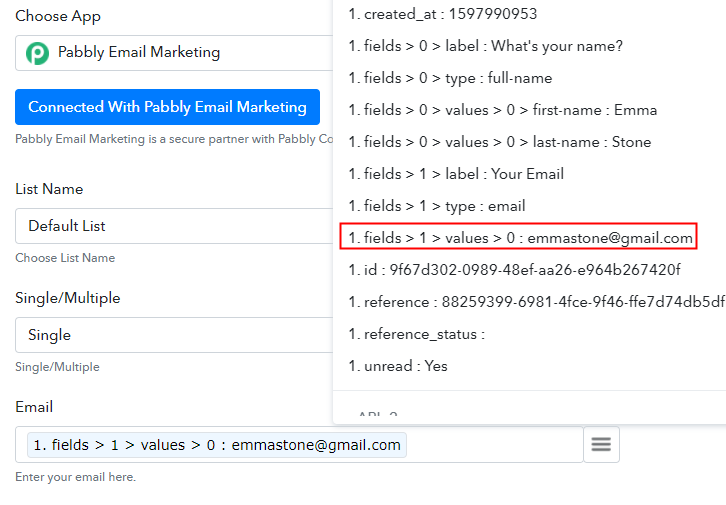
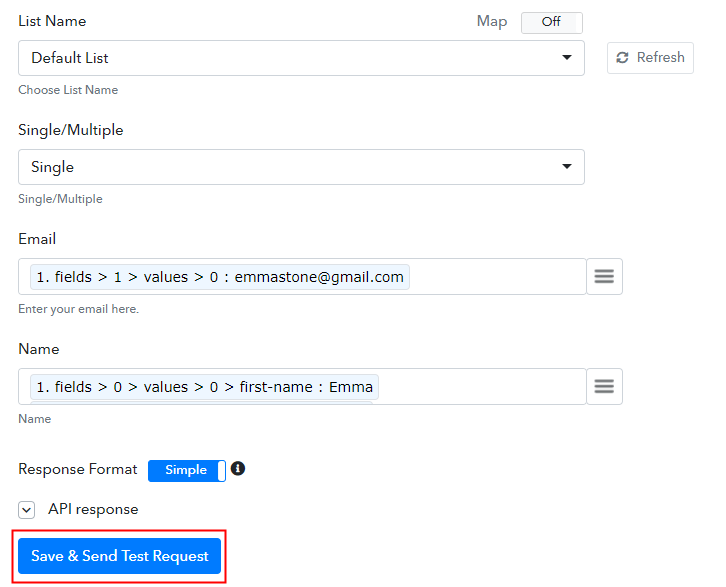
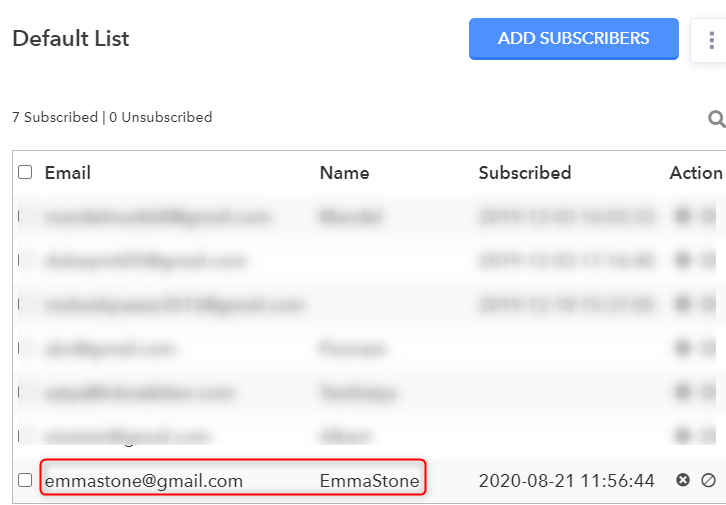
After signing into the account, click on the “Access Now” button of Connect. Begin the process of building a workflow for your automation by tapping the “Create New Workflow” button. Next, add the name of workflow which in our case is “Aidaform to Pabbly Email Marketing”. Nevertheless, you can name the workflow according to your needs. After creating a workflow, you need to pick the application you want to integrate. The succeeding step is to select “Aidaform” from the dropdown, then choose the “New Response” option. Further, click on the “Connected With Aidaform” button. It will open up the form where you have to submit the API key. To start the integration process, you have to copy the API key from Aidaform. For this, you have to sign in to your Aidaform account. After login to your Aidaform account, simply click on the “My Account” option. Now, choose the “Setting” option which is appearing on the screen. Next, in the setting option, the API key will appear. Simply copy the key from there. To send your Aidaform entries to email marketing software, you gotta paste the API key into the Pabbly Connect dashboard. As we told you earlier when you click on the “Connected With Aidaform” button, it will open up the form. Just paste the API key. Then, click on the “Save” button. Now, all your forms will appear on the dropdown. Select the one you want to integrate into email marketing software. To test the form, make an entry in Aidaform. Just fill all the details in the template and then click on the “Submit” option. After filling the form, go back to the Pabbly Connect dashboard where the filled entry will appear automatically. Simply click on “Save and Send Test Request” for further process. After setting a trigger, select the action for your trigger. For this, you have to select the application you want to integrate. Next, click on the “+” icon to add an action for your trigger. Here we are going to select “Pabbly Email Marketing” from the dropdown. Then, select the “Add subscriber” option. Now, after making all the necessary changes, click on the “Connect with Pabbly Email Marketing” button. Further, it will ask for “Bearer Token”, for which you have to log in to Pabbly Email Marketing account. To copy the “Bearer Token”, you have to log in to your Pabbly Email Marketing account. Login to your Pabbly Email Marketing account and select the “Integrations” option from the tab on the left. Then, further, click on the developer API option. Next, copy the “Bearer Token” code provided as shown in the above image. To paste your bearer token, go back to the “Pabbly Connect” dashboard. Then click on the “Connected” button which will open the page. Below on this page, you will see the option of “Bearer Token”, just paste your copied token there. Further, the “Default List” will appear in the “List Name” field. Now, all you have to do is add the required field from drop-down such as for the email field, select the email option, and for name field select the name option. After making all the changes, save the setting and then “Send Test Request”. Finally, when you check the default subscriber list in Pabbly Email Marketing software, your added entry will appear there. This is a single time process, after that, all the form submissions will automatically get appended to your subscriber list. Alright! Here we have covered all the essential steps to integrate Aidaform with Pabbly Email Marketing. All you have to do is follow all the above-mentioned steps and nothing else. Other than avoiding repetitive tasks, Pabbly Connects allows you to sort the data using filter feature. In case of any difficulty regarding workflow, you can always reach out to support staff of software. So, what is stopping you now? Go and grab a deal.Step 2: Access Pabbly Connect

Step 3: WorkFlow for Aidaform Pabbly Email Marketing Integration
(a) Start with a New Workflow

(b) Name the Workflow
Step 4: Setting Trigger for Aidaform – Pabbly Email Marketing
(a) Select Application you want to Integrate
(b) Click the Connect Button
Step 5: Copy the API Key from Aidaform
(a) Click on My Account
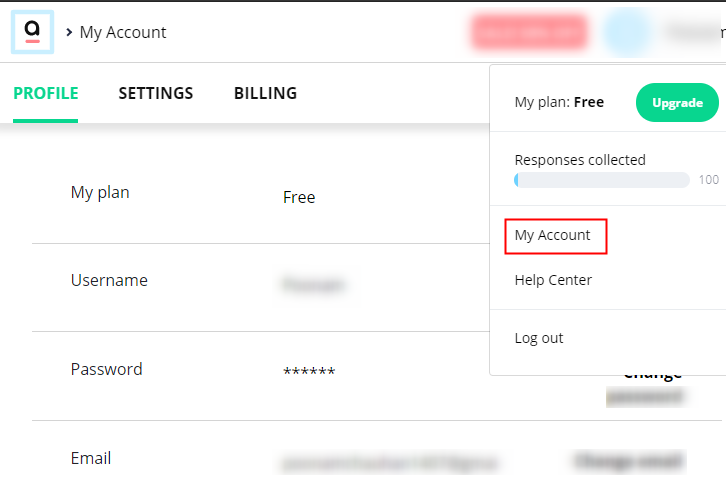
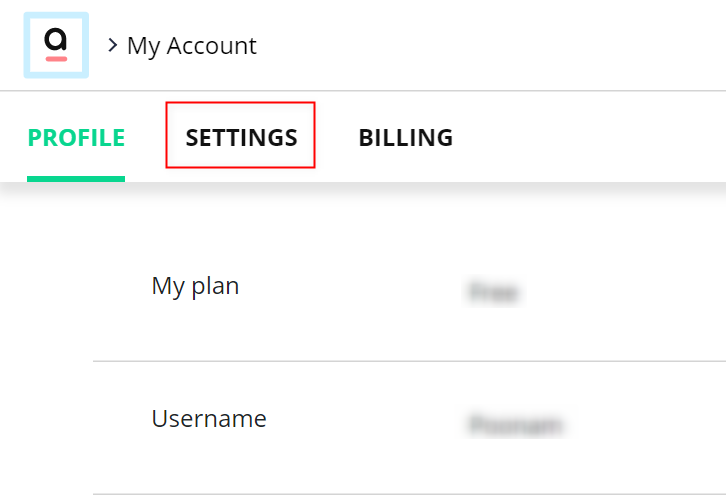
(b) Click on Setting Option
(c) Copy the API Key
Step 6: Connecting Aidaform to Pabbly Connect
(a) Paste the API Key
(b) Add Form
Step 7: Fill the Form

Step 8: Test the Submission in Pabbly Connect Dashboard
Step 9: Setting Action Aidaform – Pabbly Email Marketing
(a) Select Application you want to Integrate
(b) Click the Connect Button
Step 10: Connecting Pabbly Email Marketing to Pabbly Connect
(a) Click on Integrations
(b) Copy Bearer Token
(c) Paste Bearer Token in Pabbly Connect Dashboard

(d) Add Field Data
(e) Save and Send Test Request
Step 11: Check the Submission
Conclusion –
You May Also Like To Read –


