In this blog, we will walk you through the step by step procedure to send automatic emails as soon as the user sign up on Shopify store. If you are having a Shopify store then you must be willing to send emails such as welcome, offer, current deals. Well, as you can see it’s not possible through the Shopify dashboard. So, here is the easiest solution.
You can connect your Shopify store with Pabbly Connect and send automatic emails to your customers as soon as they sign-up.
Pabbly Connect helps you join two or more services together. We can use it to create unlimited workflows and set-up instant triggers on certain conditions. Furthermore, you can also make use of various formatters, filters, routers etc without zero coding knowledge. Also, we can define an action using multi-steps calls based on the trigger condition.
Why Choose This Method Of Integration?
In contrast with other integration services-
- Pabbly Connect does not charge you for its in-built apps like filters, Iterator, Router, Data transformer and more
- Create “Unlimited Workflows” and smoothly define multiple tasks for each action
- As compared to other services which offer 750 tasks at $24.99, Pabbly Connect proffers 50000 tasks in the starter plan of $29 itself
- Unlike Zapier, there’s no restriction on features. Get access to advanced features even in the basic plan
- Try before you buy! Before spending your money, you can actually signup & try out the working of Pabbly Connect for FREE
Well, it somehow sounds tough, but I can tell you it would take only a few minutes and the service allow you to use it’s all features without any restriction even in its free plan.
Now, let’s get started with the step by step procedure to integrate Shopify and Gmail to send automatic emails on customer sign-up.
Step 1: Sign up to Pabbly Connect

Firstly, visit the official website of Pabbly Connect and then click on the ‘Sign-Up Free‘ button. Next, on the signup page, either make use of an existing Google account or manually fill out the registration form details to get in.
Step 2: Access Pabbly Connect

After signing up successfully, click the ‘Access Now’ button that is present in the ‘Connect’ Pabbly application window.
Step 3: Create a WorkFlow to Send Emails on User Sign Up in Shopify
(a) Click over the Create New Workflow Button

Start with creating a workflow to send automatic emails on user sign up in Shopify store and for this hit the ‘Create New Workflow’ button.
(b) Name the Workflow
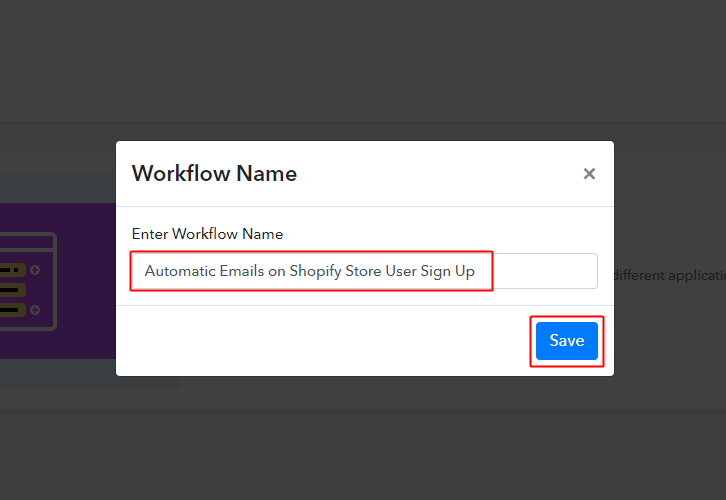
Name the Workflow as per your need (for instance: Automatic emails on user sign up in Shopify store) and hit the ‘Save’ button.
Step 4: Setting Triggers for Shopify & Gmail Integration
To send automatic emails on user sign up in Shopify store, you need to set-up a trigger and an action. So, let’s start setting up the trigger first.
(a) Select Application you want to integrate as Shopify
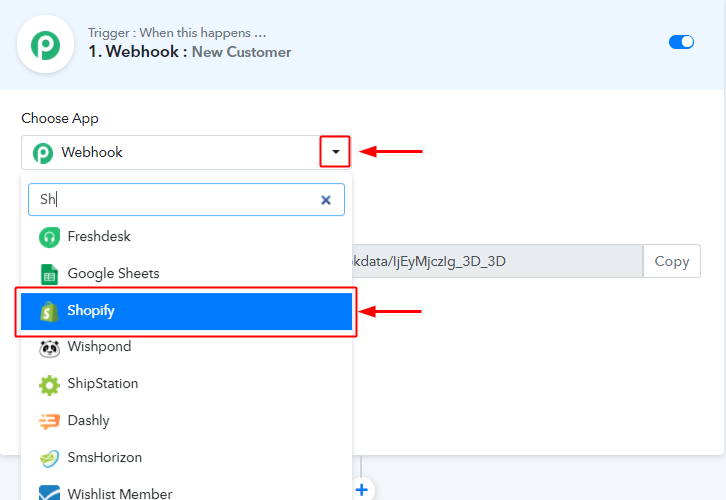
When you name and create a workflow on Pabbly Connect, a window asking for trigger details will open up.
Select the ‘Shopify’ app from the drop-down of the ‘Choose App’ field.
(b) Choose the Shopify Method
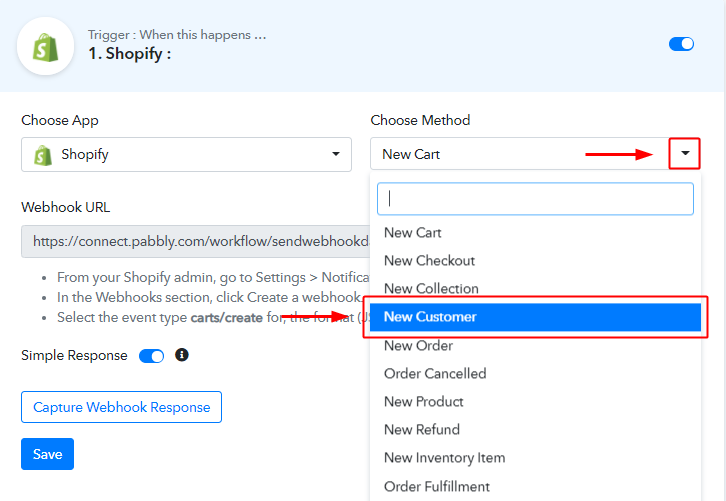
Next, select the method as ‘New Customer’ from the Choose Method field’s drop-down list.
Now, you are all set to connect this trigger with a Shopify store.
Step 5: Connect Pabbly Connect & Shopify Store
To plant the Webhook on your Shopify store, go to the dashboard of your Shopify store.
(a) Go to Your Shopify Store Dashboard
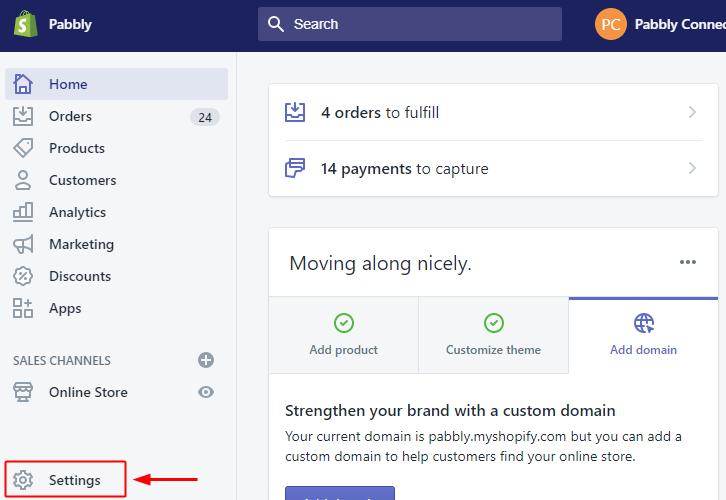
Click the ‘Settings’ option present at the bottom-left corner of your Shopify dashboard.
(b) Select Notification Option
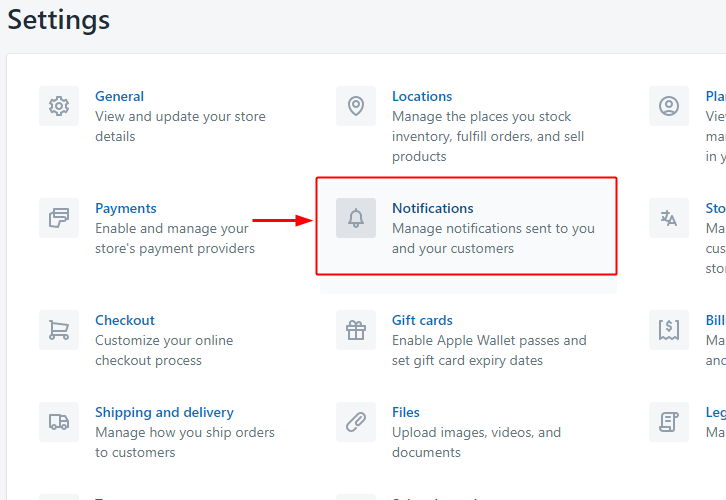
A page will open up carrying all the different setting options of the application. Select the notification option as we need to send automatic emails on user sign up in Shopify store.
(c) Click over Create Webhook Button in the Webhook Section
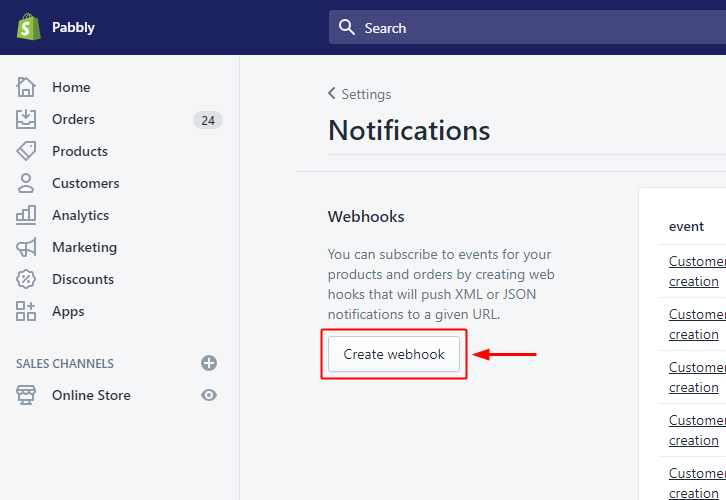
On the next page, there will be many notification options. So, head directly to the bottom of the page on ‘Webhooks’ and click the ‘Create Webhook’ button.
(d) Select the Event
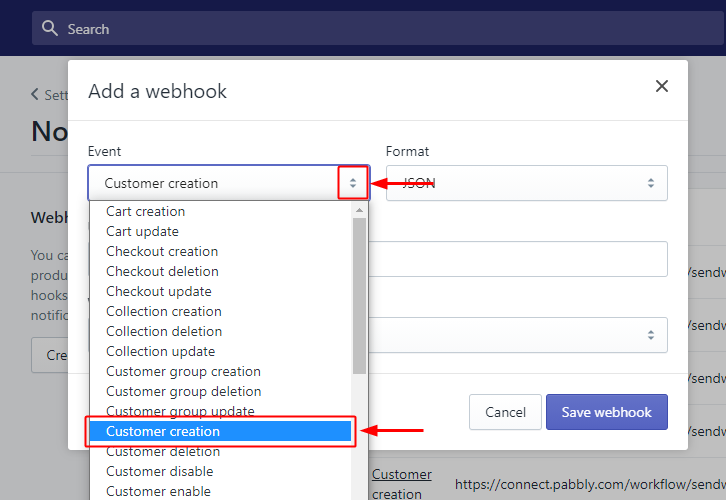
When you click over the ‘Create Webhook’ button. A window will pop open asking for a few webhook settings.
Set the Event field value to ‘Customer Creation’ by selecting the same from this field’s drop-down menu.
(e) Copy the Webhook URL from Pabbly Connect Trigger
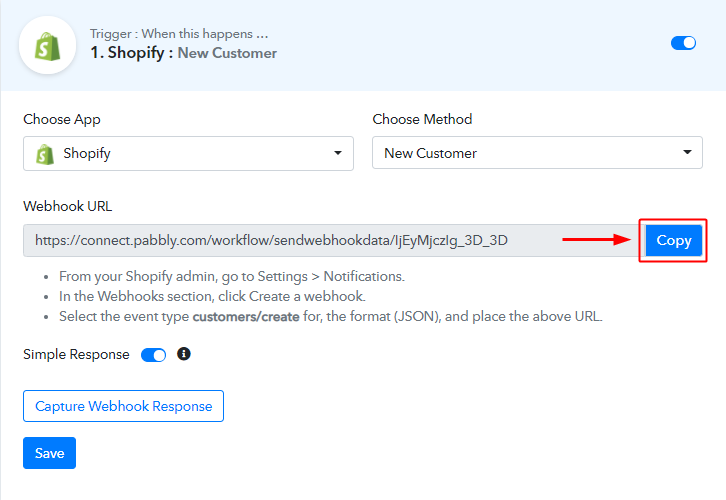
To fill out the URL field in the Shopify store’s webhook settings, head back to Pabbly Connect trigger and copy the Webhook URL.
(f) Paste Webhook URL
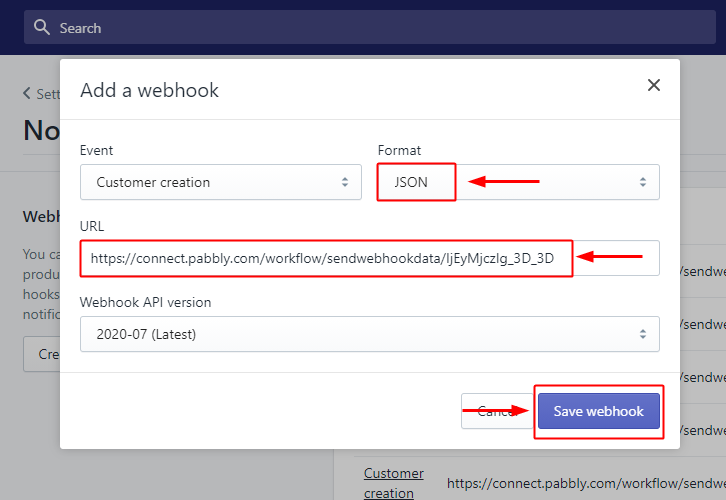
Check the ‘Format’ to be ‘JSON’.
And paste the copied Pabbly Connect Webhook URL in the URL field.
Lastly, save the created Webhook.
Step 6: Test the Trigger Response
Up to this point, the trigger is all set. So, let’s check the response of the set trigger.
(a) Go to Pabbly Connect Trigger & Capture the Webhook Response
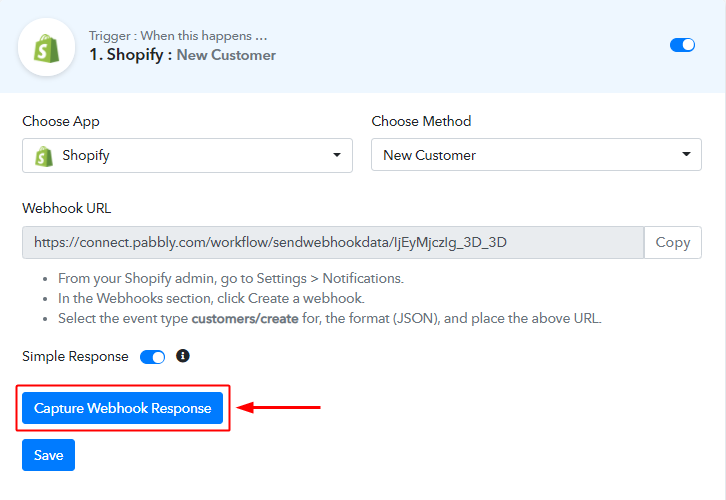
Click the ‘Capture Webhook Response’ button on the Pabbly Connect trigger.
(b) Fill the Sign UP from of Your Shopify Store
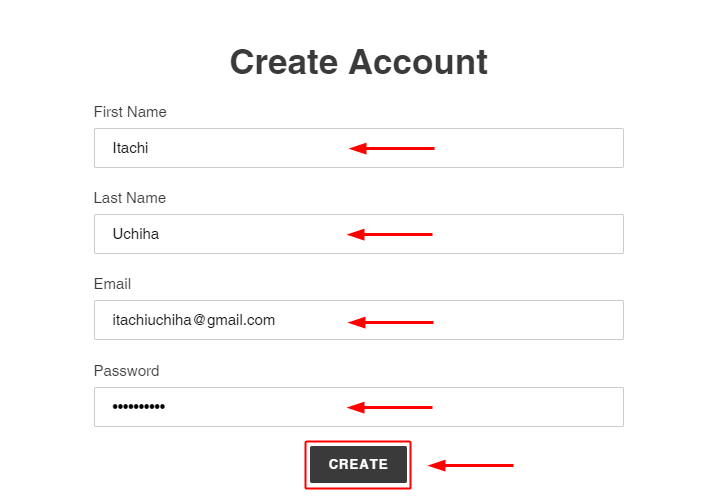
Go to your Shopify store’s sign-up form and fill in the details for a new customer for testing purpose.
Complete the sign-up process by hitting the create and submit button afterwards.
(c) Check the Webhook Response on Pabbly Connect Trigger
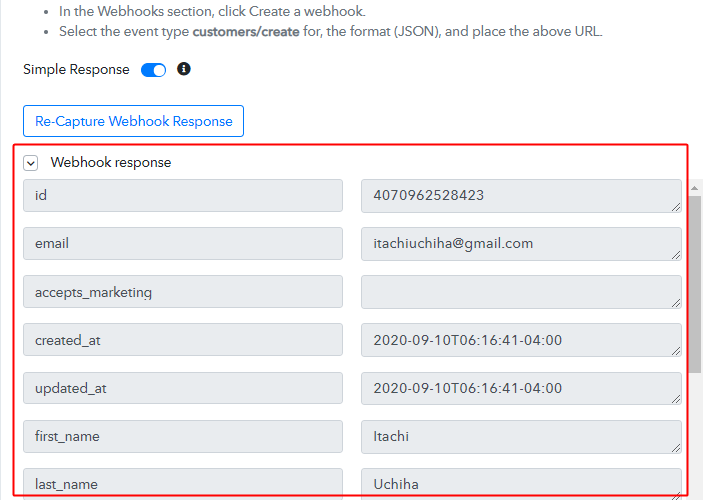
You can see the response of your sign-up on your Shopify store in the Pabbly Connect trigger window.
All the information that was filled and submitted on your Shopify store’s sign-up will be available on the response.
This ensures that our trigger setting to send automatic emails on user sign up in Shopify store is working as expected.
Step 7: Set-up An Action to Send Emails on User Sign Up in Shopify
As now we have the Shopify customer’s data on Pabbly Connect trigger, we can simply integrate an email service to send emails to the customer. To do so we are going to integrate Gmail. But, I wanna let you know that you can also select any email marketing service in the place of Gmail in here too.
(a) Select the App to Integrate as Gmail
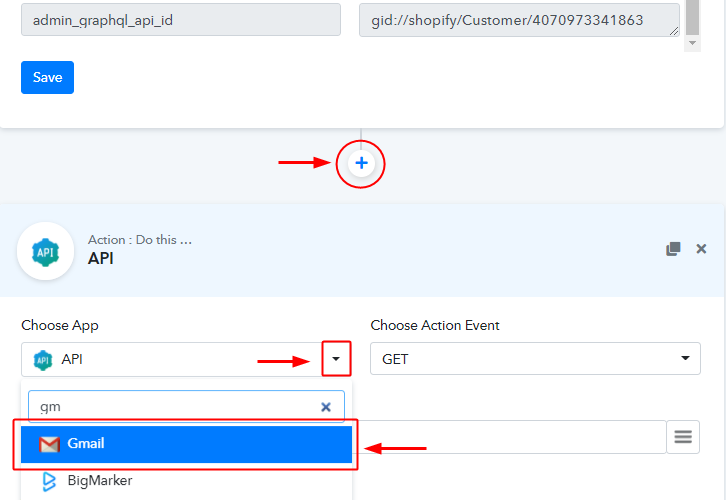
To integrate an email service, click the plus button next to your recently created trigger.
And select the Gmail app from the Choose App field’s drop-down list.
(b) Connect with Gmail
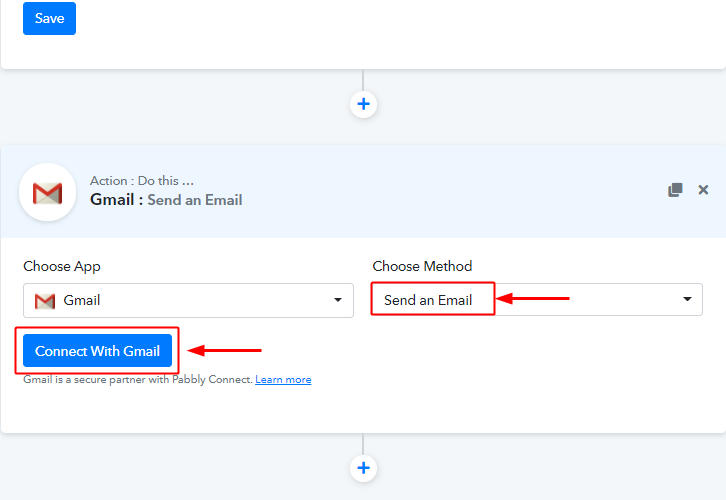
Make sure the method in here is set to ‘Send an Email’.
Lastly, hit the ‘Connect with Gmail’ button.
(c) Authorize Your Gmail Account
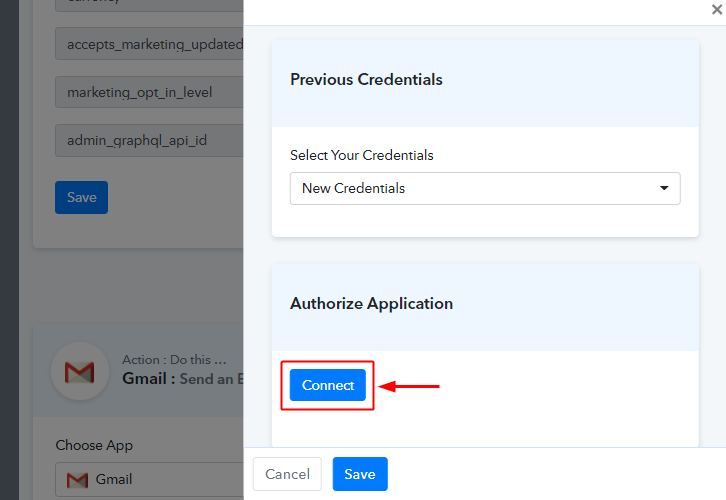
Next, the system will ask you to authorize a Gmail account.
So, click the ‘Connect’ button in the window that slides in.
Complete the authorization by allowing the system to send emails using your set account.
Step 8: Map the Action Email Values
(a) Map the Email Values from the Received Shopify Trigger Response
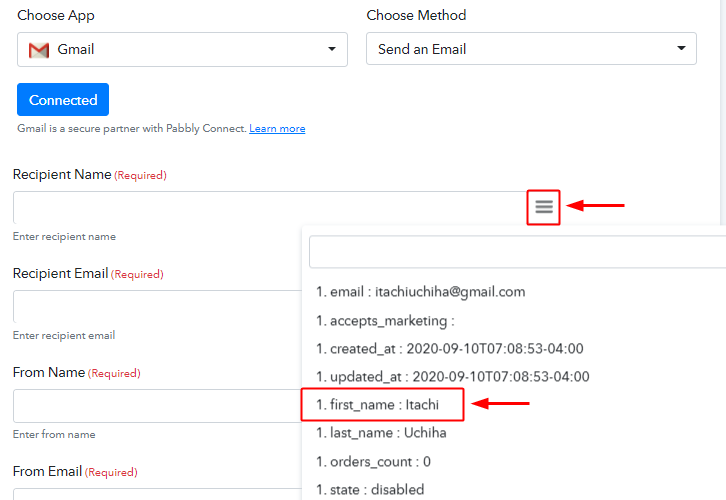
Once the authorization is completed, you will be asked to fill the details that will be used for sending all the emails more further.
You’ll need to map the values from the response that we received from the trigger.
To map a value simple place your cursor to a position where you want to map the value. Then click the three verticle lines (the menu icon) present next to that particular field. And then click over the values that you wanna map from the response drop-down list.
Likewise, fill all the rest email requirements.
(b) Complete the Email Requirements & Send a Test Request
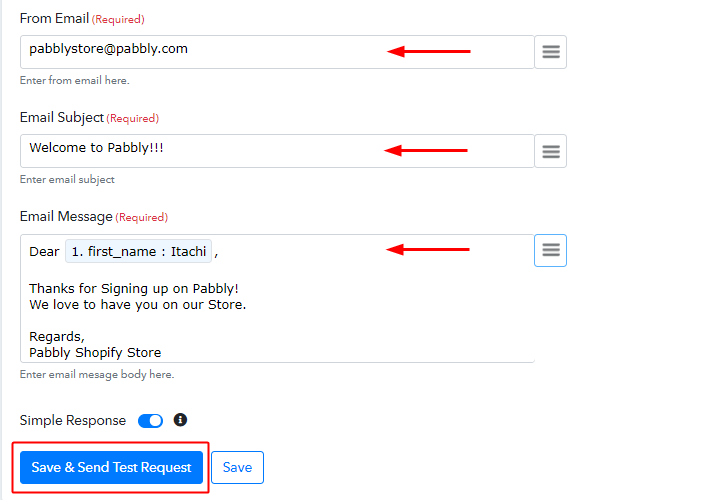
Once you are done with all the details click the ‘Save & Send Test Request’ button.
(c) Check the Action Response
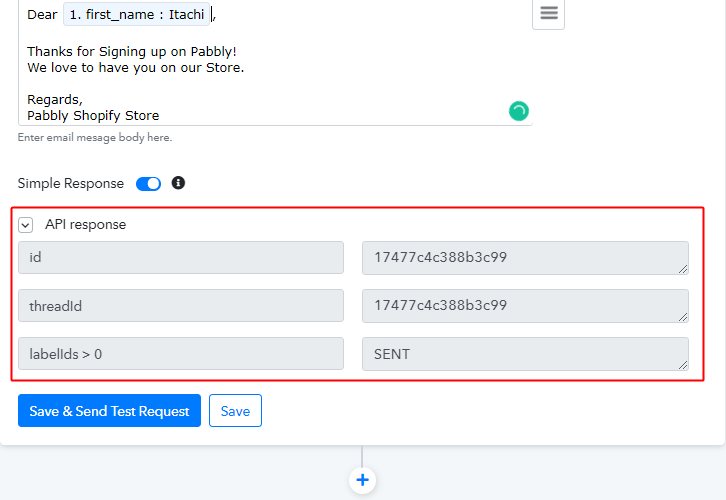
You can check the success of your nation as the response is labelled SENT.
(d) Action Response on Customer’s Gmail
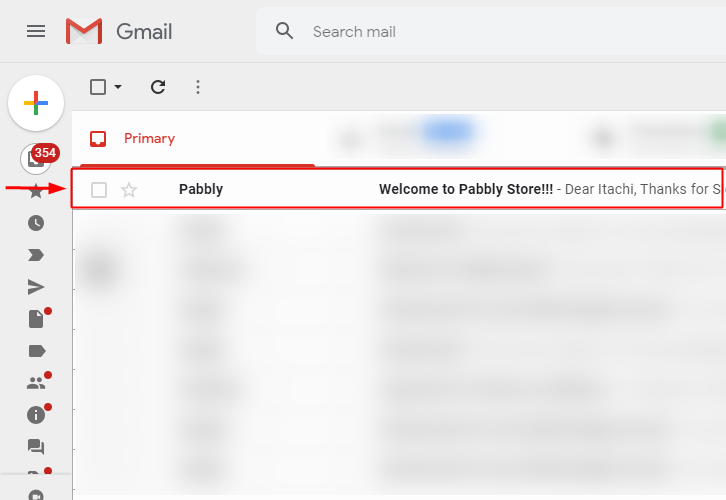
Also, while testing you can check the email’s send status on the customer’s inbox.
Step 9: Save the Webhook
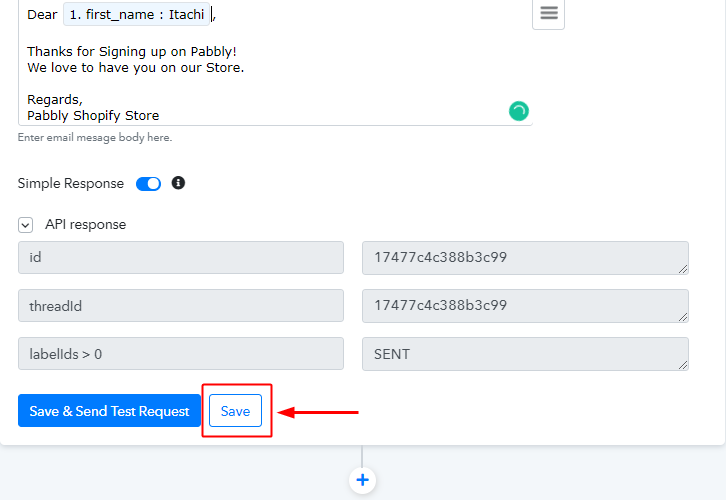
As we can see the Webhook is working perfectly. So, simply save the webhook by clicking the last action’s save button.
Wind-Up
Well, this is all about ‘How to send automatic emails on user sign-up in Shopify store’. Consequently, after completing the step by step procedure, you will end up sending automated emails to your customer’s as soon as they sign-up on your Shopify store. Most importantly, the procedure is very easy to implement and you don’t need any coding skills to carry these simple steps.
Do you want to try Pabbly Connect for FREE?
For any further queries, do comment below.


