Ideal For: All the software manufacturers, software sellers, software dealers, SaaS providers, and other merchants can use this method to enhance their software selling business online.
Why Choose this Method for Selling Over any Other Solution?
Unlike any other solution, this method allows you to:
- List and sell your software for FREE. Absolutely no payment required.
- No commission on sales.
- Collect payment through multiple payment modes from a single checkout page.
- Sell one time or recurring subscriptions of your software.
- Sell and collect payment in any currency as per your requirement.
- Give discounts on your products by offering special coupon codes.
- Add sales commission agents to help you in selling your software.
One of the multibillion-dollar business ideas is selling software online. Whether you’re selling via CD, DVD, or as a service, it always adds value to your business. This is why it is great timing to start selling software online.
Why would you like to sell software online?
The very first reason to step into online software selling business is, the SaaS-based business is dominating a world. Second, it has revealed in one of the market trends that software selling business will reach the mark of $113.1 billion in 2021. Isn’t it great?
Not just this, around 80% of companies reported improvement in sales by selling software online. Traditional business has its clutters like higher set-up costs, meeting customer’s expectations, and all. On the contrary, by selling software online you can save all these troubles and also delivers the quality product on time.
Some of the perks of starting software selling business online are:
- Cost-effective and convenient
- Provides global reach
- Affordable
- Boost sales
- Receive payment both online and offline
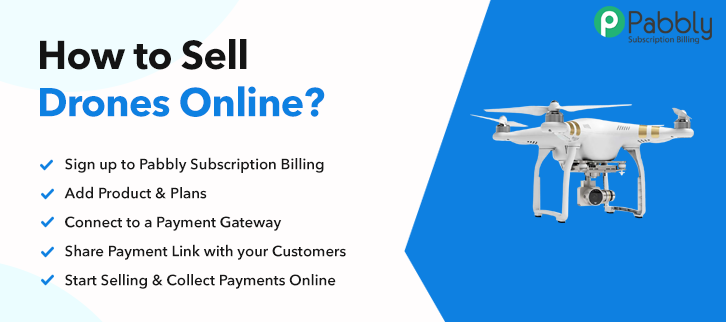
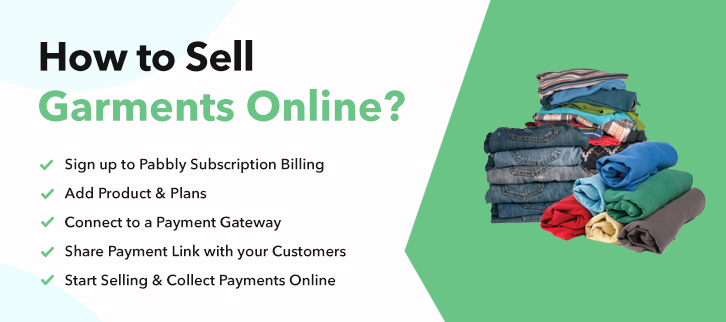
These are all the advantages that are making software sellers dive into the digital market ocean. Believe us, selling and buying products online are new black now. Using effective checkout pages, sellers are boosting their recurring or subscription business. This is where the amazing software like Pabbly Subscription Billing comes in a picture that lets you build effective checkout pages in a fraction of time. So, without wasting any more time we are going to show you how to create software selling checkout pages using the tool.
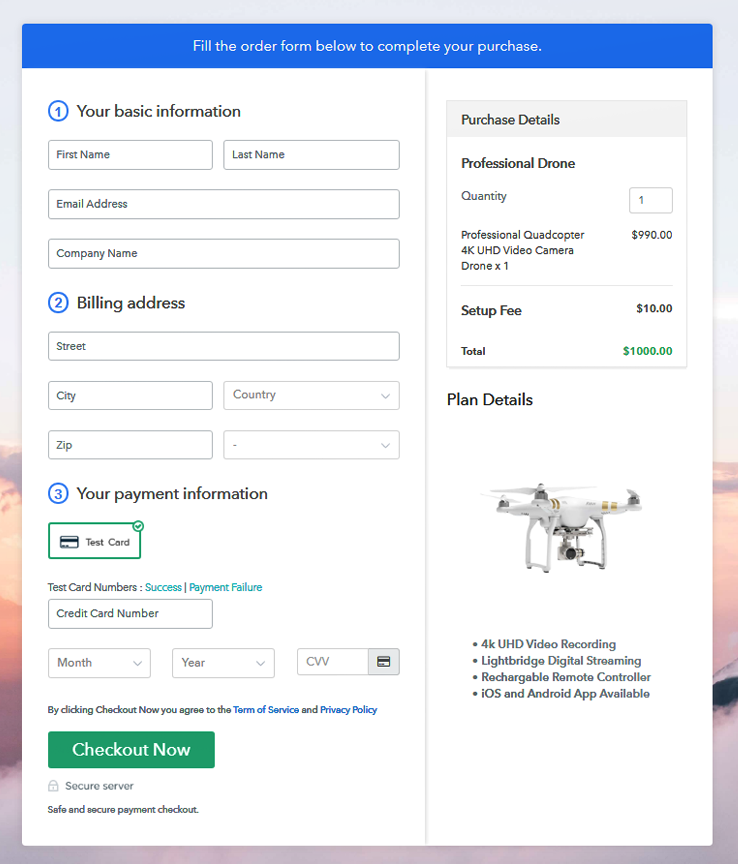
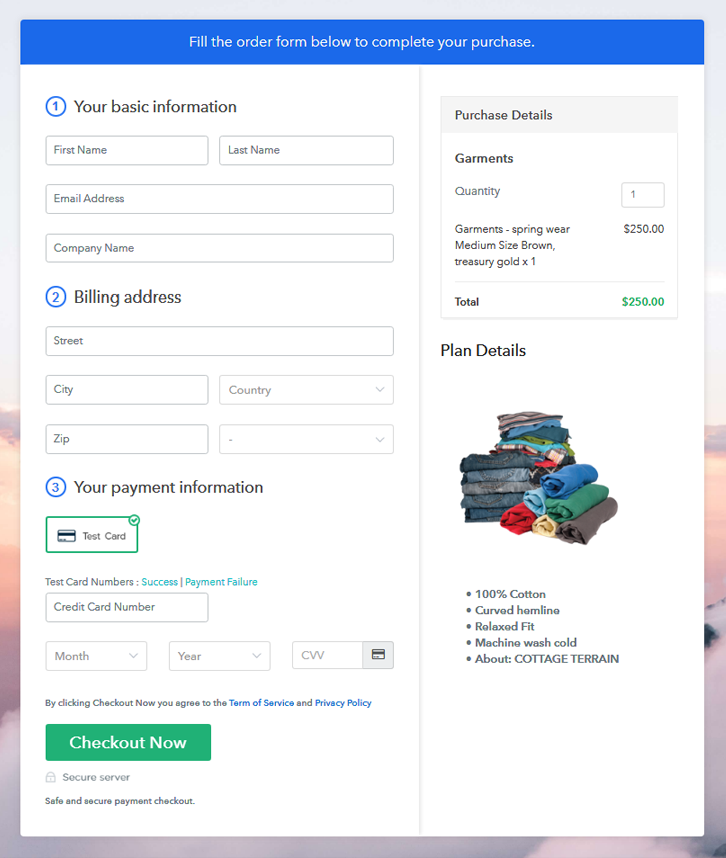
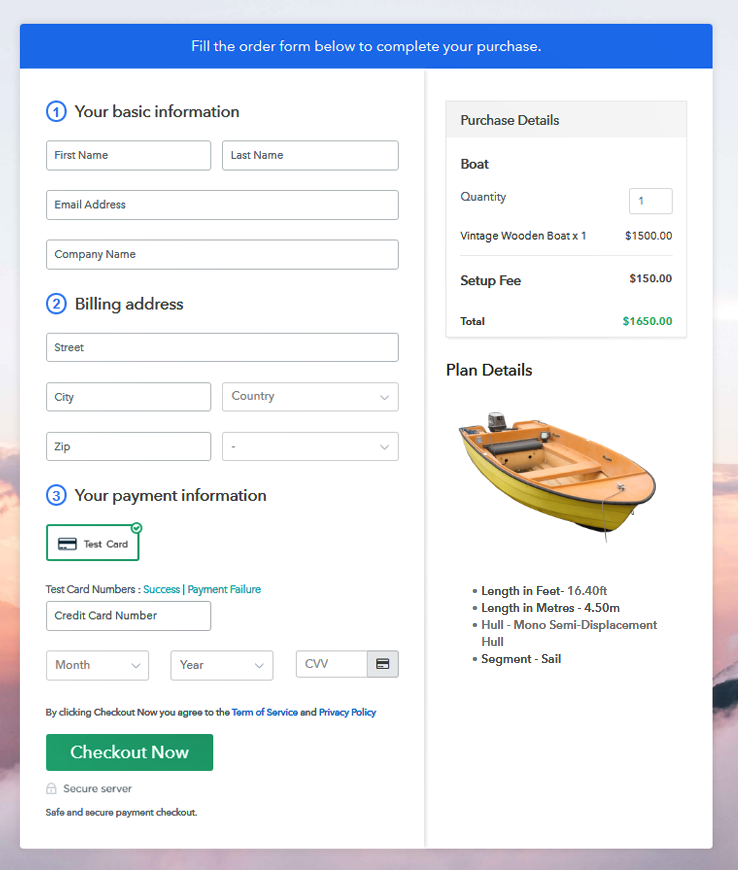
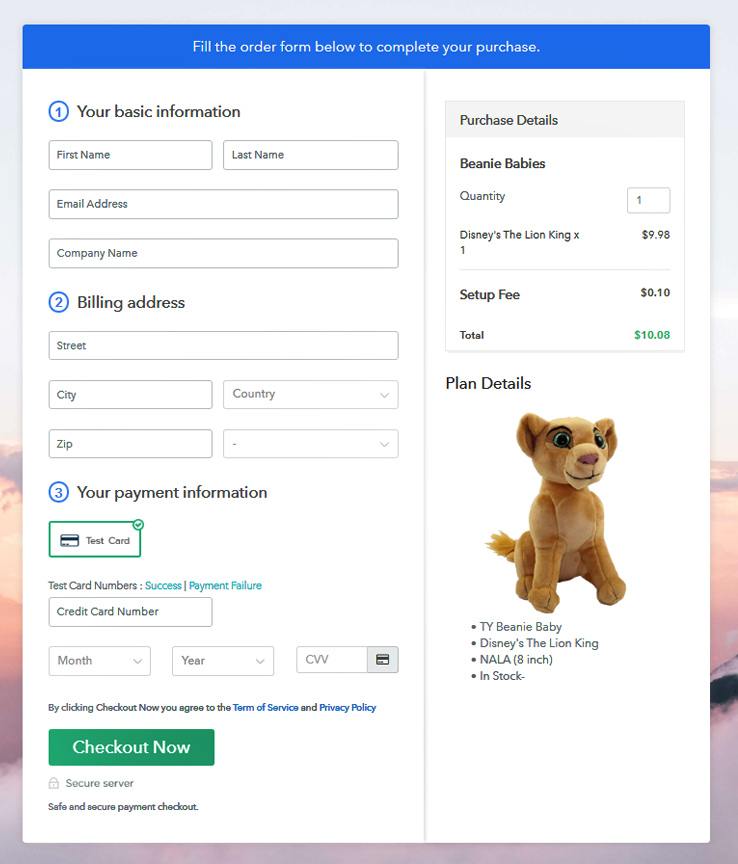
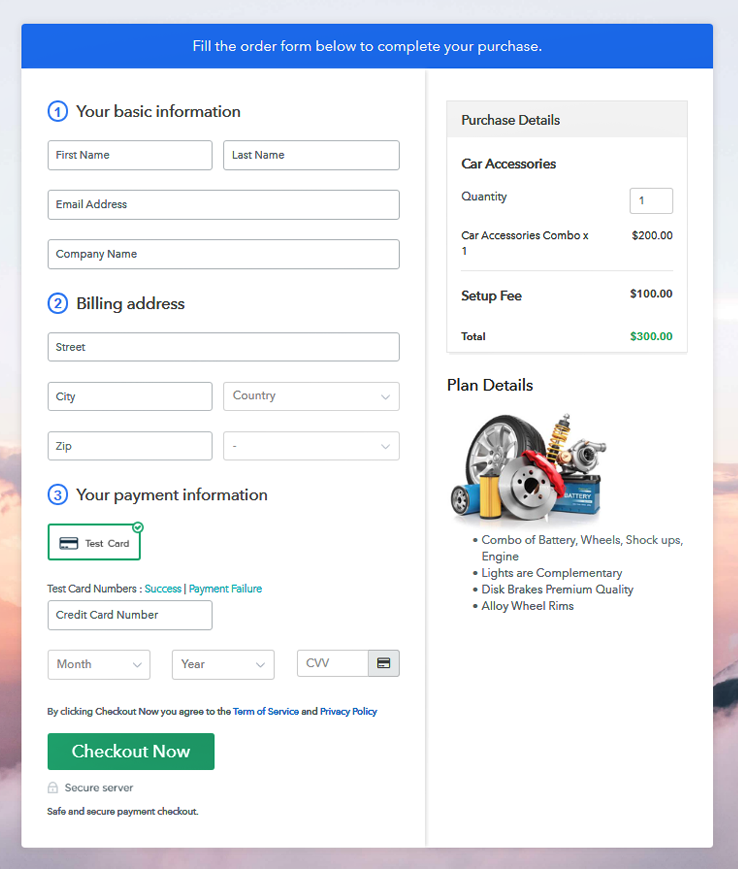
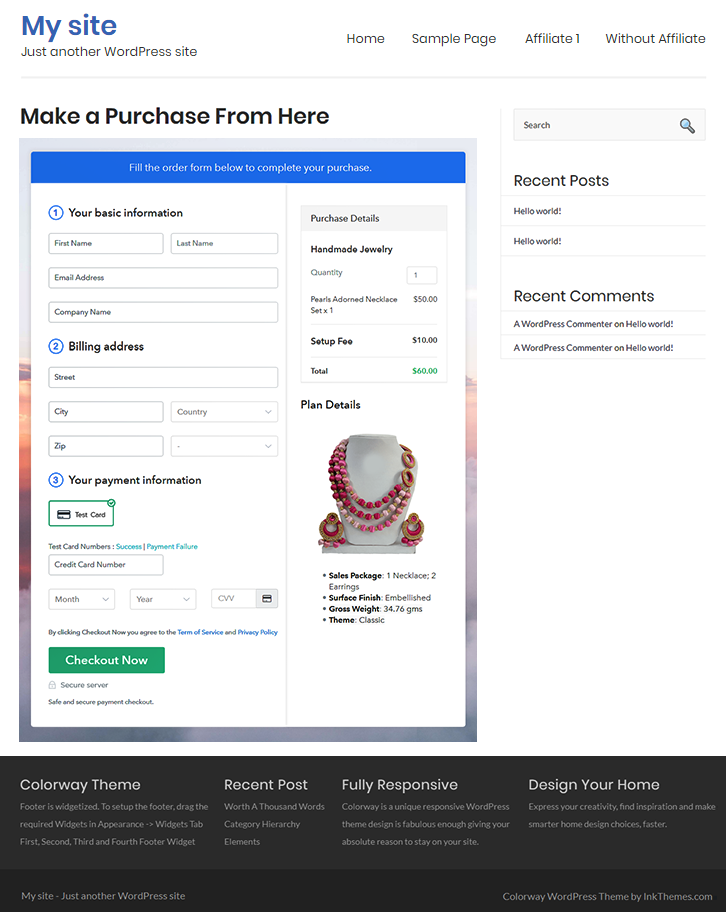
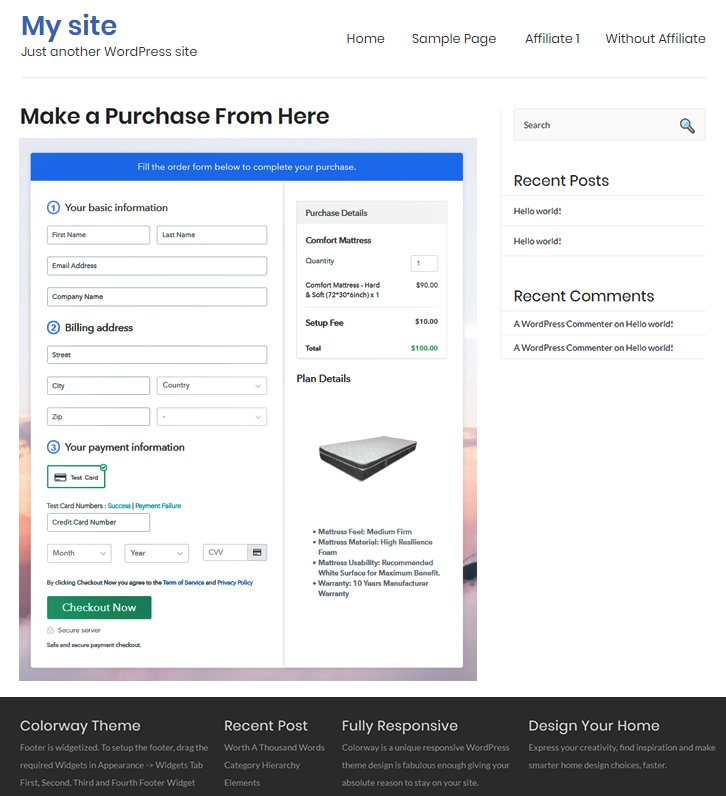
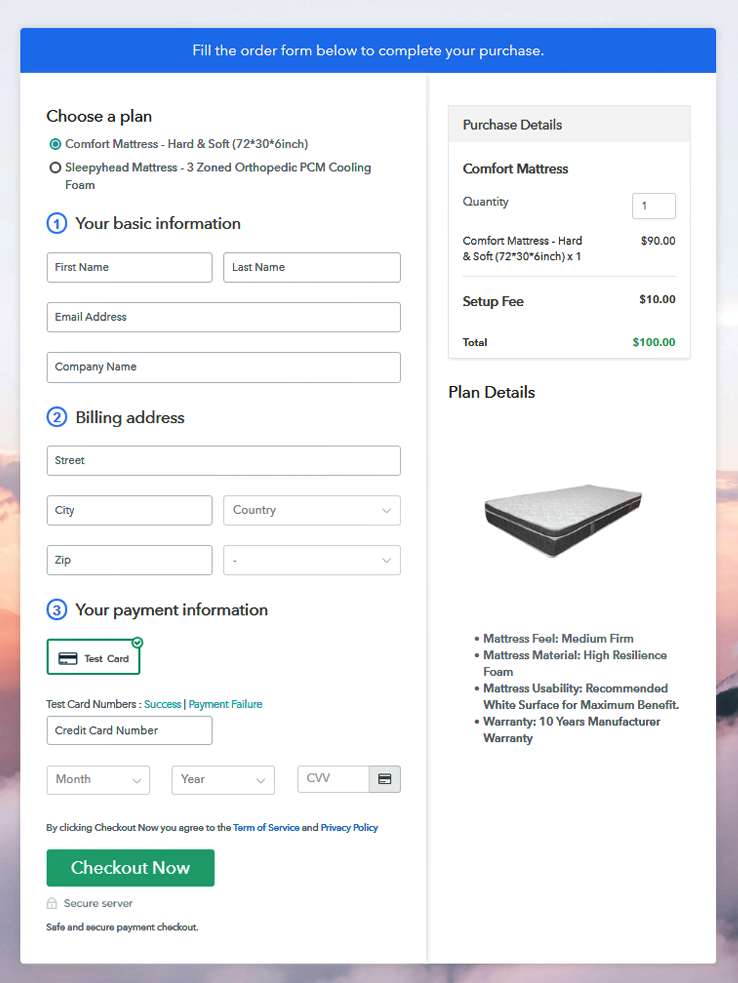
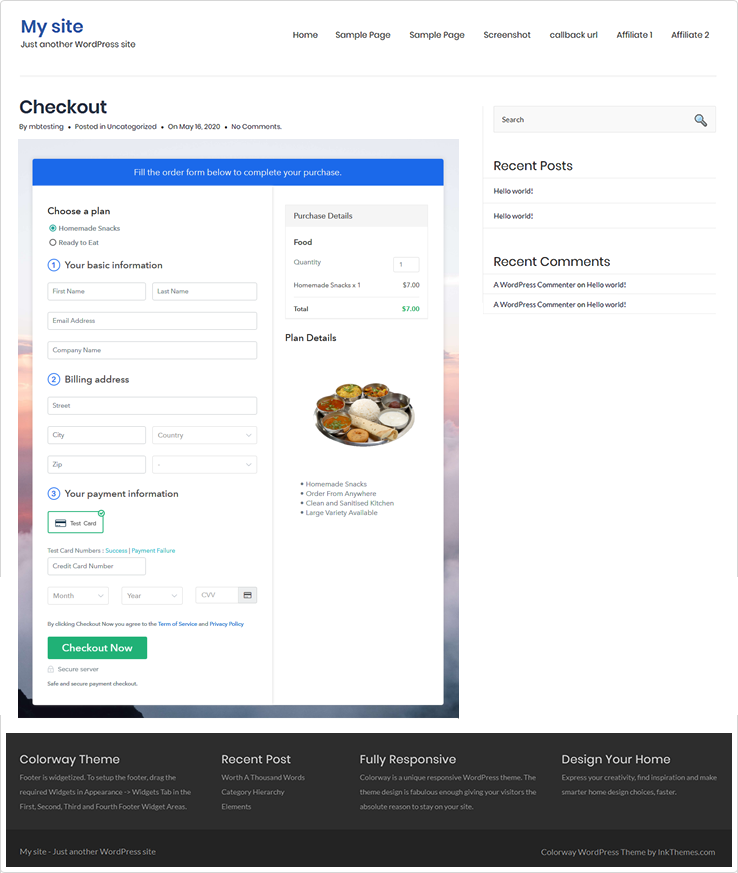
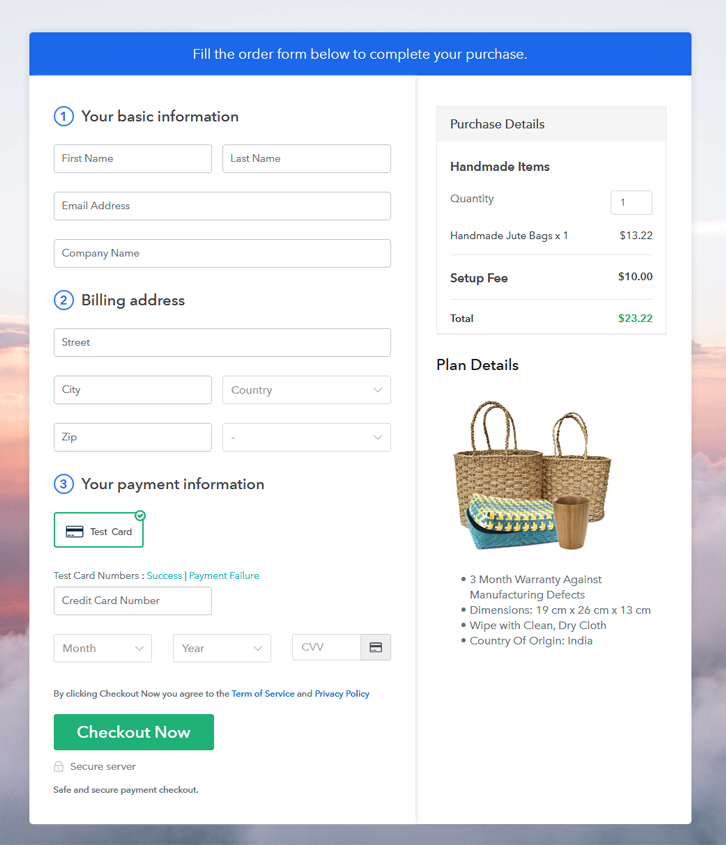
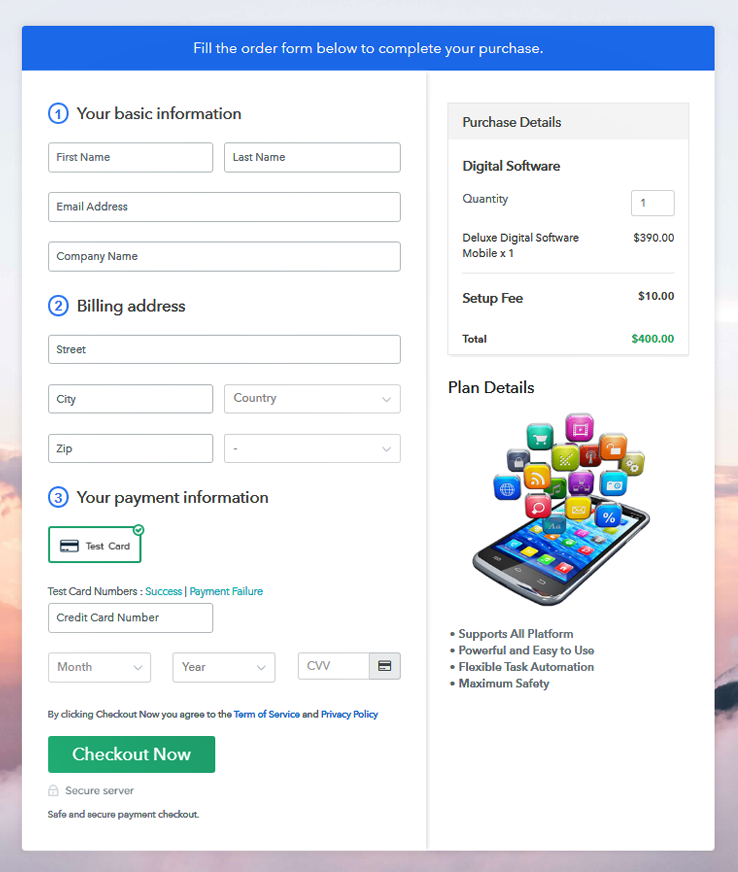
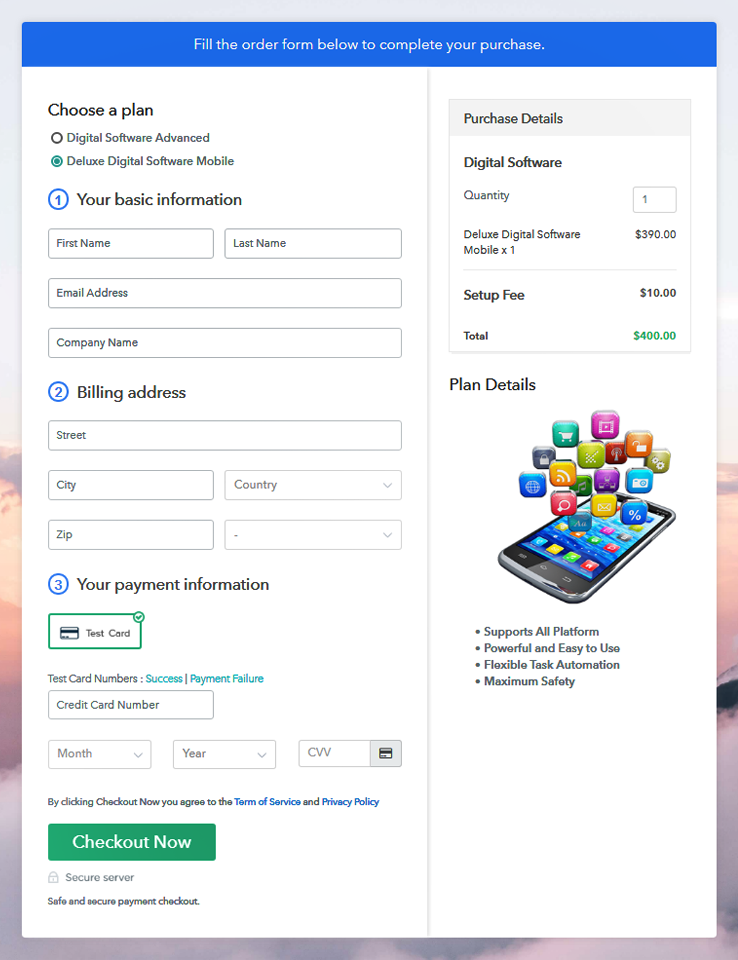
This is How your Checkout Page will Look Like After Creation
Step 1: Log in to Pabbly Subscription Billing

Go to Pabbly Subscription Billing page and click on the “Sign Up Free” button. Then, the page will open asking for details, either sign-in using Gmail credentials or you can always create a new account.
Sign Up For Free!
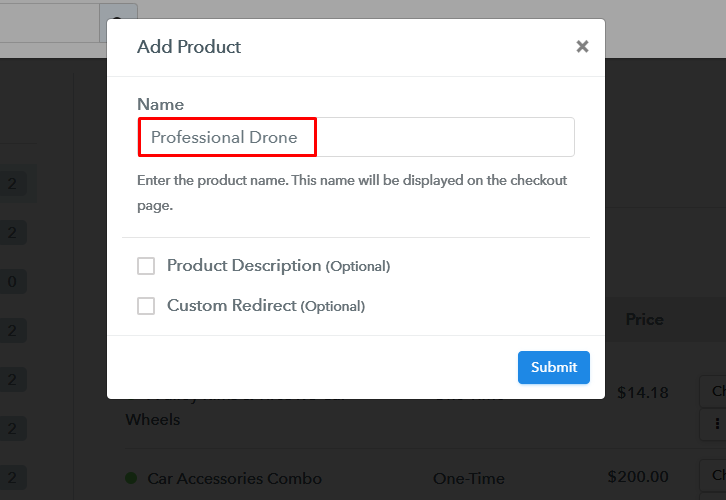
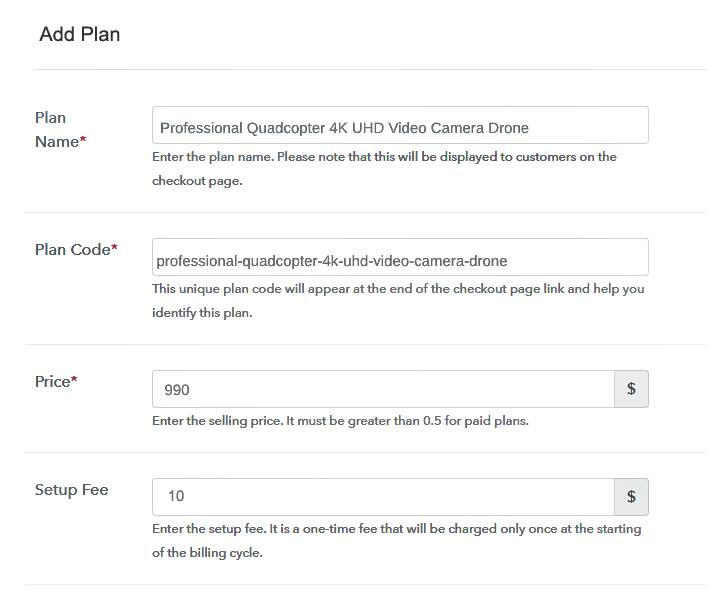
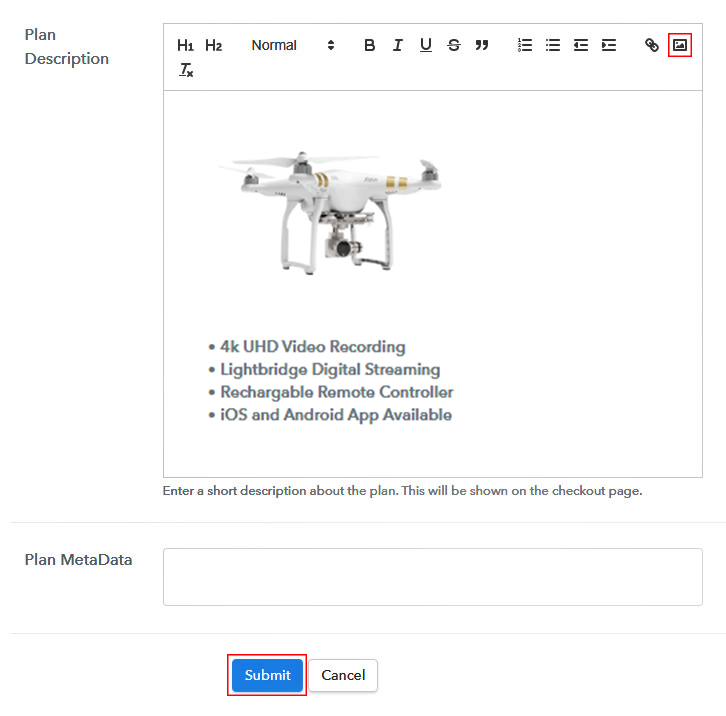
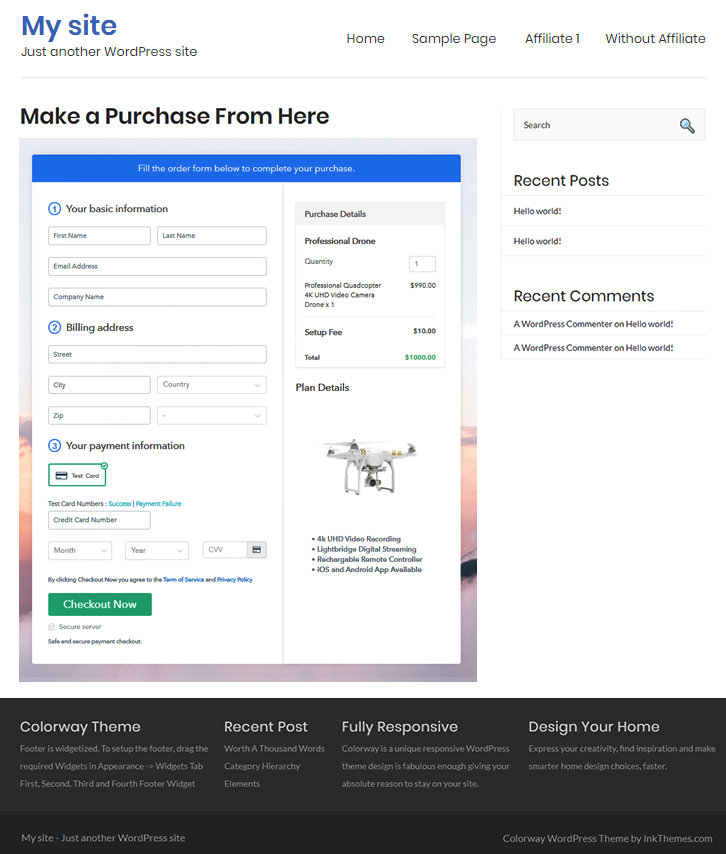
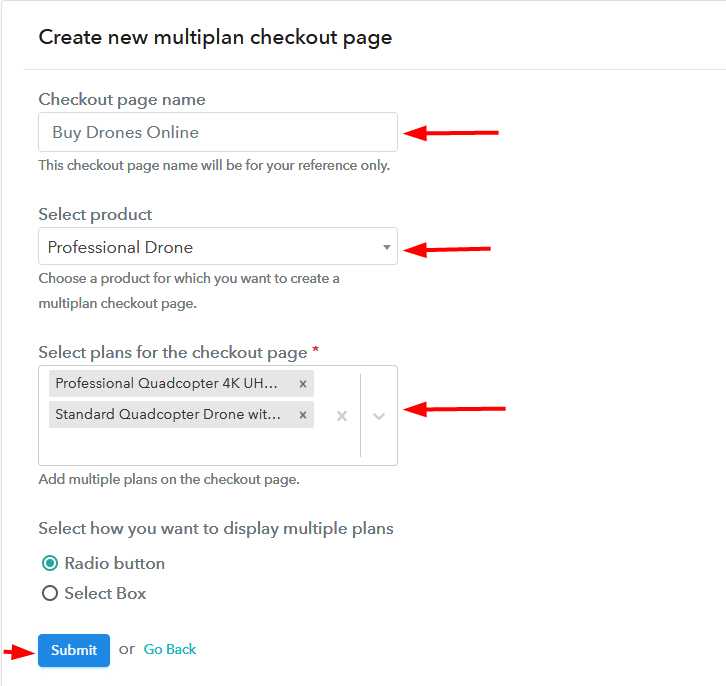
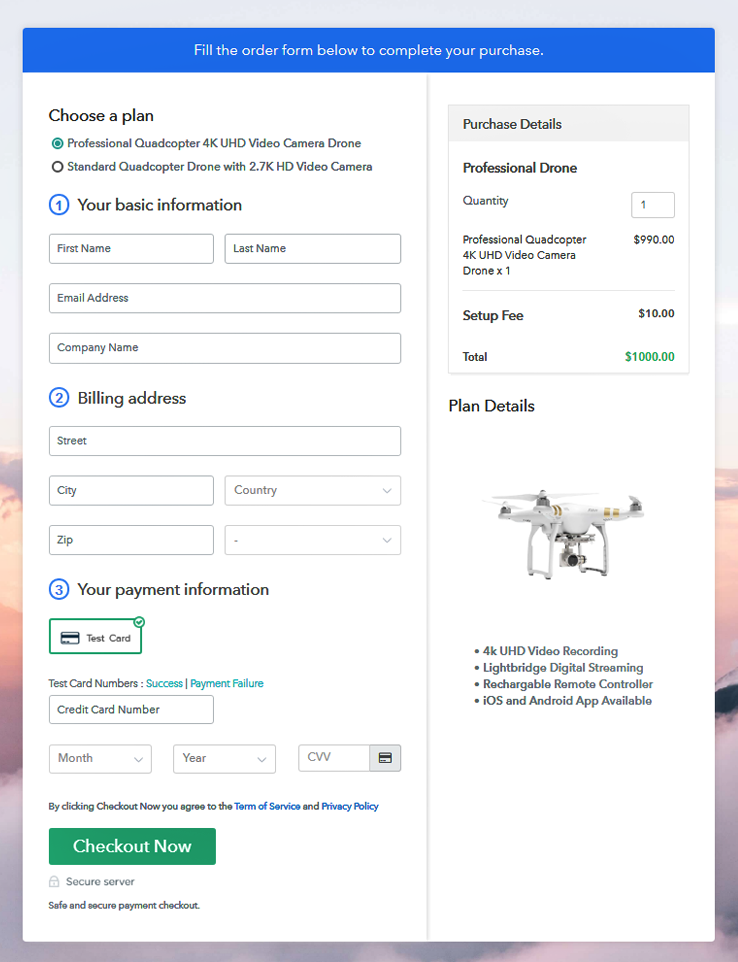
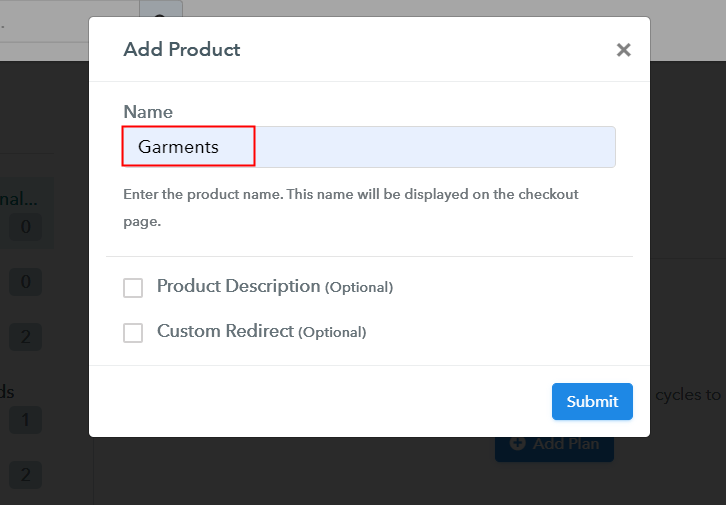
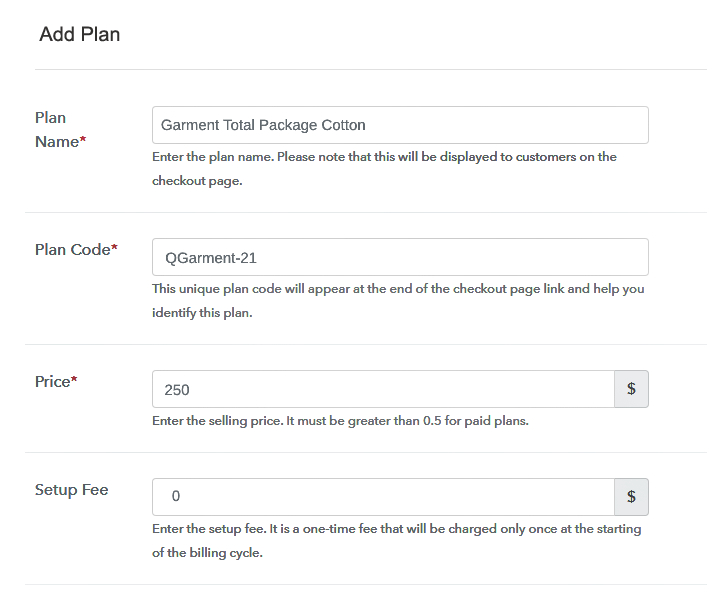
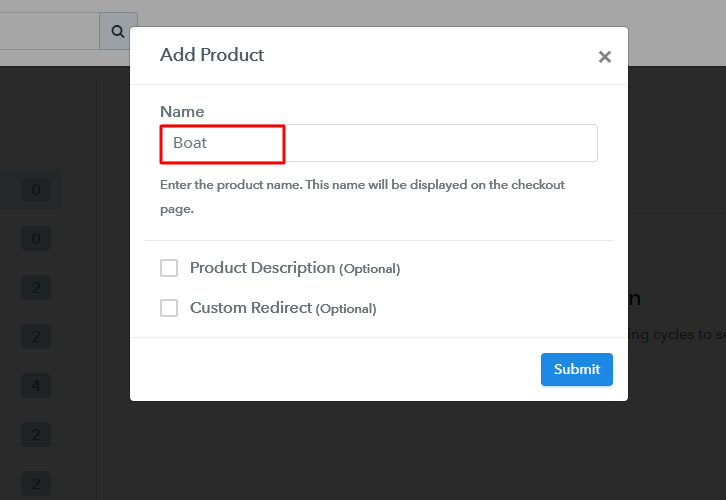
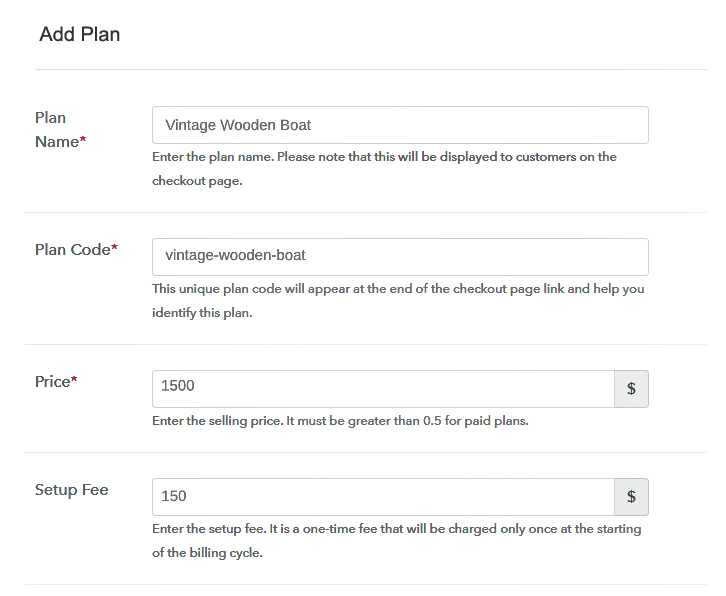
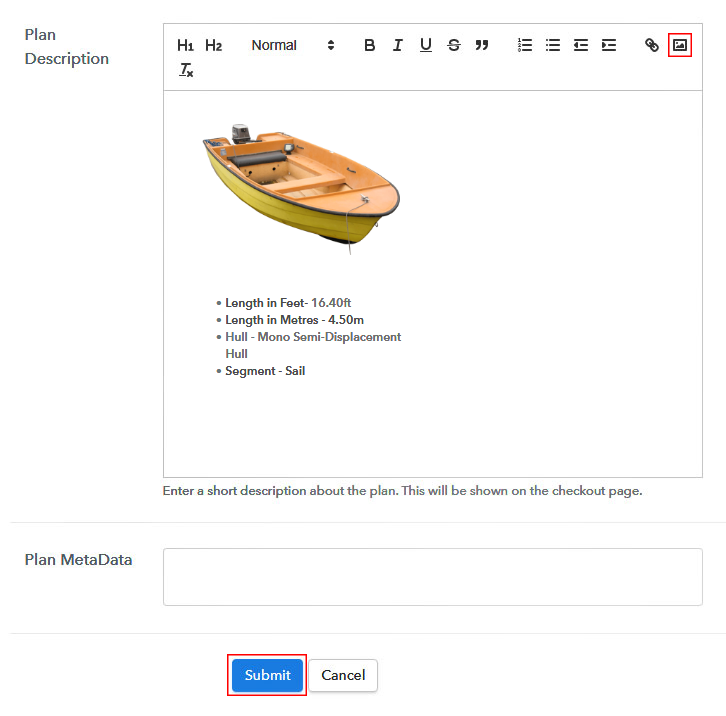
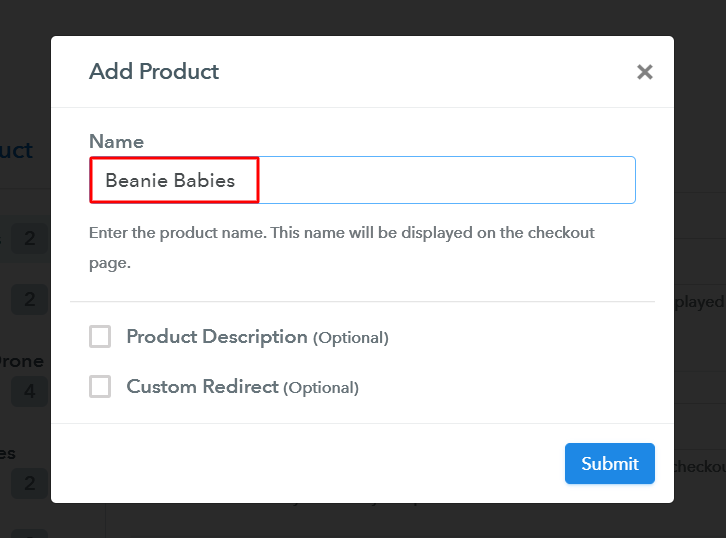
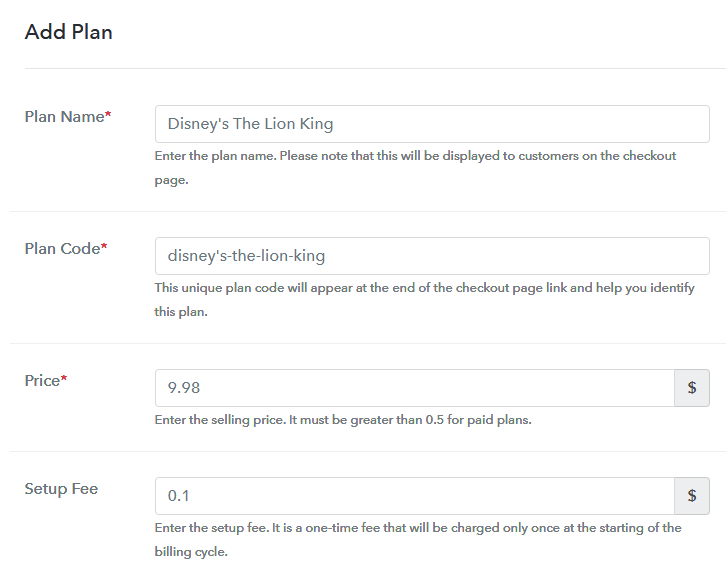
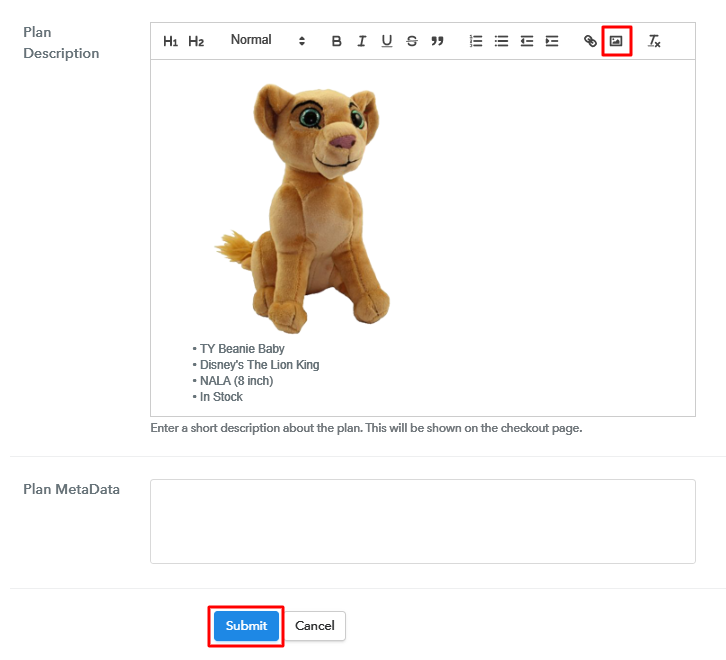
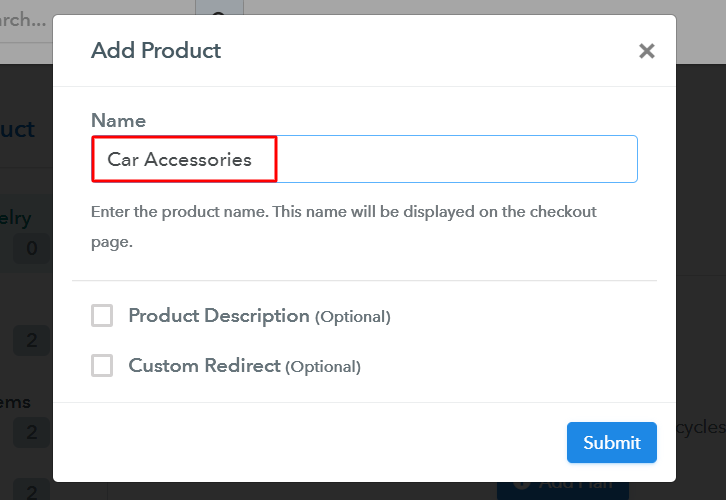
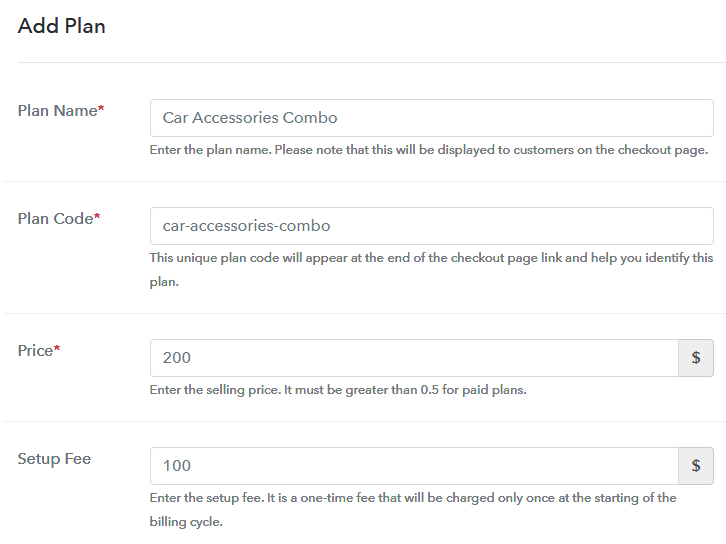
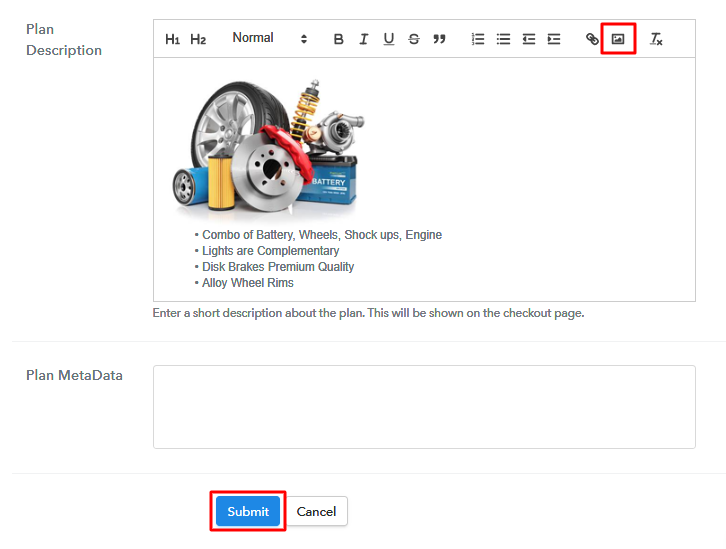
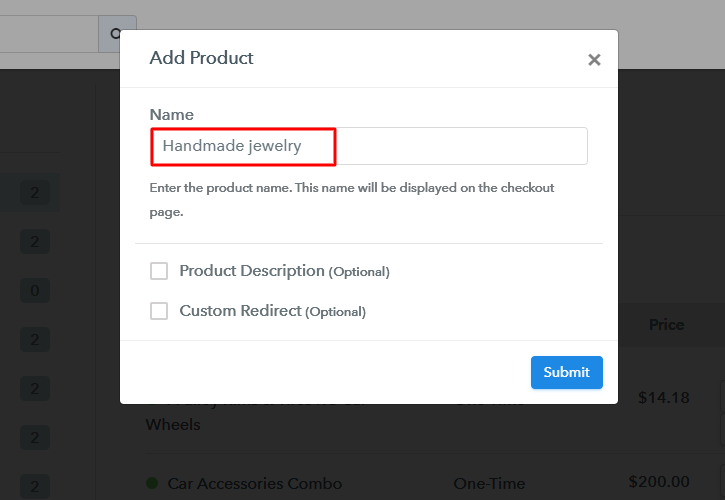
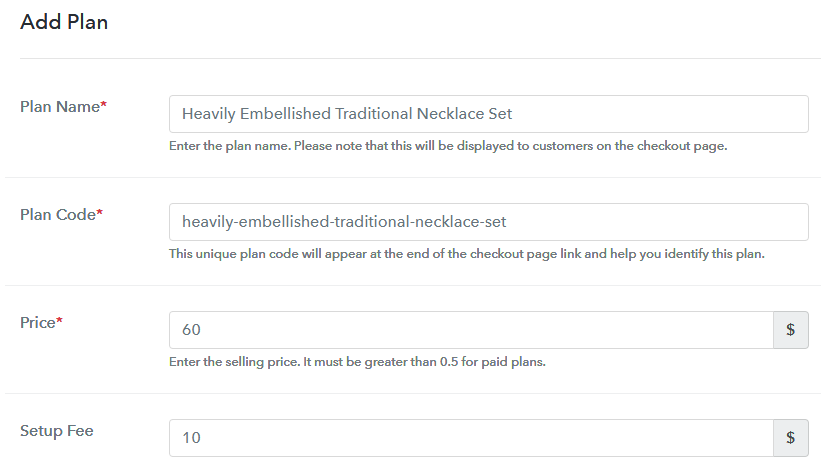
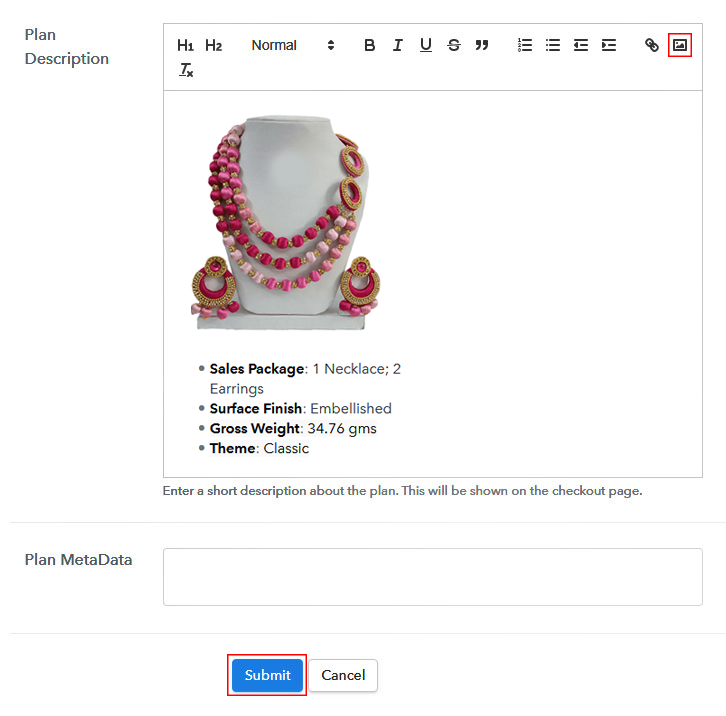
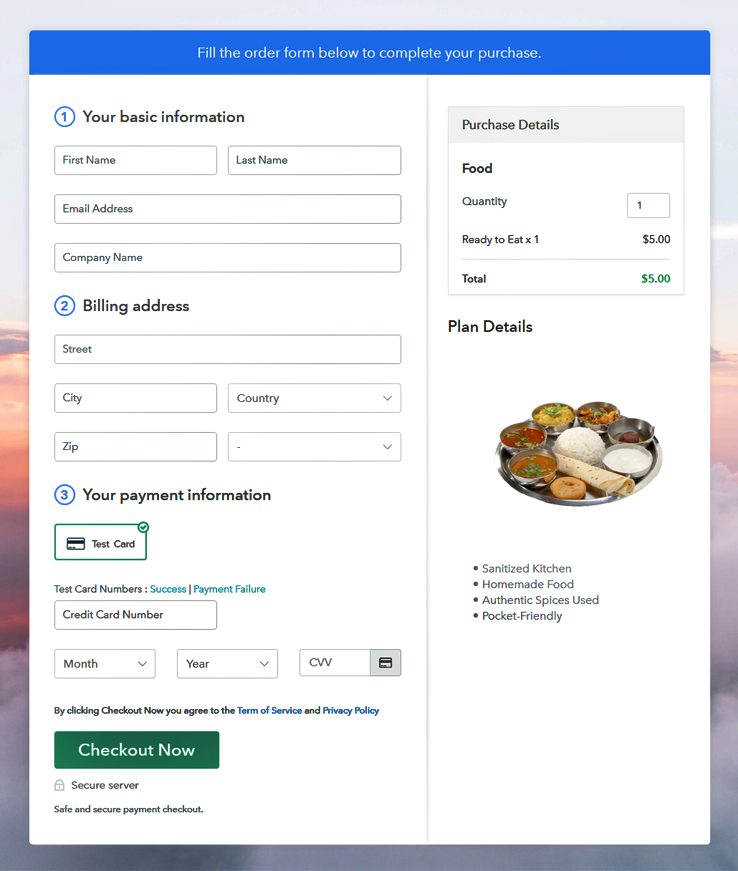
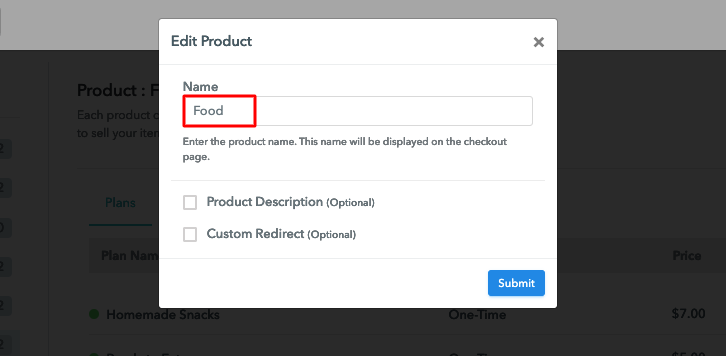
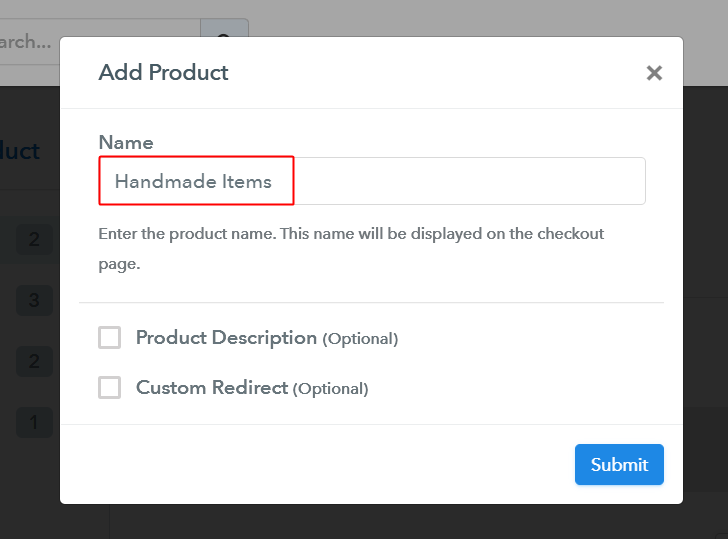
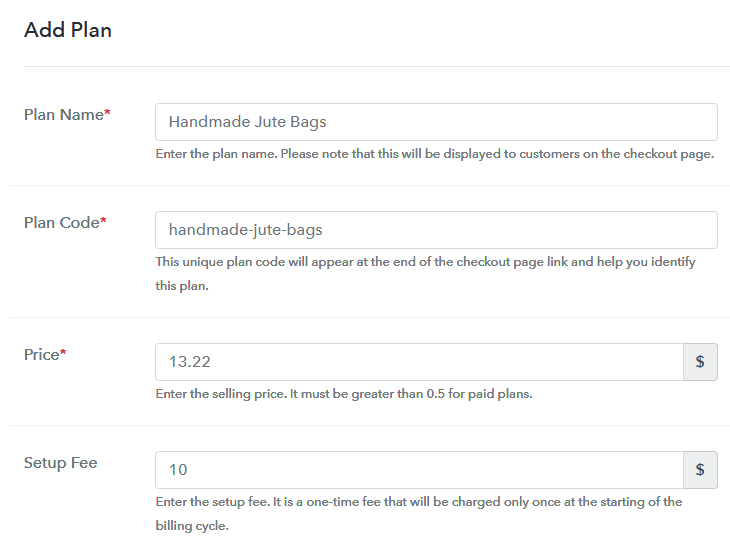
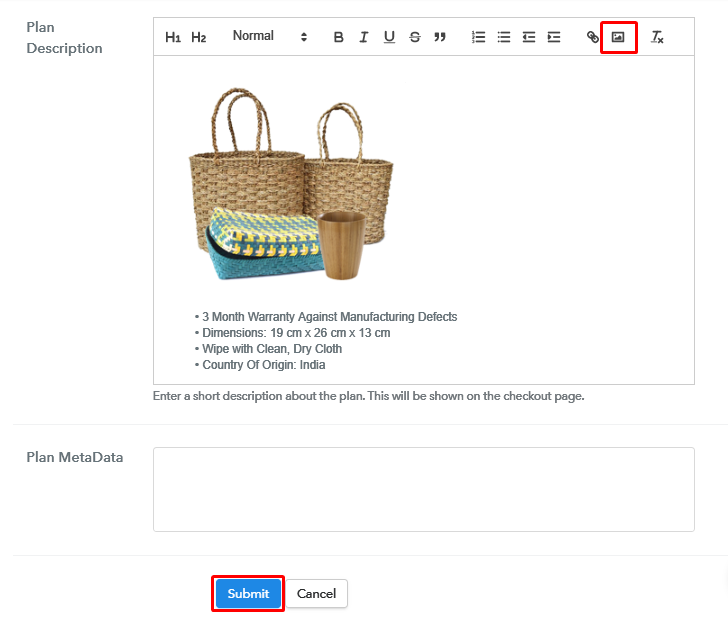
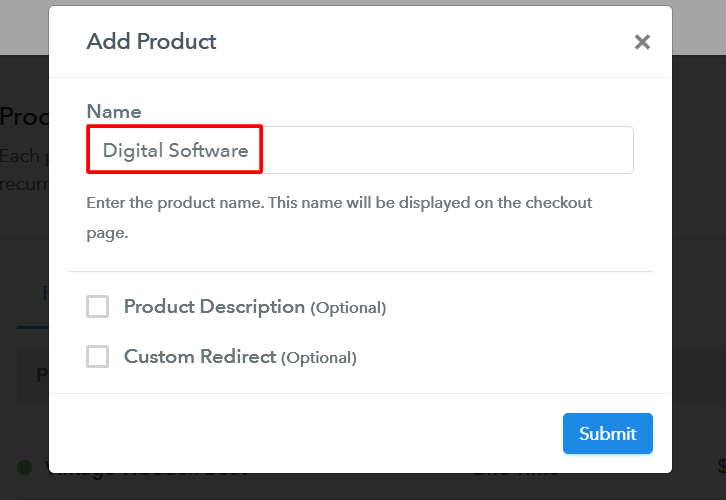
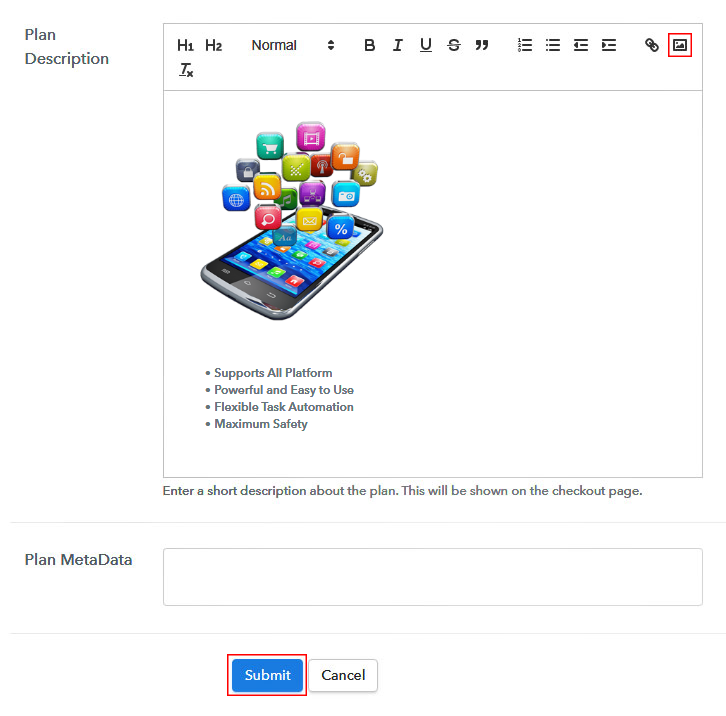
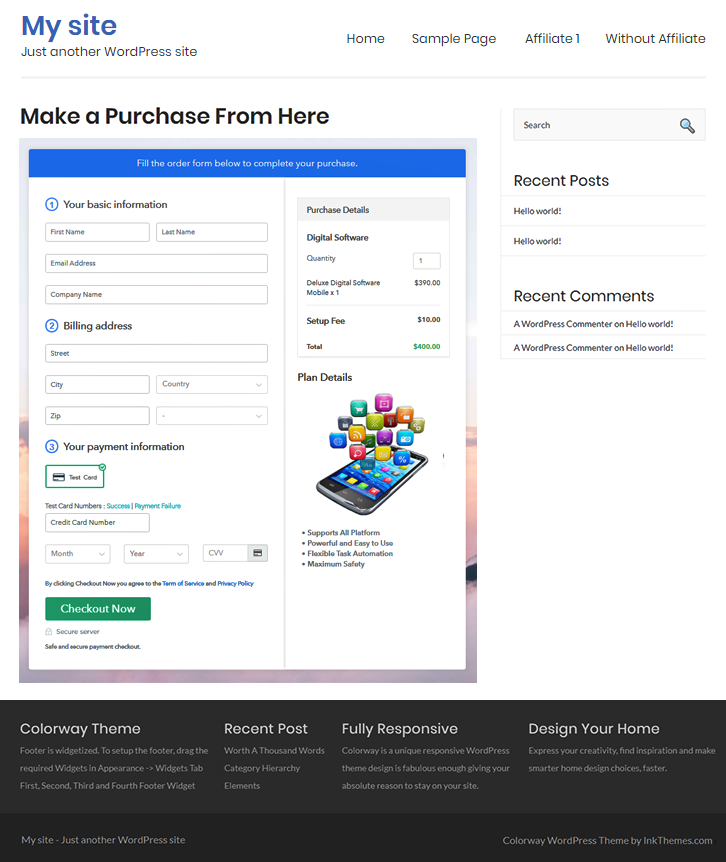
After clicking on the “Access Now” button of Pabbly Subscription Billing software, you need to fill the company name, type of currency, and contact number. Quickly fill out all those details to continue. As a beginner, it is always preferable to try test payment mode for a better understanding of payment procedure in software. Here, we are also enabling the test payment method. Also, the software is packed with payment gateways such as PayPal, Authorize.net, Stripe, etc. Below we are providing payment integration guides to help you out. Once you’re done with payment gateway, its time to add your product which is digital software. When you click on the add new button, the pop up will appear where you can specify the product, mention its description and custom redirect. Further, after entering details click submit to continue. Note: Here you can add all the products related to the similar category by creating plans for each of them. Next, we are rolling out all the possible software selling plans for your store. Further, specify the plan details like plan name, code, price, set-up fee, and much more. The next part involves uploading an image of your software and write a little description about it in bullets points. You can add a link too. Once you’re done click on the submit button. Following the same procedure, you can add multiple software without any difficulty in a same plan. Okay now to preview the checkout page, follow the steps: The next step is to copy the embed link of the checkout page. After that, paste the link on the text editor of your WordPress site. Once you’re done, just hit the “submit” button. Note: In case you want to sell multiple products via a single checkout page, you can create a multi-plan checkout page otherwise skip this step. Hopefully, now you all know the benefits of selling software online and how much easy it is to start software selling business using the Pabbly Subscription Billing tool. There is no harm to take a step forward in the digital world as it is a booming business model. It not improves your revenue but also helps in nurturing customer relationships. So. what are you waiting for? Sell “One Software At a Time” and contact us freely regarding any query.Step 2: Select Subscription Billing

Step 3: Account Setup

Step 4: Connect Payment Gateways To Sell Software Online

Step 5: Add Your Product

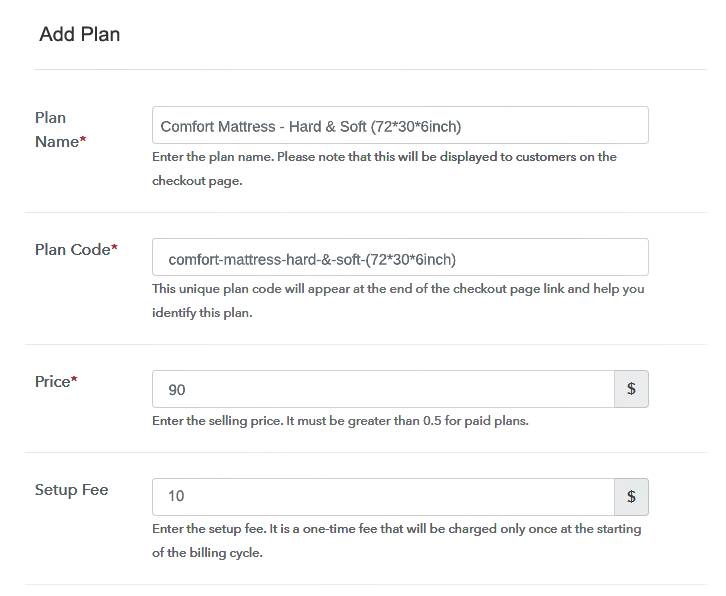
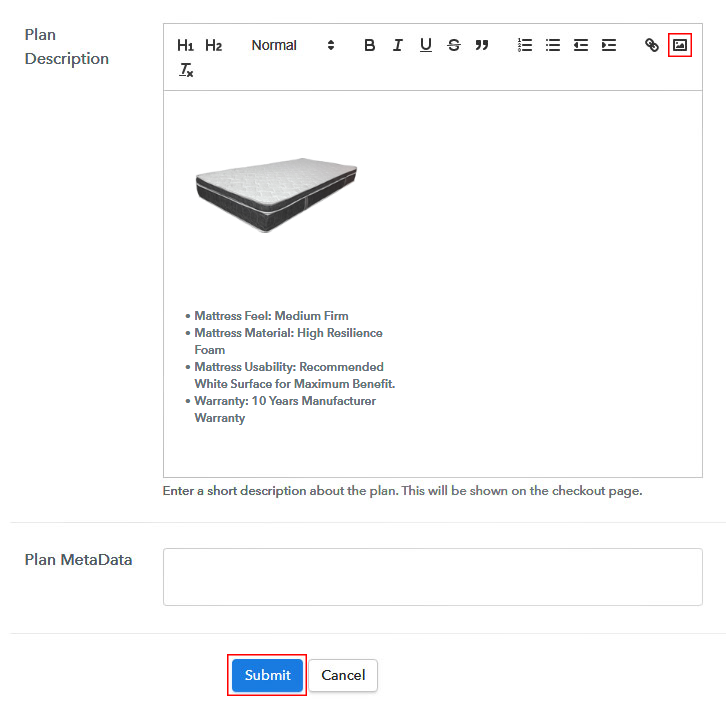
Step 6: Add Plans
(a) Select Add New Plan

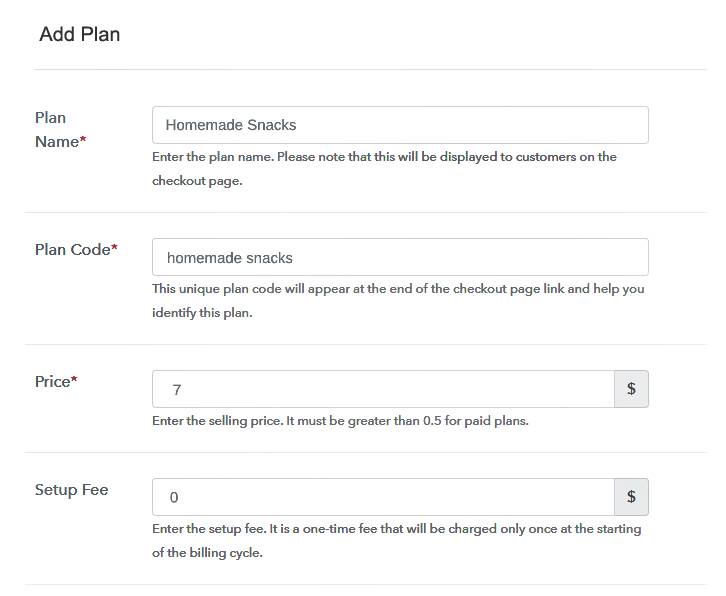
(b) Specify the Plan & Pricing Details

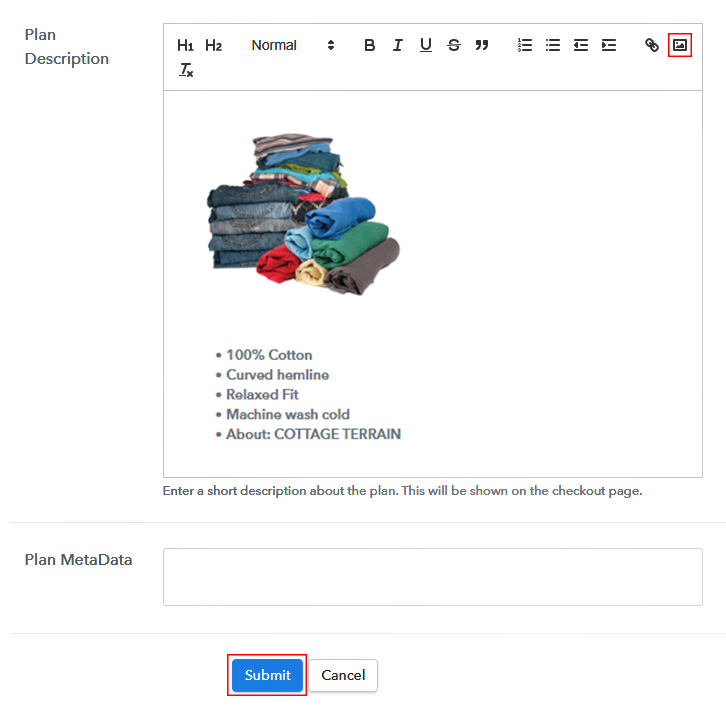
(c) Add Image & Description
Step 7: Share your Checkout Page

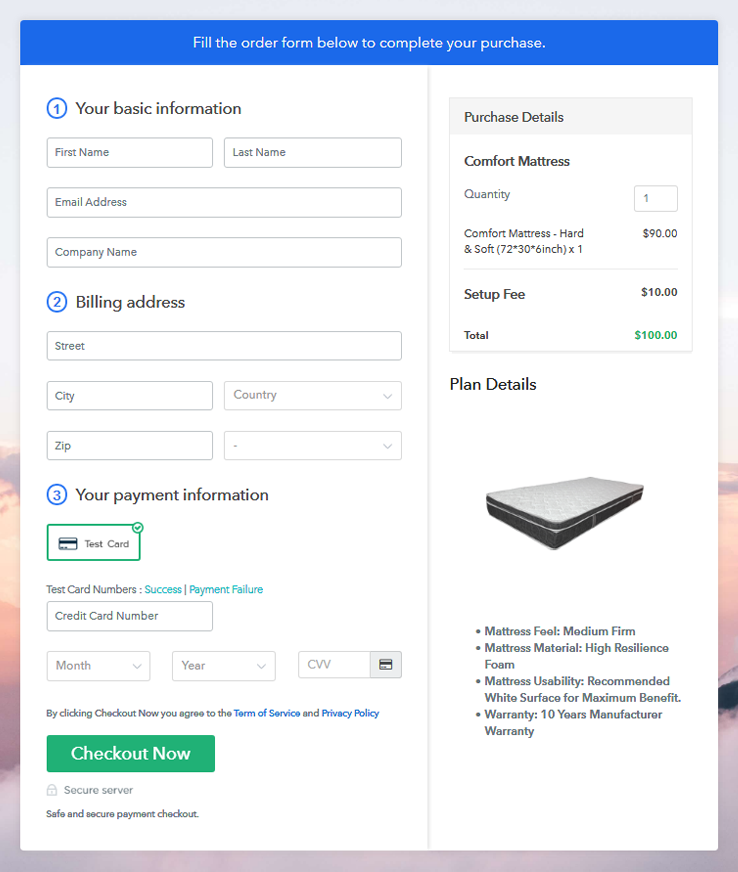
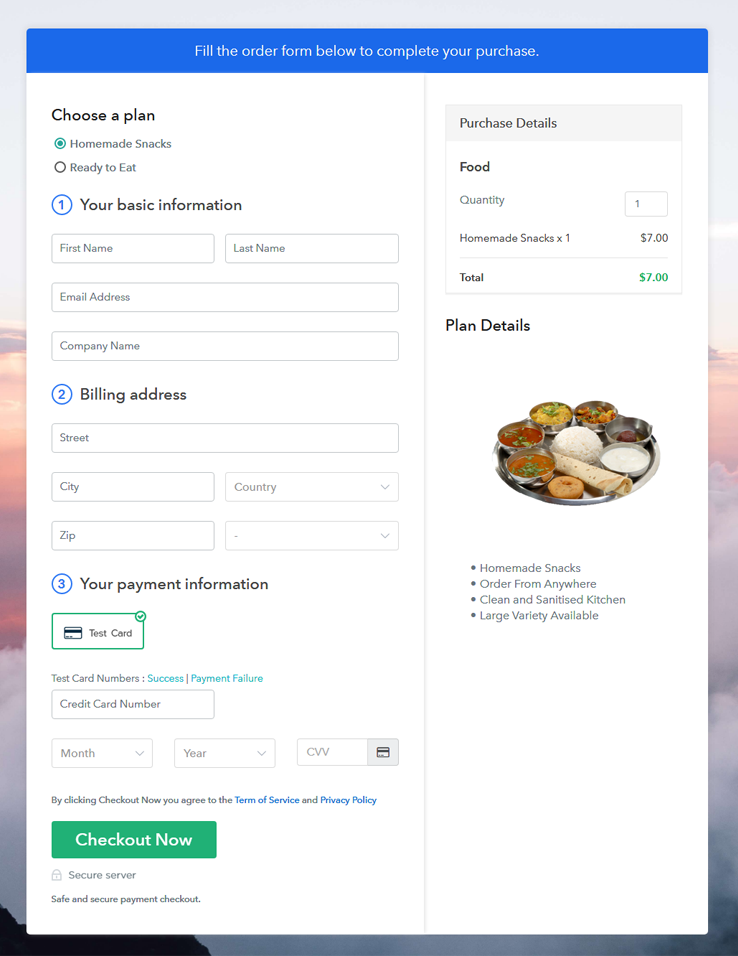
Step 8: Preview Checkout Page
(a) Click on the View Button

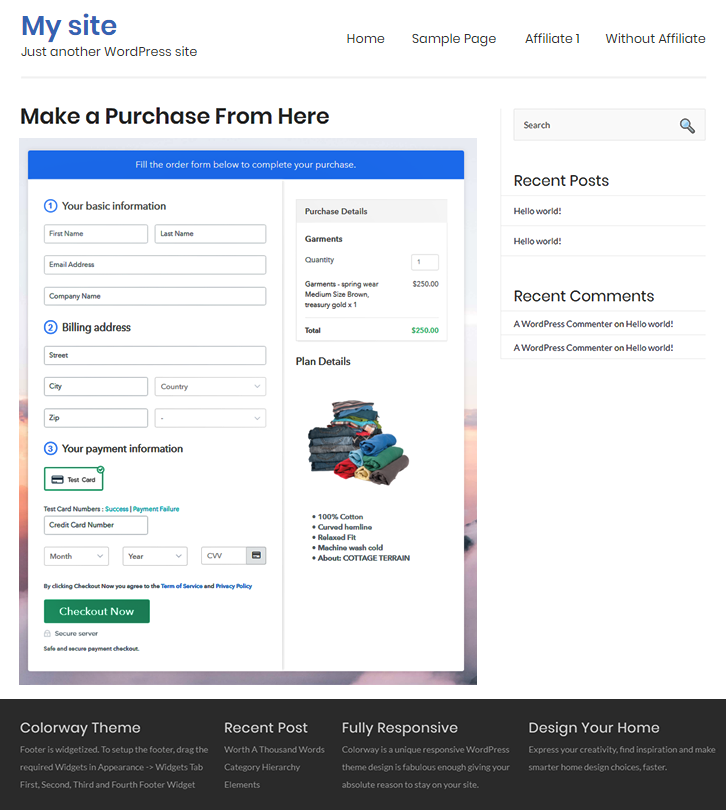
(b) Take a Look at the Checkout Page
Step 9: Embed Checkout Page in Site & Sell Software Online

(a) Edit the Page & Paste the Copied Link

(b) Save & Publish the Checkout Page

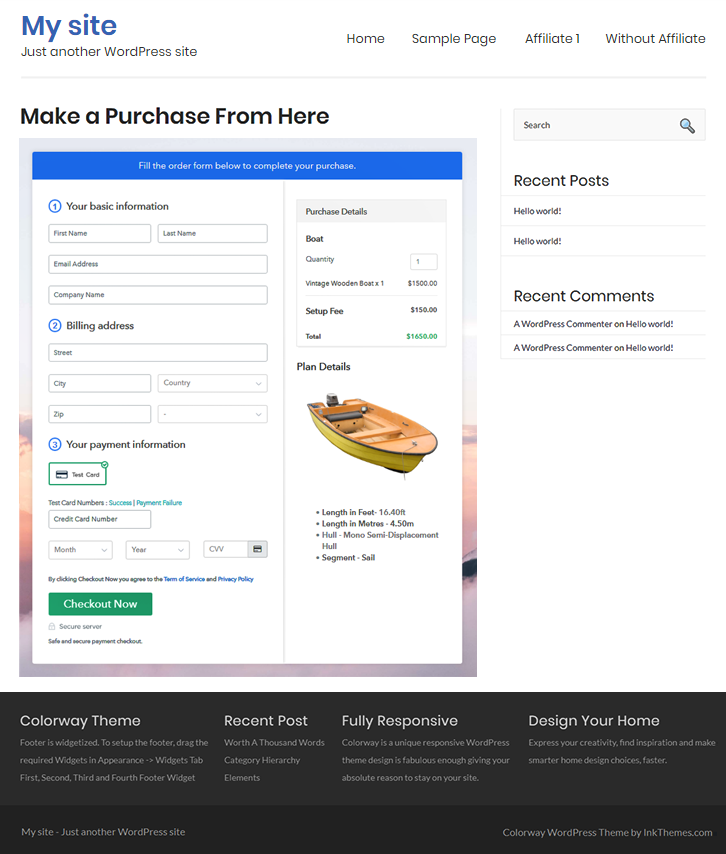
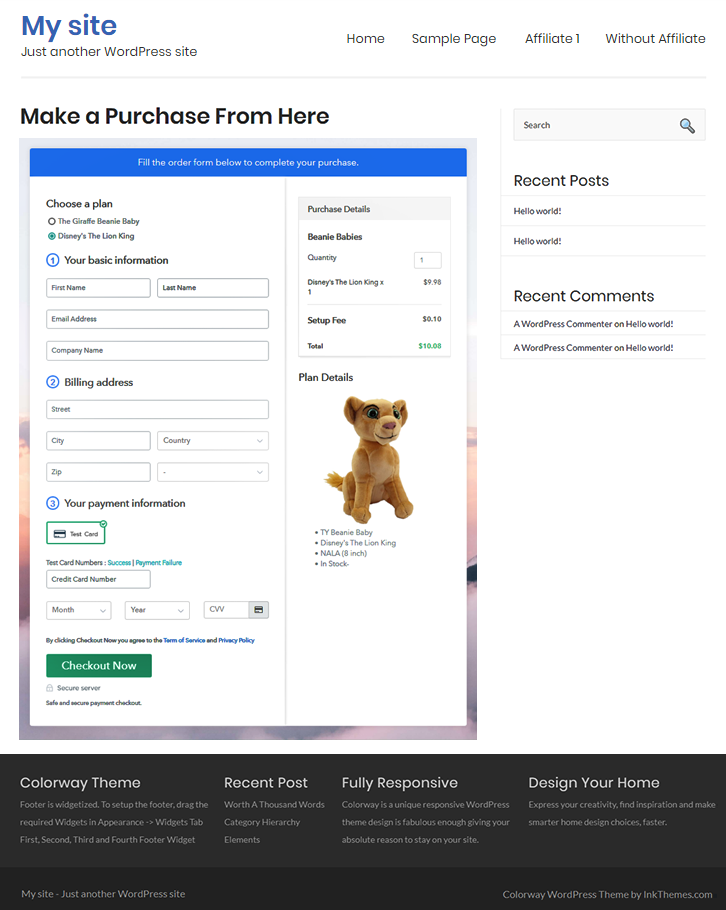
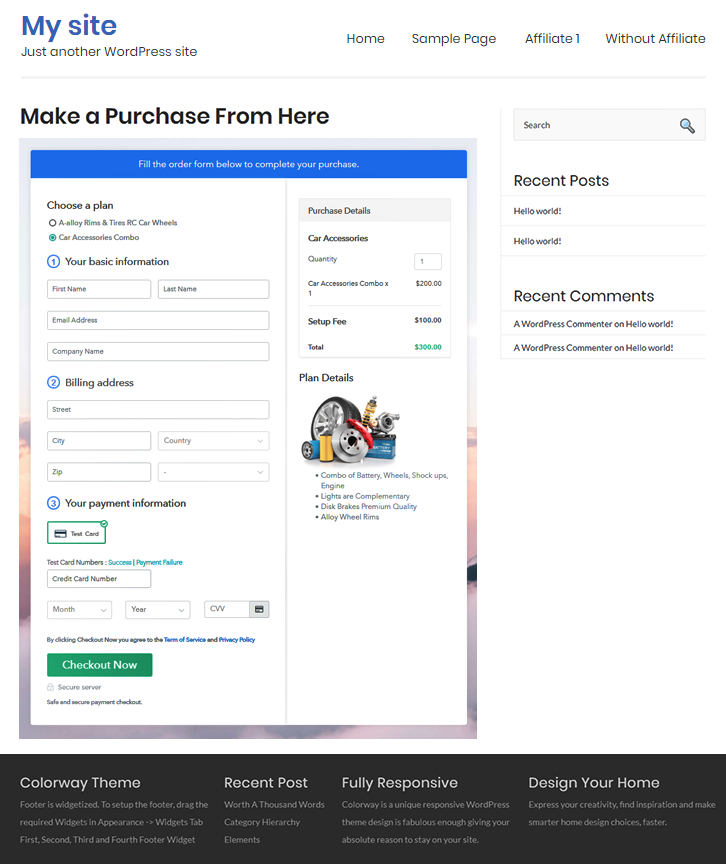
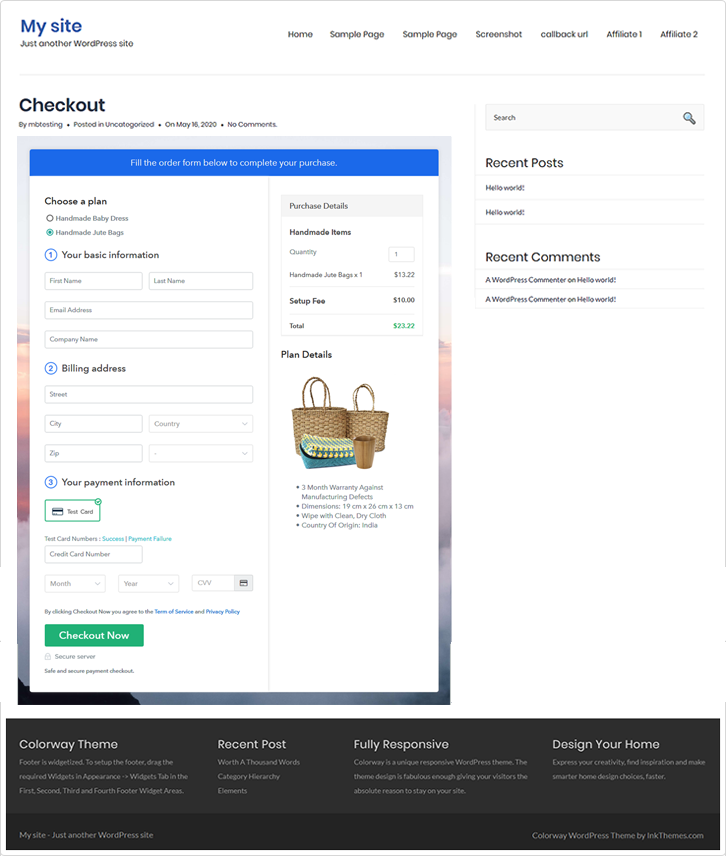
(c) Check out the Final Look of your Checkout Page on WordPress Site
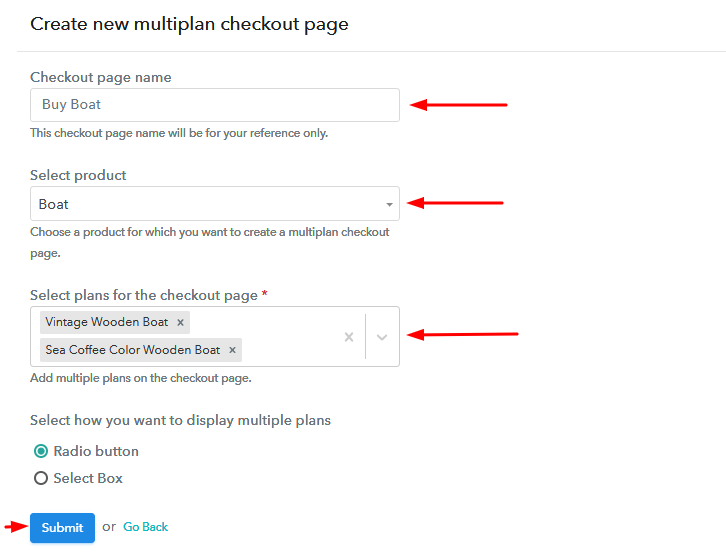
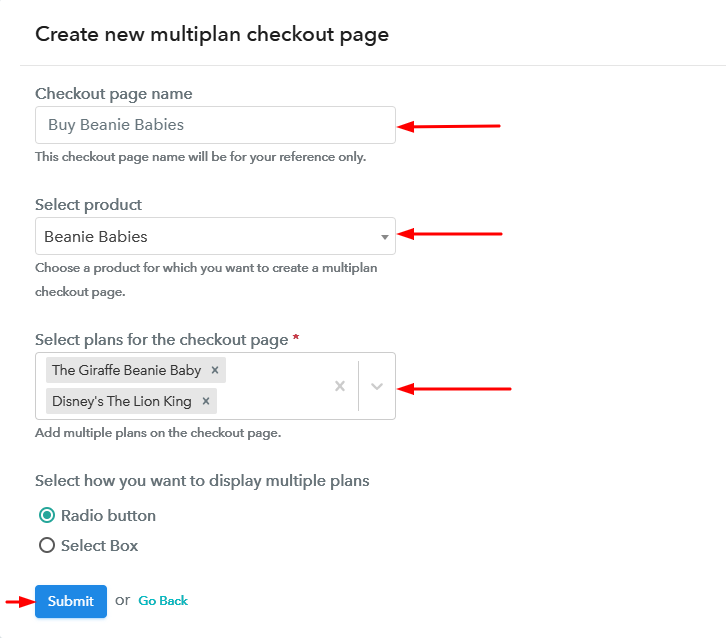
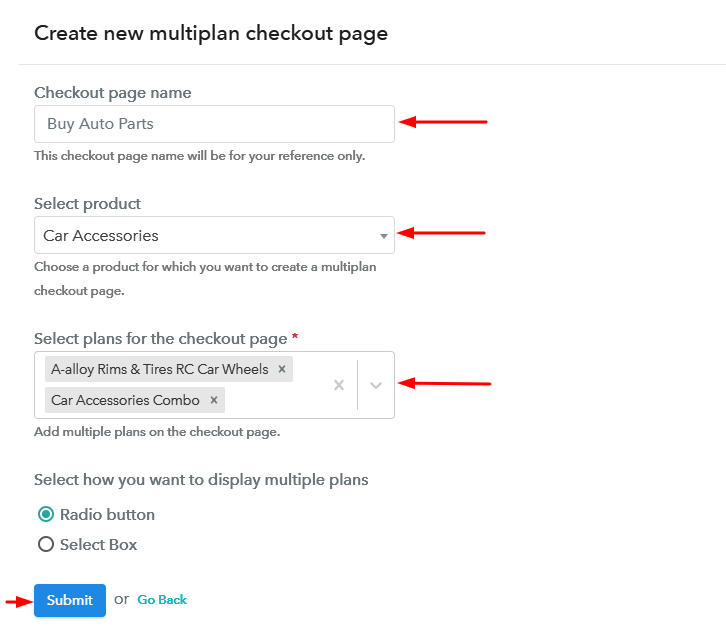
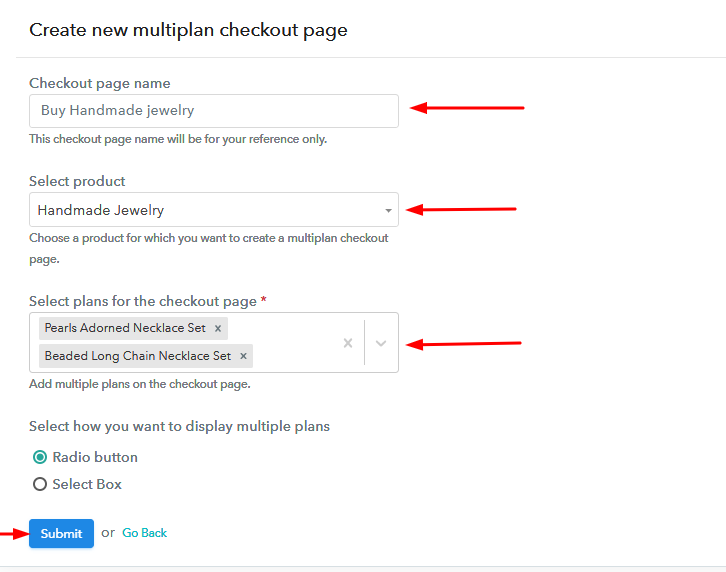
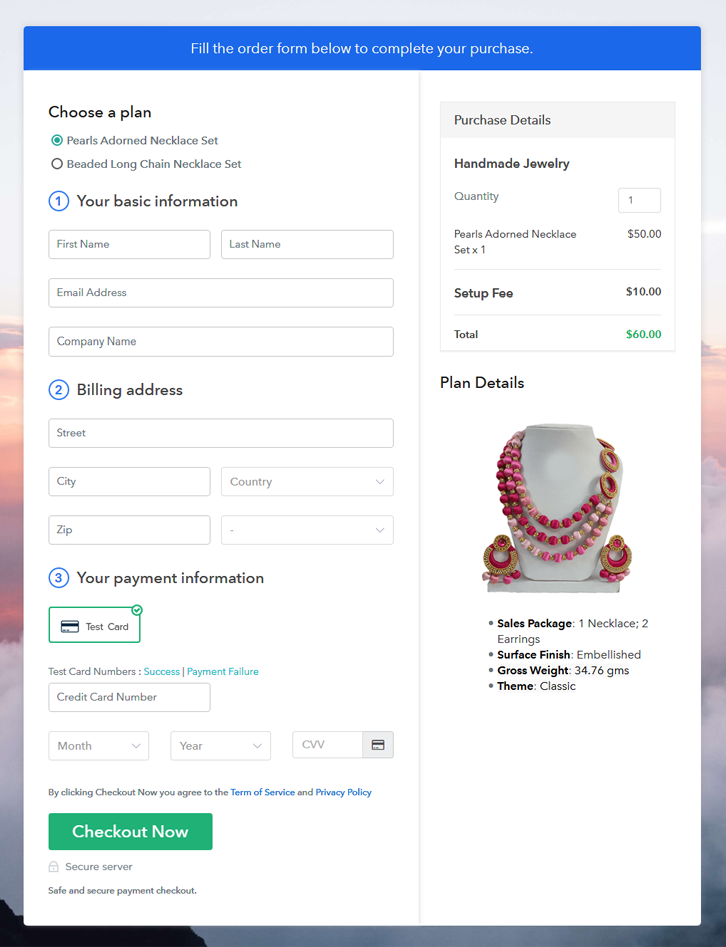
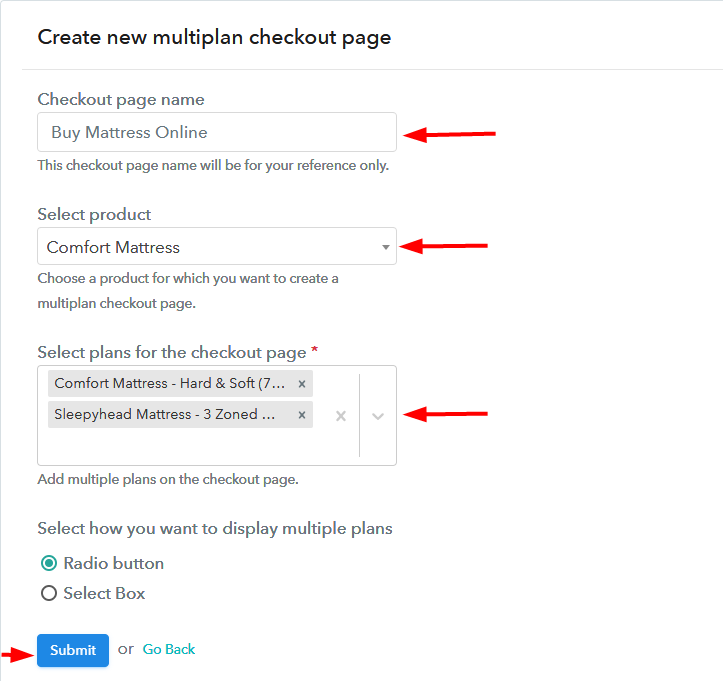
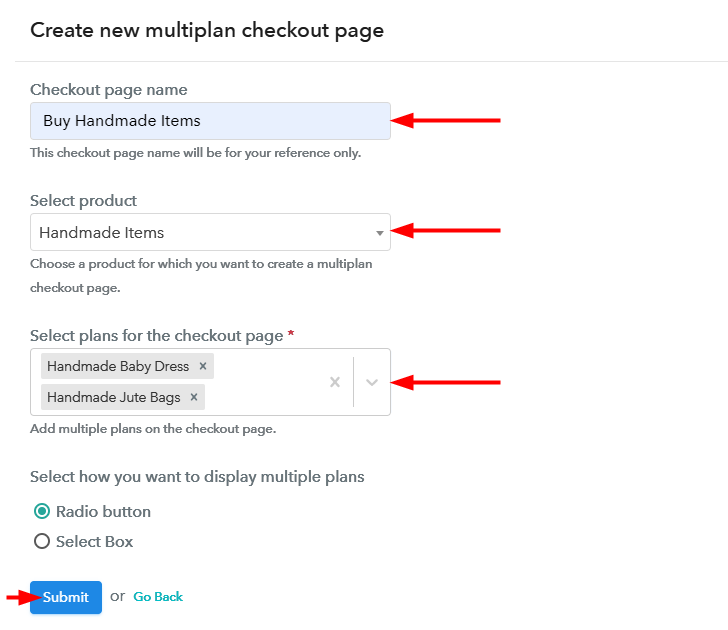
Step 10: Multiplan Checkout Page
(a) Click on Add Mutiplan Checkout

(b) Add Plans to Sell Software from Single Checkout Page

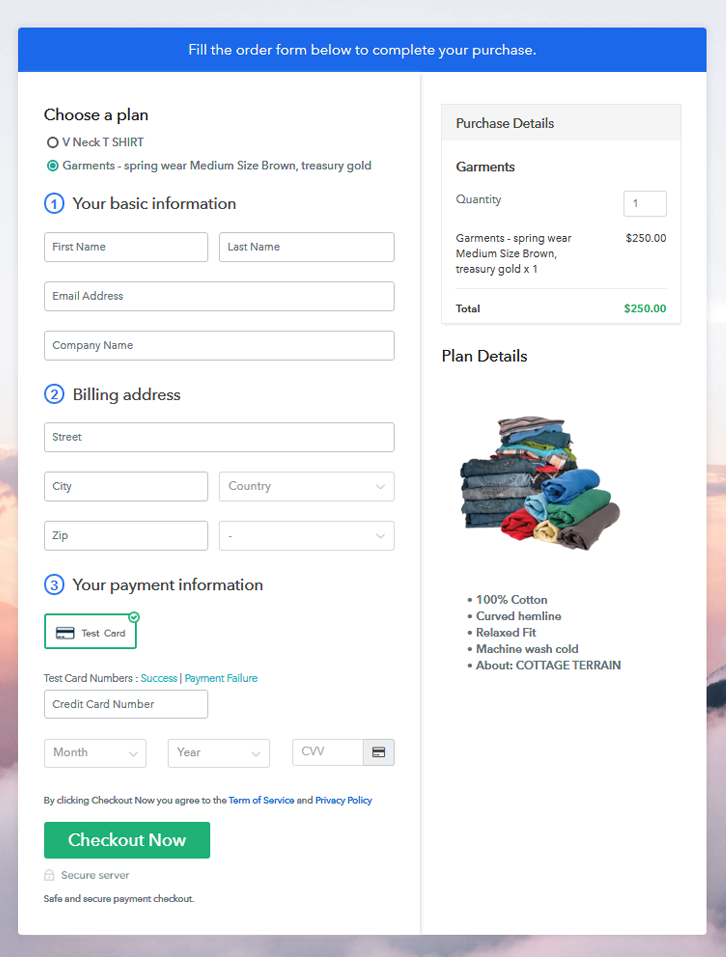
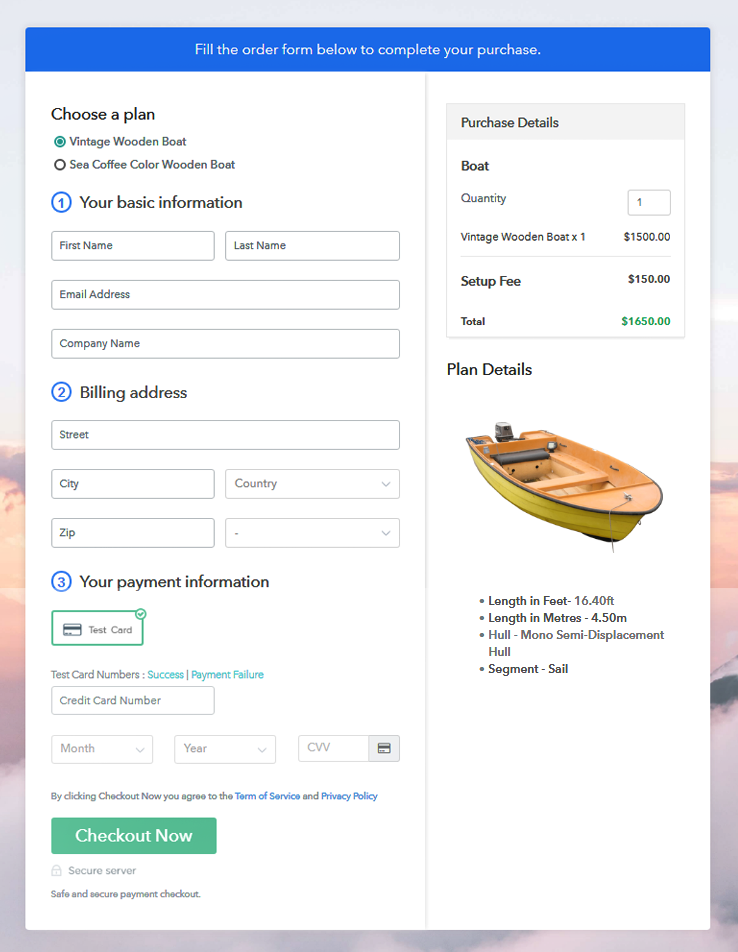
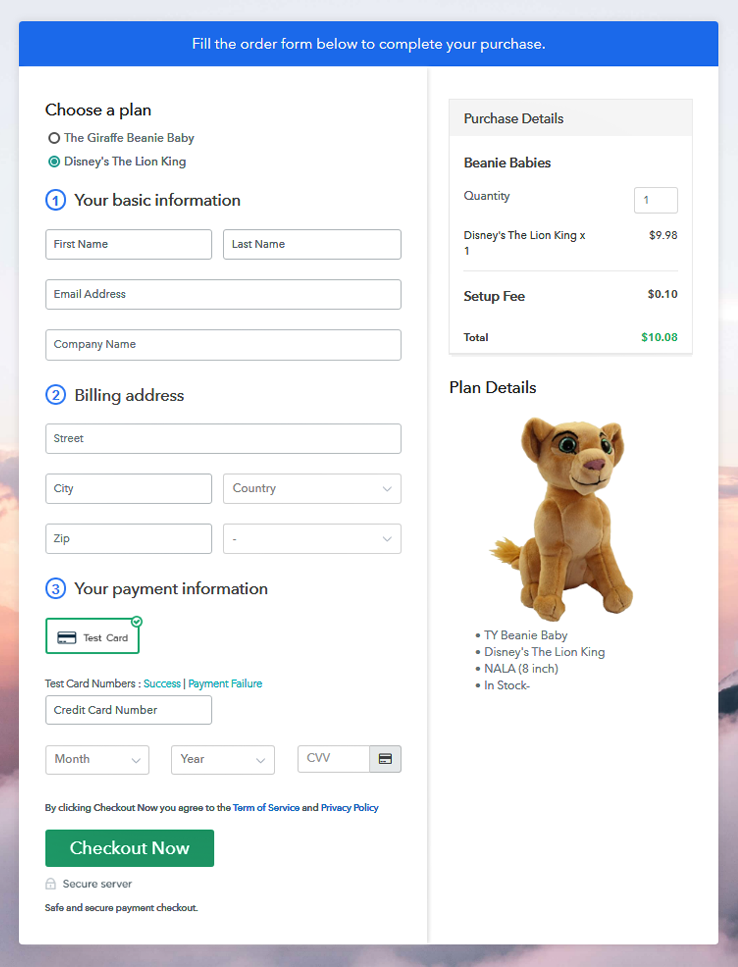
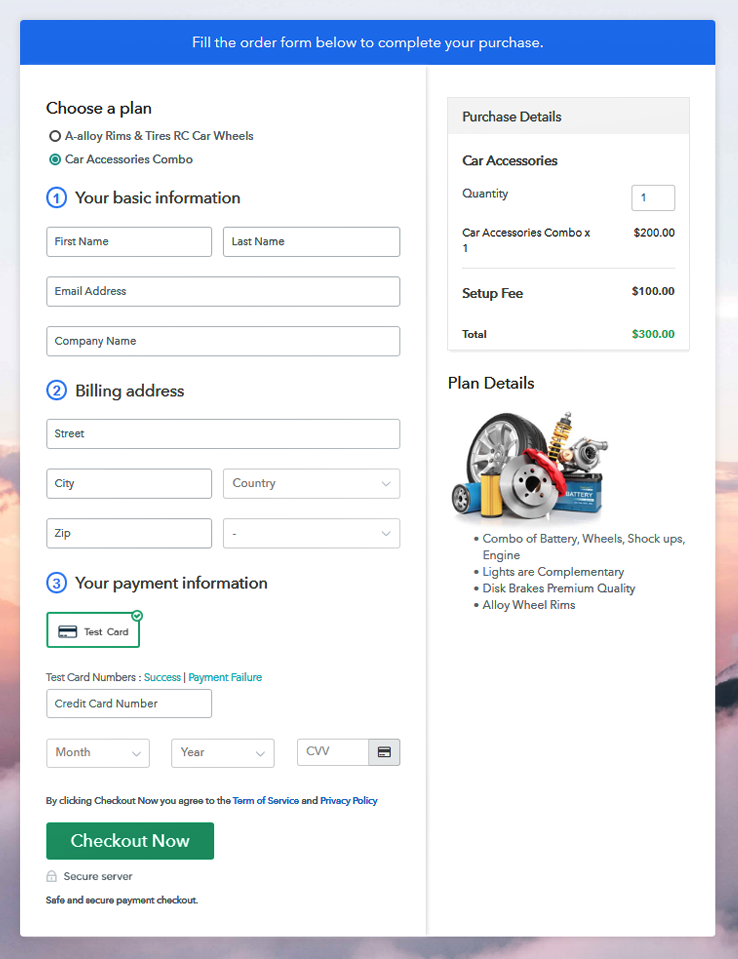
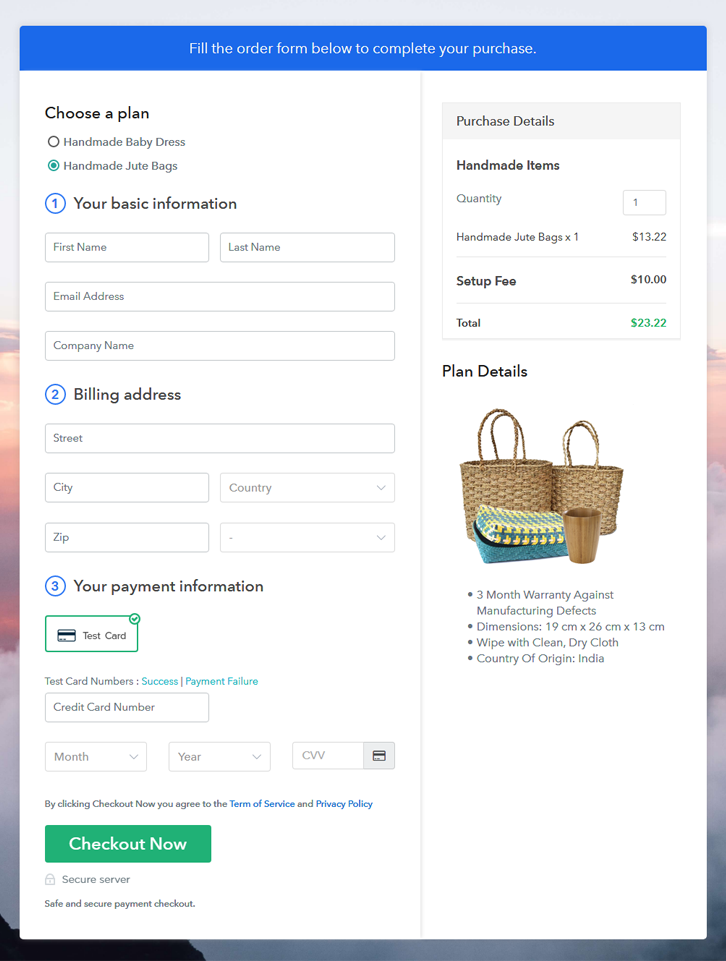
(c) Take a Look at the Checkout Page
Wrapping Up
You May Also Like To Read –